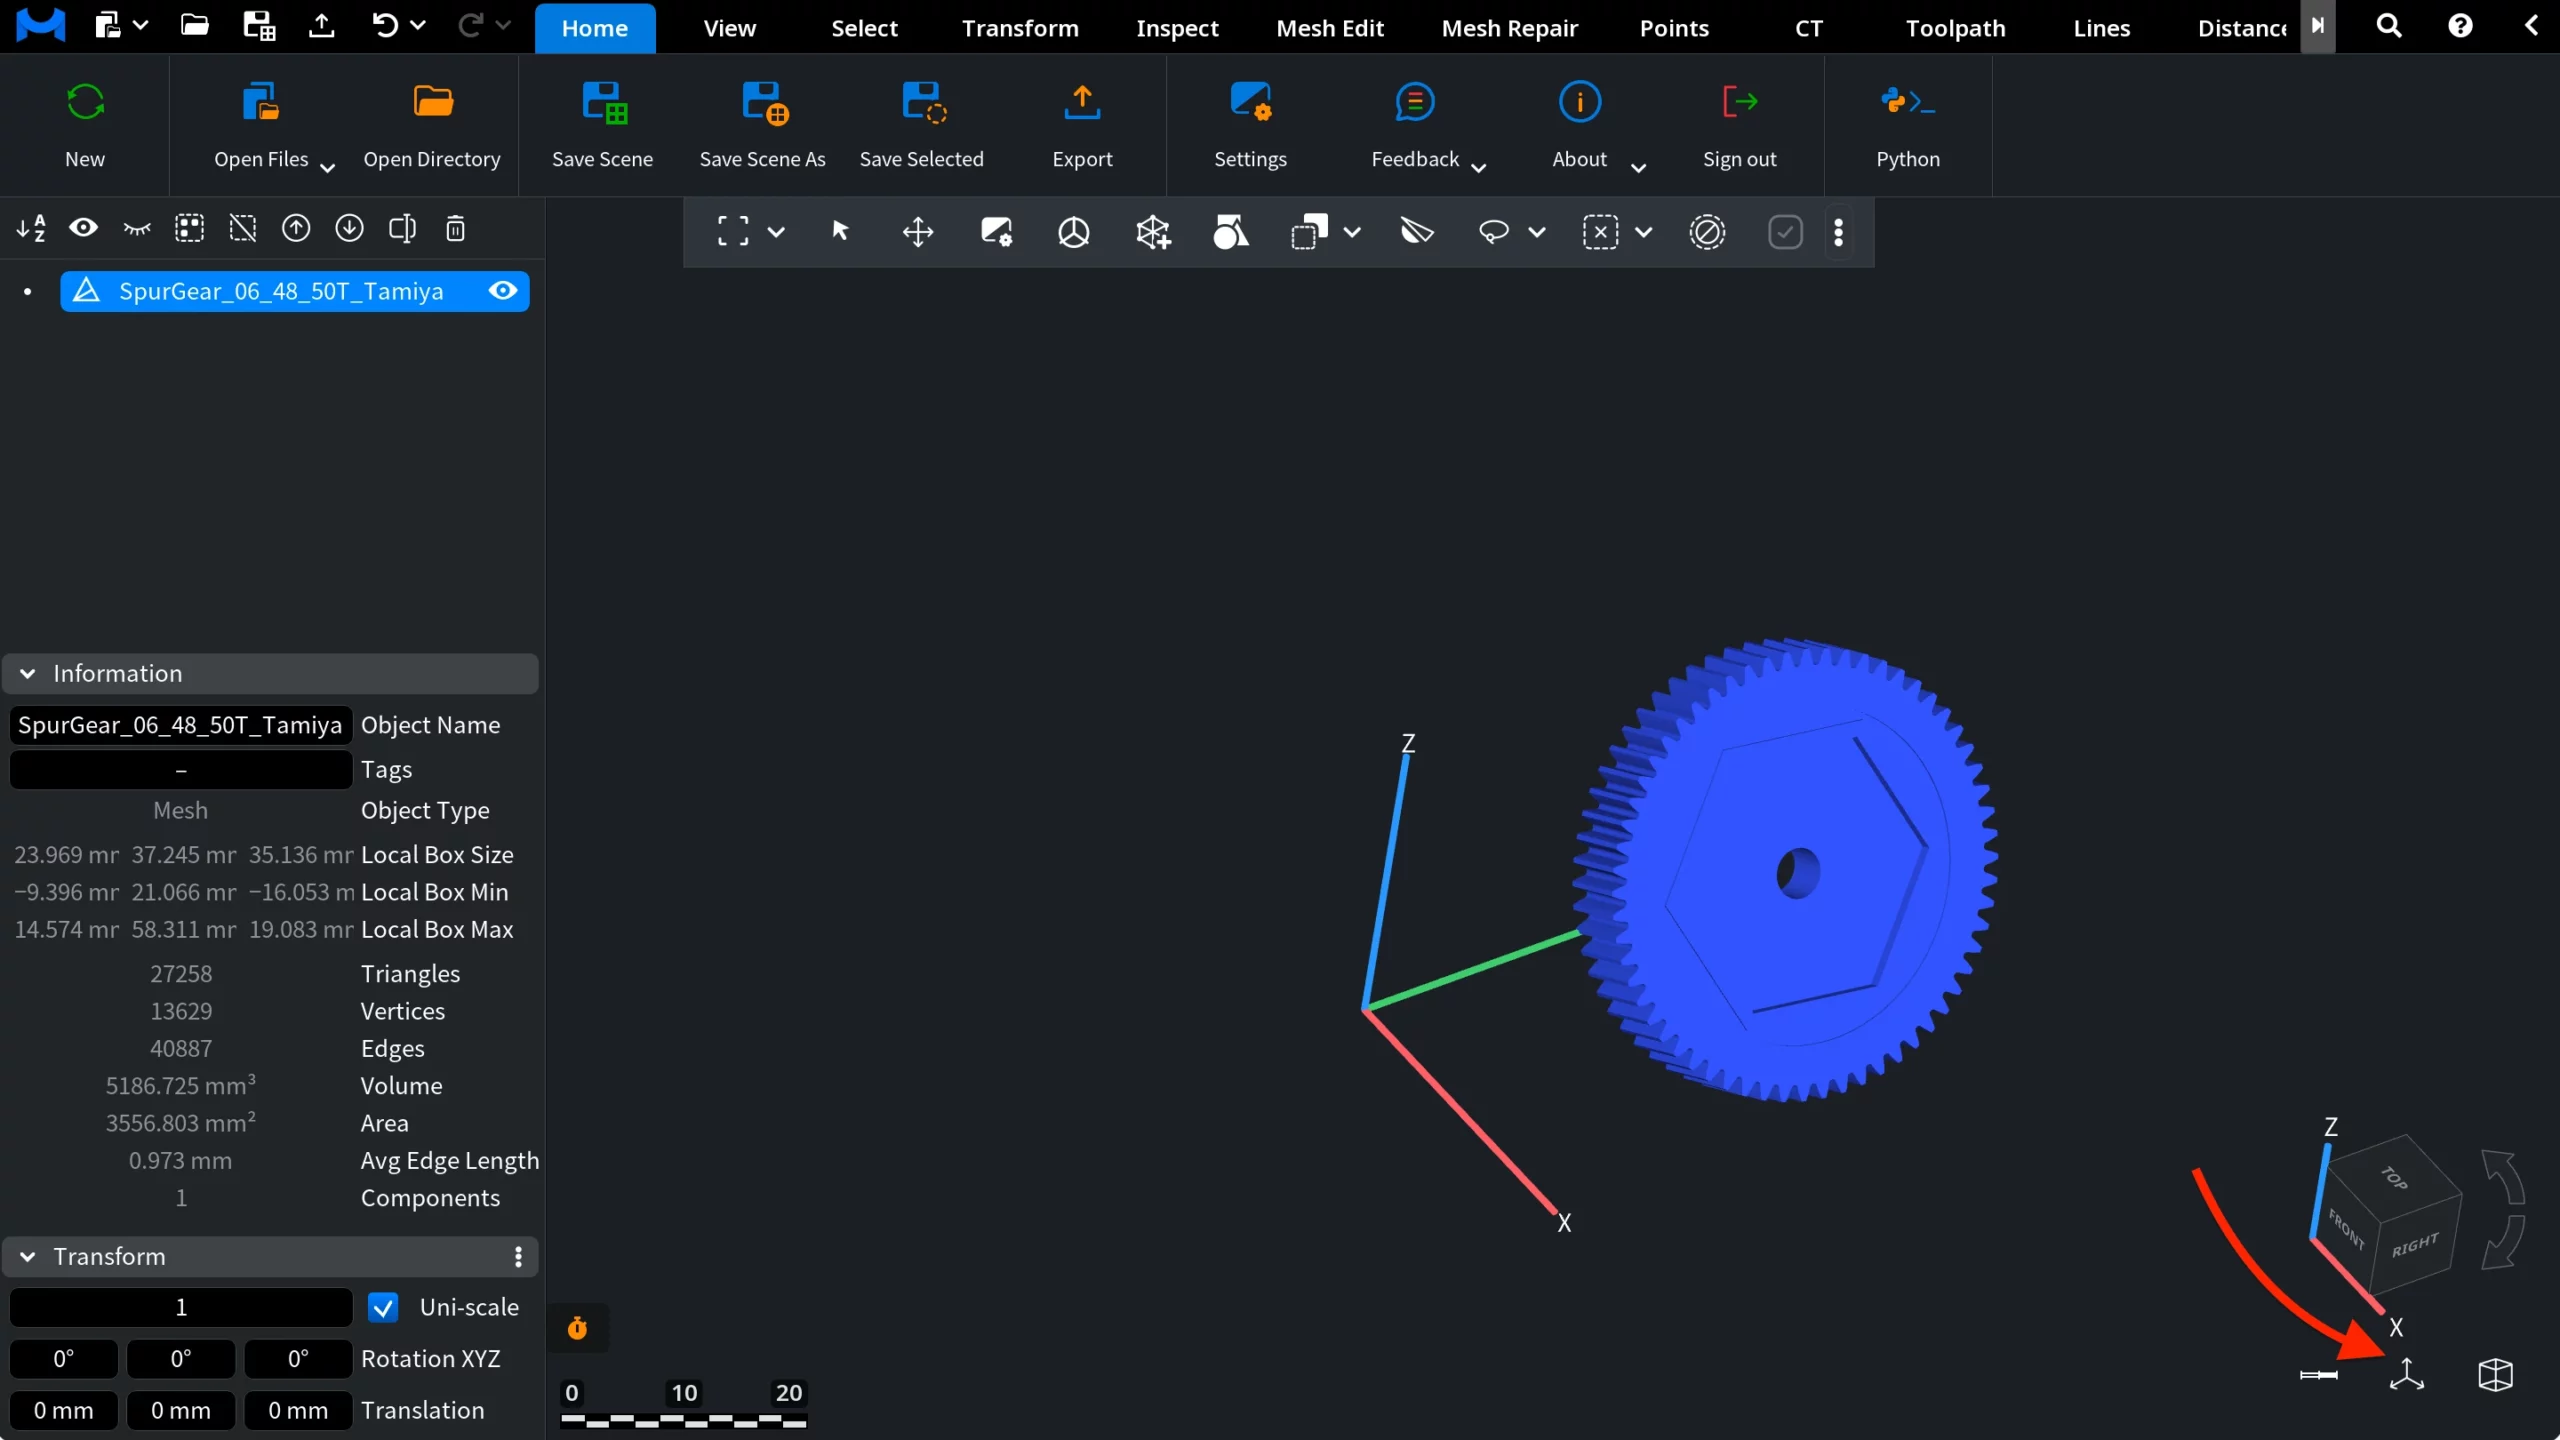
Imported 3D models are frequently positioned and rotated arbitrarily in 3D space. As a consequence, your 3D meshes might not align with the global coordinate system. This issue will surely make inspection, measurement, editing, and downstream workflows much harder to manage and less predictable.
Rotating and repositioning such models manually and by eye is both time-consuming and error-prone. Also, manual approaches are definitely not an option when precise alignment to a given reference plane is required.
The Align to Plane tool in MeshInspector addresses this problem with ease. Our program for 3D data does so by allowing one to orient a particular object based on a selected face and a chosen global plane.
That is, by clicking a face on the mesh, one is enabled to move the object to the global origin and align it consistently with the X, Y, or Z plane. This contributes to cleaner and more predictable spatial setups.
Step 1: Show Basis
Before aligning an object to a plane, it is of importance to grasp how the model is actually positioned, relative to the global coordinate system.
In MeshInspector, users are free to display the global axes directly in the viewport, employing the Basis tool. Our program shows the X, Y, and Z axes and helps you quickly determine the object’s orientation and position relative to the scene center.
To enable it, locate the Basis icon under the navigation cube in the lower-right corner of the viewport (indicated by the arrow in the screenshot). When you hover over the icon, the tooltip Basis: show basis appears. Click the icon to display the coordinate axes in the scene.
Once the Basis is enabled, you are provided with a clear spatial reference. Such a situation makes it easier to grasp how the object is positioned in 3D space. The visual context is especially useful before applying alignment tools such as Align to Plane: understandably, accurate orientation relative to the global axes is essential.
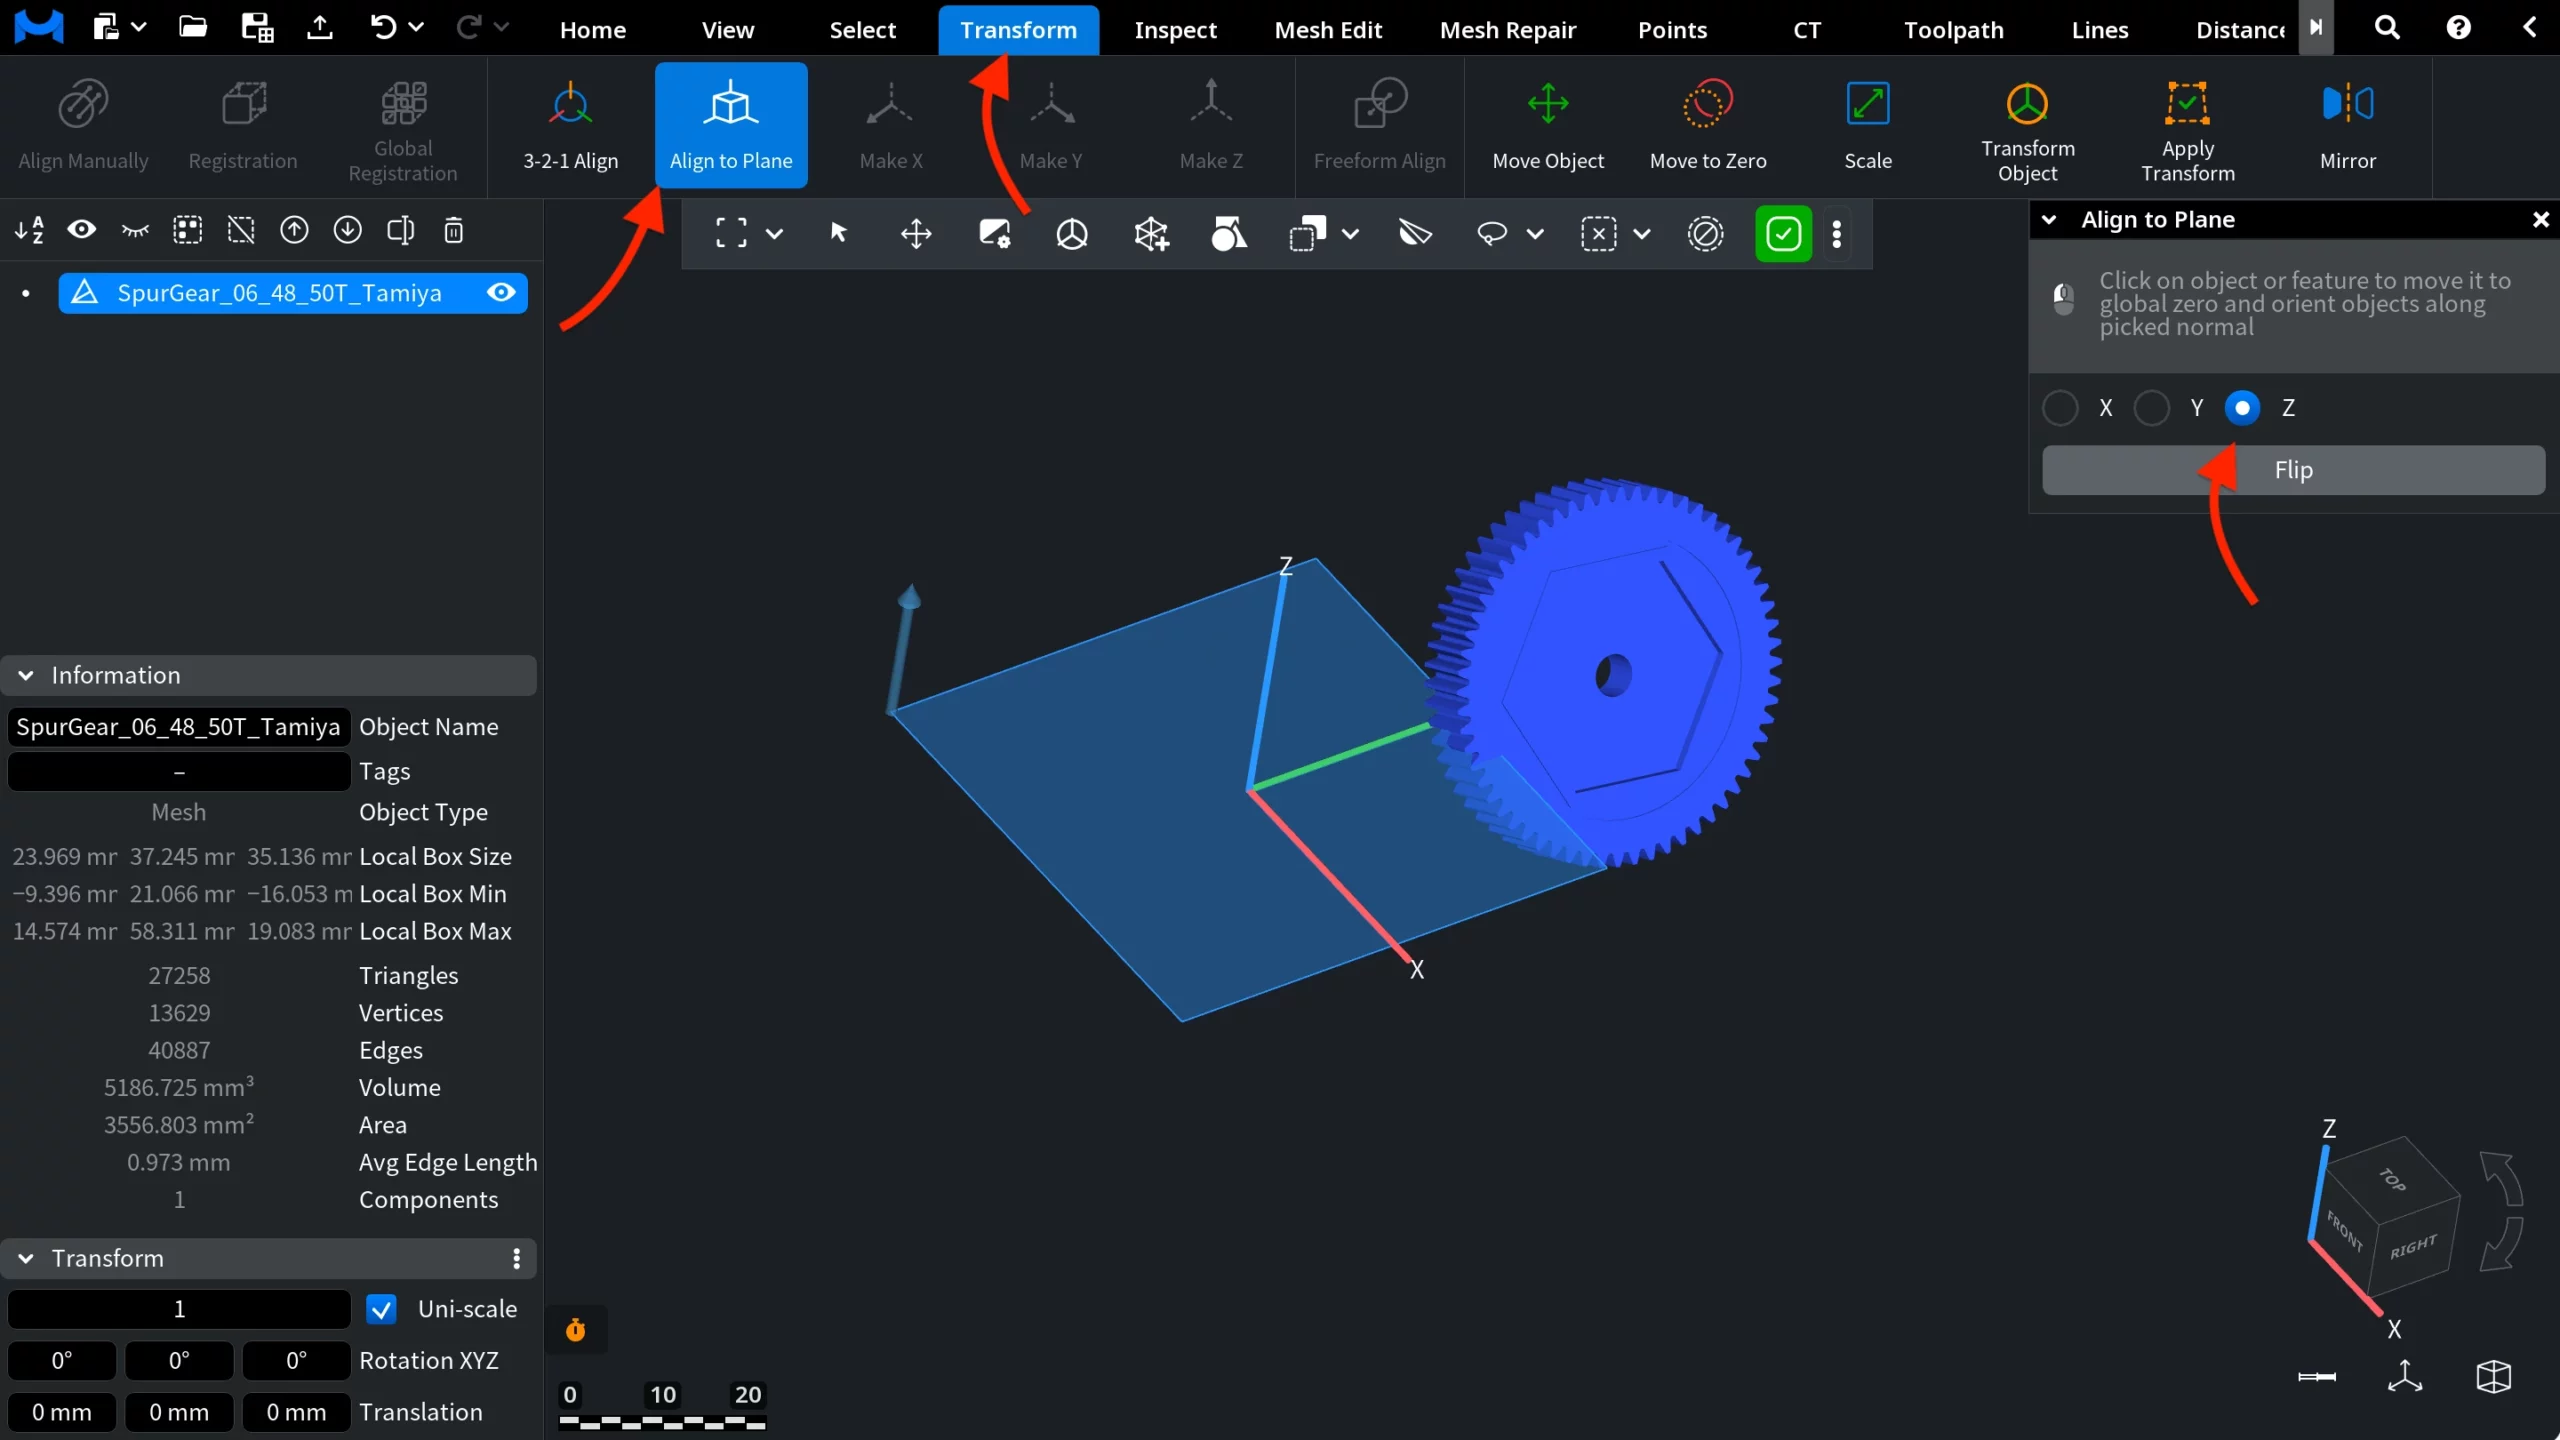
Step 2: Find and Click ‘Align to Plane’
To access Align to Plane, open the Transform tab. Then click Align to Plane.
Once the tool is activated, several visual and interface elements appear in the viewport and the tool panel:
- A reference plane corresponding to the currently selected global axis (Z by default) becomes visible in the scene.
- The global coordinate axes remain visible, providing you with clear orientation context.
- The Align to Plane panel opens. There, you can select the target plane (X, Y, or Z).
At this stage, no geometry has been modified yet. The object remains in its current position and orientation. Our solution for 3D data is now waiting for you to pick a face on the mesh.
Step 3: Alignment
With Align to Plane active, your next step is to define how the object should be positioned and oriented. This is done by clicking directly on the mesh.
When you click on the object, you are effectively clicking on a triangle that makes up the mesh surface. The selected triangle becomes your reference for alignment. Its position and orientation are employed to determine how exactly the entire object is moved and rotated.
To make the mesh structure easier to see, you can press the L key to visualize the triangles the mesh consists of. This highlights individual faces and might help you clearly identify suitable reference triangles.
In order to make the effect easier to observe in this example, we click on a larger triangle.
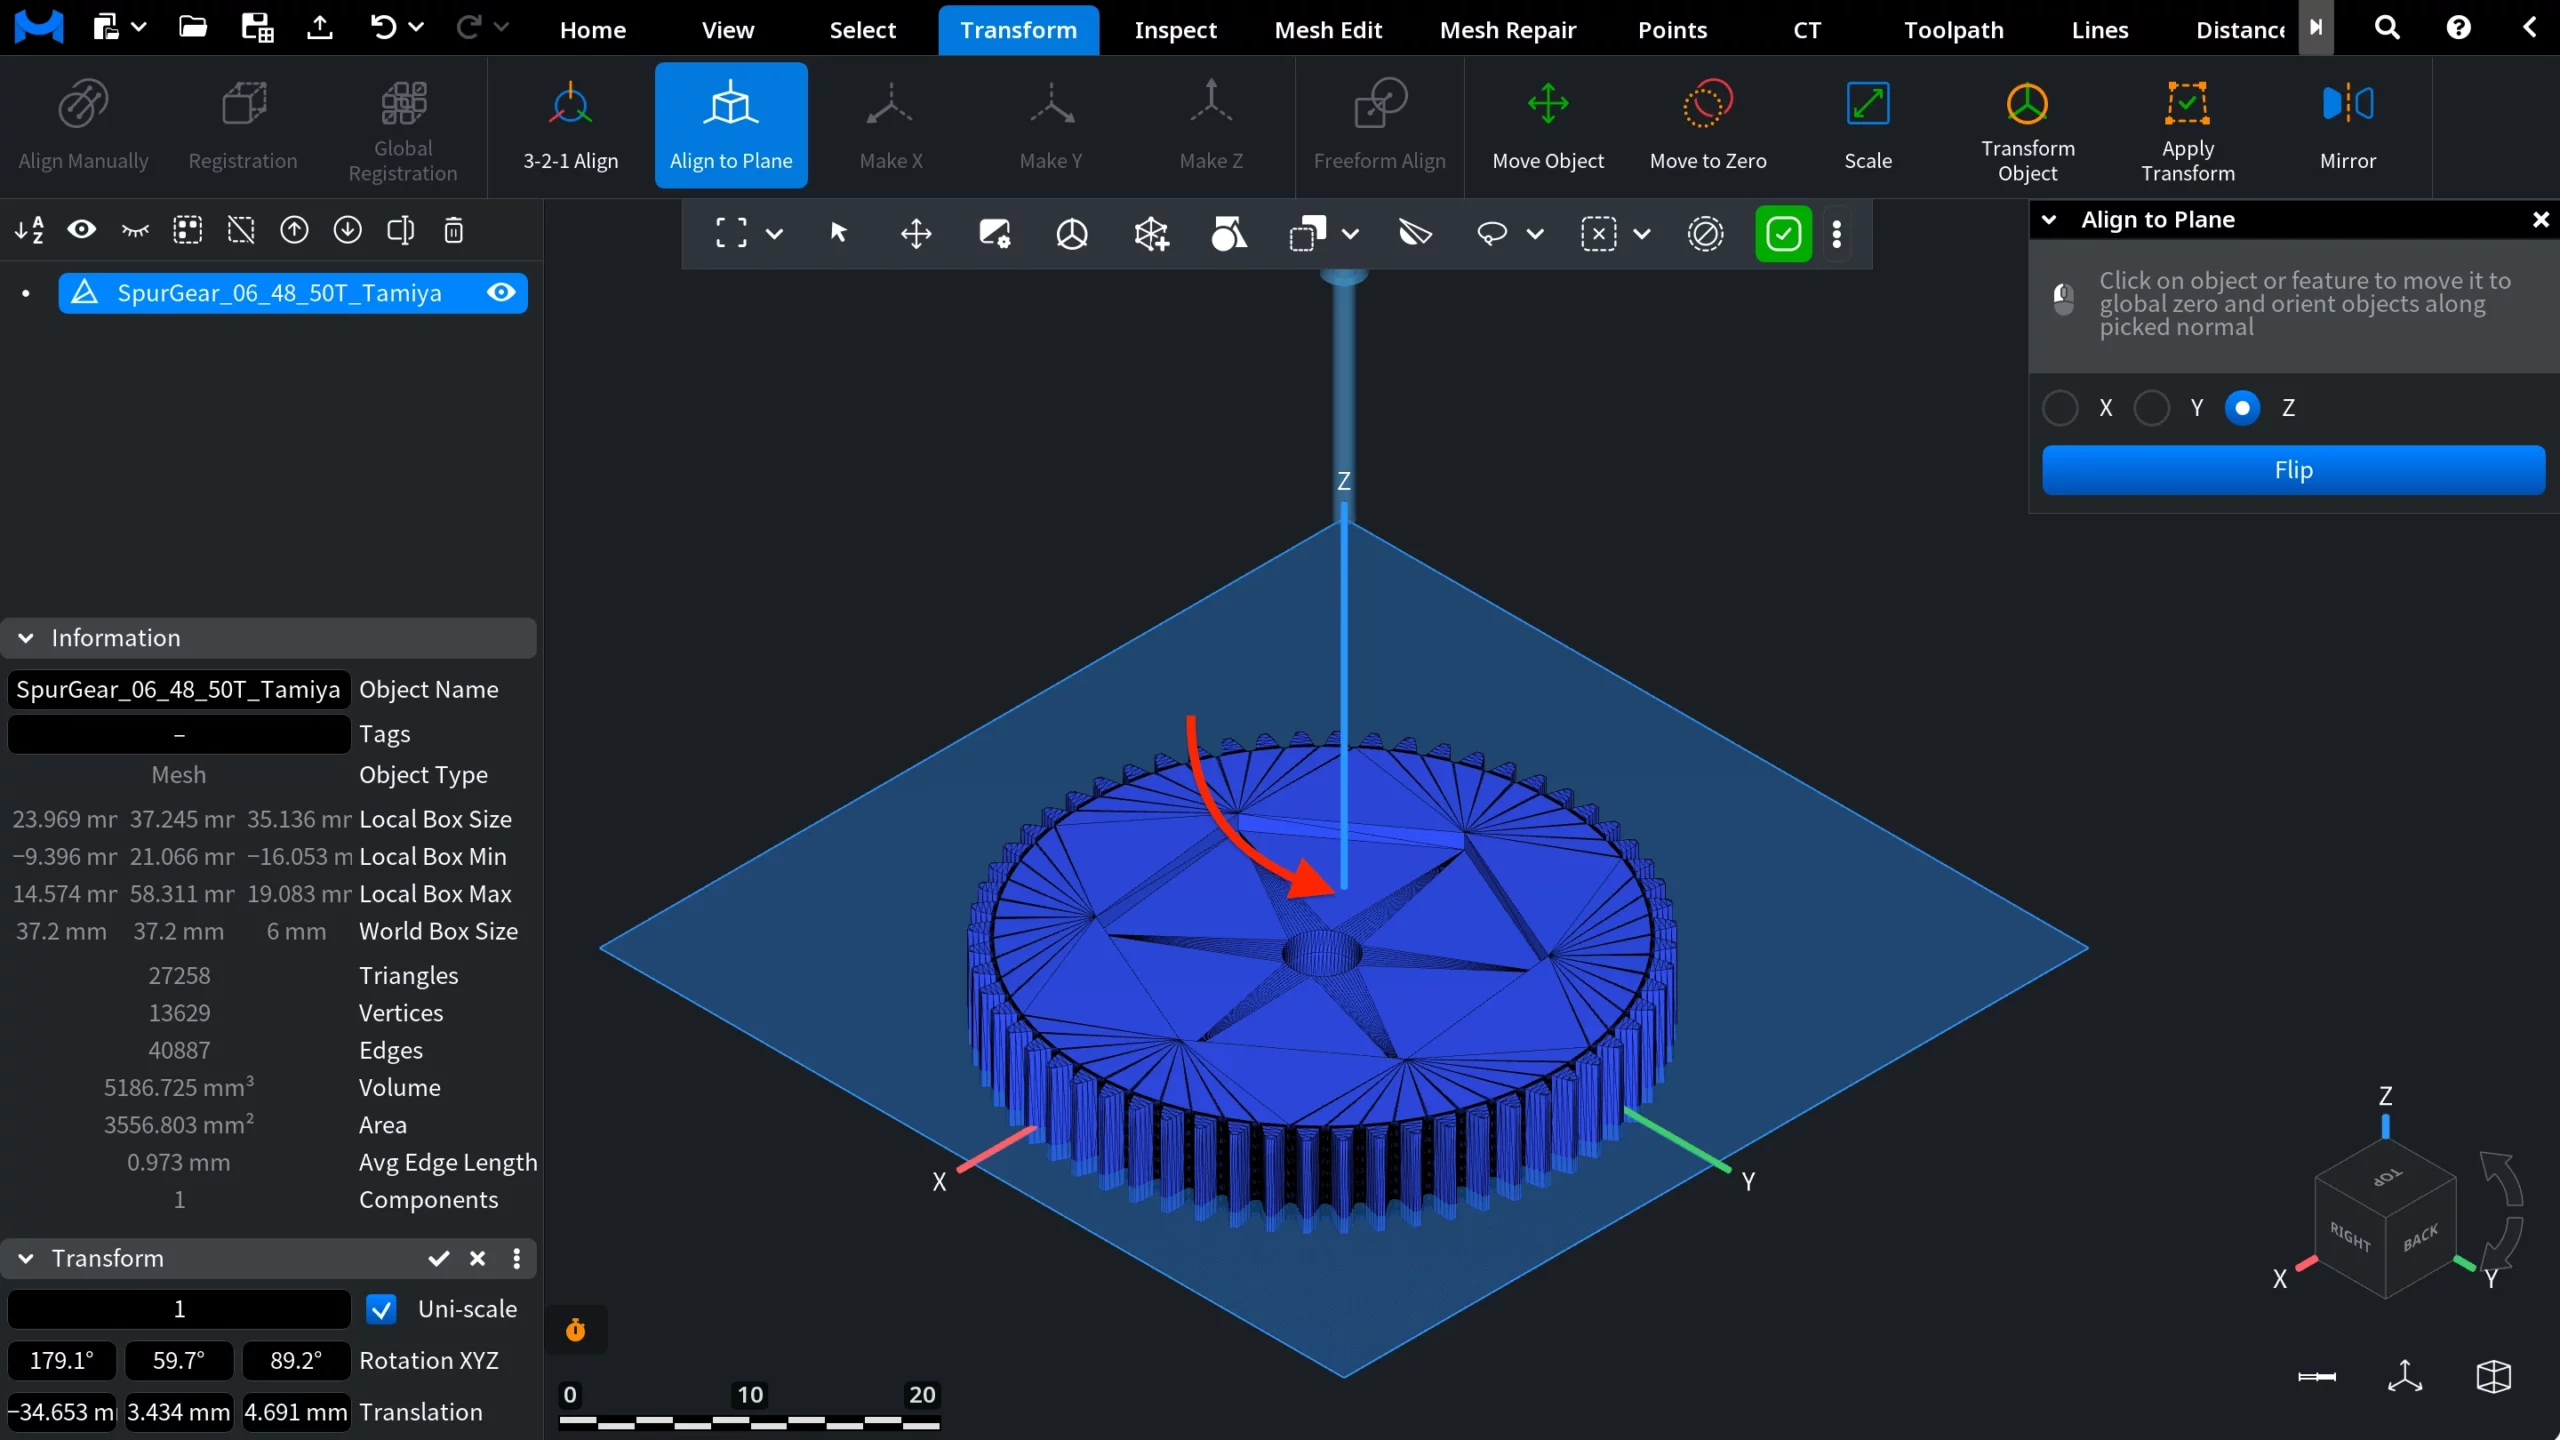
Once a triangle is selected, MeshInspector moves the picked triangle to the global origin on the selected plane. Concurrently, the entire object is reoriented so that the normal of the chosen triangle aligns with the chosen global plane (Z in this example).
Step 4 and 5: Y and X Axes
As expected, MeshInspector behaves the same way whenever you select the X or Y plane in the Align to Plane panel.
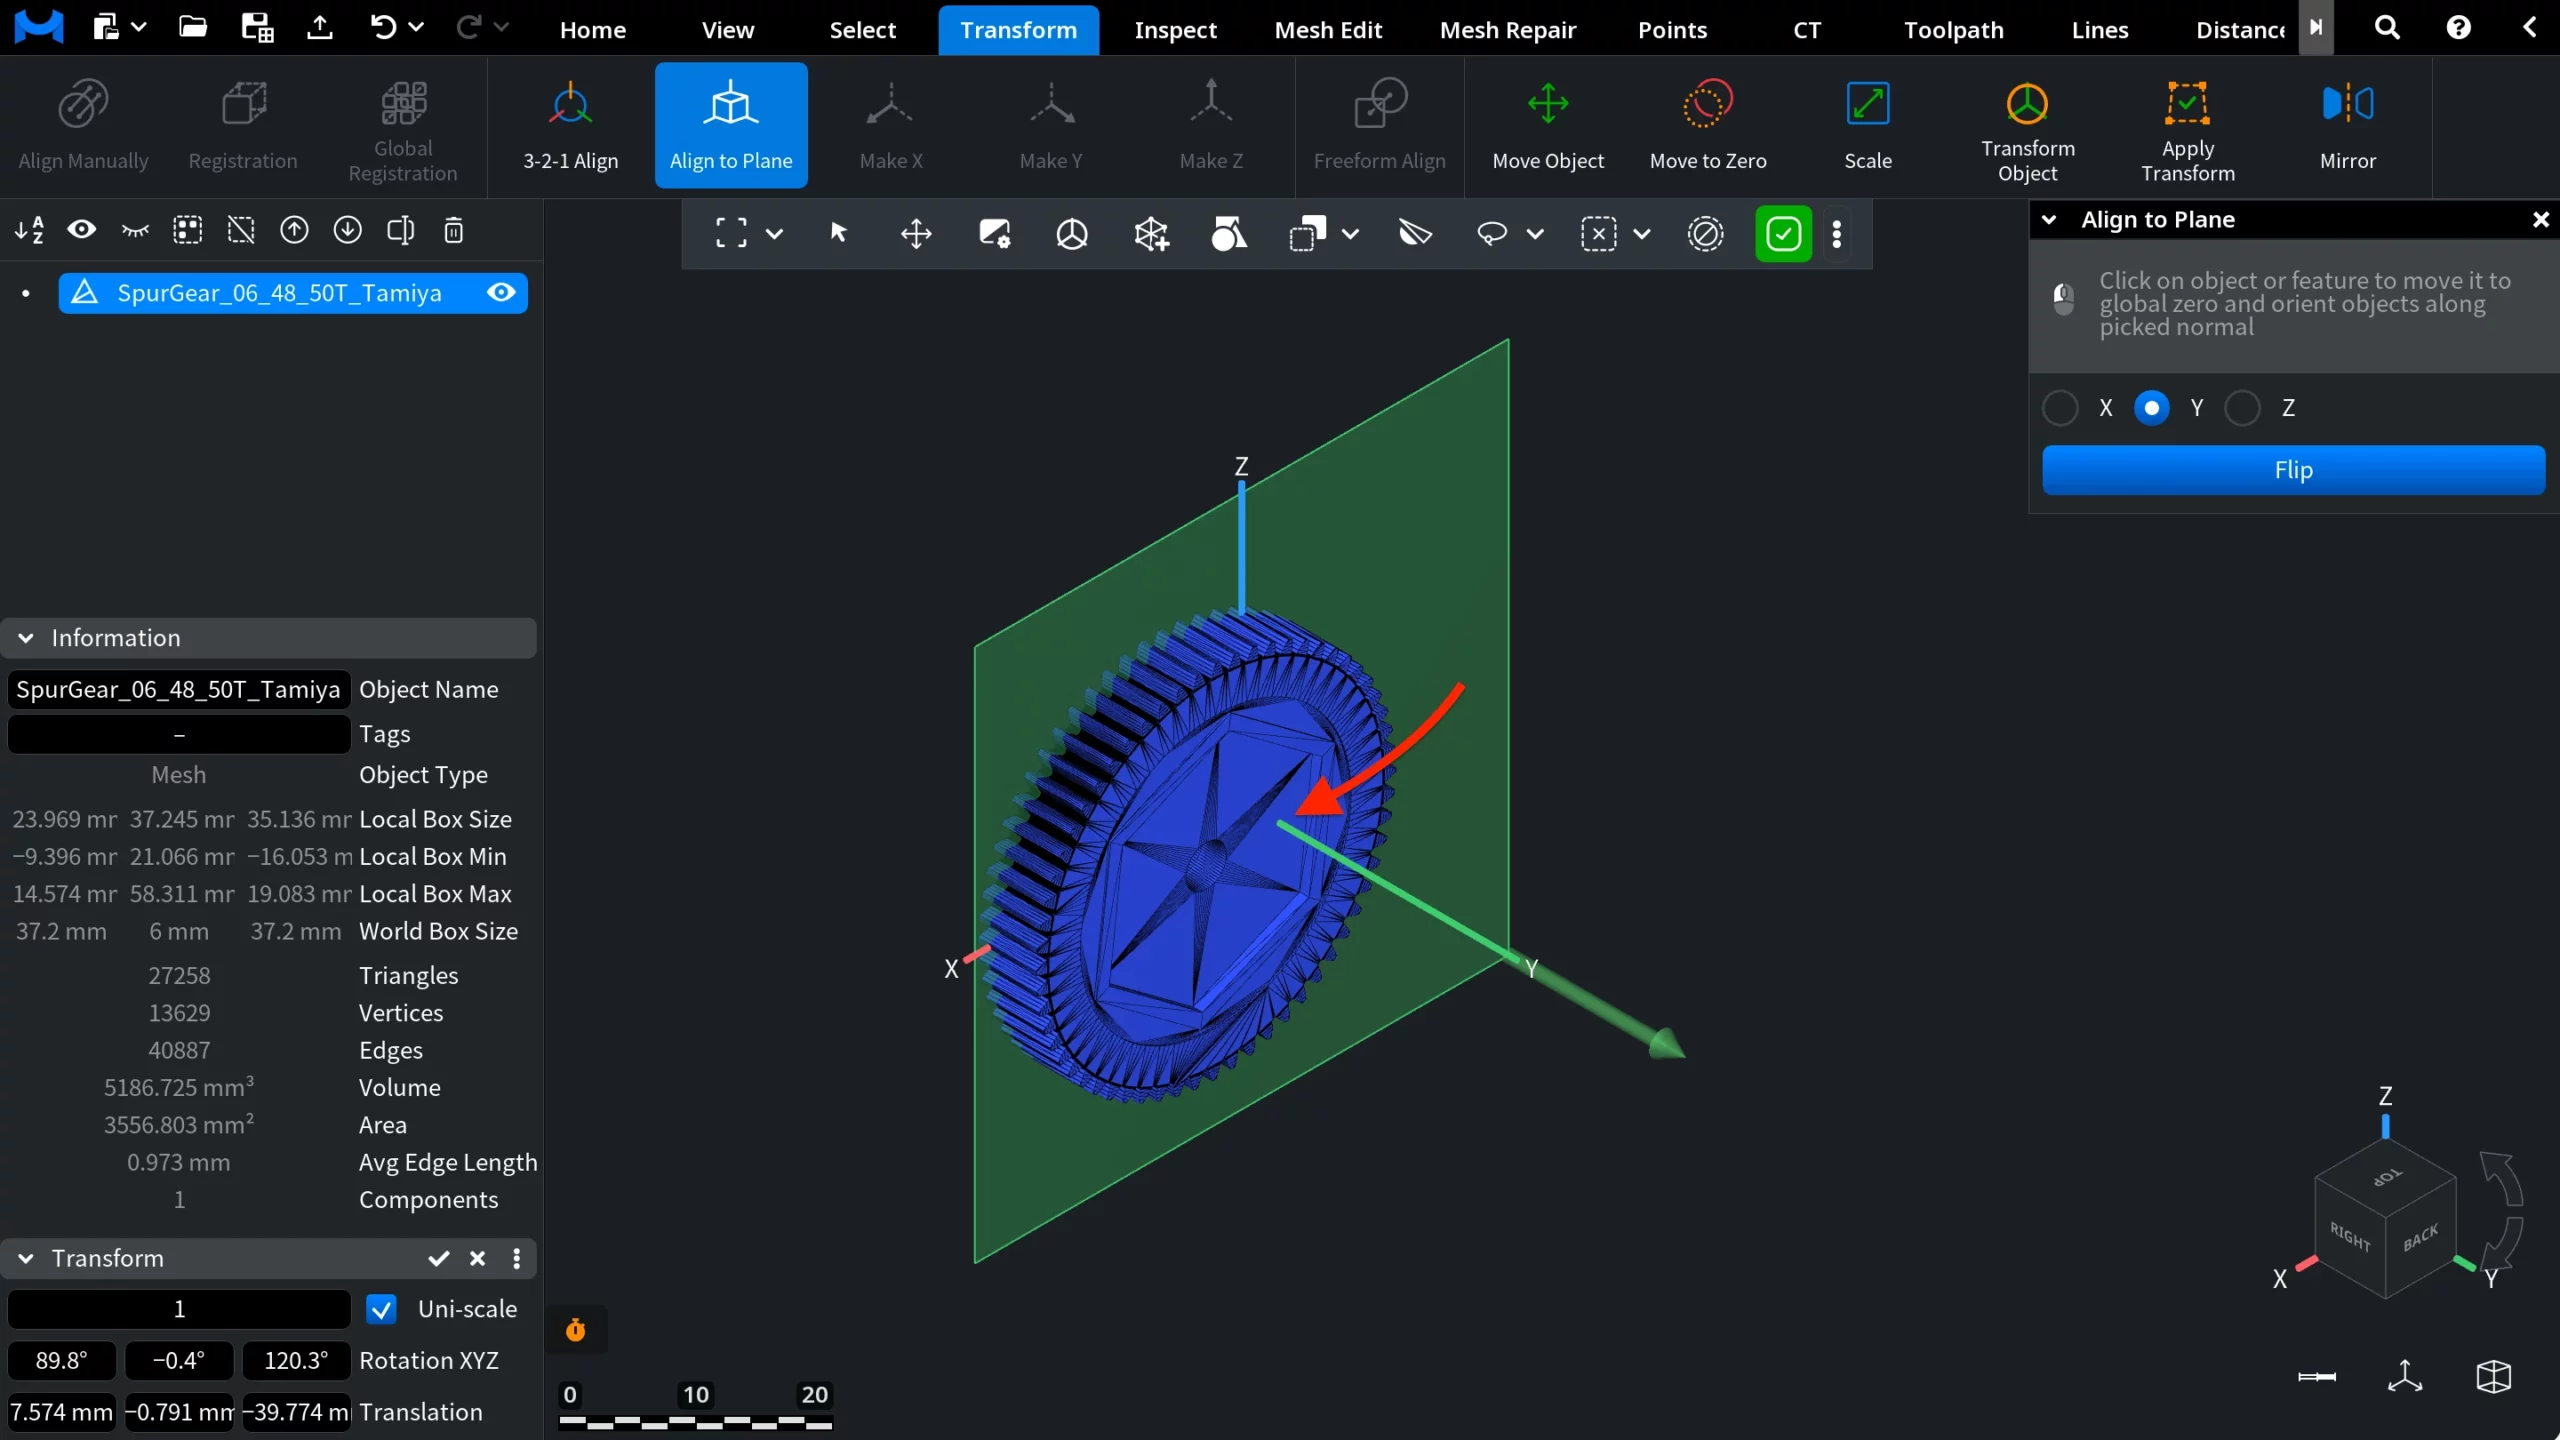
In this example, we first switch the target plane to Y. At this point, only the reference plane changes, while the object itself remains in the same position and orientation as before.
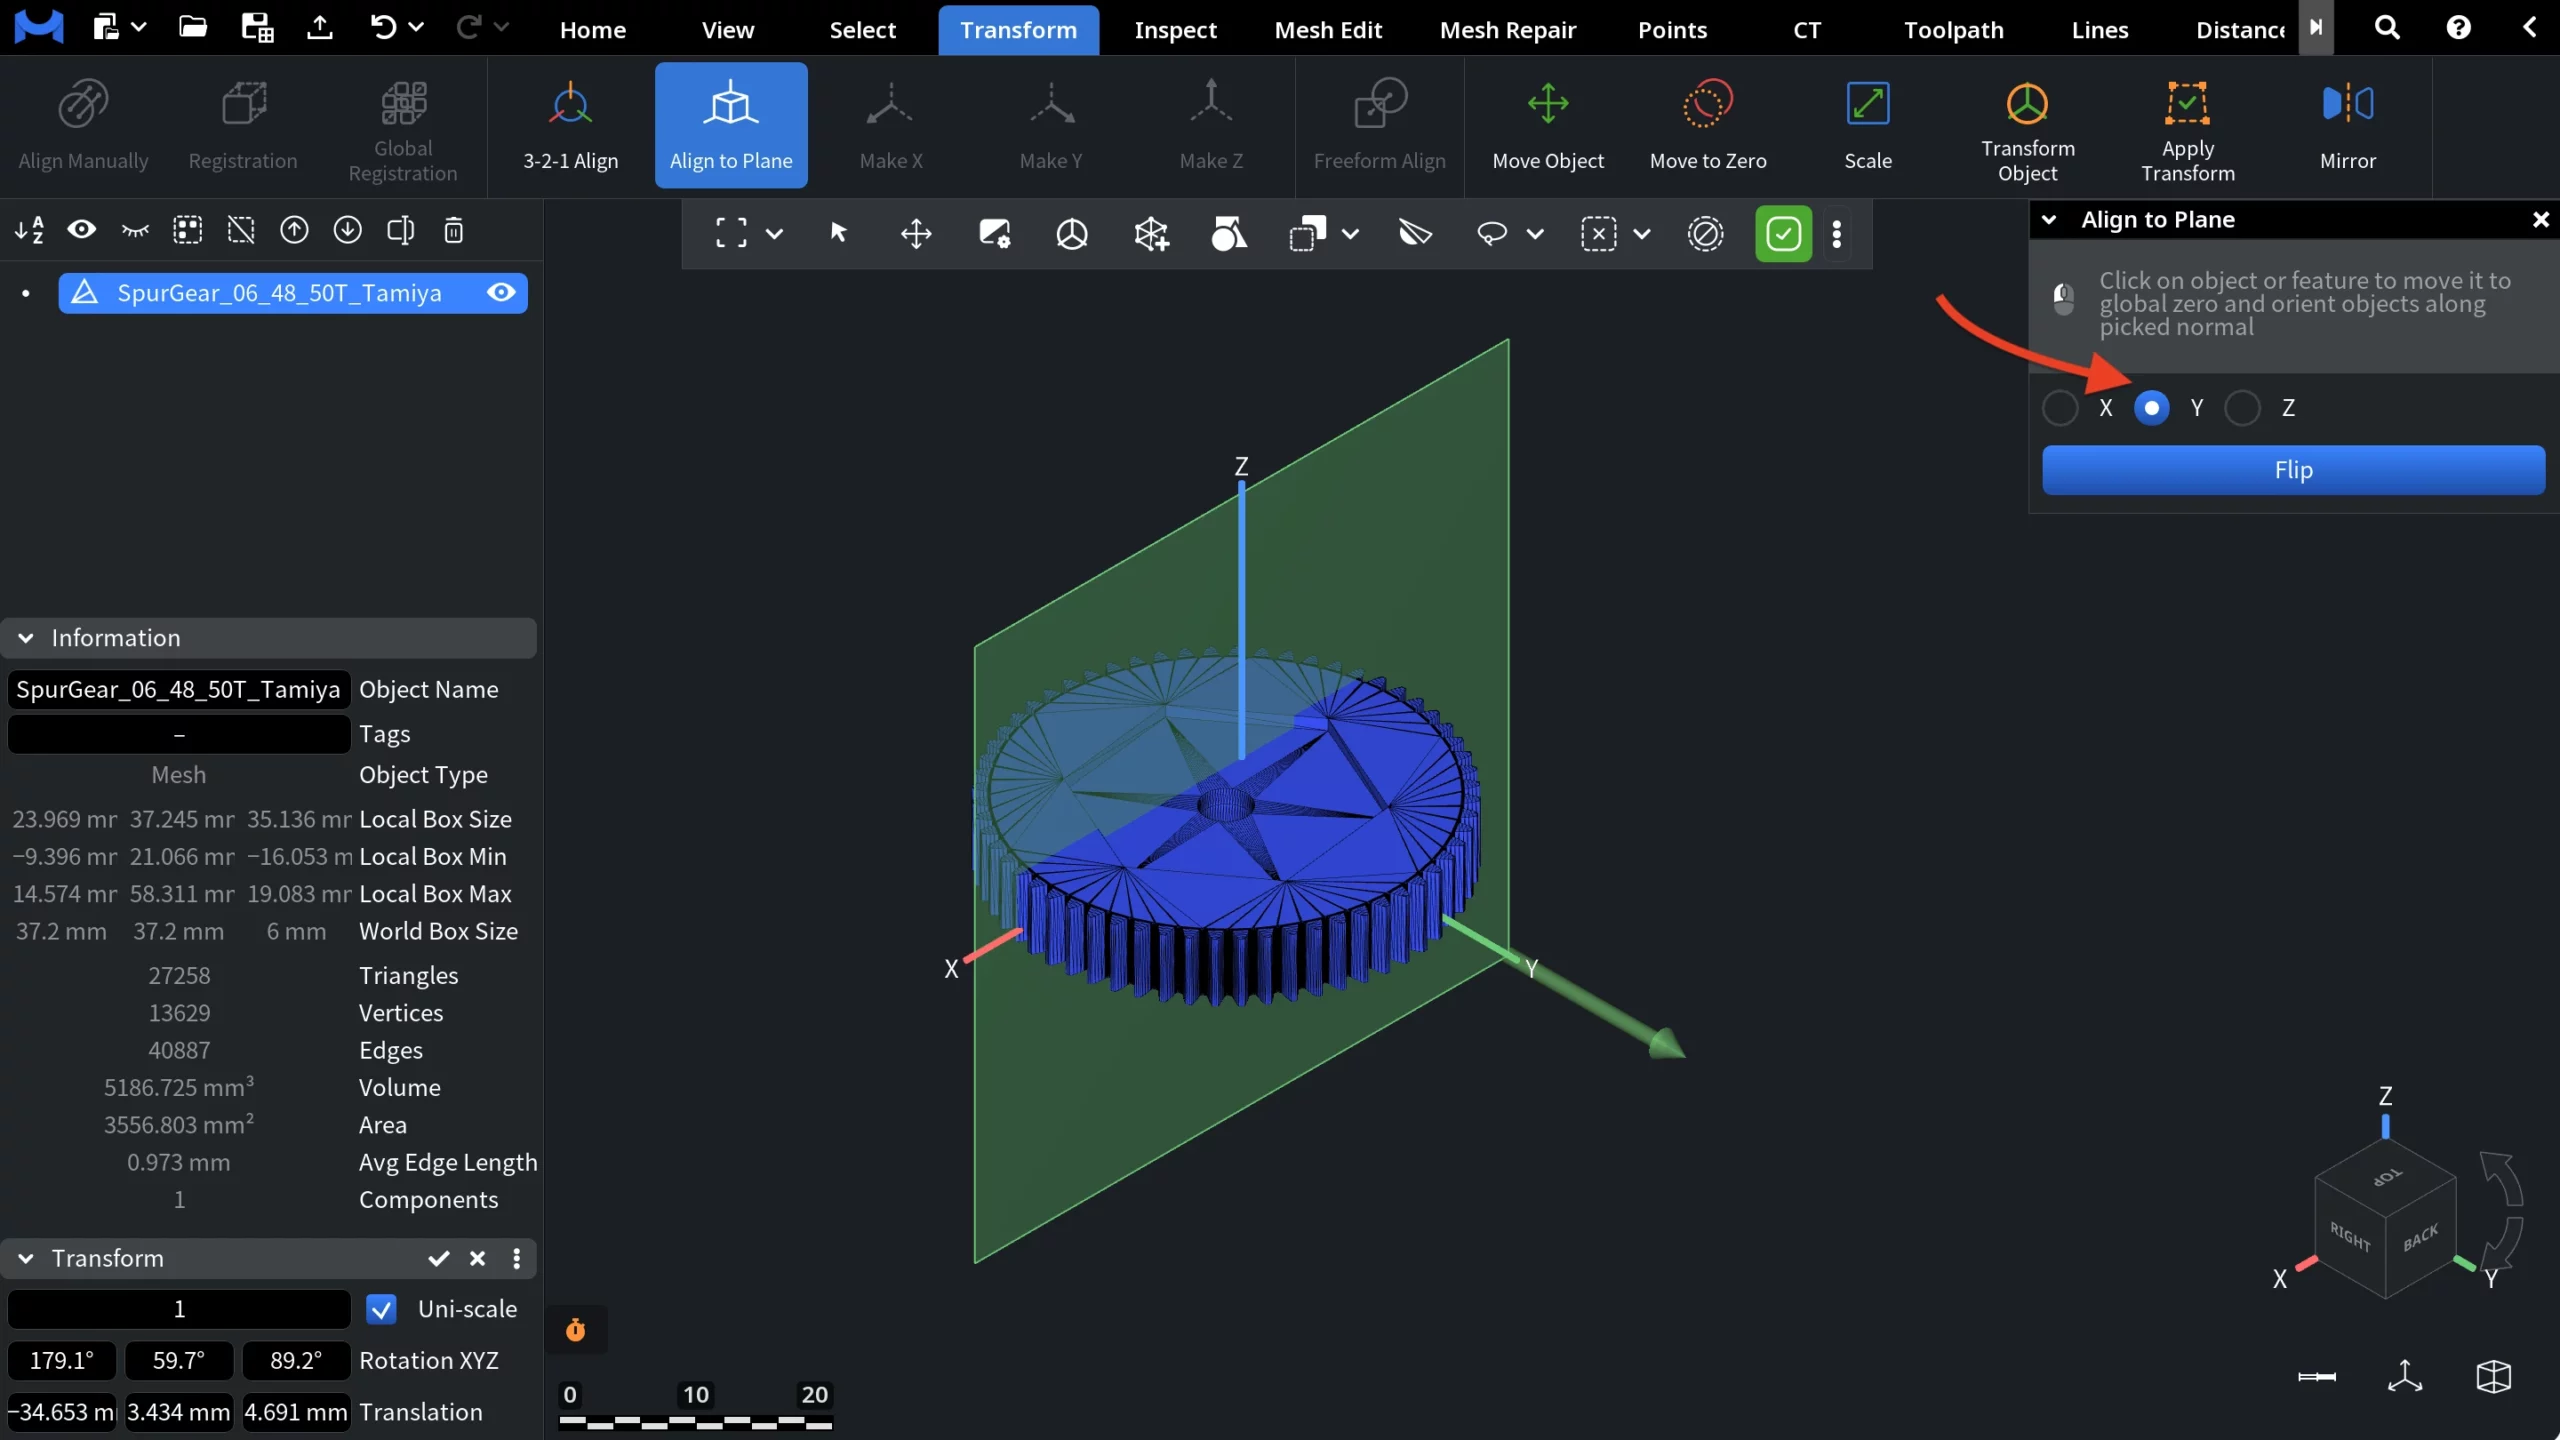
With the Align to Plain tool still active, we then click on another triangle on the mesh, indicated by the arrow in the screenshot. Once the triangle is selected, MeshInspector moves it to the global origin on the Y plane and reorients the entire object so that the triangle’s normal aligns with that plane. As a result, the model is repositioned and rotated consistently, relative to the global Y axis.
The same applies to the X plane. By repeating this process across different axes, you can quickly normalize object orientation in any primary direction without manually rotating or repositioning the model.