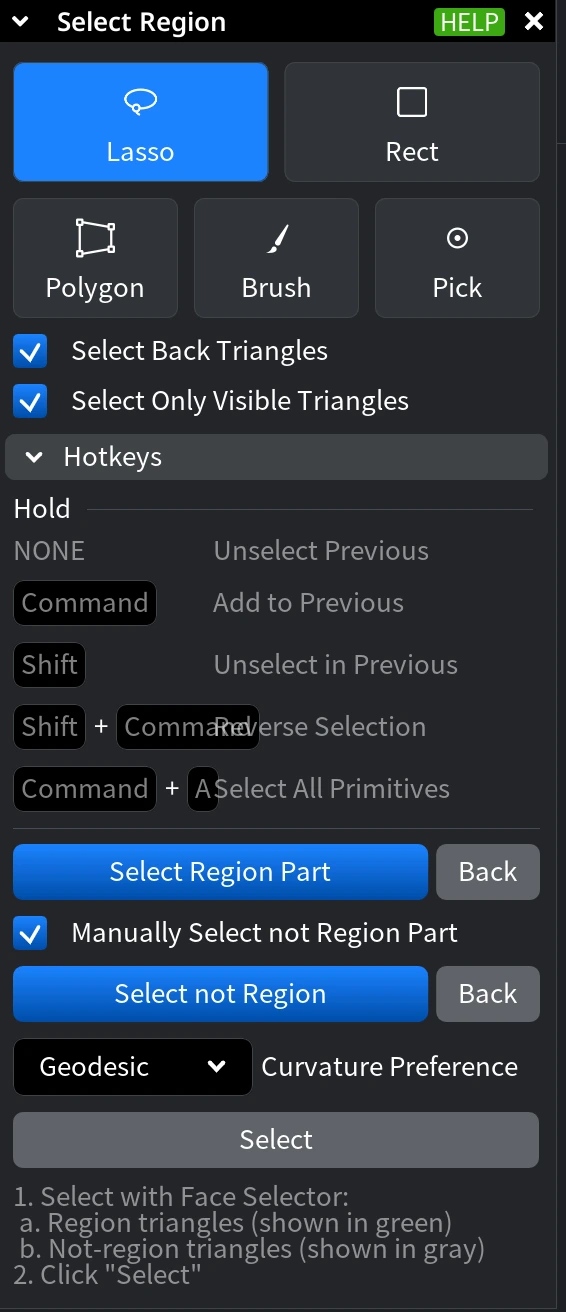
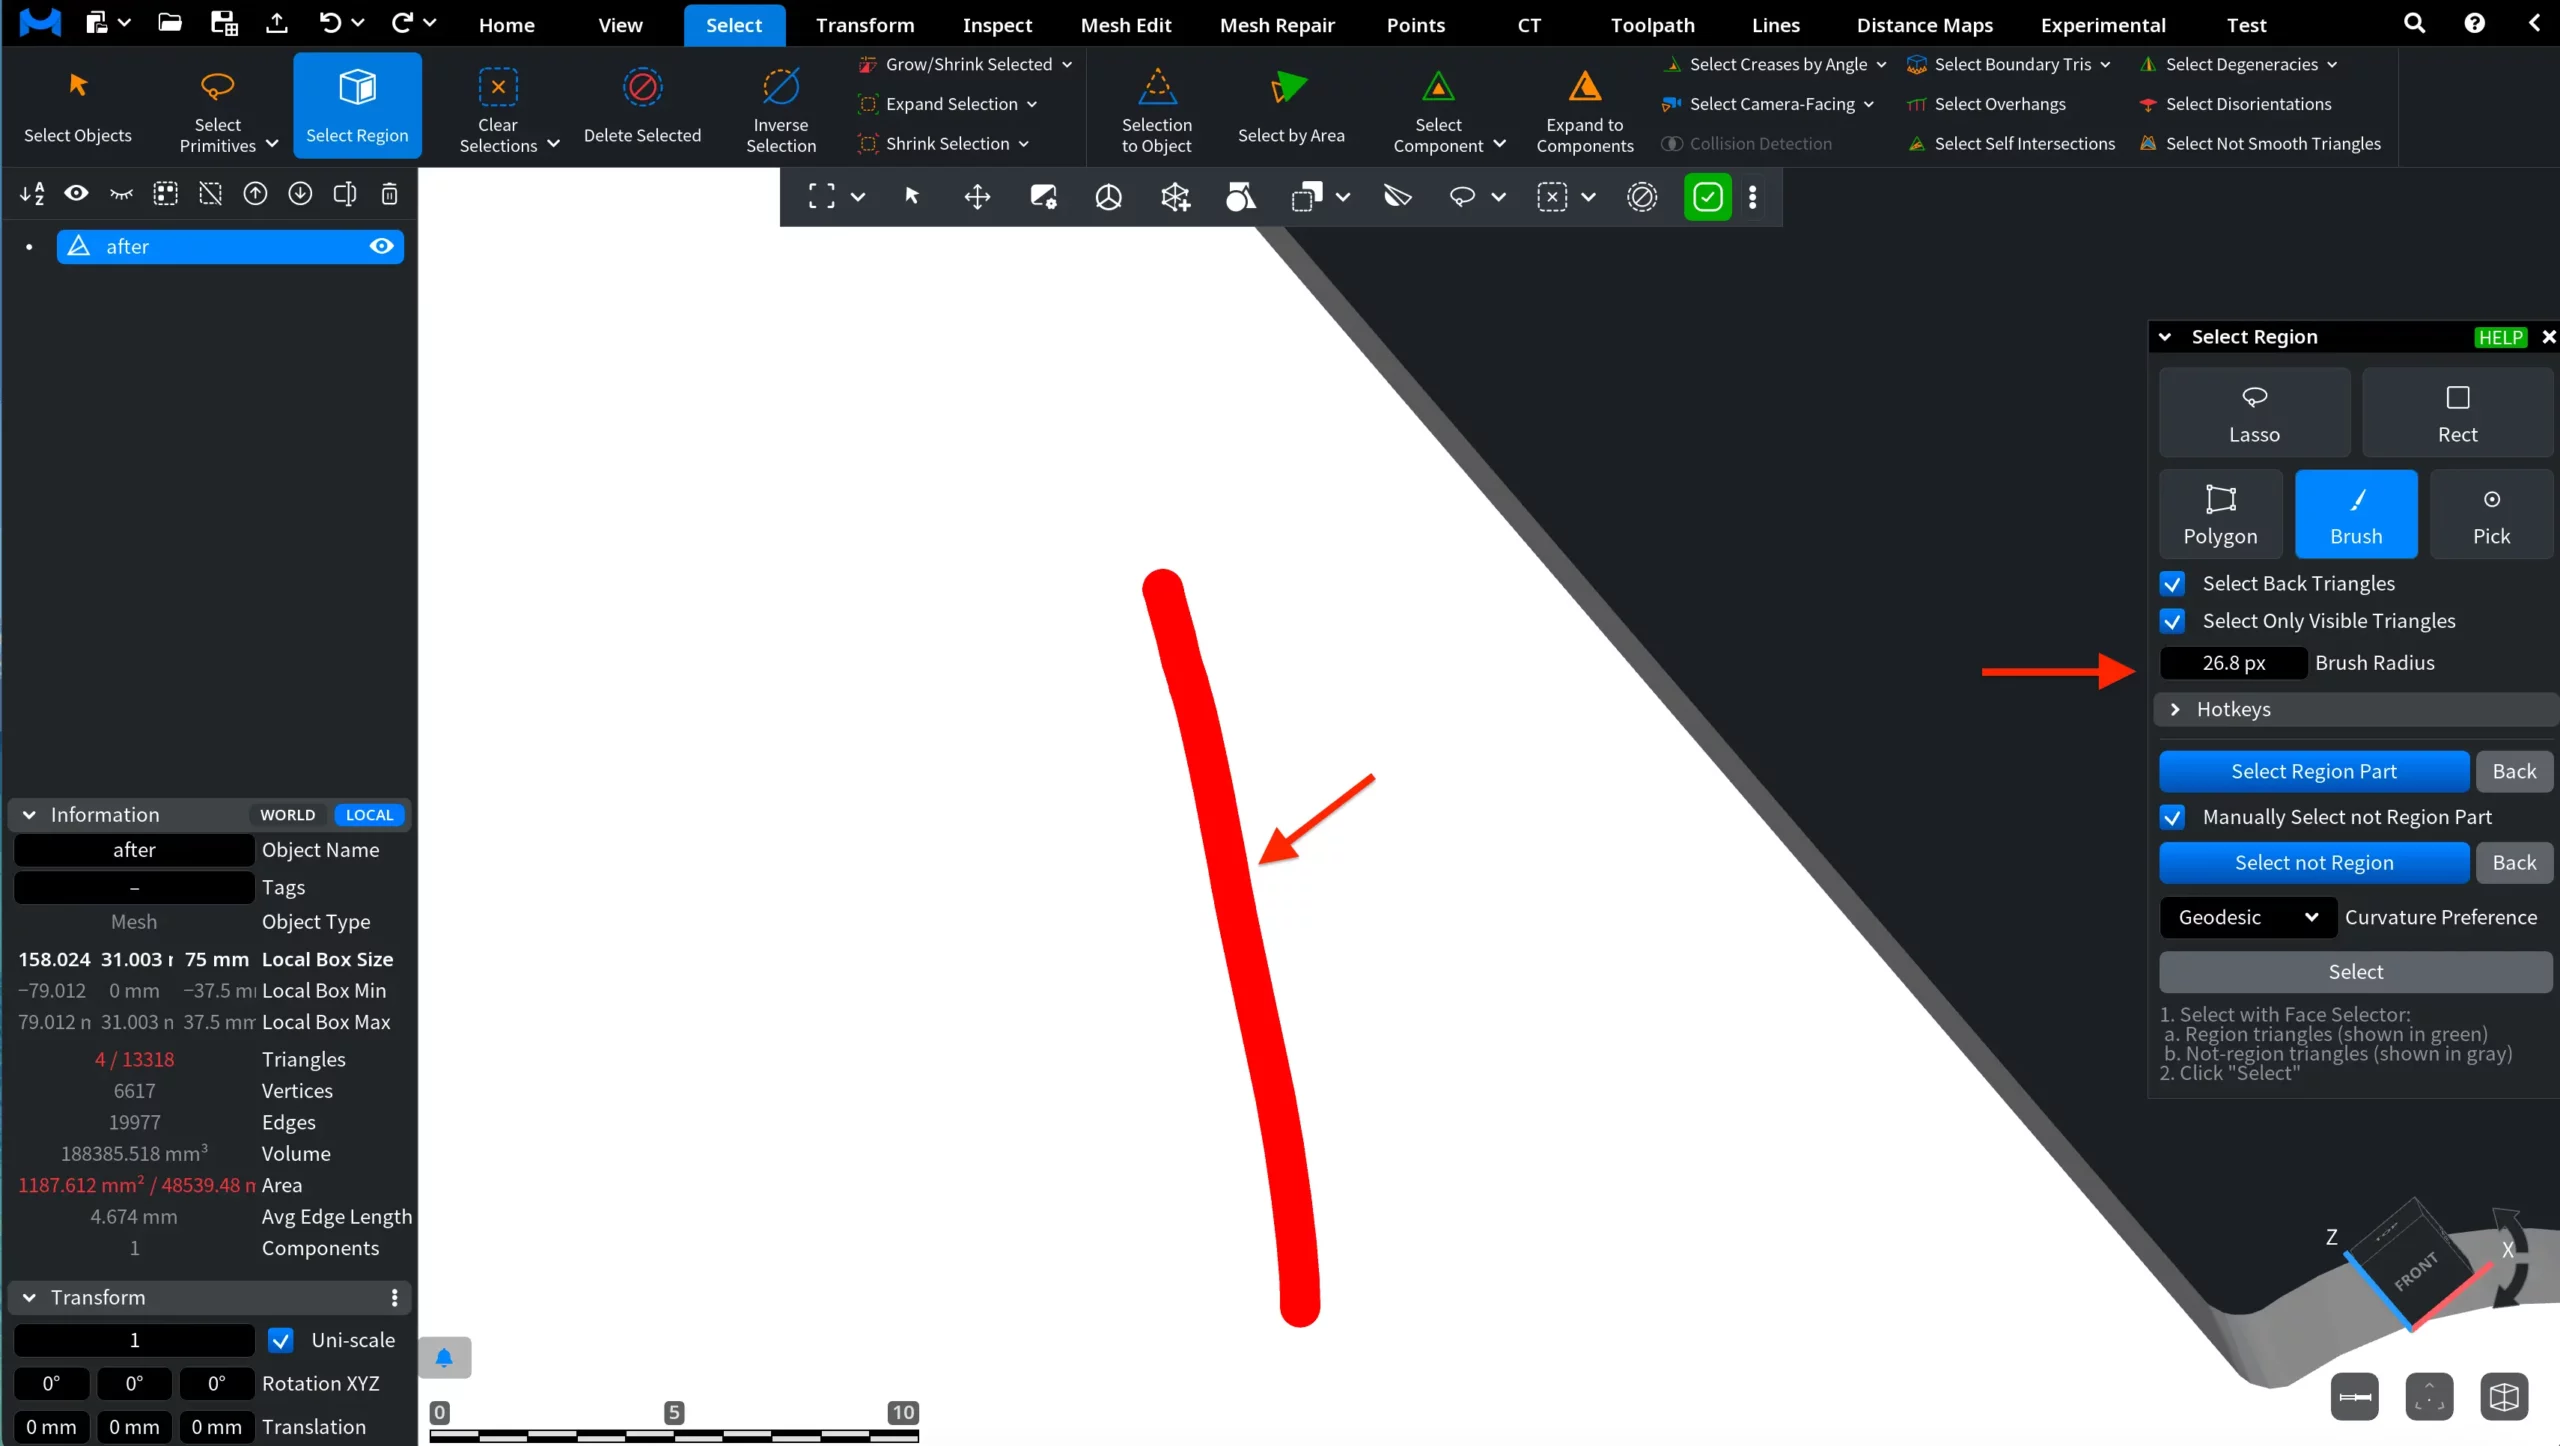
Select Region performs smart region selection on a mesh by using user-defined seed triangles. To access it, go to the Select tab and click Select Region.

The workflow proceeds as follows:
- You mark a set of triangles. Initially, these will be highlighted in red.
- After that you decide whether these belong to the desired region (they will be highlighted in green).
- Also, you may decide what triangles should not belong to the region (and they will be highlighted in grey).
Based on these seeds, the tool computes an optimal boundary between the region and the not-region by minimizing a metric along the boundary.
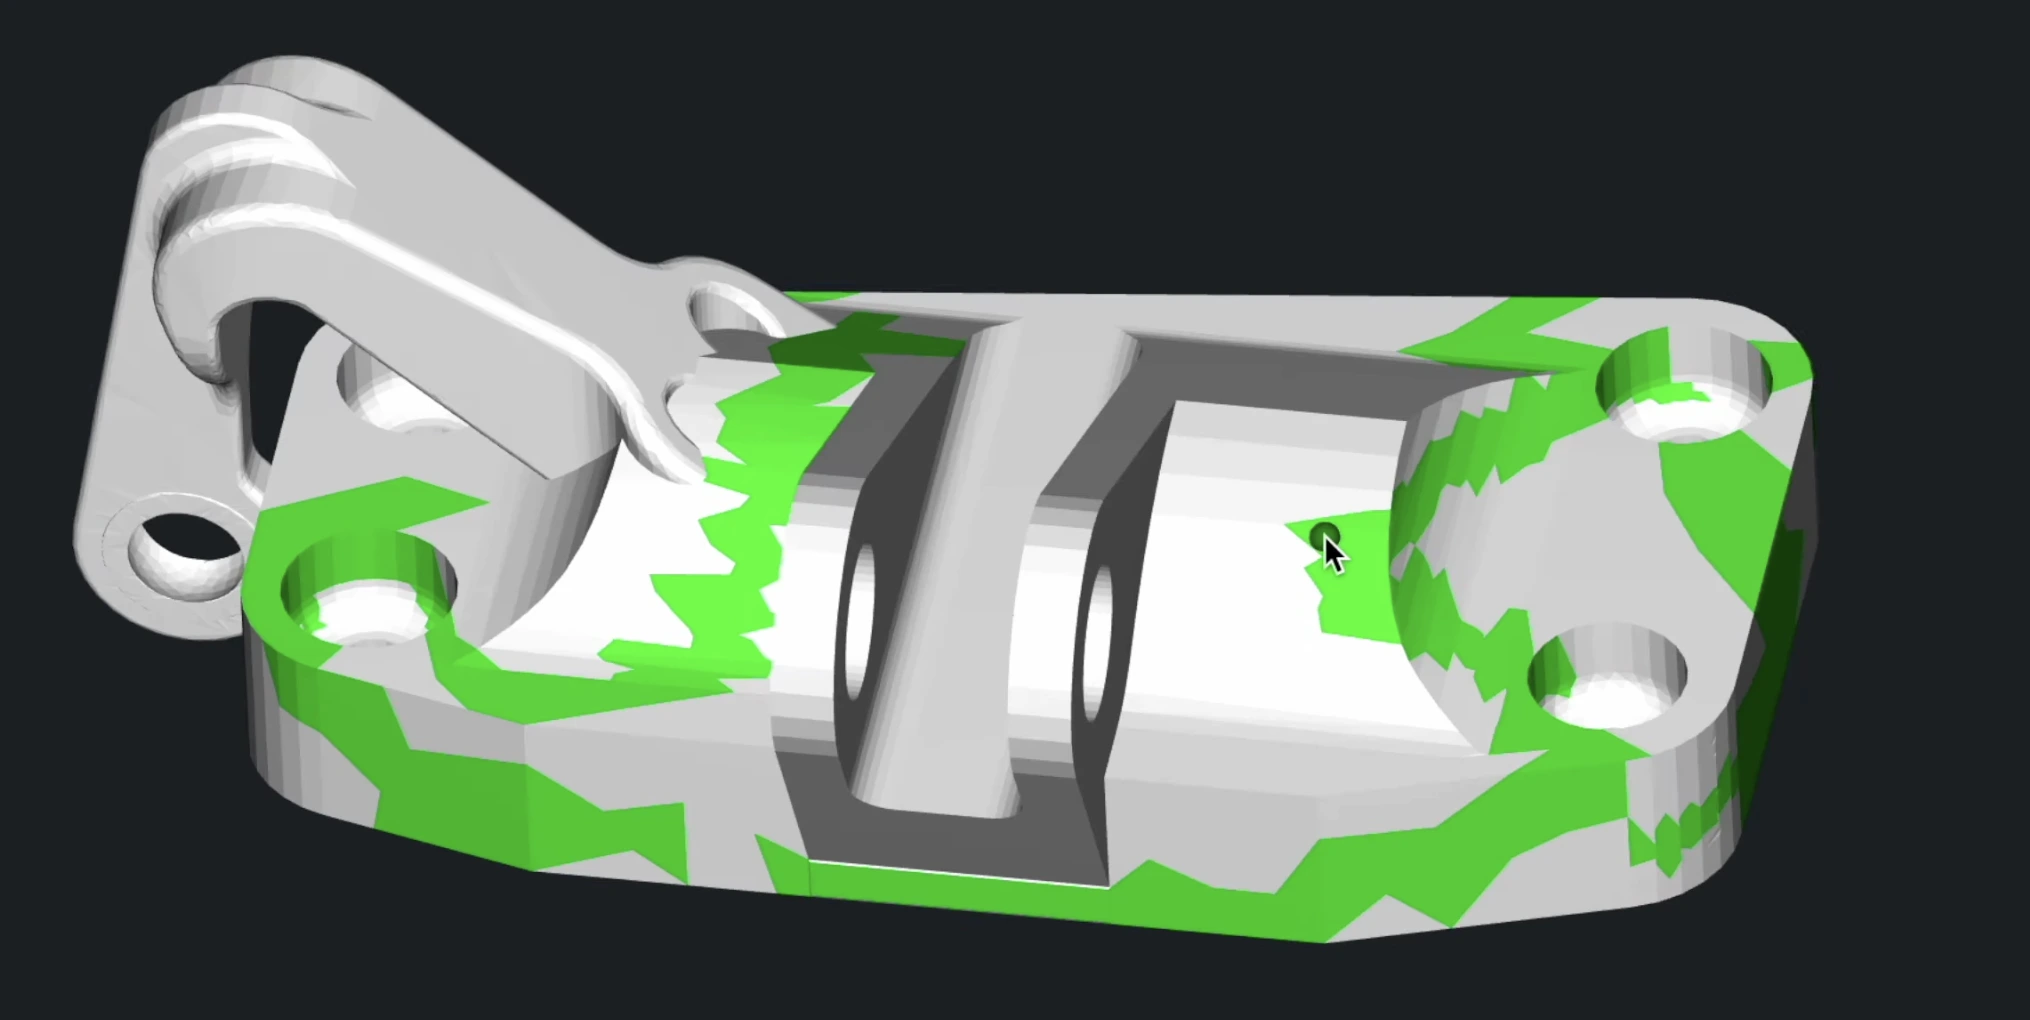
This approach allows precise isolation of regions on complex surfaces, even when the boundary is not explicitly drawn. The workflow is controlled through the dedicated Select Region panel.
Step 1. Choose a Selection Mode
Start the workflow by selecting triangles that belong to the intended region using one of the available selection modes.
- Lasso enables freehand selection by drawing around an area.
- Rect selects all triangles within a dragged rectangular area.
- Polygon selects triangles inside a manually defined polygon.
- Brush enables paint-style selection with an adjustable radius.
- Pick selects individual triangles with a single click.
Step 2. Adjust Selection Behavior
- Select Back Triangles includes triangles located on the hidden side of the mesh.
- Select Only Visible Triangles limits selection to triangles visible from the current view.
When using Brush, you can also adjust the Brush Radius to control the size of the painted area.
Using Modifier Keys (Where Applicable)
While selecting triangles, modifier keys control how the current selection is updated:
- None unselects the previous selection.
- CTRL (or Command) adds triangles to the current selection.
- SHIFT removes triangles from the current selection.
- SHIFT + CTRL (or Command) reverses the selection.
- CTRL (or Command) + A selects all primitives.
Use these keys to incrementally build the set of triangles that define the region.
Step 3. Define Region Seeds
Once the desired triangles are selected, click Select Region Part to convert them into region seeds. Region seeds are displayed in green and define the area of interest on the mesh. This step is mandatory, i.e., the region cannot be computed until region seeds are defined.
Step 4. Define the Not-Region (When Applicable)
You can also specify triangles that should explicitly not belong to the region:
- Enable Manually Select not Region to manually select not-region triangles.
- Manually selected not-region triangles are displayed in gray.
If Manually Select not Region Part is disabled, MeshInspector automatically determines the not-region based on the defined region seeds.
Step 5. Uncertainty Distance and Curvature Preference in Select Region
When computing the boundary between the region and the not-region, Uncertainty Distance and Curvature Preference control how the boundary is placed and how it follows the mesh surface.
Uncertainty Distance defines the distance threshold between the user-selected region part and the automatically determined not-region part. Use Uncertainty Distance to balance boundary precision and robustness, especially when the separation between region and not-region is not clearly defined or when working with scanned meshes.
Curvature Preference defines how the boundary is traced along the mesh surface when multiple valid boundary paths are possible.
This setting influences which paths are favored during boundary computation:
- Geodesic selects the shortest possible boundary path along the surface.
- Convex prefers boundary paths that pass through convex regions of the mesh.
- Concave prefers boundary paths that pass through concave regions of the mesh.
Curvature Preference allows you to control how tightly or loosely the computed region follows surface features, particularly on complex or highly curved geometry. Combined with Uncertainty Distance, it provides fine-grained control over both the position and shape of the computed region boundary.
Step 6. Finalize the Region Selection Workflow
Click Select to finalize the process.