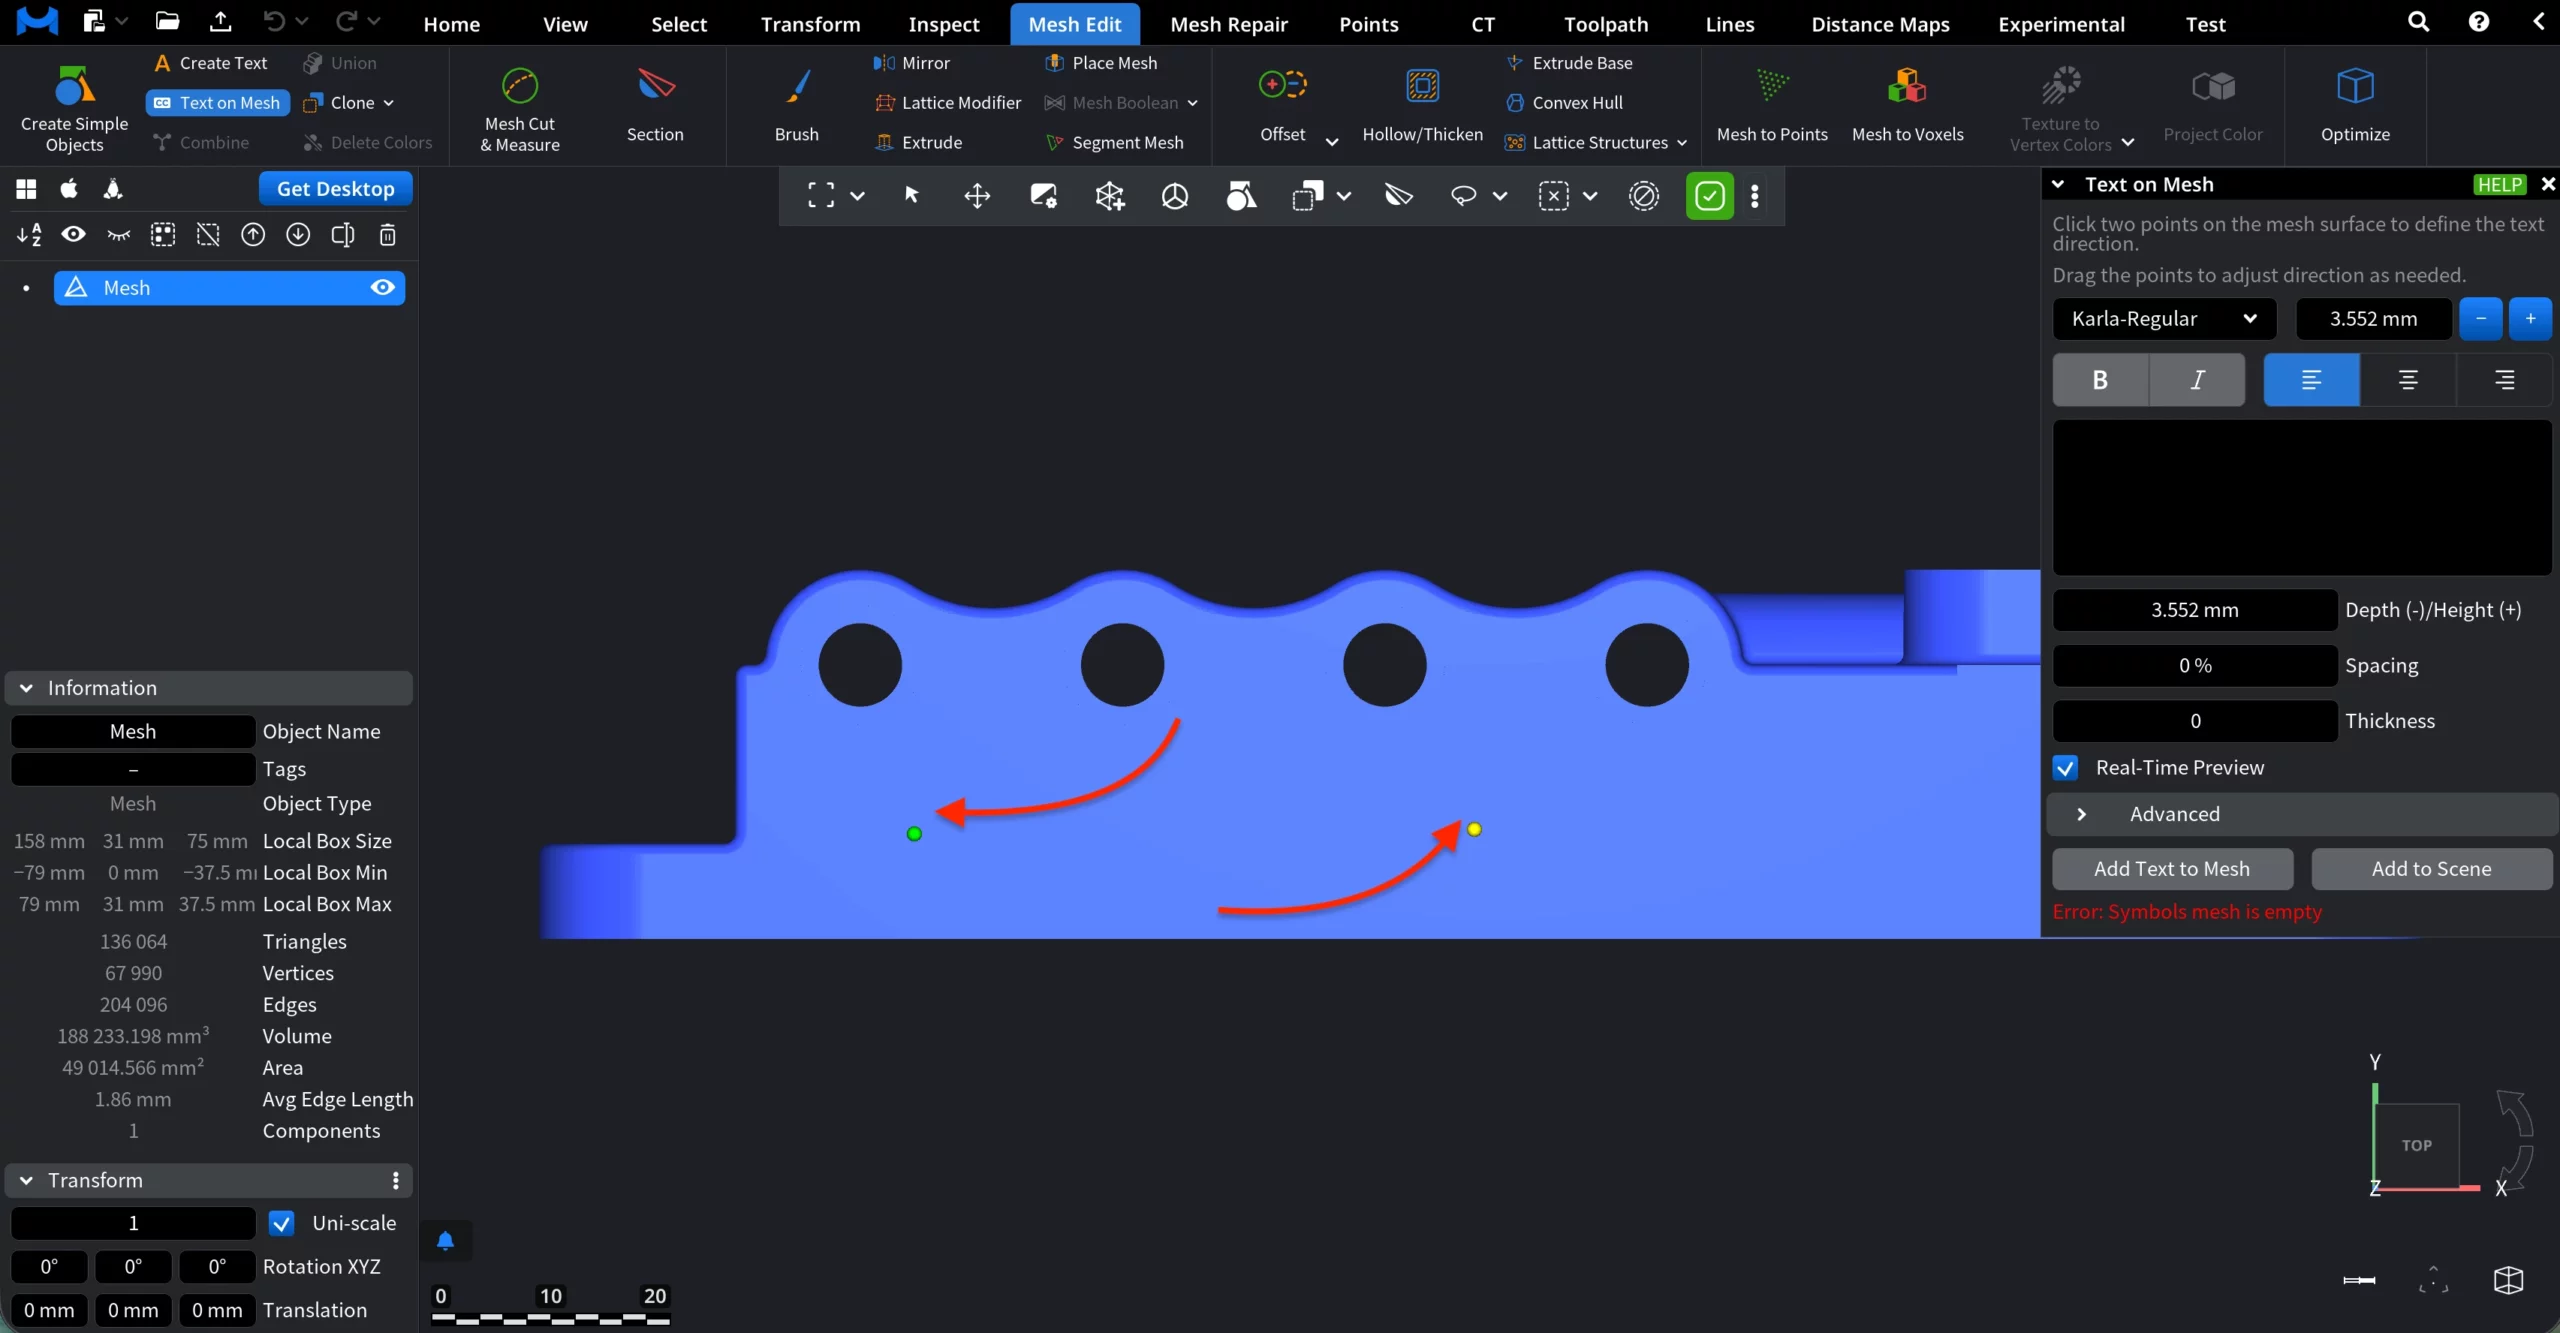
The Text on Mesh tool allows you to place text directly onto an existing mesh surface. To activate it, go to the Mesh Edit tab and click Text on Mesh.

Then, click two points on the target mesh surface: the first click, leaving a green point, defines the text start position, while the second click, leaving a yellow point, defines the text direction.
Text parameters
You can control the appearance and geometry of the text using the following settings:
Font selects the font used for the text:
- Karla-Regular (Default)
- Cuisine-Regular
- DroidSans
- ProggyClean
- ProggyTiny
- Roboto-Medium
Text input. Enter or edit the text content.
Depth (–) / Height (+) controls whether the text is engraved into the surface or raised above it.
Spacing adjusts the distance between characters.
Thickness defines the stroke thickness of the text geometry.
Real-Time Preview, when enabled, updates are shown immediately in the viewport. Below, you can see a preview with MeshInspector entered and several settings added.
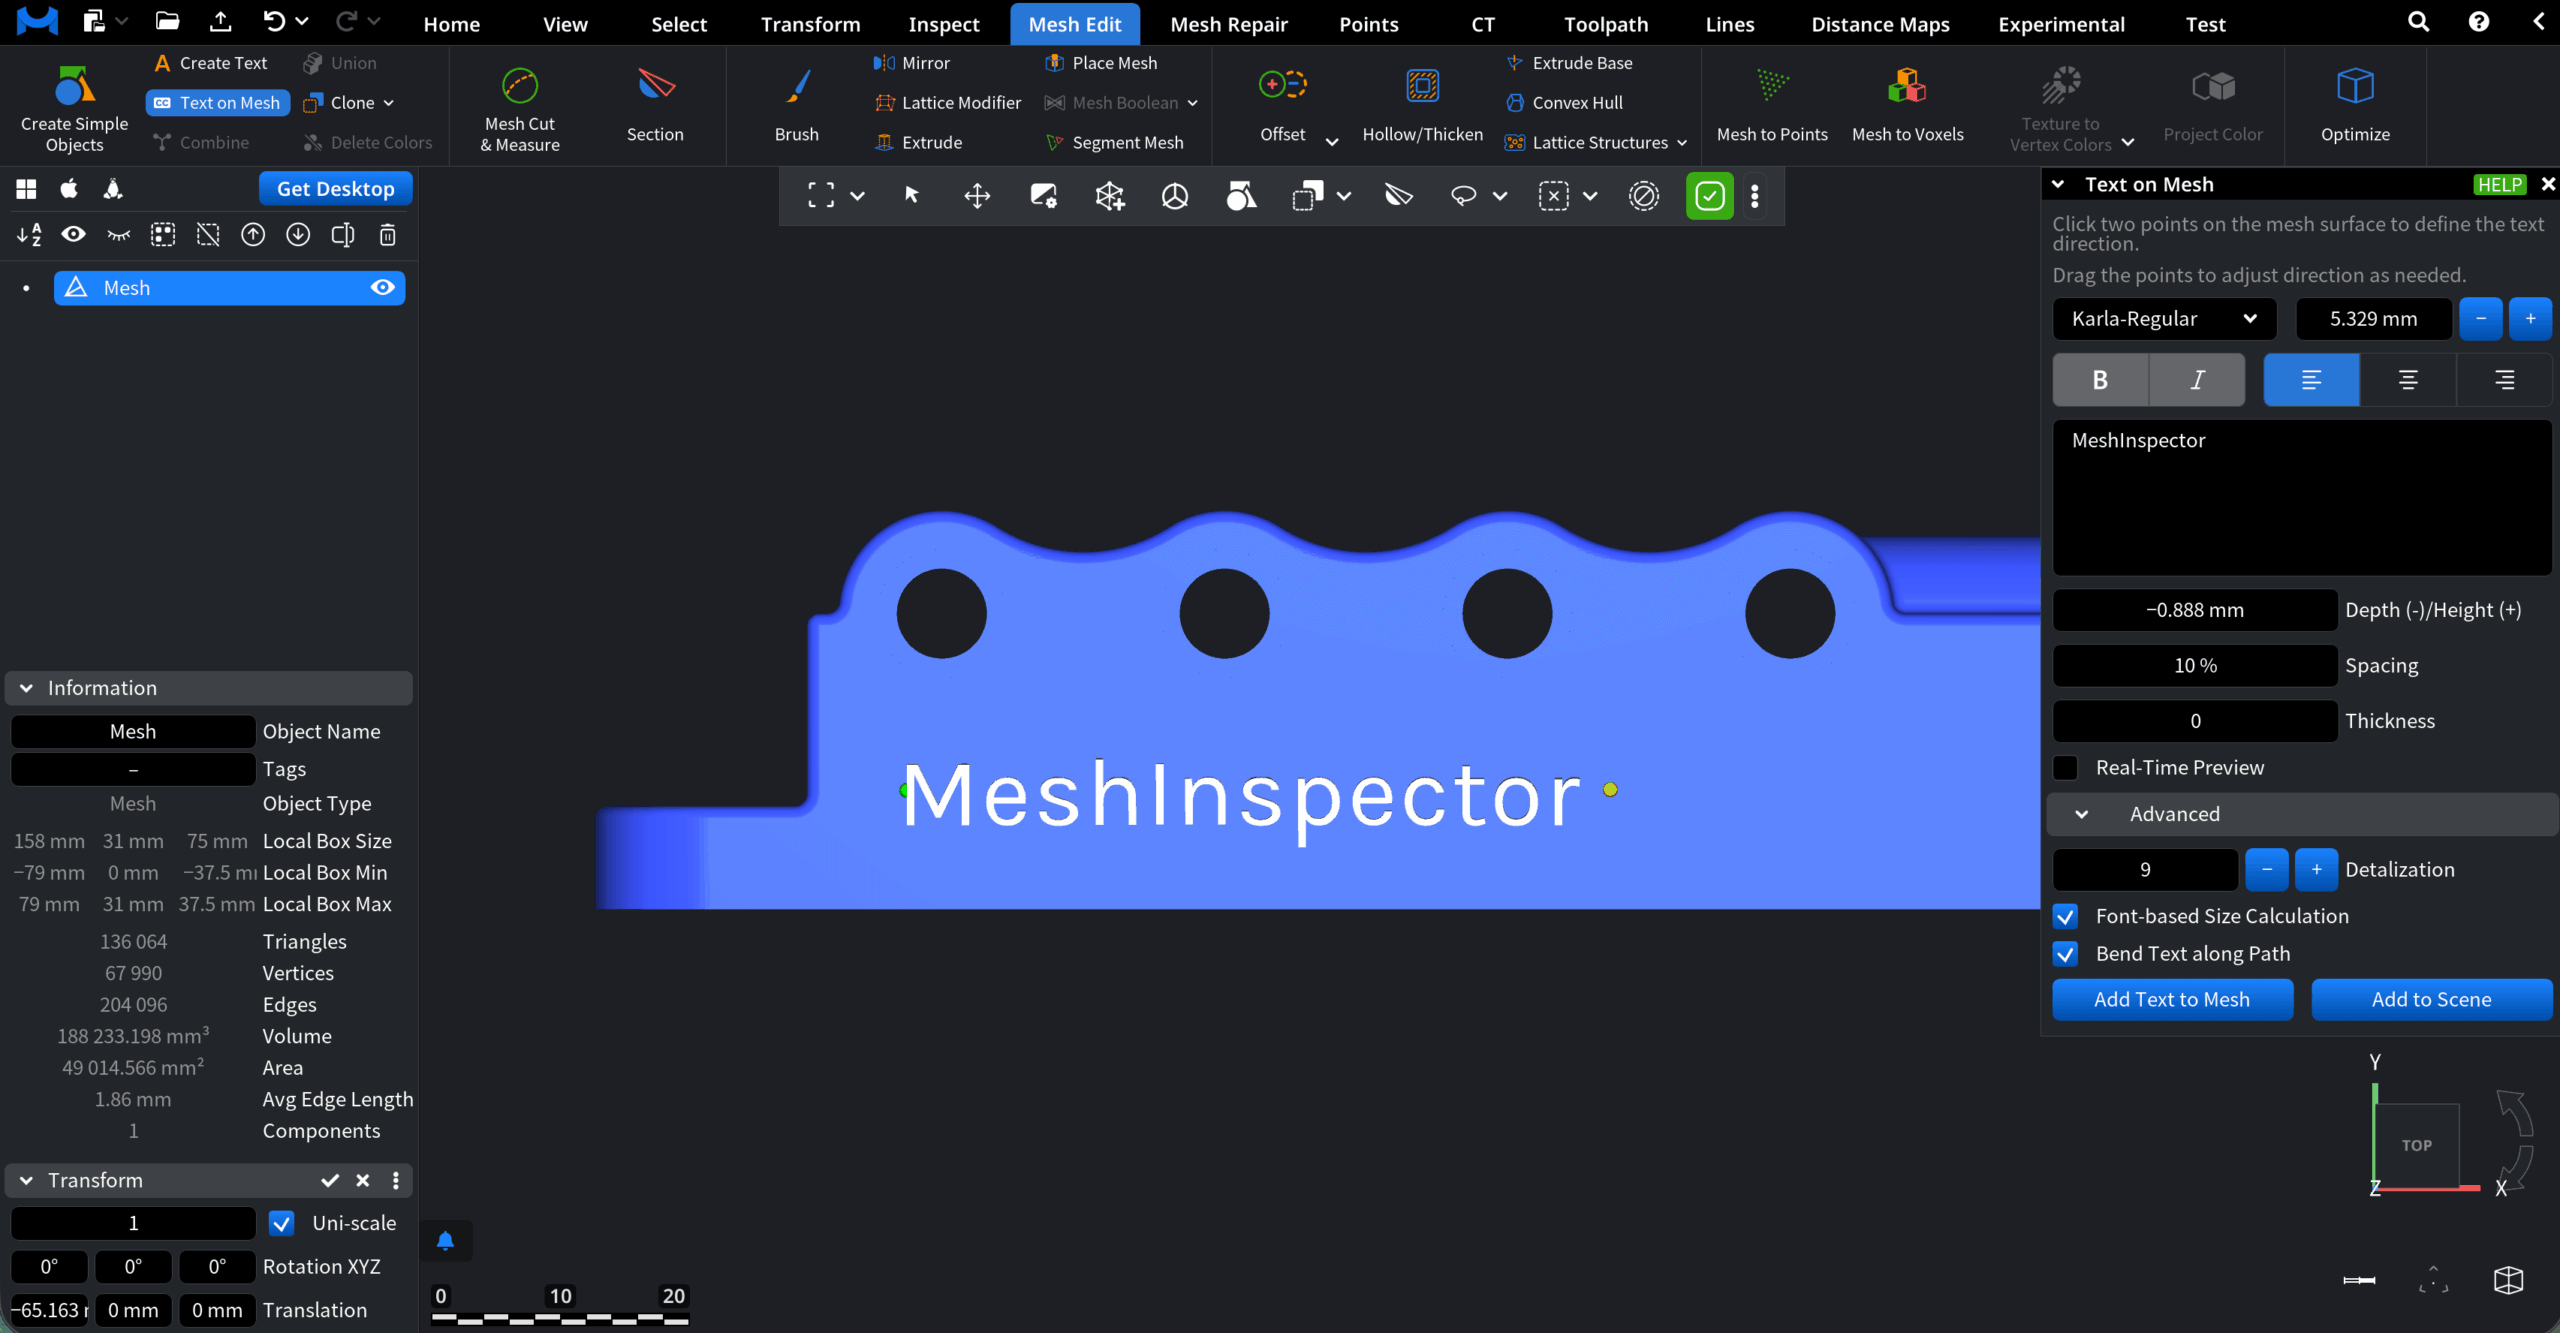
Advanced options
- Detalization controls the geometric resolution of the text.
- Font-based Size Calculation automatically scales text size based on font metrics.
- Bend Text along Path allows the text to follow curved surface paths when applicable.
Finalizing the text
- Add Text to Mesh permanently applies the text to the selected mesh as part of its geometry.
- Add to Scene creates the text as a separate object instead of merging it with the mesh.
This is how you can add text to meshes in MeshInspector.