Transform Object, located under the Transform tab, allows MeshInspector users to adjust an object's position, orientation, and scale interactively.

The tool is designed for manual object manipulation and lets you move, rotate, and scale the selected model while keeping full control over the widget’s behavior and visibility.
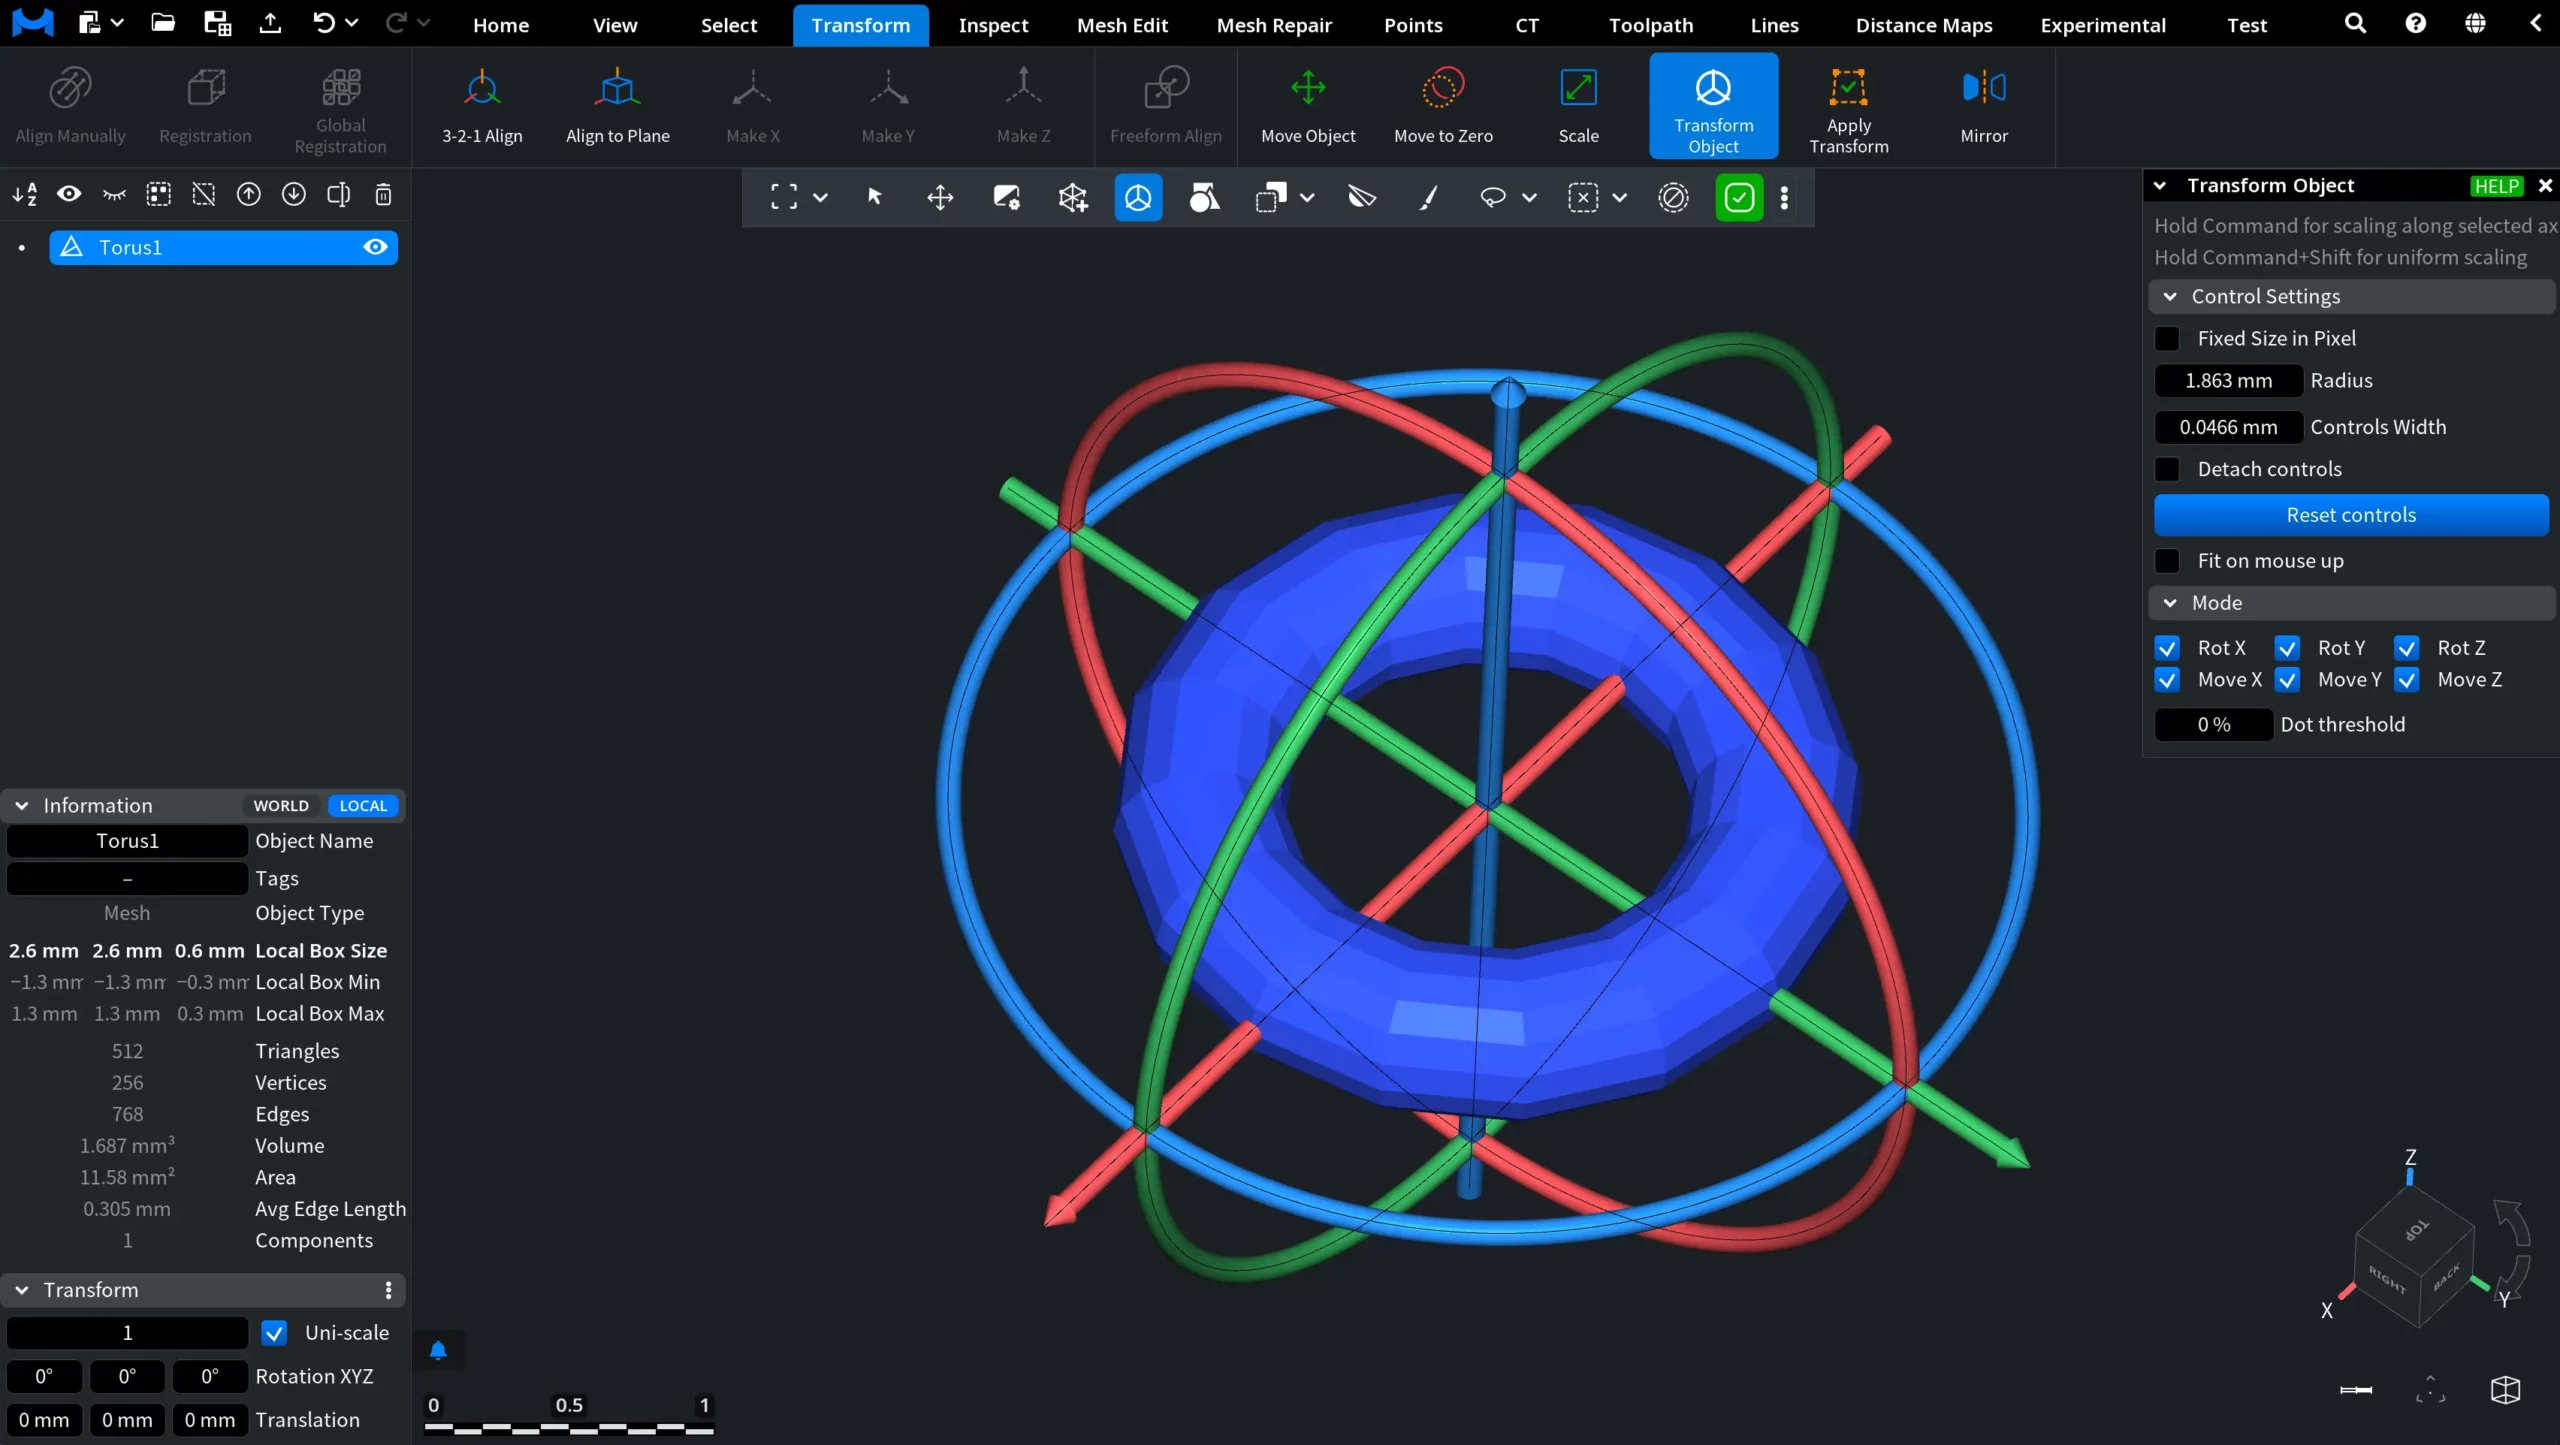
Once the tool is activated, a transformation widget appears around the selected object. In the viewport, you can use its colored axes and rotation rings to adjust the object interactively. The right-side panel opens the Transform Object settings, where you can fine-tune how the widget behaves.
At the top of the panel, MeshInspector displays two shortcuts:
- Hold Command to scale along the selected axis.
- Hold Command+Shift to apply uniform scaling.
Control Settings
The Control Settings section lets you customize the appearance and behavior of the transformation widget.
- Fixed Size in Pixel keeps the transformation widget at a constant on-screen size when you zoom in or out. When this option is enabled, the Radius and Controls Width values are specified in pixels rather than measurement units.
- Radius defines the radius of the widget controls.
- Controls Width specifies the width of the widget controls.
![]()
- Detach controls separates the widget controls from the object.
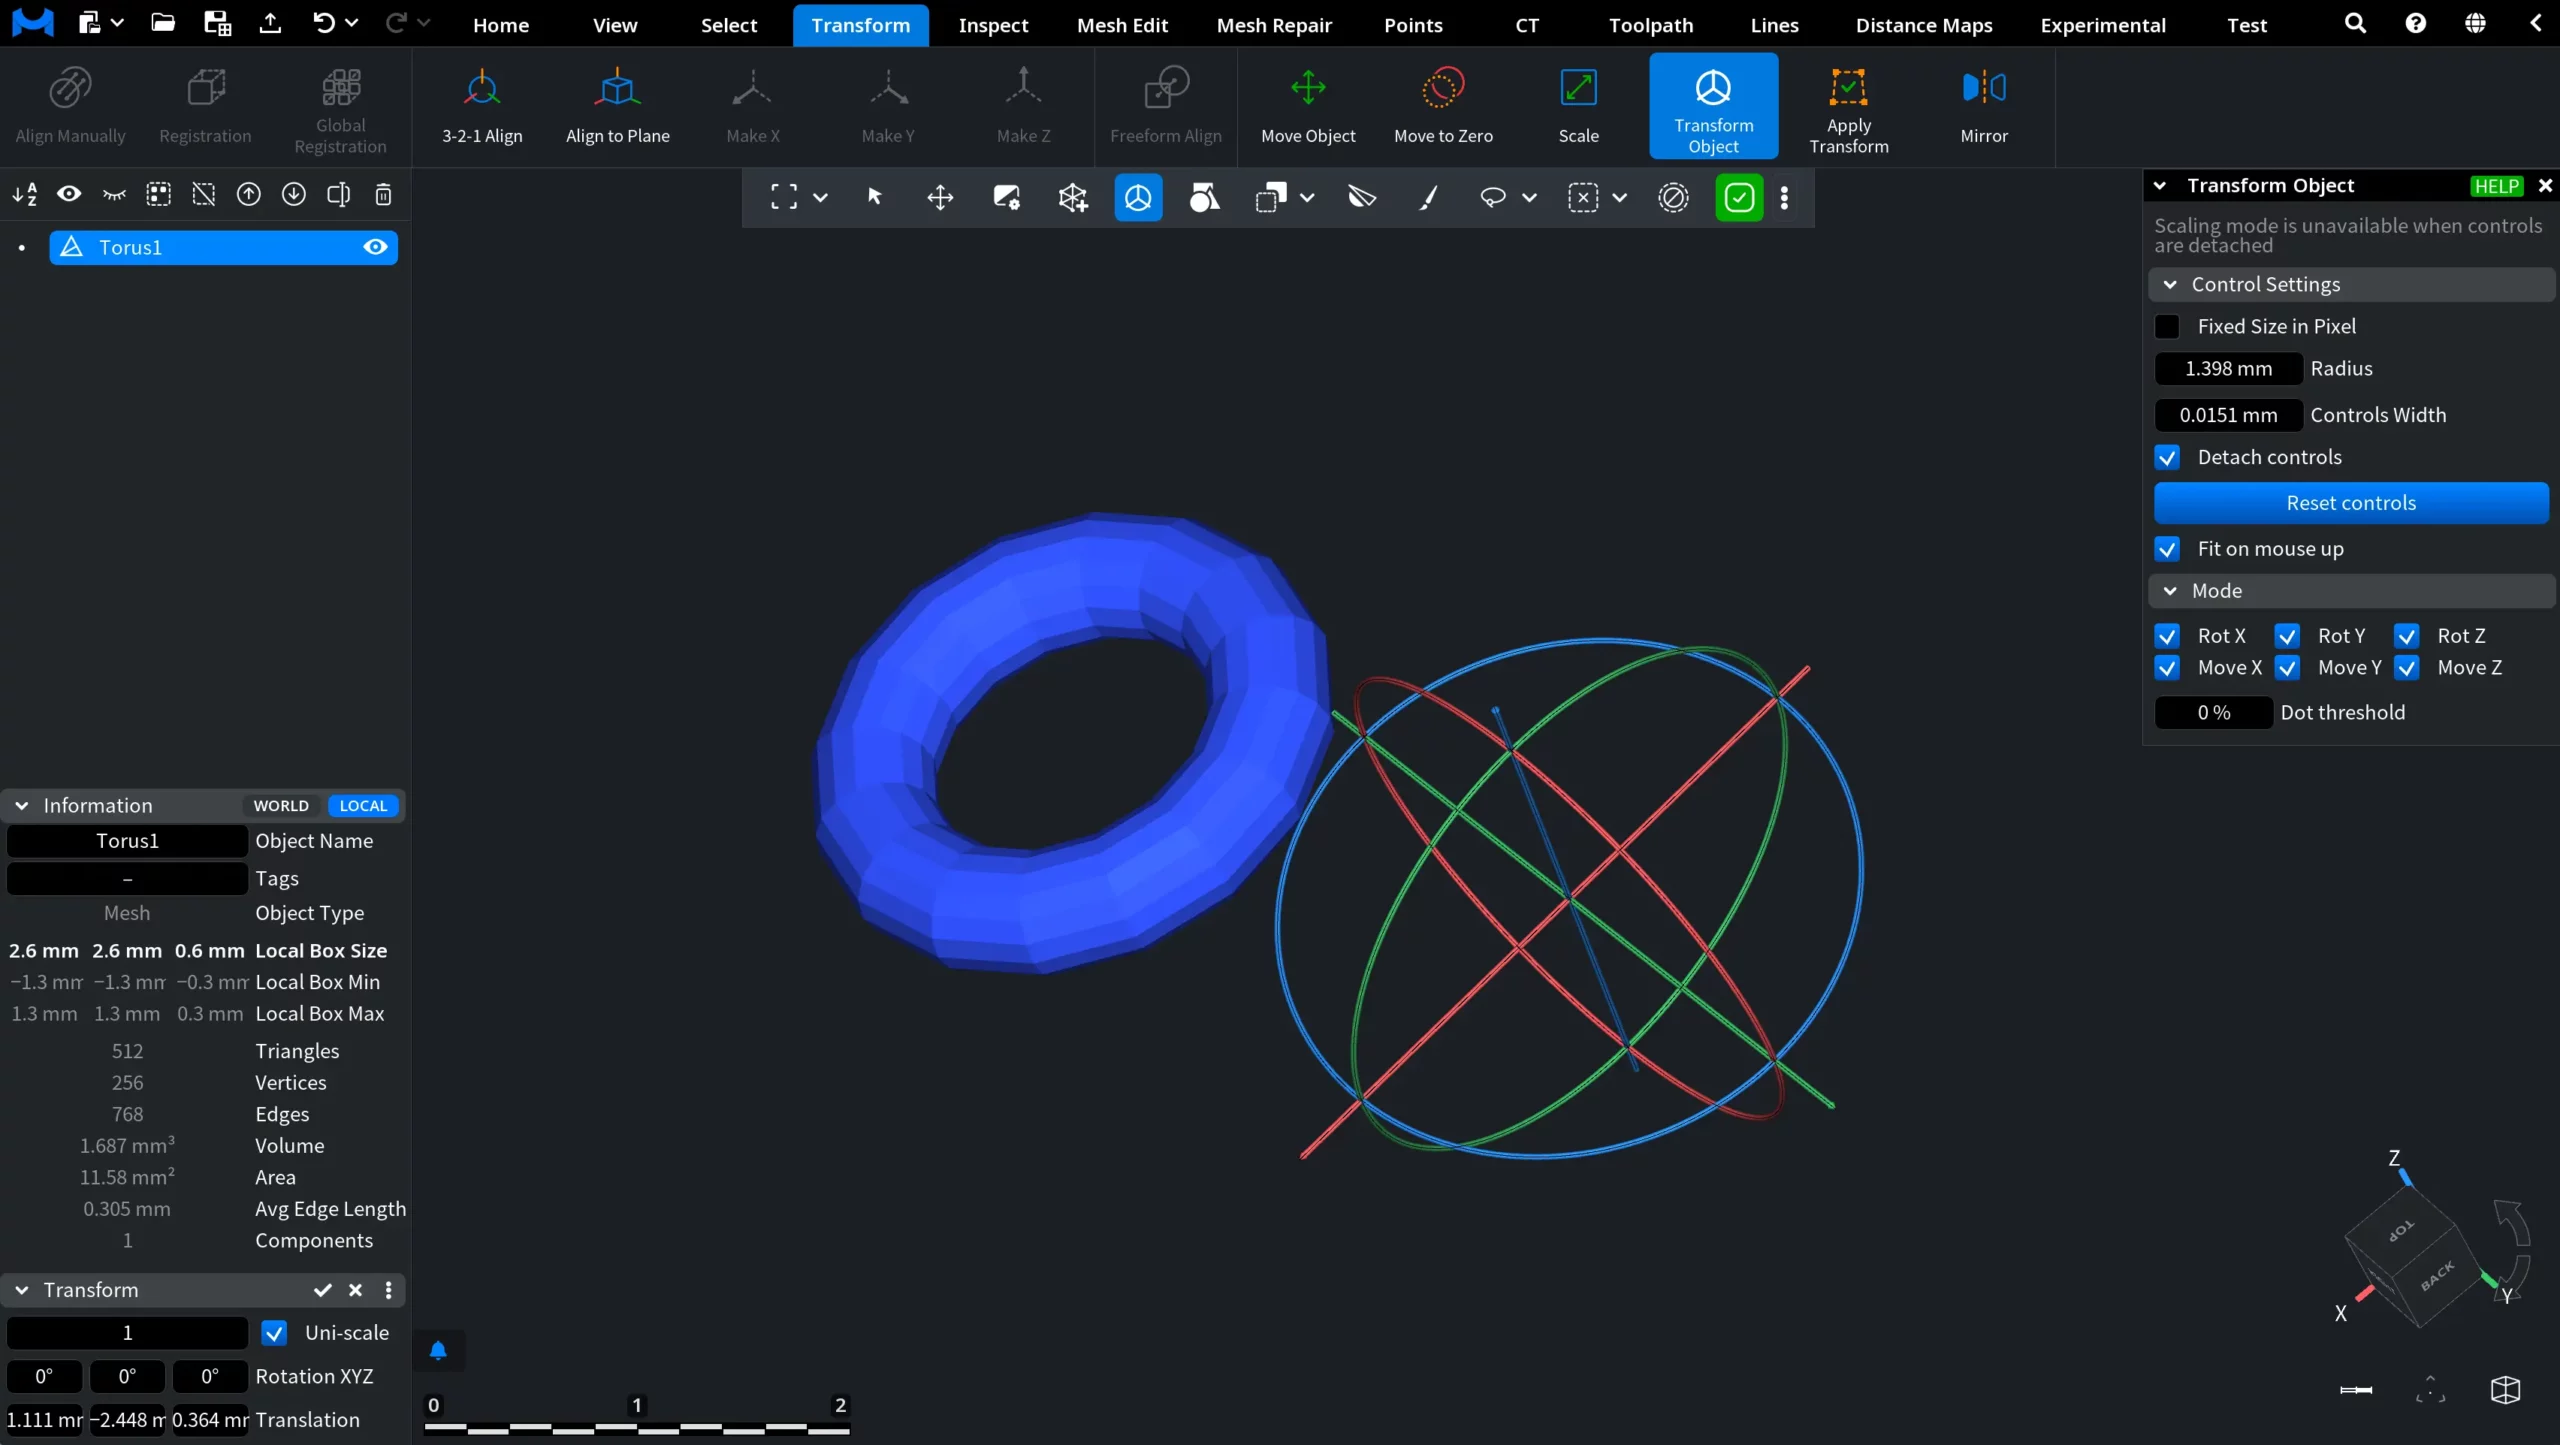
- Reset controls restores the widget settings to their default values.
- Fit on mouse up recenters the transformed object in the viewport after you release the mouse button or the touchpad.
Mode
The Mode section allows you to define which transformation controls are active.
You can enable or disable the following options independently:
- Rot X
- Rot Y
- Rot Z
- Move X
- Move Y
- Move Z
This means you can limit the tool to only the transformations you currently need. For example, you may leave only movement controls active, or only rotation controls, depending on the task.
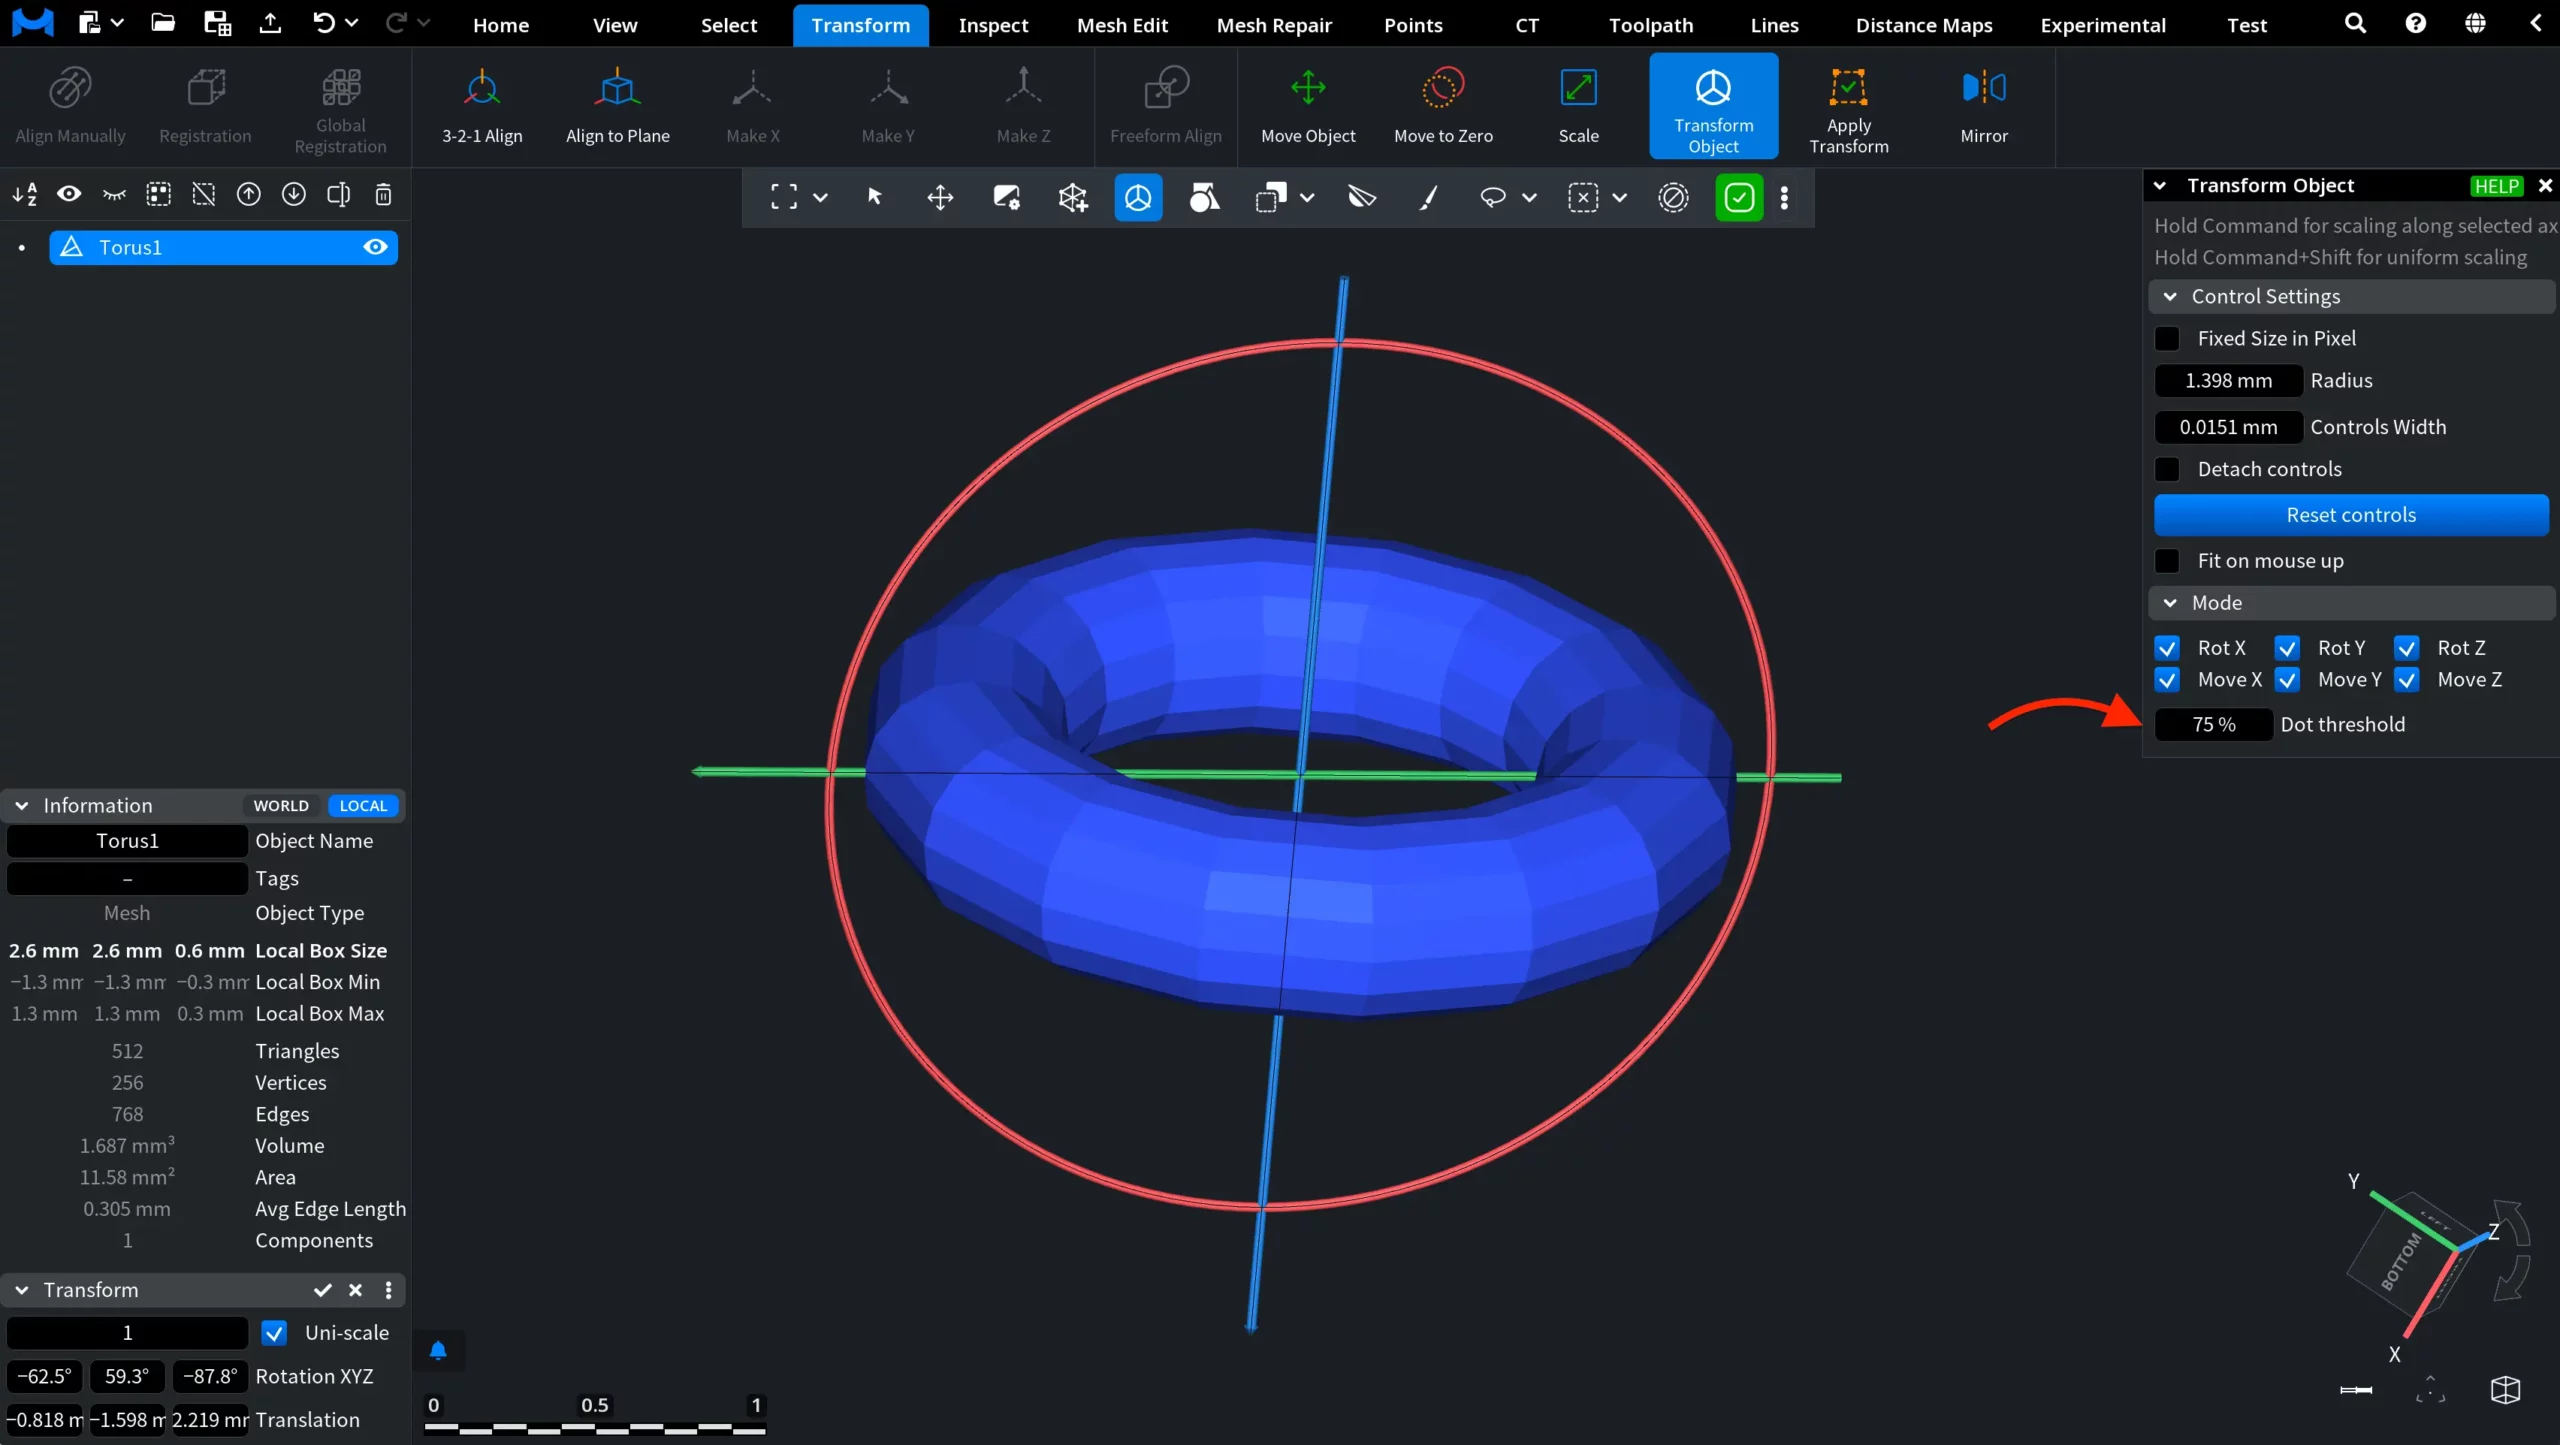
Dot threshold
The Dot threshold field controls the visibility filtering of the widget elements. As shown below, changing this value affects how many controls remain visible in the viewport. At lower values, more transformation rings and axes are displayed. At higher values, some controls are hidden, which can make the widget less cluttered.
Rotation
To rotate the selected object, drag one of the colored rotation rings around it. Each ring corresponds to one of the three coordinate axes:
- The red ring rotates the object around the X-axis;
- The green ring rotates it around the Y-axis;
- The blue ring rotates it around the Z-axis.
As you drag a ring, a tooltip appears next to the cursor and shows the rotation angle being applied. In the screenshot below, the object is being rotated by −48.71°.
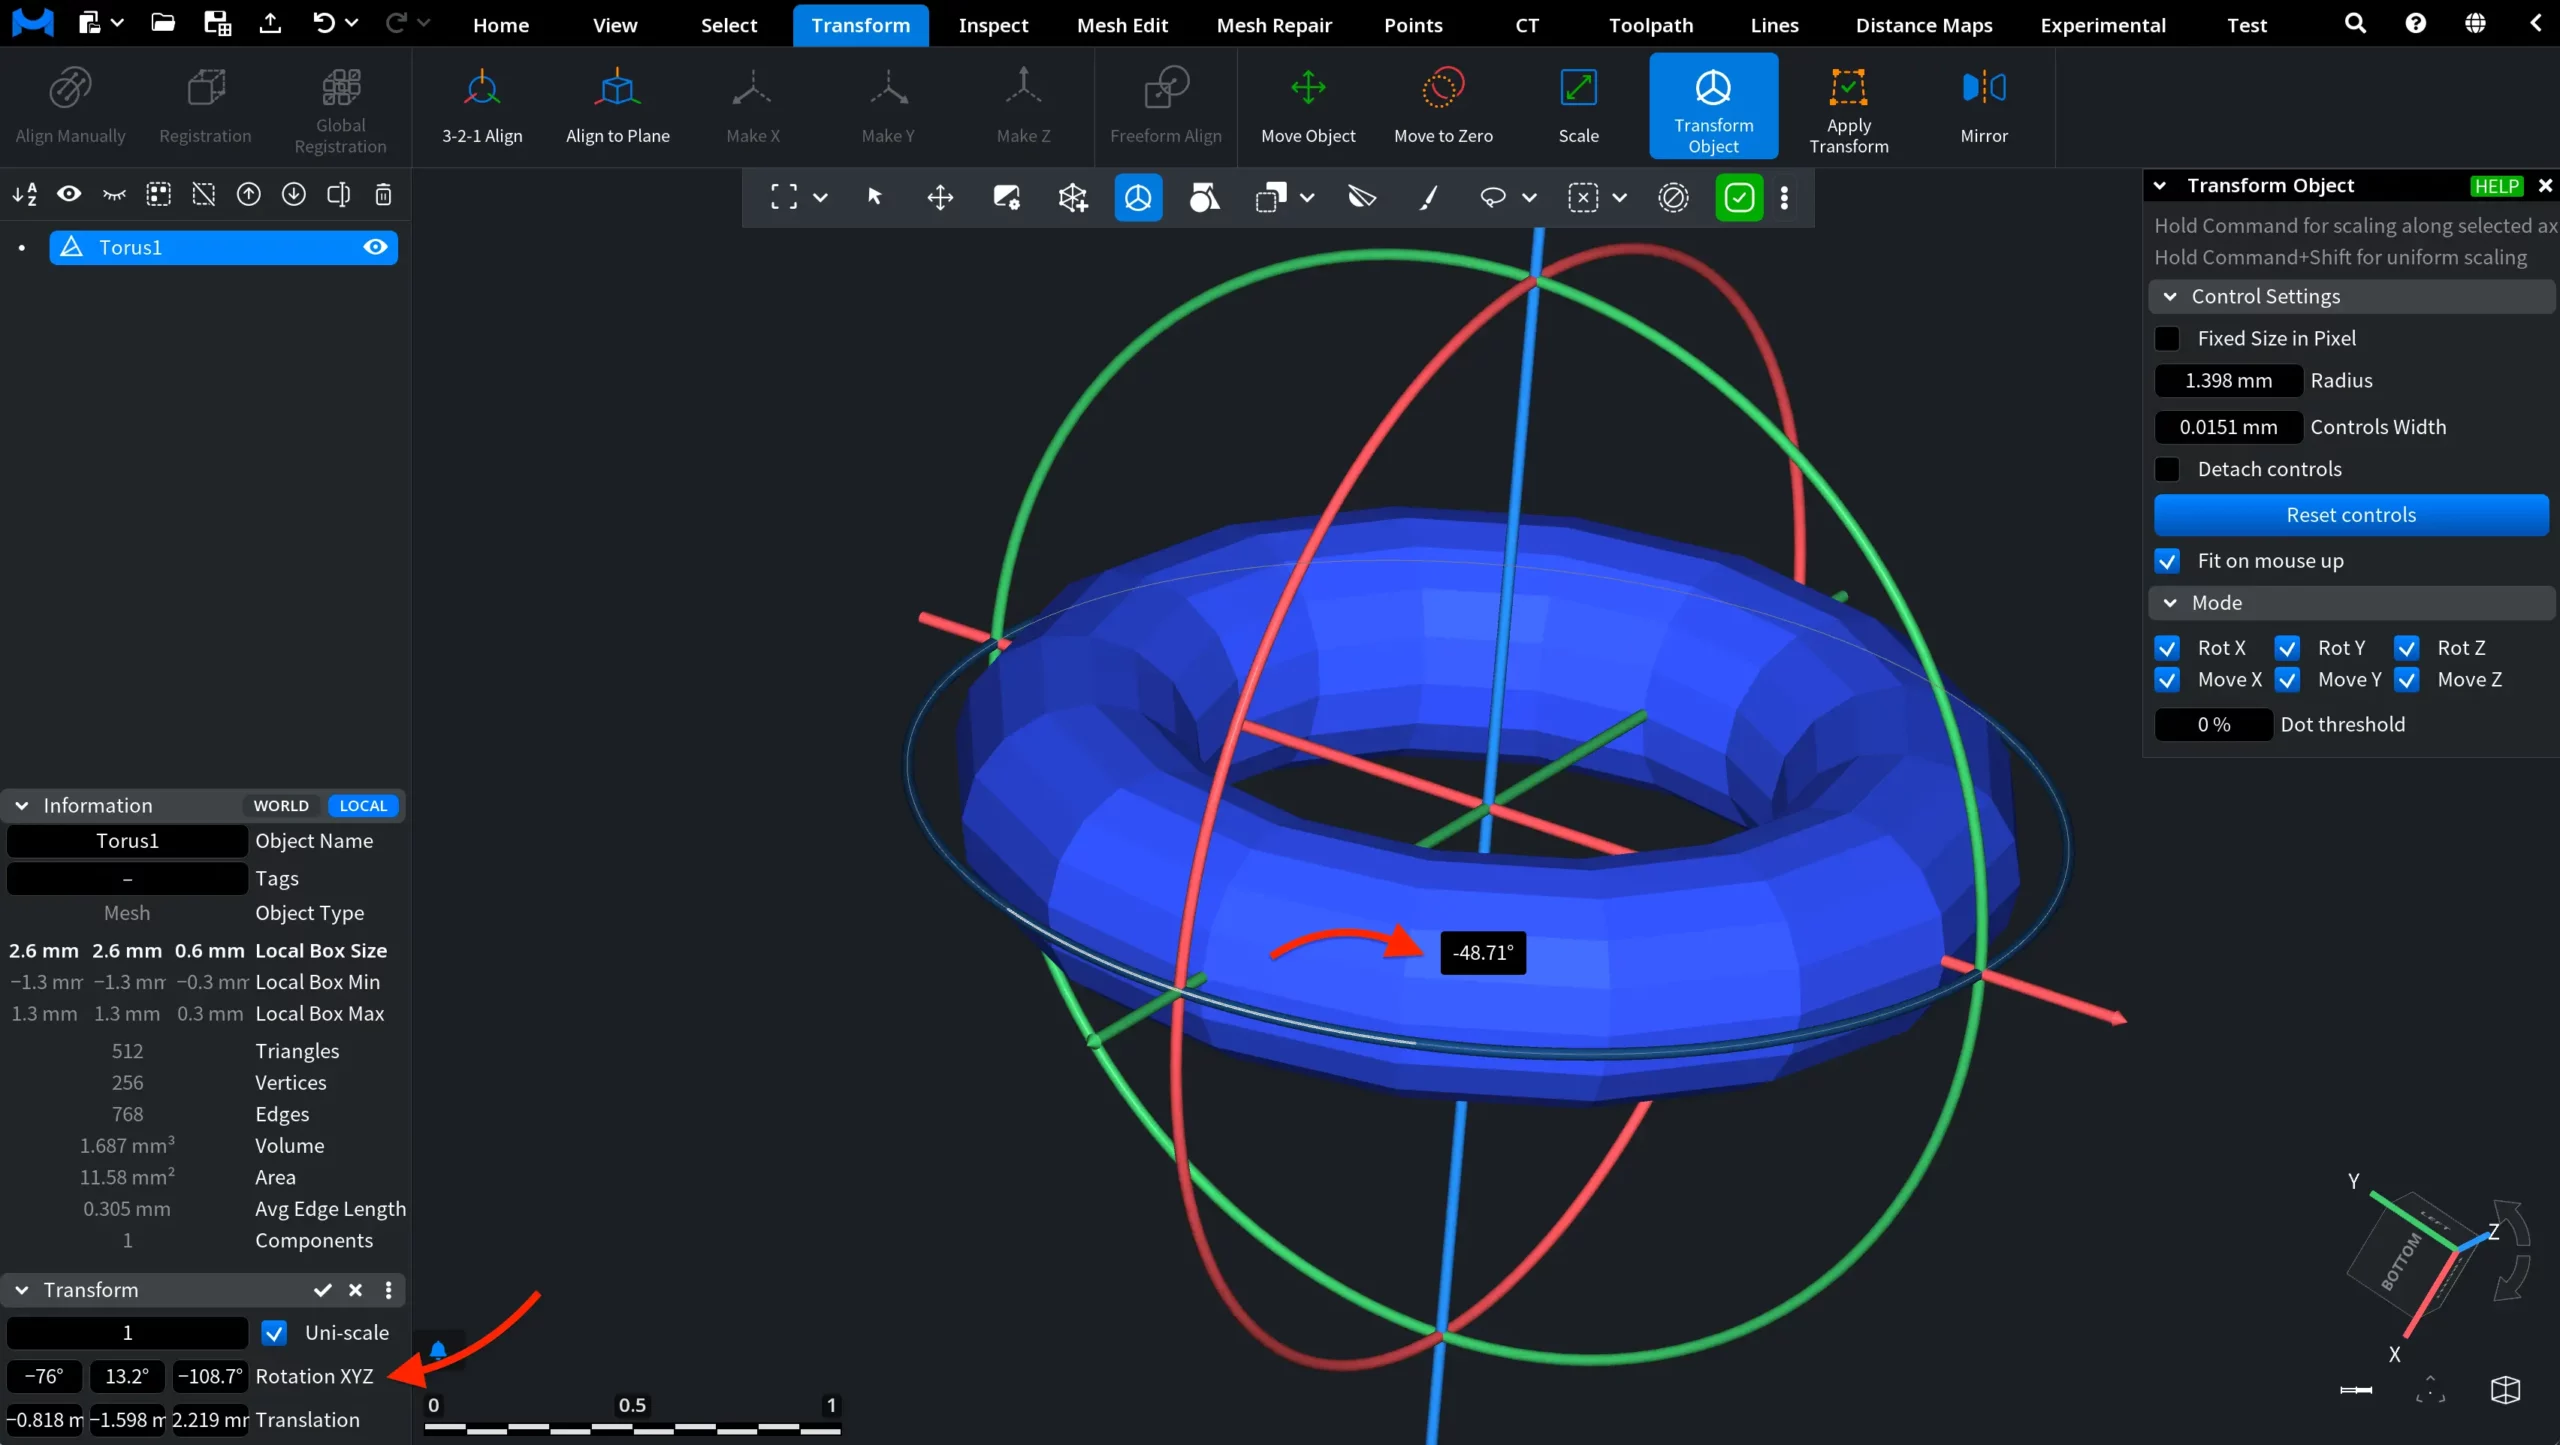
The resulting values are also displayed in the Transform section in the lower-left corner of the interface under Rotation XYZ. These fields allow you to review the object’s rotation around each axis and adjust the values by entering them manually or dragging within the fields.
Translation
To translate the selected object, drag one of the straight colored controls extending from the center of the transformation widget. Each control corresponds to one of the three coordinate axes:
- The red control translates the object along the X-axis;
- The green control translates it along the Y-axis;
- The blue control translates it along the Z-axis.
As you drag a control, a tooltip appears next to the cursor and shows the translation distance along the selected axis. In the screenshot below, the object is being translated by 0.5747.

The resulting position is also displayed in the Transform section in the lower-left corner of the interface under Translation. The three fields show the object’s displacement along the X-, Y-, and Z-axes. You can adjust the values by entering them manually or dragging within the fields.
Scaling
To scale the selected object along a specific axis, hold Command and drag the corresponding straight colored control:
- The red control scales the object along the X-axis;
- The green control scales it along the Y-axis;
- The blue control scales it along the Z-axis.
As you drag the control, a tooltip appears next to the cursor and shows the scaling factor being applied. For example, a value of 1.300× means that the object is being enlarged along the selected axis by 30%.
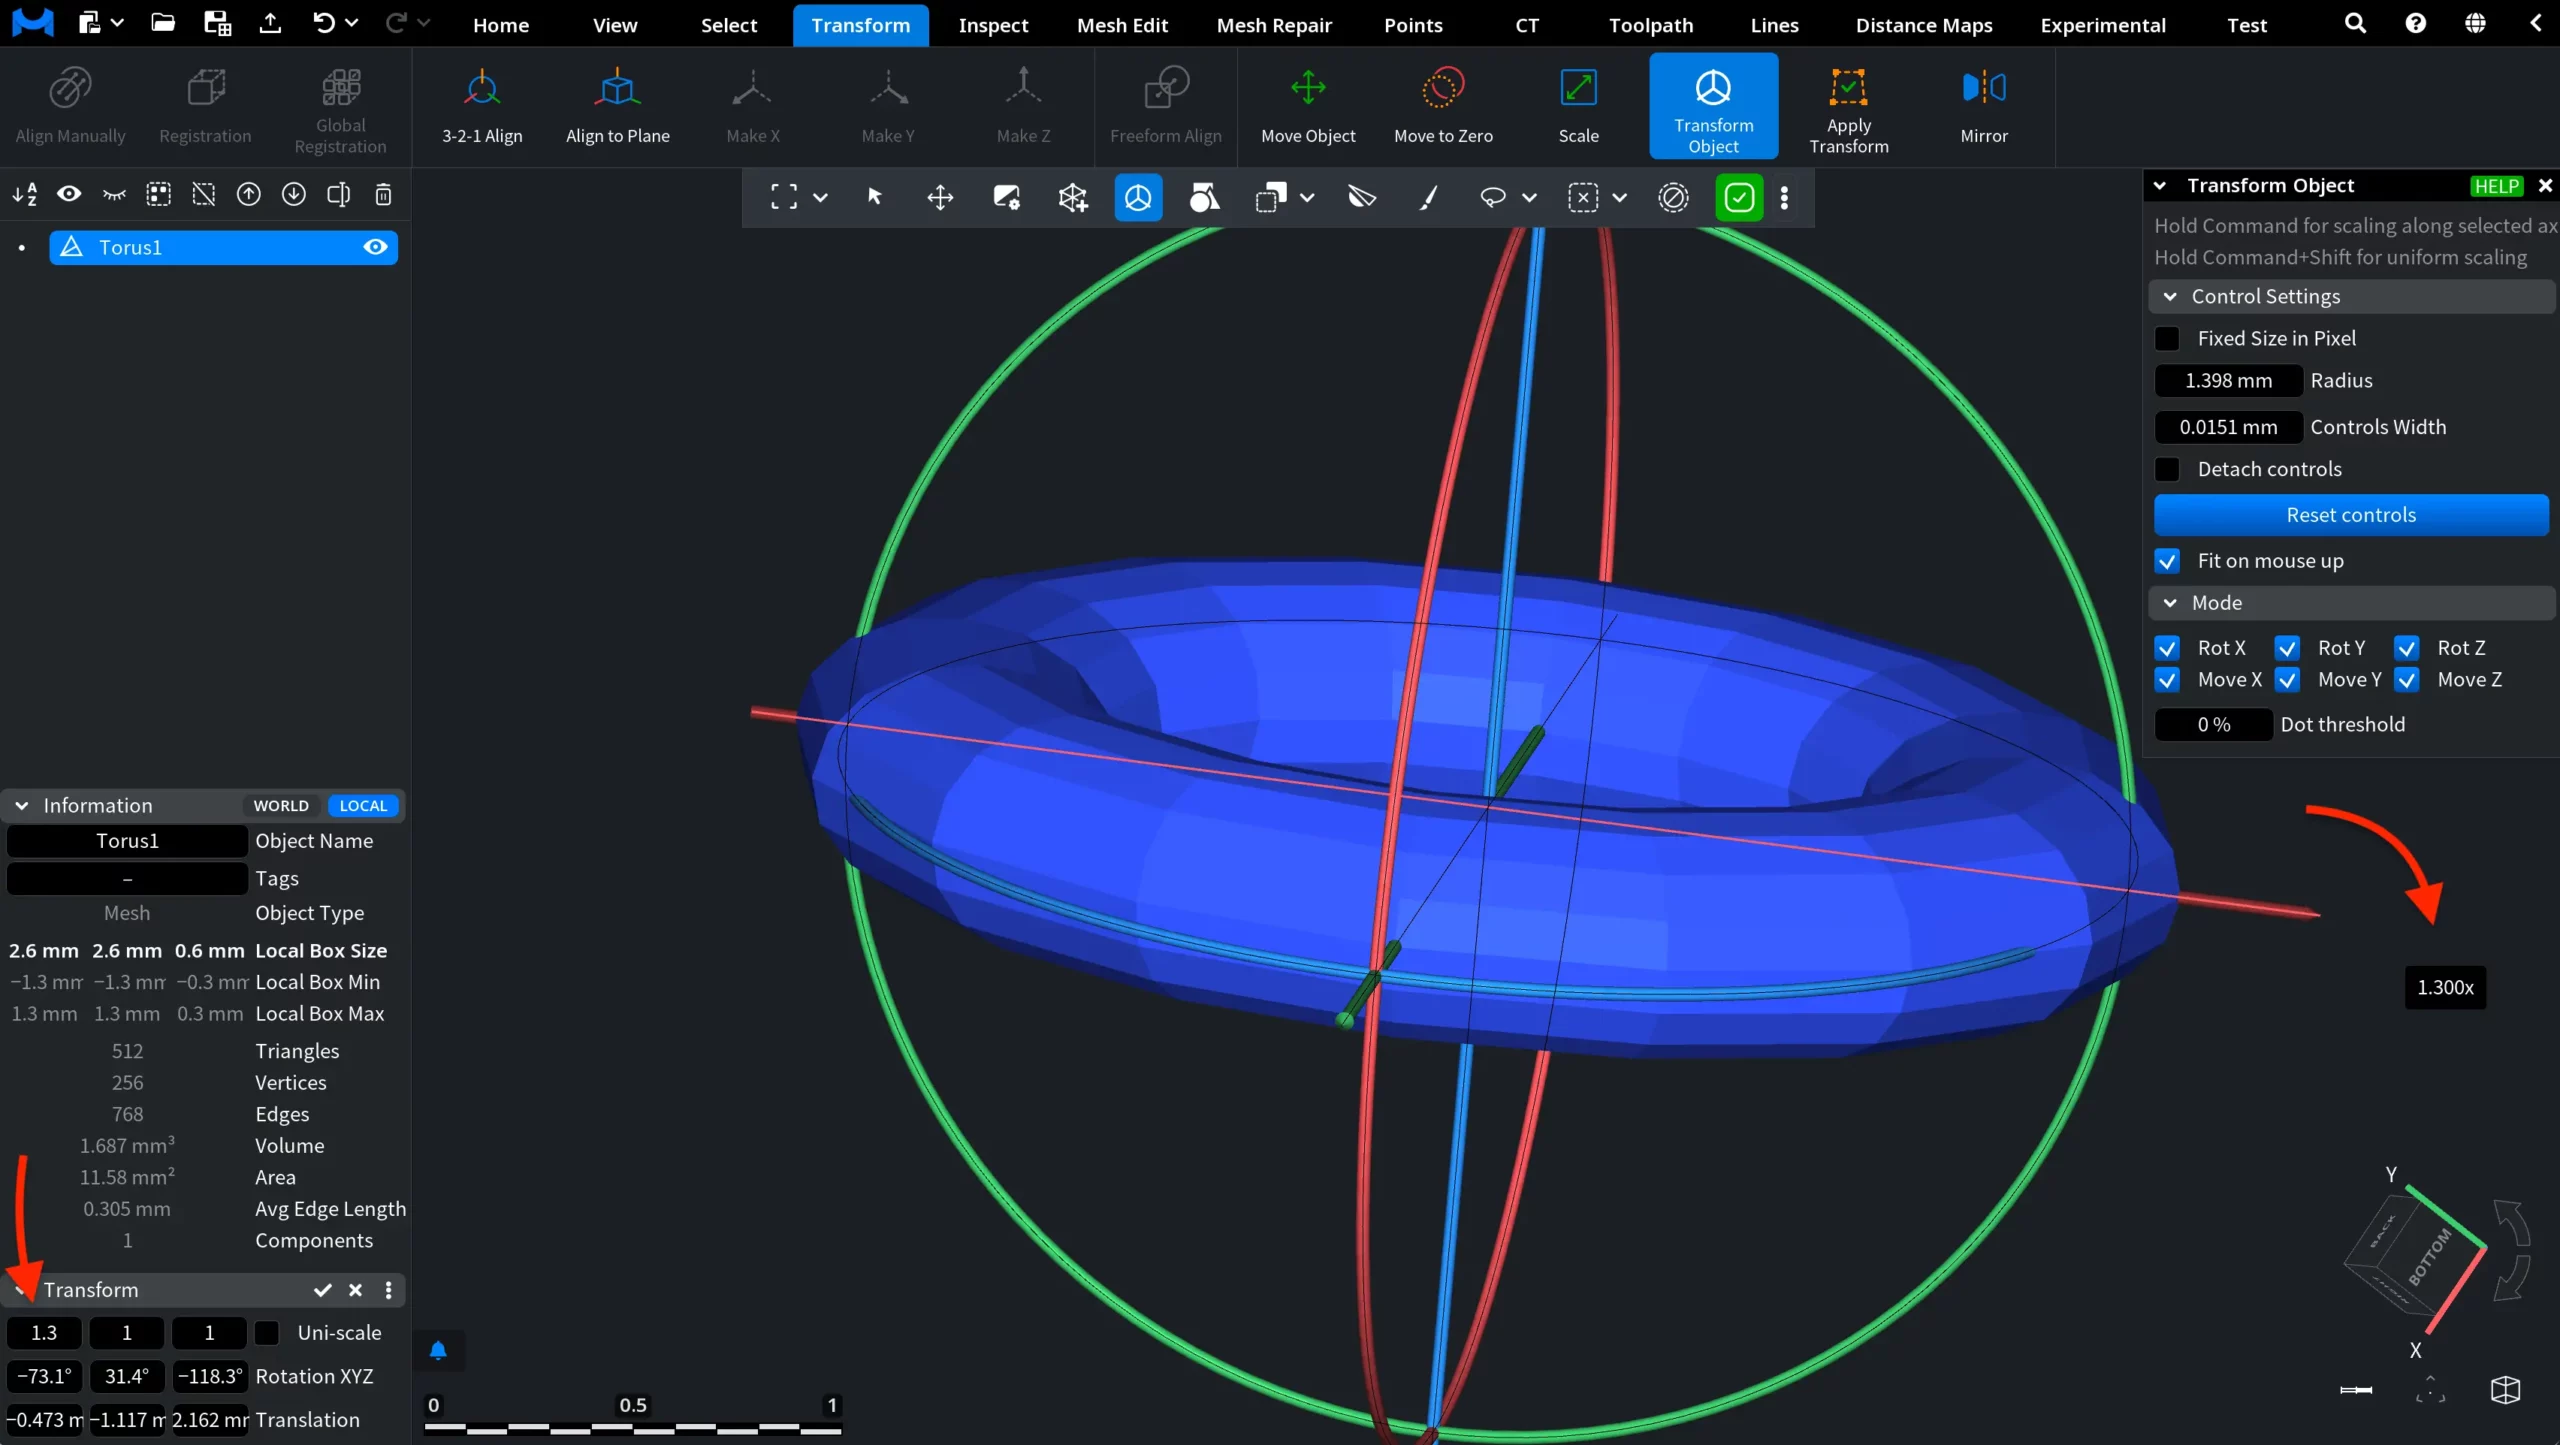
The resulting scale values are displayed in the Transform section in the lower-left corner of the interface. When Uni-scale is disabled, three separate fields are shown, allowing you to review or specify the scaling factor for each axis independently. In the screenshot below, the object has been scaled to 1.3 along one axis, while the other two values remain unchanged at 1. You can also enter the values manually.
Uniform Scaling
To scale the entire object proportionally, hold Command+Shift while dragging a control. This applies the same scaling factor along all three axes and preserves the object’s proportions.
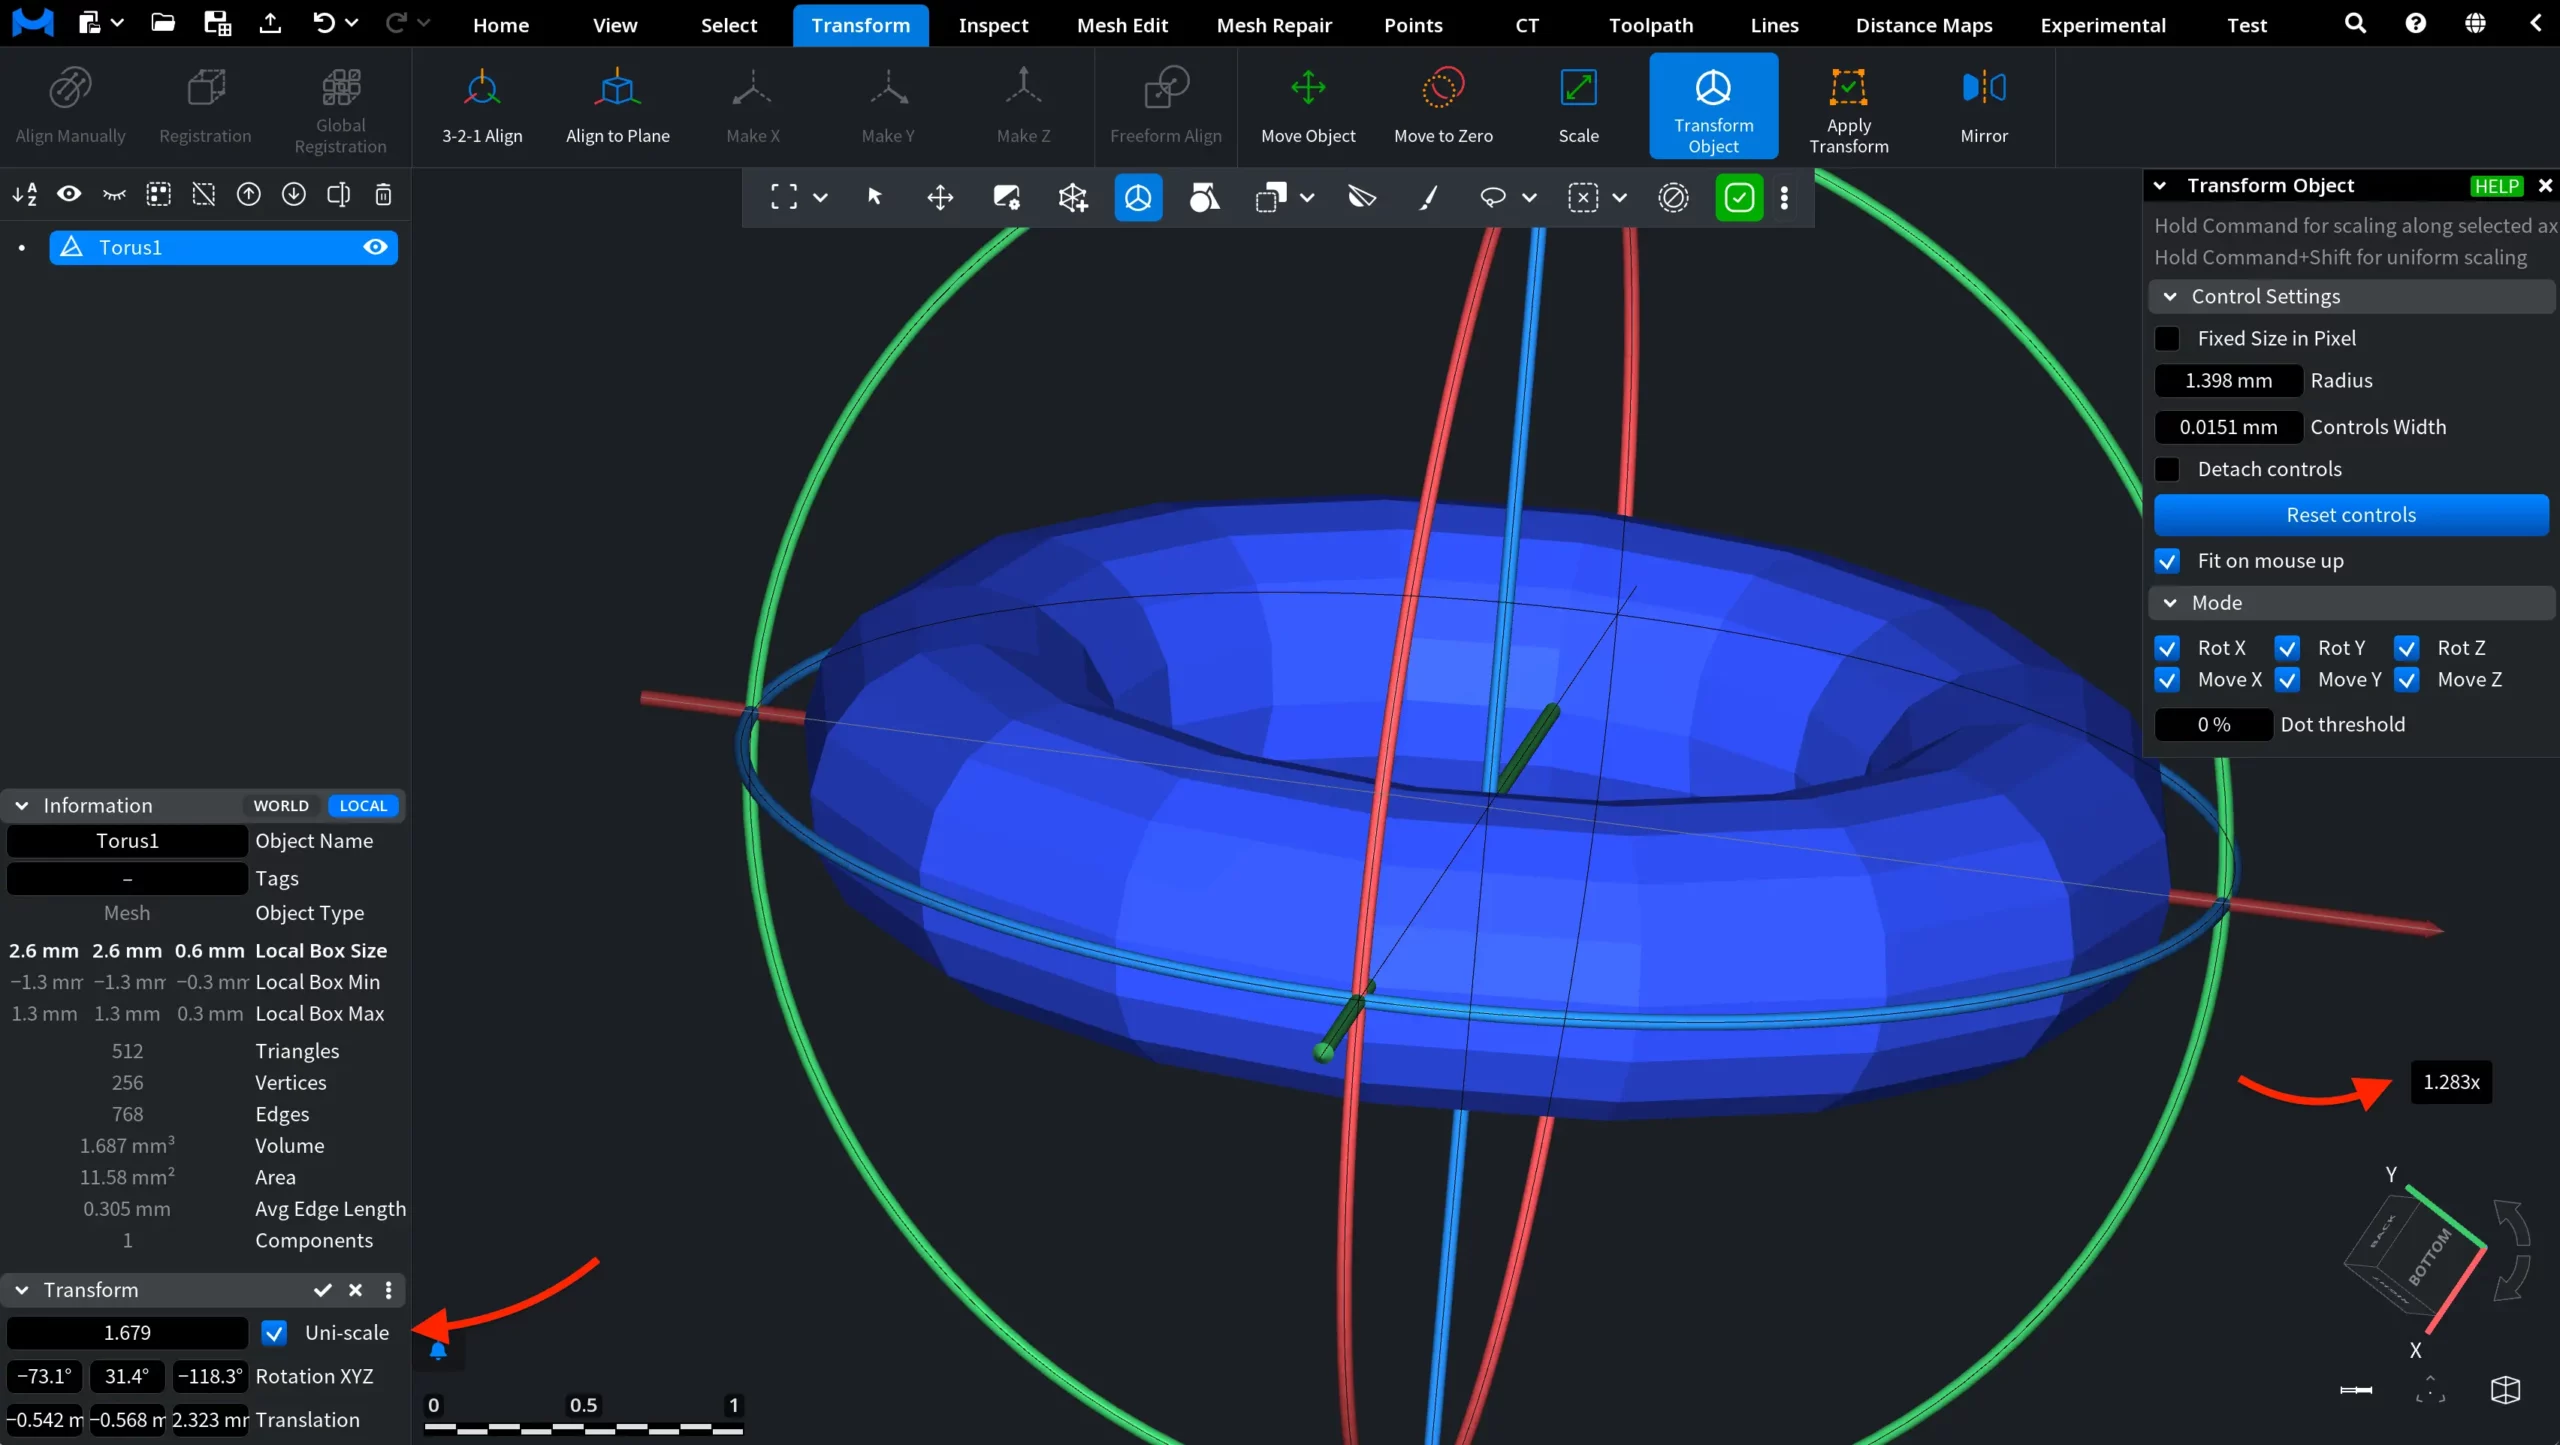
You can also enable Uni-scale in the Transform section in the lower-left corner of the interface. When this option is active, the three axis-specific fields are replaced with a single field representing the uniform scaling factor.