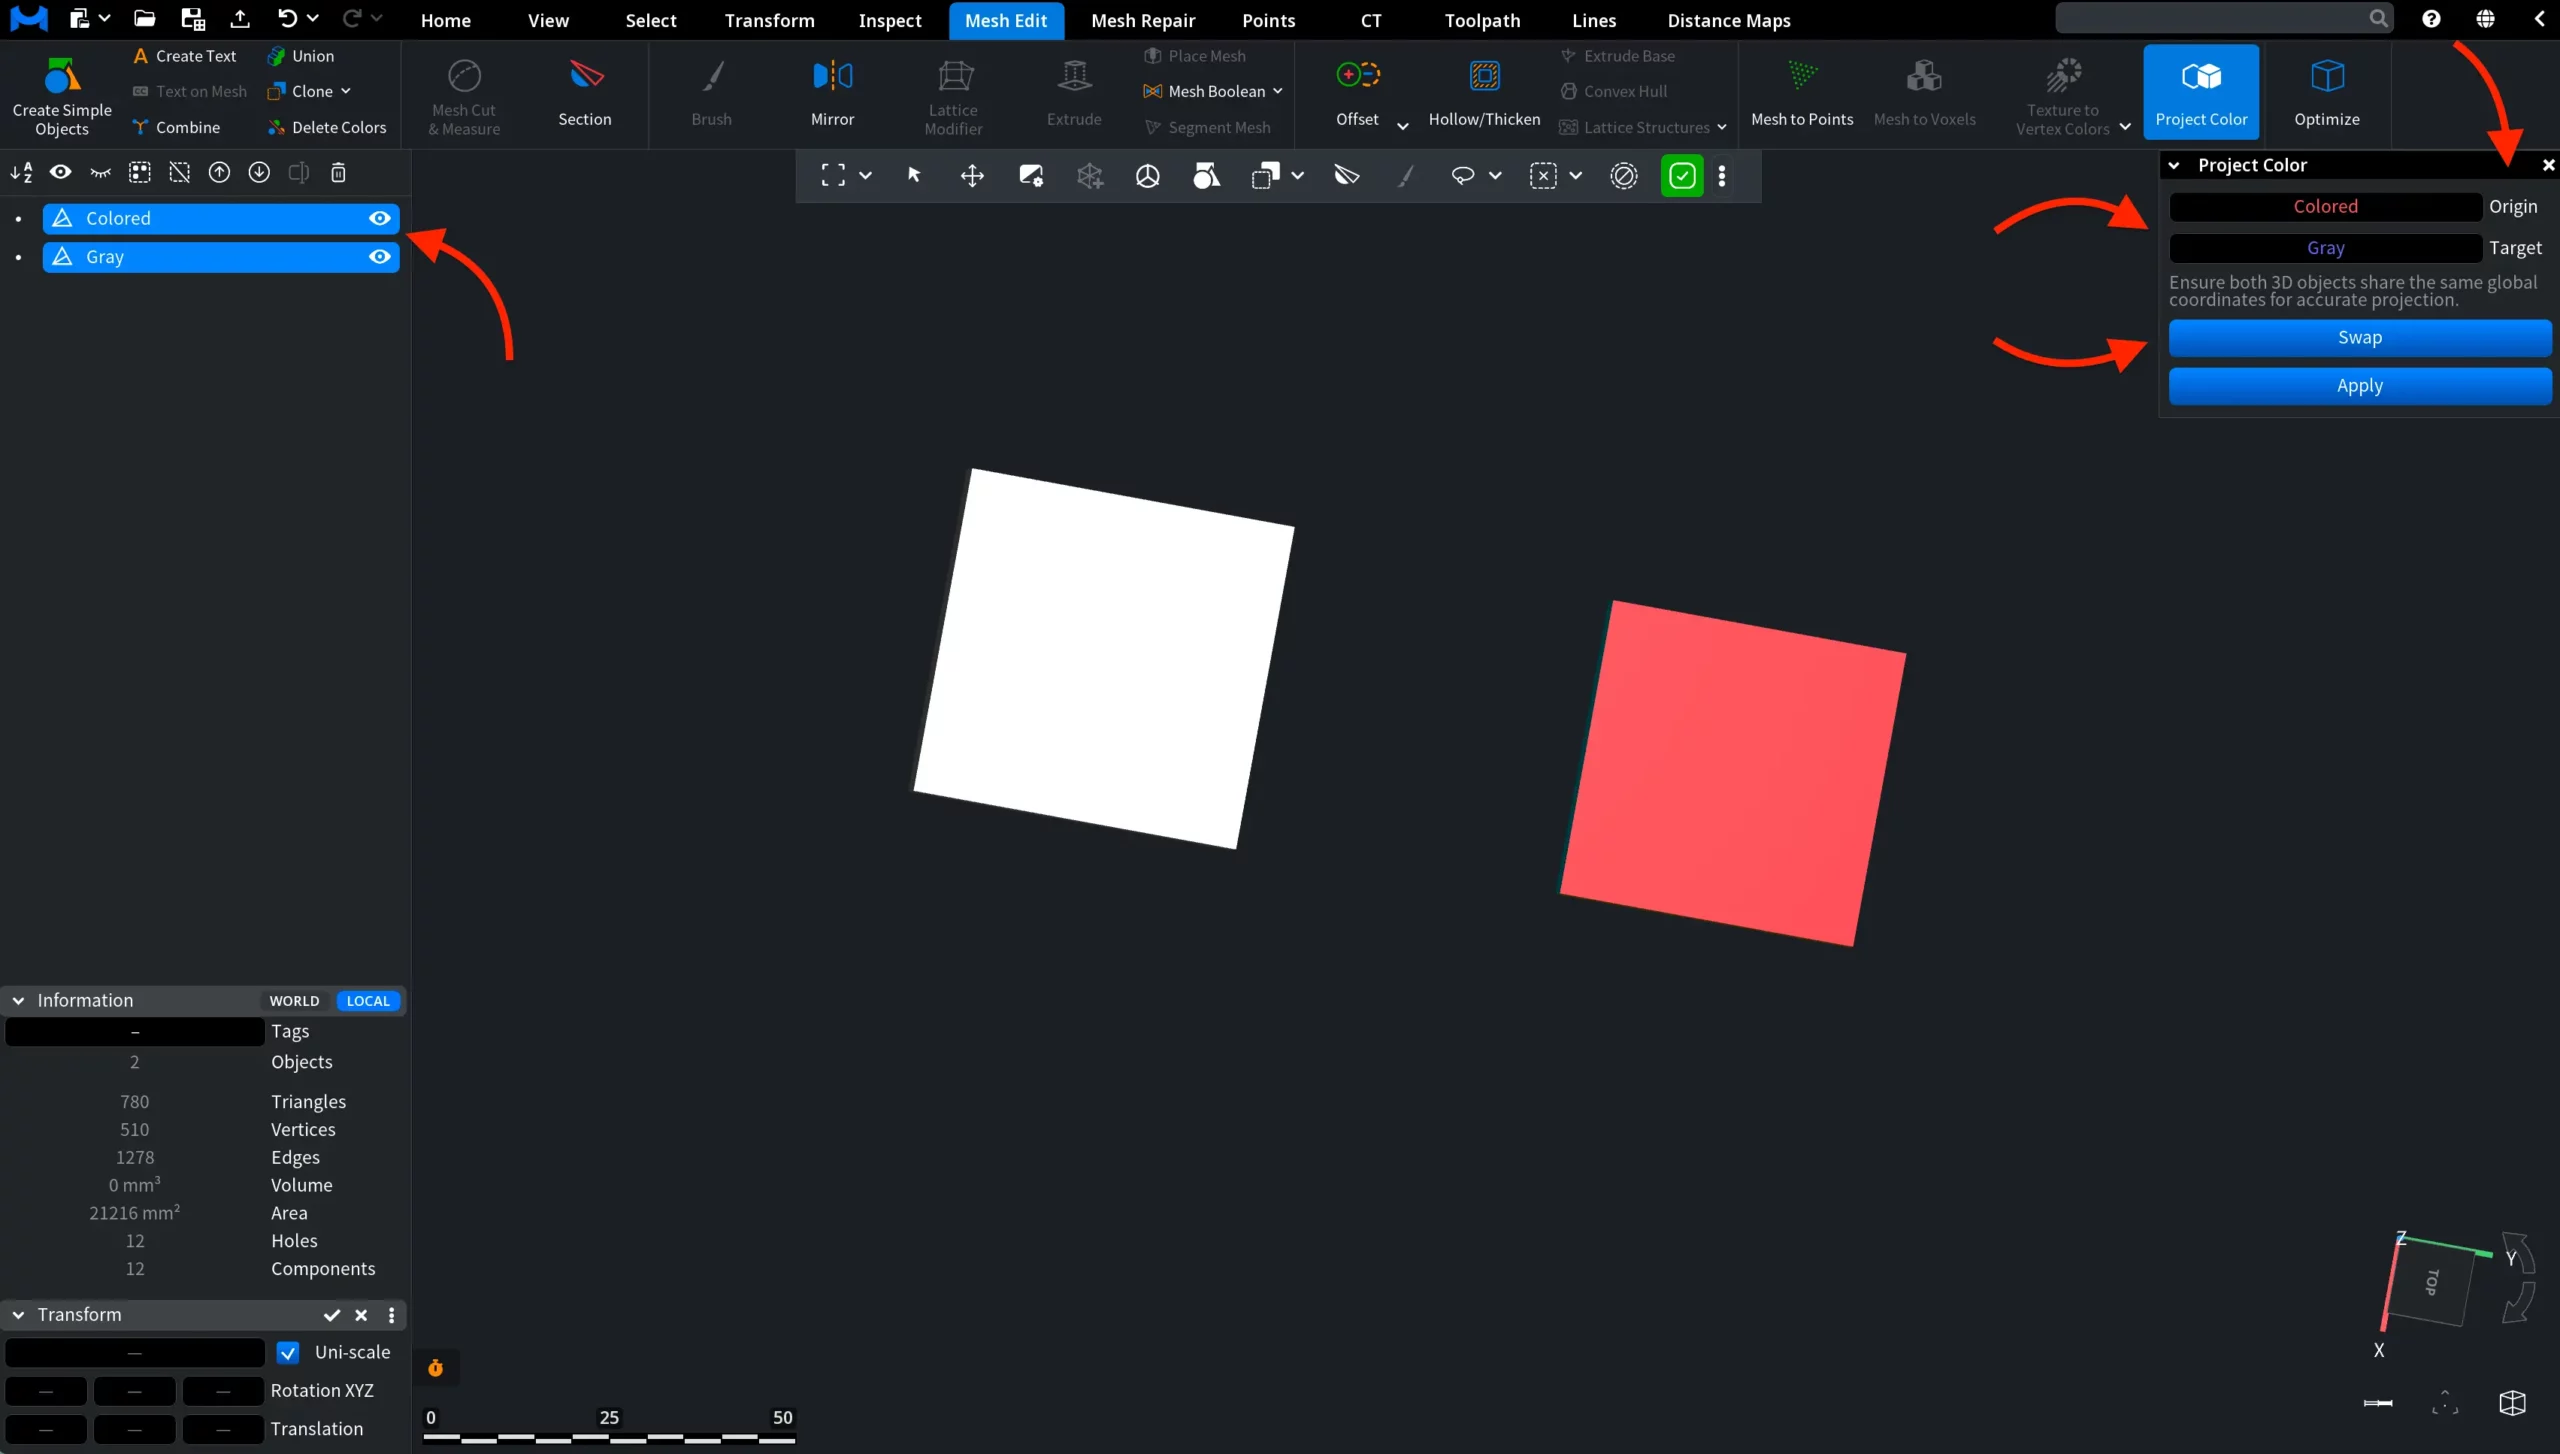
The Project Color tool transfers color information from one mesh to another. It can project vertex colors, texture colors, or face colors from a source mesh onto a target mesh. This is useful when you have one object that already contains color data and another object with a similar shape but different topology, resolution, or mesh structure. To use the tool, go to the Mesh Edit tab, then click Project Color.
Note: the tool becomes clickable and active only when you select exactly two meshes.
Project Color: Before
Select two meshes in the Scene Tree. One mesh will be used as the Origin, and the other will be used as the Target.
After both meshes are selected, go to the Mesh Edit tab and click Project Color. A dedicated Project Color panel opens on the right side of the screen.
In this panel, you can check which mesh is assigned as the Origin and which one is assigned as the Target. The Origin is the mesh that provides the color data, while the Target is the mesh that receives the projected colors.
If the objects are assigned in the wrong order, click Swap to switch them. When the setup is correct, click Apply to project the color information from the Origin mesh onto the Target mesh.
Project Color: After
After you click Apply, MeshInspector projects the color information from the Origin mesh onto the Target mesh. In this example, the gray mesh receives the color data from the colored source mesh.
The result appears directly in the viewport. Both meshes are still present in the scene, but the target object now contains the projected color data.
How to Use the Project Color Tool in MeshInspector


