The Fast Offset tool, located under the Mesh Edit tab, allows you to quickly apply an offset to the selected mesh. As such, it prioritizes speed over precision, so the result may be less accurate. Fast Offset is useful when you need a quick approximate offset and the highest geometric accuracy is not required.
To open the tool, go to Mesh Edit, click the small arrow next to the Offset tool, and select Fast Offset from the dropdown menu.

Fast Offset: Parameters
Once you select Fast Offset, the dedicated Fast Offset panel opens.
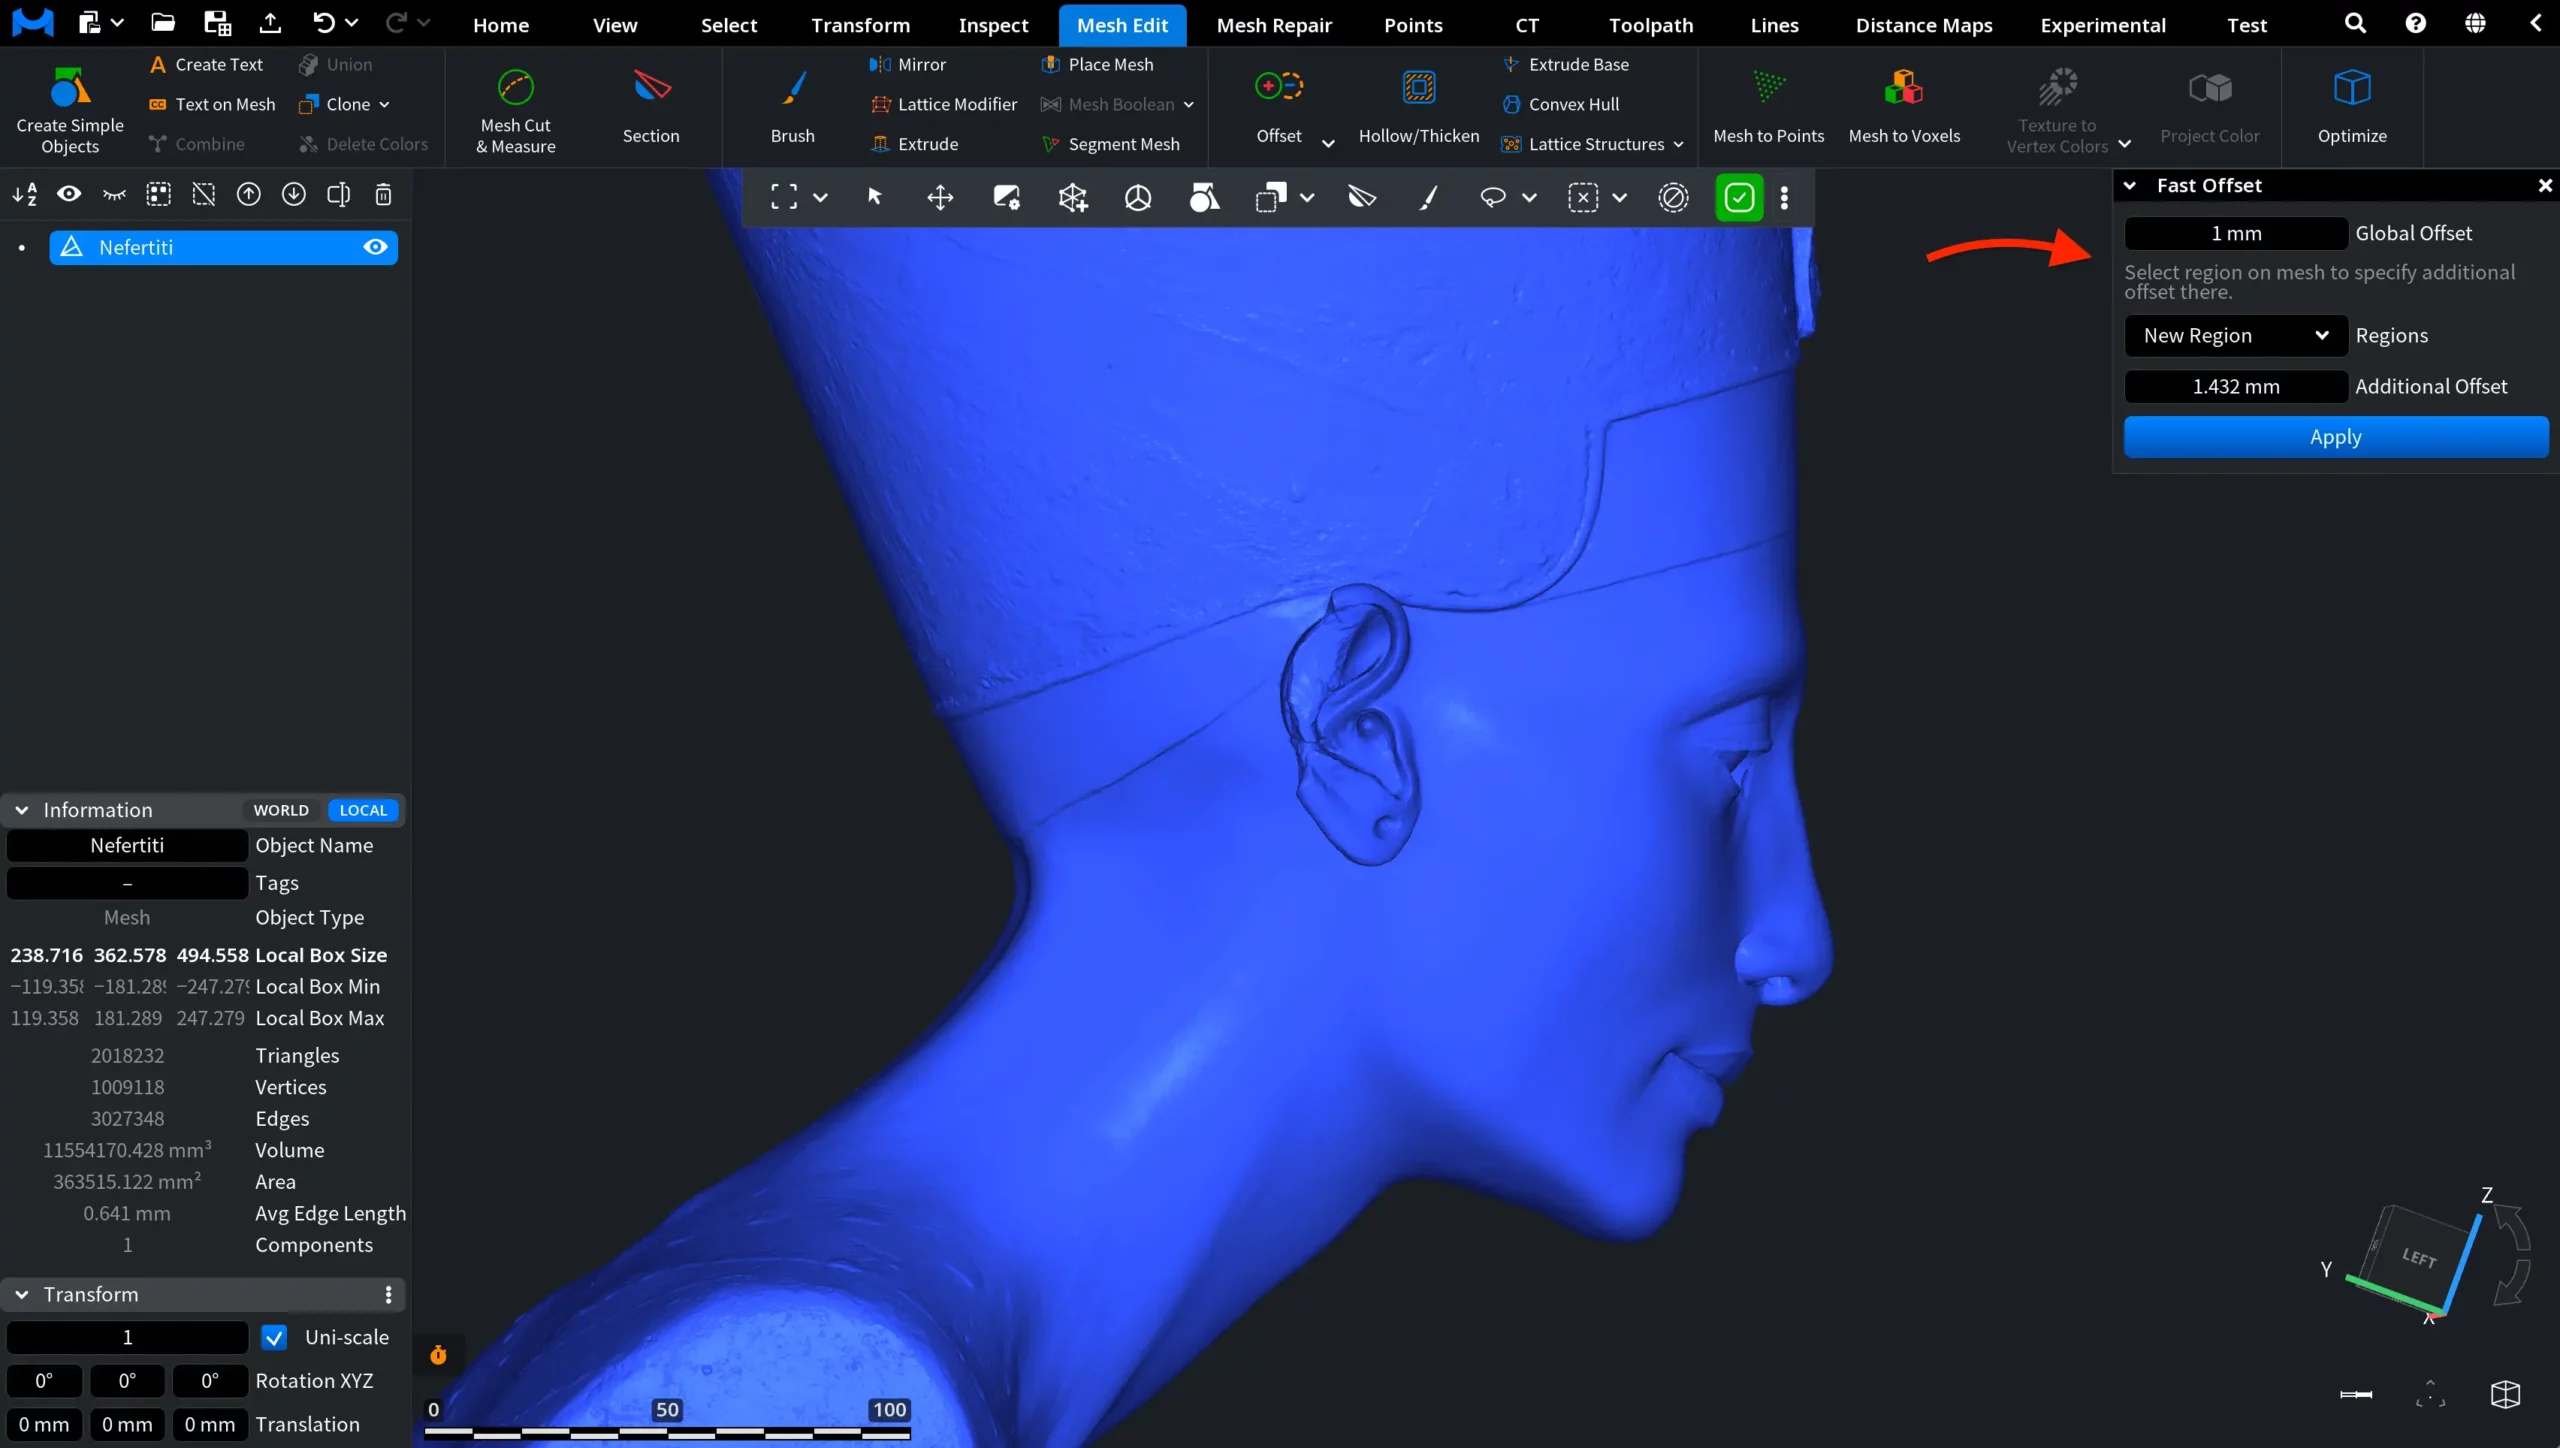
Global Offset defines the offset applied to the whole mesh.
Below the Global Offset field, the panel includes the region-specific settings. They let you select a region on the mesh and specify an additional offset there.

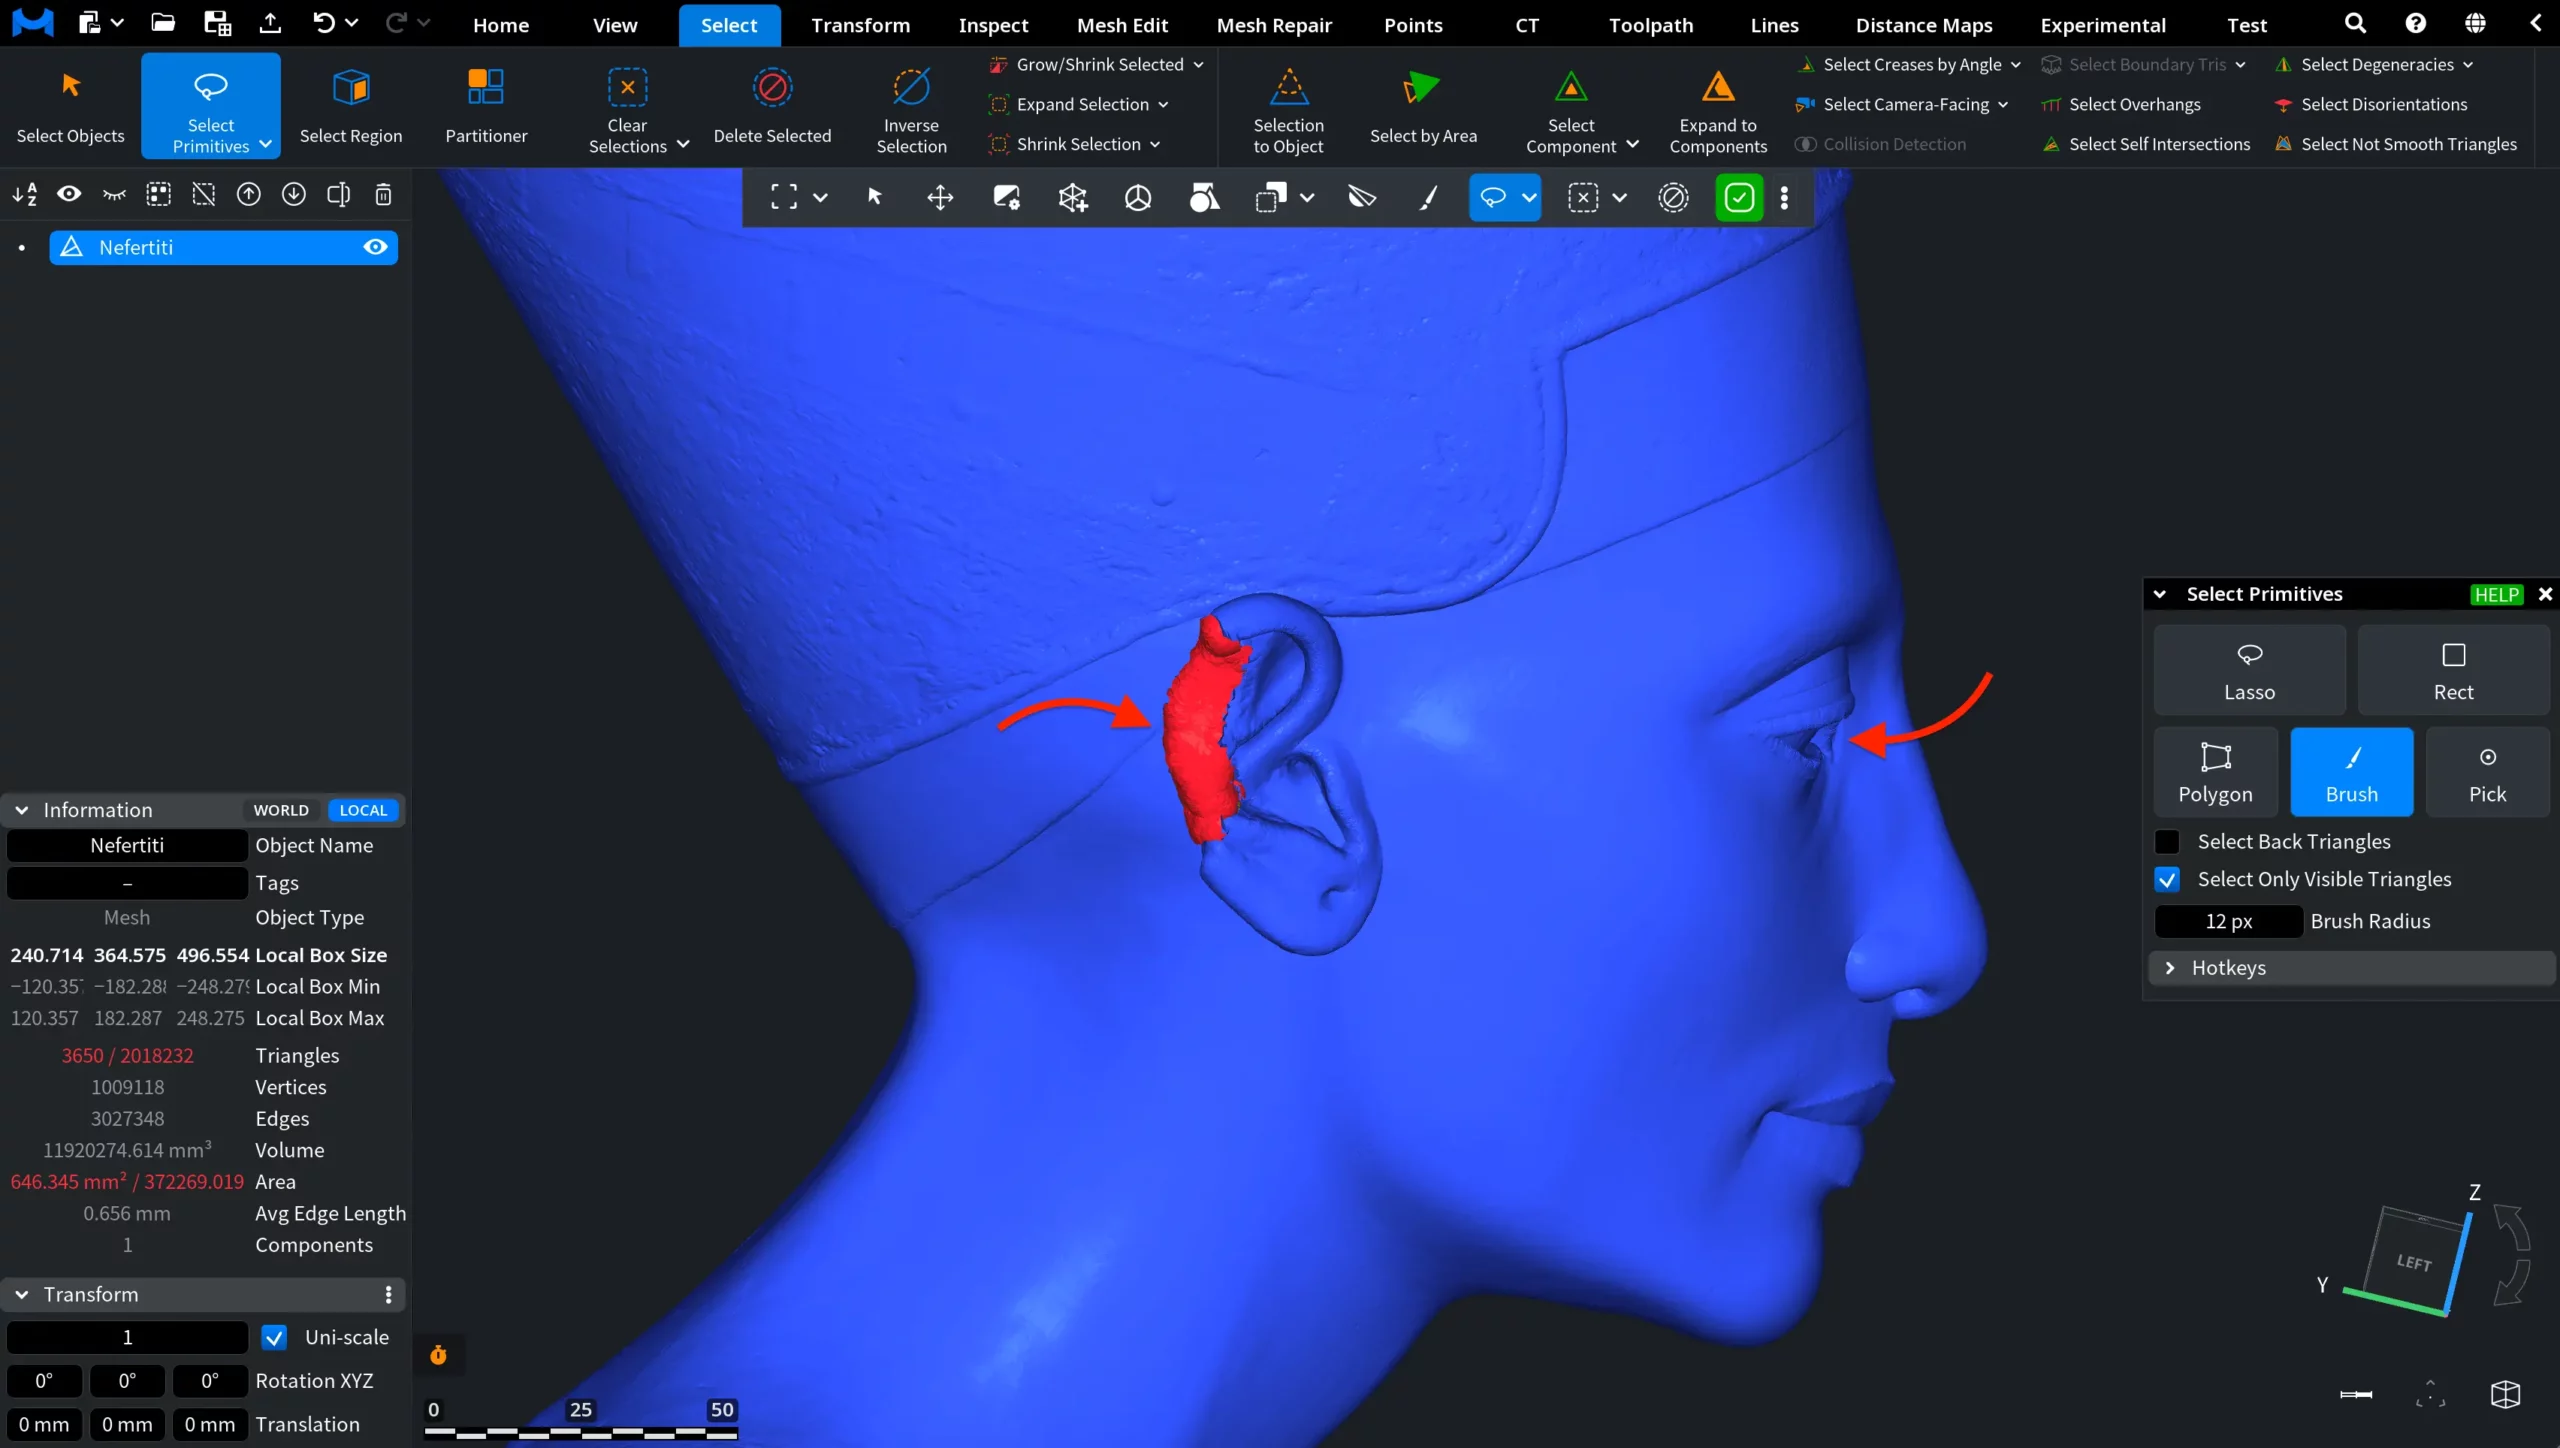
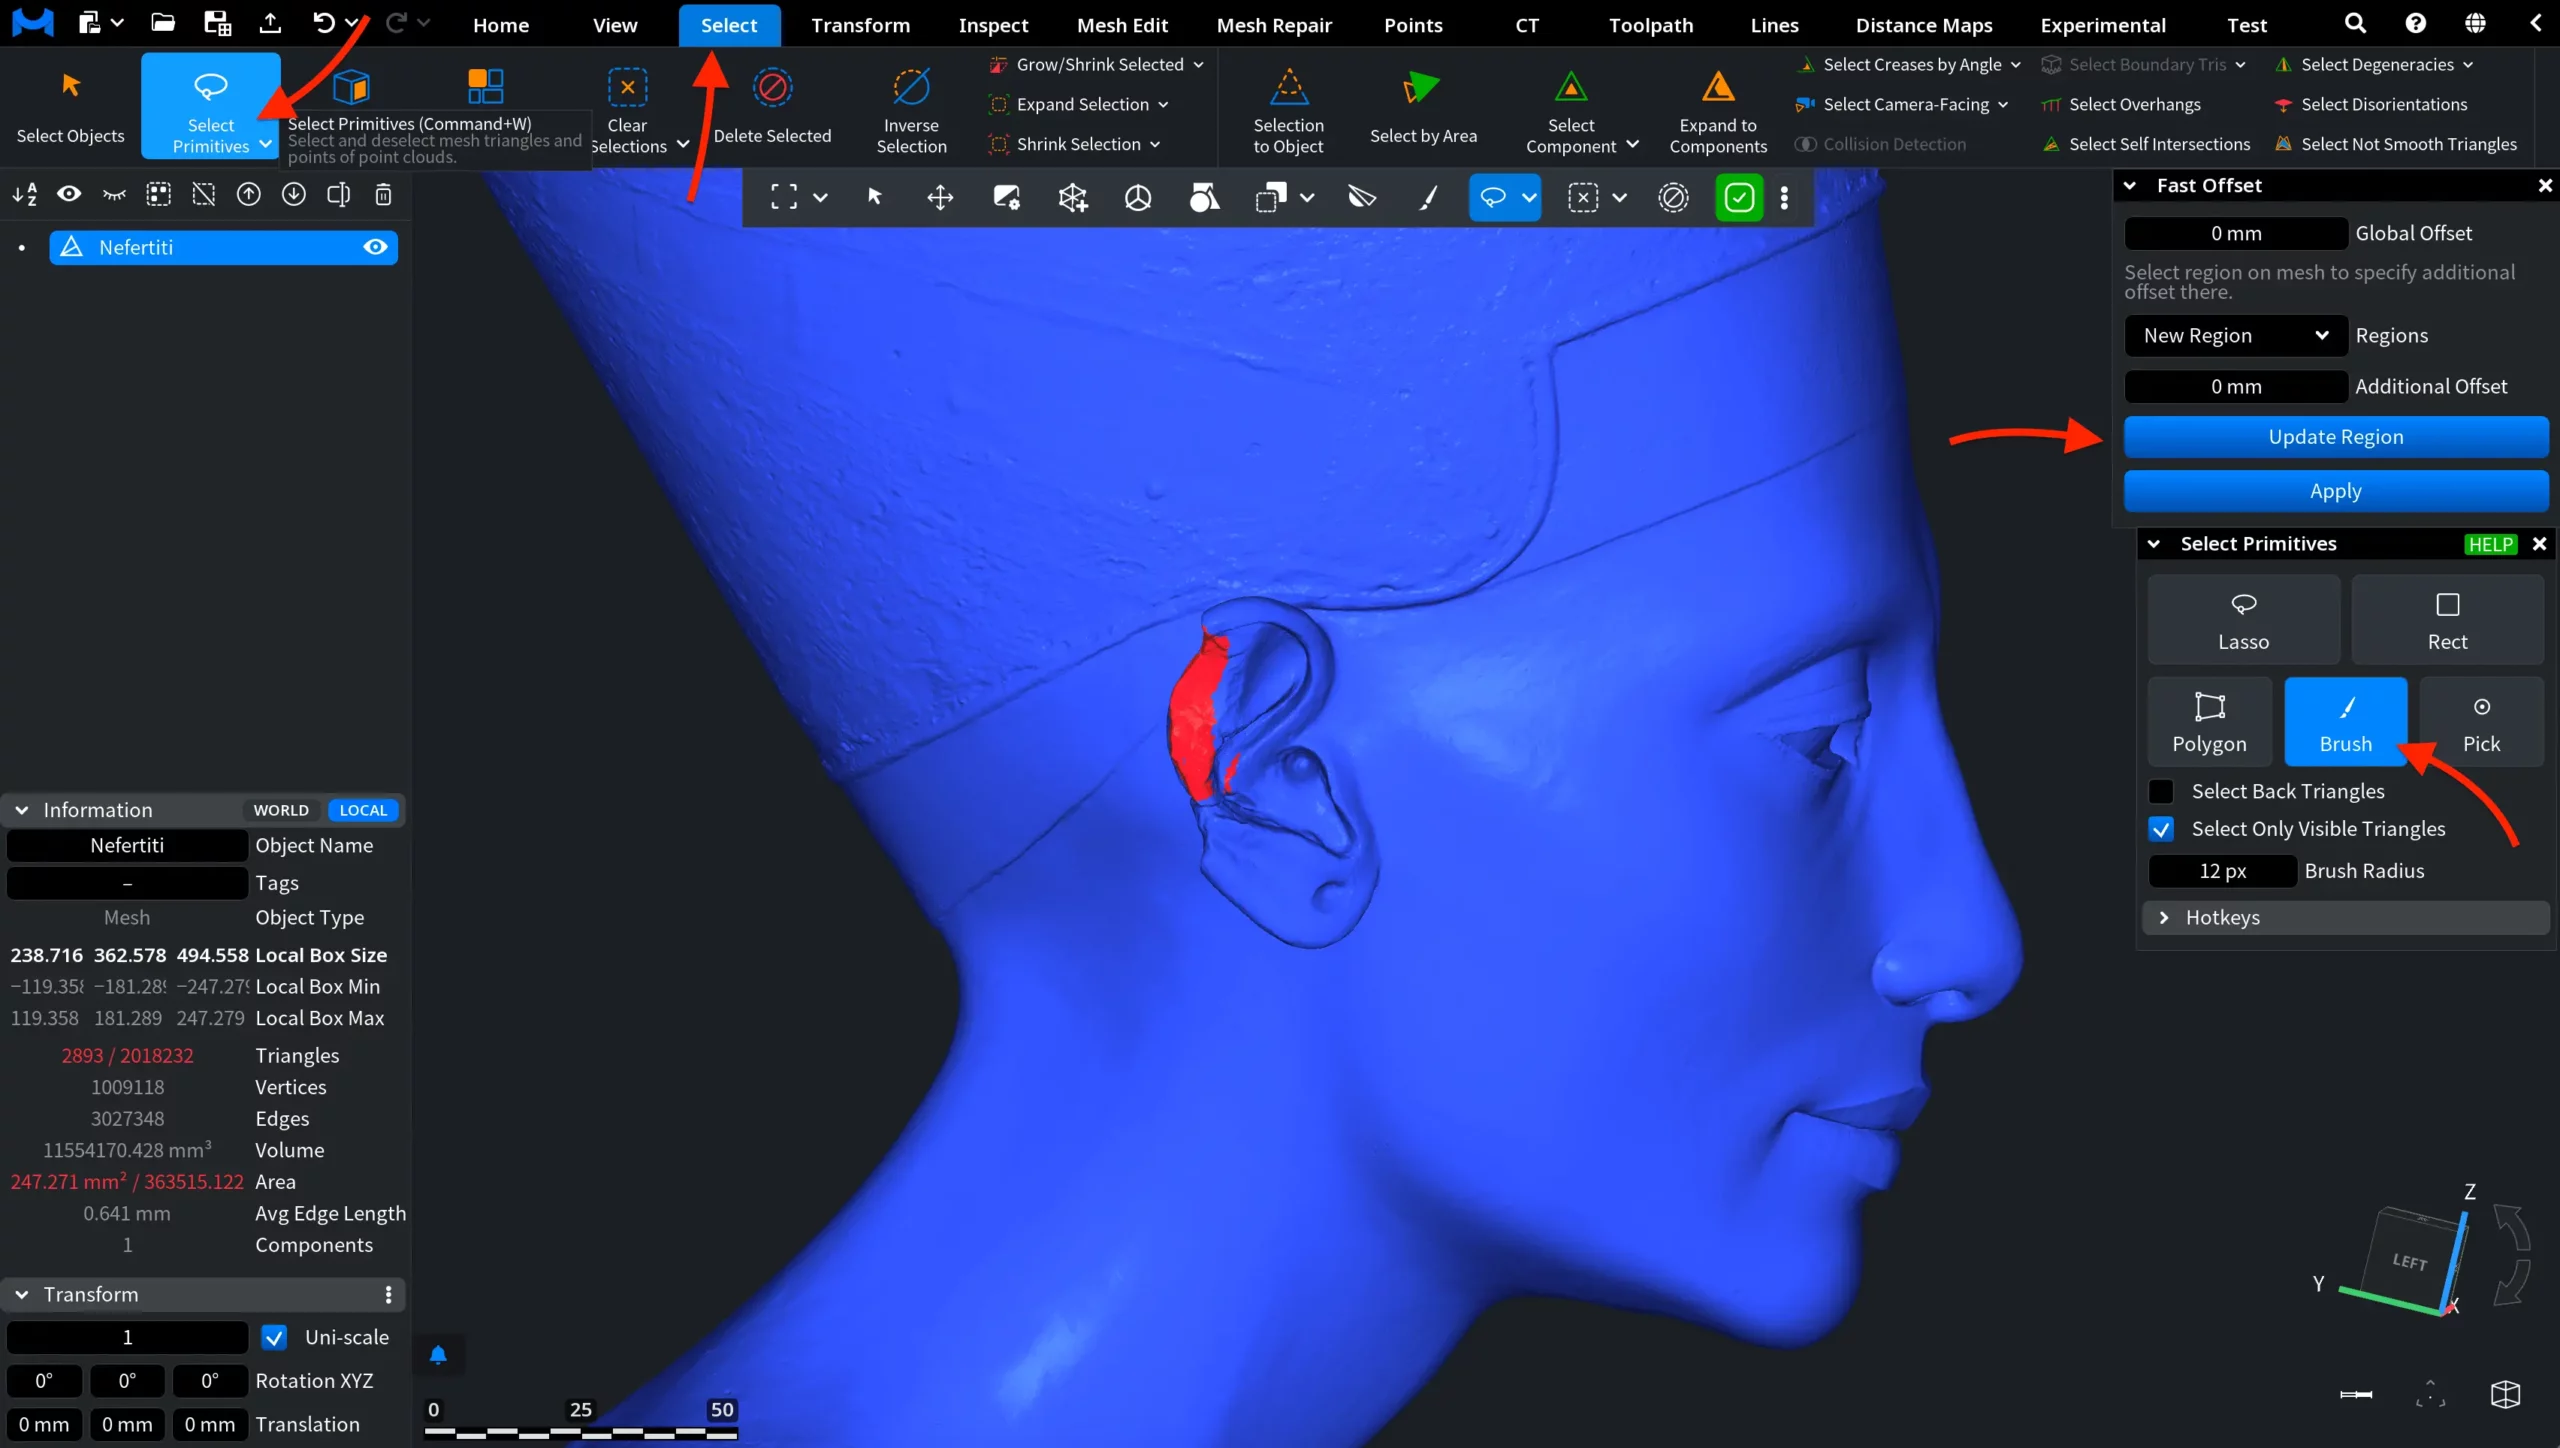
Regions lets you define a region where the additional offset should be applied. To select the required area, go to the Select tab and click Select Primitives. You can use any available selection mode depending on the shape of the target area.
In this example, we use Brush to select the broken area near the ear. After the region is selected, click Update Region in the Fast Offset panel. This saves the current mesh selection as the region where the additional offset will be applied.
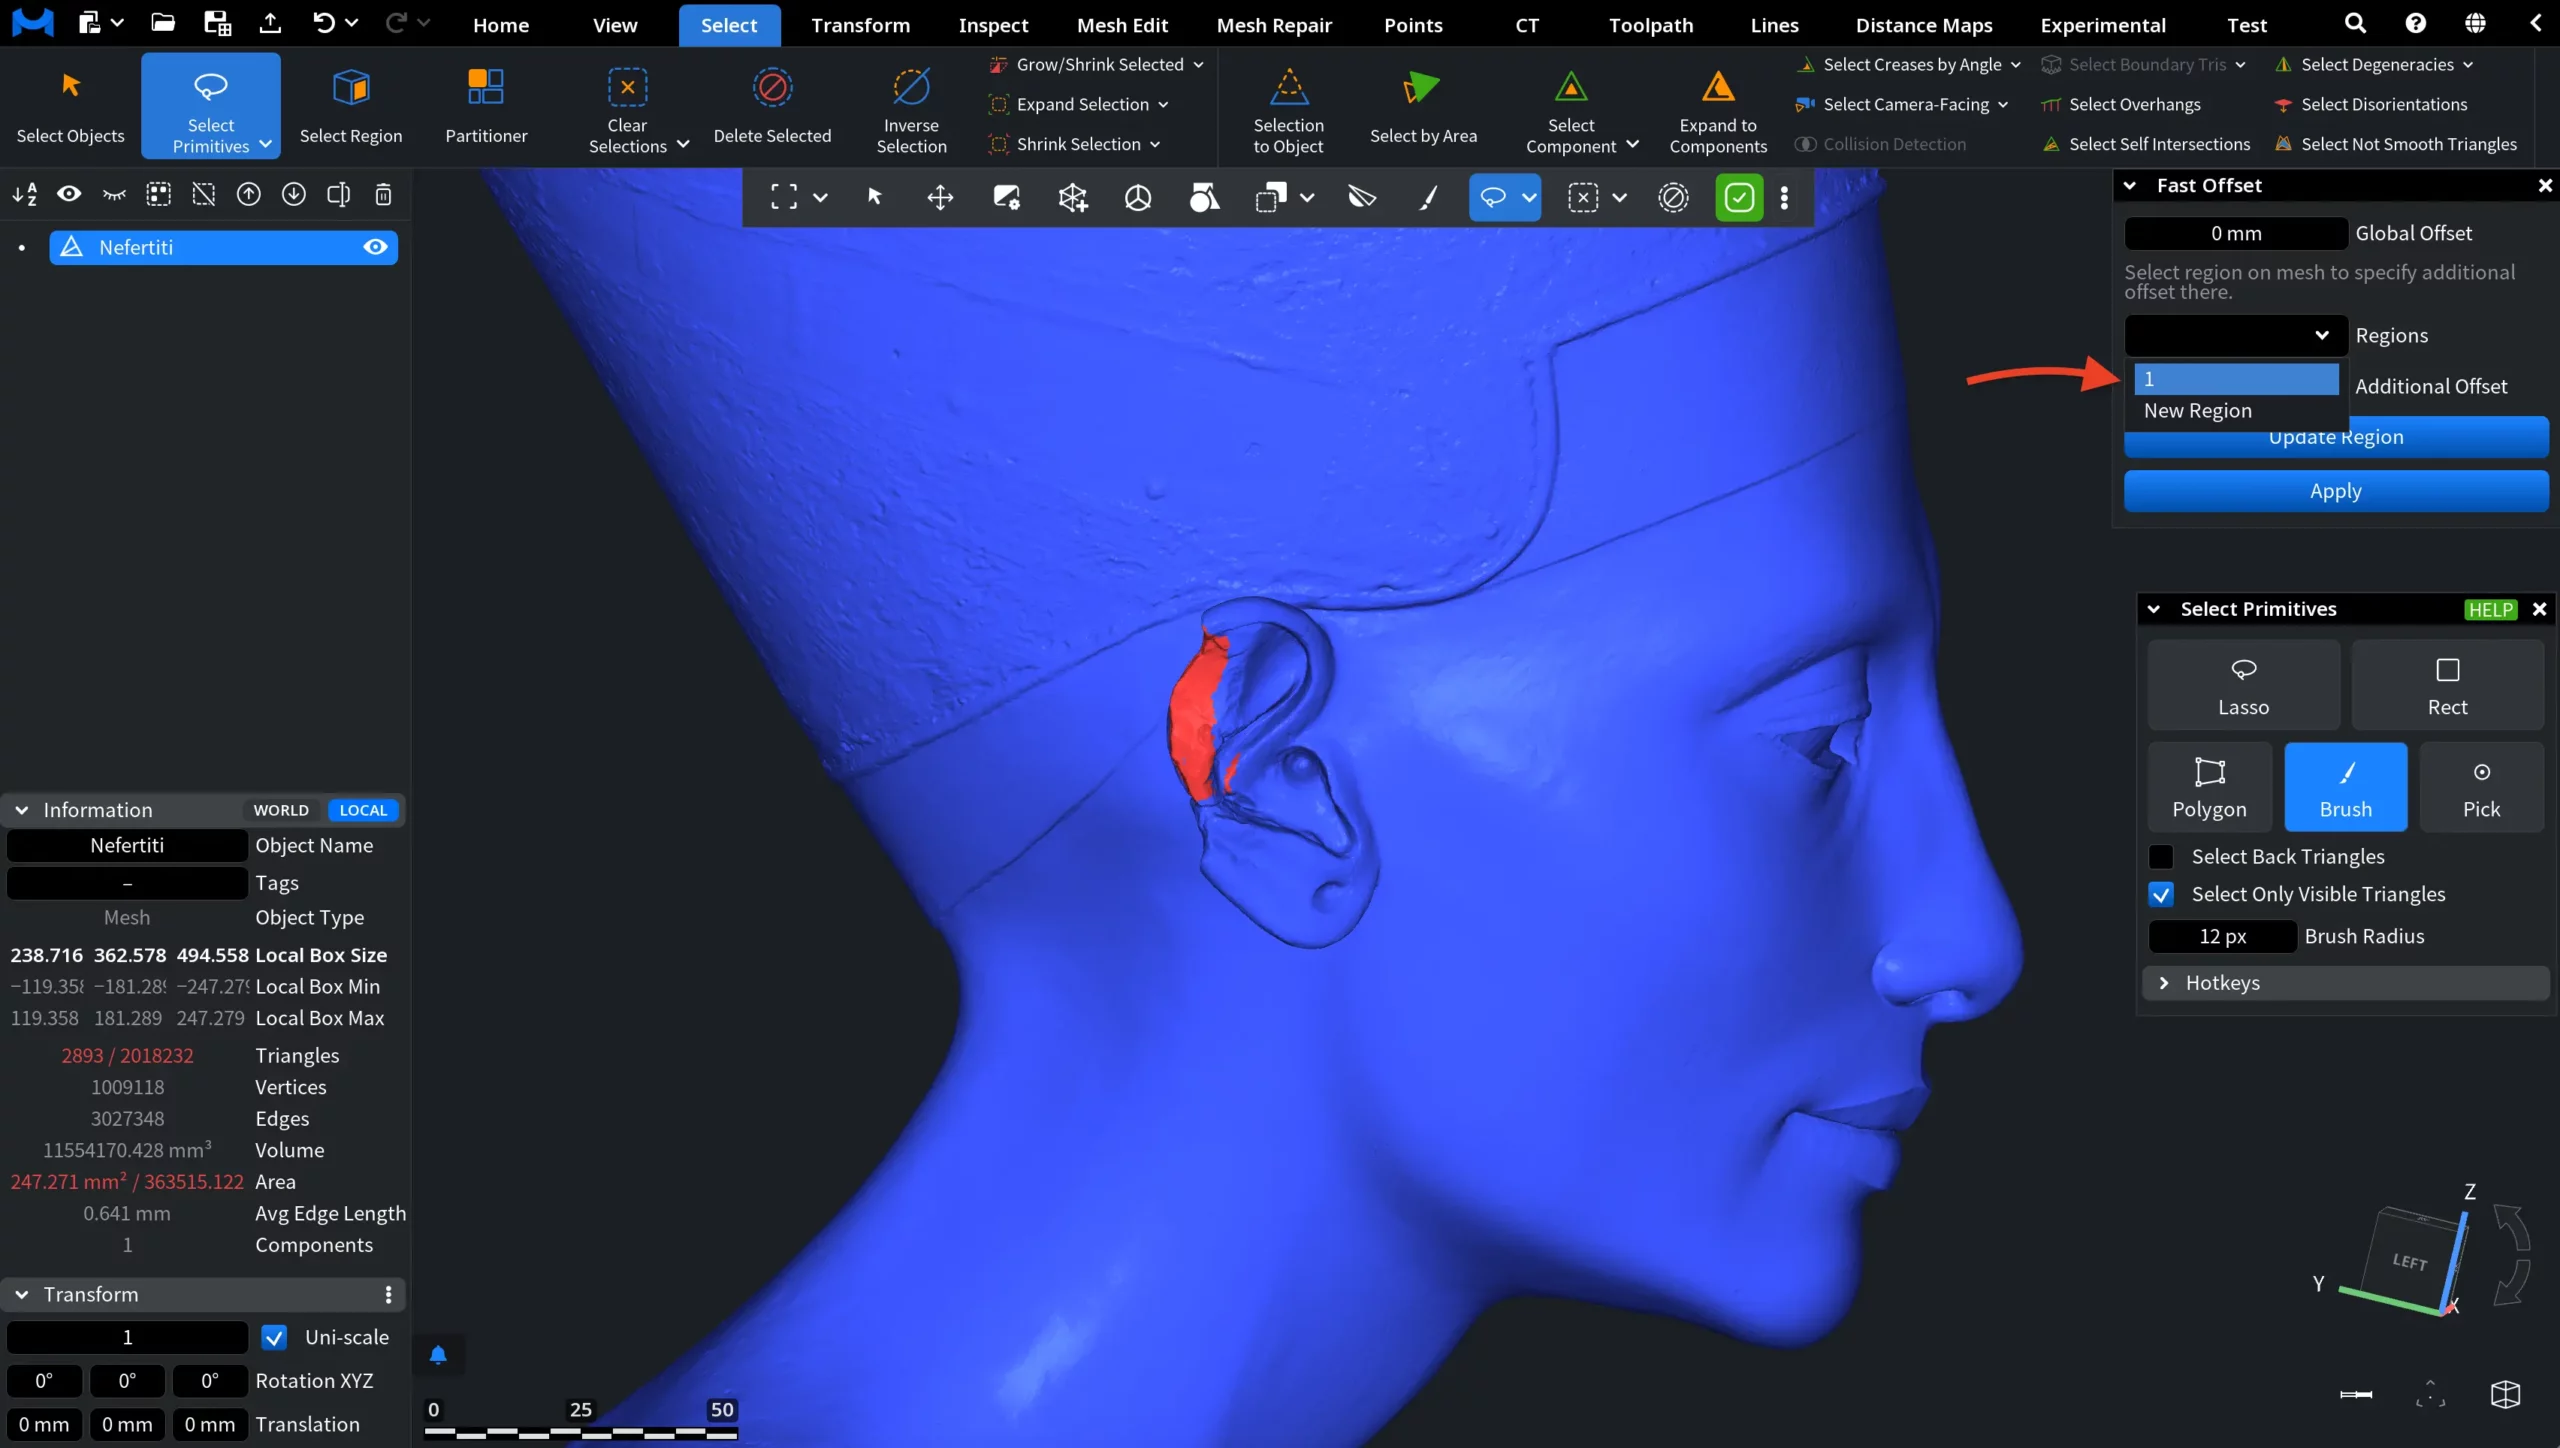
Once you click Update Region, the region is saved as 1. You can save additional regions if needed. To do this, make sure New Region is selected in the Regions dropdown, select another area via Select Primitives under the Select tab, and click Update Region again. Subsequent regions will be saved as 2, 3, 4, and so on.
Additional Offset defines the extra offset applied to the selected region. This value is added to the Global Offset for that region. After the required values and regions are defined, click Apply to run the operation.
After you click Apply, the offset is applied according to the defined values.