The Points to Lines tool, located under the Points tab, converts the vertices of an active point cloud into a line object by connecting the points sequentially. The resulting line follows the order of the points in the point cloud rather than automatically determining a geometric path between them.

To access Points to Lines:
- Select the point cloud in the scene tree.
- Open the Points tab.
- Click Points to Lines on the right side of the toolbar.
Clicking Points to Lines opens a dedicated panel with one setting:
- Closed Line determines whether the resulting line is treated as open or closed. When enabled, MeshInspector connects the last point back to the first point to form a closed loop. When disabled, the line remains open.
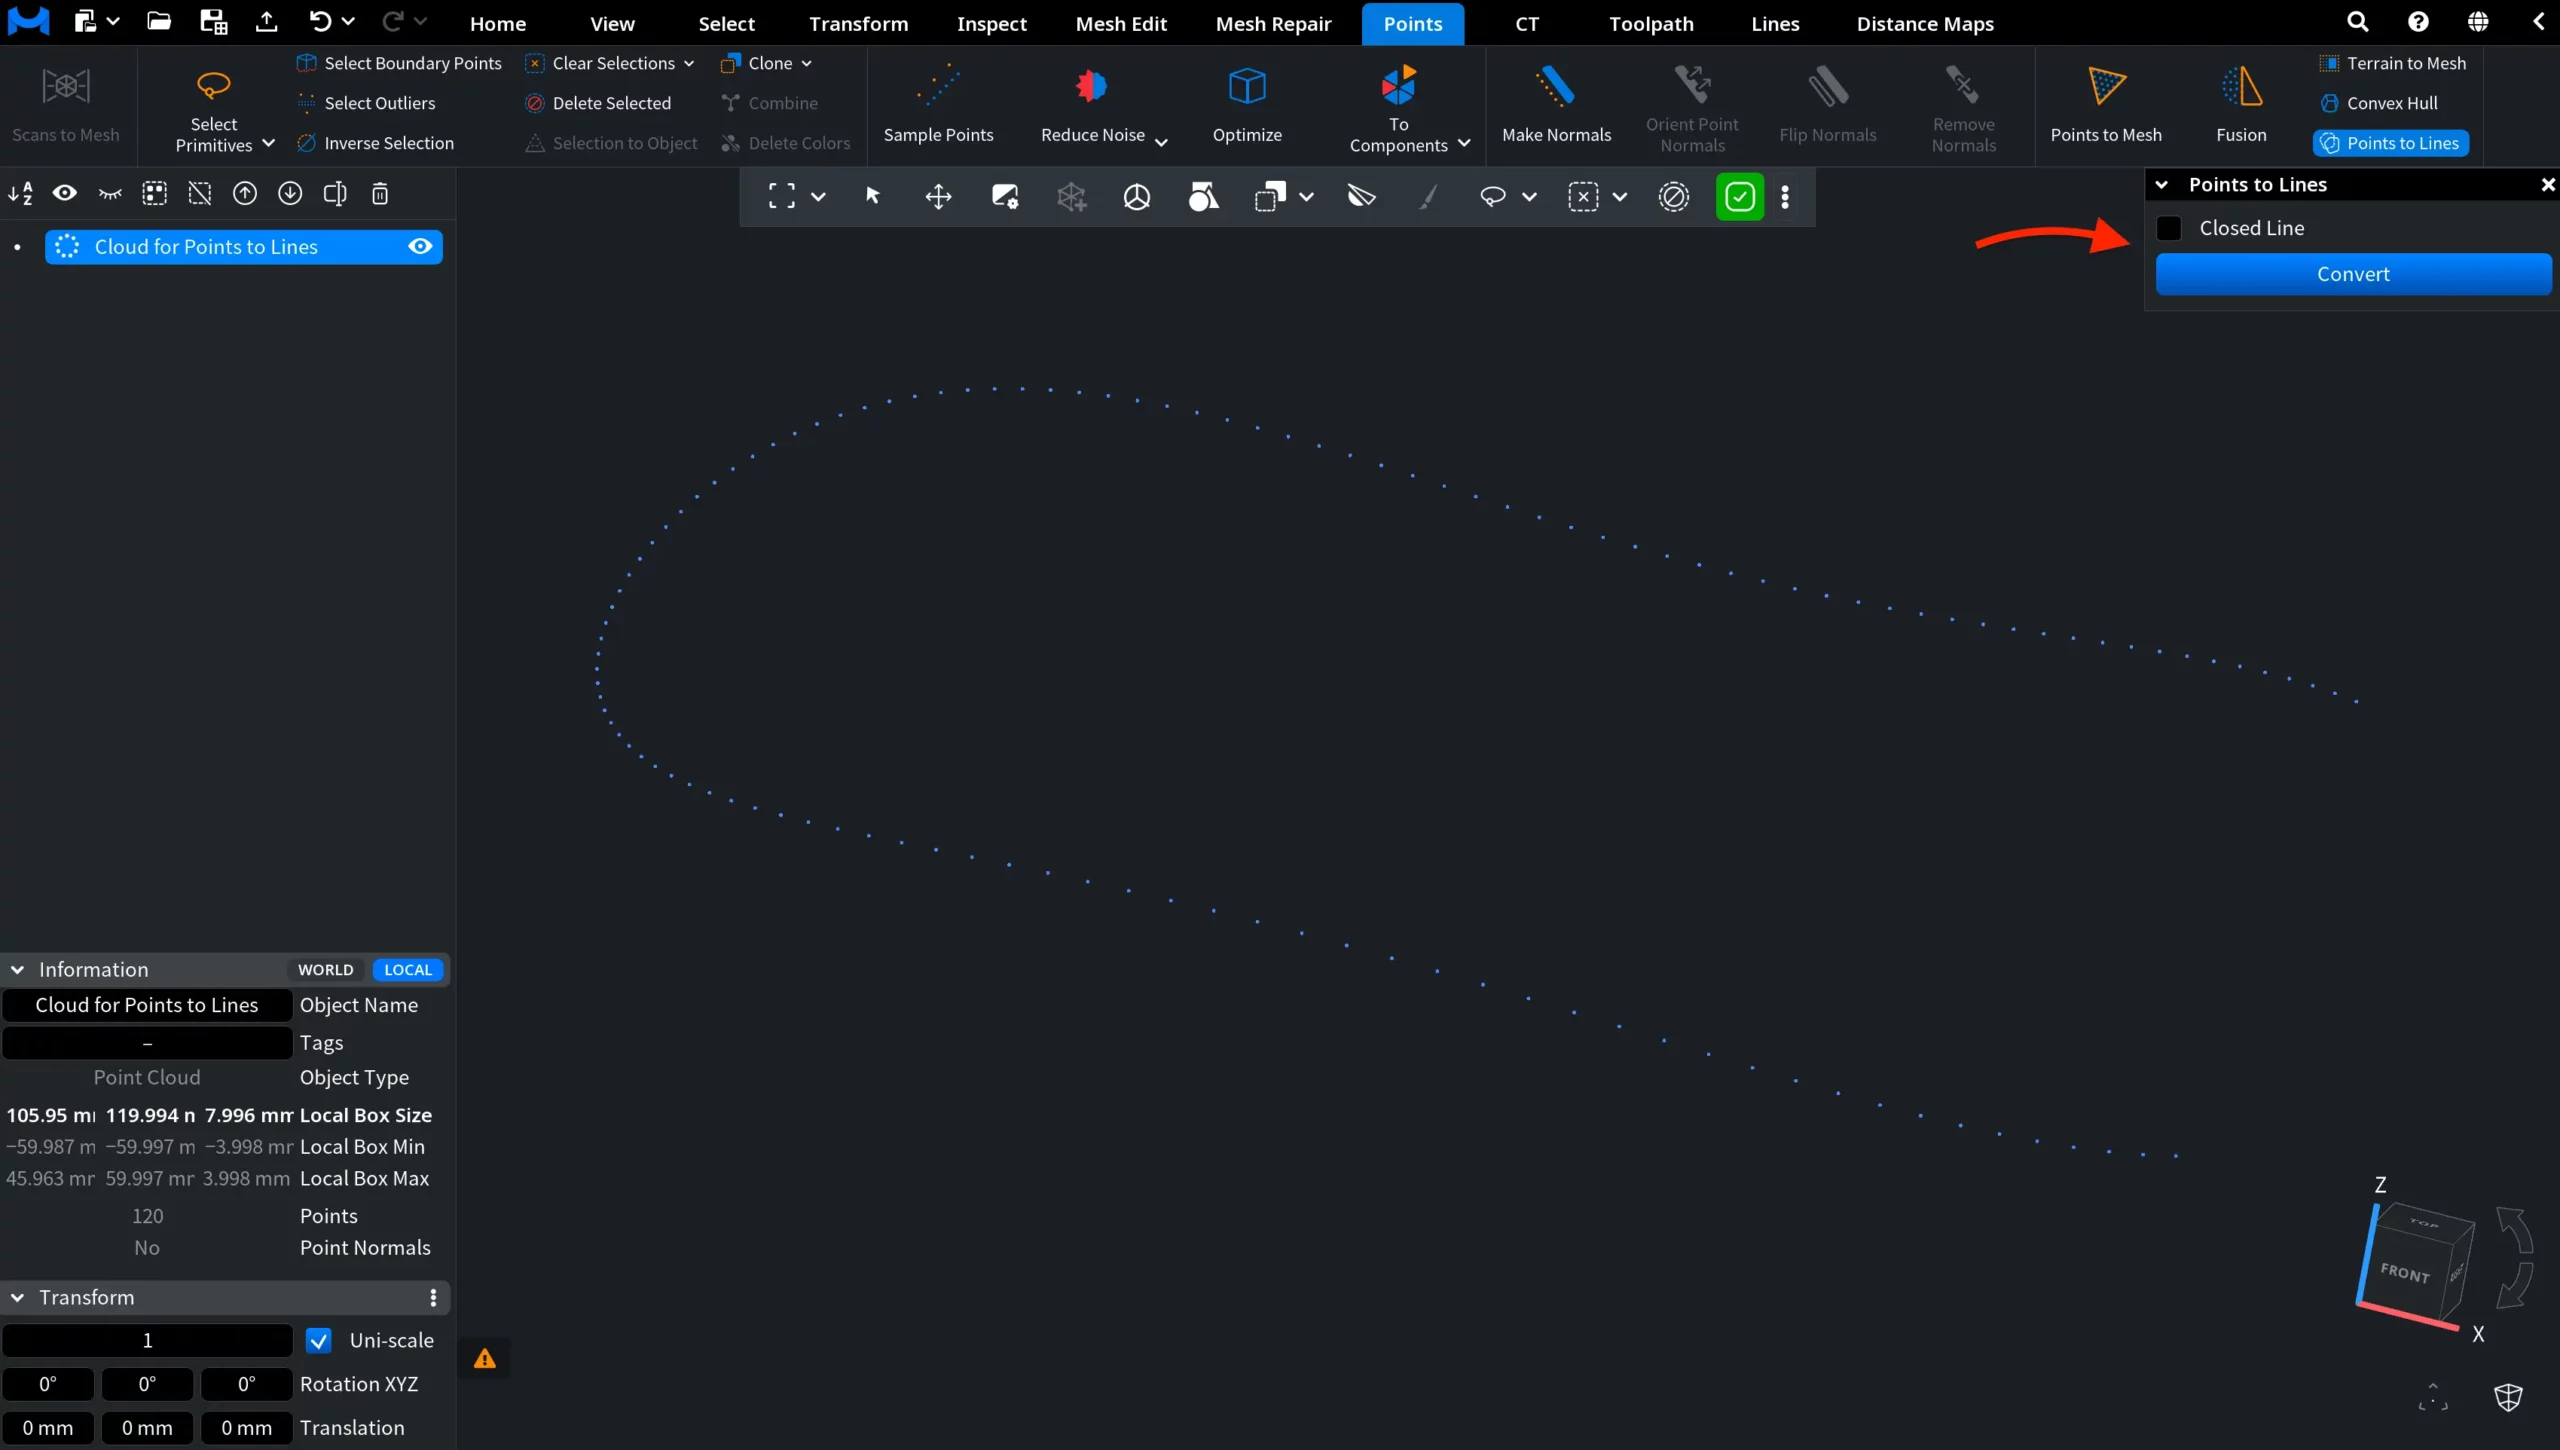
Click Convert to create the line object using the selected option.
Points to Lines: Results
After clicking Convert, MeshInspector replaces the point cloud with a polyline object whose vertices follow the order of the original points.
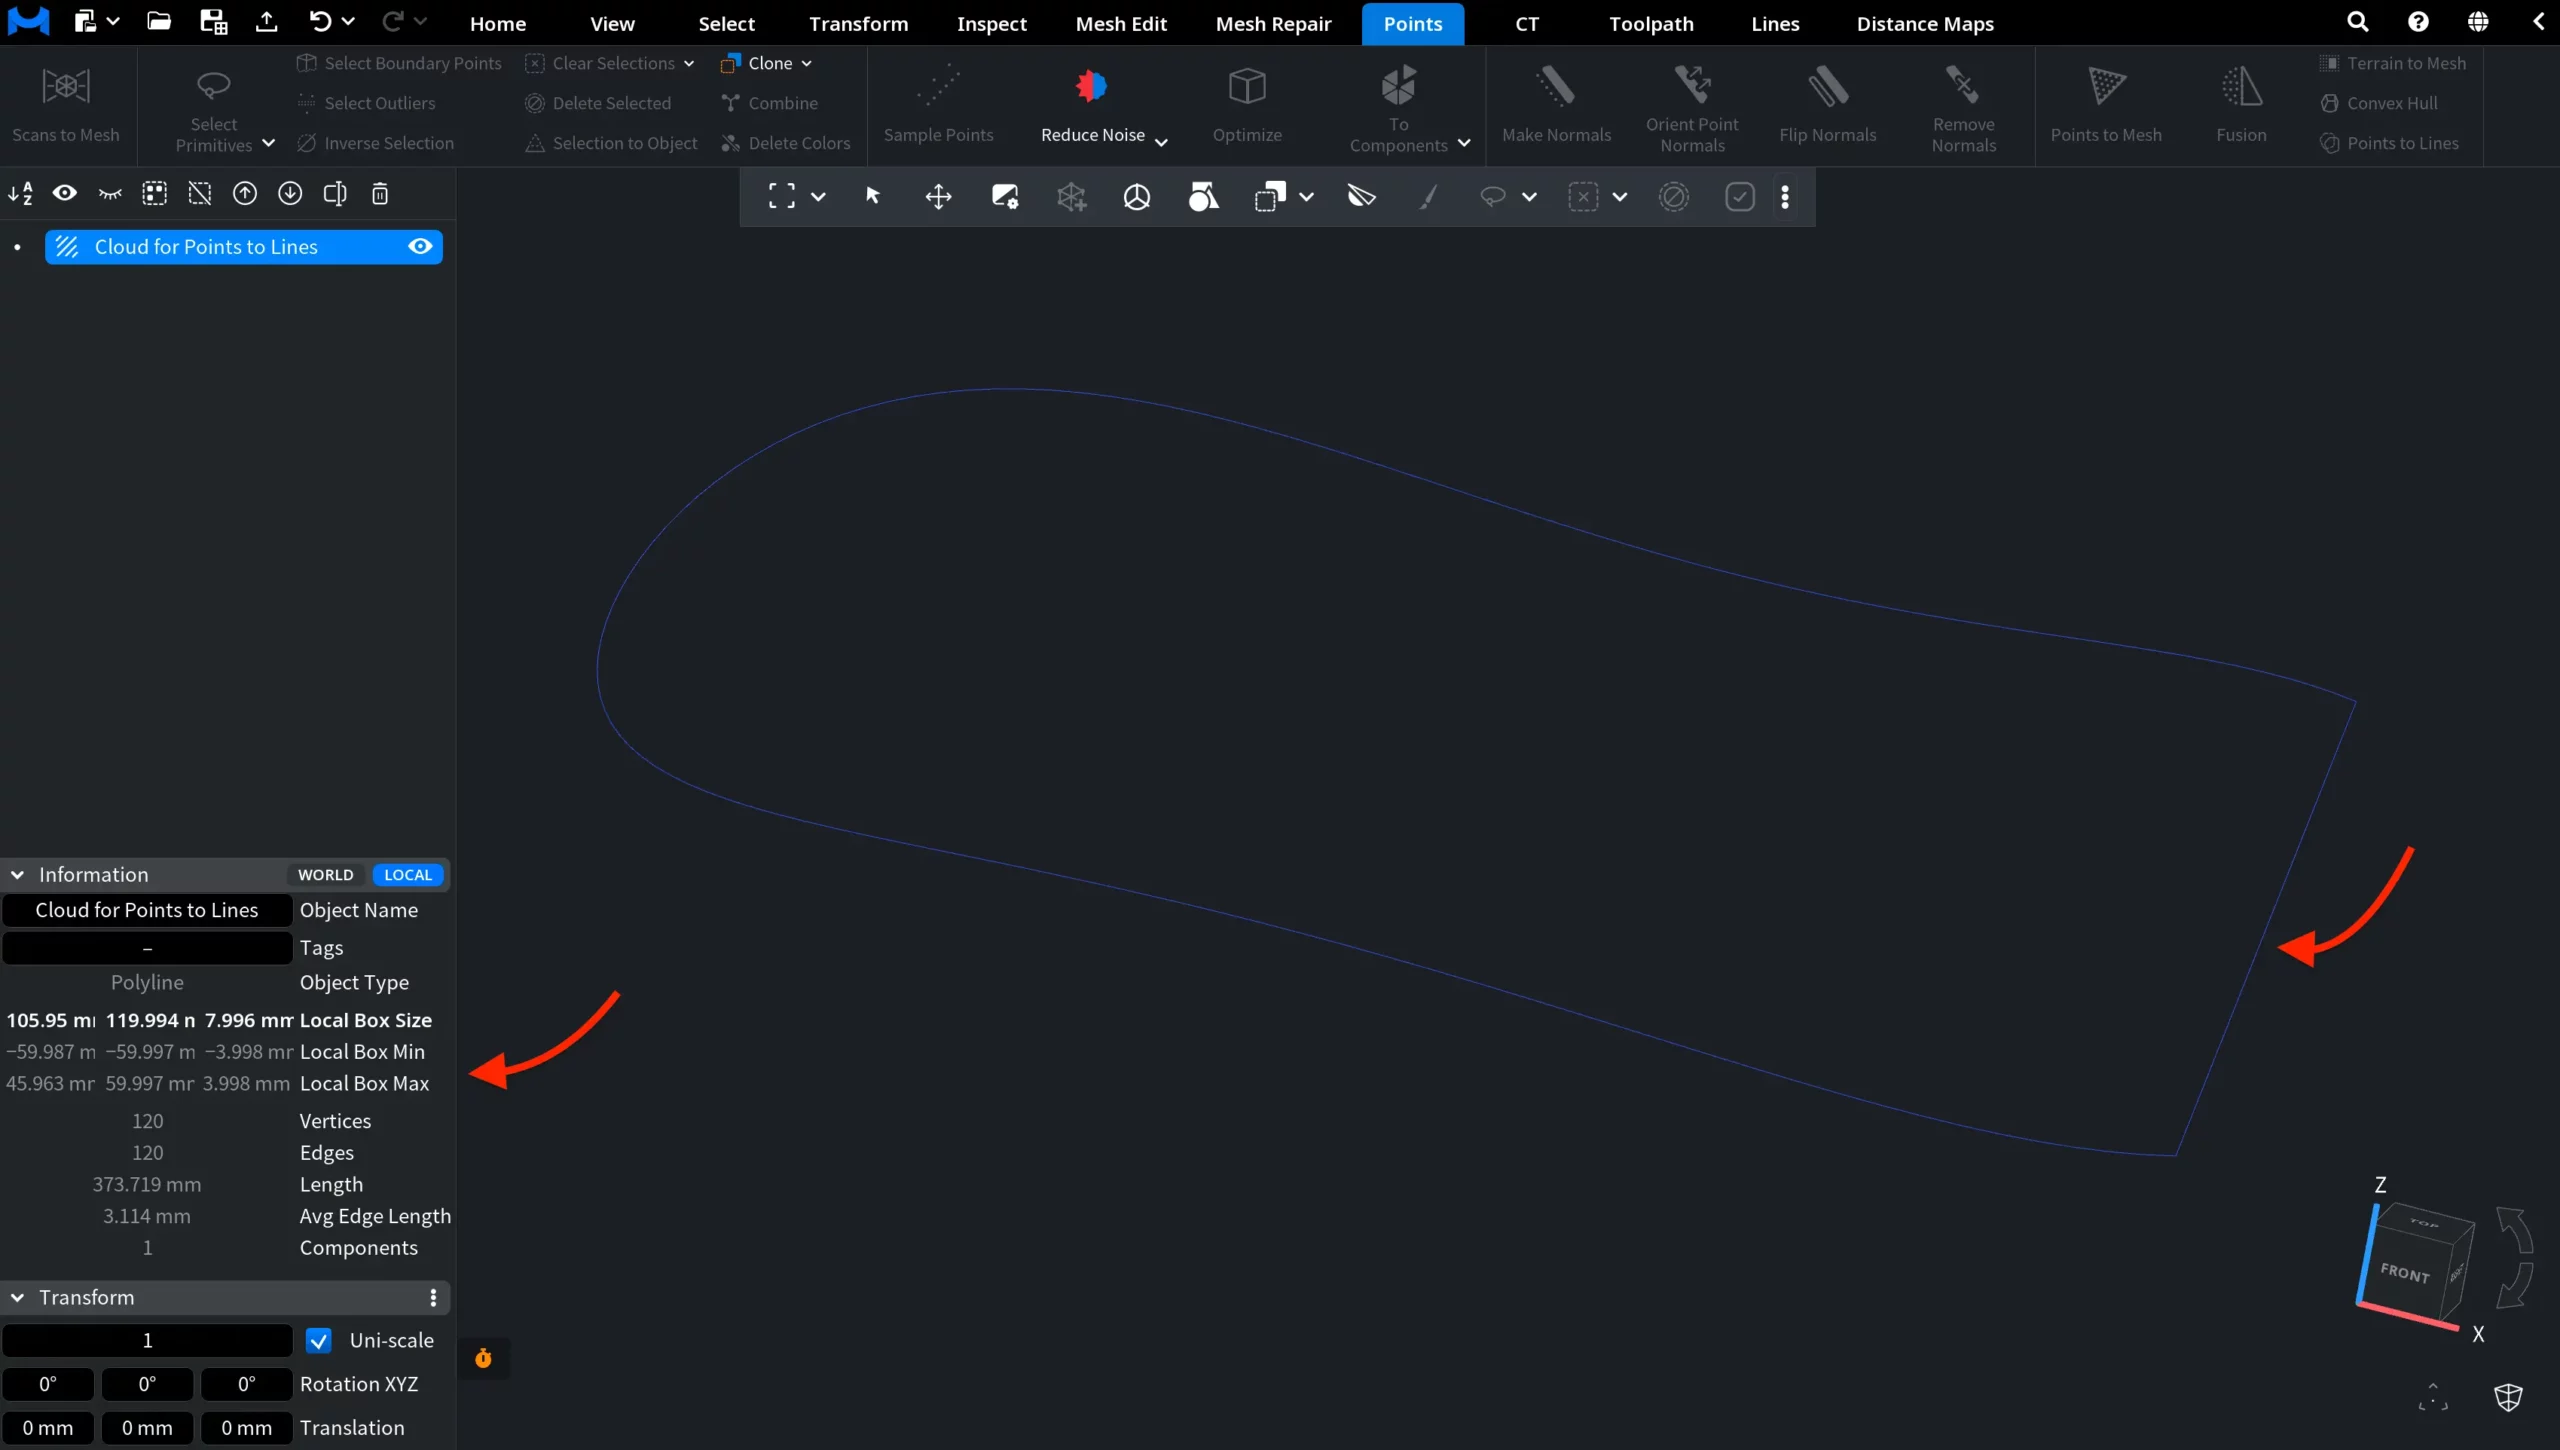
With Closed Line enabled, the last point is connected back to the first point, creating a closed loop. In this example, the resulting polyline contains 120 vertices and 120 edges.
With Closed Line disabled, MeshInspector still connects the points sequentially, but leaves the first and last points unconnected. The resulting polyline therefore contains 120 vertices and 119 edges, and the opening between the two endpoints remains visible.
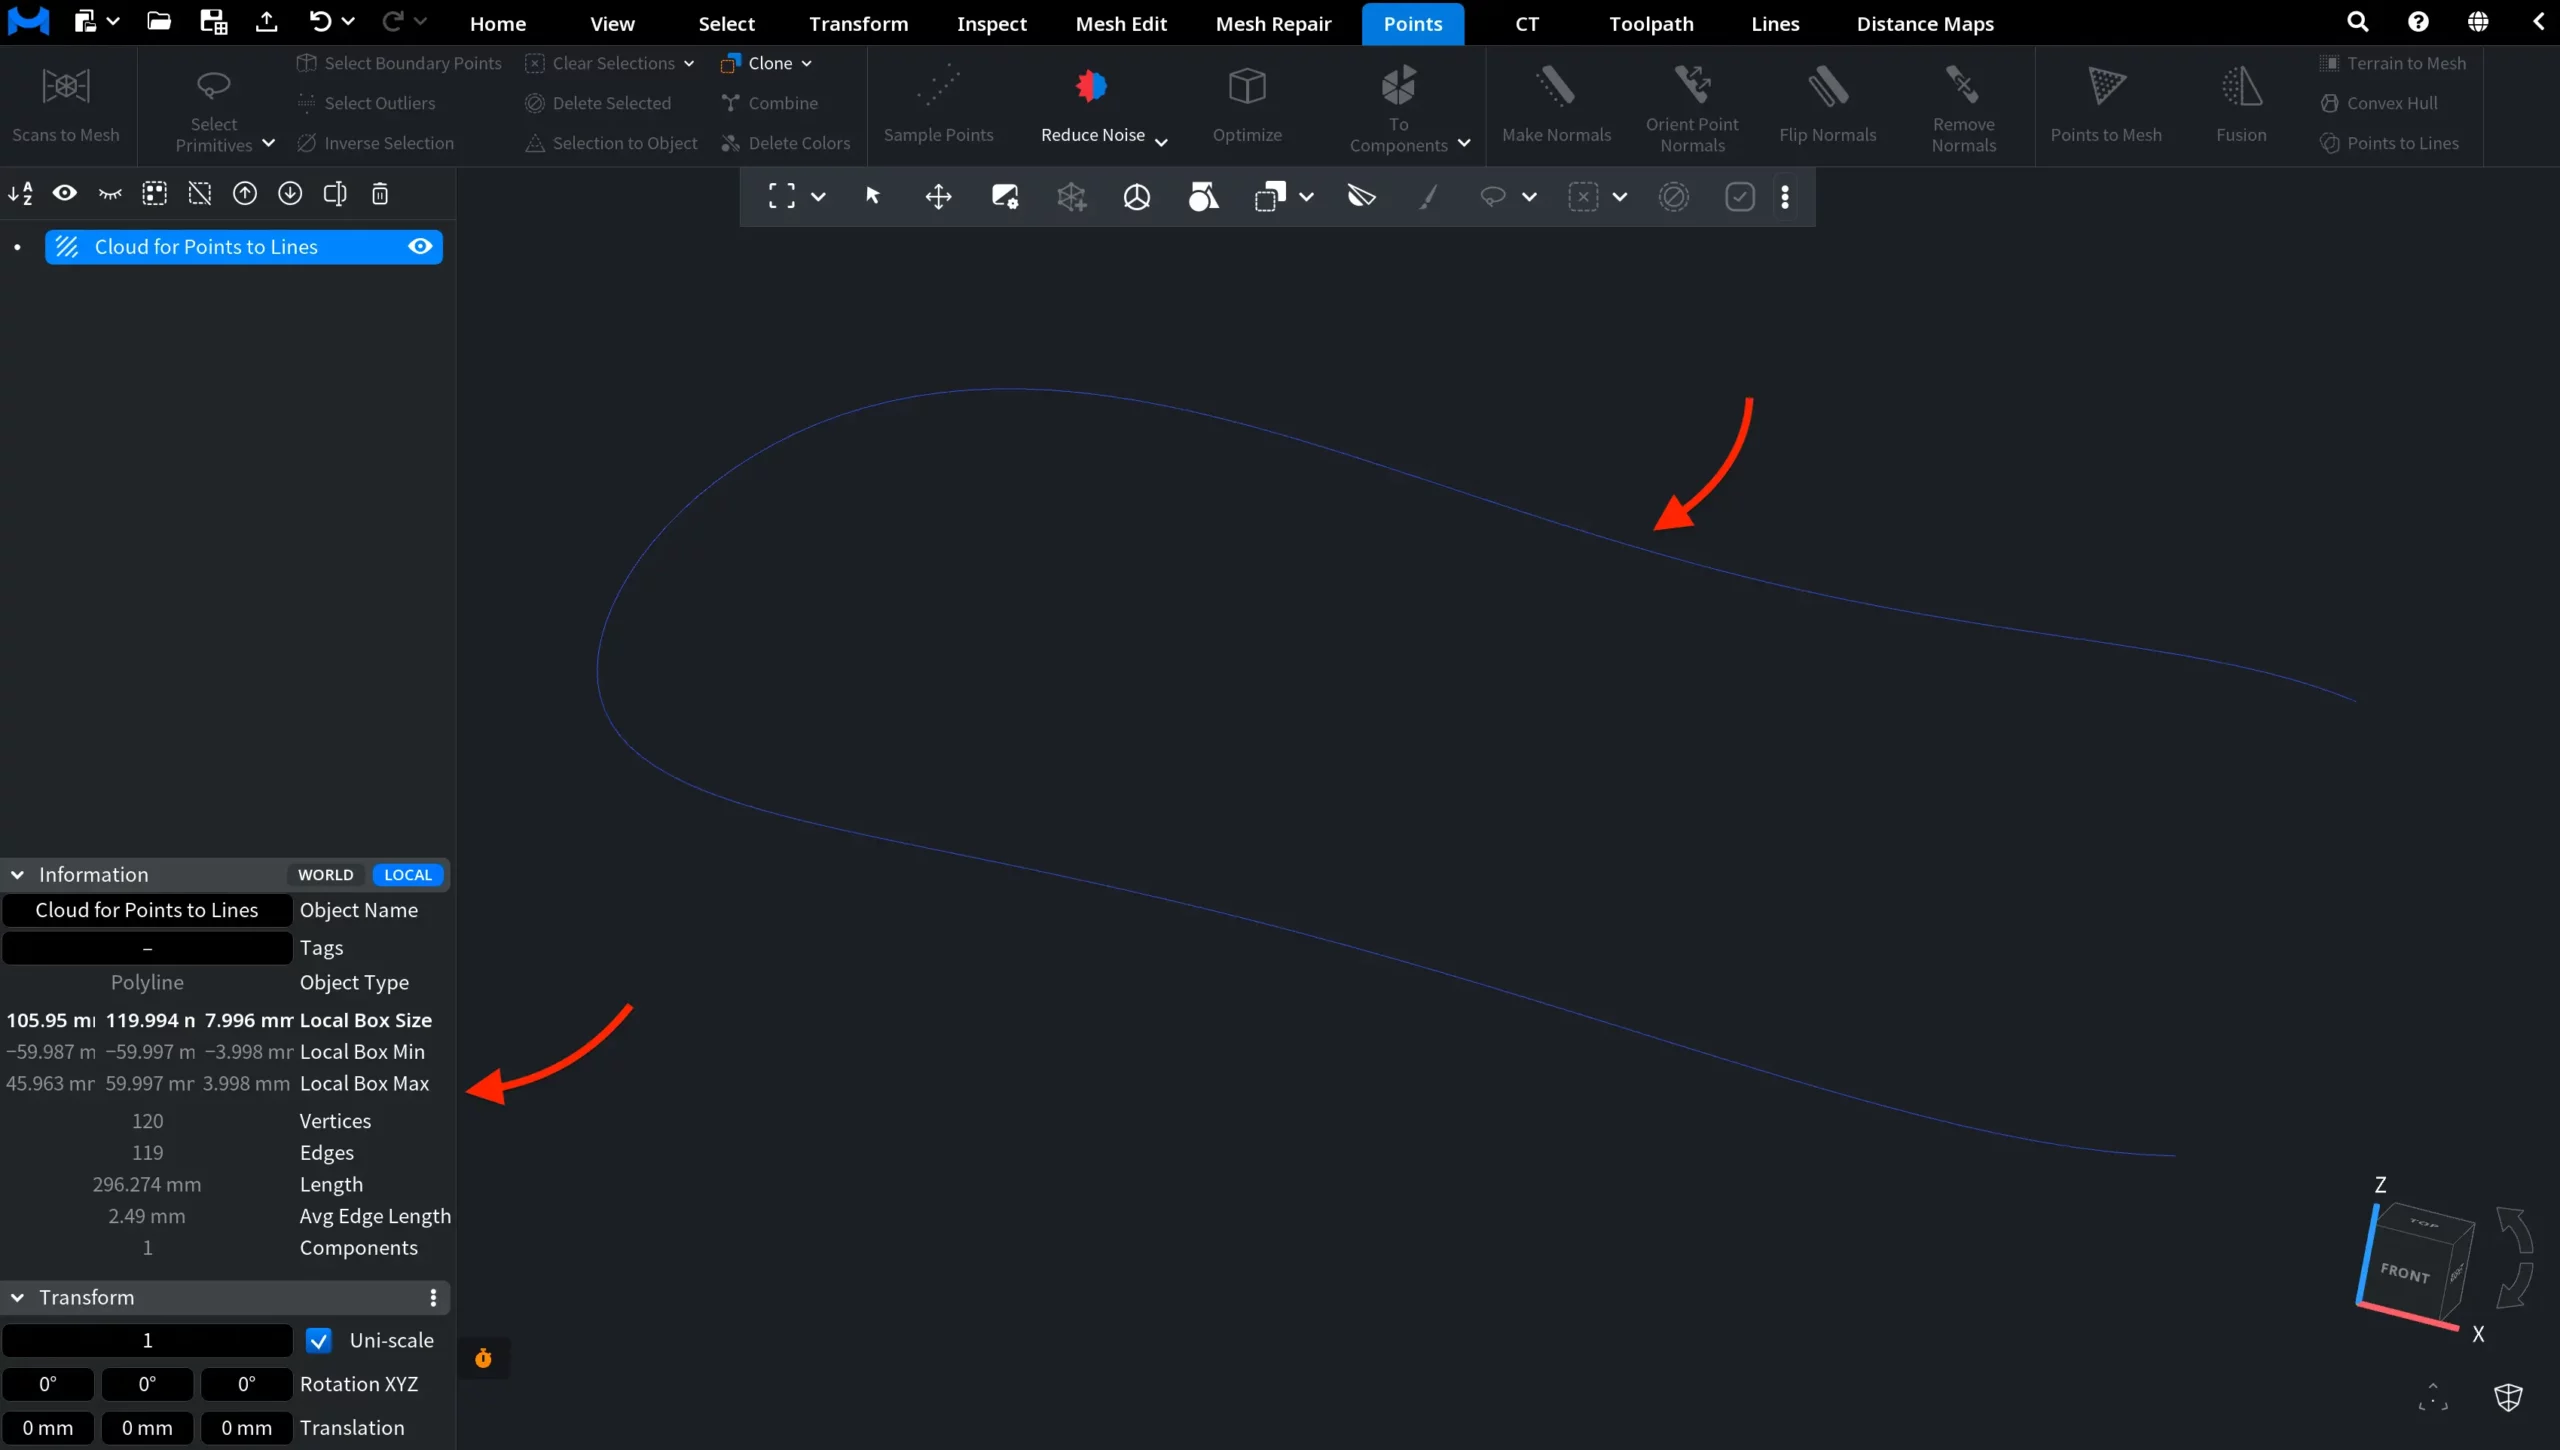
This makes the effect of Closed Line straightforward: enabling it adds one final edge between the first and last points, while disabling it leaves the sequence open.
Guide to the Points to Lines Tool in MeshInspector