Working with volumetric datasets frequently necessitates isolating specific structures or materials from the surrounding volume. The Voxels Segmentation tool in MeshInspector allows you to segment voxel regions using seed-based selection guided by voxel intensity values.
To access this tool, open the CT tab on the top toolbar and click Voxels Segmentation.

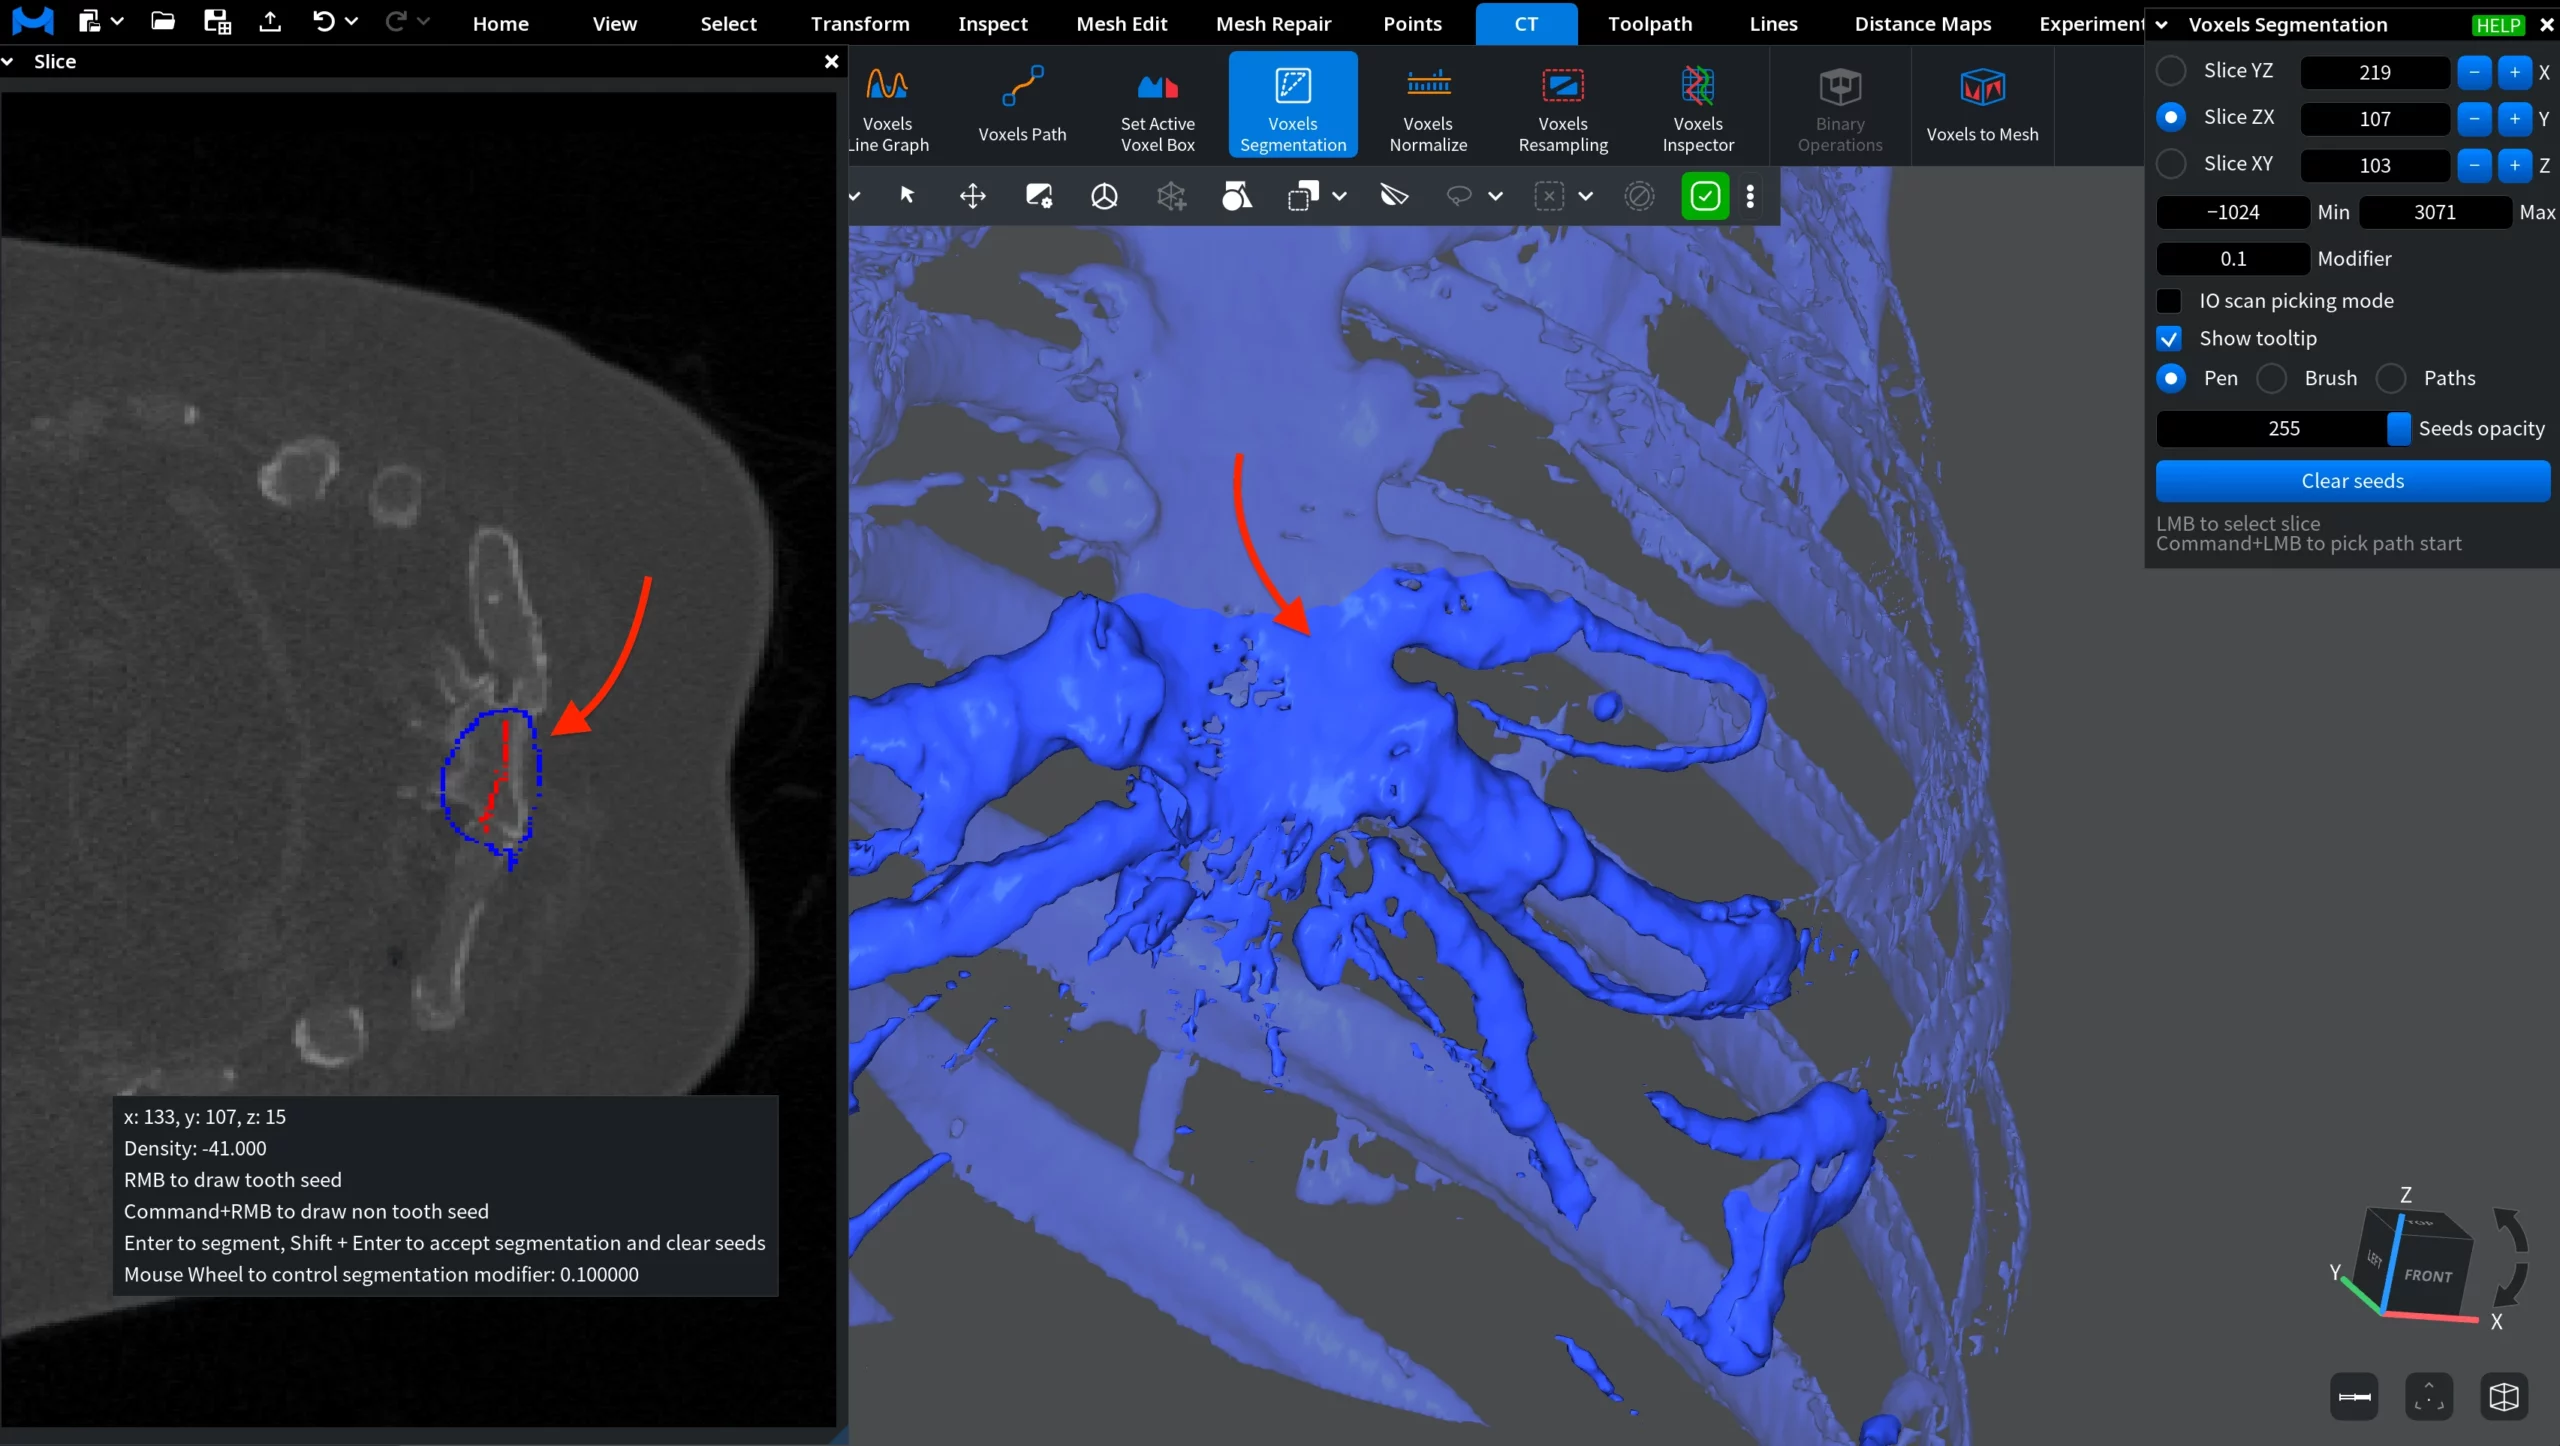
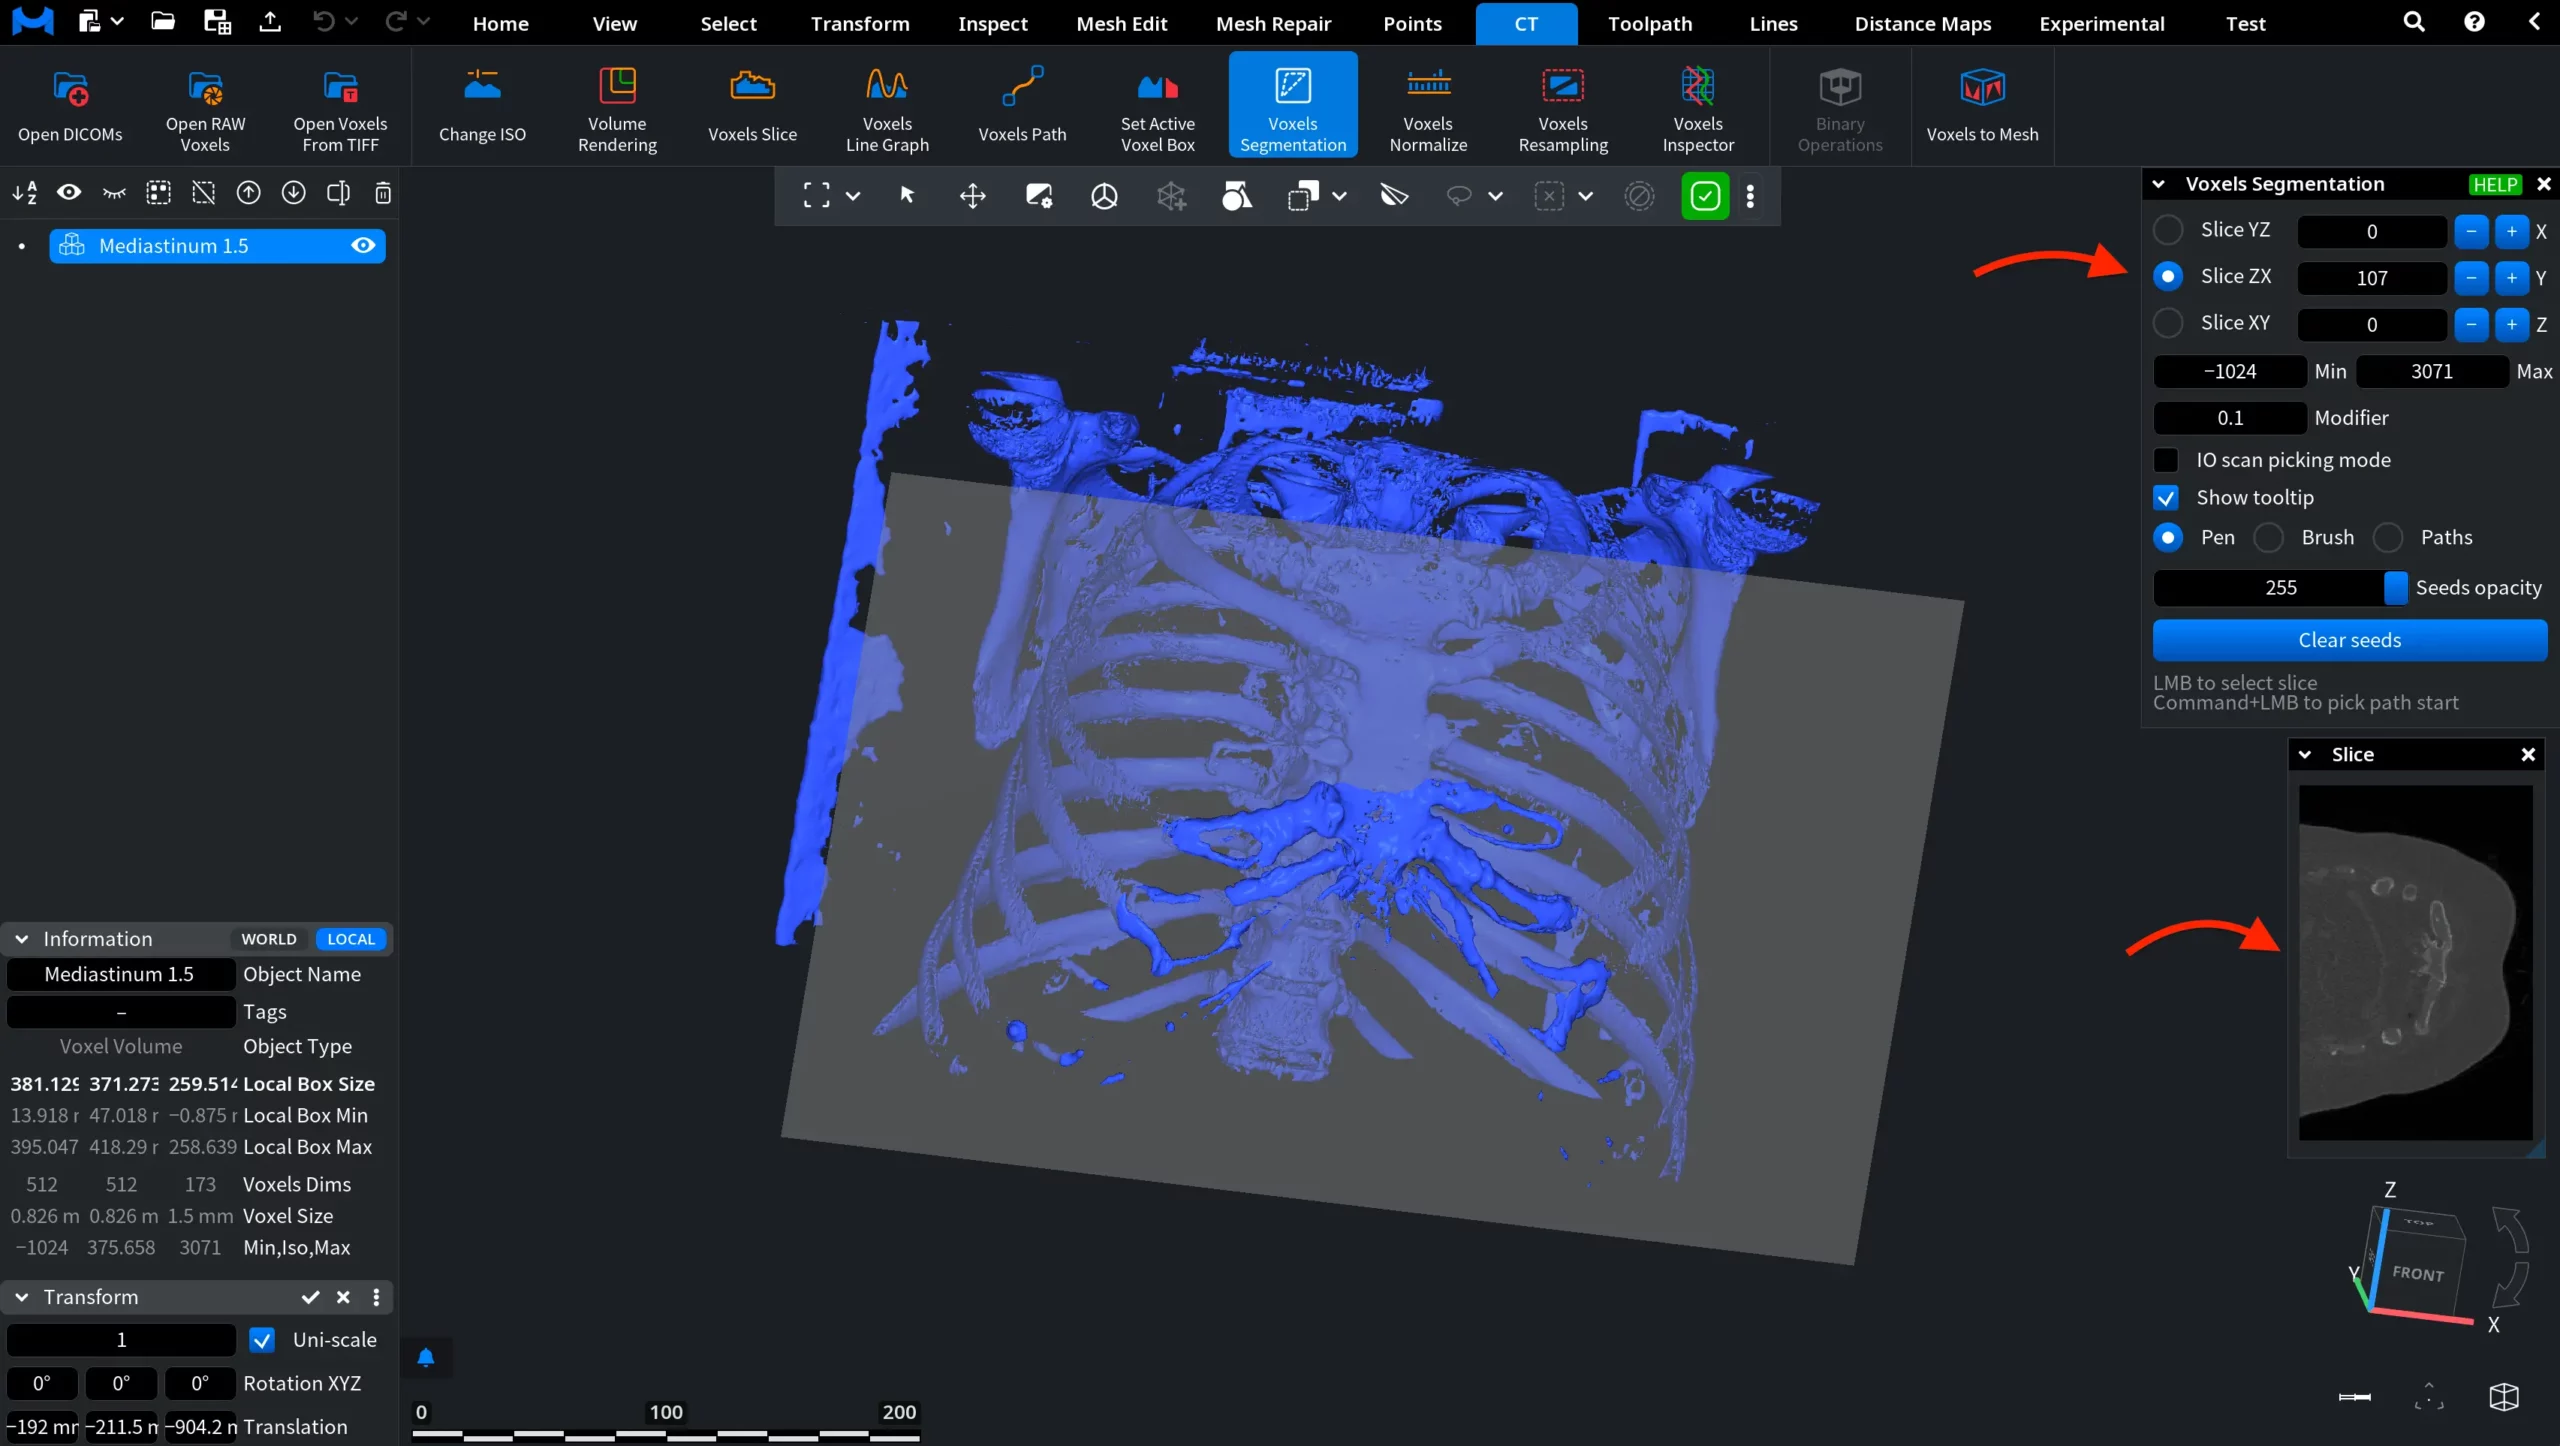
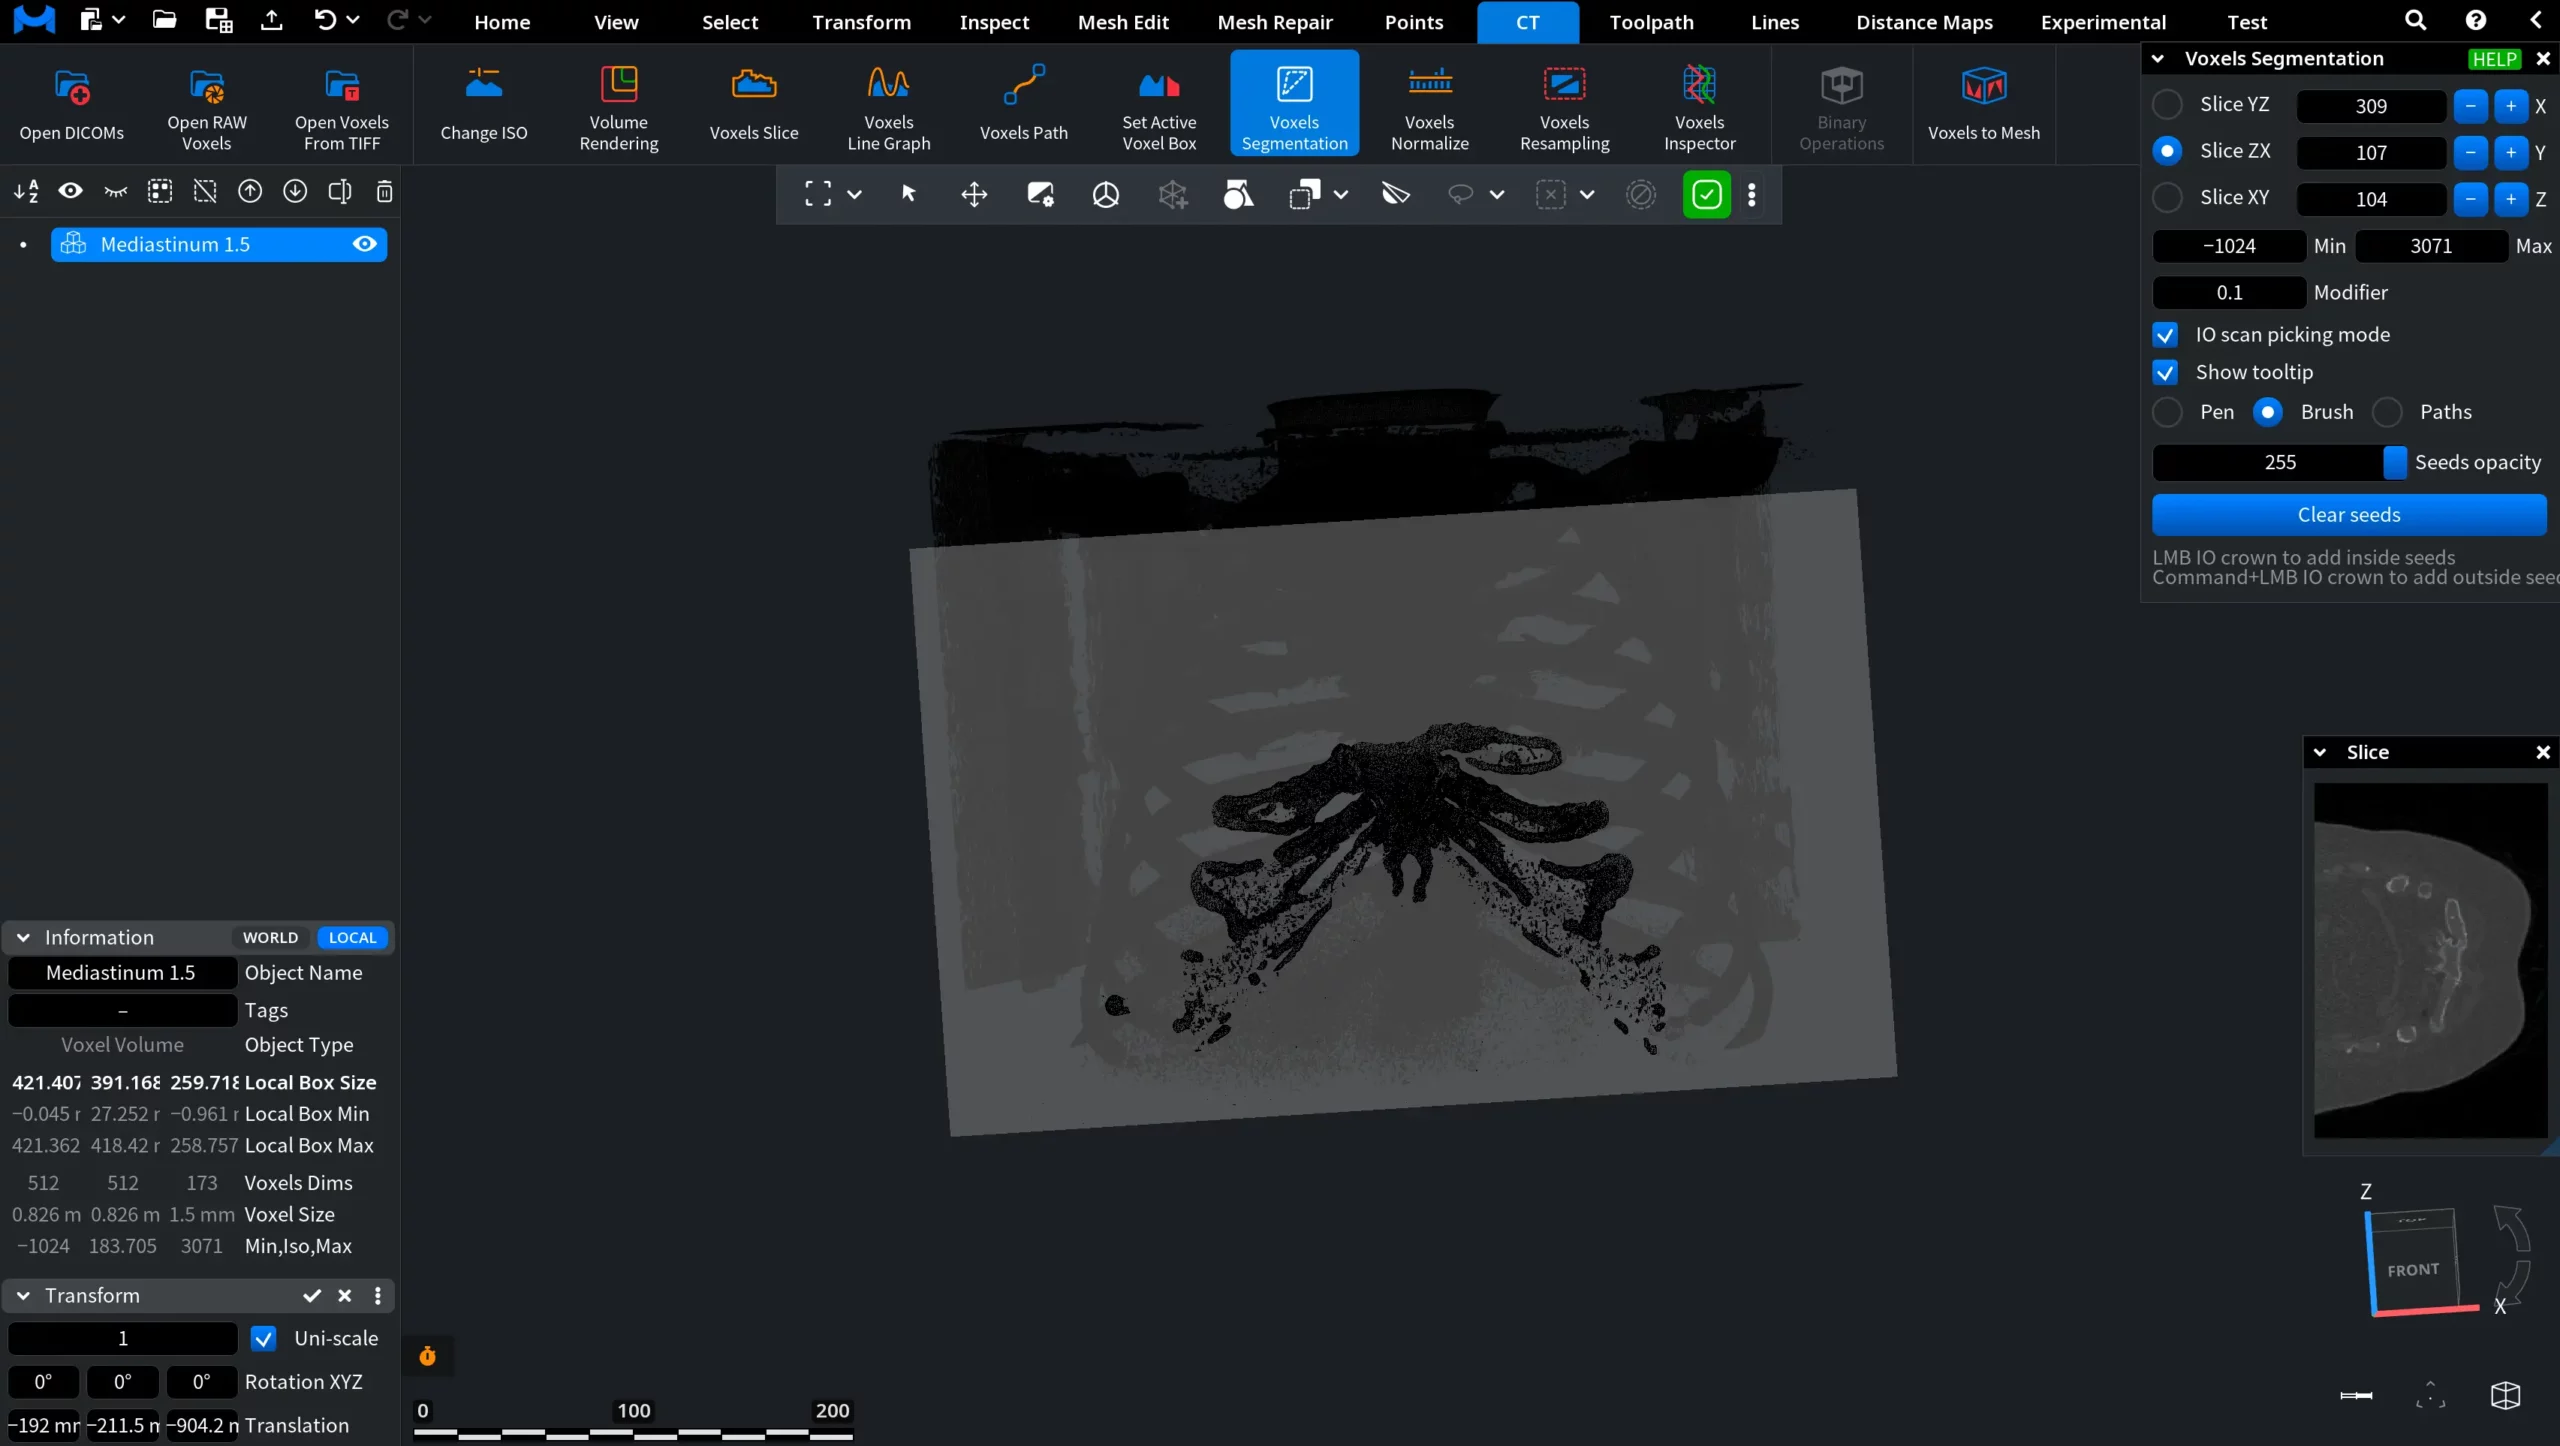
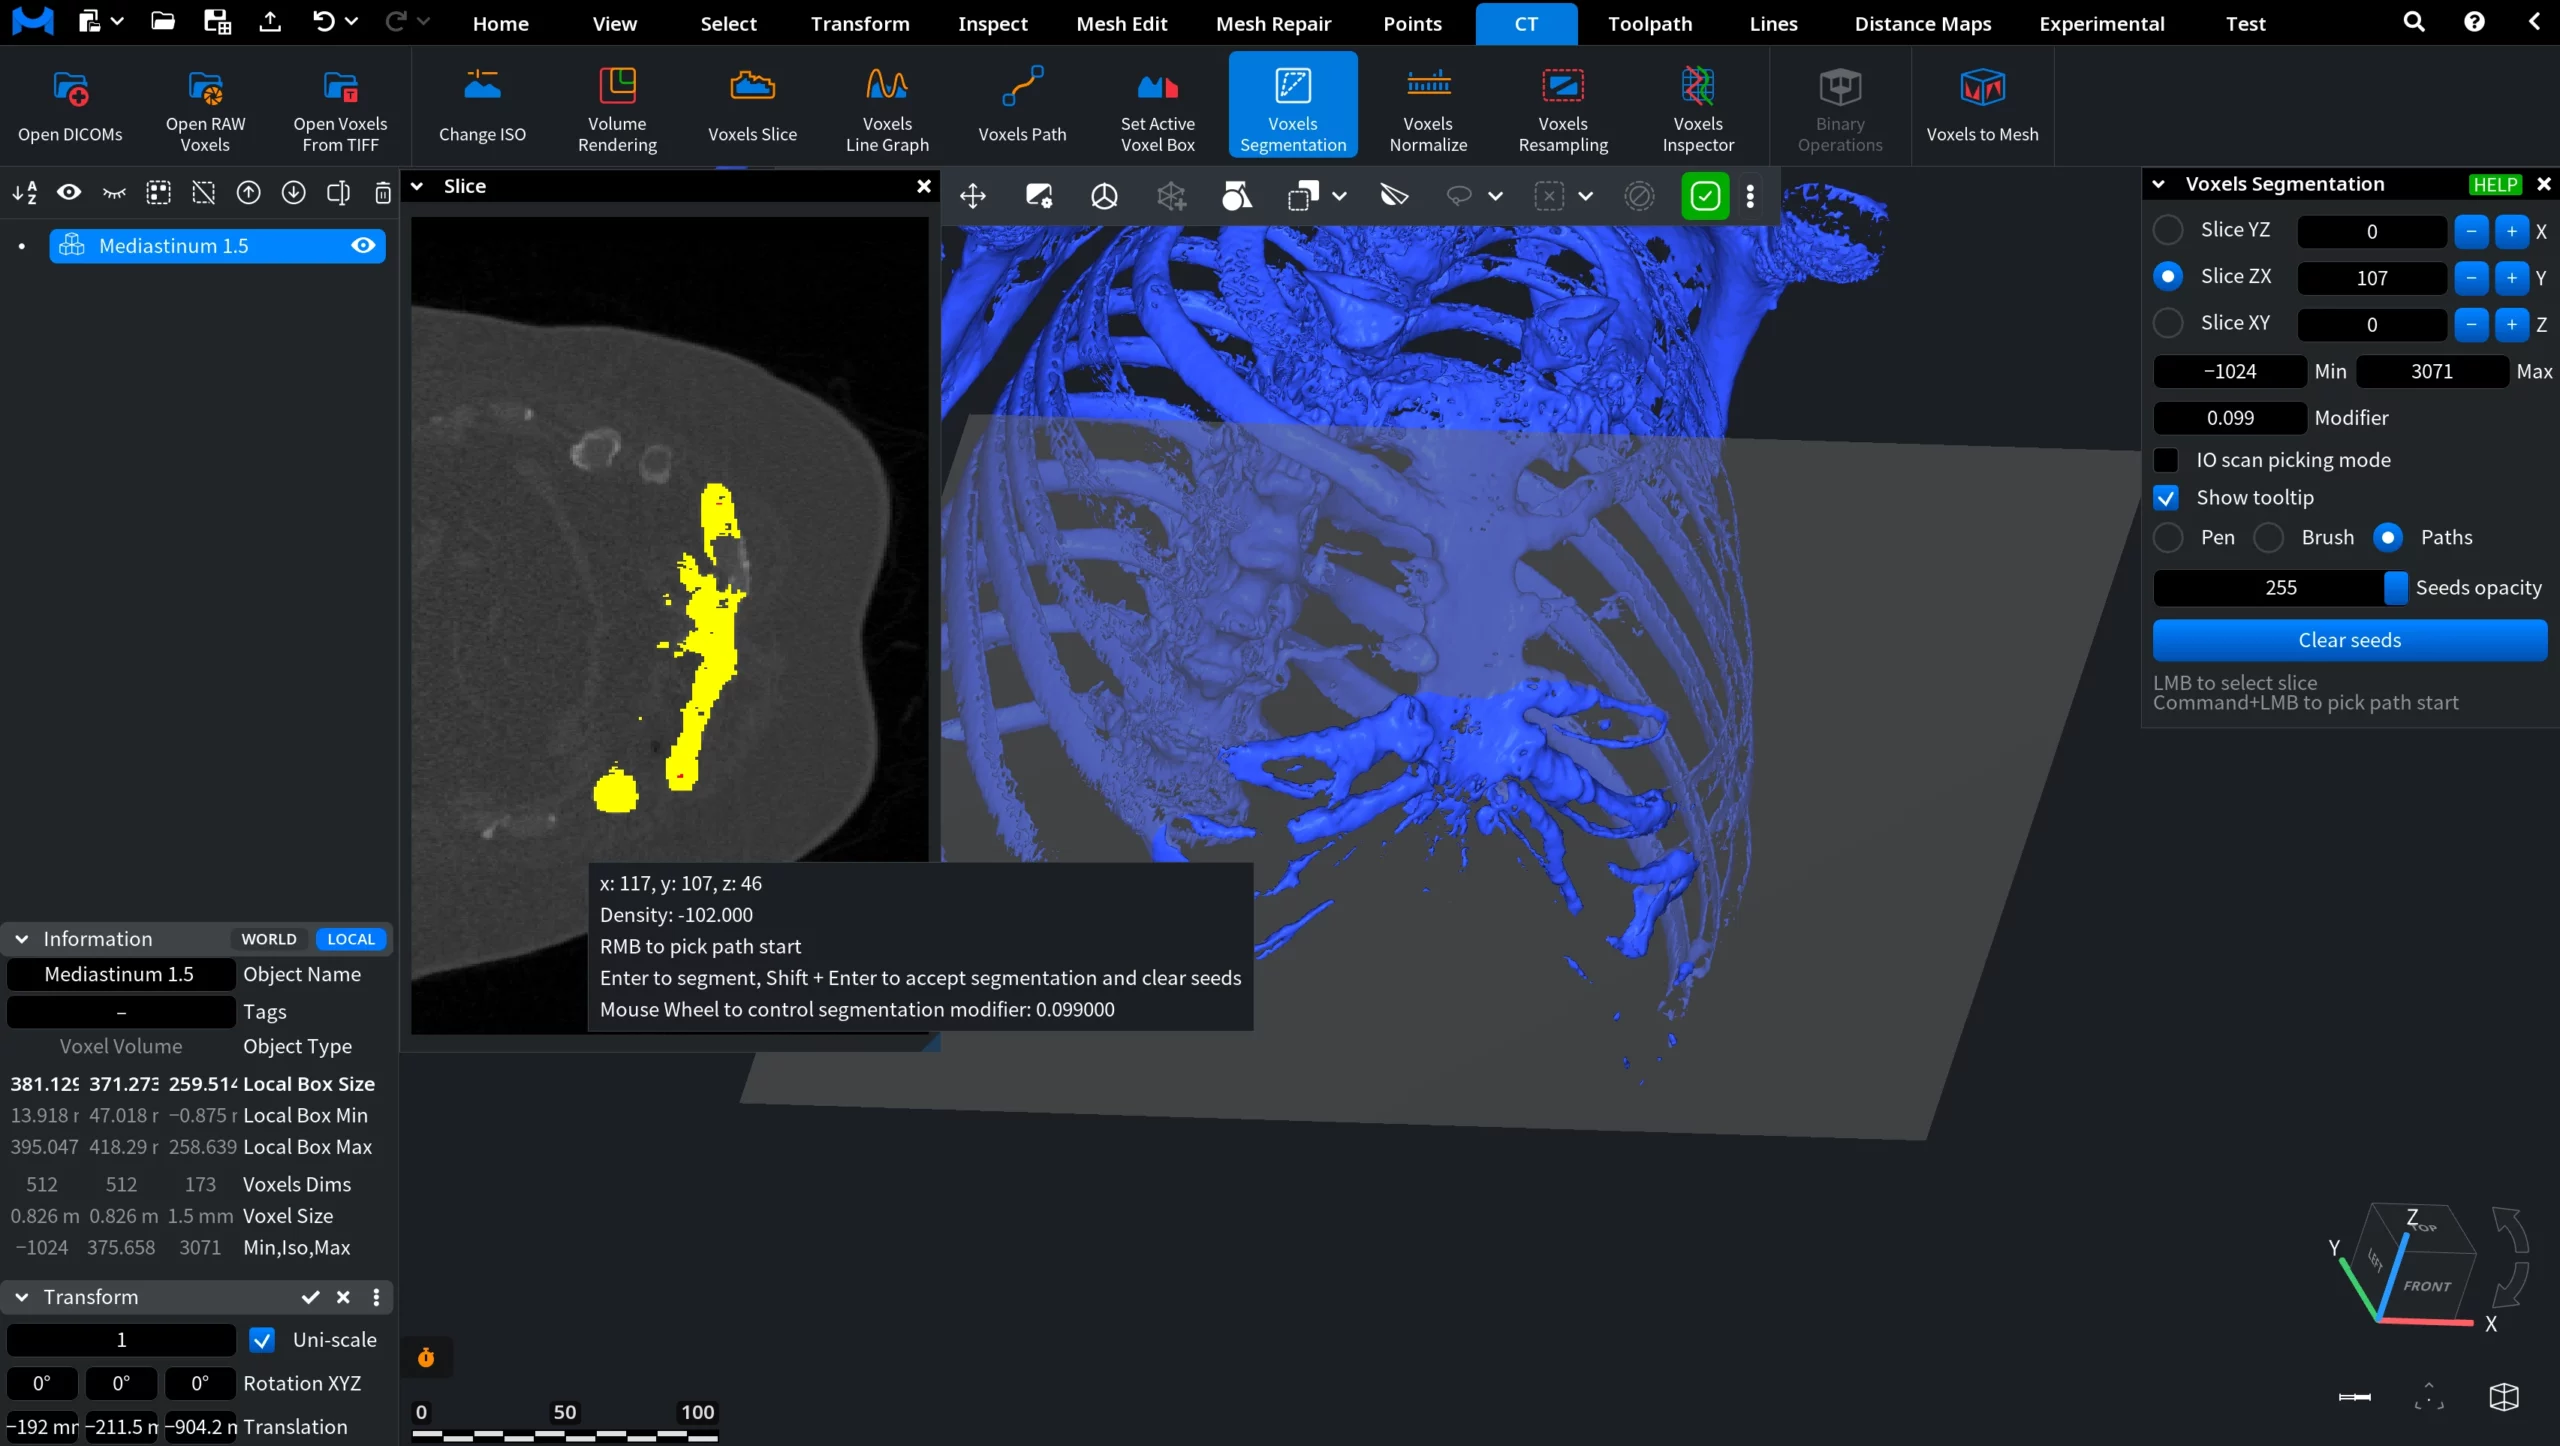
Once Voxels Segmentation is activated, several elements appear in the interface:
- First, a dedicated Voxels Segmentation settings panel opens. It contains the controls used to define and refine the segmentation process.
- At the same time, a Slice view appears within the tool panel. This view displays the currently selected CT slice. As such, it helps users identify structures and intensity ranges when creating segmentation seeds.
- In addition, a slice plane appears in the viewport. It represents the currently active slice of the voxel volume and corresponds to the slice displayed in the slice view. It can be moved through the volume to examine different cross-sections of the dataset and guide the segmentation process.
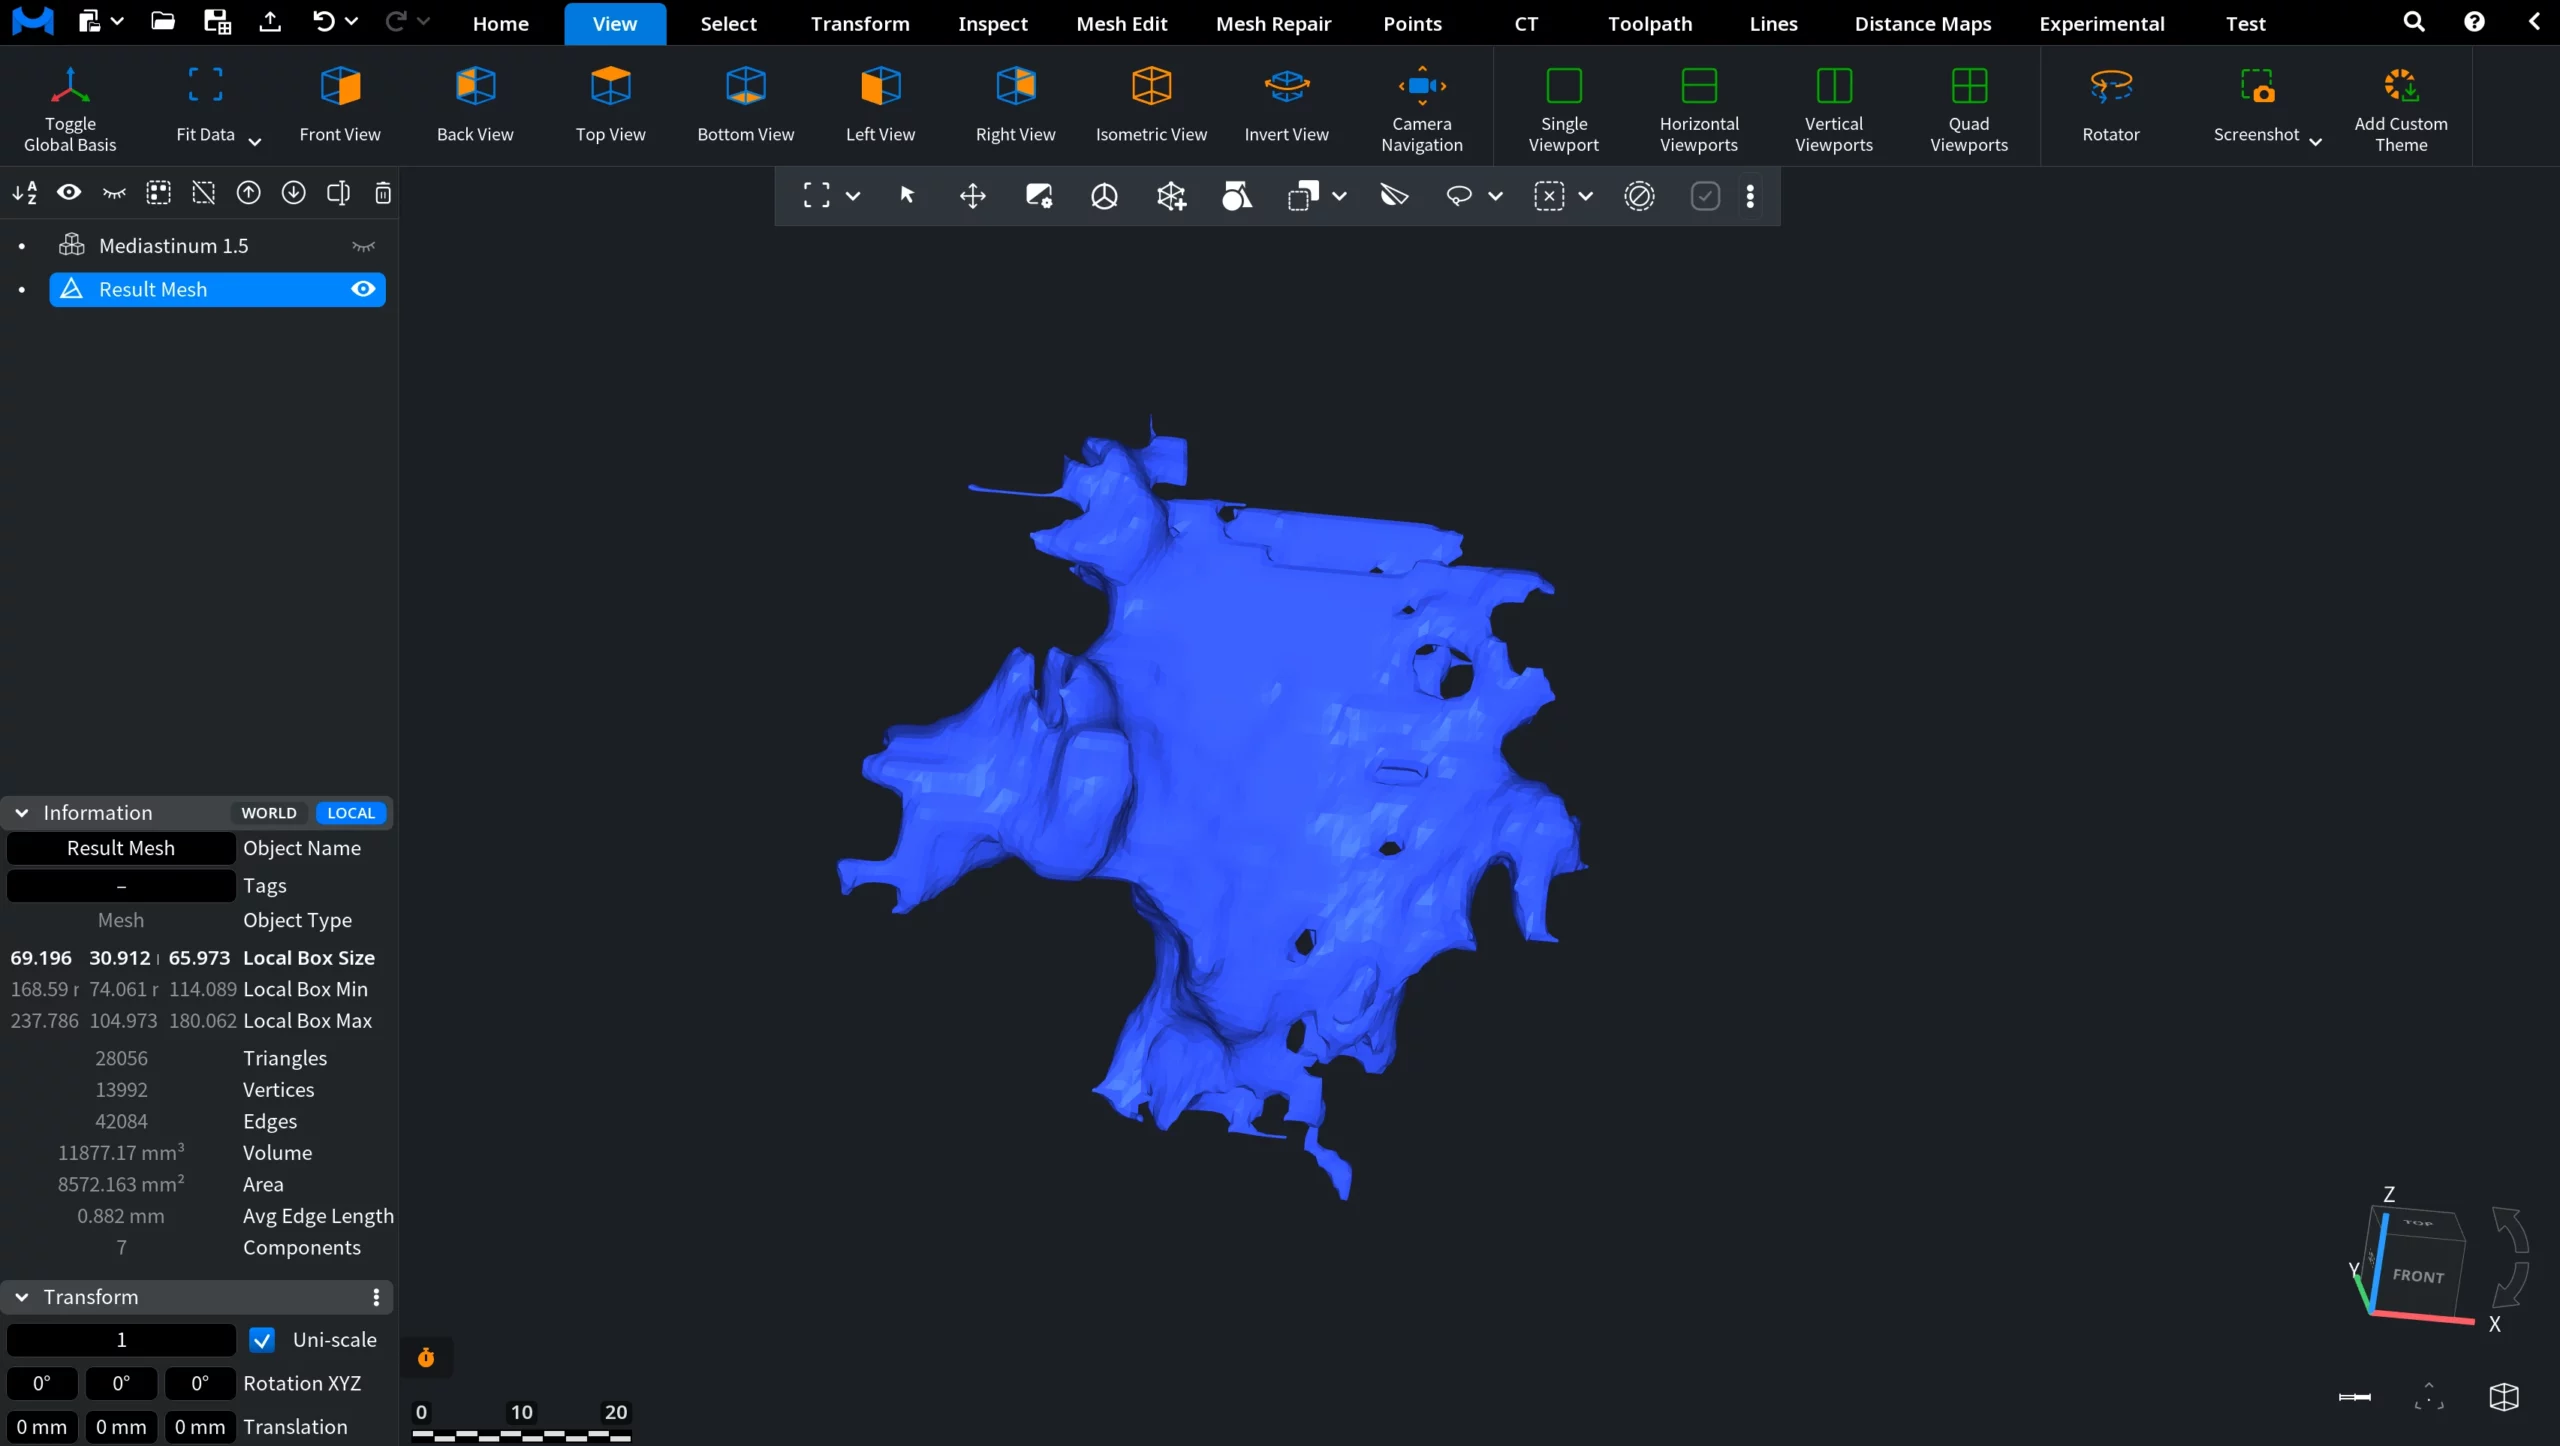
In this example, we will segment the anterior part of the volume (the front region in anatomical terms). To define and inspect this region, the ZX slice is used. This slice orientation allows you to traverse the volume along the front-to-back direction (Y axis) and accurately position the slice plane within the anterior region of interest.
Voxels Segmentation: Settings and Controls
Slice
The Slice controls determine which cross-section of the voxel volume is currently active. The slice defines the plane displayed both in the main viewport and in the Slice view panel.
Three slice orientations are available:
- Slice YZ displays a slice aligned with the YZ plane. The slice moves along the X axis, revealing cross-sections of the dataset from left to right.
- Slice ZX displays a slice aligned with the ZX plane. The slice moves along the Y axis, allowing users to inspect the dataset from front to back.
- Slice XY displays a slice aligned with the XY plane. The slice moves along the Z axis, producing horizontal cross-sections of the voxel volume.
The slice position can be adjusted in several ways:
- Entering a value manually in the slice field;
- Dragging the value to scroll through slices;
- Using the + and – buttons to move to the next or previous slice;
- Left-clicking on the voxel object in the viewport to jump to the slice at the clicked location, based on the selected Slice orientation.
Only one Slice can be activated at a time.
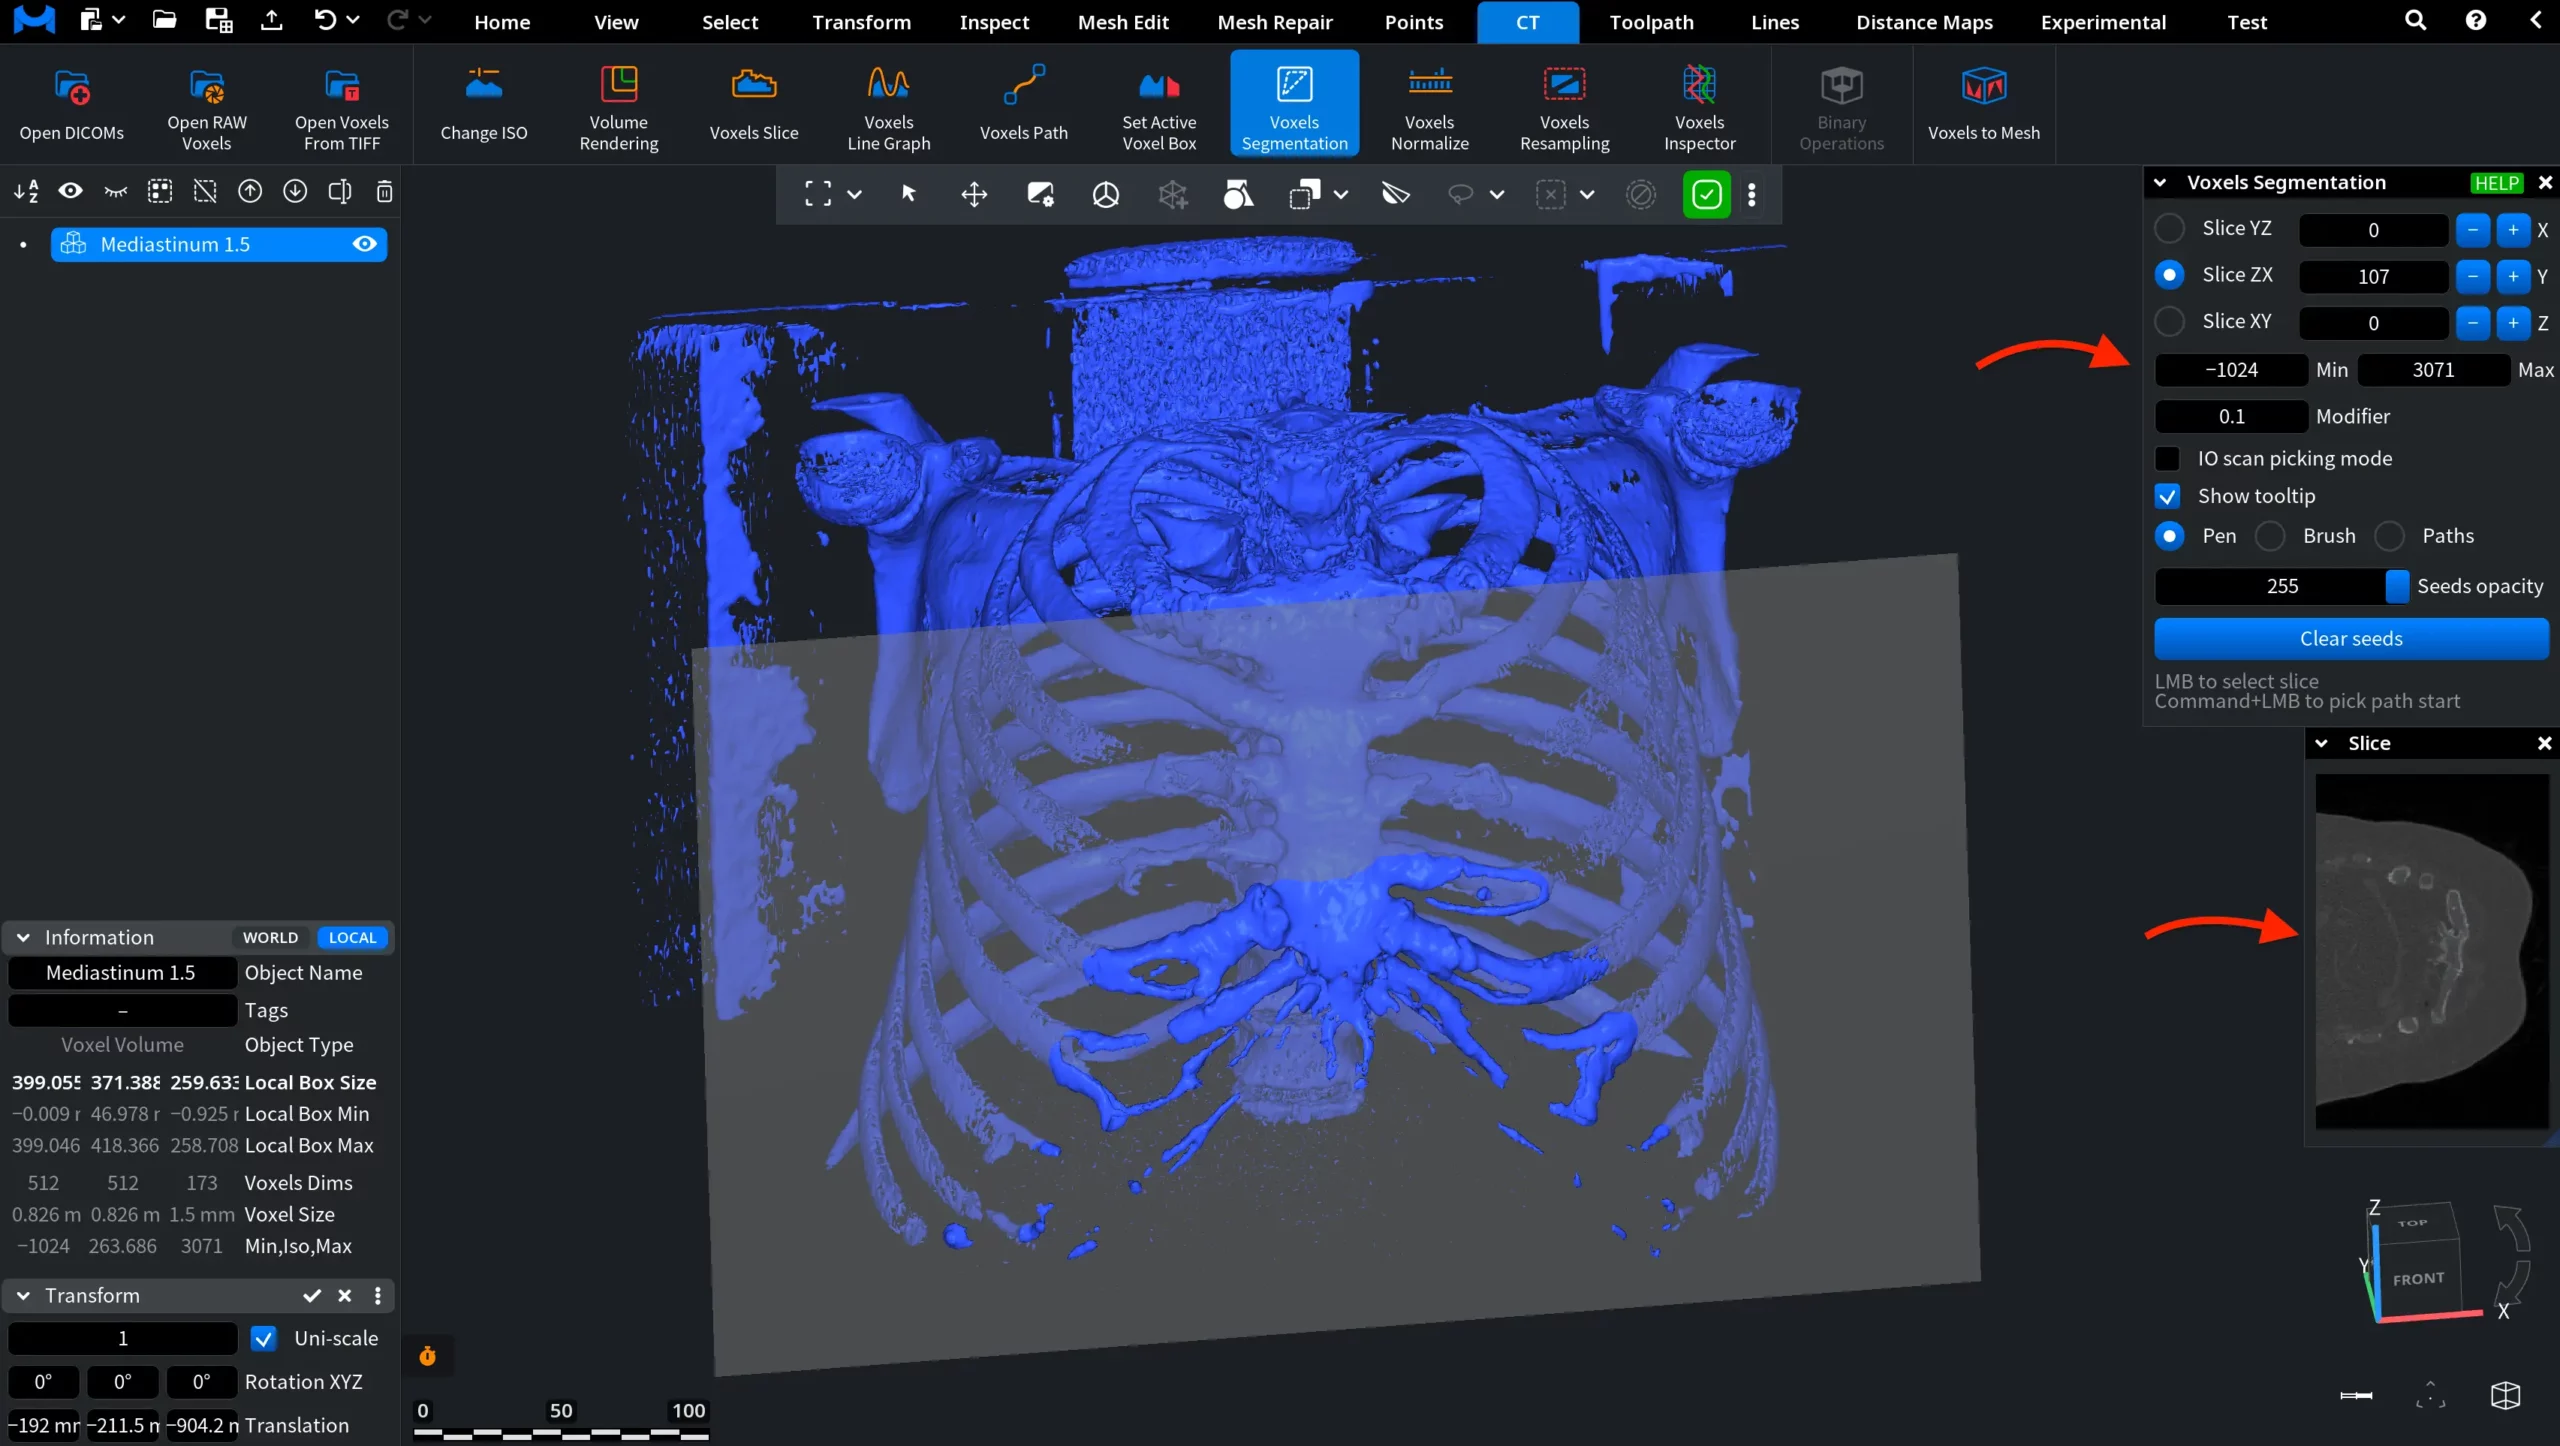
Min and Max
The Min and Max parameters define the voxel intensity range used for segmentation picking. Only voxels whose intensity values fall within this range are considered during segmentation picking.
Adjusting this range helps focus the segmentation on structures with specific density values in the CT dataset.
- Min defines the lower intensity threshold. Voxels with intensity values below this limit are excluded from seed picking. Increasing the Min value excludes low-density regions, like air or background.
- Max defines the upper intensity threshold. Voxels with intensity values above this limit are ignored during seed placement. Lowering the Max value suppresses very dense structures.
Together, Min and Max create an intensity window that restricts which voxels can be used during the segmentation process.
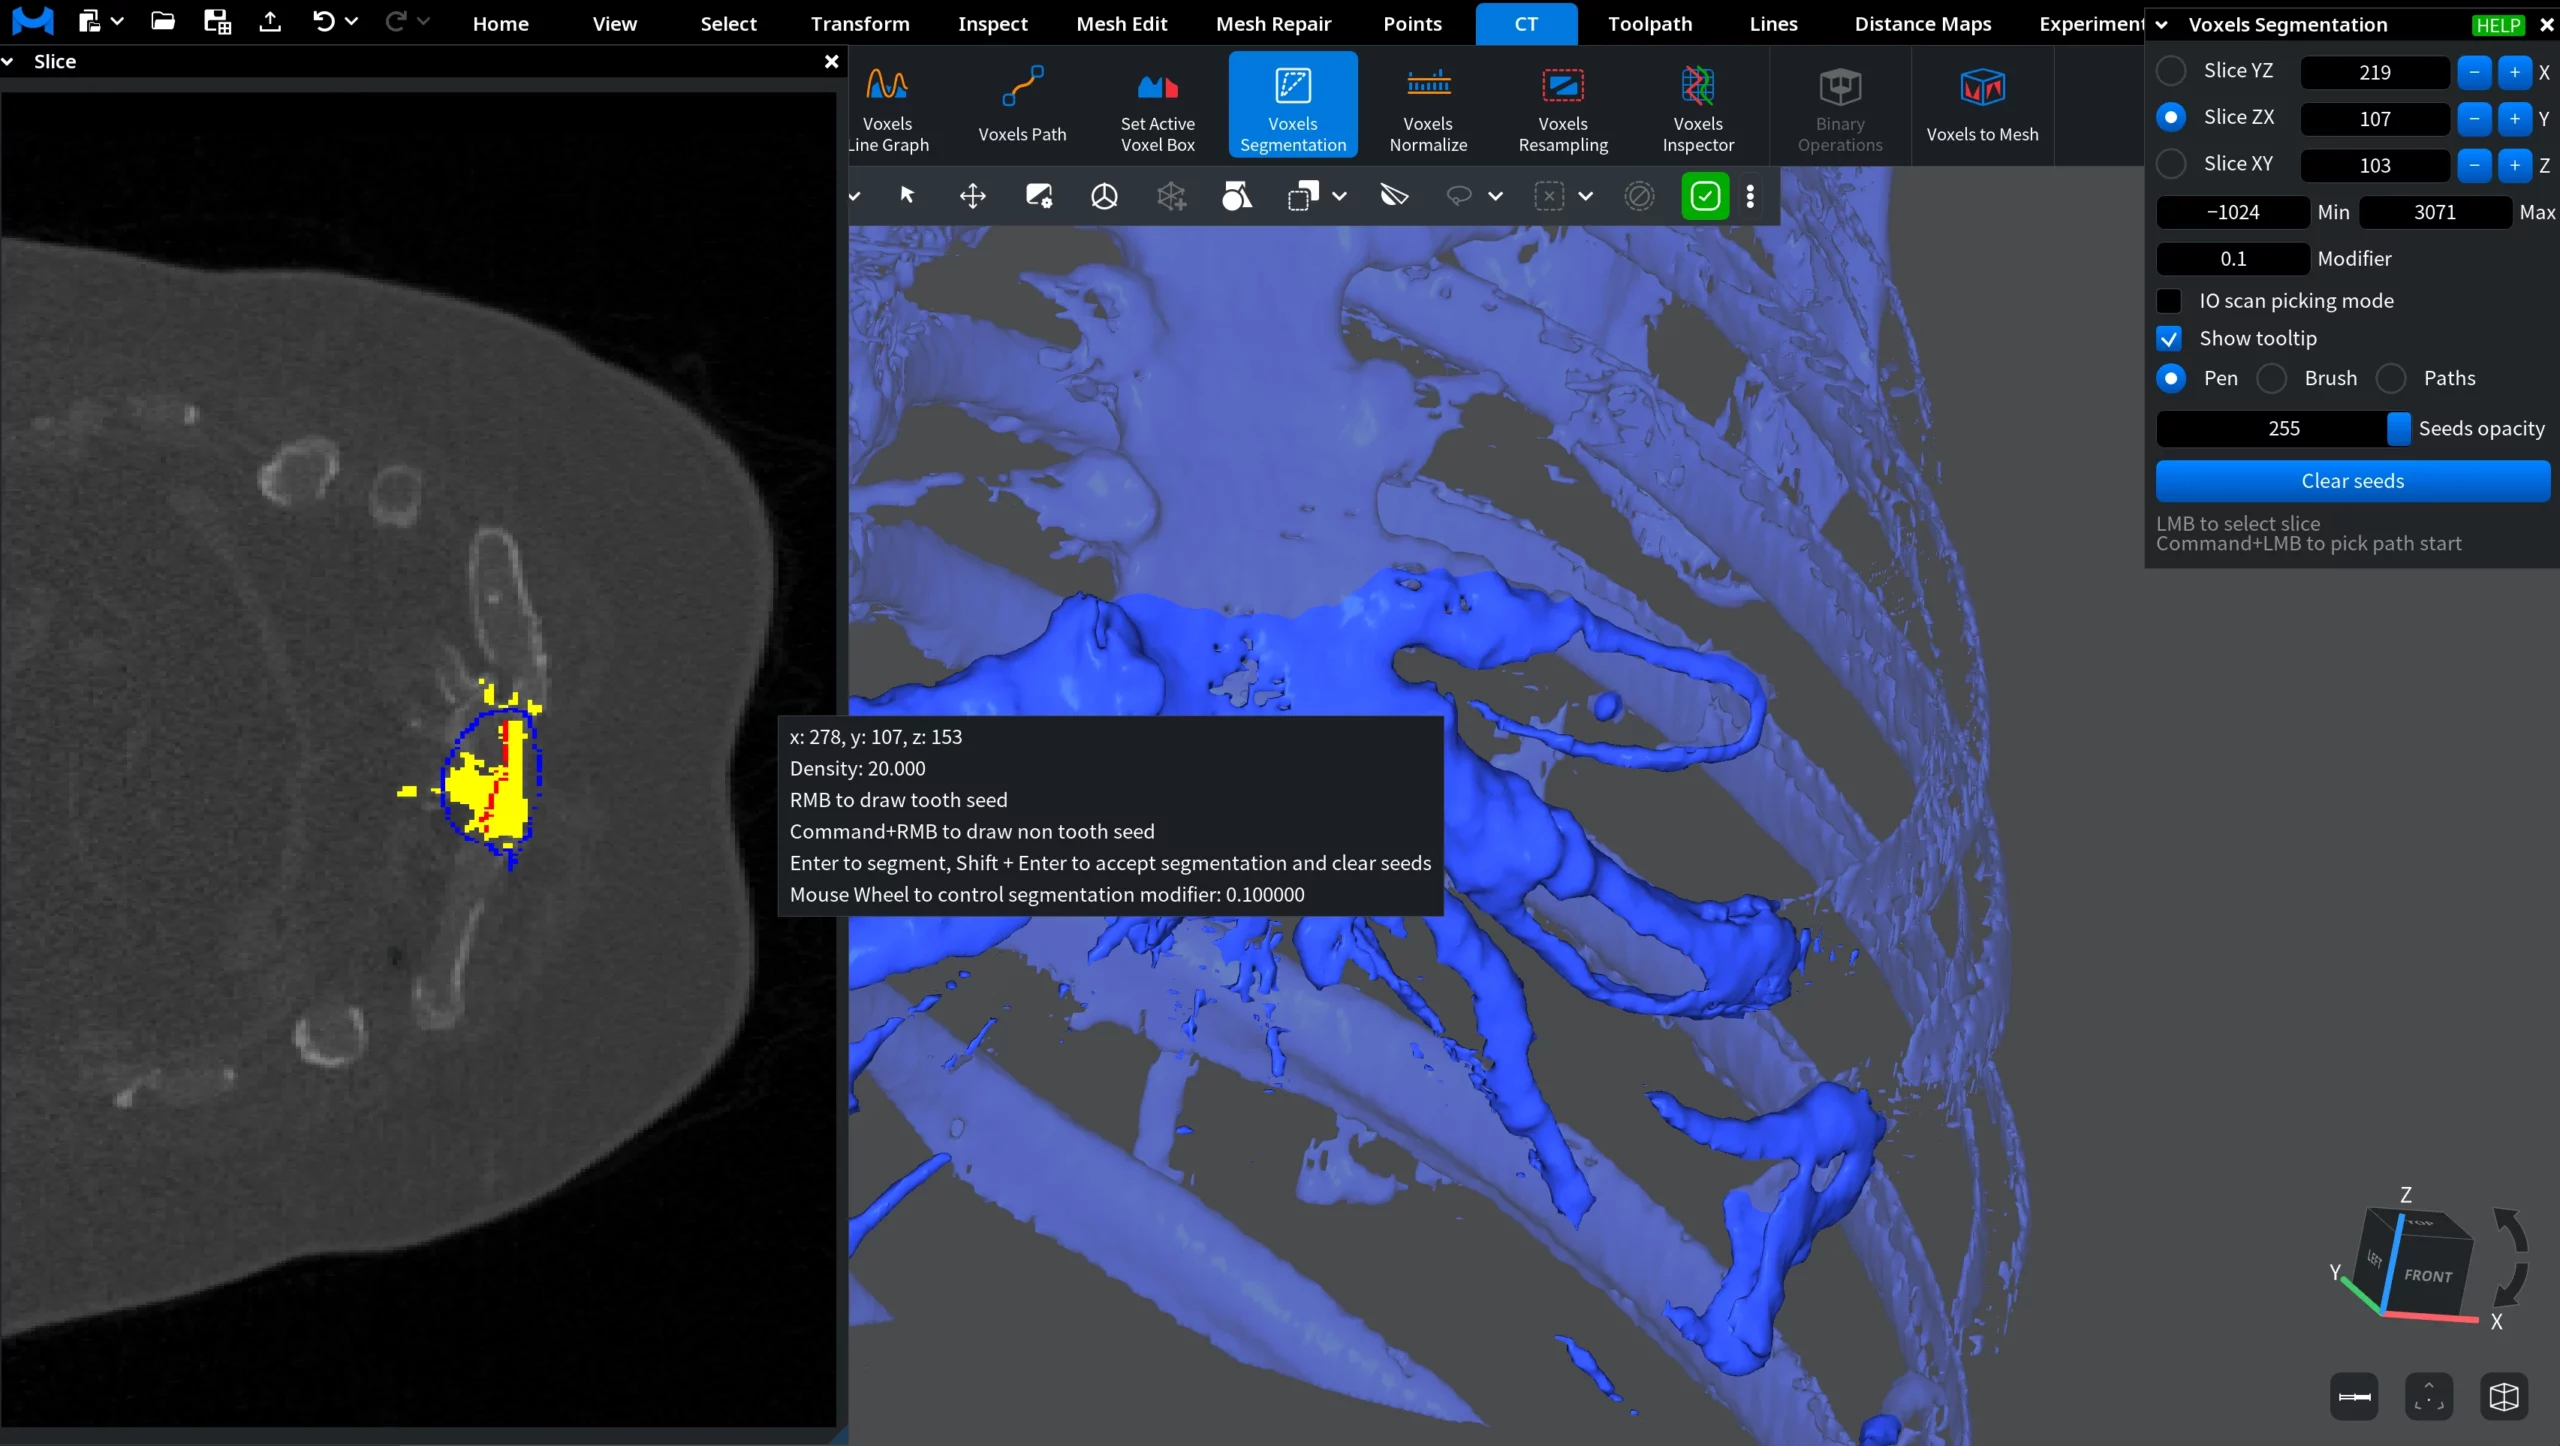
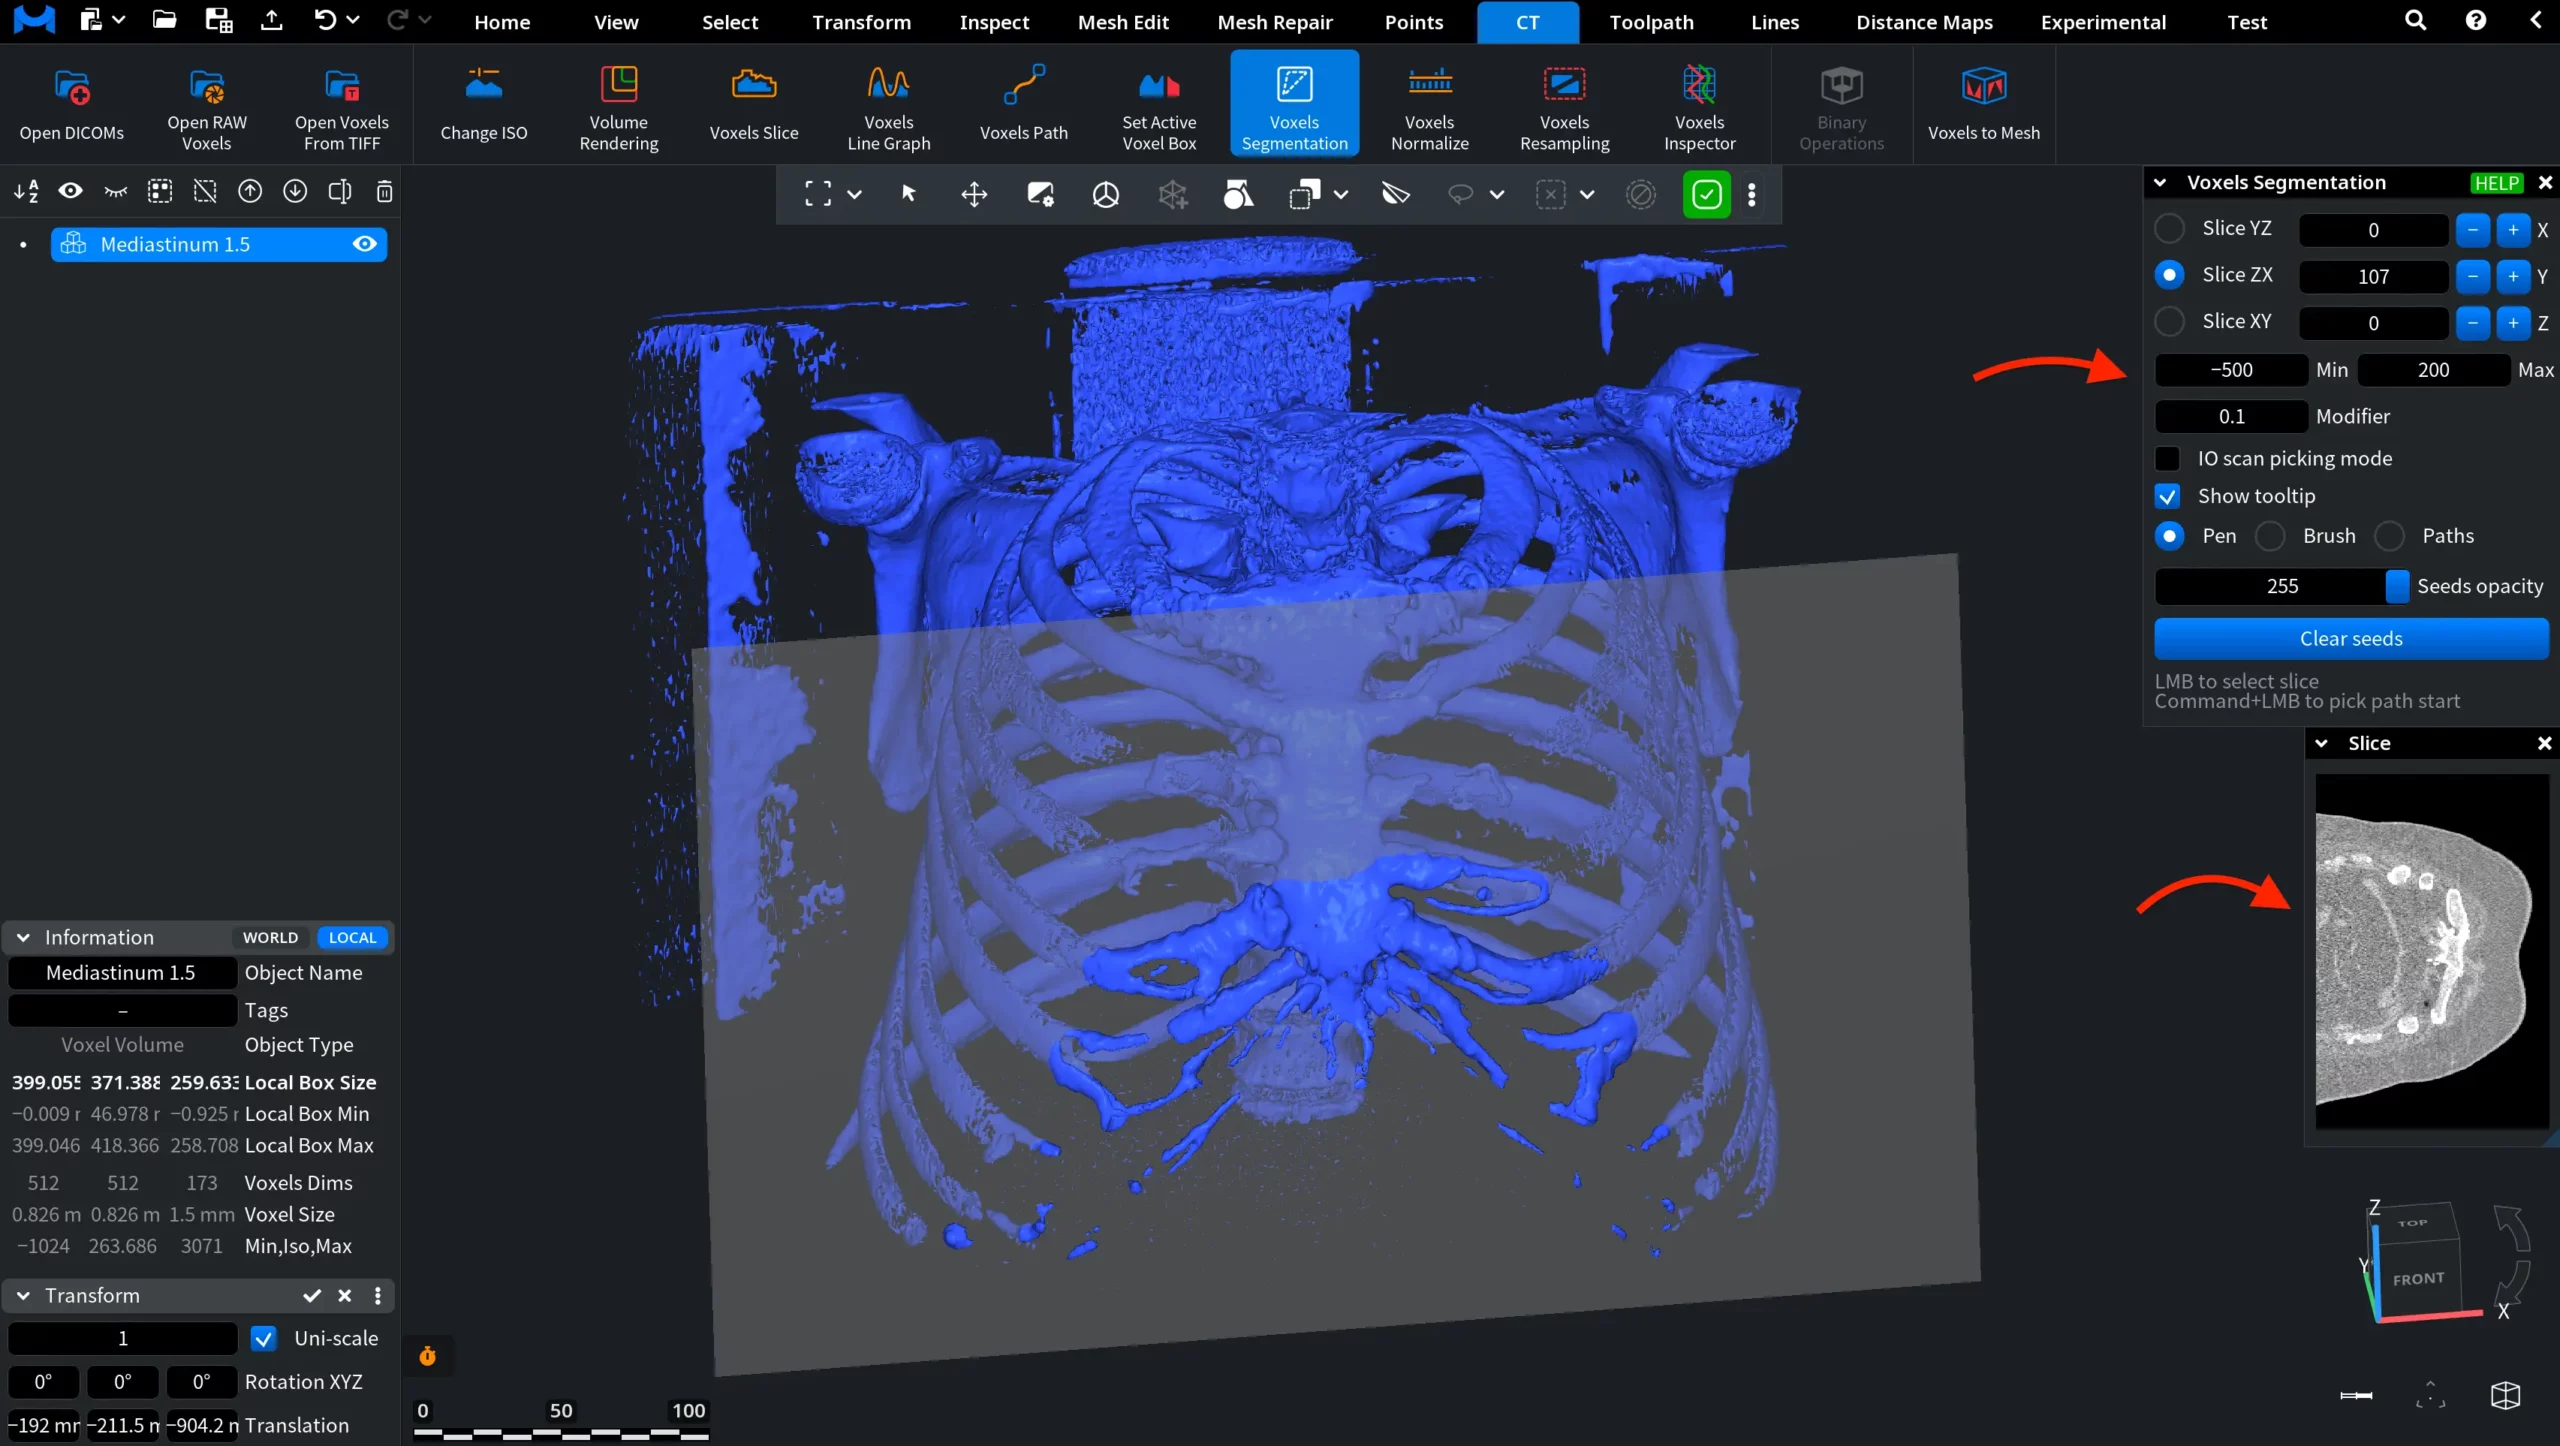
In this example, the Min and Max values are set to a narrow intensity window (−500 to 200), focusing on mid-density values in the CT dataset. As a result, the Slice view emphasizes soft tissues and other mid-density structures.
Modifier
Modifier controls how the segmentation expands from the placed seeds. As such, it influences how the segmentation algorithm groups neighboring voxels around the seed points. A lower Modifier value makes the segmentation more restrictive. A higher Modifier value makes the segmentation more tolerant.
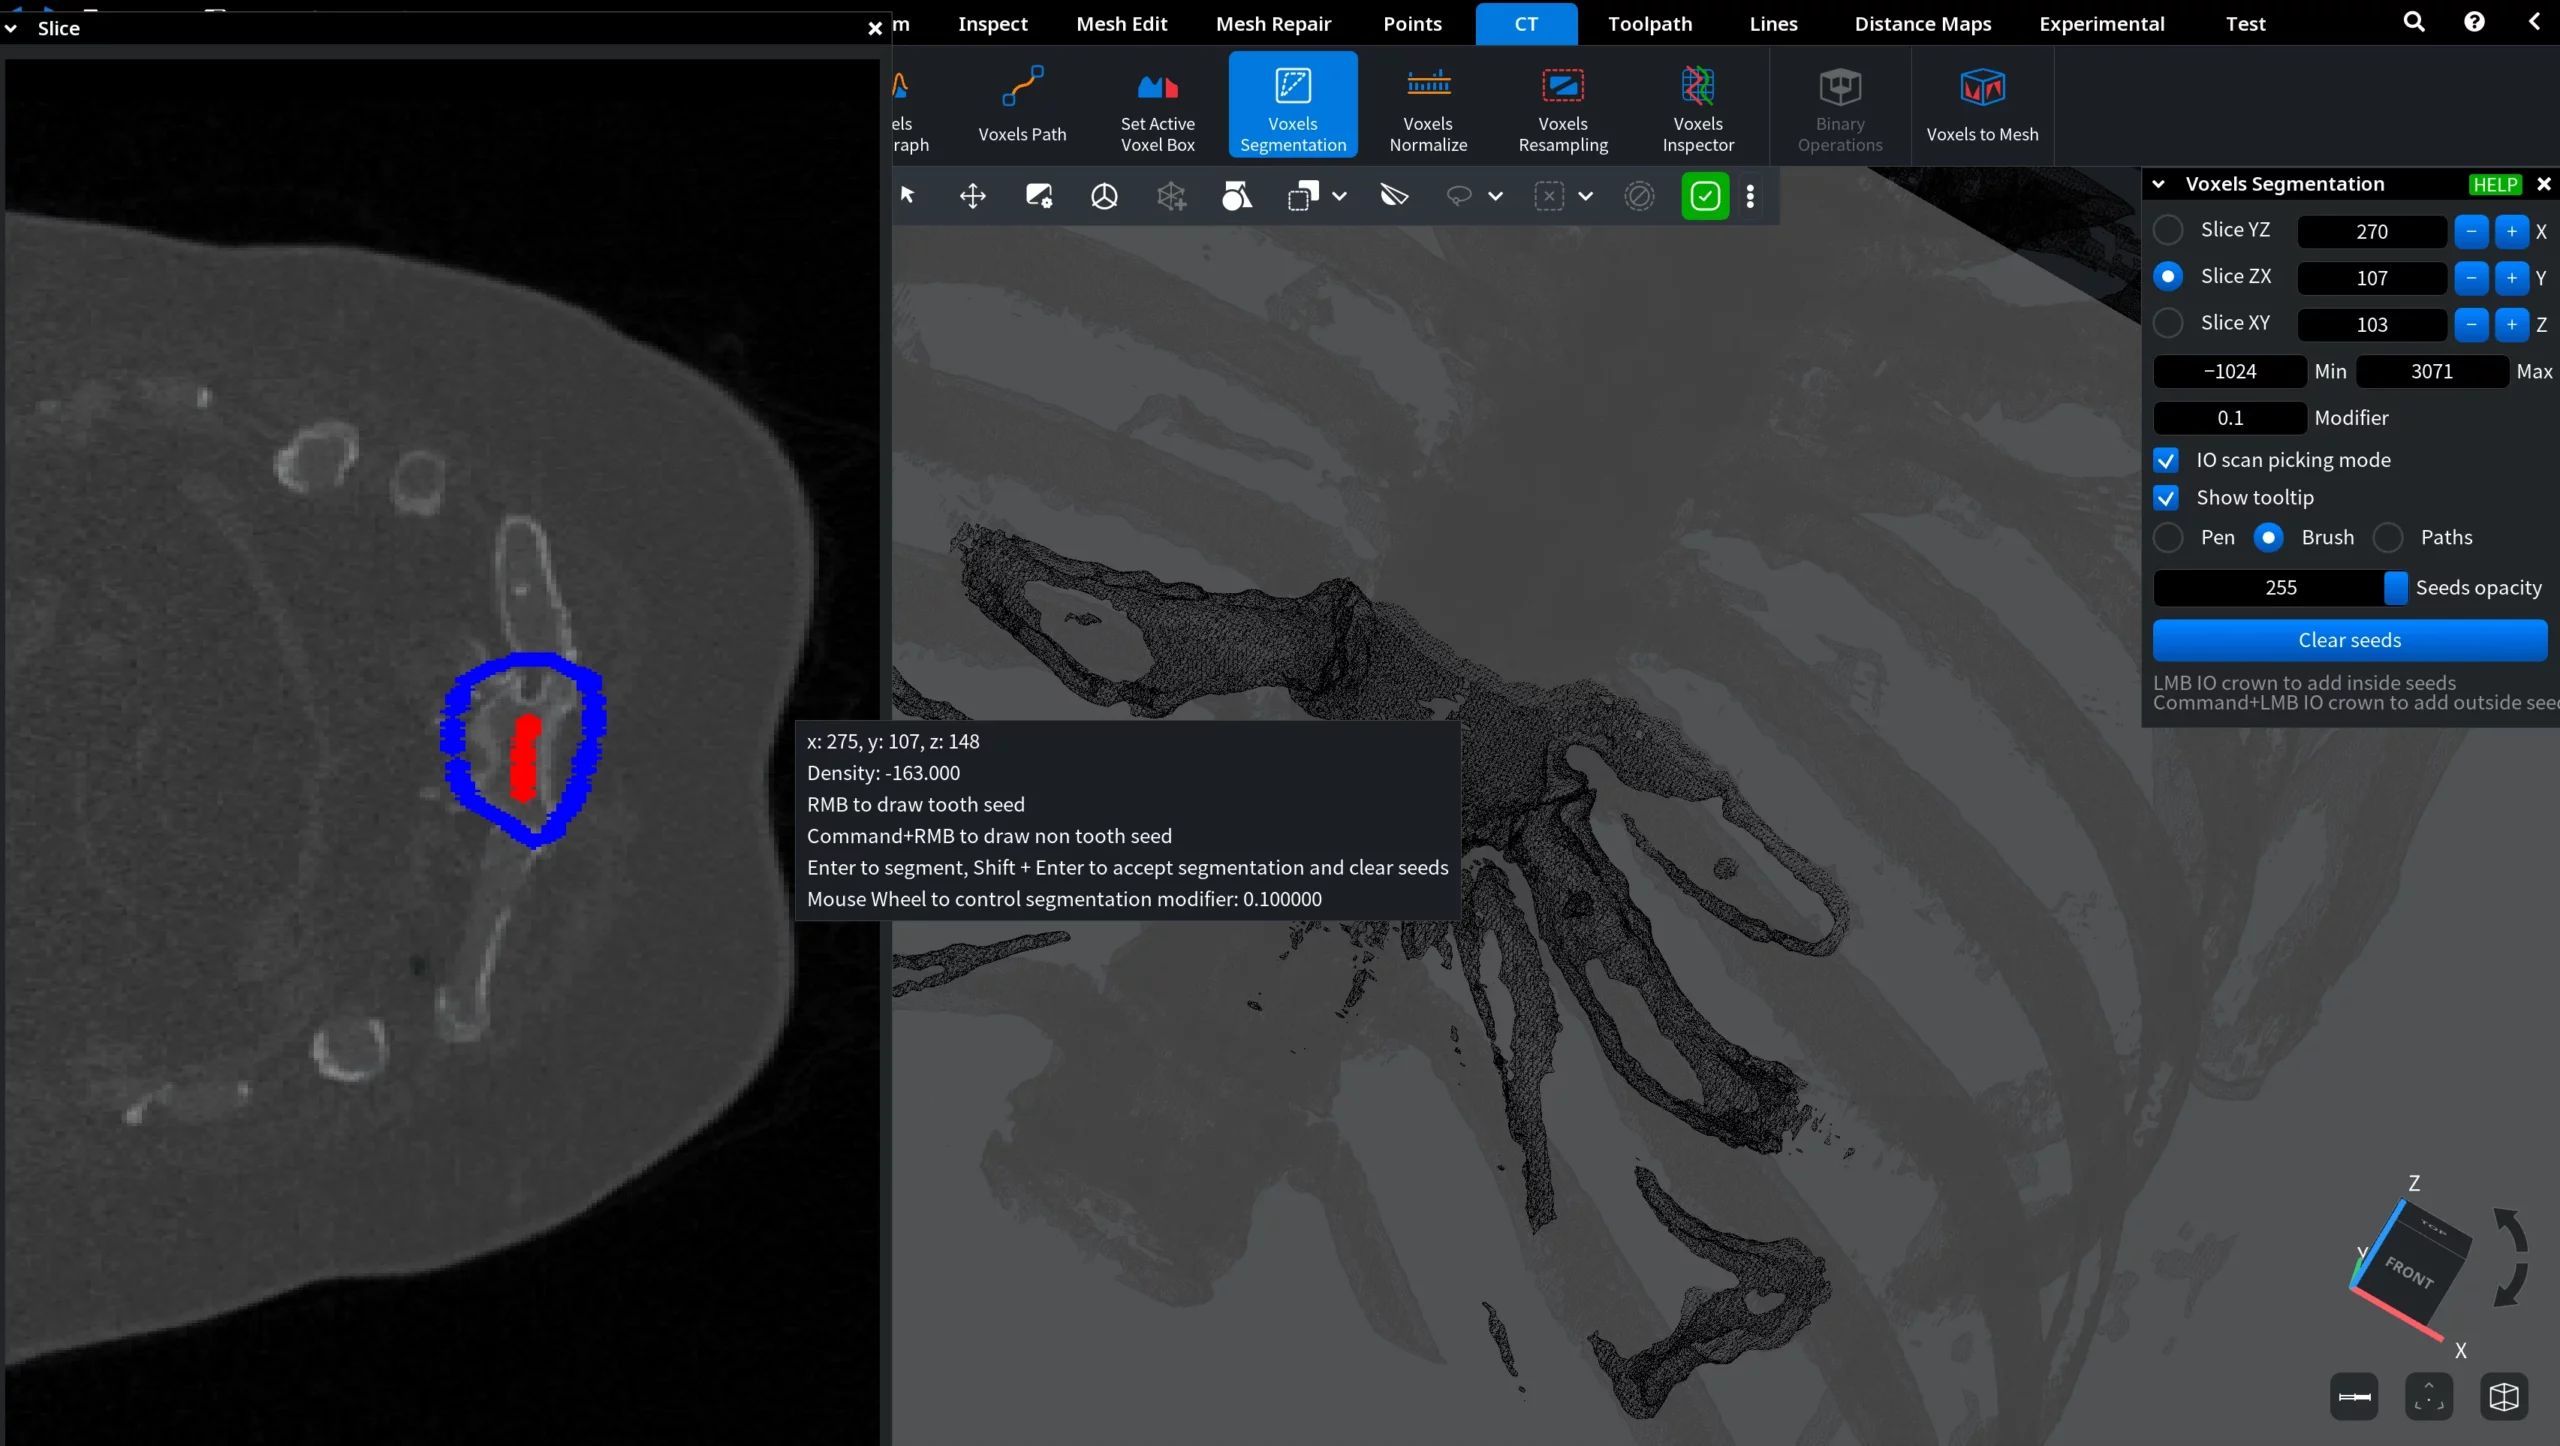
IO Scan Picking Mode
IO Scan Picking Mode (Inside/Outside) controls how strictly segmentation follows user-defined seeds. When enabled, segmentation is constrained by inside and outside seeds, producing a more localized and controlled result.
Show Tooltip
When enabled, Show Tooltip displays an informational tooltip when the cursor is placed over the Slice view during voxel segmentation. The tooltip shows voxel information (such as coordinates and density) and provides shortcuts and instructions for placing seeds and running the segmentation.
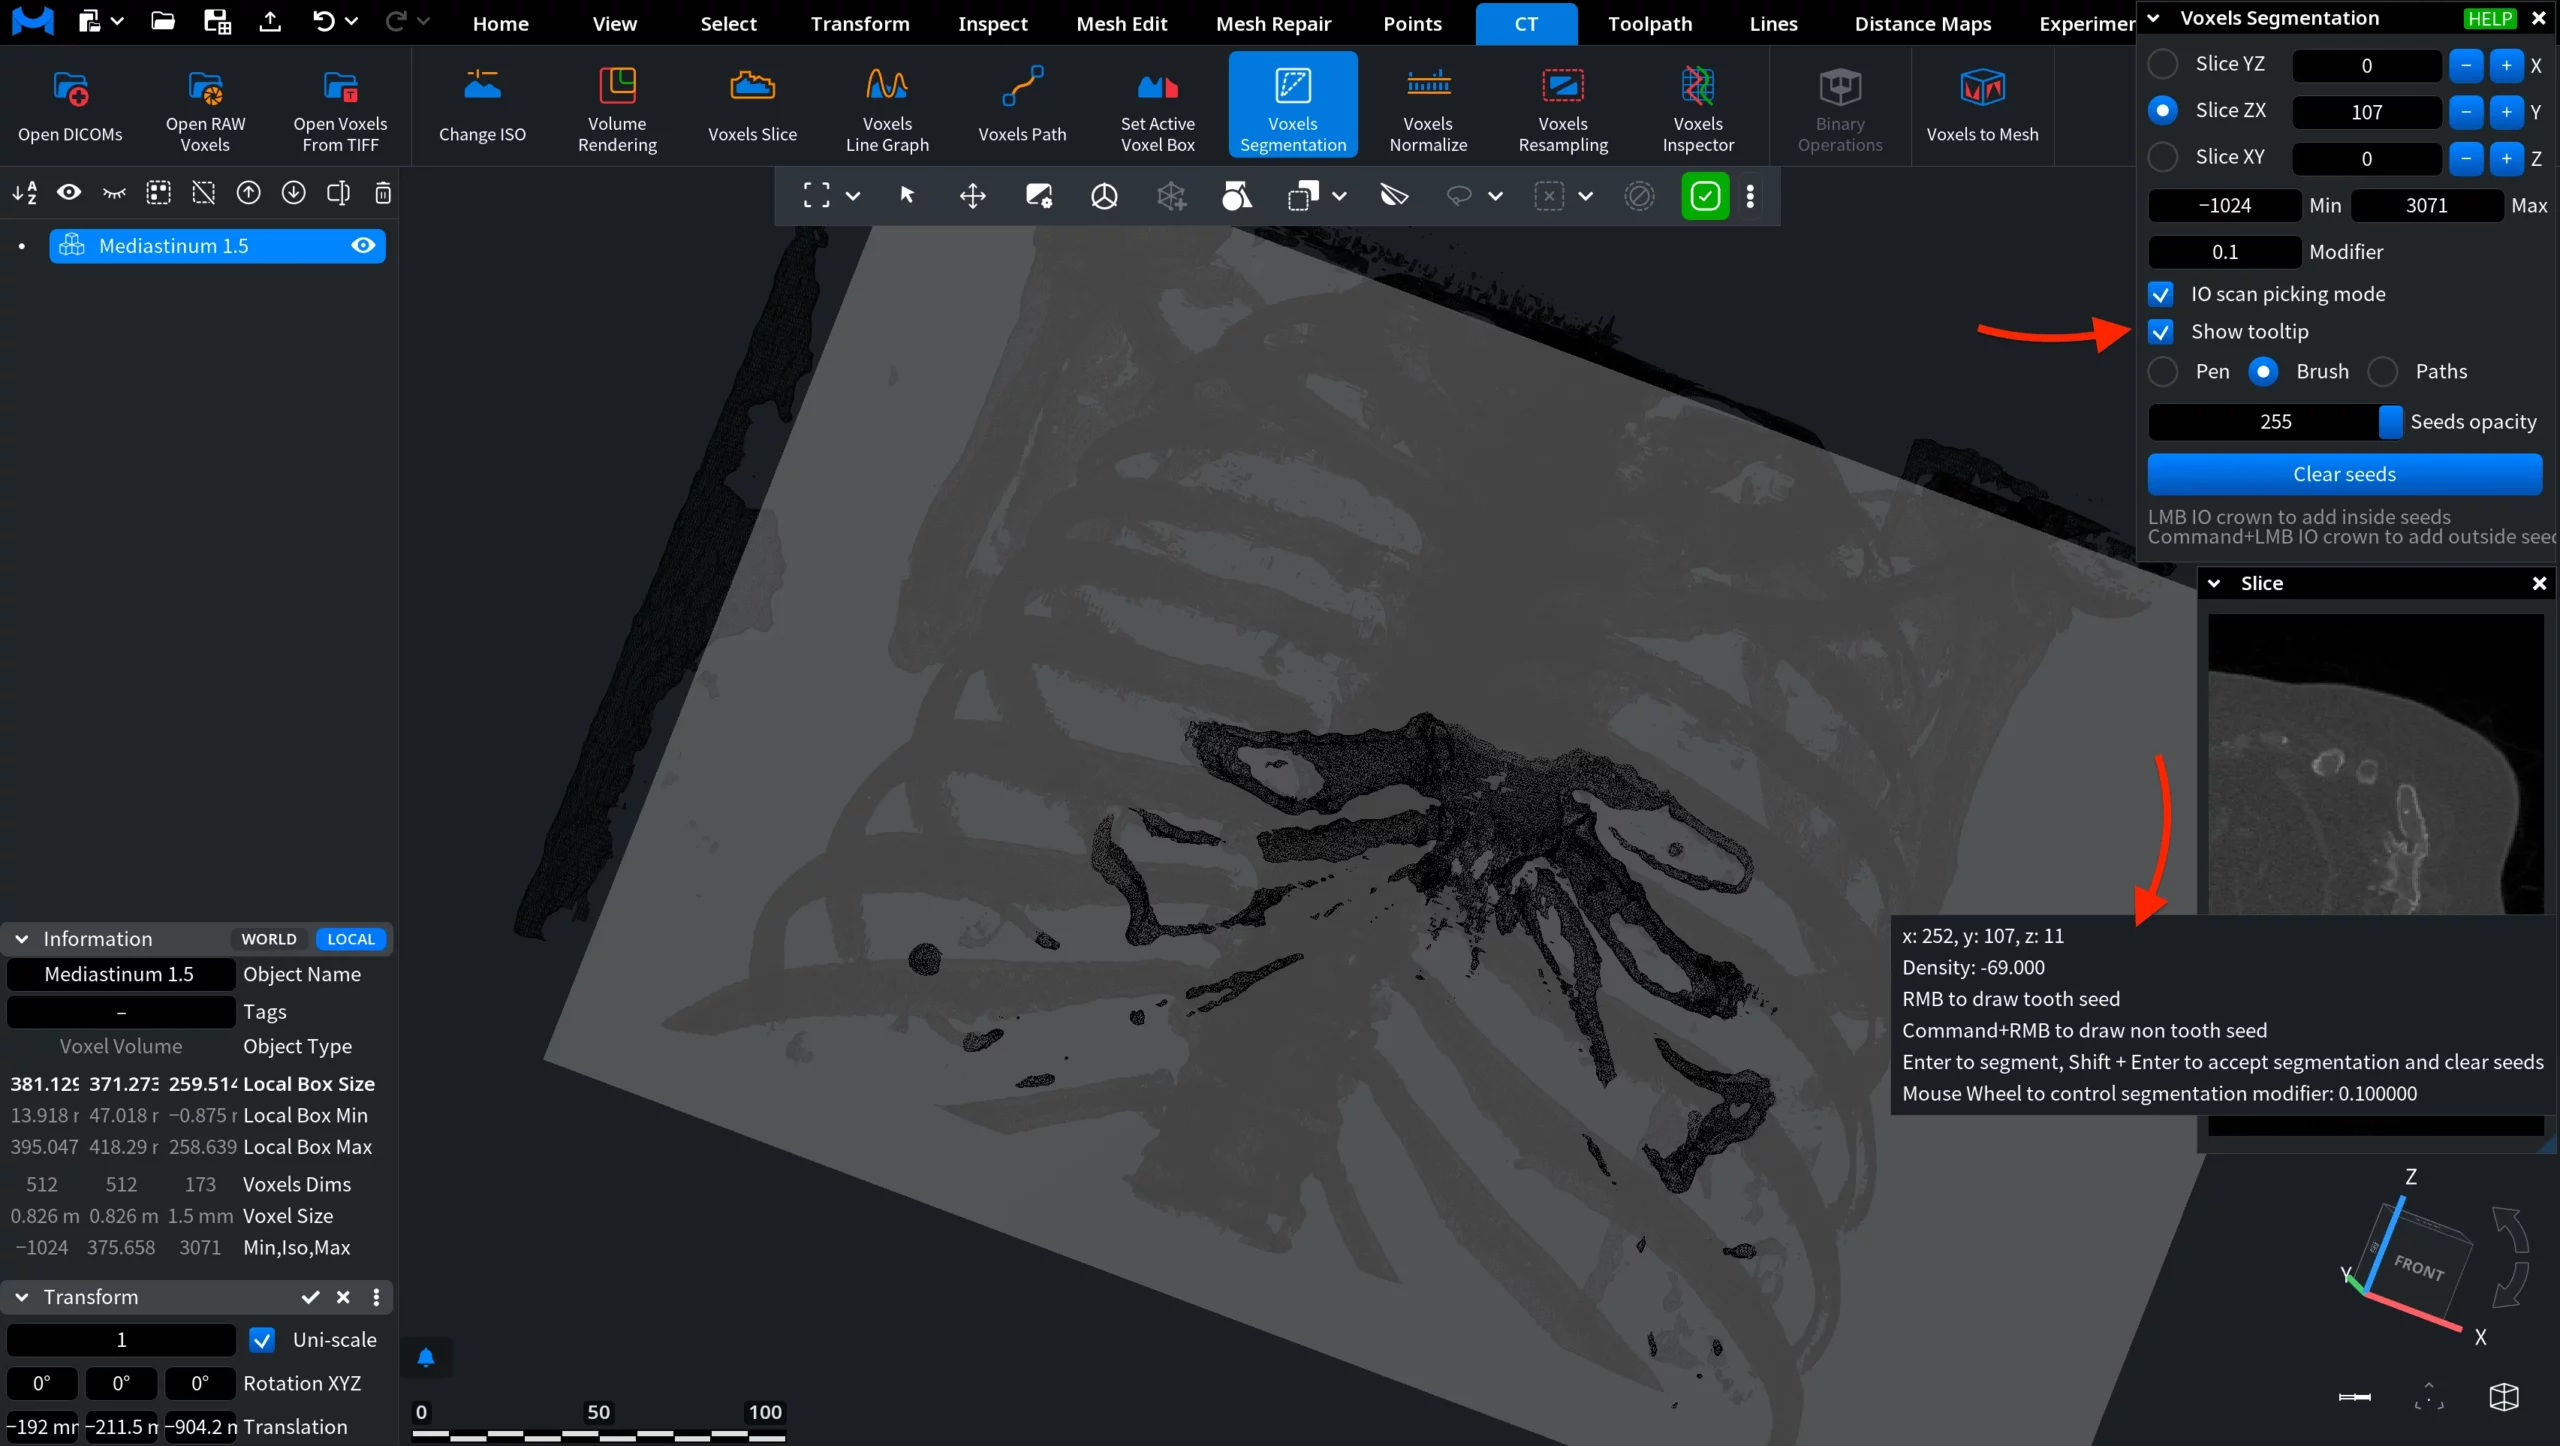
When disabled, this tooltip is hidden.
Pen / Brush / Path
Pen places seeds as individual points. Each click adds a discrete seed. You can also click and drag to place a sequence of points along the cursor path.
Brush places seeds as a continuous region. Click and drag to paint seeds over an area, creating dense coverage for faster segmentation of larger structures.
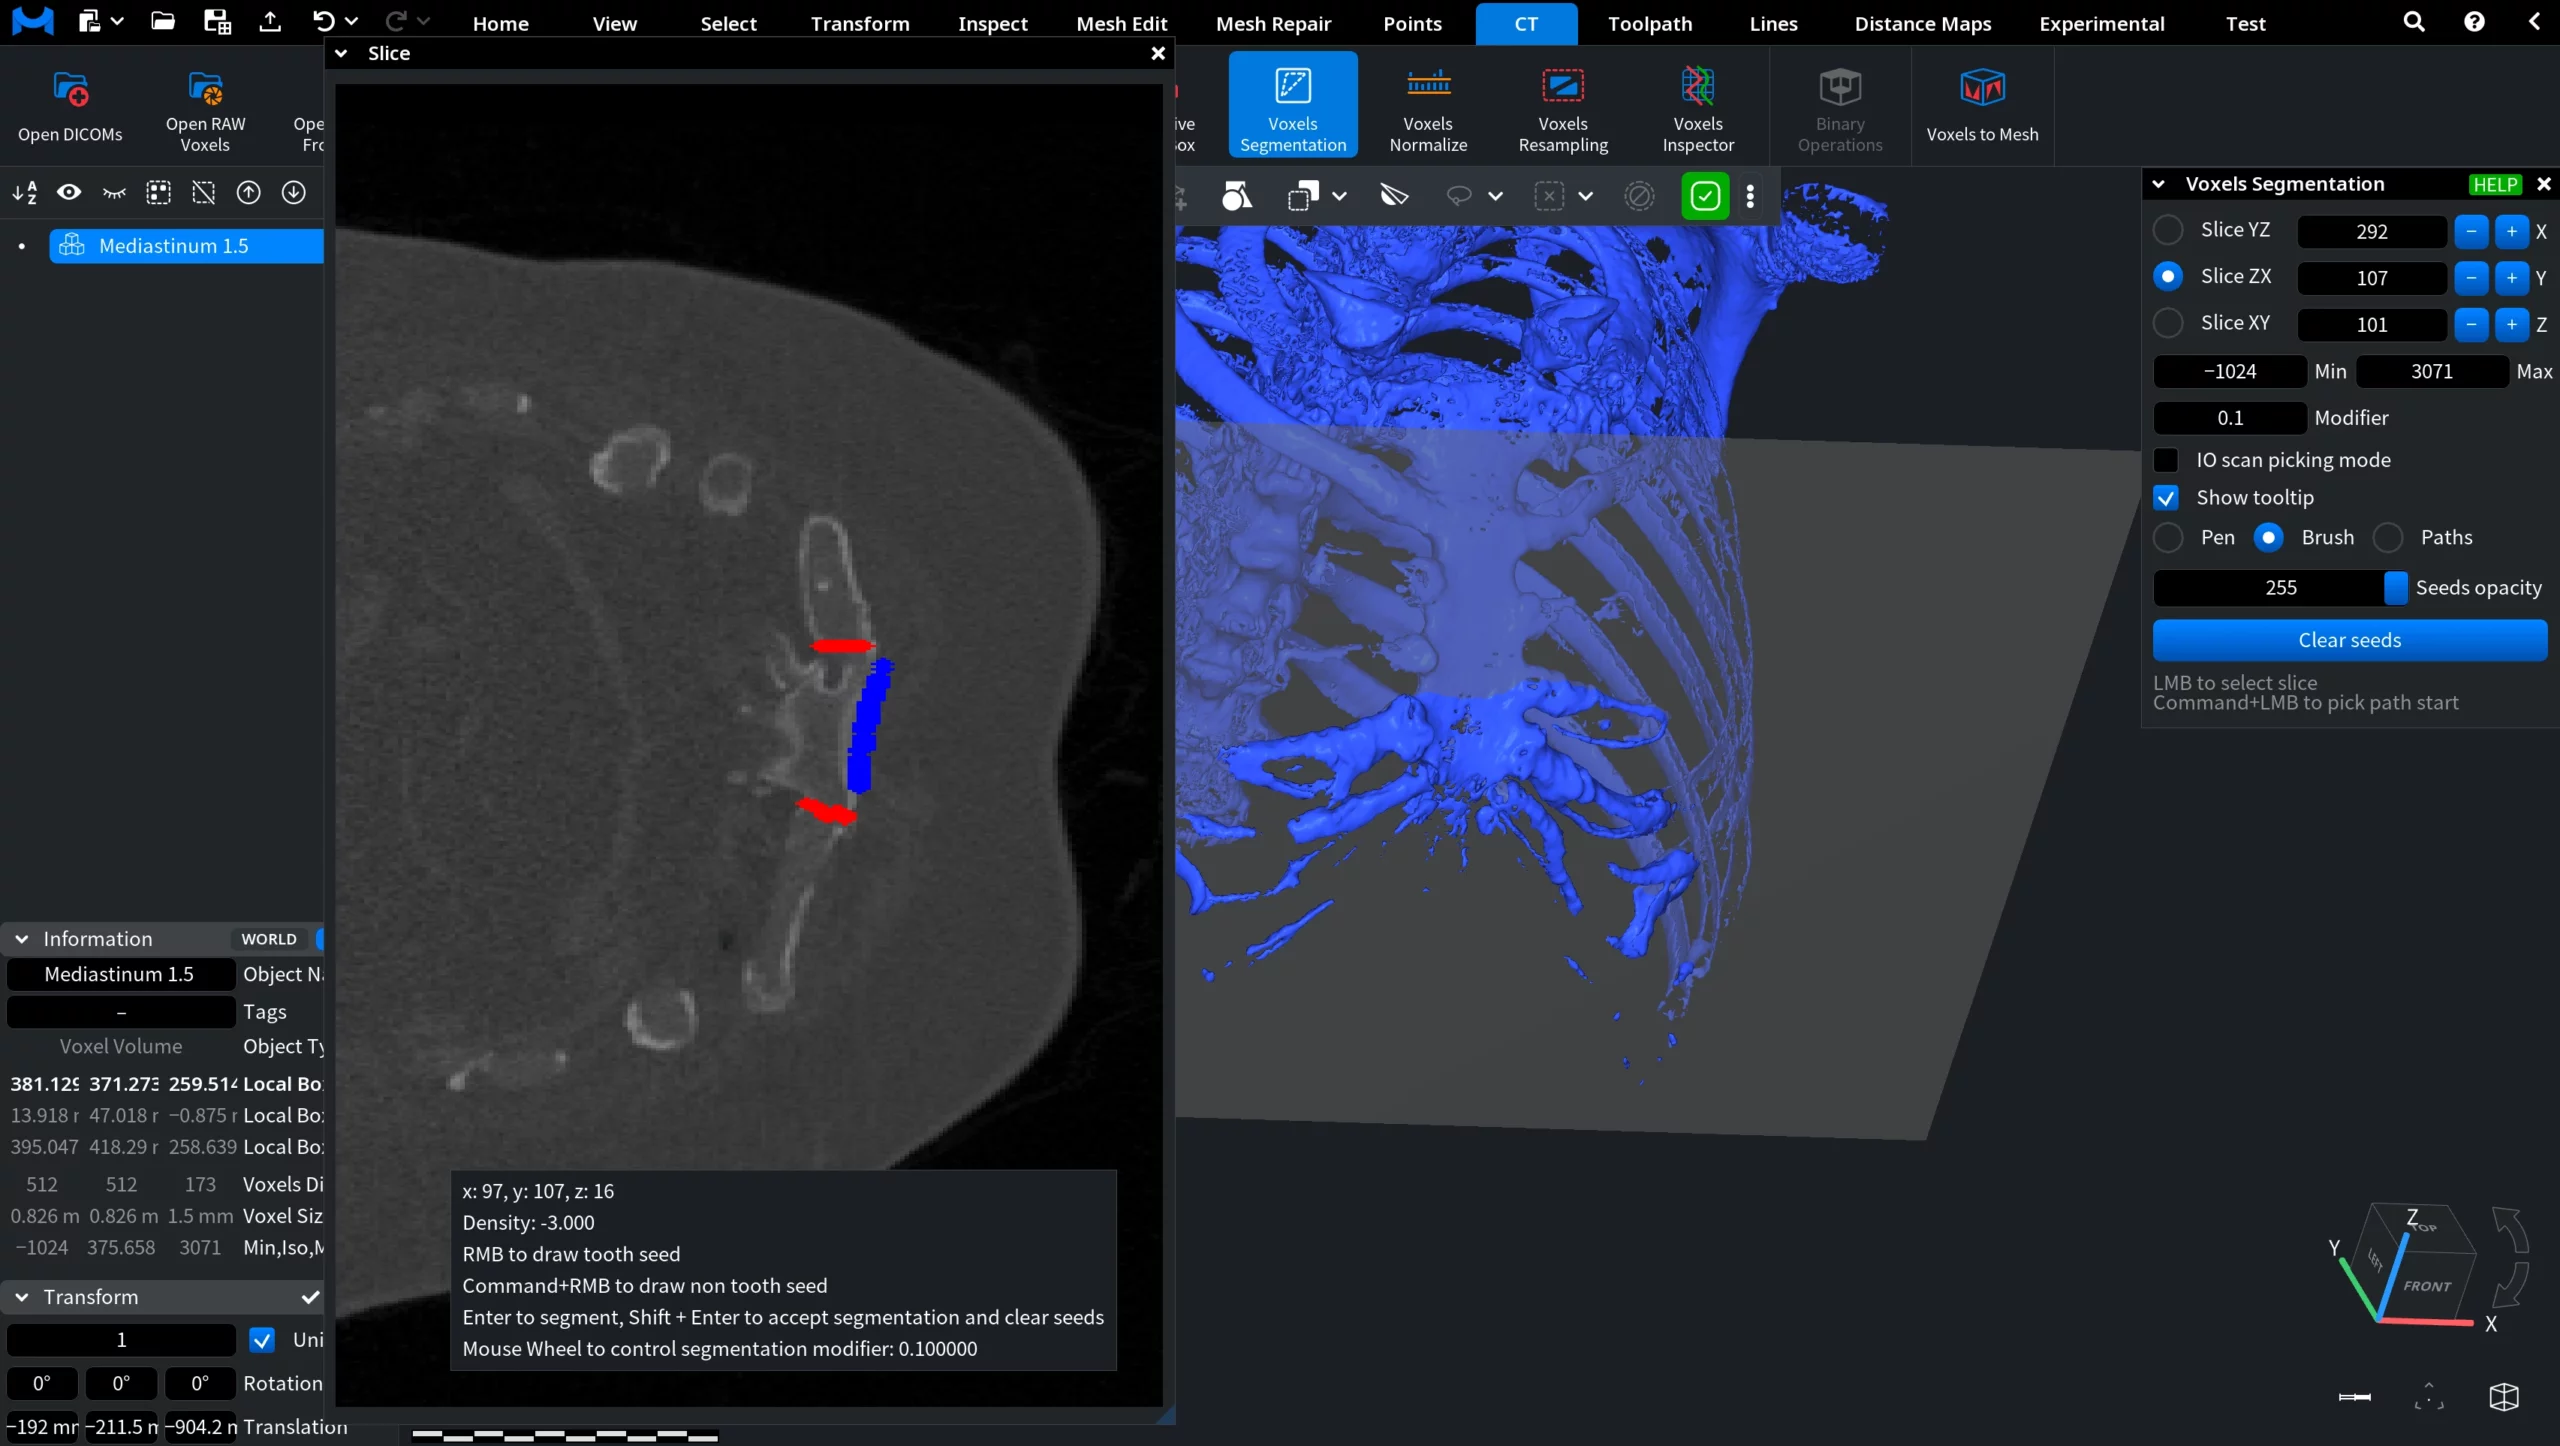
Path, as the name suggests, places seeds along a defined path. Select a start point and a finish point for the system to generate a path.
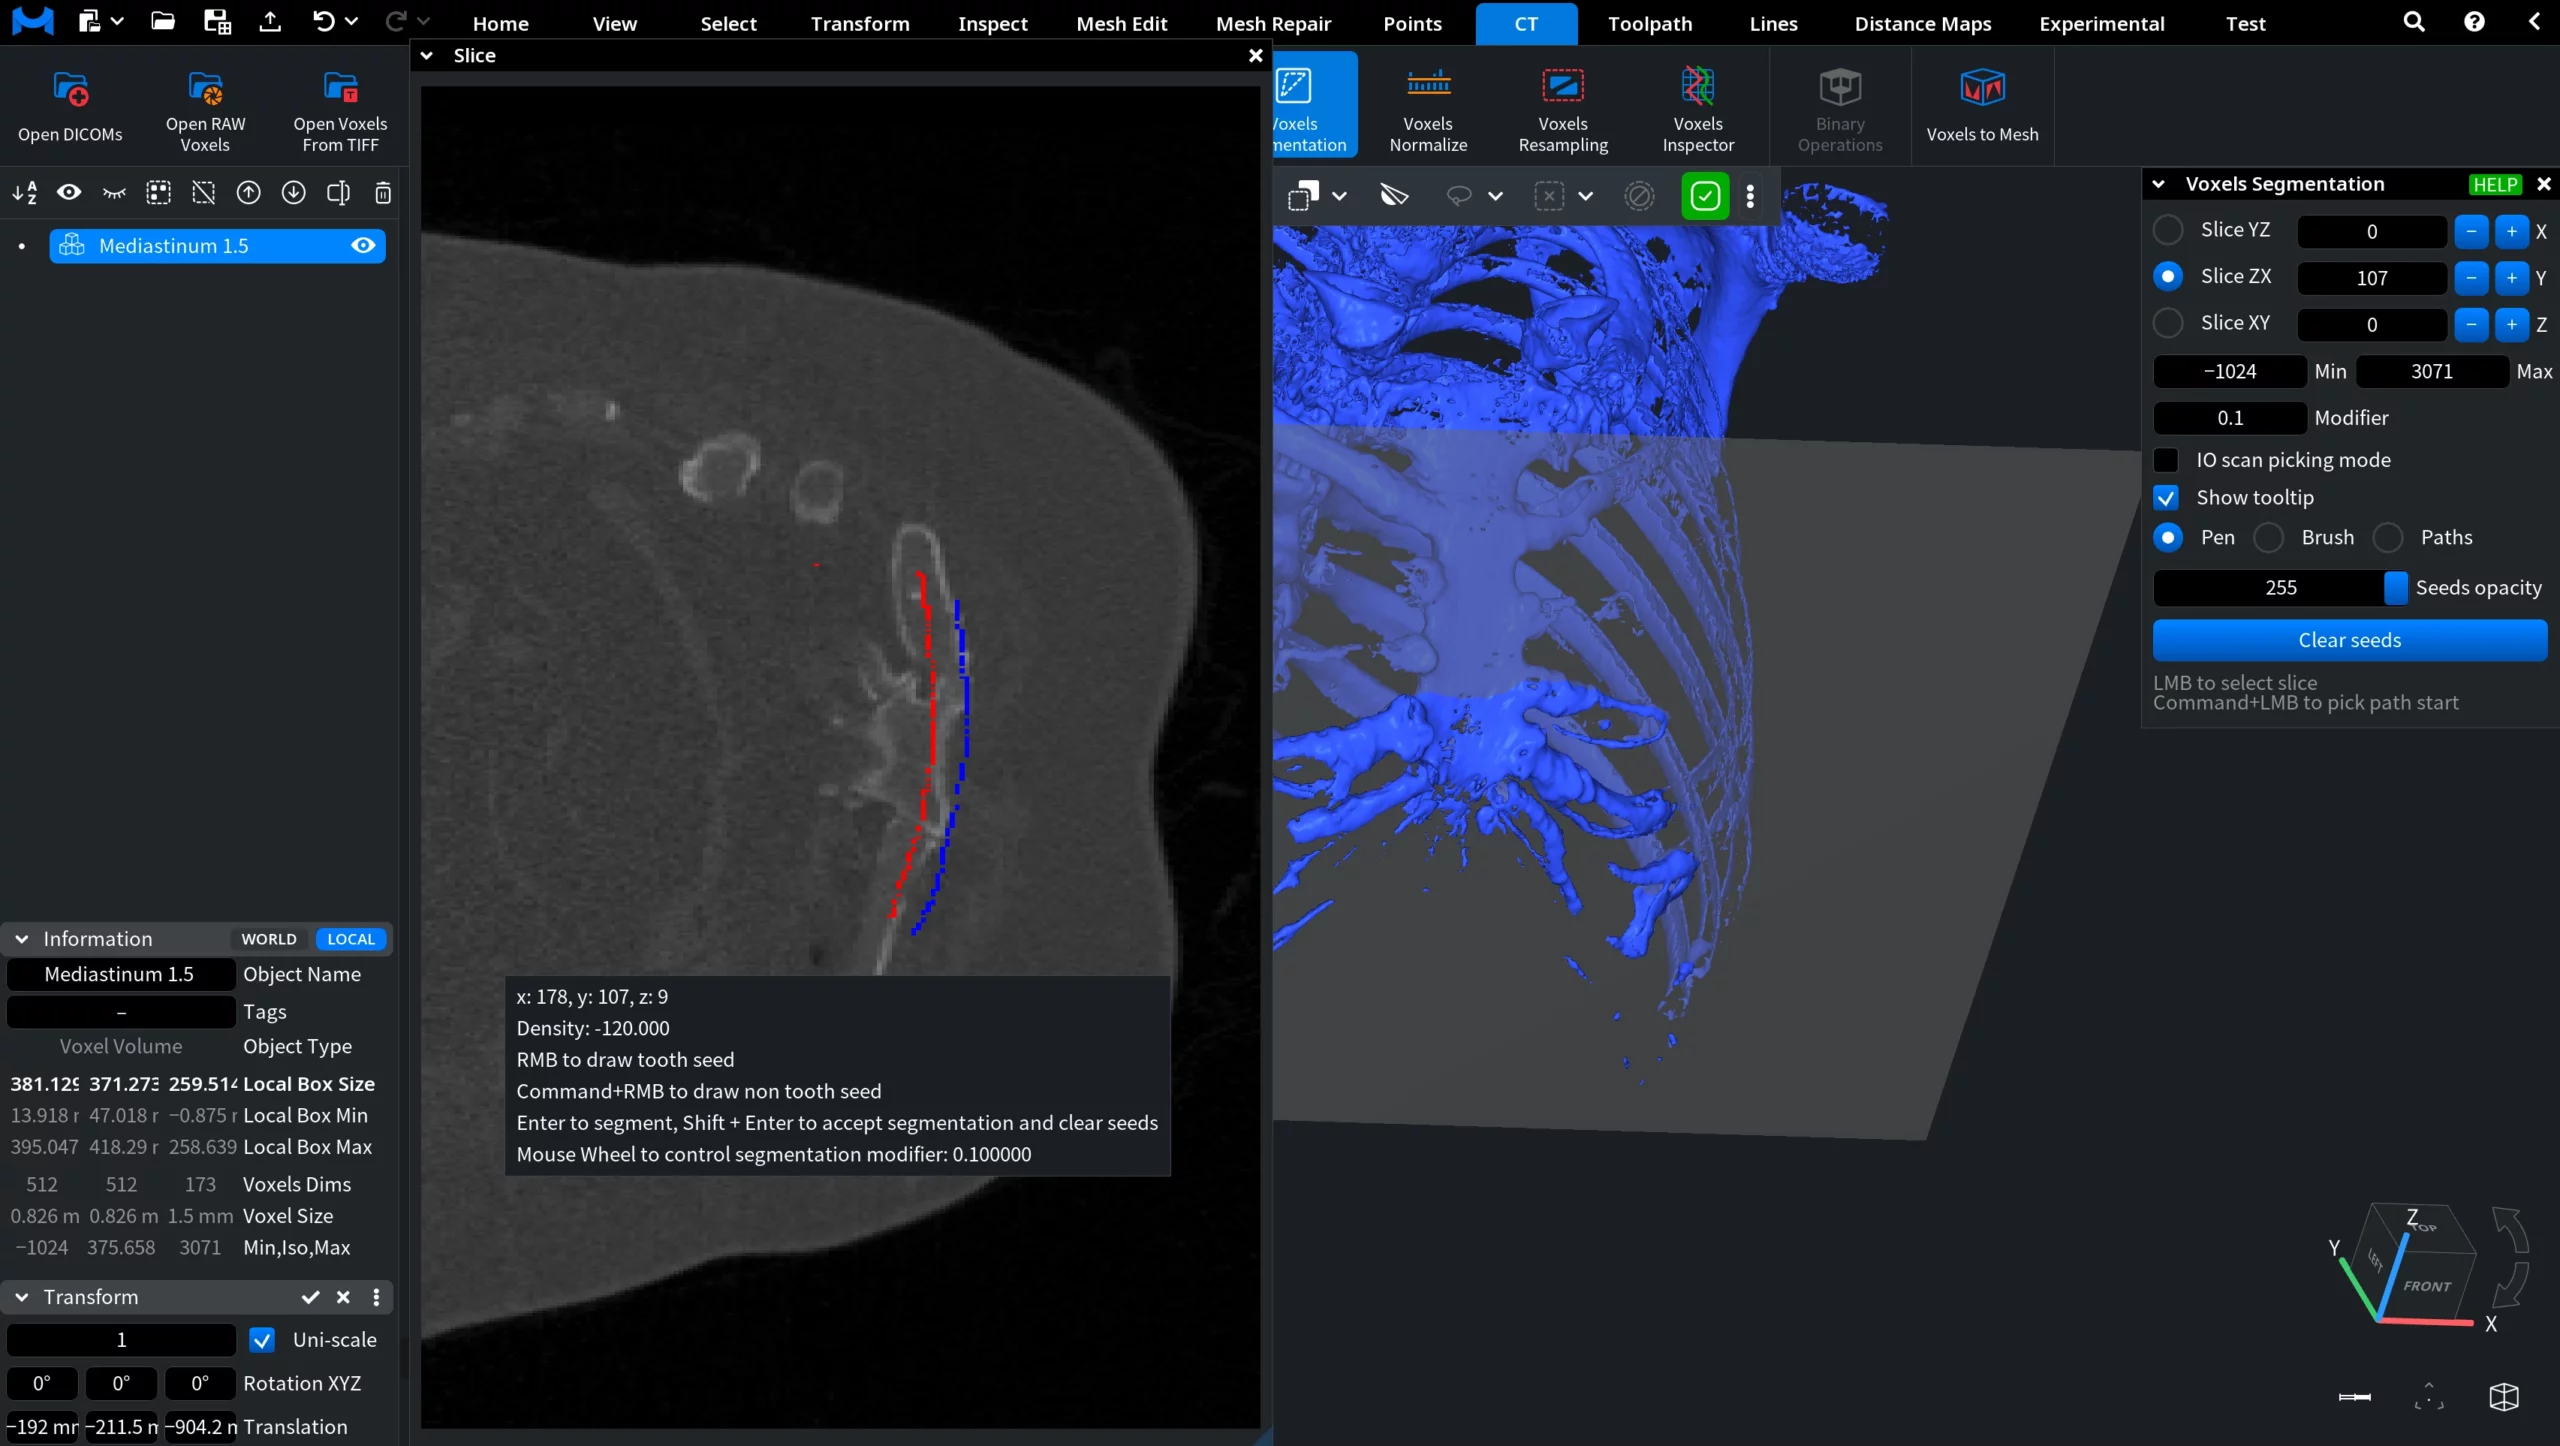
Segmentation Controls
Seeds define example regions that guide the segmentation. Inside seeds mark the target structure, while outside seeds mark areas to exclude. Both seed placement and segmentation are performed directly in the Slice view.
Controls: Pen and Brush
- RMB places inside seeds.
- Ctrl / Command + RMB places outside seeds.
- Enter runs segmentation.
- Shift + Enter accepts segmentation and clears seeds.
- Mouse wheel adjusts the segmentation modifier.
Controls: Path
- RMB picks the path start.
- RMB picks the path finish.
- Other controls remain the same.