Voxels Inspector compares a surface with the voxel values around it. Click a point of the surface, and a graph shows how the values change along the normal at that point. With a mesh selected next to the volume, Adjust moves the vertices of the mesh to the place where the values change fastest, the boundary of the material, with sub-voxel precision. Use it to check and refine a mesh made from a CT volume, for example after a quick conversion with Voxels to Mesh.
Open the tool
- In the Scene tree, select one voxel object, or a voxel object and one mesh (Ctrl+click; Cmd+click on macOS).
- Click CT › Voxels Inspector.
The Voxels and Mesh fields show what the tool works with. If you select only a volume, the tool uses the volume's own iso-surface: the Mesh field shows the name of the volume, and you can only look at the values. To correct a mesh, select the mesh together with the volume: the Correction section appears in the panel.
Auto Switch to Selected Objects is on by default: when you select another volume or mesh in the Scene tree, the tool switches to it.
Inspect the values at a point
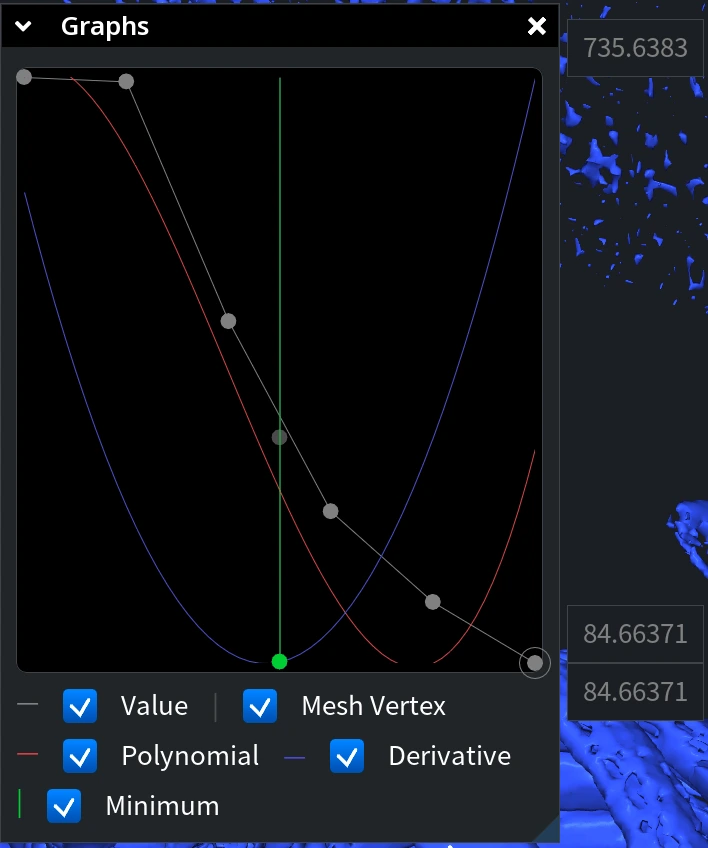
Click a point of the surface. The tool takes the nearest vertex, samples the volume along its normal and opens the Graphs window:
- Value: the sampled voxel values (dots).
- Mesh Vertex: where the vertex is now.
- Polynomial: the polynomial fitted to the samples.
- Derivative: the derivative of the polynomial.
- Minimum: where the derivative is lowest, that is, where the values drop fastest along the normal. Adjust moves the vertex toward this point.
If Minimum is close to Mesh Vertex, the surface lies on the boundary at this point.
| Parameter | What it does | Default / range |
|---|---|---|
| Sampling Points | How many points are sampled for every vertex. | 6 (2–20). Adjust needs at least 4. |
| Polynomial Degree | Degree of the polynomial fitted to the samples. | 3 (3–6) |
Adjust a mesh to the volume
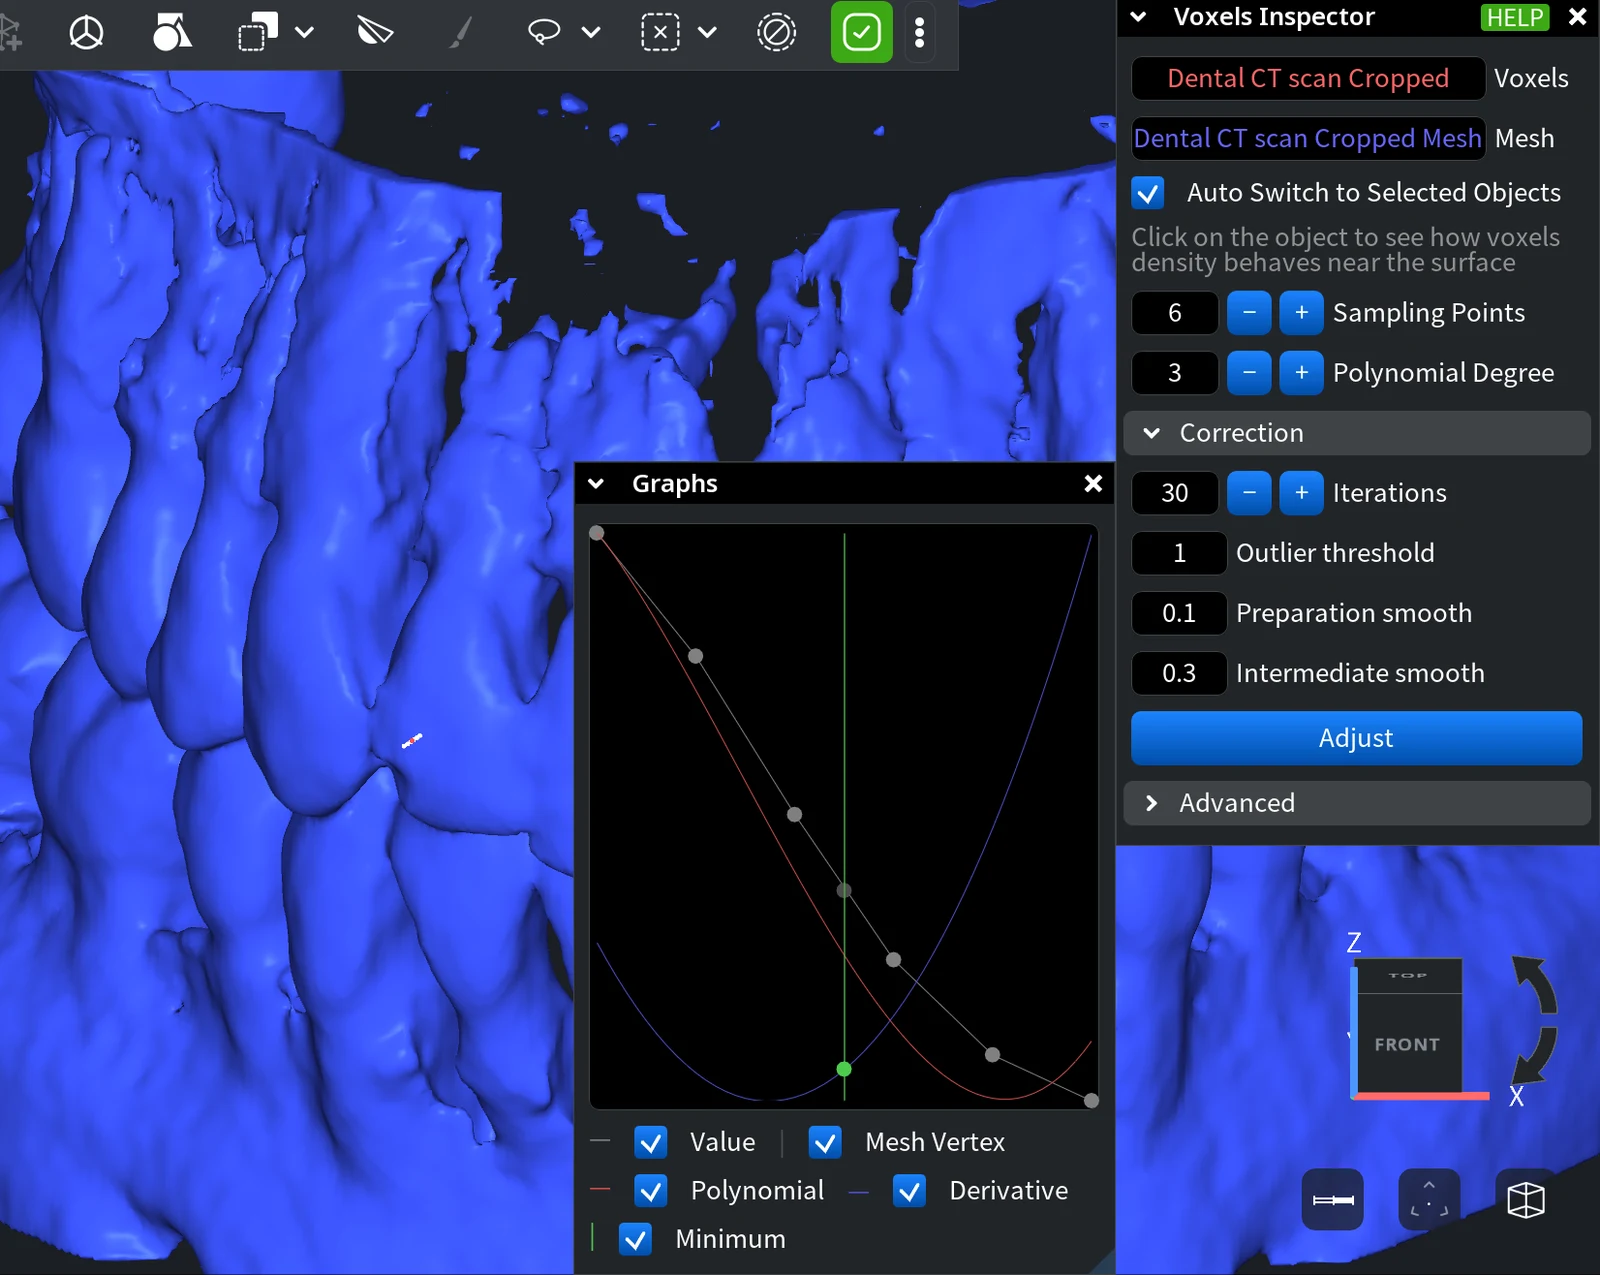
The Correction section is shown only when a separate mesh is selected with the volume.
| Parameter | What it does | Default / range |
|---|---|---|
| Iterations | Number of iterations. Each one moves the vertices a little and smooths the shifts. | 30 (1–100) |
| Outlier threshold | If the target position of a vertex is farther than this number of voxels, the vertex is not moved in this iteration. Keep it small for a small Polynomial Degree. | 1 (1–10) |
| Preparation smooth | Smoothing of the mesh before the iterations. Set 0 for a mesh that is already smooth. | 0.1 (0–1) |
| Intermediate smooth | Smoothing of the shifts on each iteration. Small values are not recommended. | 0.3 (0–1) |
Click Adjust. The tool moves the vertices of the selected mesh in place; Ctrl+Z (Cmd+Z on macOS) undoes it. To see the vertices that were not moved, turn on Advanced › Highlight Uncorrected Points.
Advanced: color maps on the surface
| Option | What it does |
|---|---|
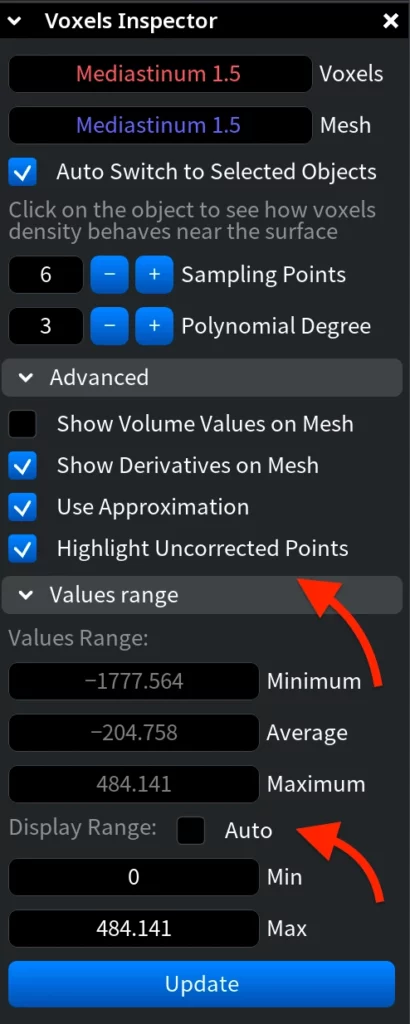
| Show Volume Values on Mesh | Colors the surface by the voxel value at every vertex. |
| Show Derivatives on Mesh | Colors the surface by the derivative of the values along the normals: it shows where the surface is on a sharp boundary. |
| Use Approximation | Appears with Show Derivatives on Mesh. On: the derivative is approximated from the neighborhood of the point. Off: it is the difference of the values on the two sides of the surface. |
| Highlight Uncorrected Points | Shows the vertices that Adjust did not move. |
| Values range | Minimum, Average and Maximum of the values shown on the mesh. Under Display Range, Auto maps the whole range to the colors; turn it off to set Min and Max, then click Update. |