
Loads from YouTube (Google) when you press Play
Volume Rendering shows the whole voxel volume as a semi-transparent cloud instead of one iso-surface. Use it to look inside a CT scan or any other volume: dense parts, cavities and inclusions that the iso-surface hides. It changes only the display — the voxel data stays the same. For the basics of voxel objects, see Voxels.
Open the tool
- Select exactly one voxel volume in the scene tree.
- Click CT › Volume Rendering. The tool is unavailable while Change ISO or Section is open.
The volume switches from the iso-surface to volume rendering, and the Volume Rendering panel opens on the right. When you close the tool, the iso-surface display returns. While the tool is open, Change ISO, Voxels Slice, Voxels Line Graph and the other volume tools of the CT tab are unavailable.
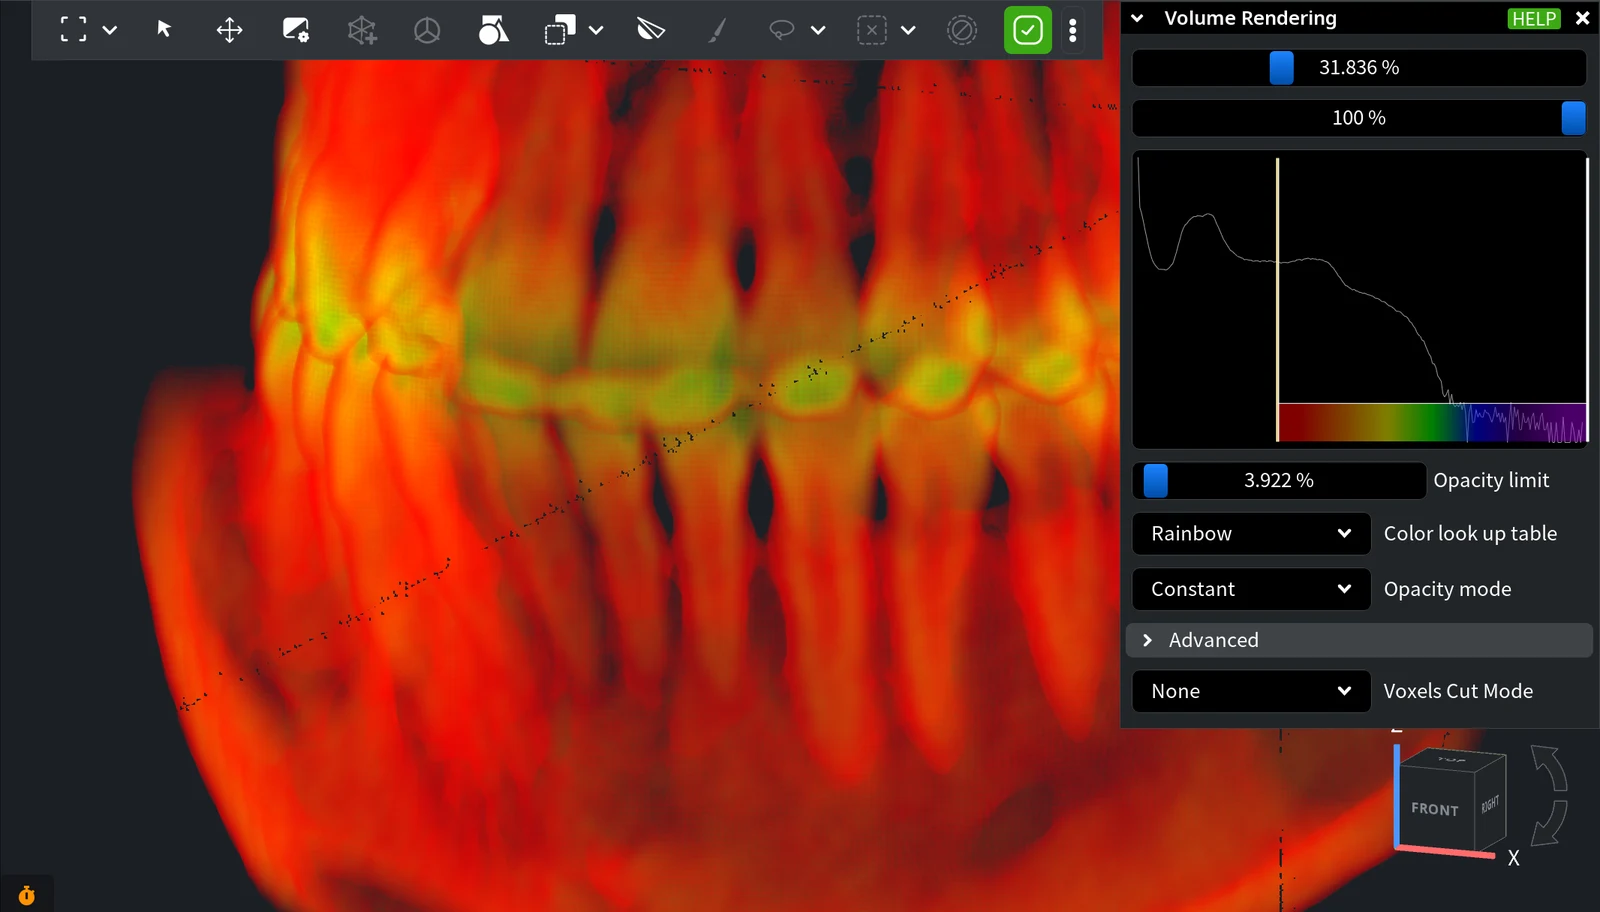
Value range and histogram
The two sliders at the top set the visible value range in percent of the volume's value range. Voxels with a value lower than the first slider or higher than the second one are transparent. When the tool opens, the lower limit is the current iso value and the upper limit is the maximum value, so you see roughly what the iso-surface encloses. To type an exact value, Ctrl+click the slider (Cmd+click on macOS).
Under the sliders, the histogram shows how many voxels have each value (logarithmic scale). The two white vertical lines are the range limits, the colored line is the current iso value, and the colored band between the limits shows the color table and the opacity profile. Peaks of the histogram are materials (air, plastic, metal, soft tissue, bone); put the limits around the peak you want to see.
Panel settings
| Setting | What it does | Default / tip |
|---|---|---|
| Opacity limit | Maximum opacity of the voxels in the range, in percent. Lower values let you see deeper into the volume. | 3.9 %. Raise it for thin or sparse structures. |
| Color look up table | Colors of the values: Gray shades (like a CT image), Rainbow (low values red, high values violet) or One color (pick the color with Color). | Rainbow |
| Opacity mode | Constant — the same opacity for the whole range; Linear increasing — higher values are more opaque; Linear decreasing — lower values are more opaque. | Constant |
| Advanced › Filter type | Linear interpolates between neighboring voxels (smooth look); Discrete shows each voxel as a block. | Linear |
| Advanced › Shading type | Lighting of the volume: None, Value Gradient (light from the change of voxel values) or Alpha Gradient (light from the change of opacity). Shading makes surfaces inside the volume easier to read. | None |
| Advanced › Sampling Step | Distance between samples along each view ray. It starts at the voxel size and can only be made larger: larger is faster but loses fine details. | Increase it if rotating the view is slow. |
Volume rendering uses the graphics card. On a weak GPU, keep volumes moderate (resample them with Voxels Resampling) or increase Sampling Step.
Voxels Cut Mode
Voxels Cut Mode hides part of the volume so you can look inside: None (the whole volume), Clip Plane or Active Voxels.
Clip Plane
- Set Voxels Cut Mode to Clip Plane.
- Click Plane YZ, Plane XZ or Plane XY to place a plane across the volume, or Import Plane and click a plane object in the scene to copy it.
- Move the plane with Shift (or the arrow buttons), tilt it with Normal, and click Flip to hide the other side. Show Plane shows or hides the plane; Clip volume (on by default) cuts the volume by the plane.
- Choose Volume to keep the volume rendering or Iso to show the iso-surface cut by the same plane.
Hold the cursor over the plane to see the value of the voxel under it. Ctrl+click the plane (Cmd+click on macOS) to use that value as the iso value: MeshInspector rebuilds the iso-surface at this value, switches the view to Iso and adds a Change ISO step to the history (Ctrl+Z / Cmd+Z undoes it). This is a quick way to find the iso value for a wall or a material boundary before Change ISO or converting the volume to a mesh.
Active Voxels
Set Voxels Cut Mode to Active Voxels and draw a lasso in the viewport with the left mouse button:
- drag — keep only the voxels inside the lasso;
- Ctrl+drag (Cmd+drag on macOS) — add the voxels inside the lasso back;
- Shift+drag — hide the voxels inside the lasso.
Reset Active Voxels shows the whole volume again. The lasso changes only the display while the tool is open; the volume data is not cut. To crop the volume itself, use Set Active Voxel Box.


