Under the Select tab, click the arrow next to Select Primitives and choose Edge Selector.

This opens a dedicated panel for selecting mesh edges using different selection modes.

Colors in Edge Selector
Use Color of selected edges to customize how selected edges are displayed. Clicking this option opens a color picker. The color picker shows both the Current and Original colors for easy comparison. You can modify the Current color, while the Original color remains unchanged as a reference.
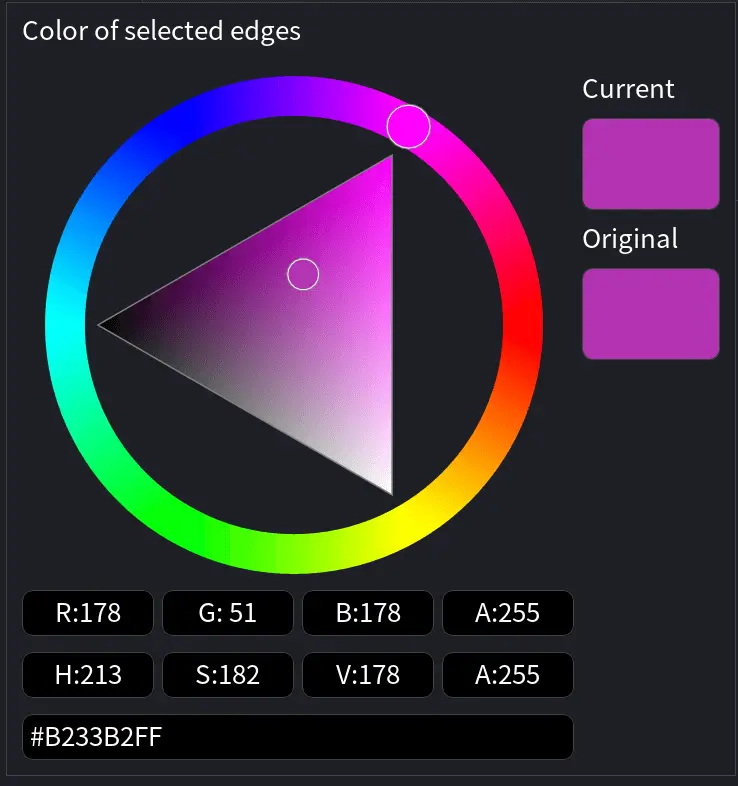
For precise adjustments, the panel displays RGBA (Red, Green, Blue, Alpha) values as well as HSV (Hue, Saturation, Value) values. You can also enter a specific HEX color code directly.
Methods in Edge Selector
There are three methods for selecting edges.
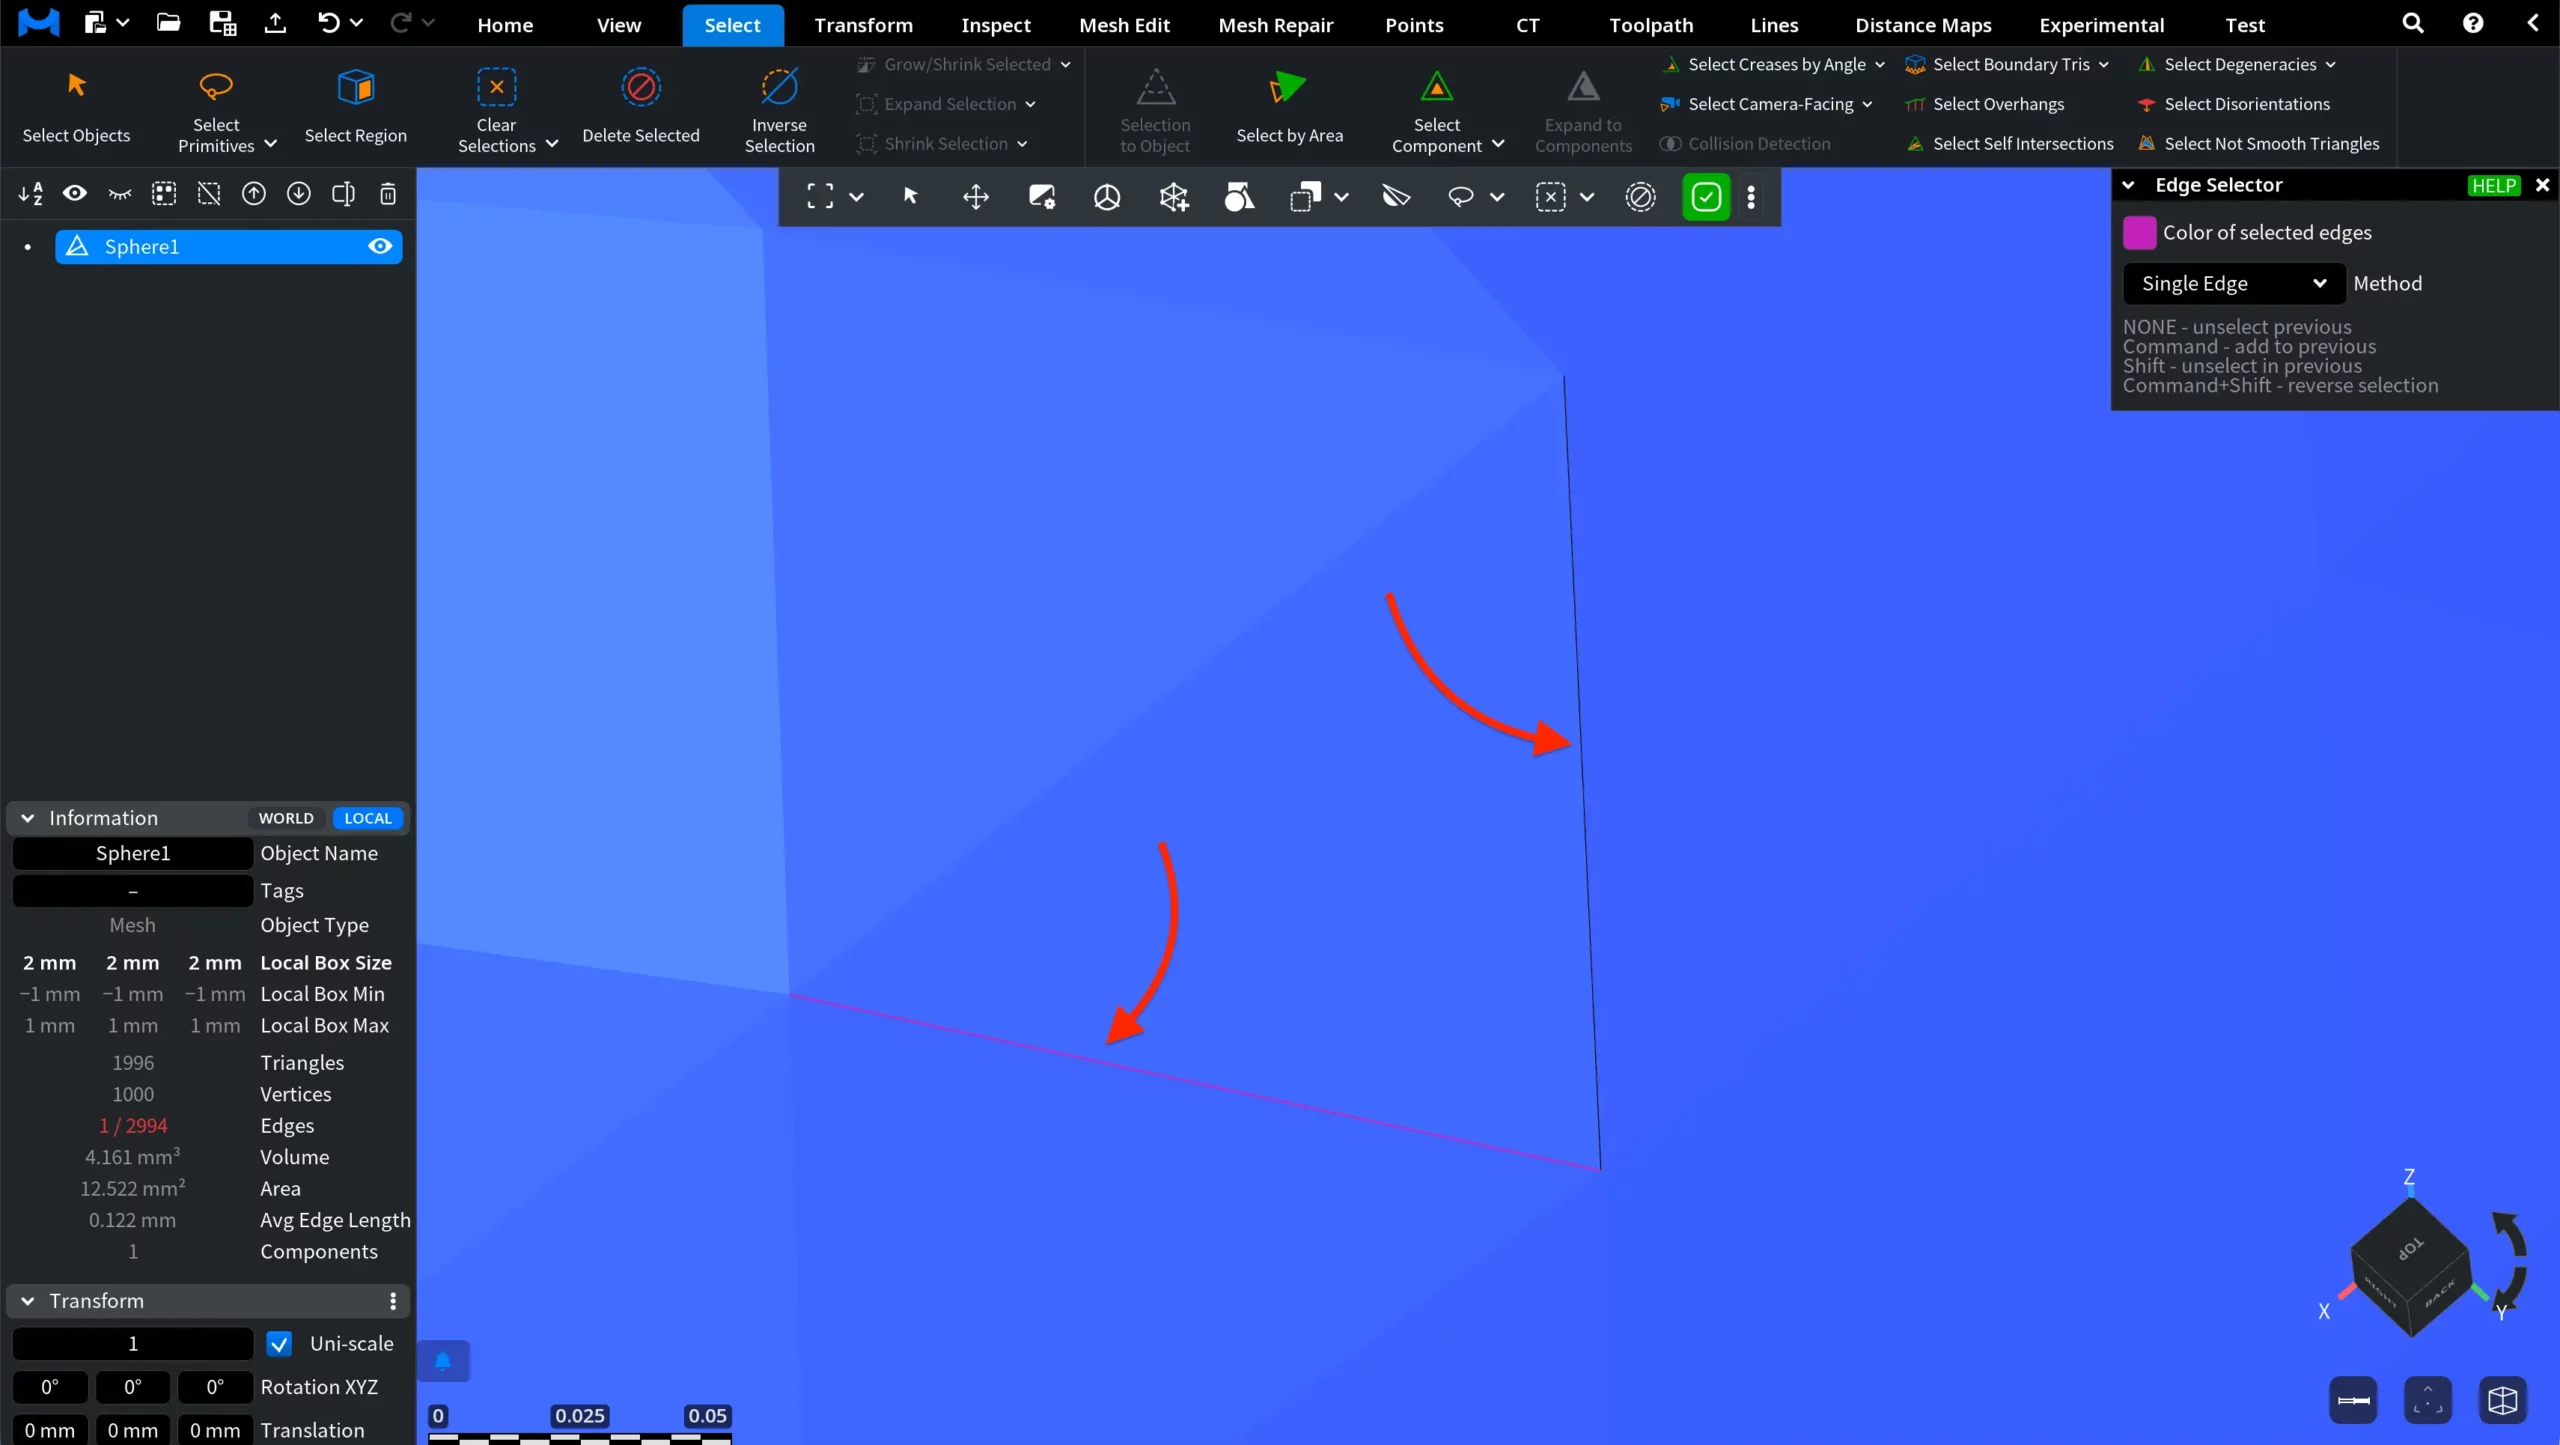
Single Edge
Single Edge selects one mesh edge at a time under the mouse cursor. When you hover the cursor over an edge, that edge becomes highlighted in black for preview. Click the edge to add it to the current selection. Once selected, the edge changes color to indicate that the selection has been committed. You can continue clicking additional edges one by one to build a multi-edge selection. Use this mode for precise, edge-by-edge inspection, cleanup, or editing.
Polyline
Polyline selects a connected chain of mesh edges by placing successive points on the surface. Click the first point to define the starting edge, then continue clicking additional points to extend the selection path. MeshInspector automatically builds a connected polyline between these points, following existing mesh edges across the surface. You can also drag the mouse to define the path continuously. The first and last placed points are marked as polyline endpoints until the selection is committed.
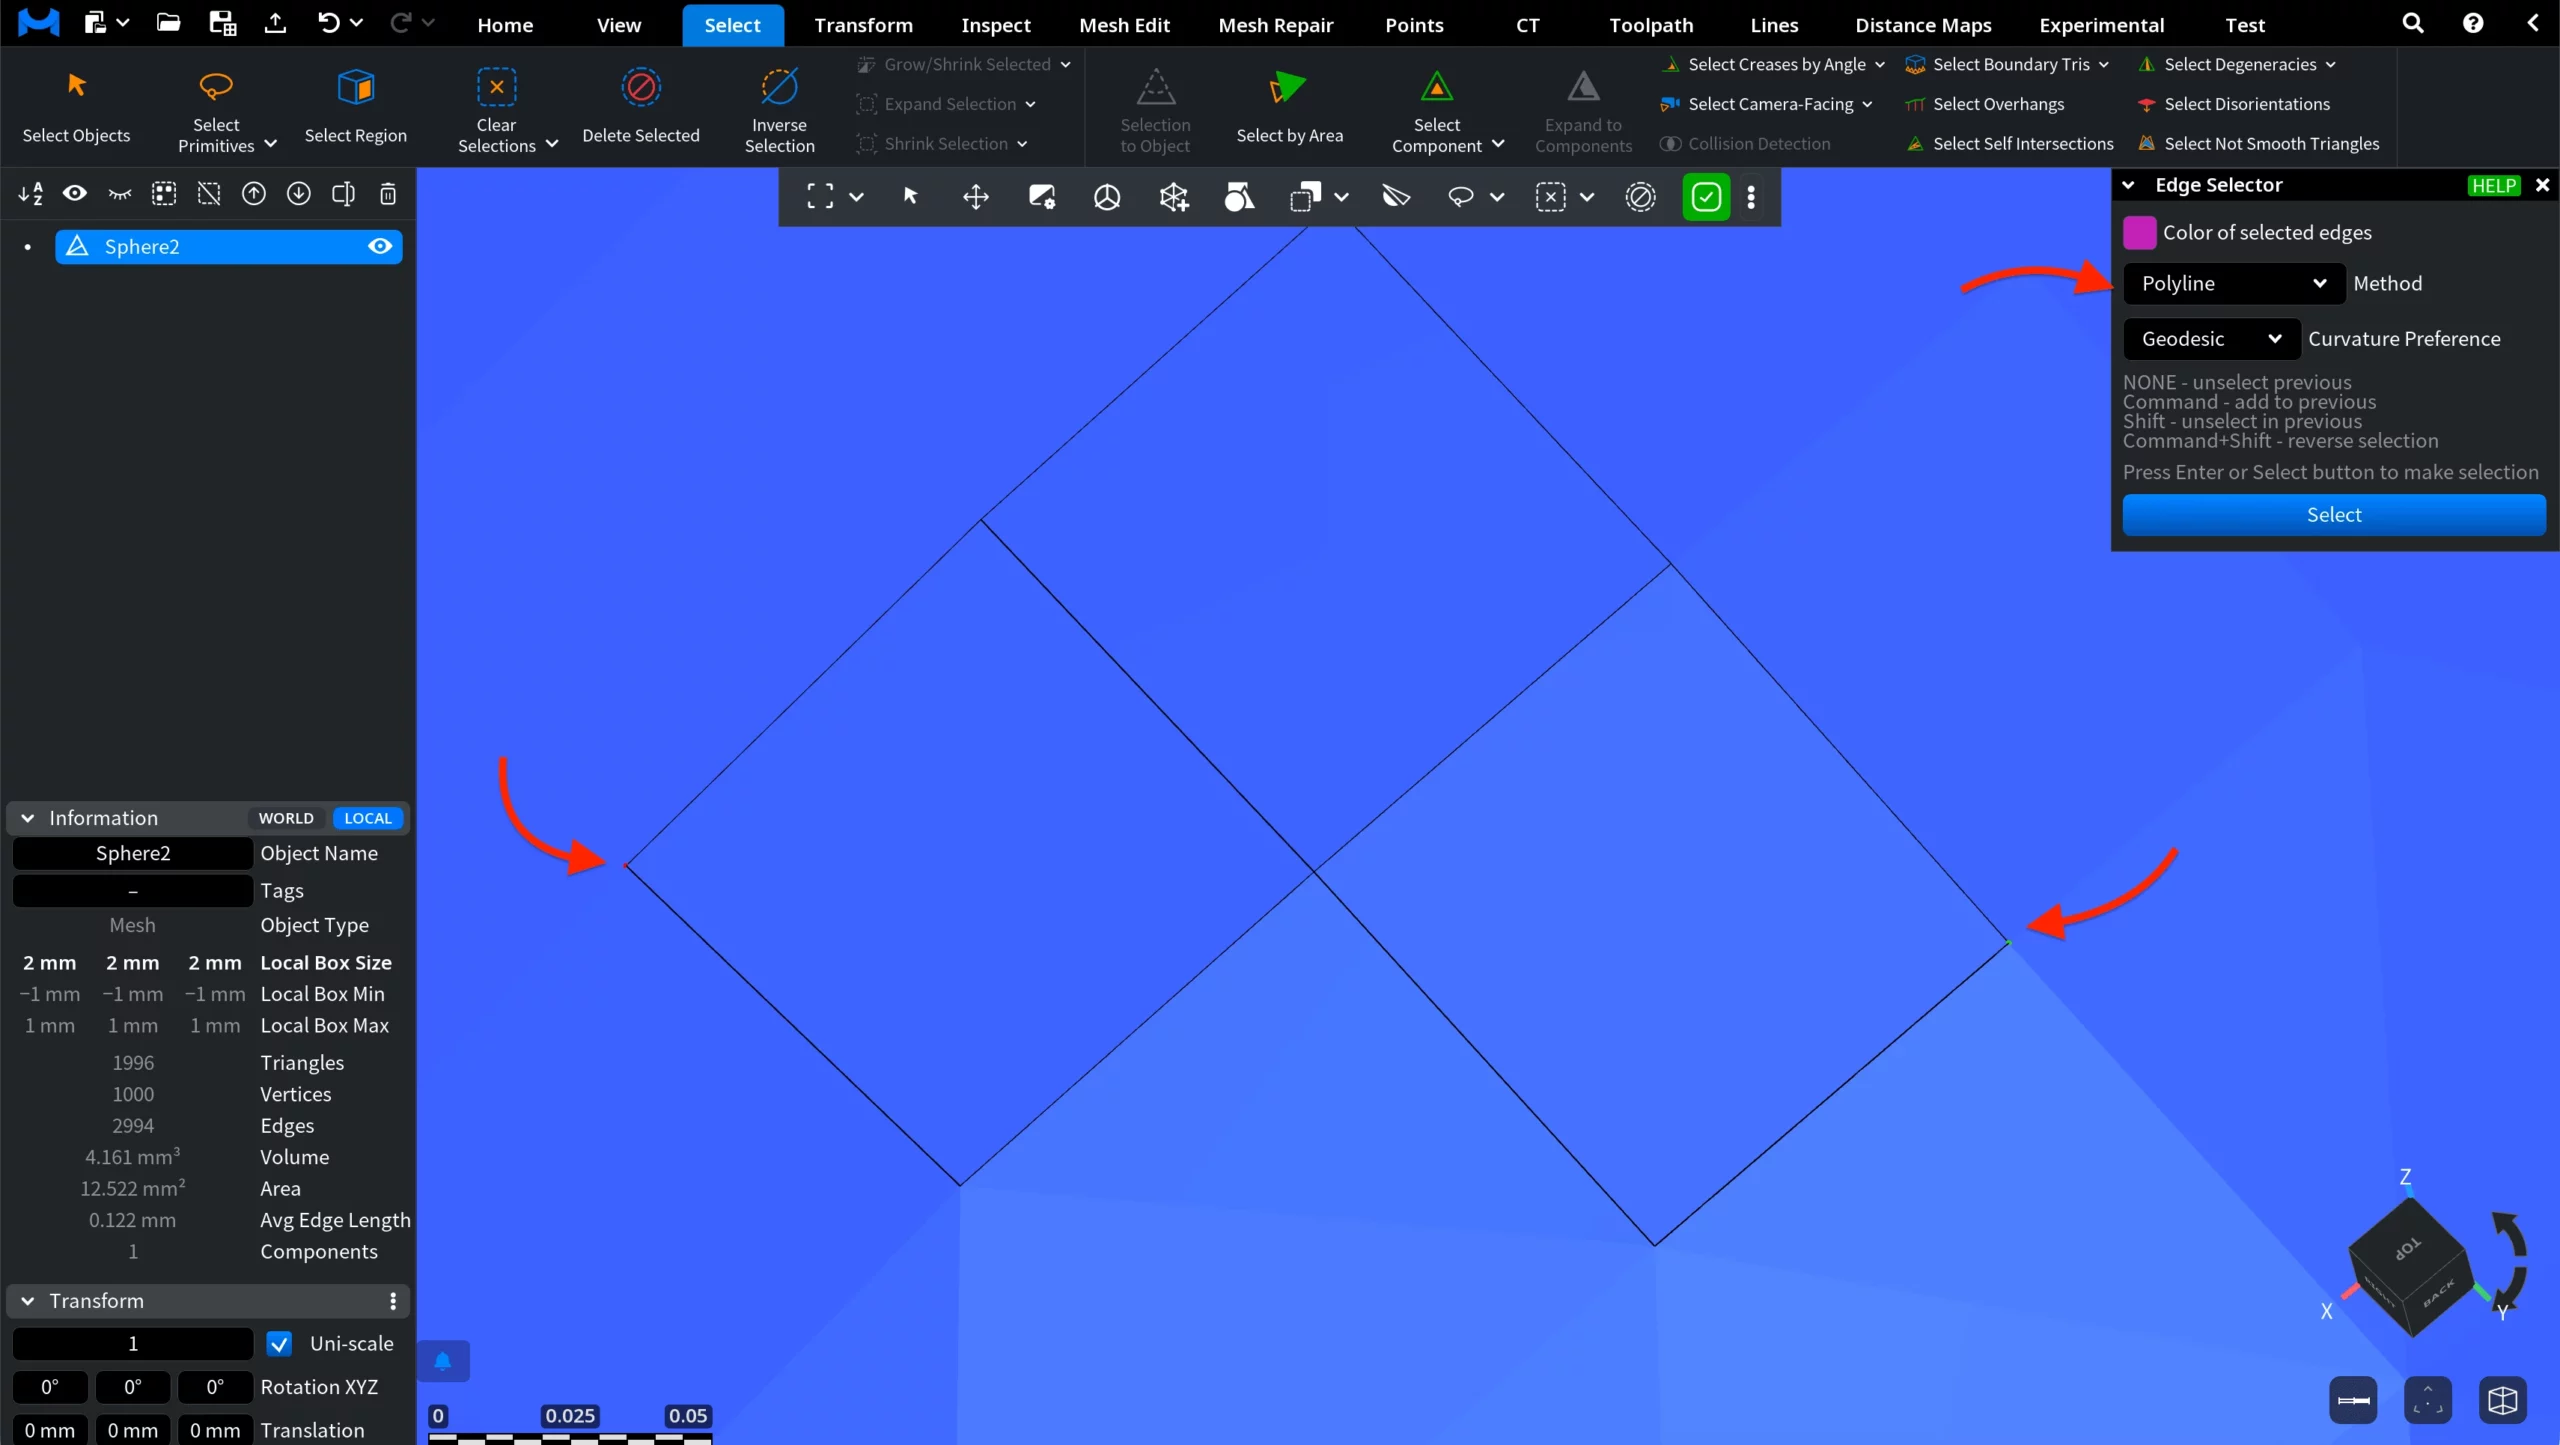
Once the desired path is defined, press Enter or click Select to finalize the edge selection.
Additional settings:
Curvature Preference controls how the polyline follows the surface:
- Geodesic follows the shortest path along the surface.
- Convex favors outward-curving regions.
- Concave favors inward-curving regions.
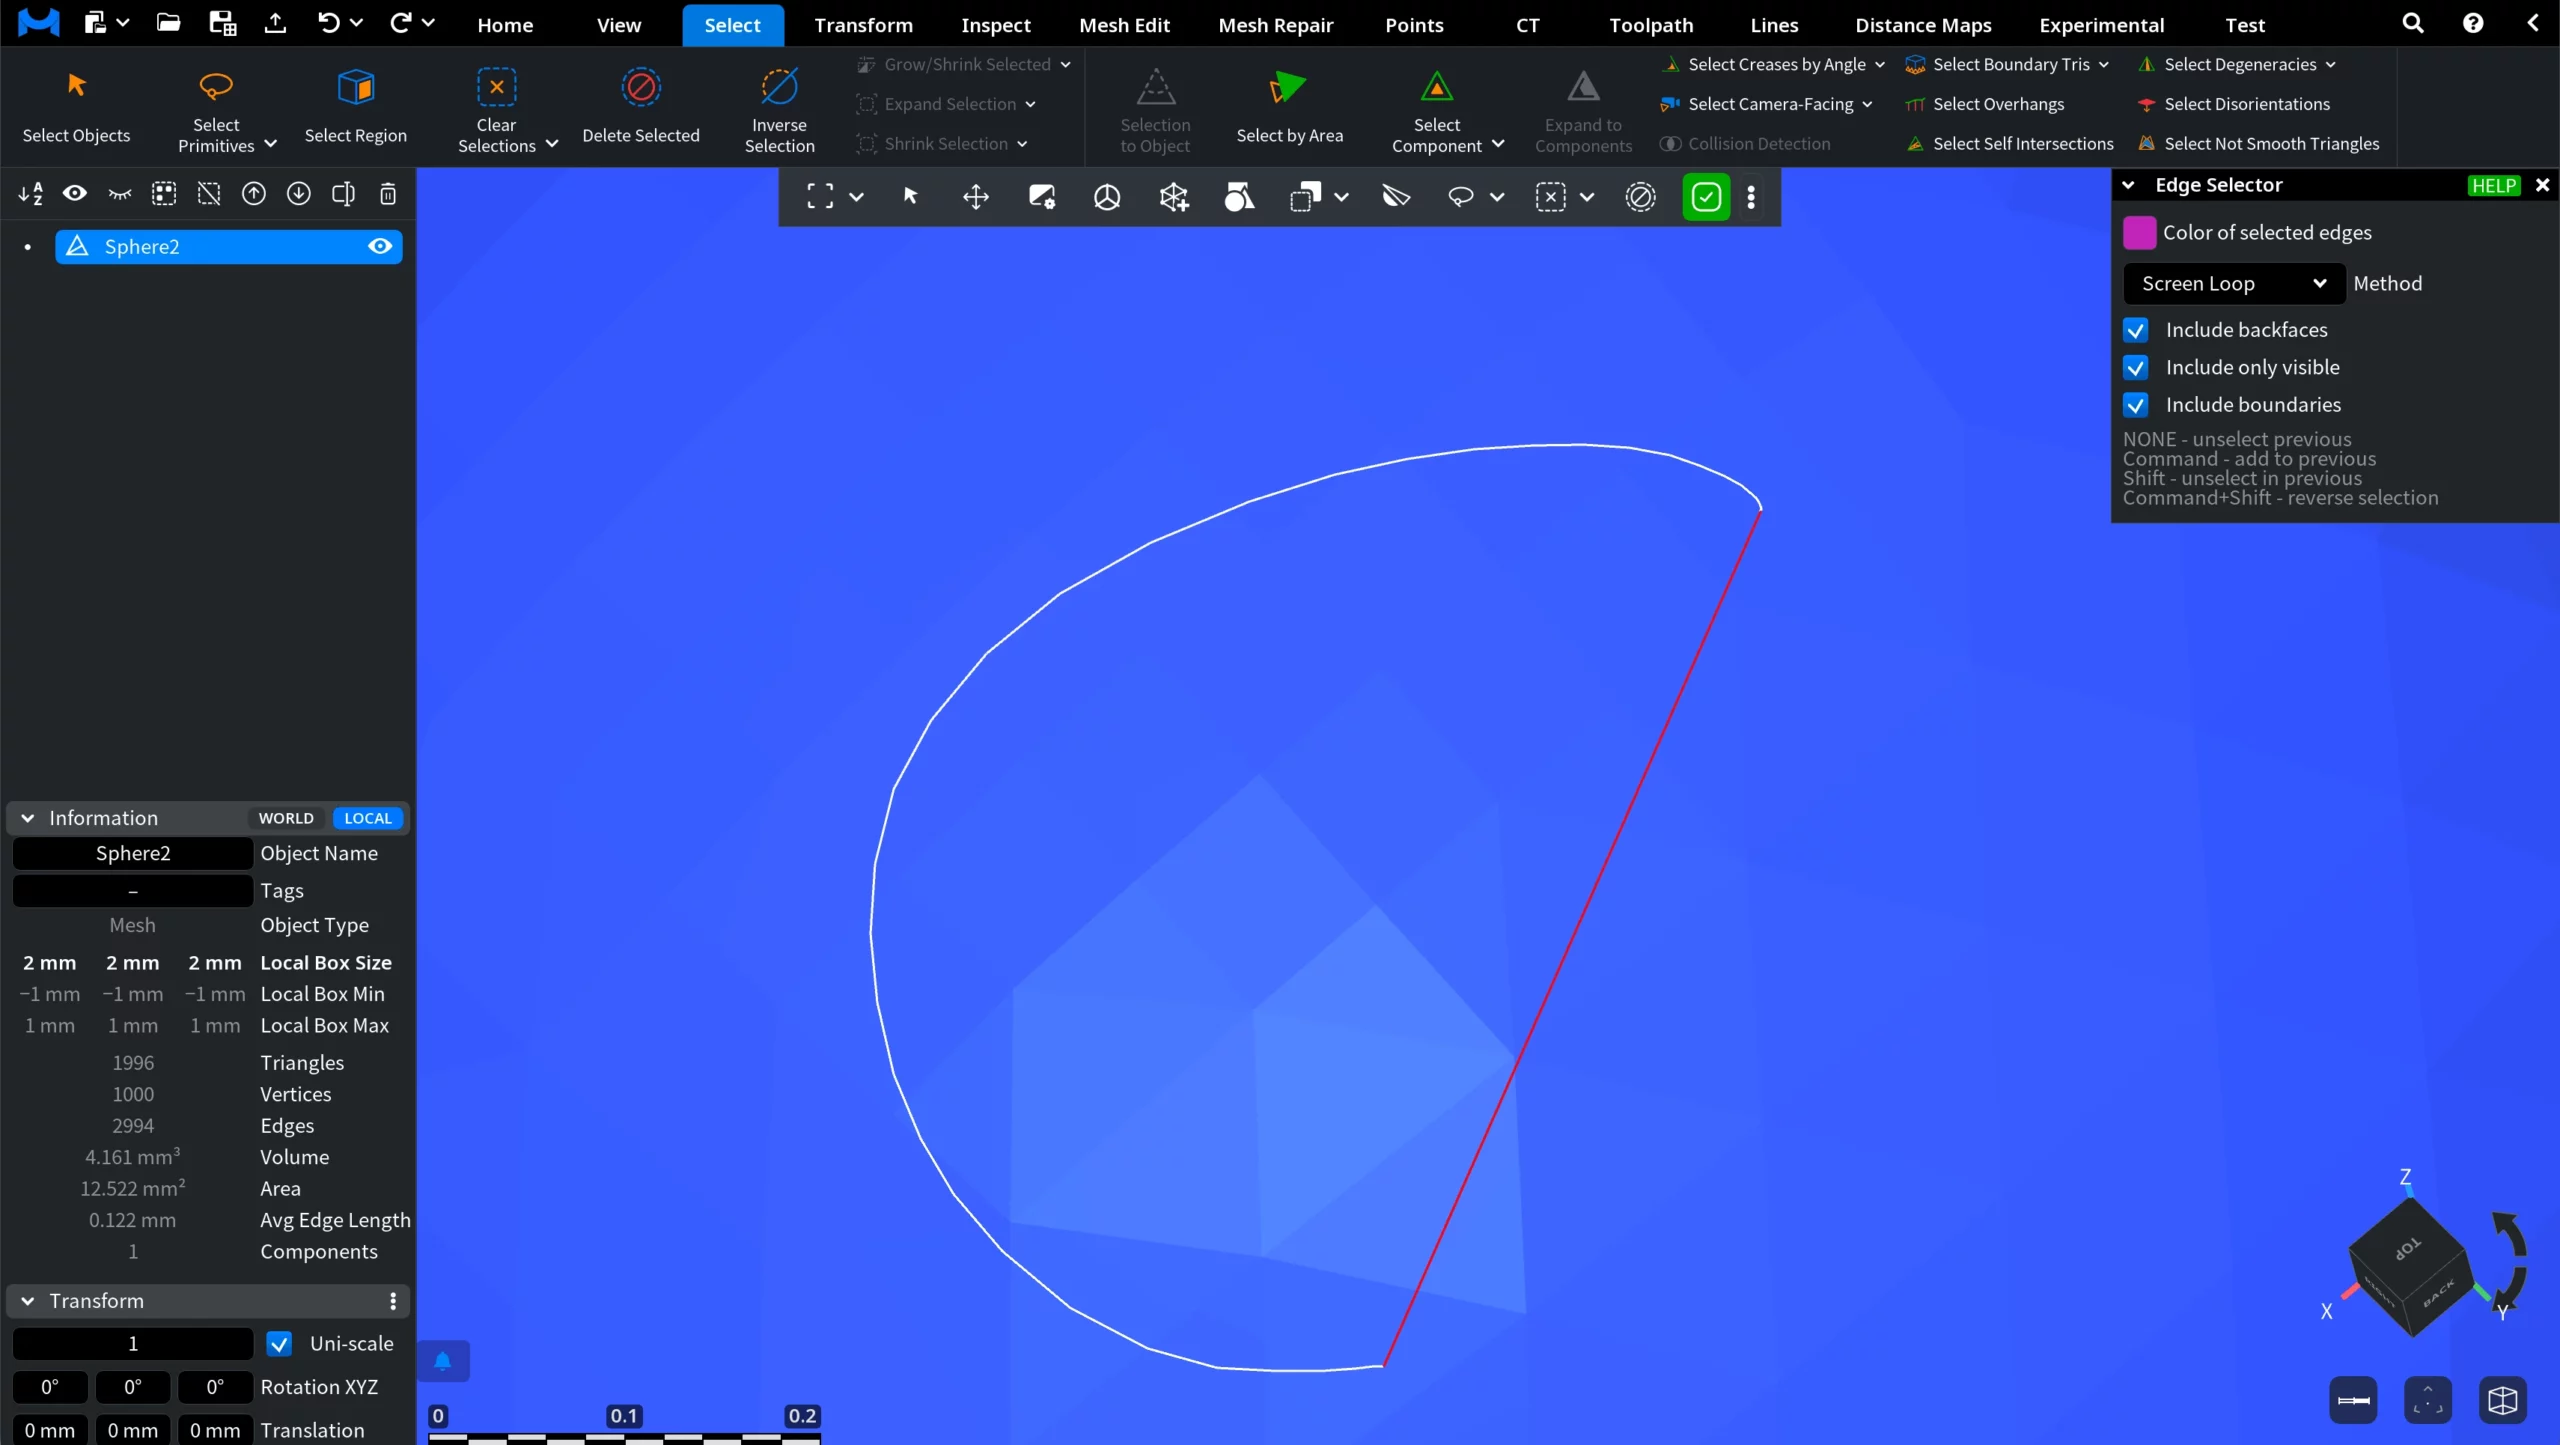
Screen Loop
Screen Loop selects all mesh edges enclosed or intersected by a lasso-style loop drawn in screen space. Hold the left mouse button and drag the cursor to draw a freeform selection contour around the target area. While drawing, MeshInspector displays the loop as a temporary screen-space preview. Once you release the mouse button, all edges enclosed or crossed by the defined loop become selected according to the active visibility settings.
Additional options:
- Include backfaces includes edges located on the reverse side of the mesh.
- Include only visible limits selection to edges visible from the current view.
- Include boundaries ensures that mesh boundary edges incident to the selected edges are also included.
Modifier Keys (Where Applicable)
Modifier keys change how the current edge selection is updated:
- None replaces the previous selection.
- CTRL (or Command) adds edges to the current selection.
- SHIFT removes edges from the current selection.
- SHIFT + CTRL (or Command) reverses the selection.