Advice and answers from the MeshInspector Team

Partitioner Tool in MeshInspector Explained

Guide to the Partitioner Tool in MeshInspector
Updated over 1 week ago

The Partitioner tool helps you automatically split a mesh into a specified number of segments. It solves the problem of manually defining possible separation areas when a model needs to be prepared for 3D printing as separate parts, reverse engineering, inspection, or further editing. You can find it under the Select tab.

Partitioner: Where to Find

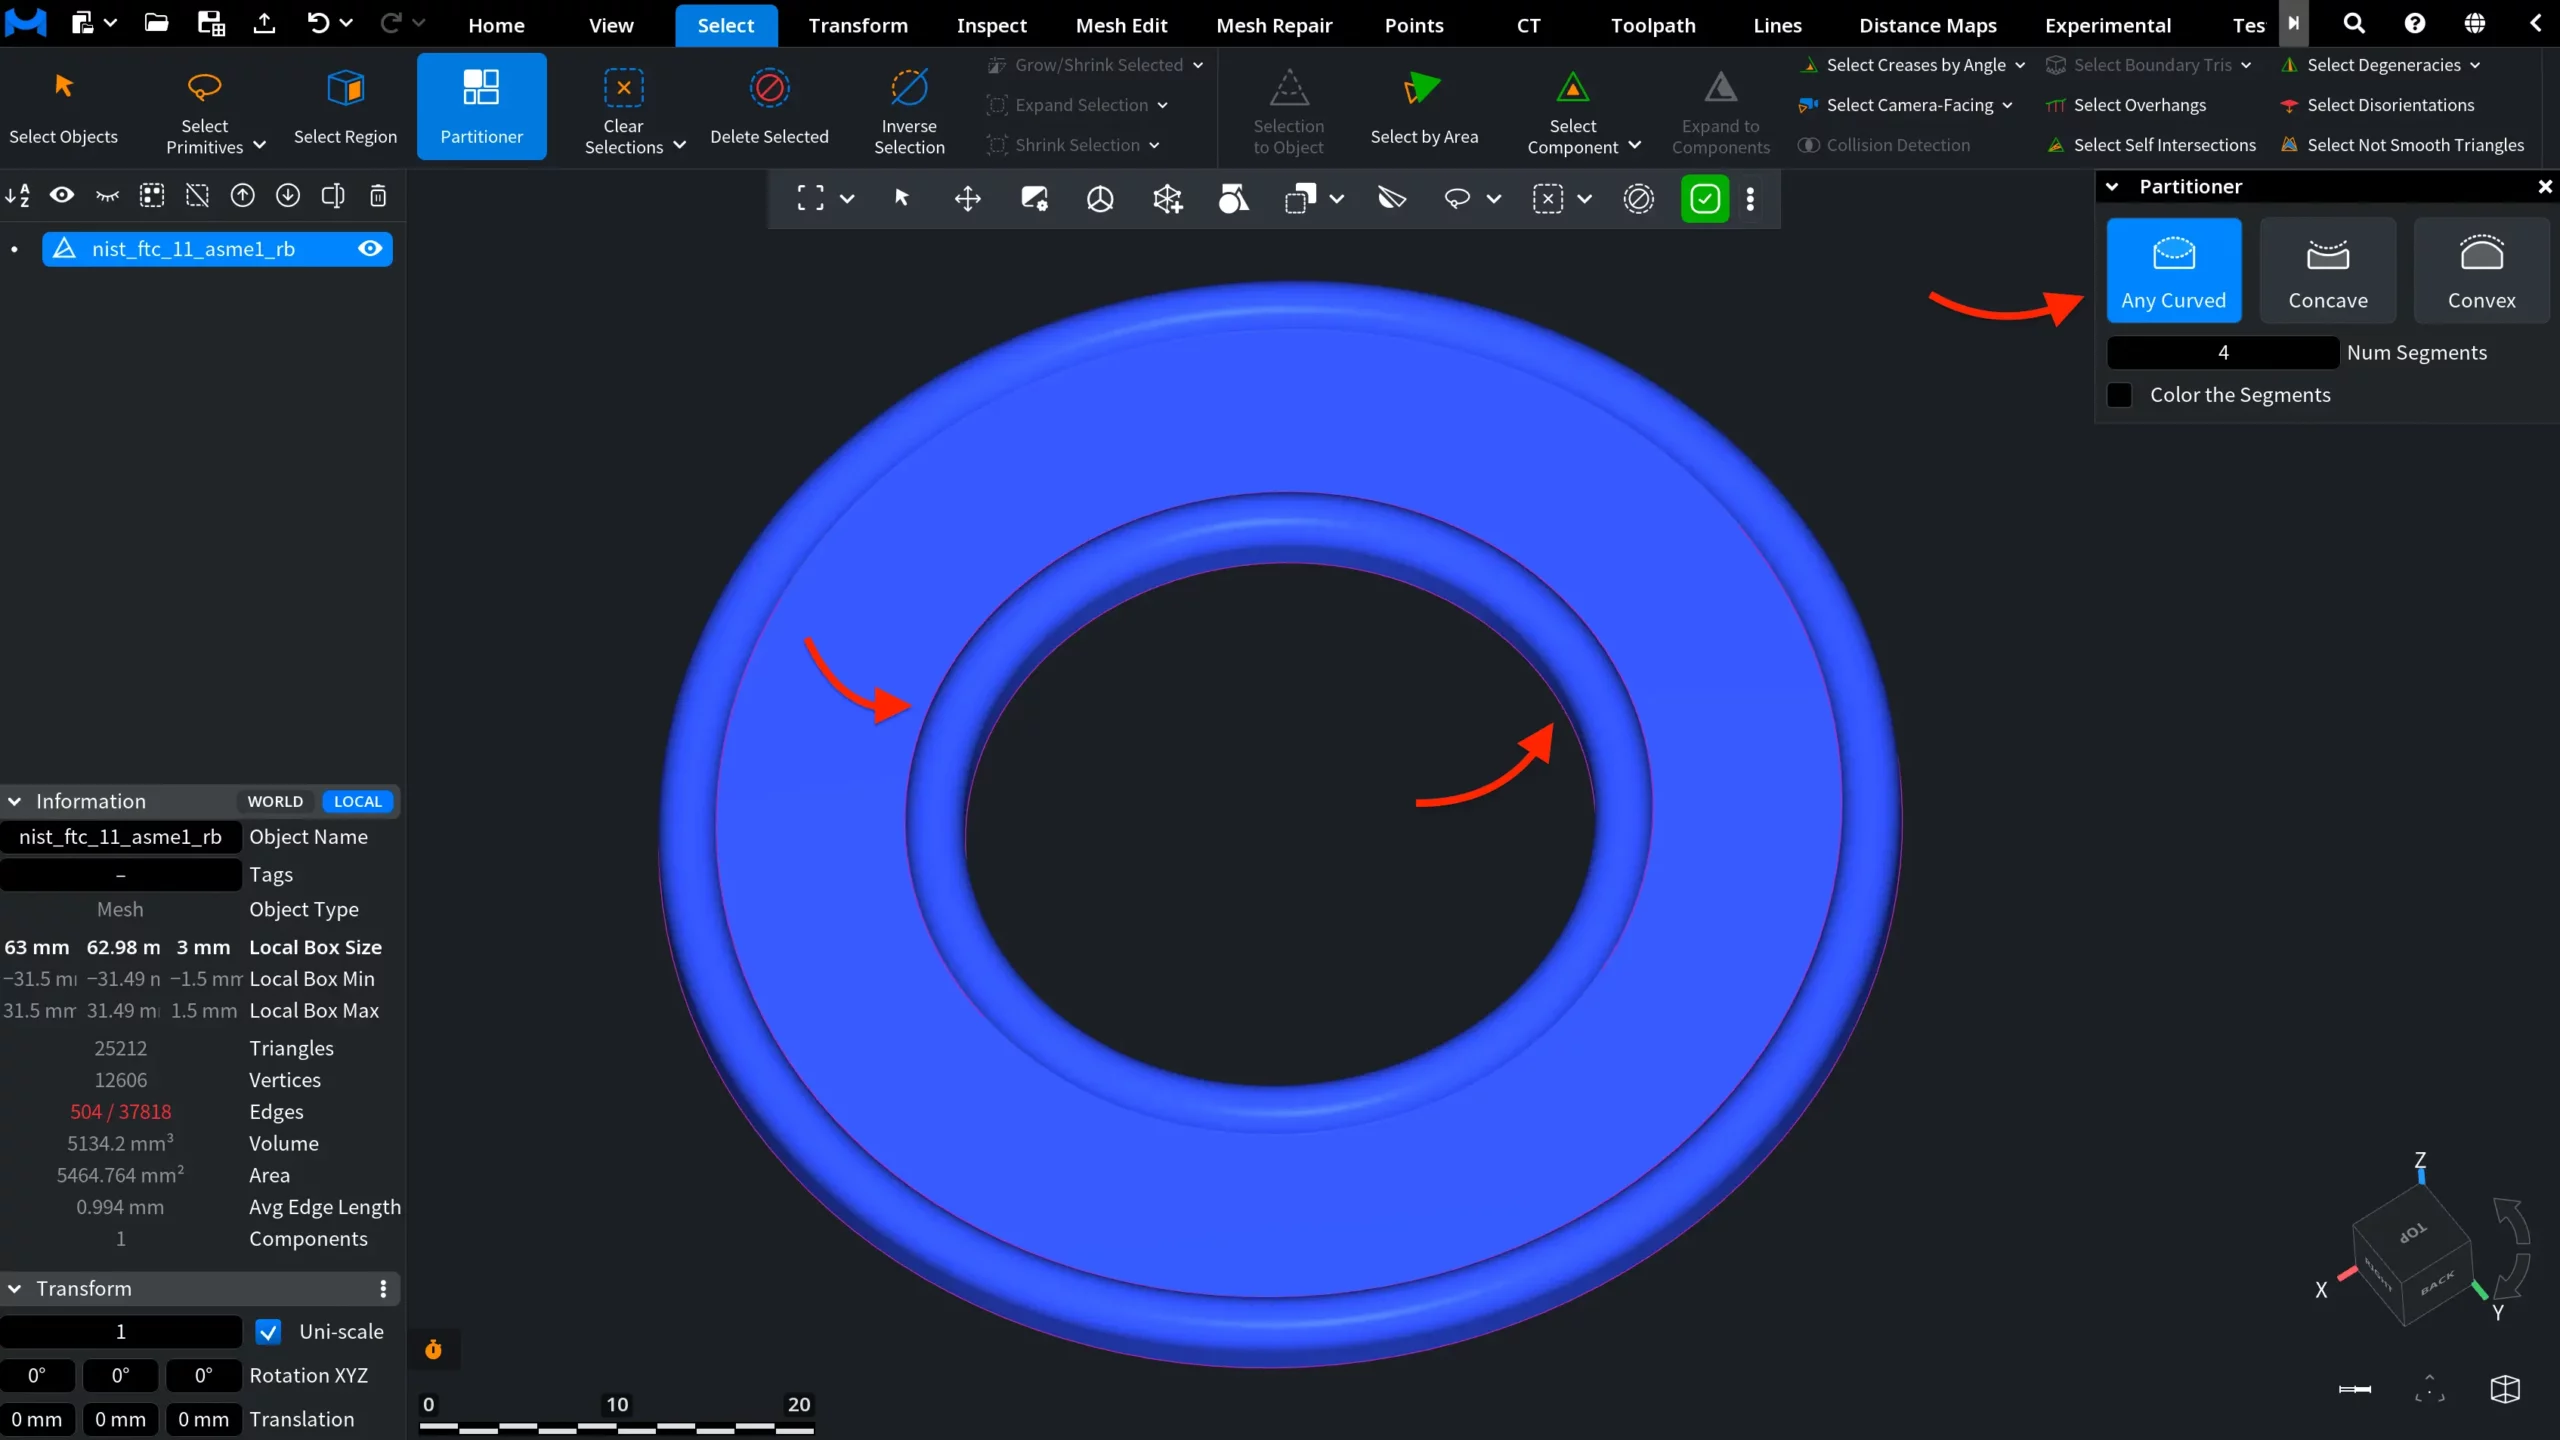
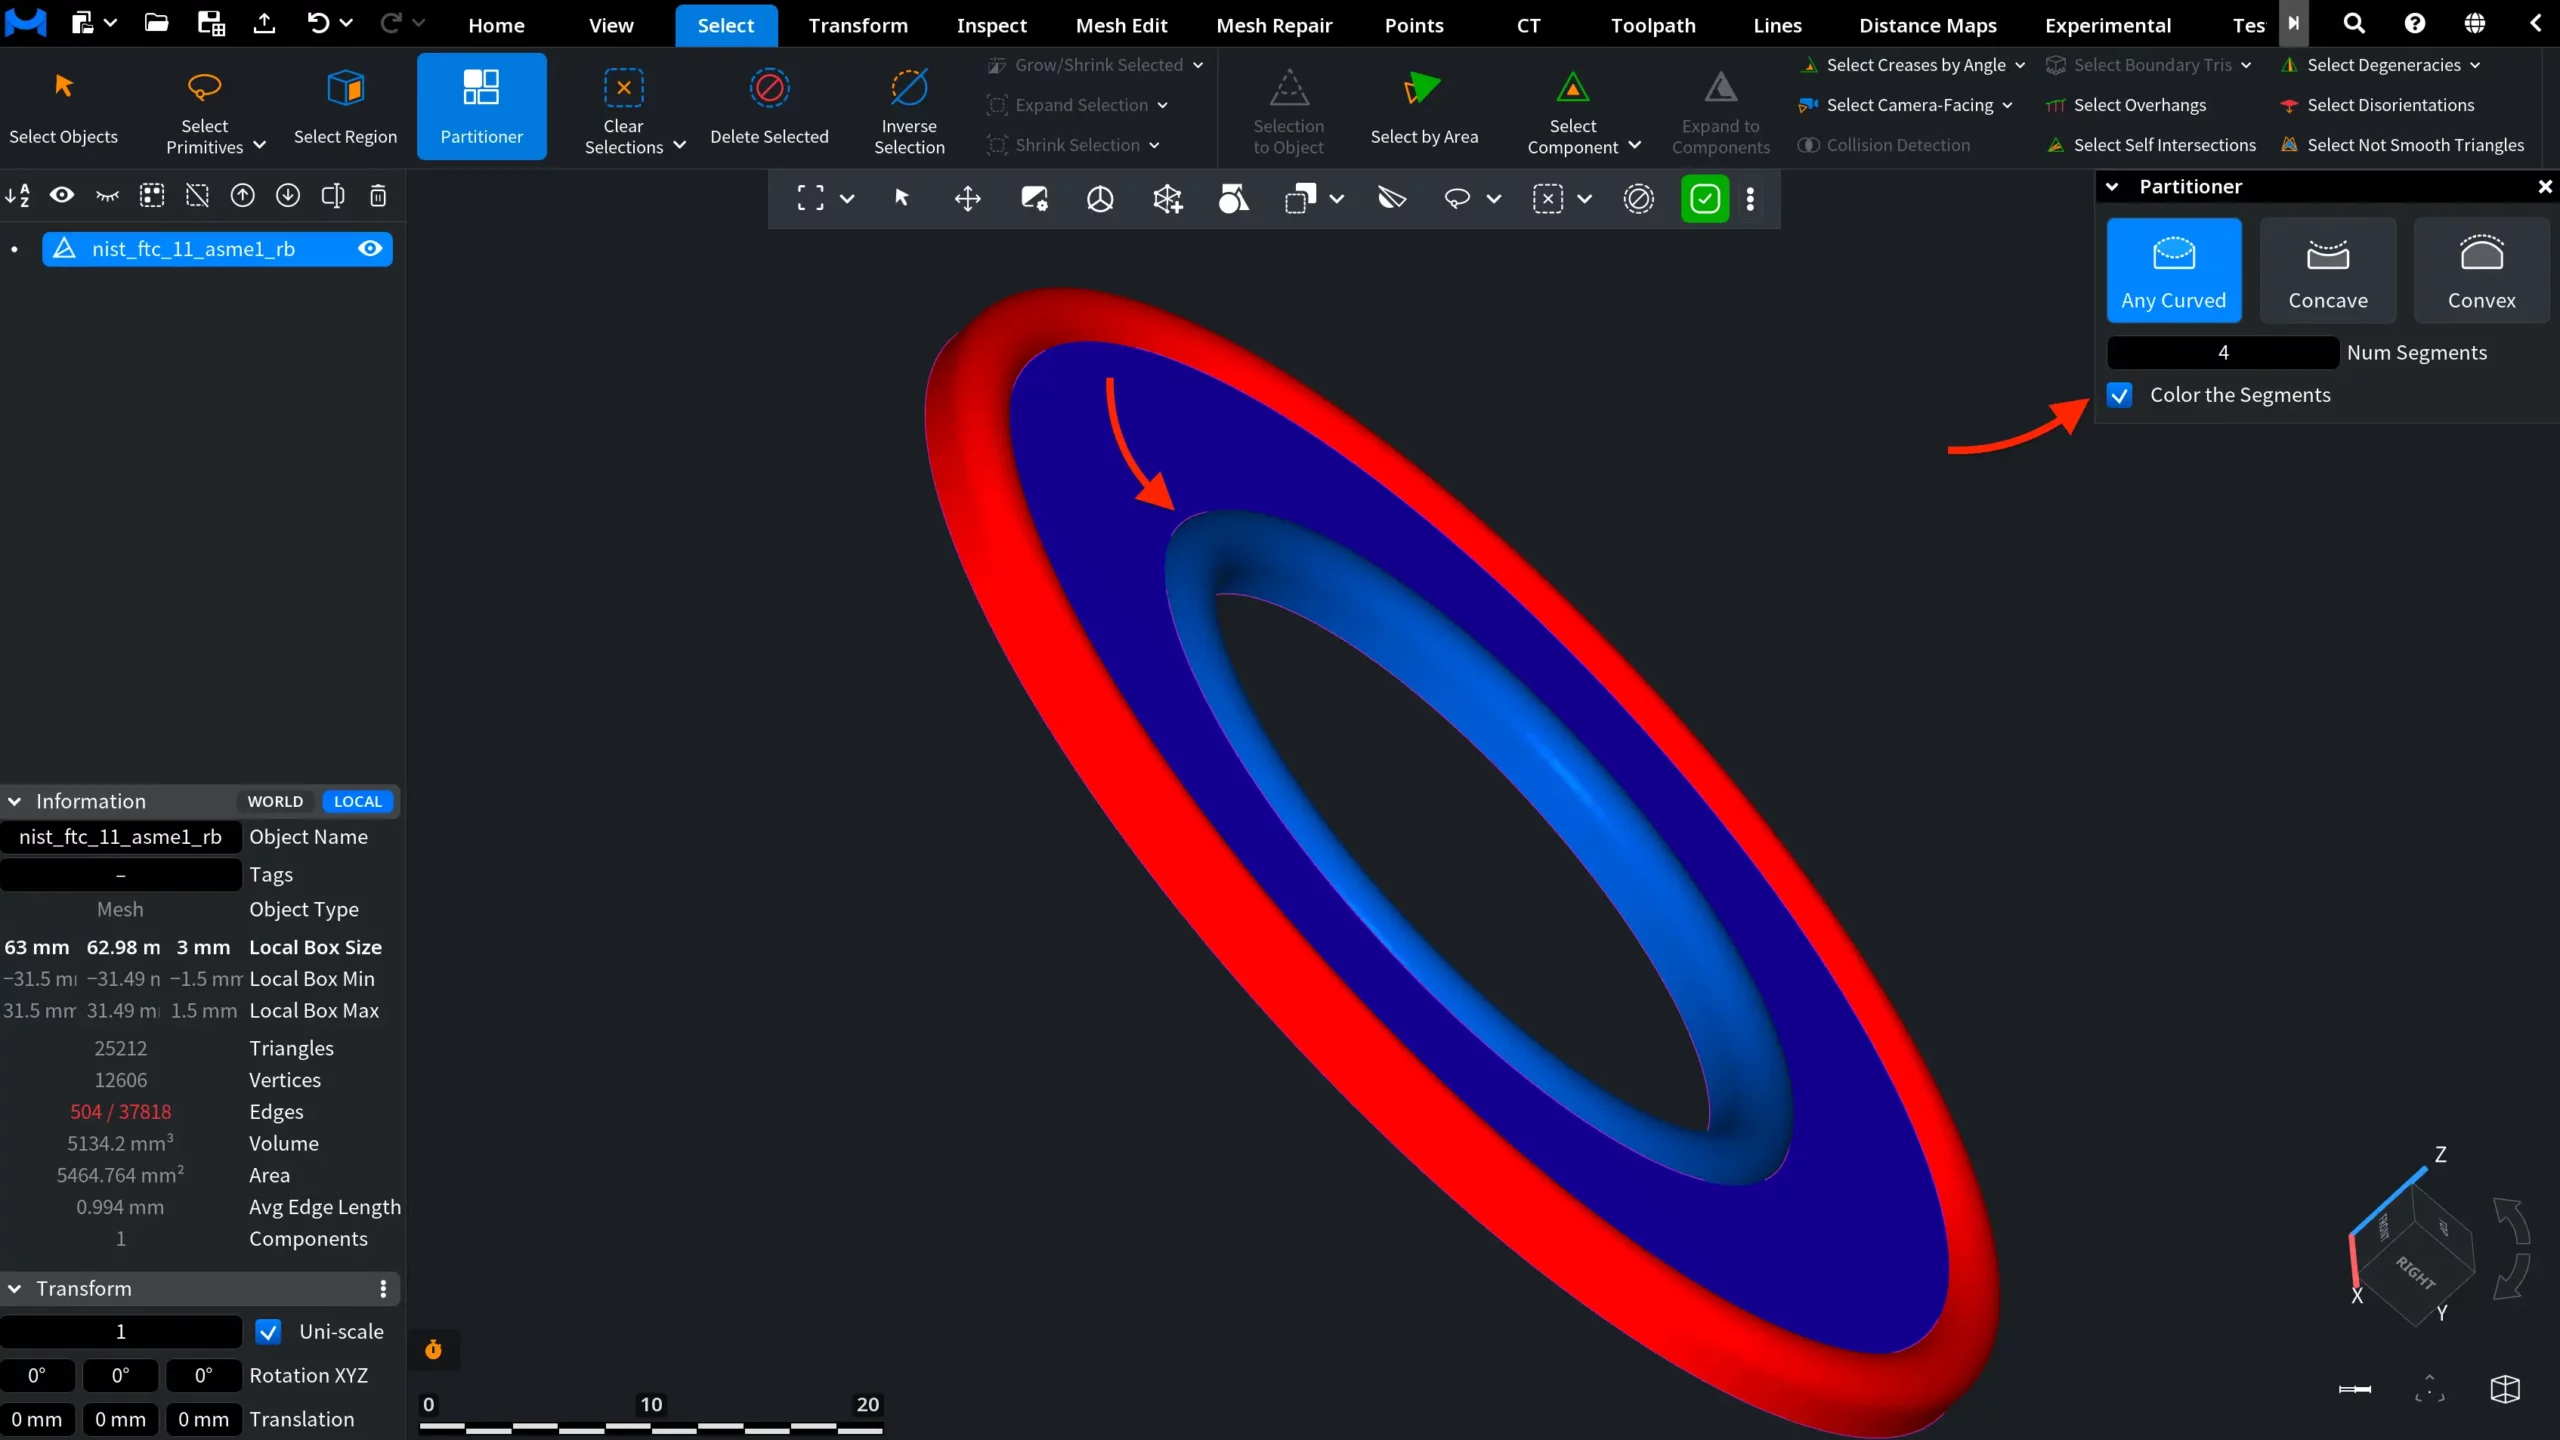
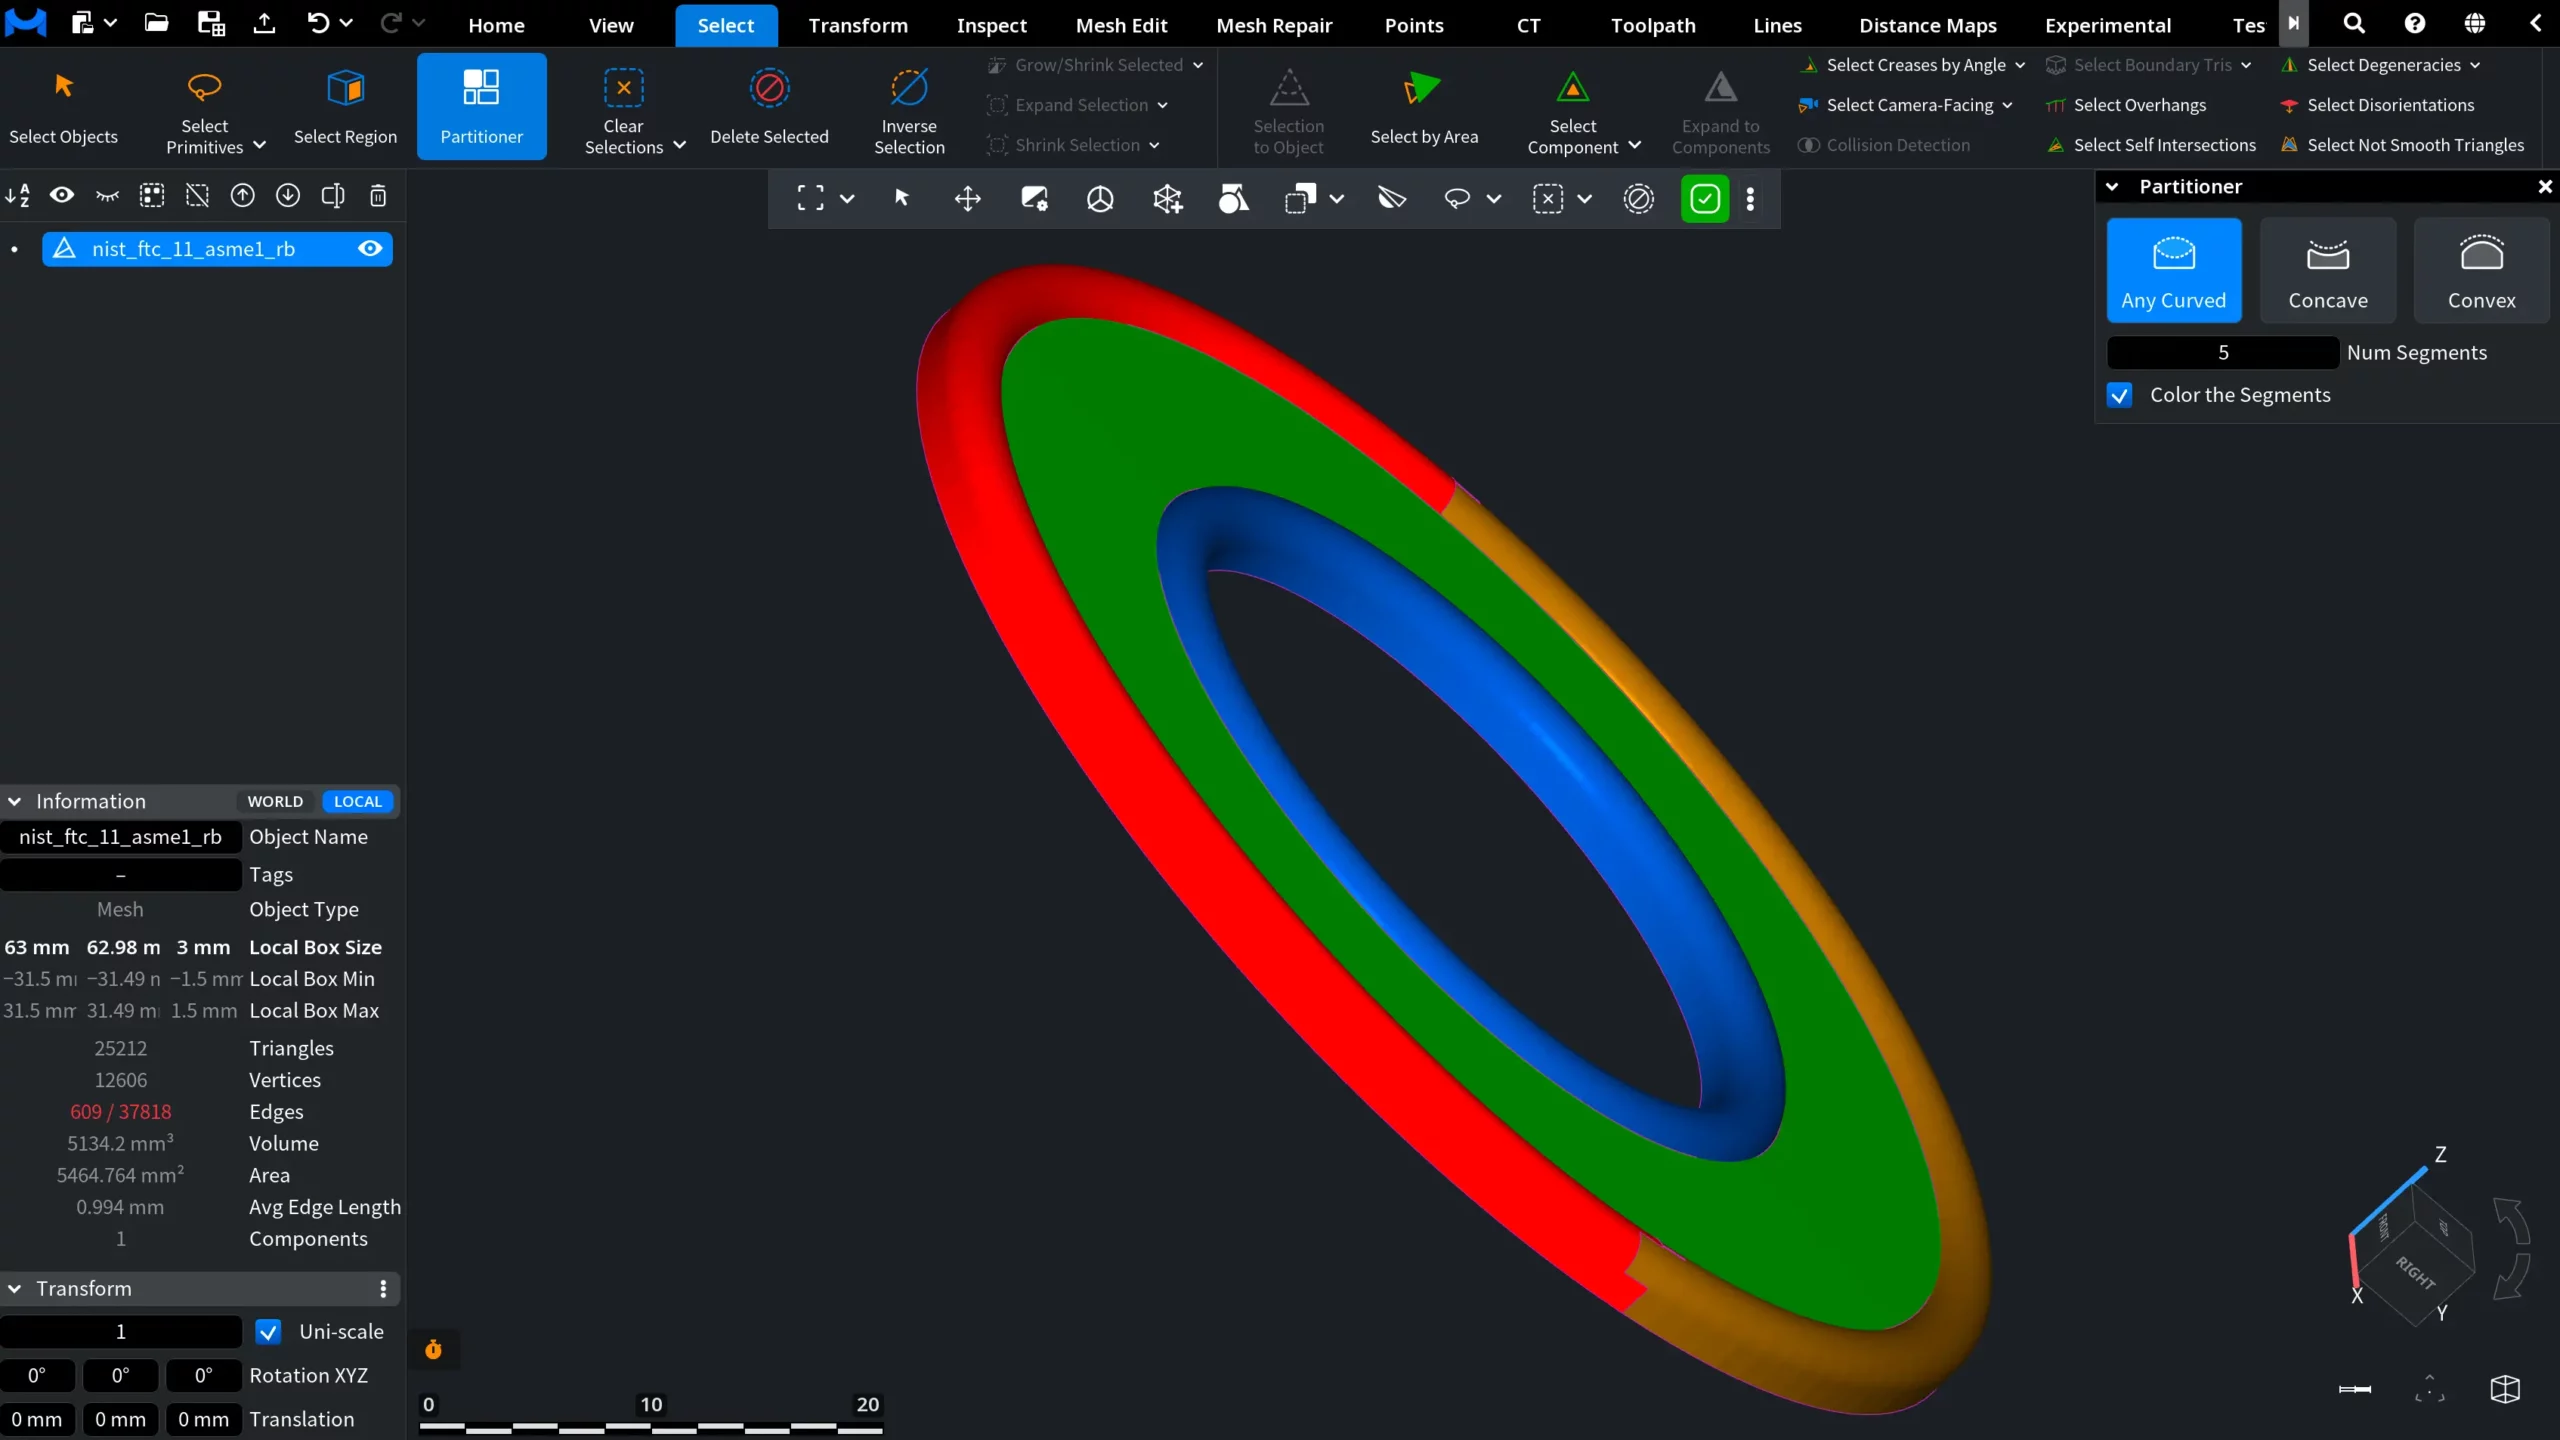
Partitioner: Effect and Settings

After you click Partitioner, MeshInspector applies the operation to the selected mesh. The object is divided into the specified number of segments, and the boundaries between these segments are shown as selected edges on the model. A dedicated Partitioner panel also opens on the right side of the workspace.

Practitioner: Effect and Settings

This panel lets you adjust how the mesh is divided and how the result is displayed:

  • Any Curved places segment boundaries along both concave and convex curved edges. Use this option when you want the tool to detect curved transitions of different types.
  • Concave makes segment boundaries tend to pass along concave edges. Use this option when you want the partitioning to follow inward-curving areas of the model.
  • Convex makes segment boundaries tend to pass along convex edges. Use this option when you want the partitioning to follow outward-curving areas of the model.


You can also control:

  • Num Segments defines how many segments the mesh should be partitioned into. A lower value creates larger, simpler segments, while a higher value creates more detailed segmentation.
  • Color the Segments colors all triangles belonging to the same segment with one distinct color. If this option is off, MeshInspector only shows the segment boundaries as selected edges.

In the screenshot below, the object is divided into four colored areas, with Color the Segments enabled. The colored surfaces represent the segments created by the Partitioner tool, while the selected edges still indicate the boundaries between these segments. This view is useful when you need to check whether the mesh has been divided correctly before converting the segments into separate objects or continuing with further editing.

Partitioner: Colored Segments

As you increase or decrease the Number of Segments, MeshInspector updates the partitioning automatically. The selected boundary edges change, and, if Color the Segments is enabled, the colored areas on the model change as well.
Partitioner: Five Segments

After Partitioner: To Components

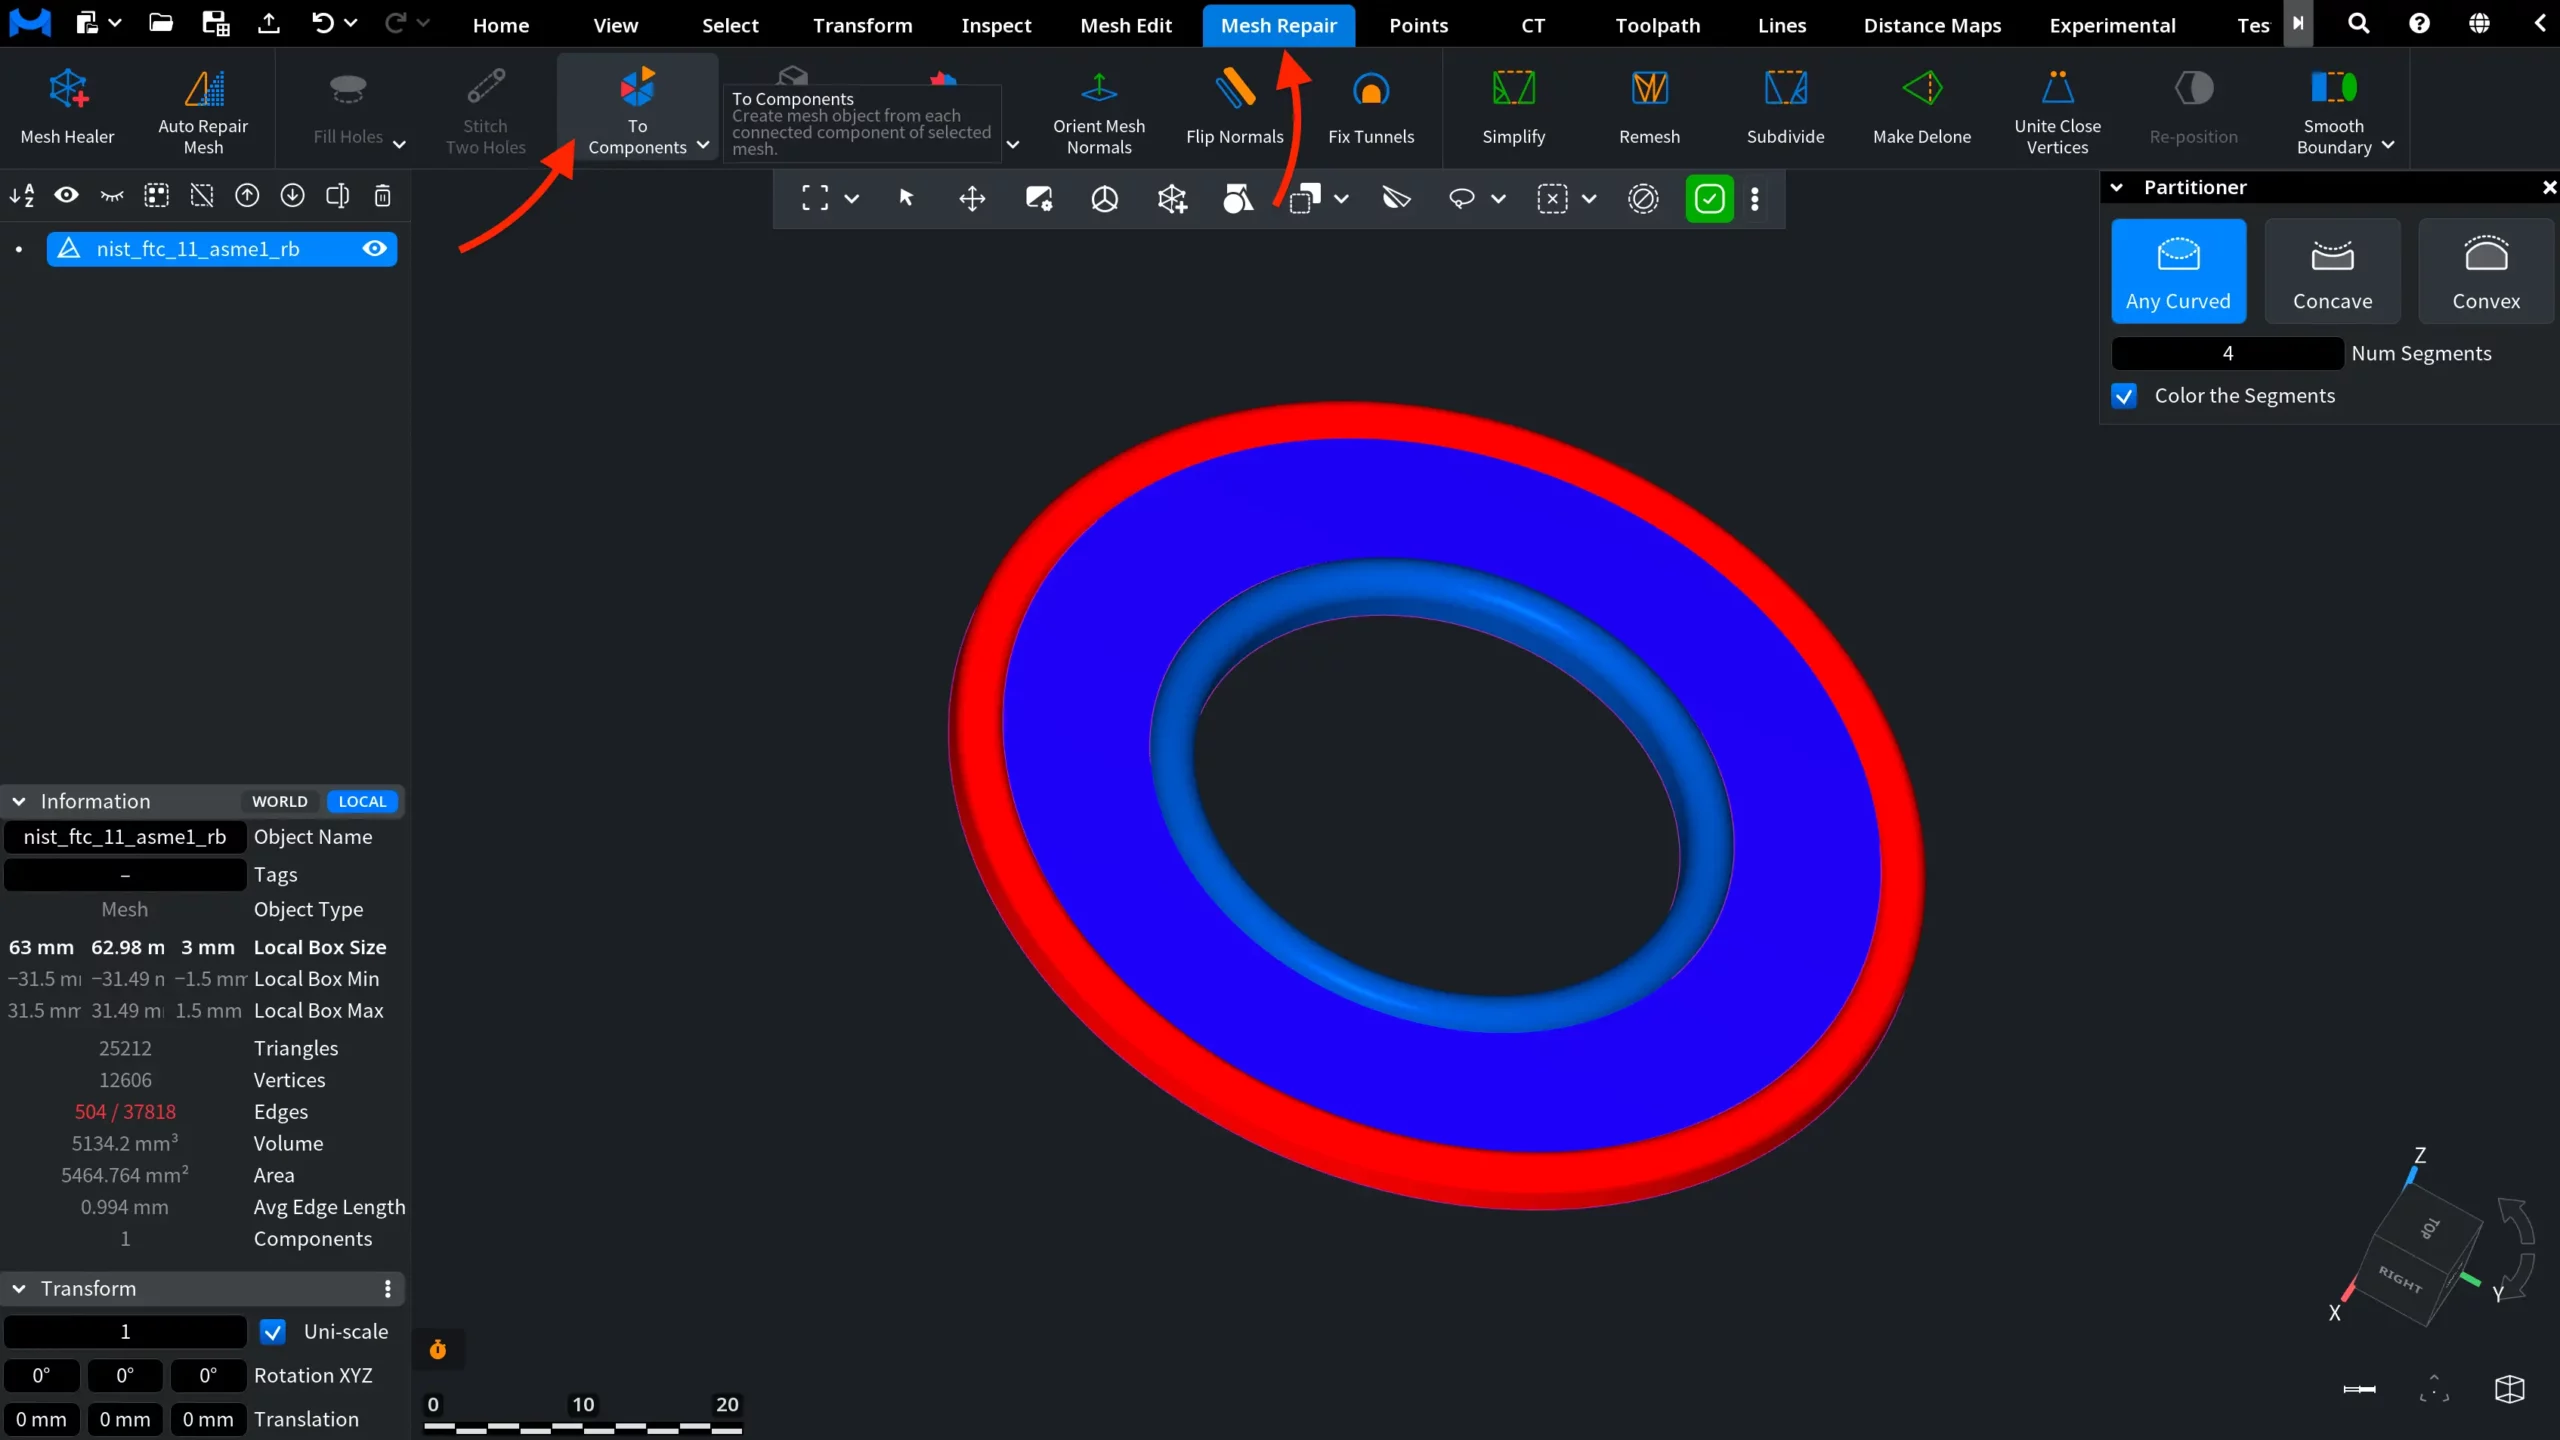
If you want to turn all partitioned segments into individual mesh objects, keep the partitioning result active — do not undo it — then go to the Mesh Repair tab and click To Components. MeshInspector will create a separate mesh object from each partitioned segment. After conversion, the parts appear as individual objects in the Scene Tree, so you can hide, show, select, edit, export, or process them separately.

To Components Based on Partitioner: Before

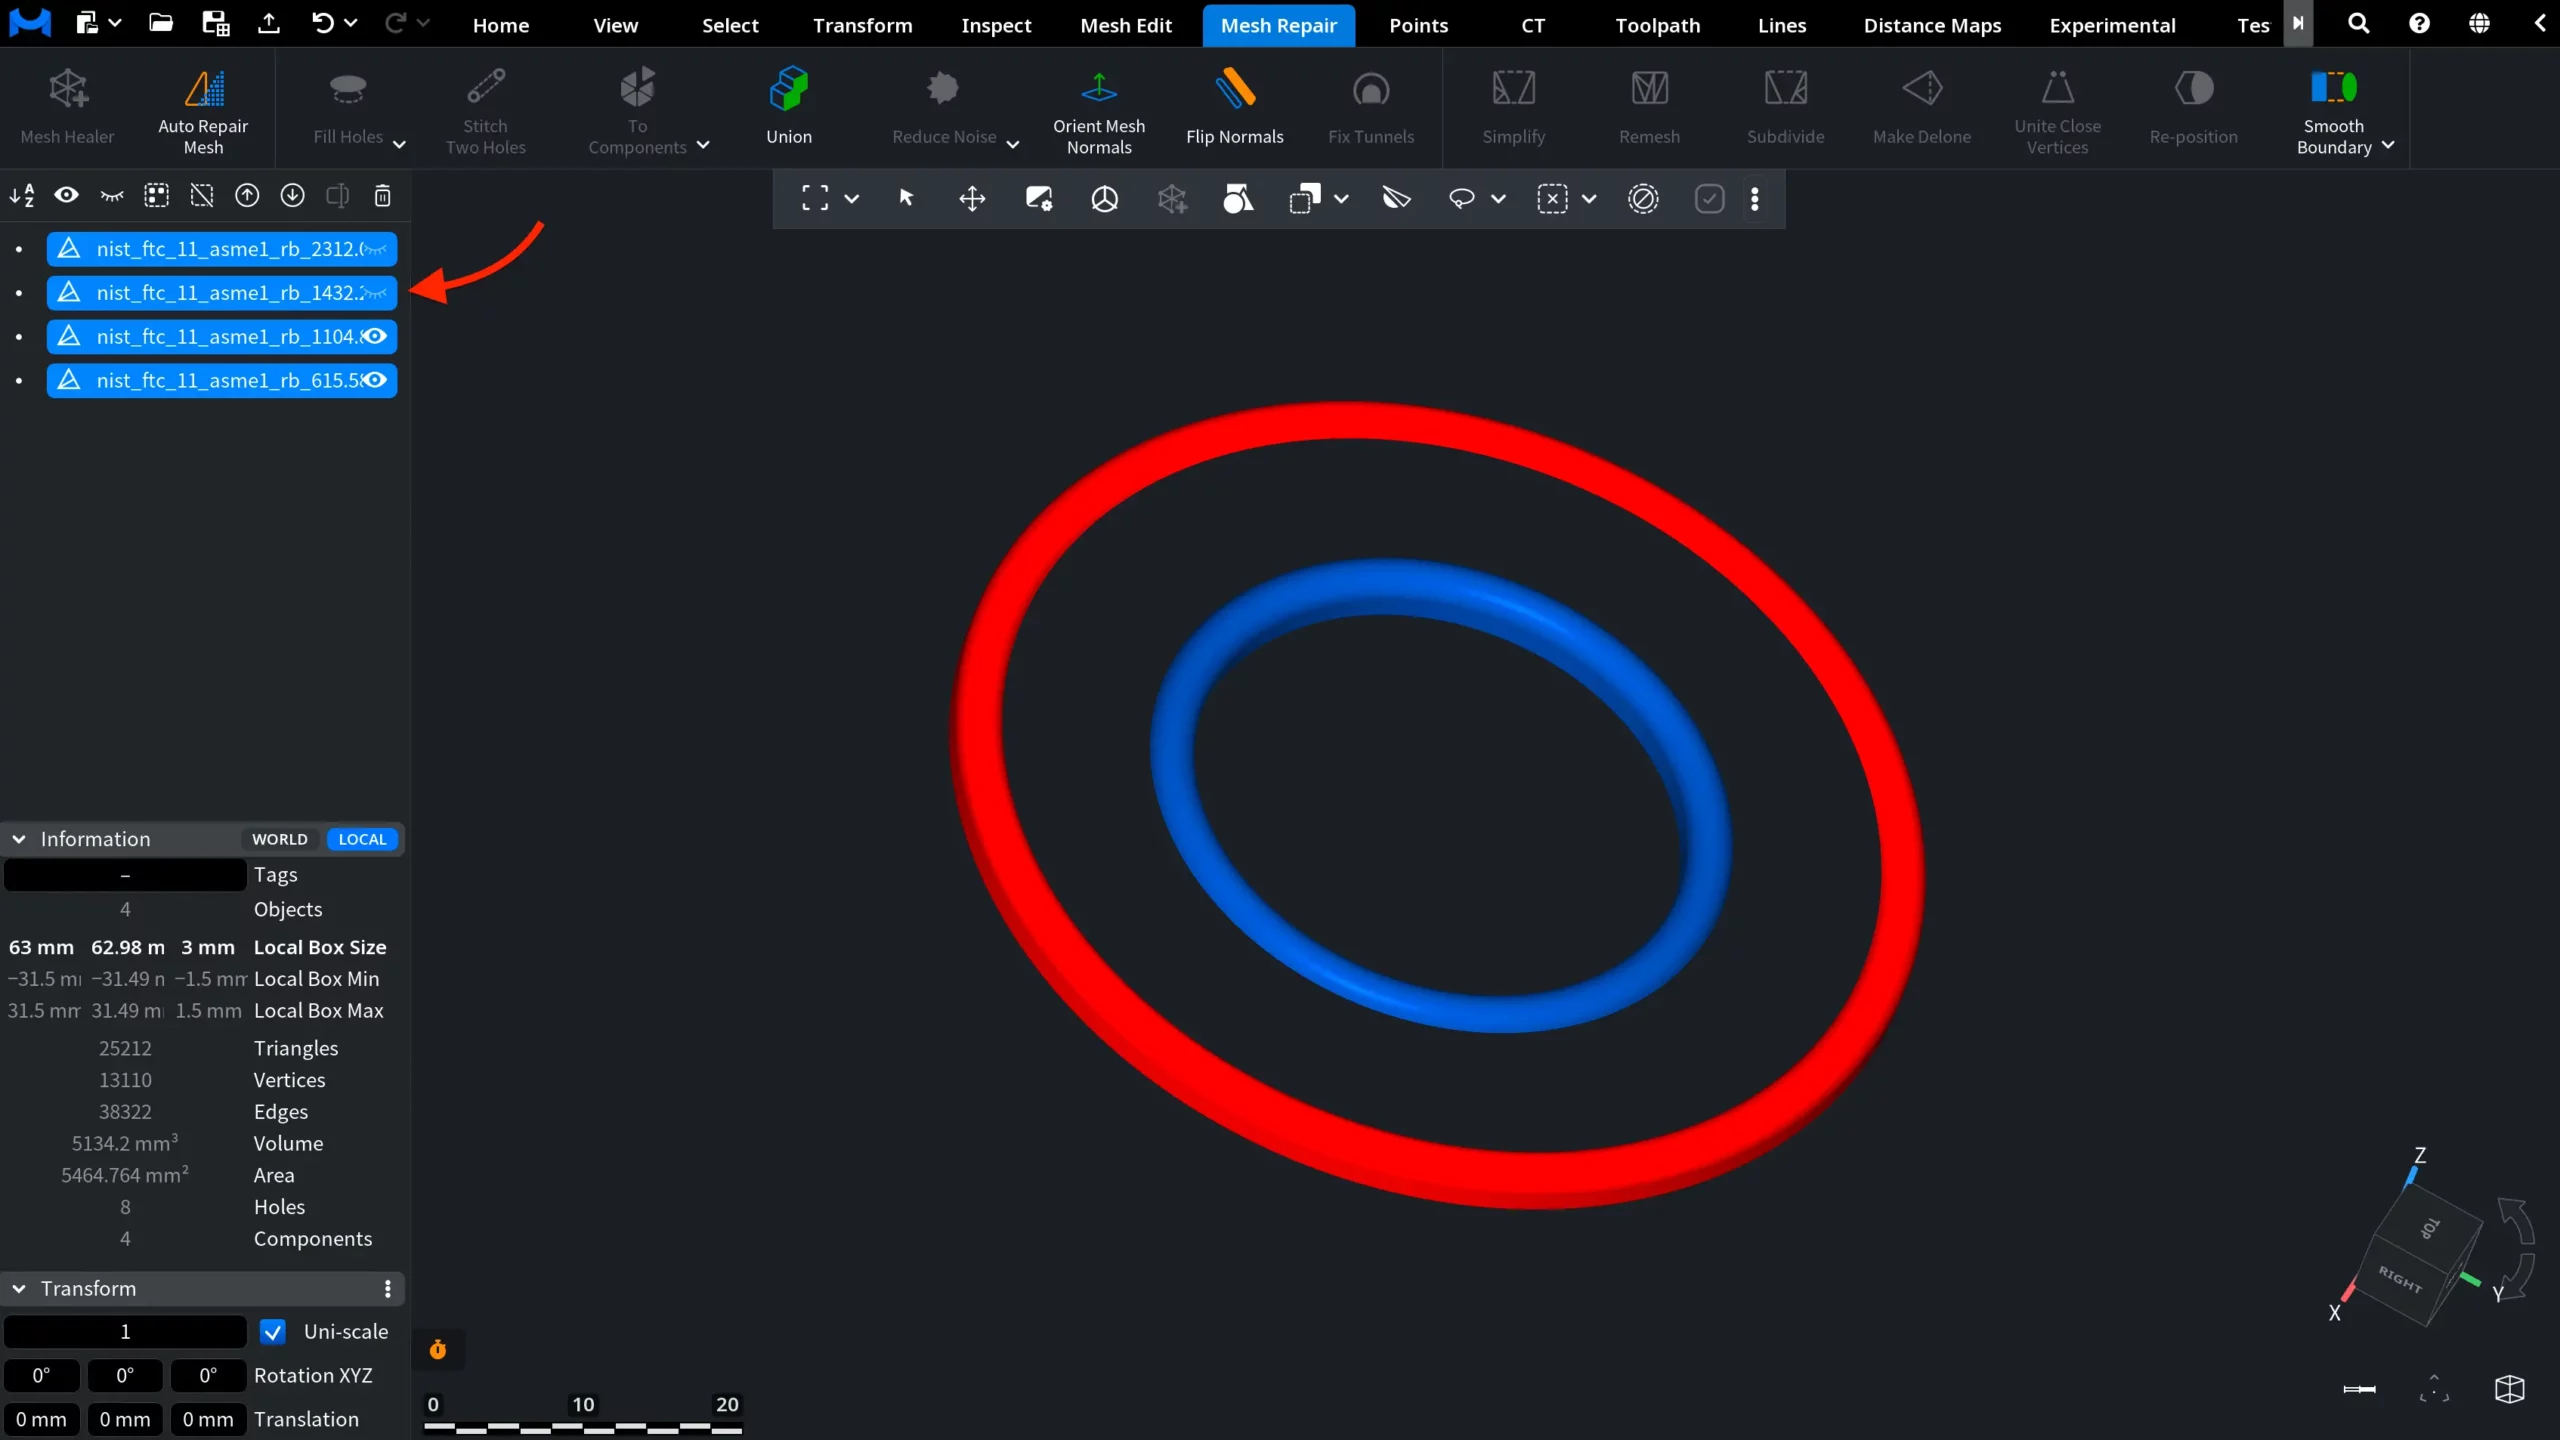
In the screenshot below, the four segments from the previous step have been converted into separate mesh objects. They now appear as individual items in the Scene Tree. Note that the original object is no longer shown as a single source mesh: it has been split into separate objects. For clearer visualization, two of the resulting objects are hidden, so only the selected parts are visible in the viewport.

To Components Based on Partitioner: After

After Partitioner: Selection to Object

You do not always need to convert all partitioned segments into separate objects. If you only need one segment, or several specific segments, you can select them manually after using Partitioner. After applying Partitioner, go to the Select tab and click Select Component. Then click the segment you want to separate. To select several segments, use the modifier keys shown in the Select Component panel while clicking the needed segments. In this example, only the central segment is selected. It is highlighted in red. Color the Segments is disabled here to make the selected area easier to see.

Select to Object After Partitioner: Step 1
After that, with the needed segment selected, click Selection to Object in the same Select tab. MeshInspector creates a new mesh object from the selected area on the active mesh. Unlike To Components, this option does not split the whole mesh into separate objects. It extracts only the selected segment or segments, while the source mesh remains in the Scene Tree.
Select to Object After Partitioner: Step 2

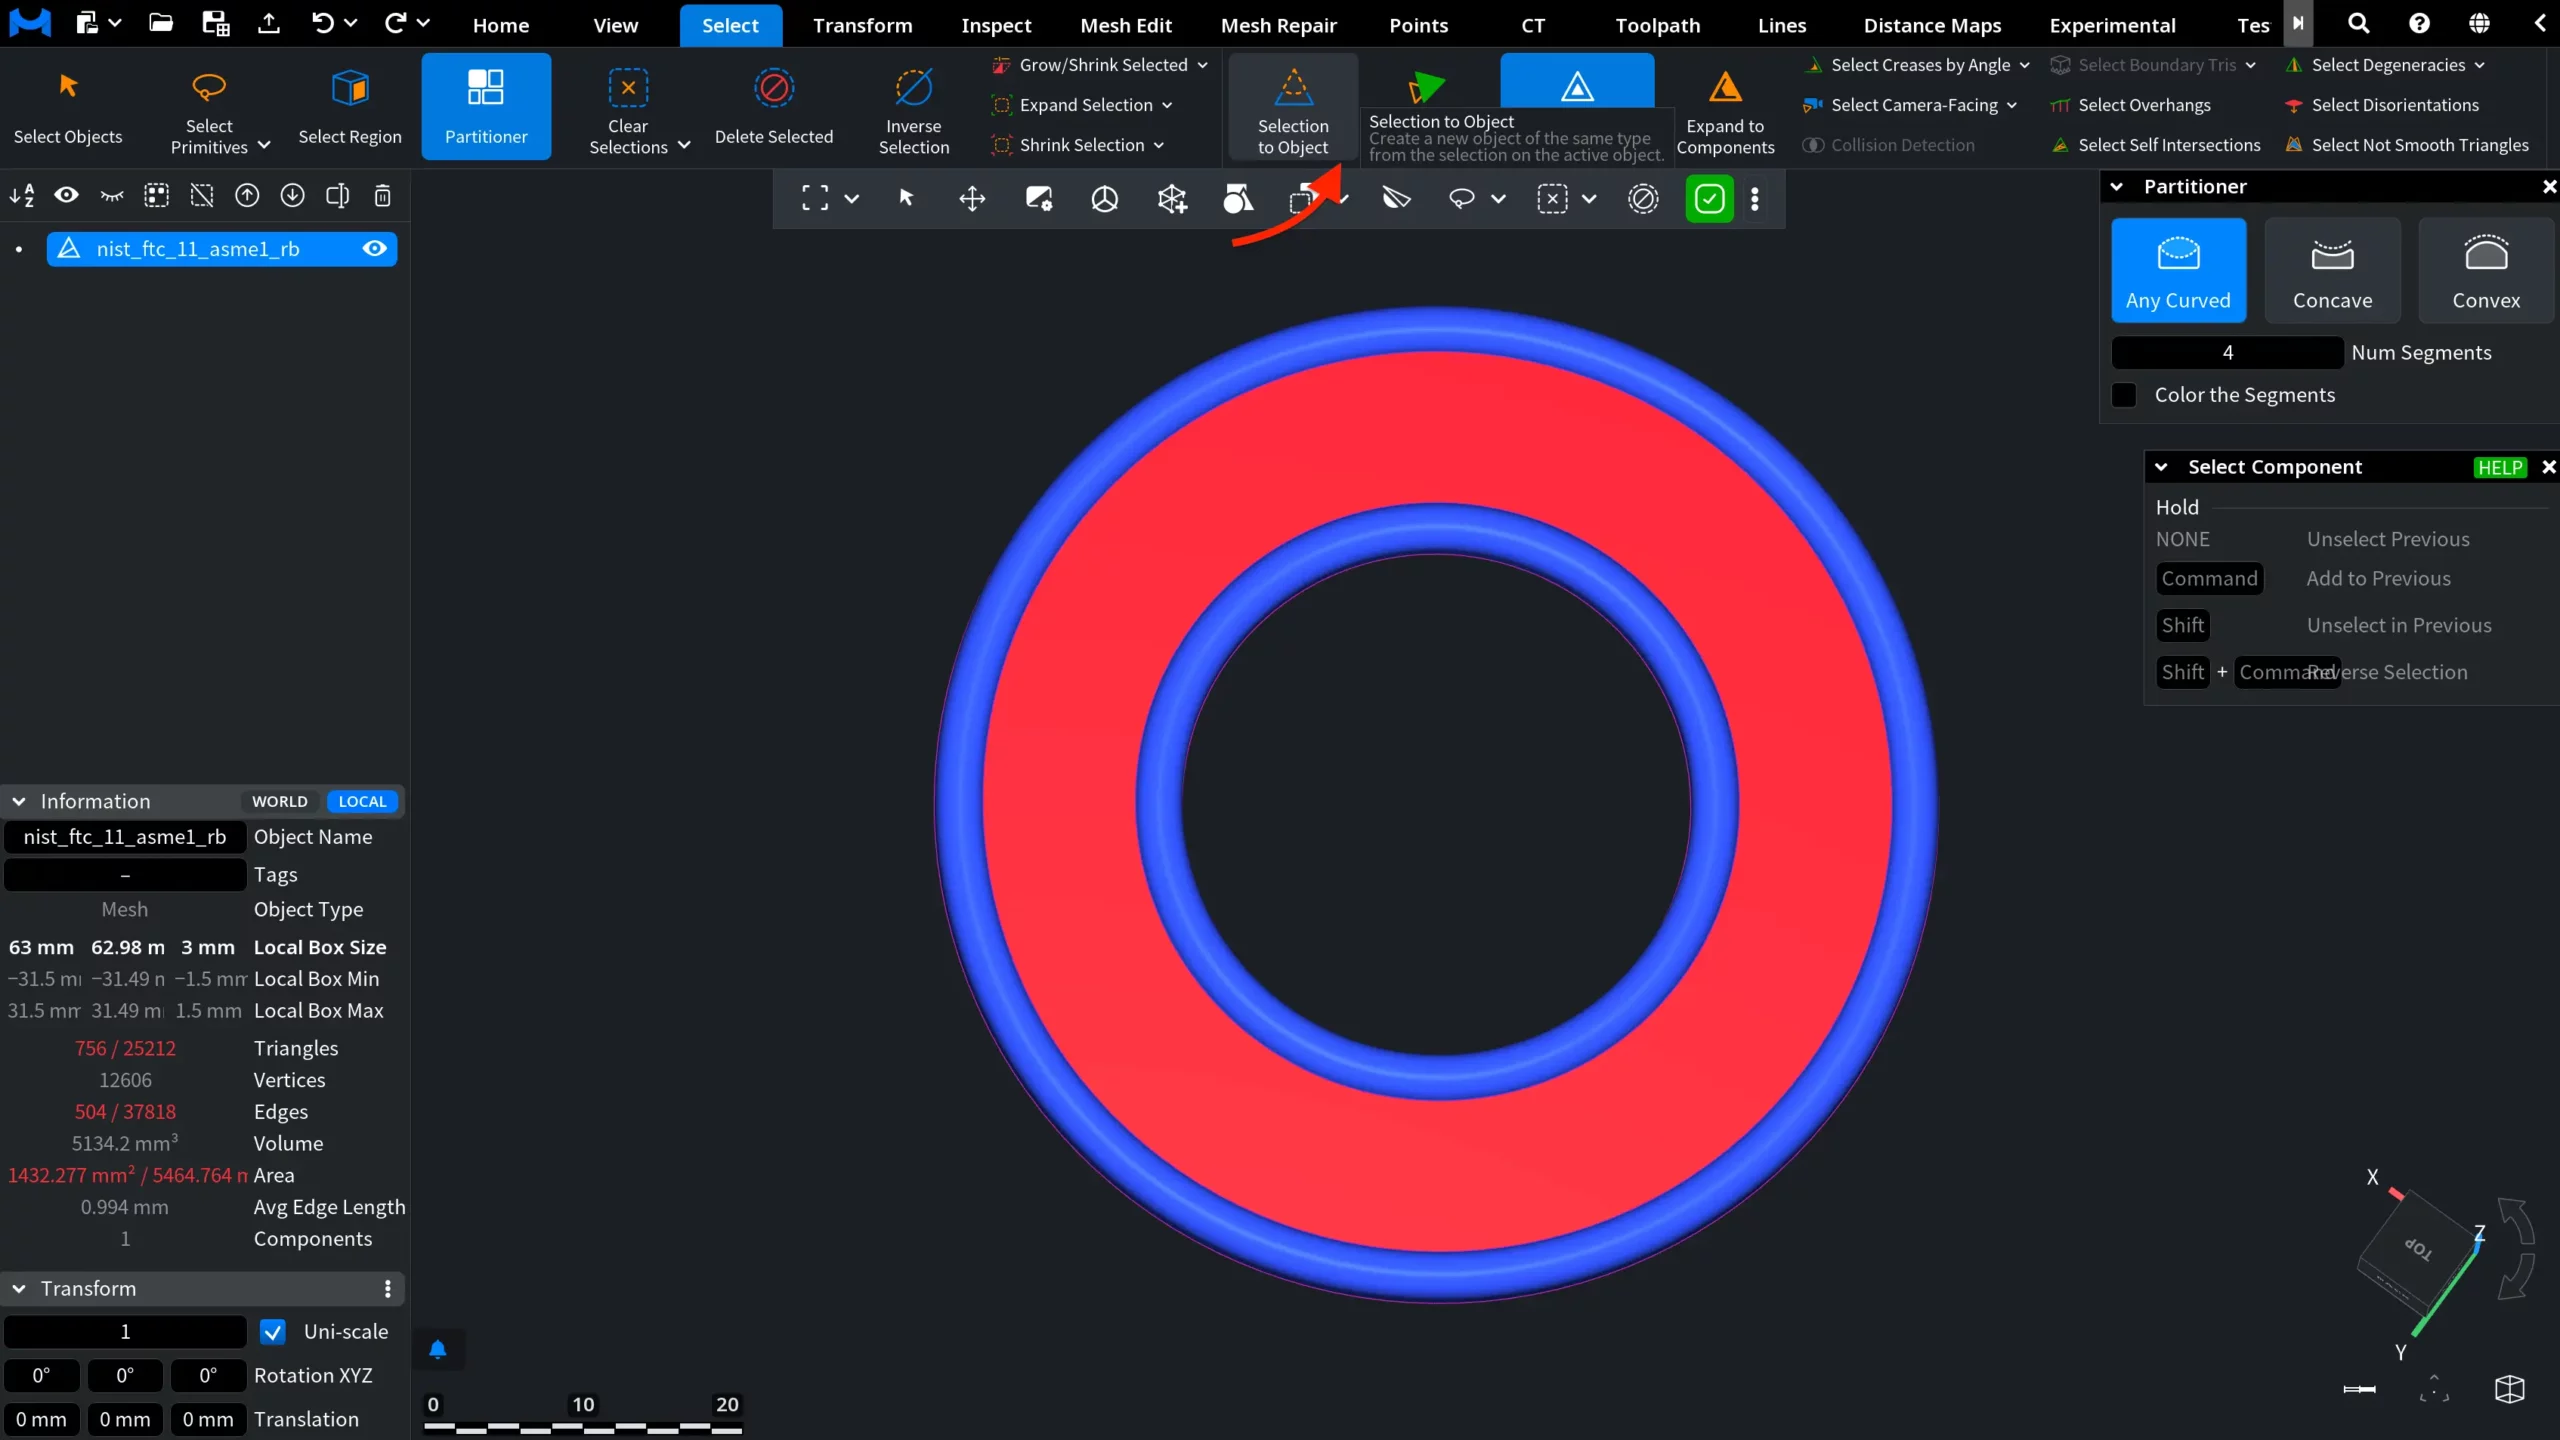
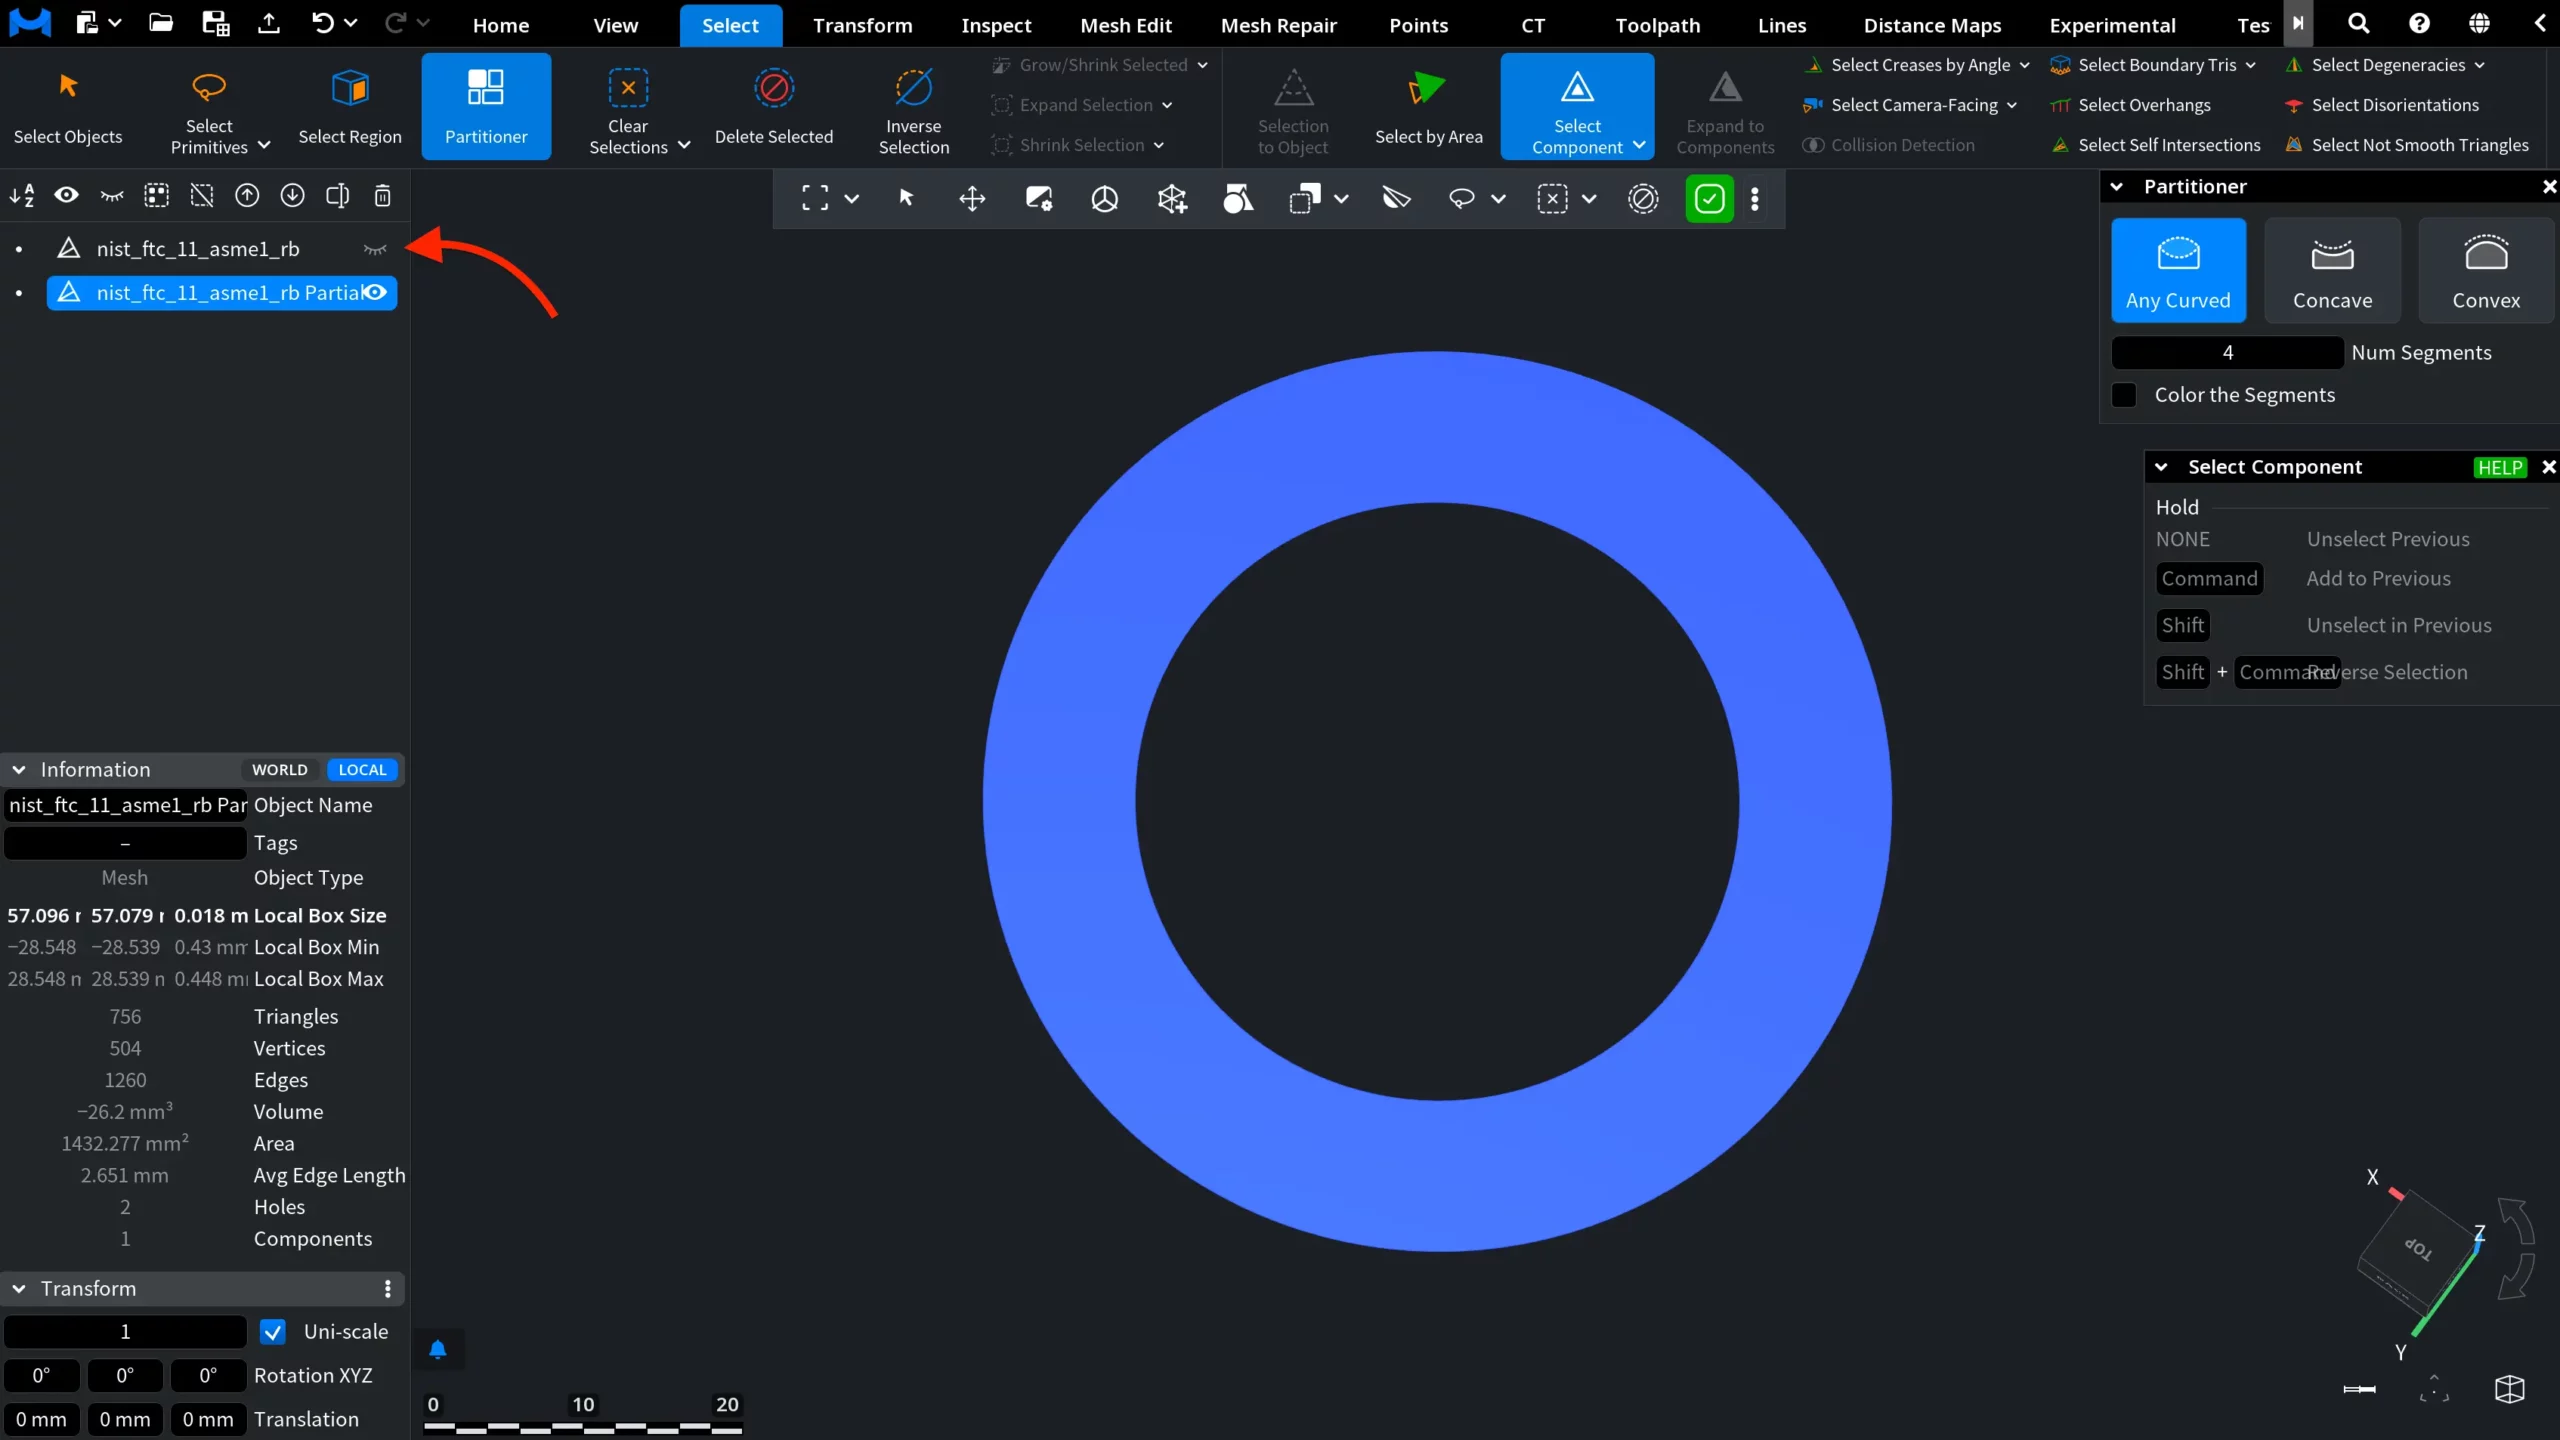
In the result, the selected segment has been converted into a separate mesh object and appears as a new item in the Scene Tree. The source object is still present in the Scene Tree, but it is hidden automatically, so only the newly created object is visible in the viewport.

Select to Object After Partitioner: Result

How to Work with the Partitioner Tool in MeshInspector

Table Of Contents