Align Manually, located under the Transform tab, allows you to manually align a floating object with a fixed object by selecting corresponding points on both. To use the tool, make sure that at least two objects are present in the scene.
The tool enables precise positioning by matching selected points on the floating object with the corresponding points on the fixed object. This method is particularly useful when automated alignment is unreliable, such as when working with asymmetrical or irregular shapes.

Once you click Align Manually, a dedicated panel opens. The viewport is divided into three areas: one for the floating object, one for the fixed object, and one for the alignment preview. This makes it easier to select corresponding points and review the result before applying the transformation.
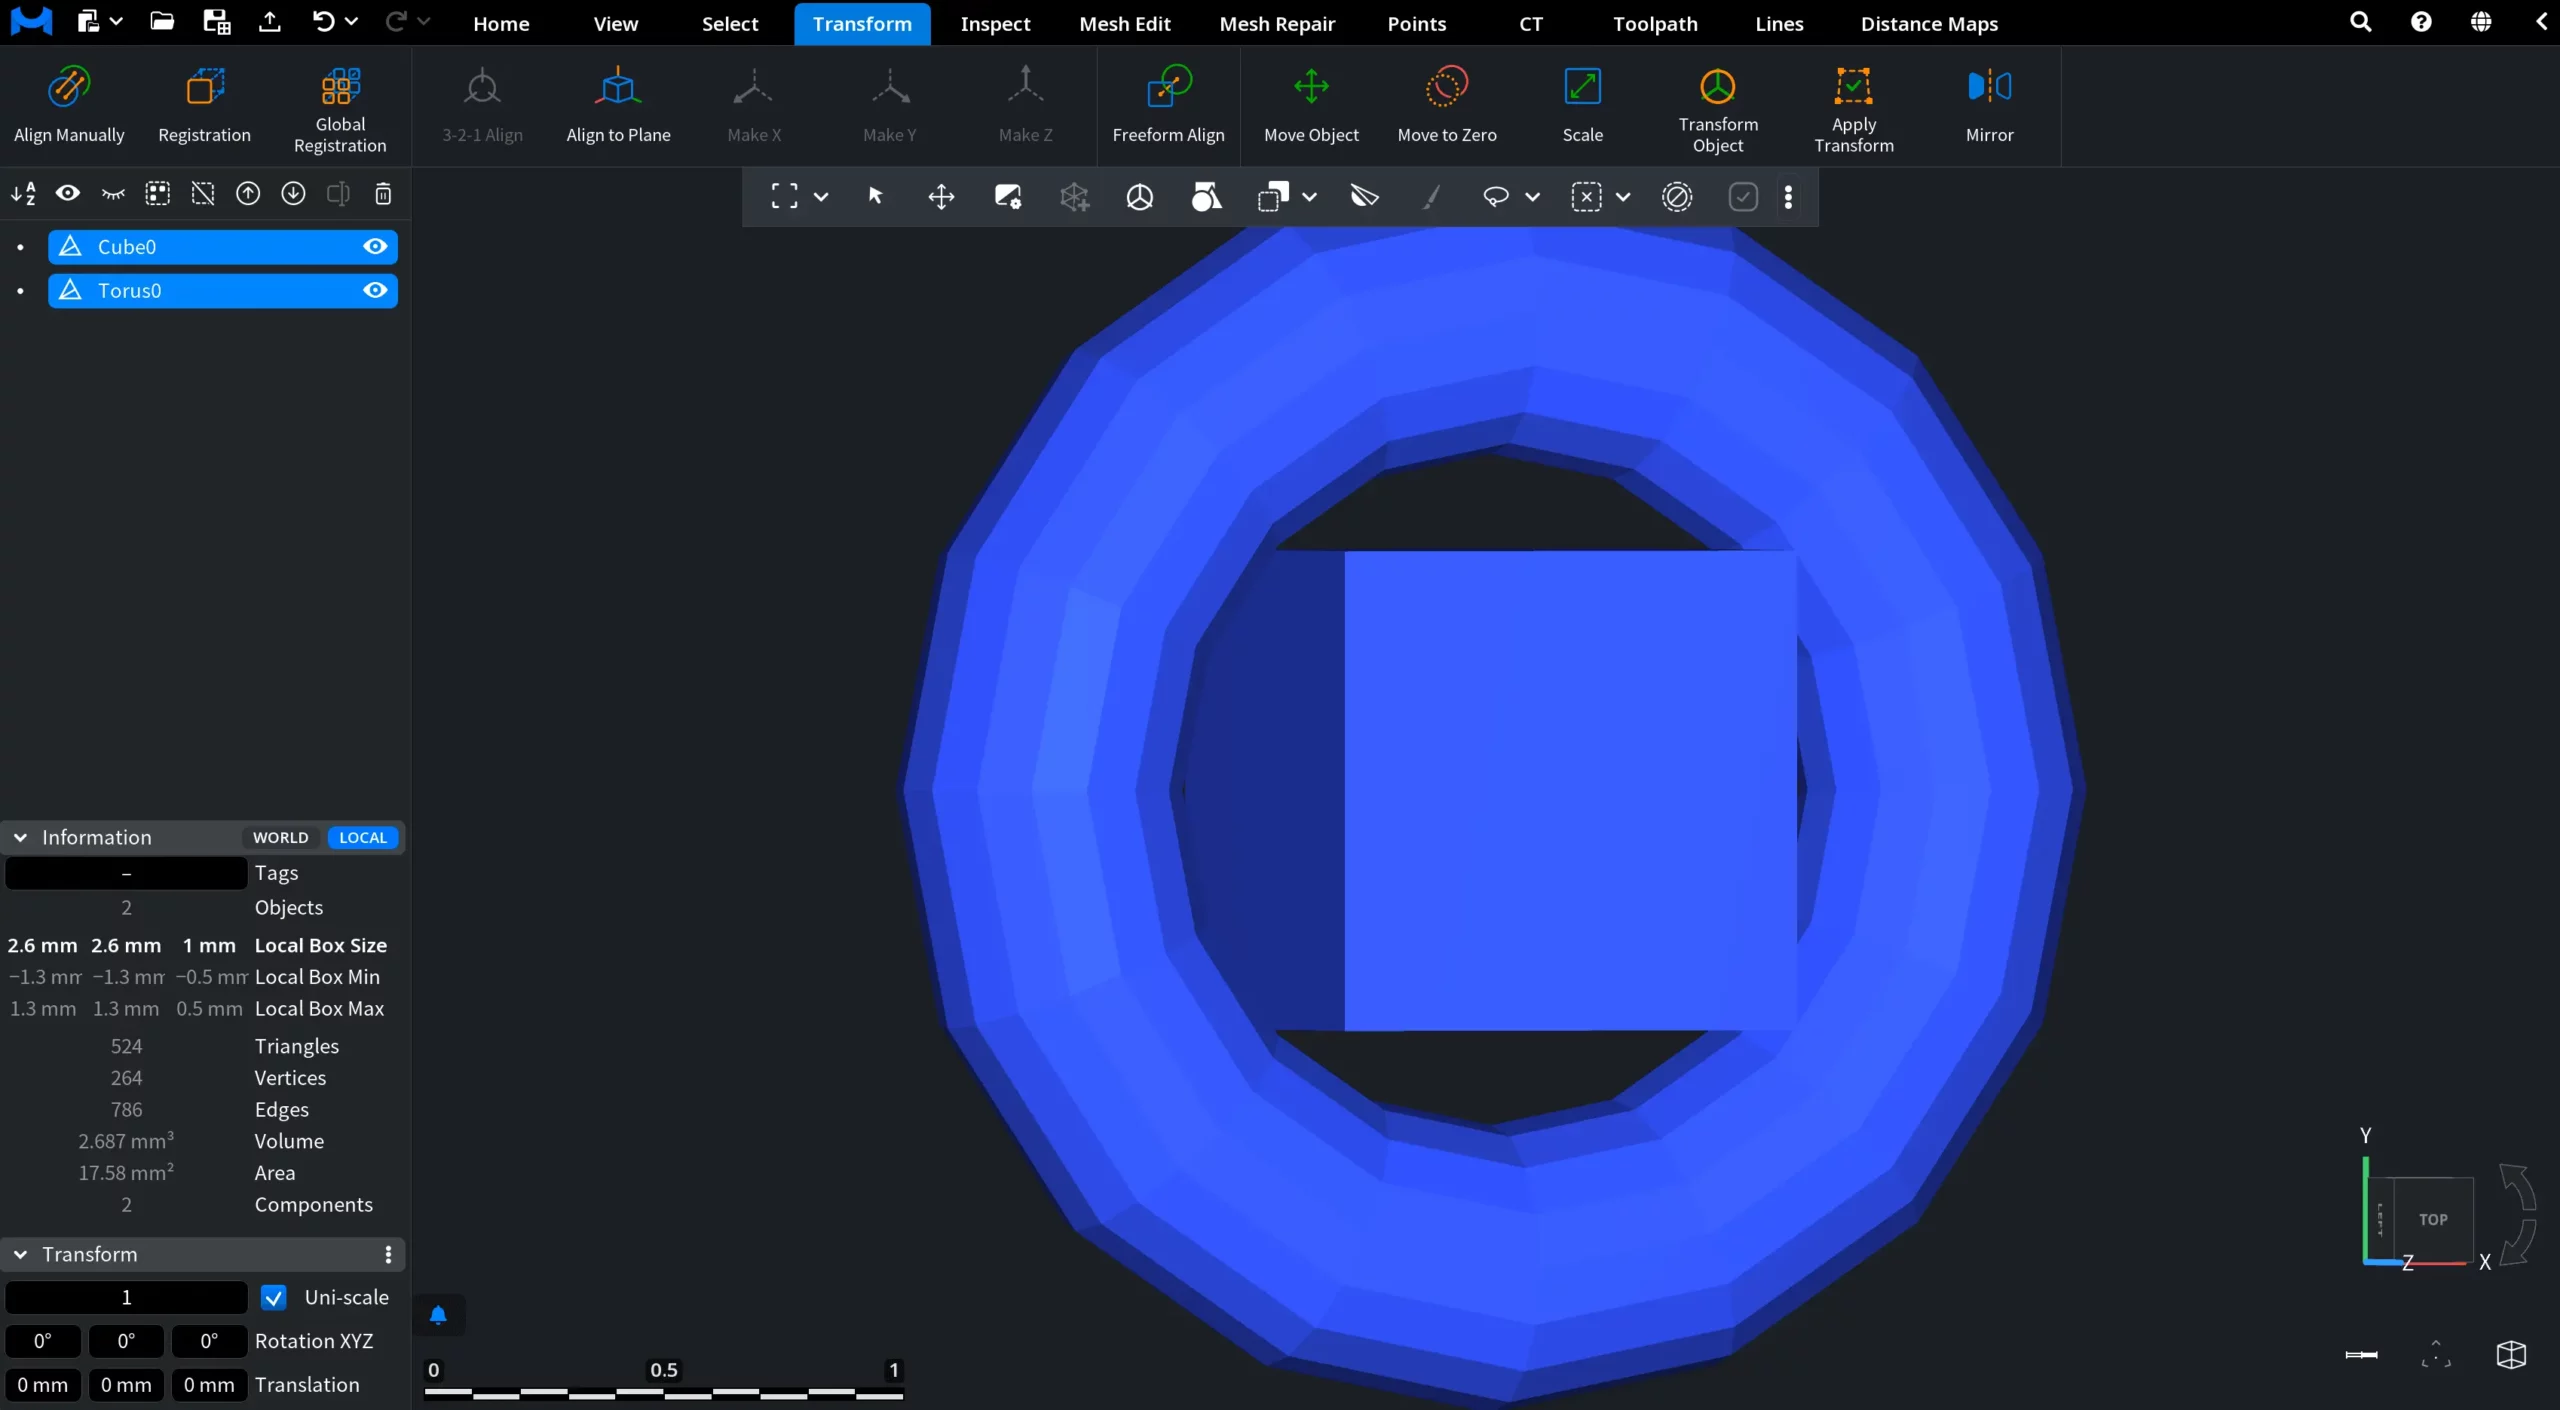
In the screenshot below, you can see the objects in the viewport before Align Manually is activated.
In the next screenshot, you can see the viewport after Align Manually is activated.
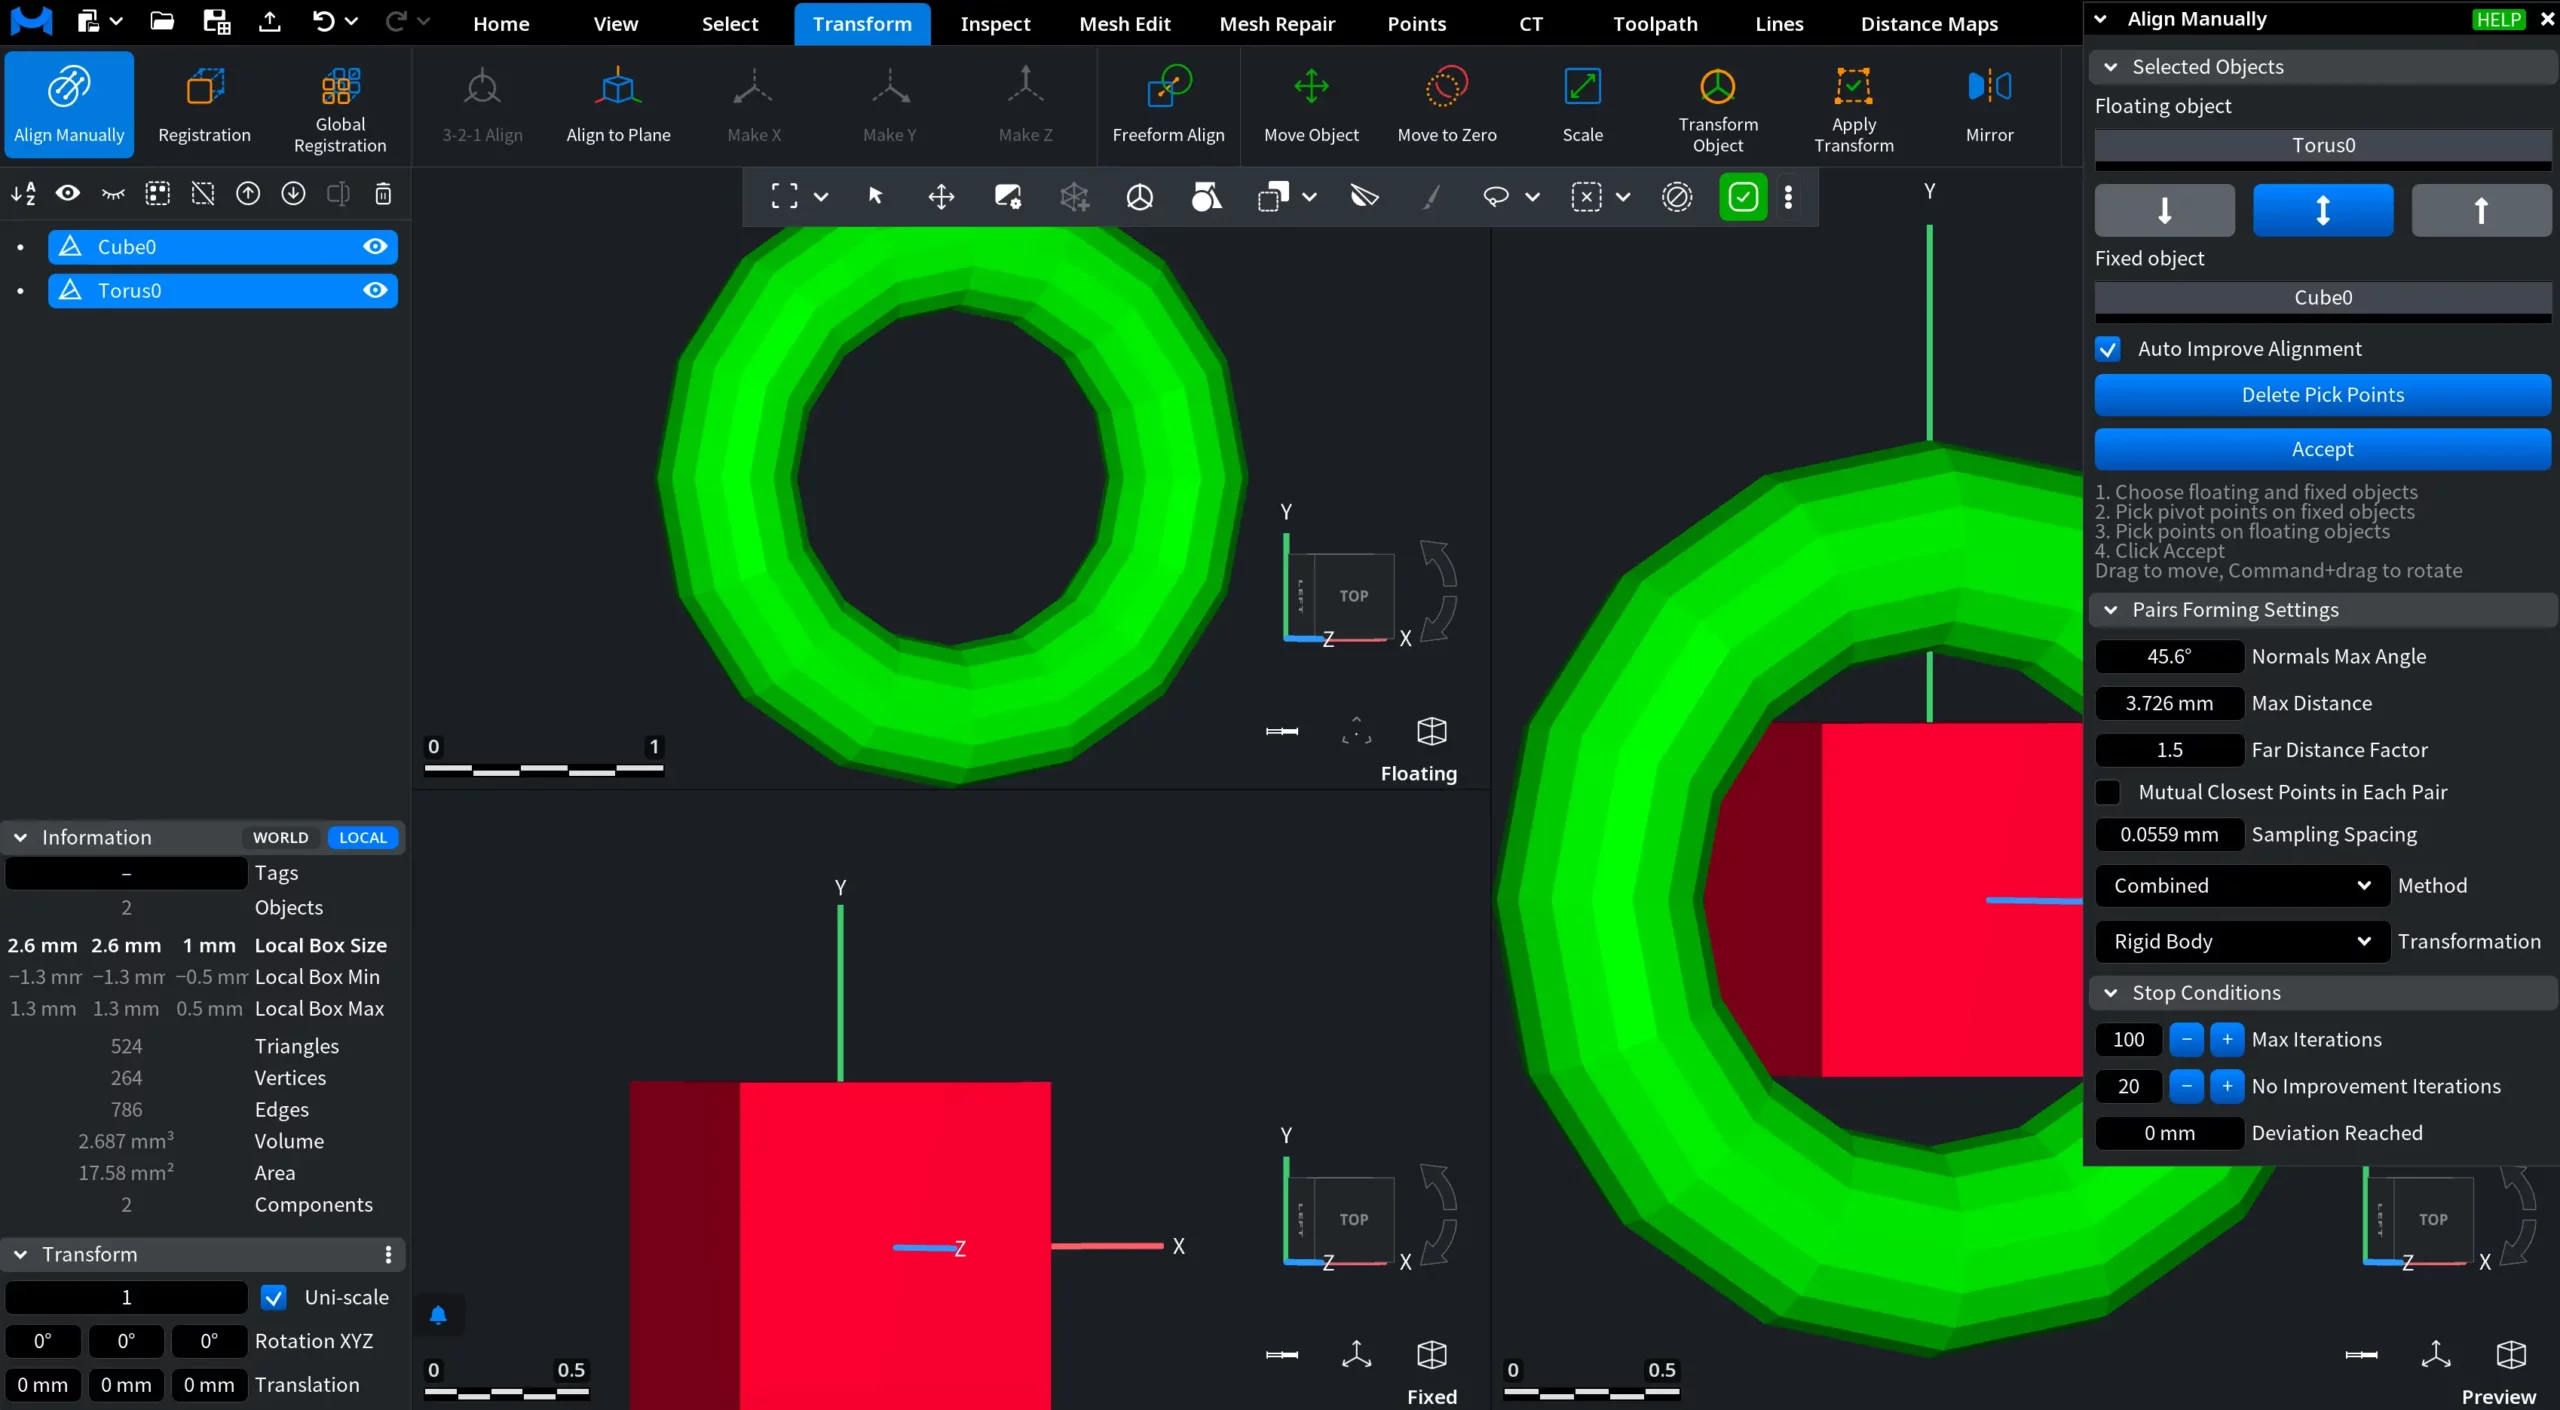
In the panel, you can adjust a range of settings.
Selected Objects
The Selected Objects section defines which objects participate in the alignment process:
- Floating object — the object that will be moved and adjusted during alignment.
- Fixed object — the reference object that remains stationary.
Use the arrow buttons to assign the selected objects to these roles or swap their roles.
Auto Improve Alignment
The Auto Improve Alignment checkbox controls automatic refinement during point picking. When enabled, the tool improves the alignment after each newly picked pair of points, starting from the third pair. The refinement is performed using the Iterative Closest Points (ICP) algorithm.
Action Buttons
Below the checkbox, two action buttons are available:
- Delete Pick Points removes all previously selected points from the floating and fixed objects, allowing you to restart the point-picking process.
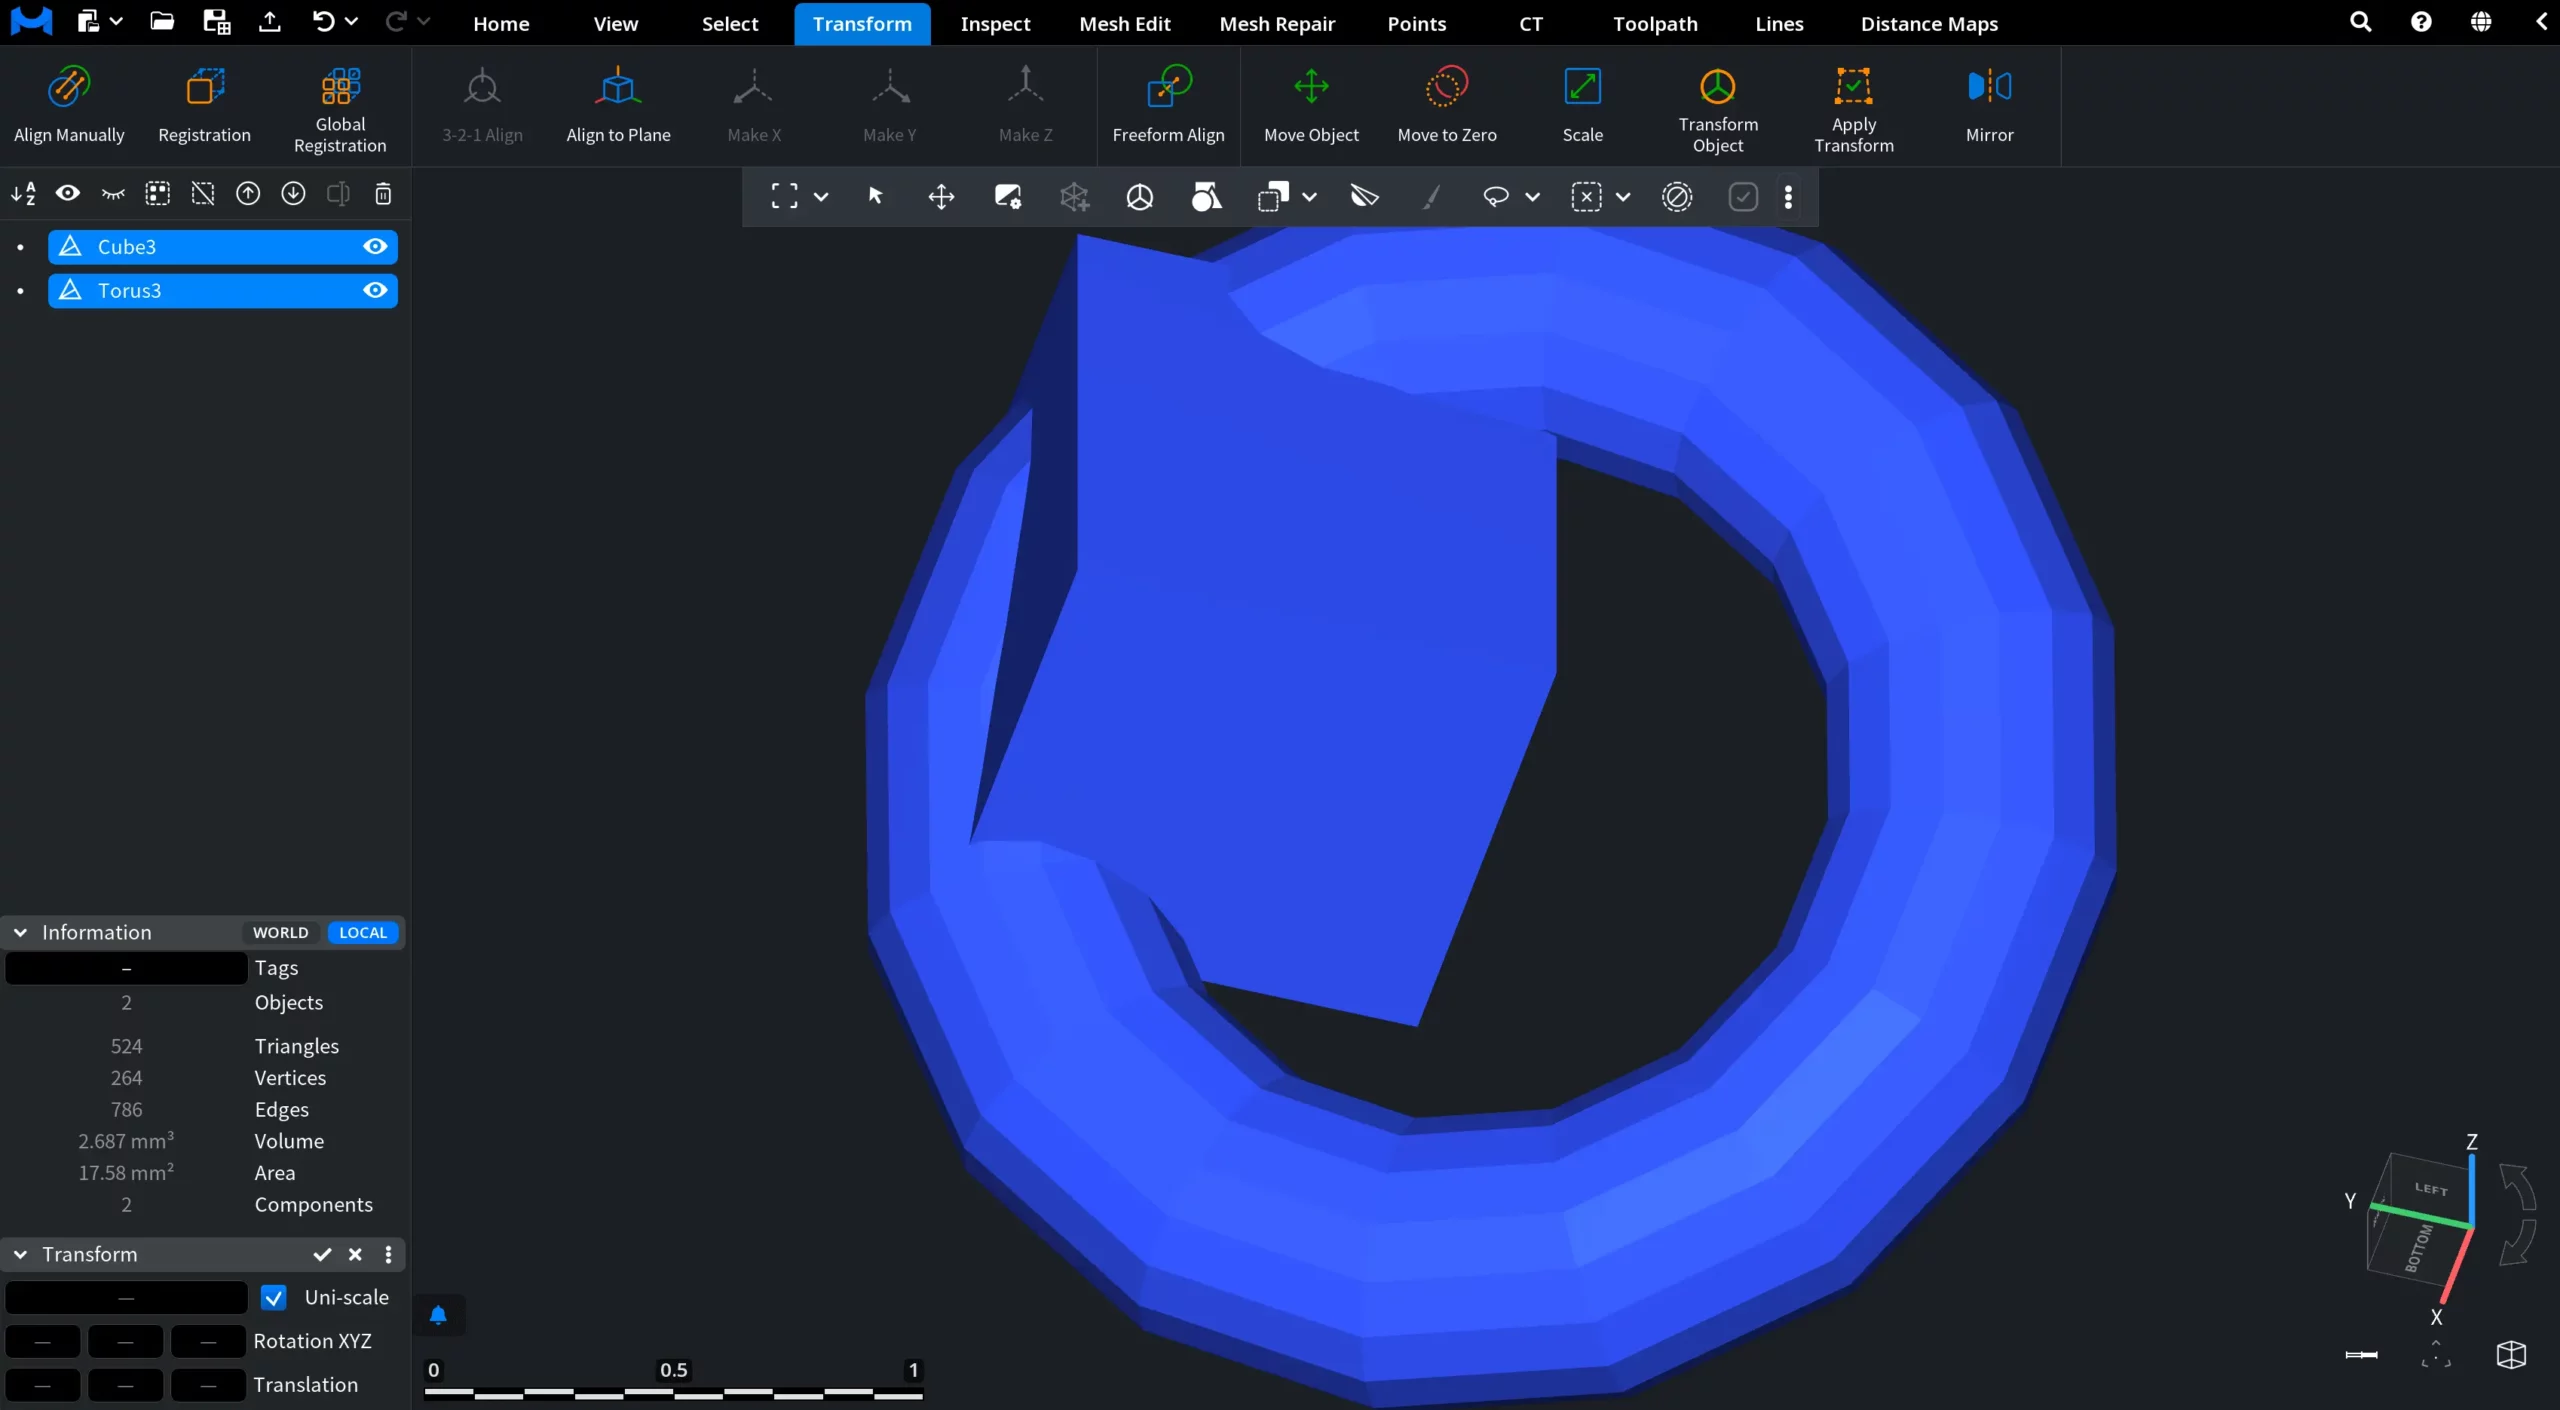
- Accept applies the alignment based on the selected point pairs. The floating object is repositioned to match the corresponding points on the fixed object.
The alignment workflow is as follows:
1. Choose the floating and fixed objects.
2. Pick pivot points on the fixed object by clicking its surface.
3. Pick the corresponding points on the floating object.
4. Review the result in the preview area.
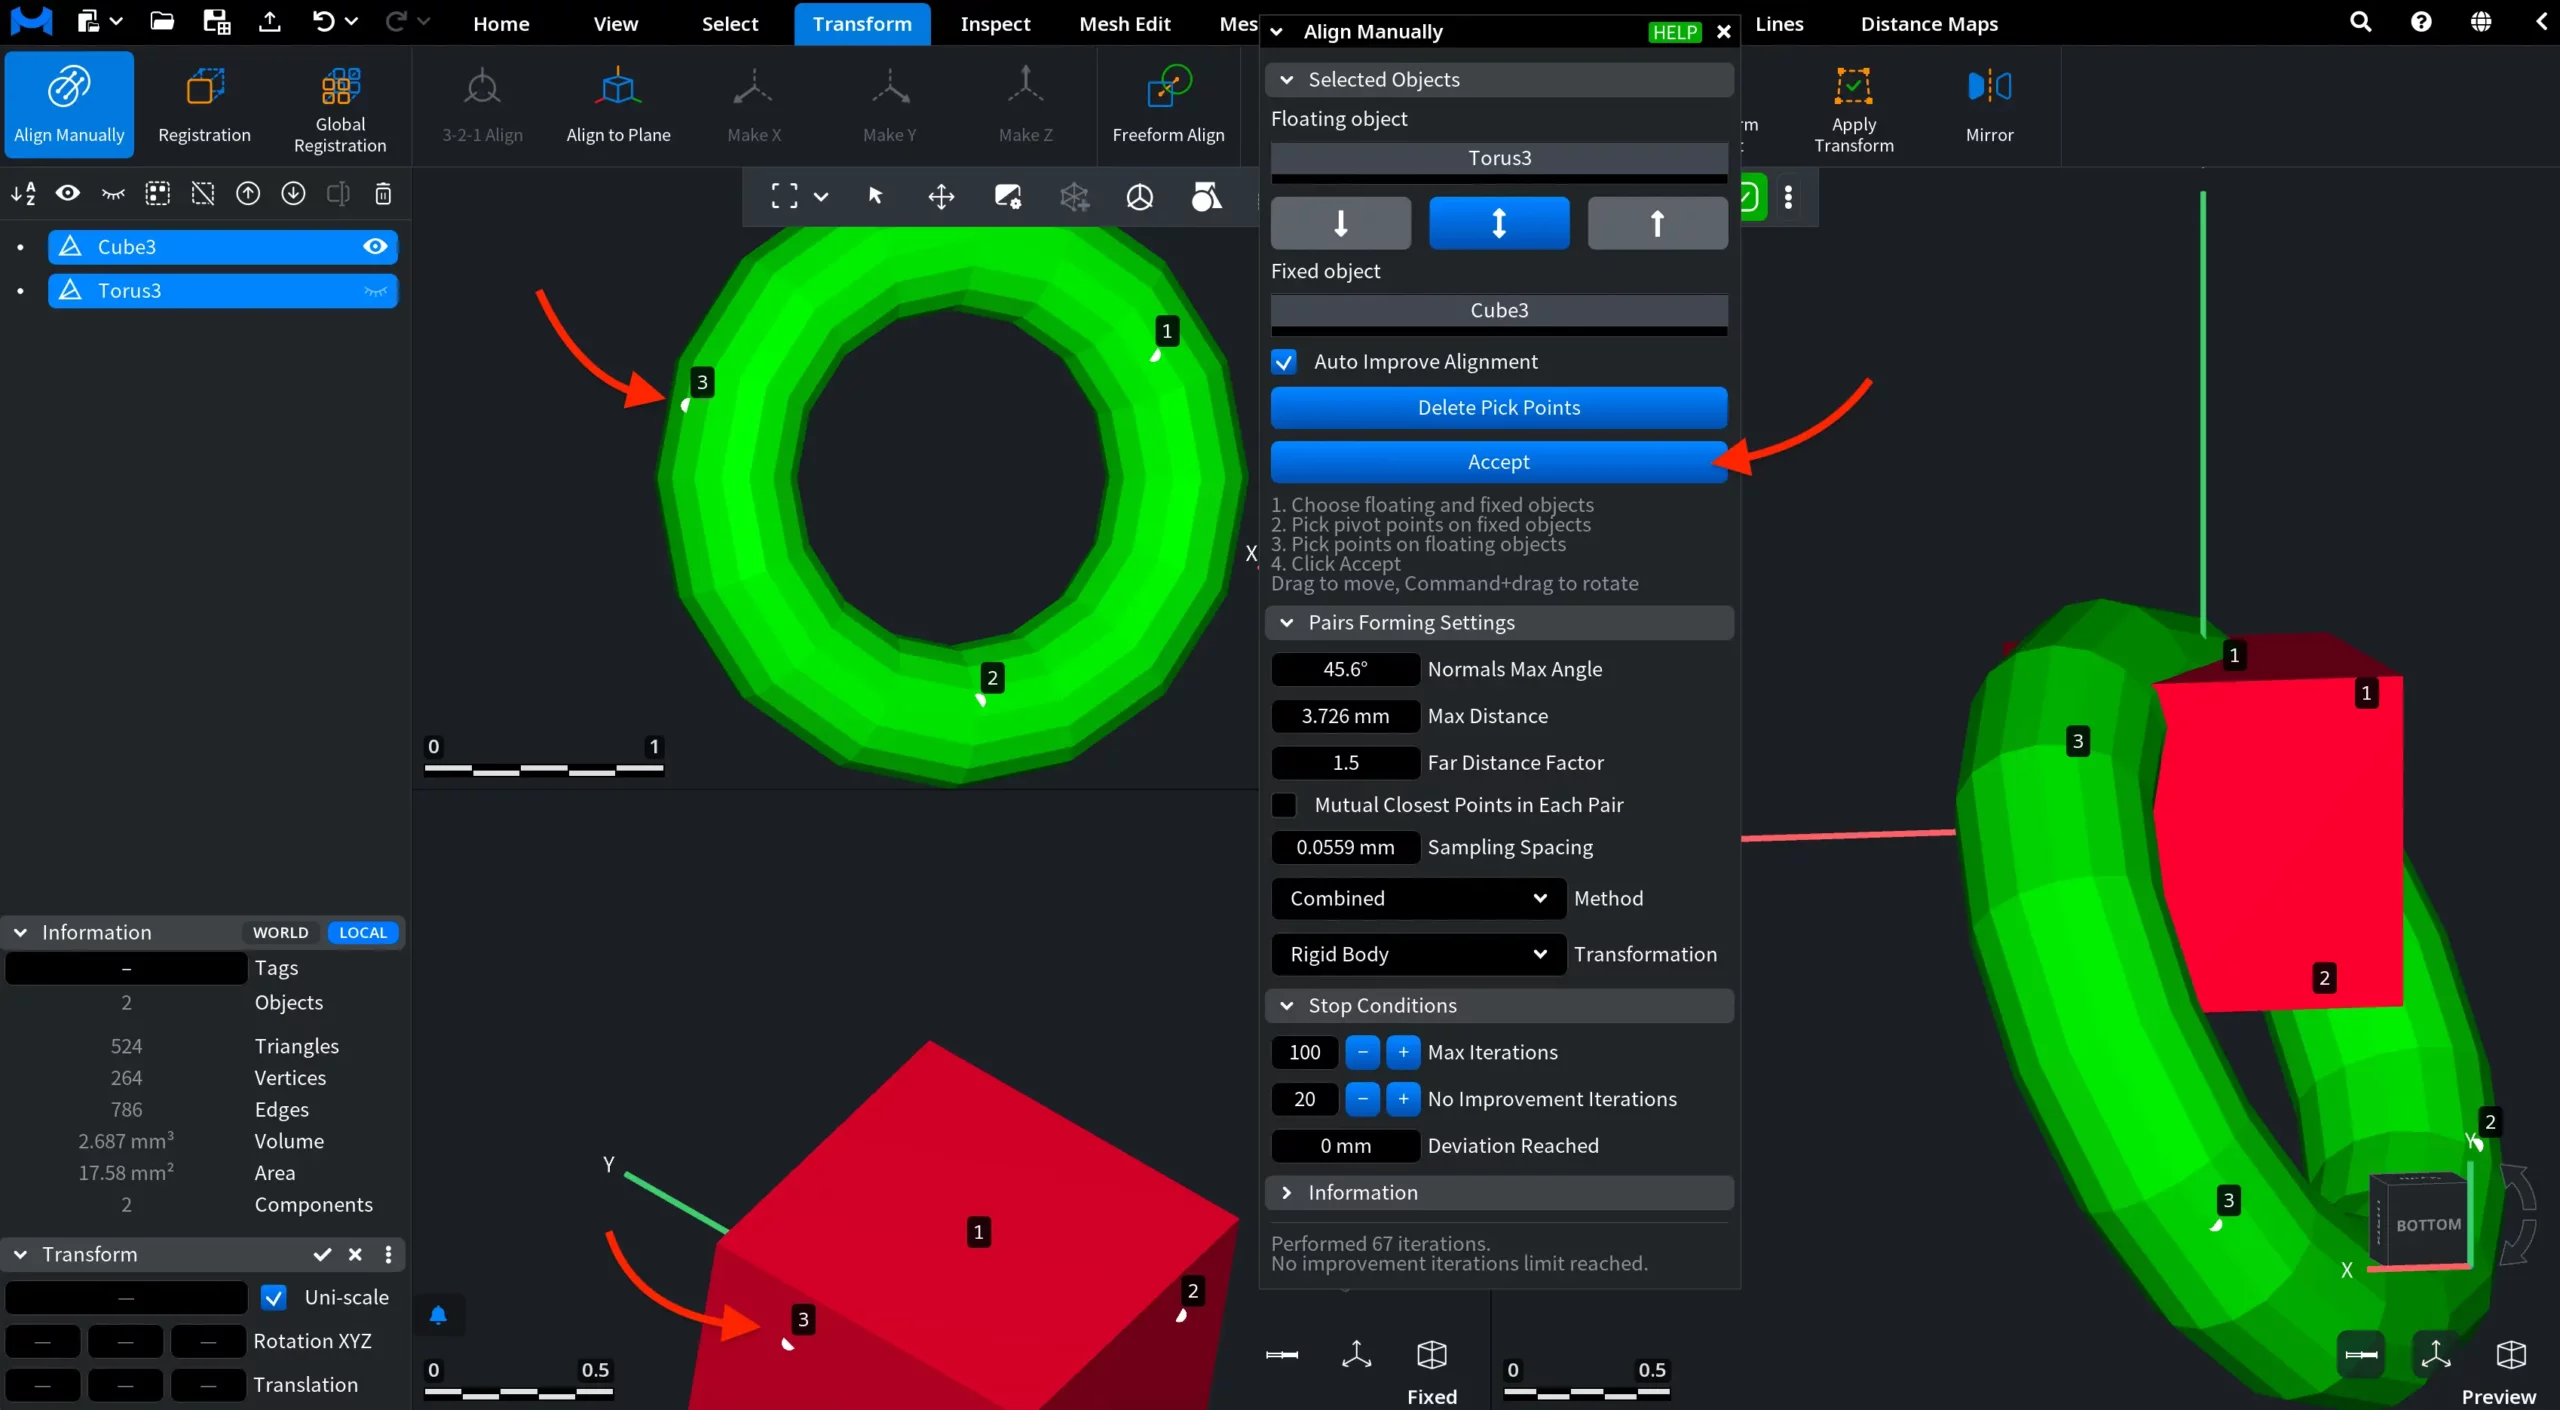
5. Click Accept to apply the alignment.
You can also drag an object to move it or hold Command on macOS or Ctrl on Windows while dragging to rotate it.
Pairs Forming Settings
The Pairs Forming Settings section controls how point pairs are formed during alignment. These parameters influence which points can be treated as corresponding points on the floating and fixed objects.
Normals Max Angle defines the maximum allowable angle between the normals at two points. A point pair is used only if the angle does not exceed this value.
Max Distance defines the maximum allowable distance between two points. A point pair is used only if the distance is lower than this value.
Far Distance Factor filters point pairs based on the root-mean-square (RMS) distance. A point pair is counted only if the distance between the points is lower than the RMS distance multiplied by this factor.
Mutual Closest Points in Each Pair, when enabled, forms a pair only if both points are mutually closest to each other.
Sampling Spacing determines the sampling voxel size. Only one point is selected in each voxel.
Method
The Method setting allows you to select the target function to minimize during alignment. Available options include:
- Combined
- Point-to-Point
- Point-to-Plane
Transformation
The Transformation setting allows you to select the type of transformation searched for during alignment. Available options include:
- Rigid + Scale
- Rigid Body
- Orthogonal Axis Rotation
- Fixed Axis Rotation
- Translation Only
Stop Conditions
The Stop Conditions section controls when the Iterative Closest Points (ICP) algorithm stops refining the alignment:
- Max Iterations defines the maximum number of ICP iterations allowed.
- No Improvement Iterations specifies how many iterations without improvement will cause the algorithm to stop.
- Deviation Reached defines the target root-mean-square (RMS) distance in millimeters. Once this value is reached, the algorithm stops.
By adjusting these parameters, you can balance alignment accuracy and computation time to achieve reliable results across different alignment scenarios.