


Make X, Make Y and Make Z turn a mesh or a point cloud in one click by a feature of that model, for example a plane fitted to a face. Make Z puts the feature into the XY plane with its normal along the Z axis, so the face you measured becomes the "top" of the model. Hold Shift while you click a button to orient the model in the opposite direction.
All three buttons are on the Transform tab.

What you need: a feature
A feature is a simple geometric shape fitted to the model: a plane, a line, a point, a circle, a sphere, a cylinder or a cone. You create features on the Inspect tab, and each feature appears in the Scene tree as a child of its model. See how to create features.
The buttons are available when you select:
- the feature itself (with or without its model), or
- one mesh or point cloud that has a feature. If the model has several features, the tool uses the first visible one.
Otherwise the tooltip of the button says Please select ObjectMesh or ObjectPoints with child Feature object.
What the buttons do
| Button | The feature (a plane) ends up in | Its normal or axis points along | With Shift |
|---|---|---|---|
| Make X | YZ plane | X axis | −X |
| Make Y | ZX plane | Y axis | −Y |
| Make Z | XY plane | Z axis | −Z |
How the model is turned depends on the type of the feature:
- Plane: the plane goes into the plane given in the table, with its normal along the axis.
- Circle: its normal goes along the axis.
- Line, Cylinder, Cone: the axis of the feature goes along the chosen axis.
- Point, Sphere: the model is only moved, not turned.
In every case, MeshInspector also moves the model so that the base point of the feature (for example, the centre of the plane) is at the global origin. The new position is written into the coordinates of the model at once, as with Apply Transform, and the view switches to an isometric view of the model. To go back, use Undo (Ctrl+Z, or Cmd+Z on macOS).
Example: Make X
Make X turns the model so that the selected feature lies in the YZ plane and its normal is along the X axis.

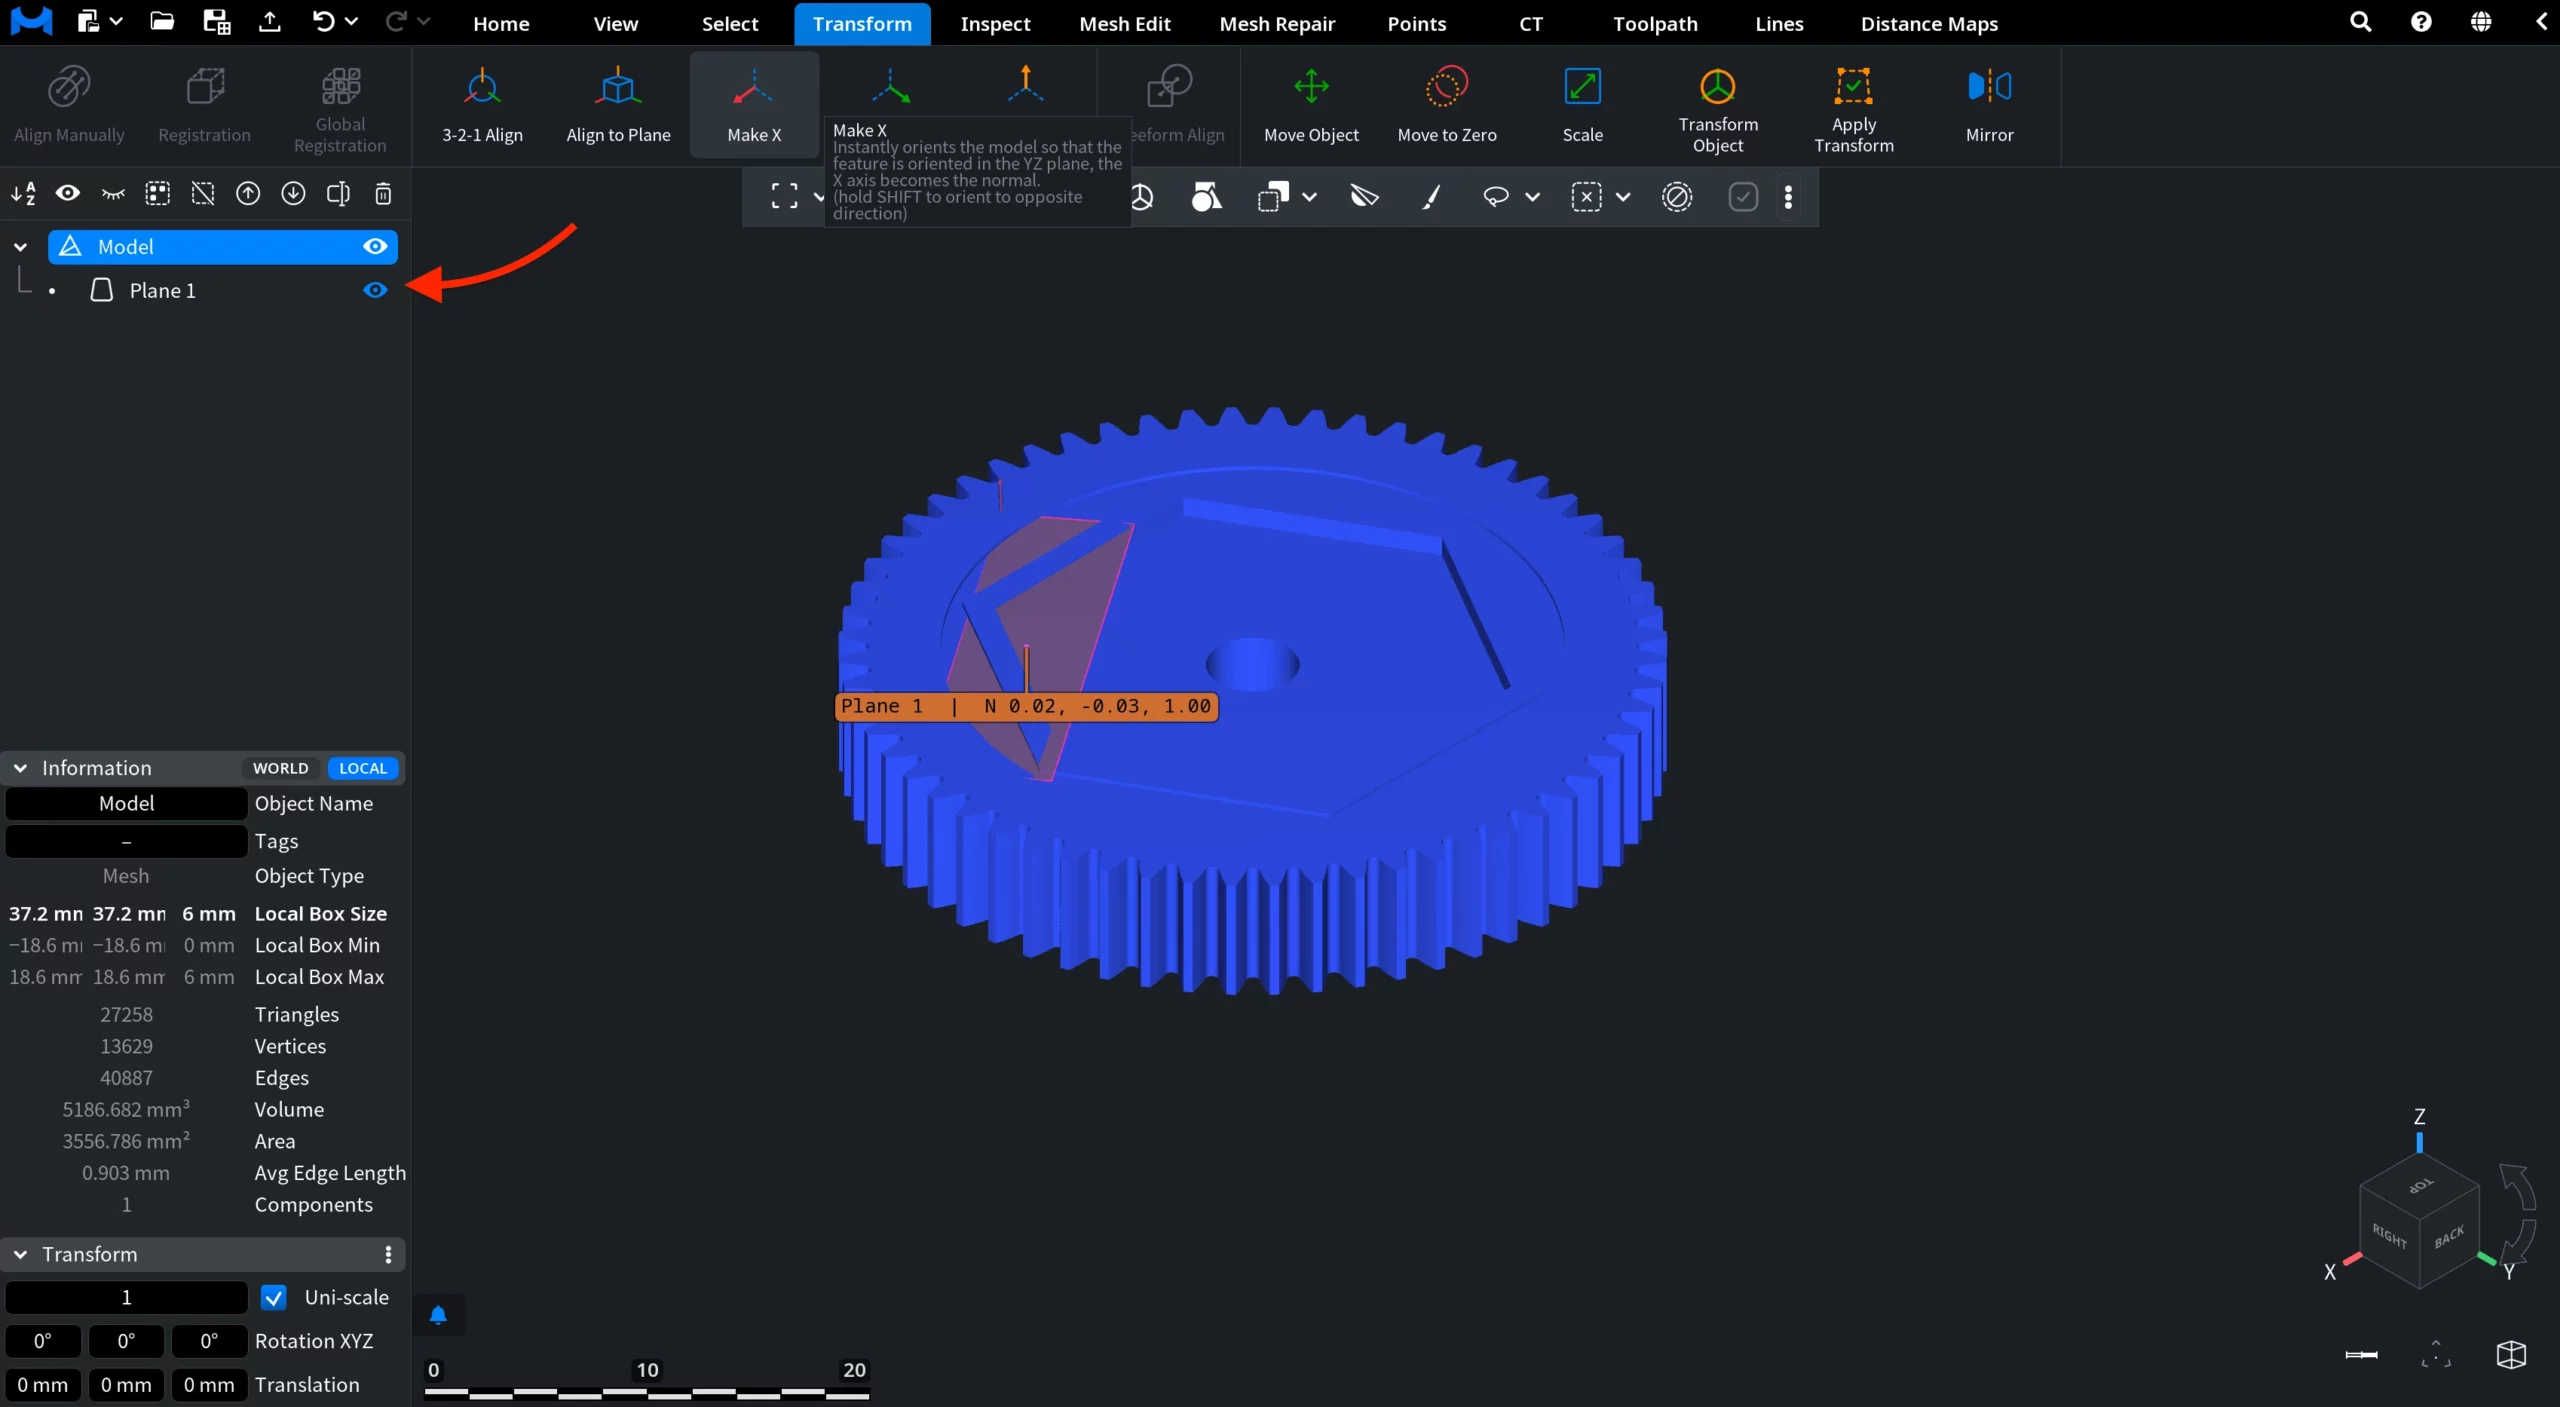
In the screenshot below, a plane was created with the Plane tool on the Inspect tab. It appears in the Scene tree as a child of the model. The model is selected, so Make X is available and uses this plane. Before Make X, the normal of the plane is close to the global Z axis: N 0.02, -0.03, 1.00.
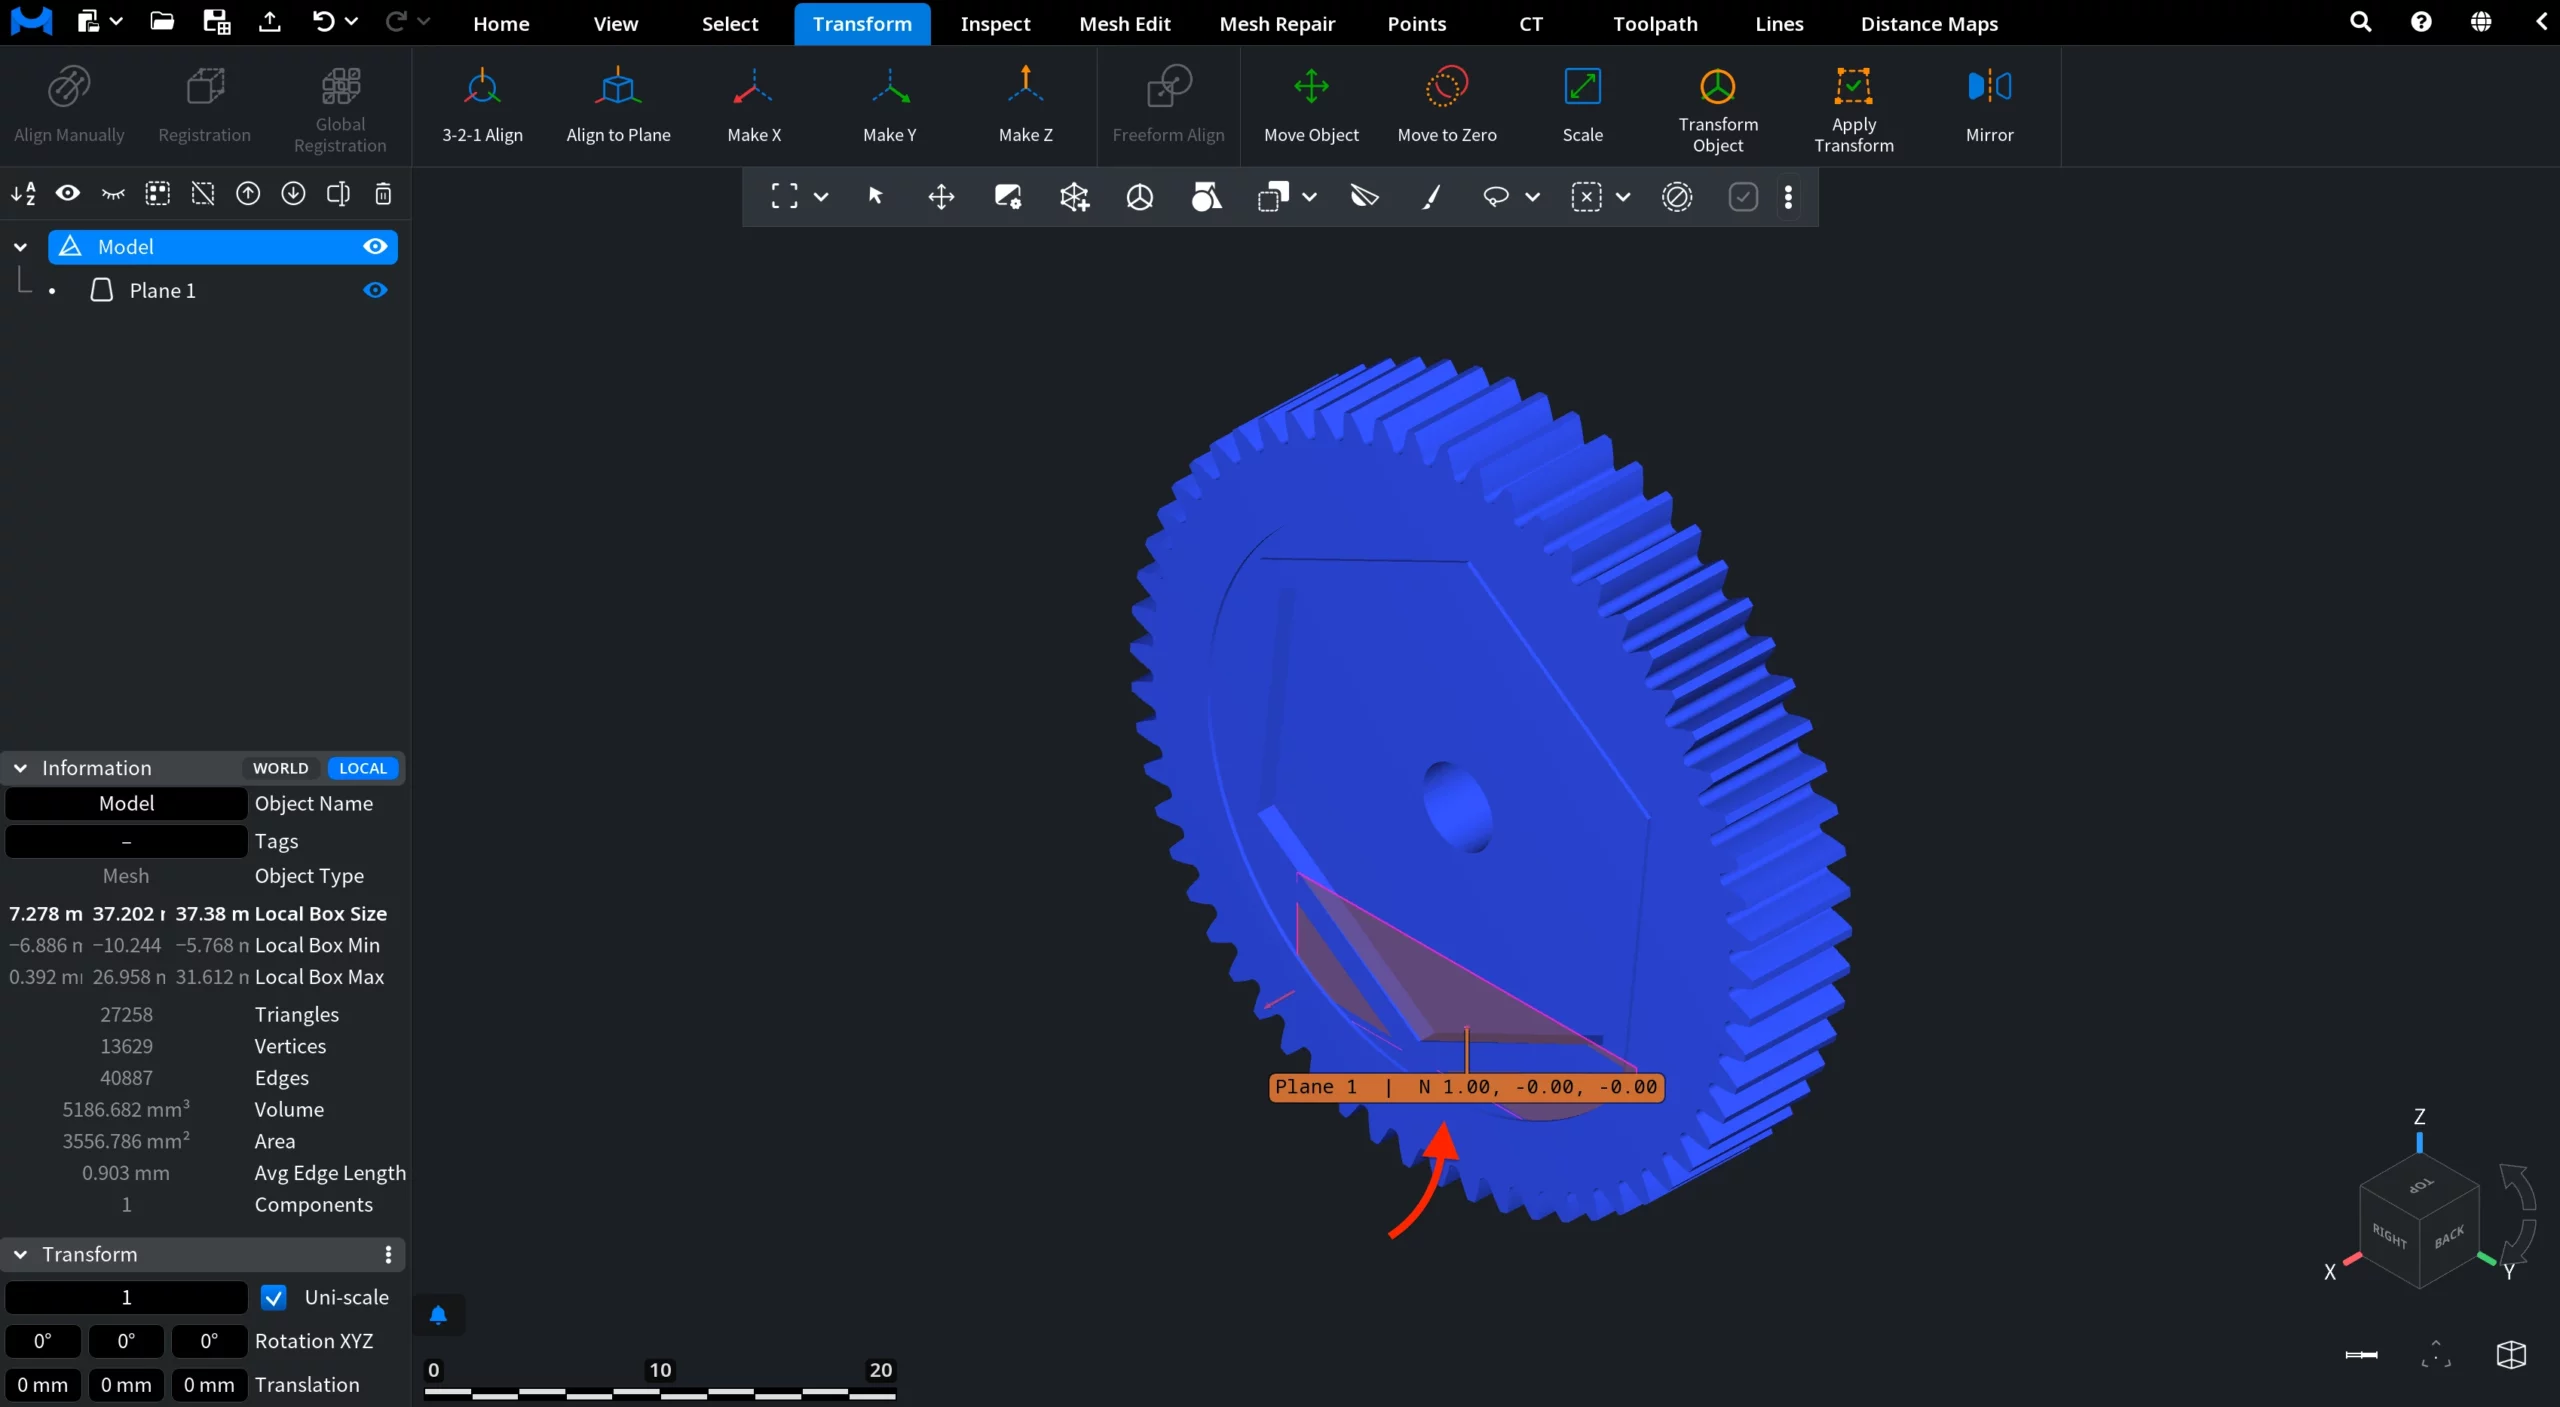
After a click on Make X, the plane lies in the YZ plane, and its normal is along the global X axis: N 1.00, -0.00, -0.00.
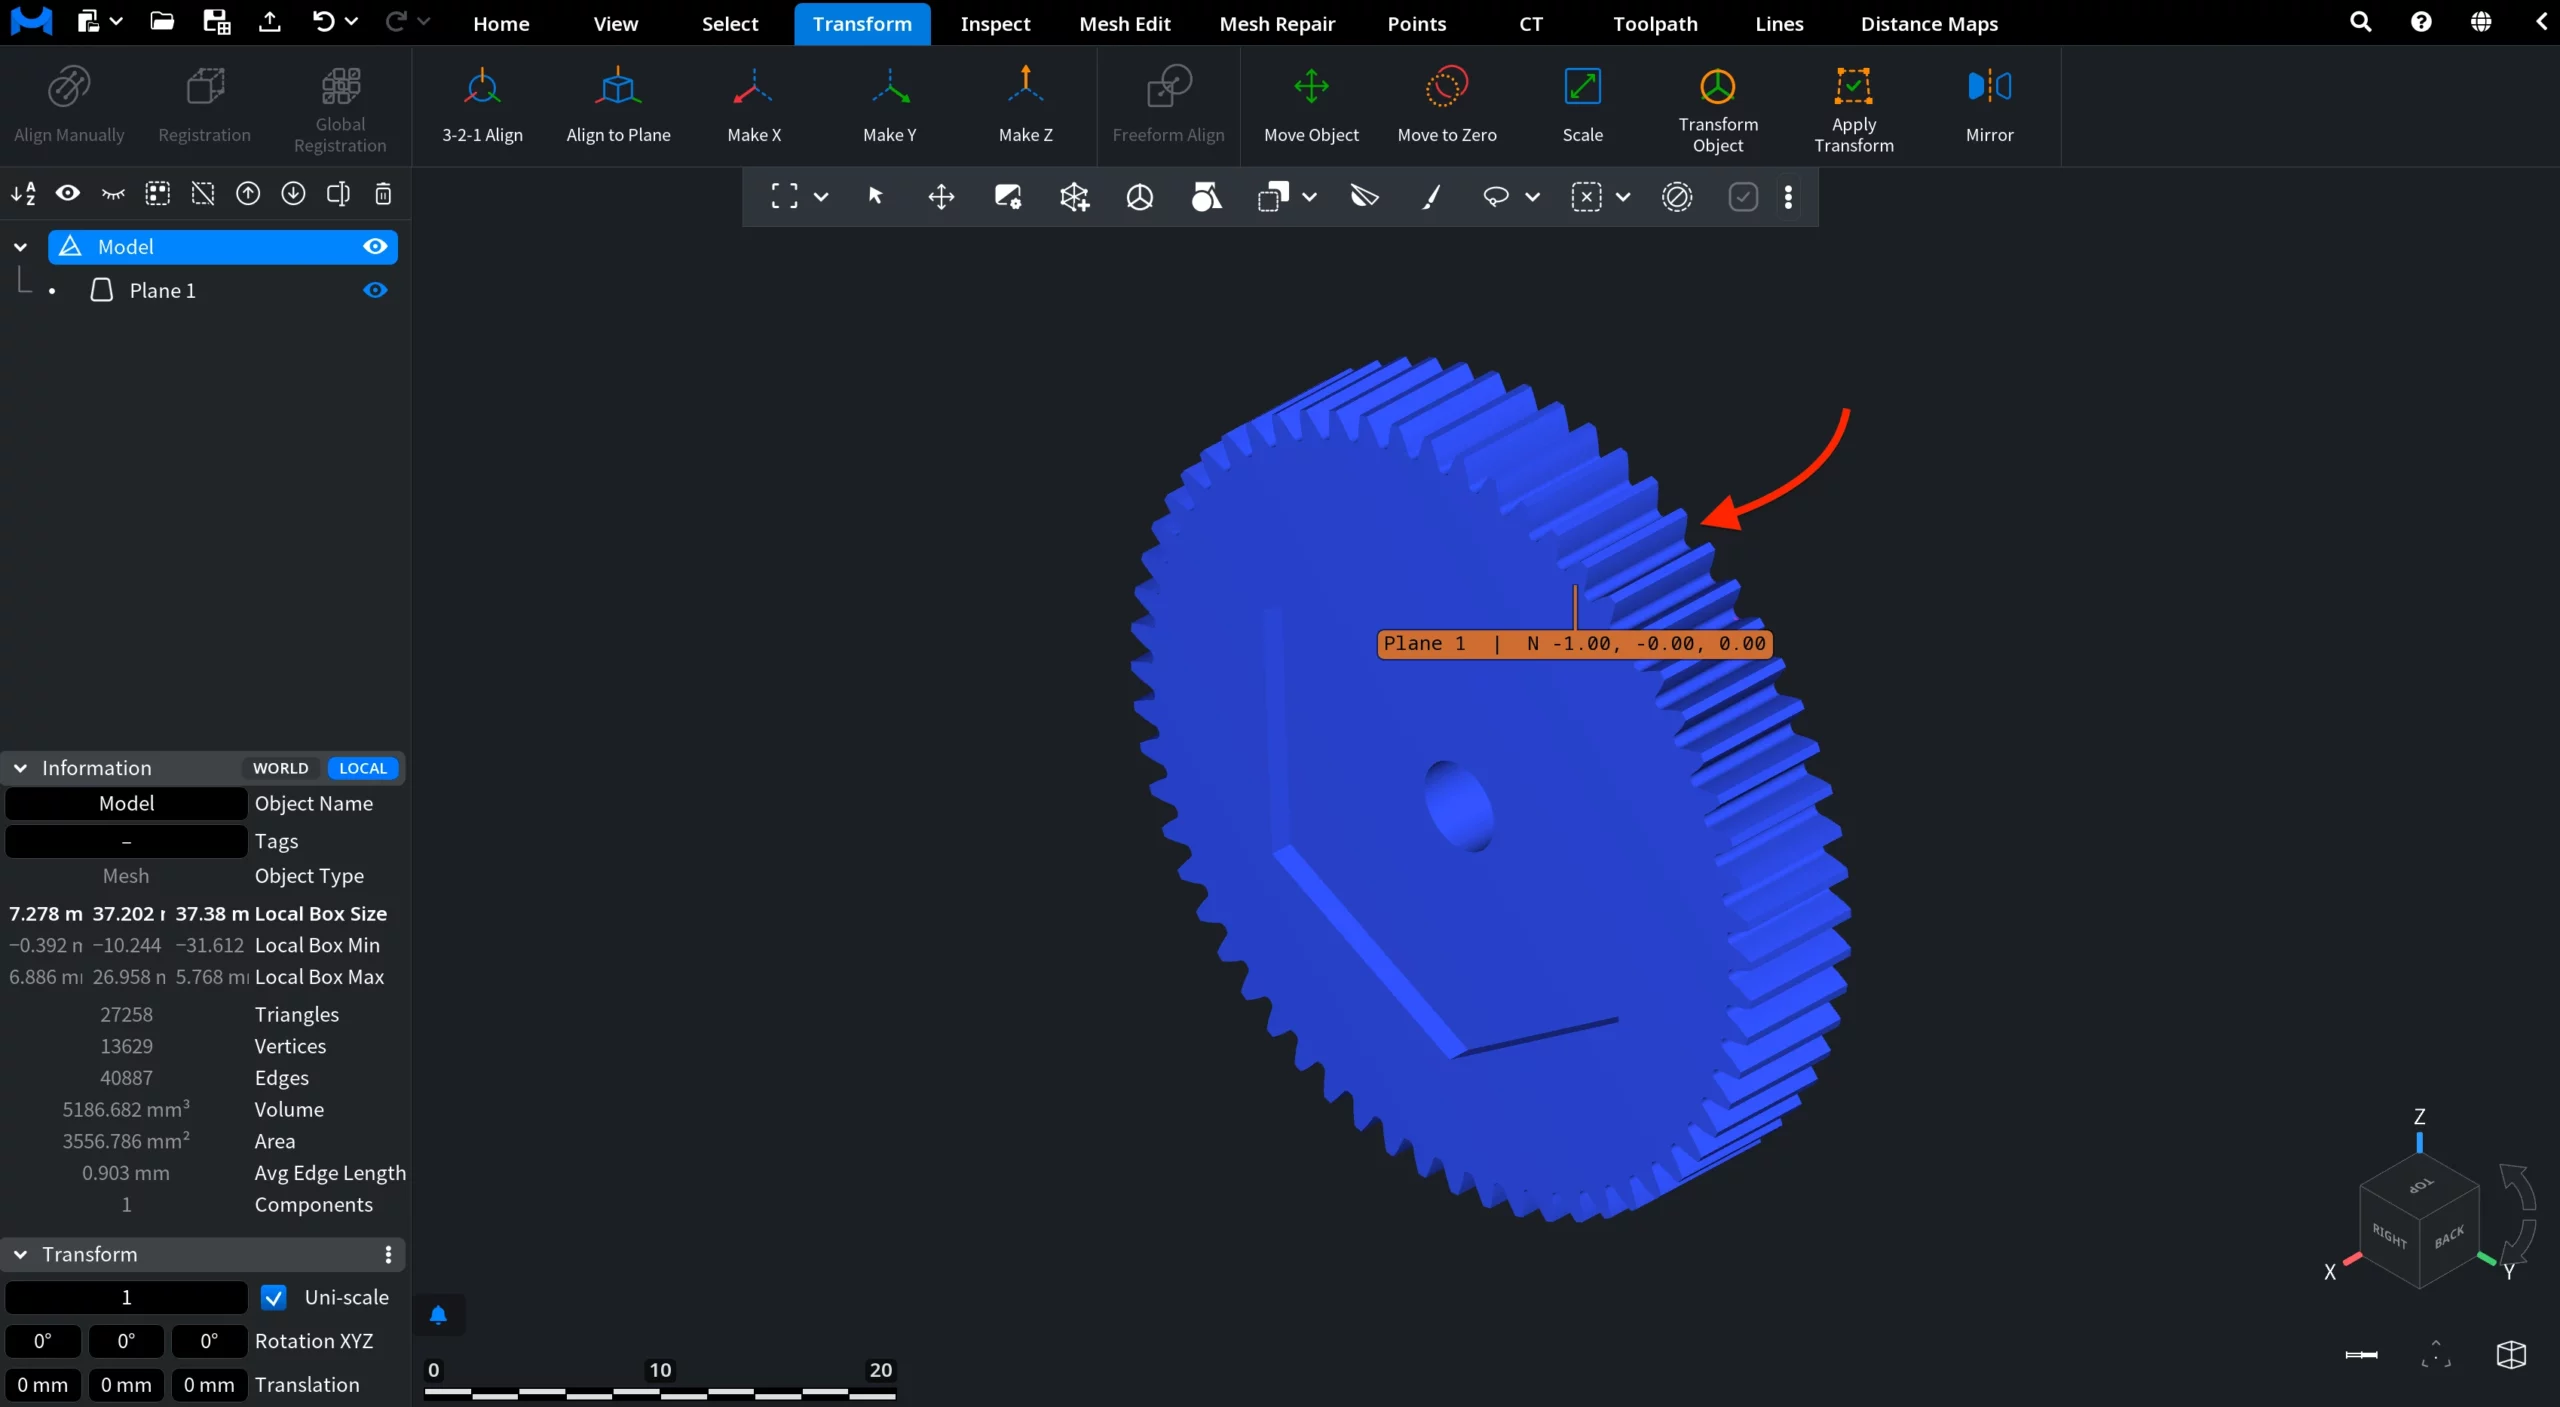
With Shift held, the model is oriented the opposite way: the normal of the plane points along the negative X axis.
Make Y
Make Y turns the model so that the feature lies in the ZX plane and its normal is along the Y axis. Hold Shift for the negative Y direction.

Make Z
Make Z turns the model so that the feature lies in the XY plane and its normal is along the Z axis. Hold Shift for the negative Z direction. Use it to make a measured face the top of the model, or, with Shift, its bottom.

Other ways to orient a model
To put a face on a plane without creating a feature first, click the face with Align to Plane. To fix the position of a part along all three axes, use 3-2-1 Align. To only move a model to the origin, use Move to Zero.


