When working with point clouds, normals may already exist but may not have a consistent orientation across the dataset. This can lead to issues in operations that rely on normal direction. To tackle this, MeshInspector provides the Orient Point Normals tool. This tool selects similar normal orientations for nearby points, helping ensure that neighboring points have consistent normal directions.
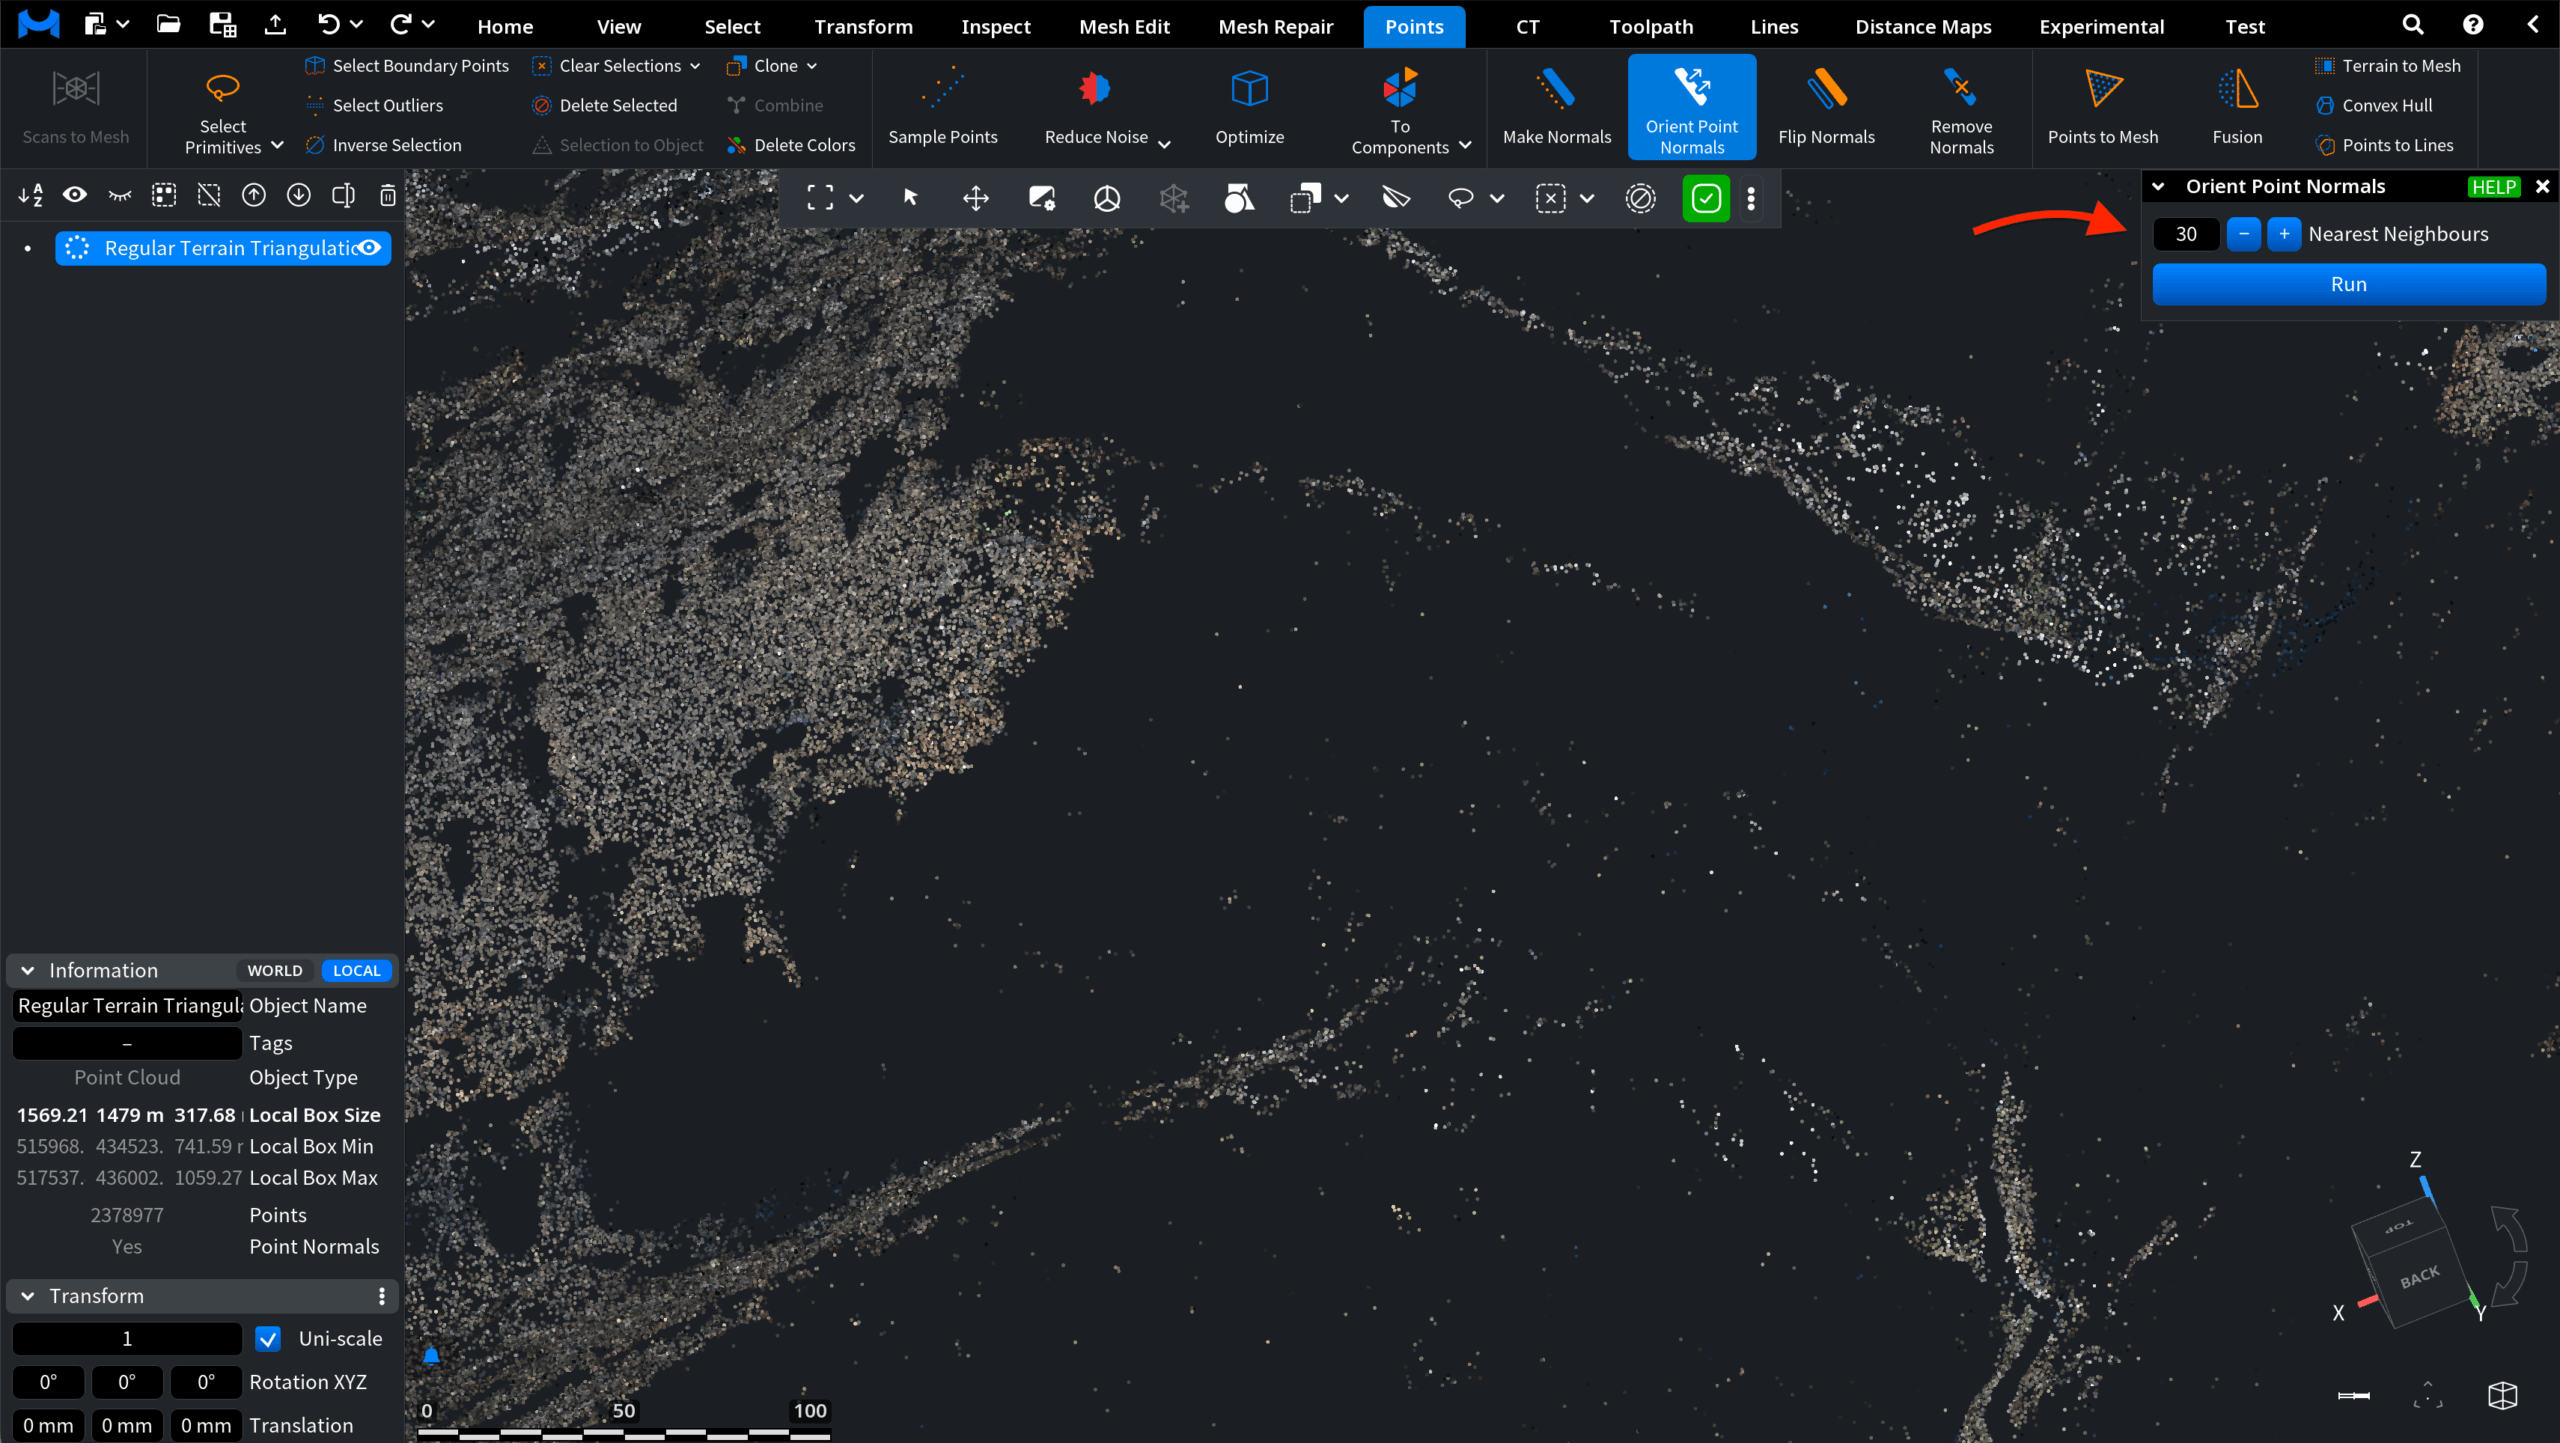
To access this tool, open the Points tab in the top toolbar and select Orient Point Normals.

After clicking Orient Point Normals, a dedicated settings panel opens. The panel contains a single parameter: Nearest Neighbours. It defines the number of nearest neighbor points used for building the local triangulation. If the value is too small, the triangulation may be suboptimal and may produce additional holes. If the value is too large, optimization becomes more difficult and performance decreases.
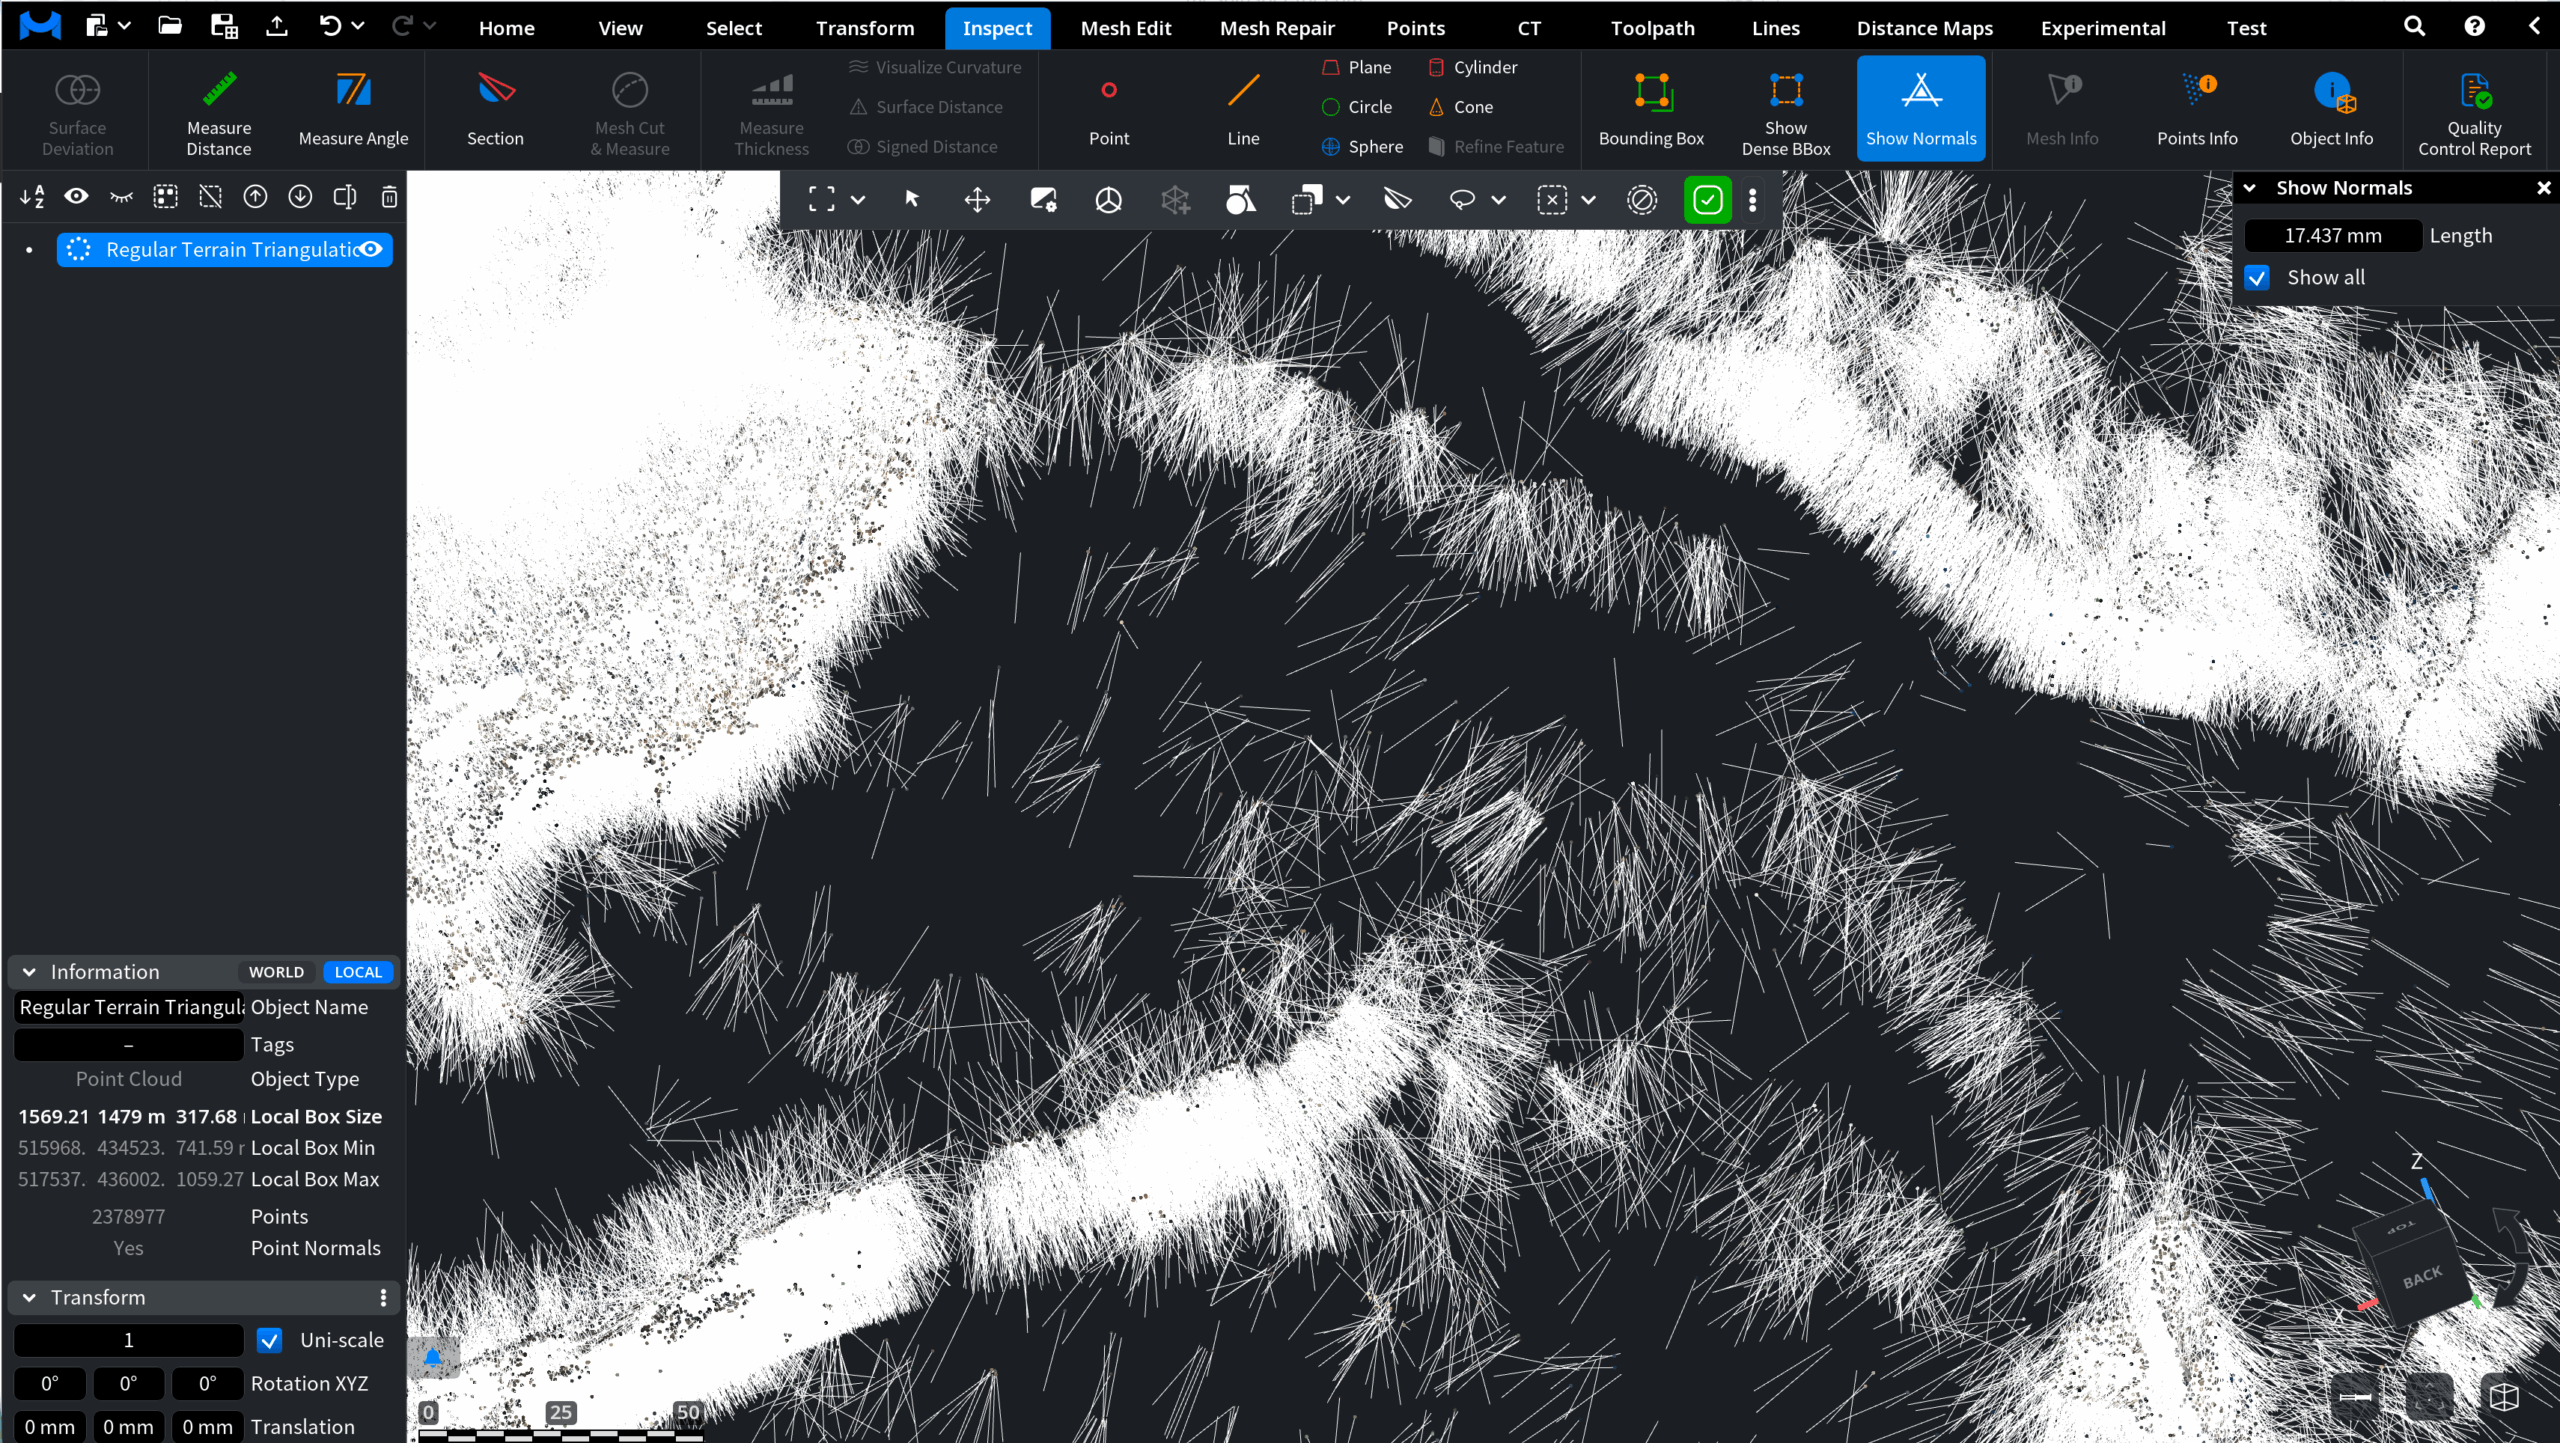
Before applying the tool, the existing normals can be visualized as they are. To do this, open the Inspect tab and click Show Normals.

Orient Point Normals: Before and After
The normals are now visible in the viewport.
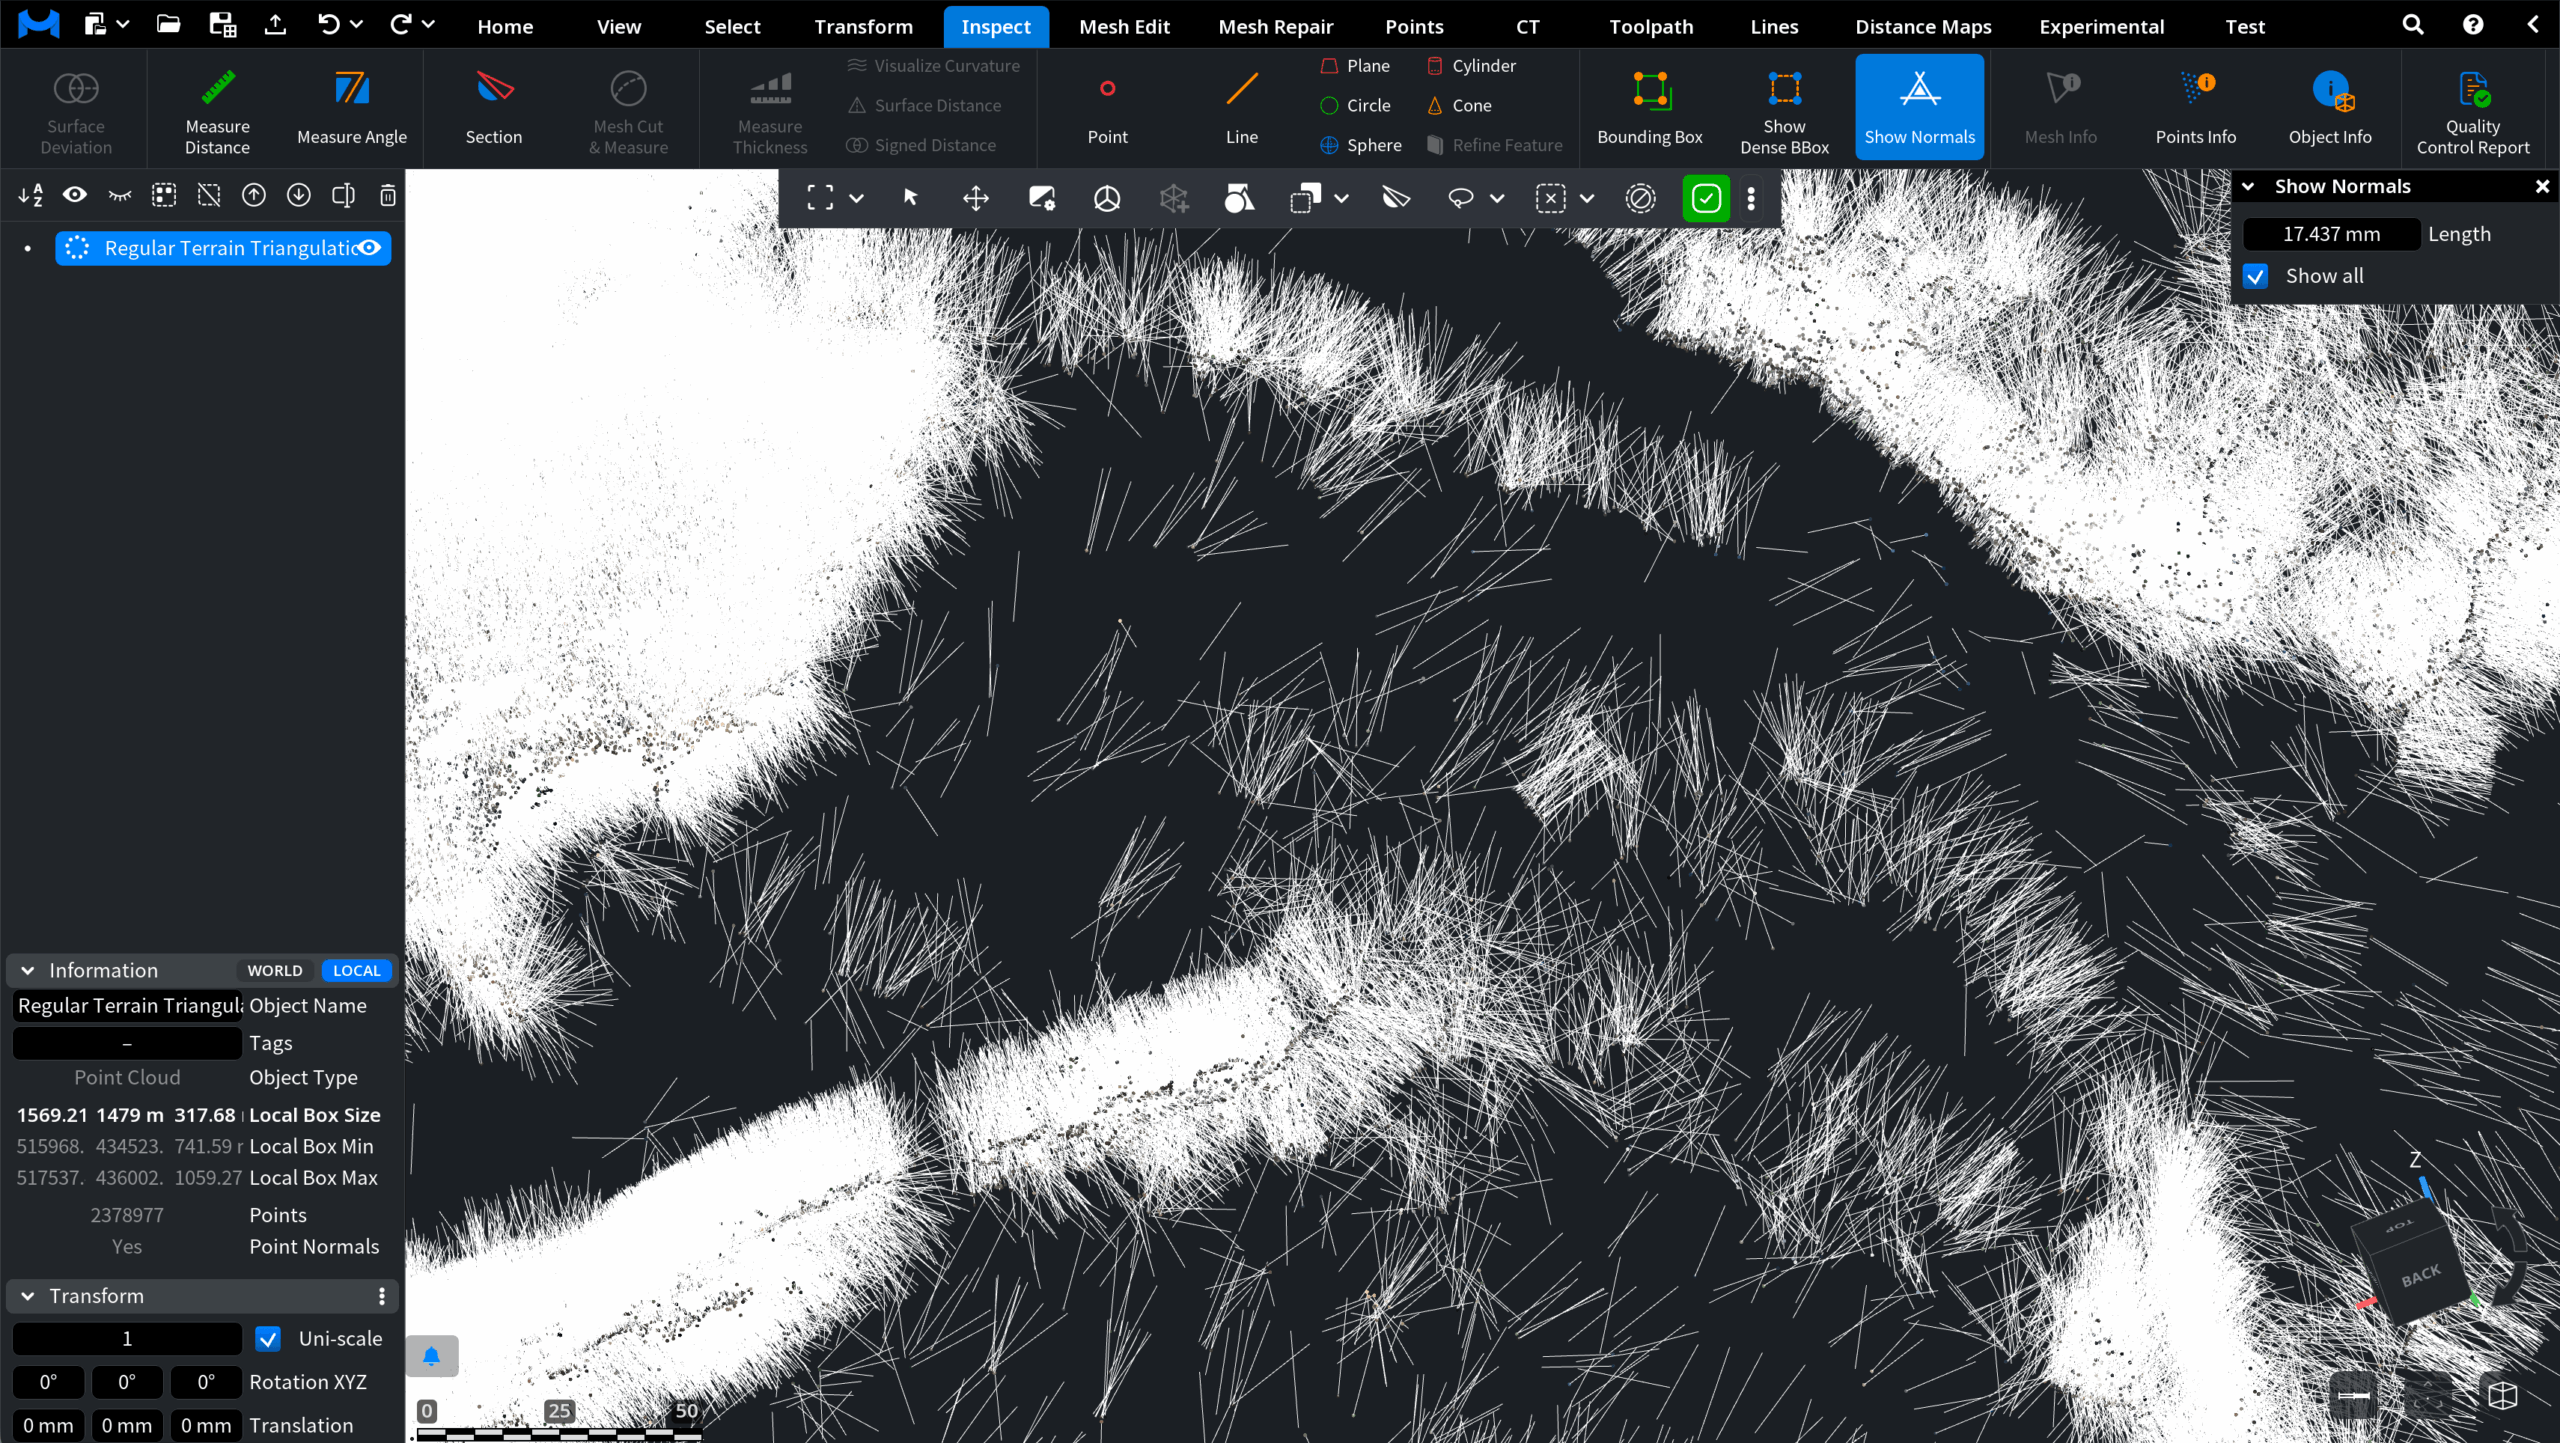
Next, return to the Points tab and click Orient Point Normals. In our example, Nearest Neighbours is set to 30. The operation is now applied. To see how the normals have changed, return to the Inspect tab and click Show Normals.