
Loads from YouTube (Google) when you press Play
Align Manually moves an object onto another one by matching points that you pick on both. Use it as the first, rough step when two scans of a part, or a scan and its CAD model, lie in different places: automatic fine alignment with Registration only works when the objects are already close. It also helps when the shape is so irregular or symmetric that automatic methods find a wrong position.
You find the tool in Transform › Align Manually.

Before You Start
- Select at least two objects, for example two meshes, two point clouds or a mesh and a cloud.
- The object that is higher in the Scene tree becomes the fixed object: it stays in place. The other objects are floating: they move. An object with the Reference Model tag is the fixed one instead, wherever it is in the tree. You can change the roles in the panel.
- Find features that are clearly visible on both objects: corners, holes, edges of flat faces.
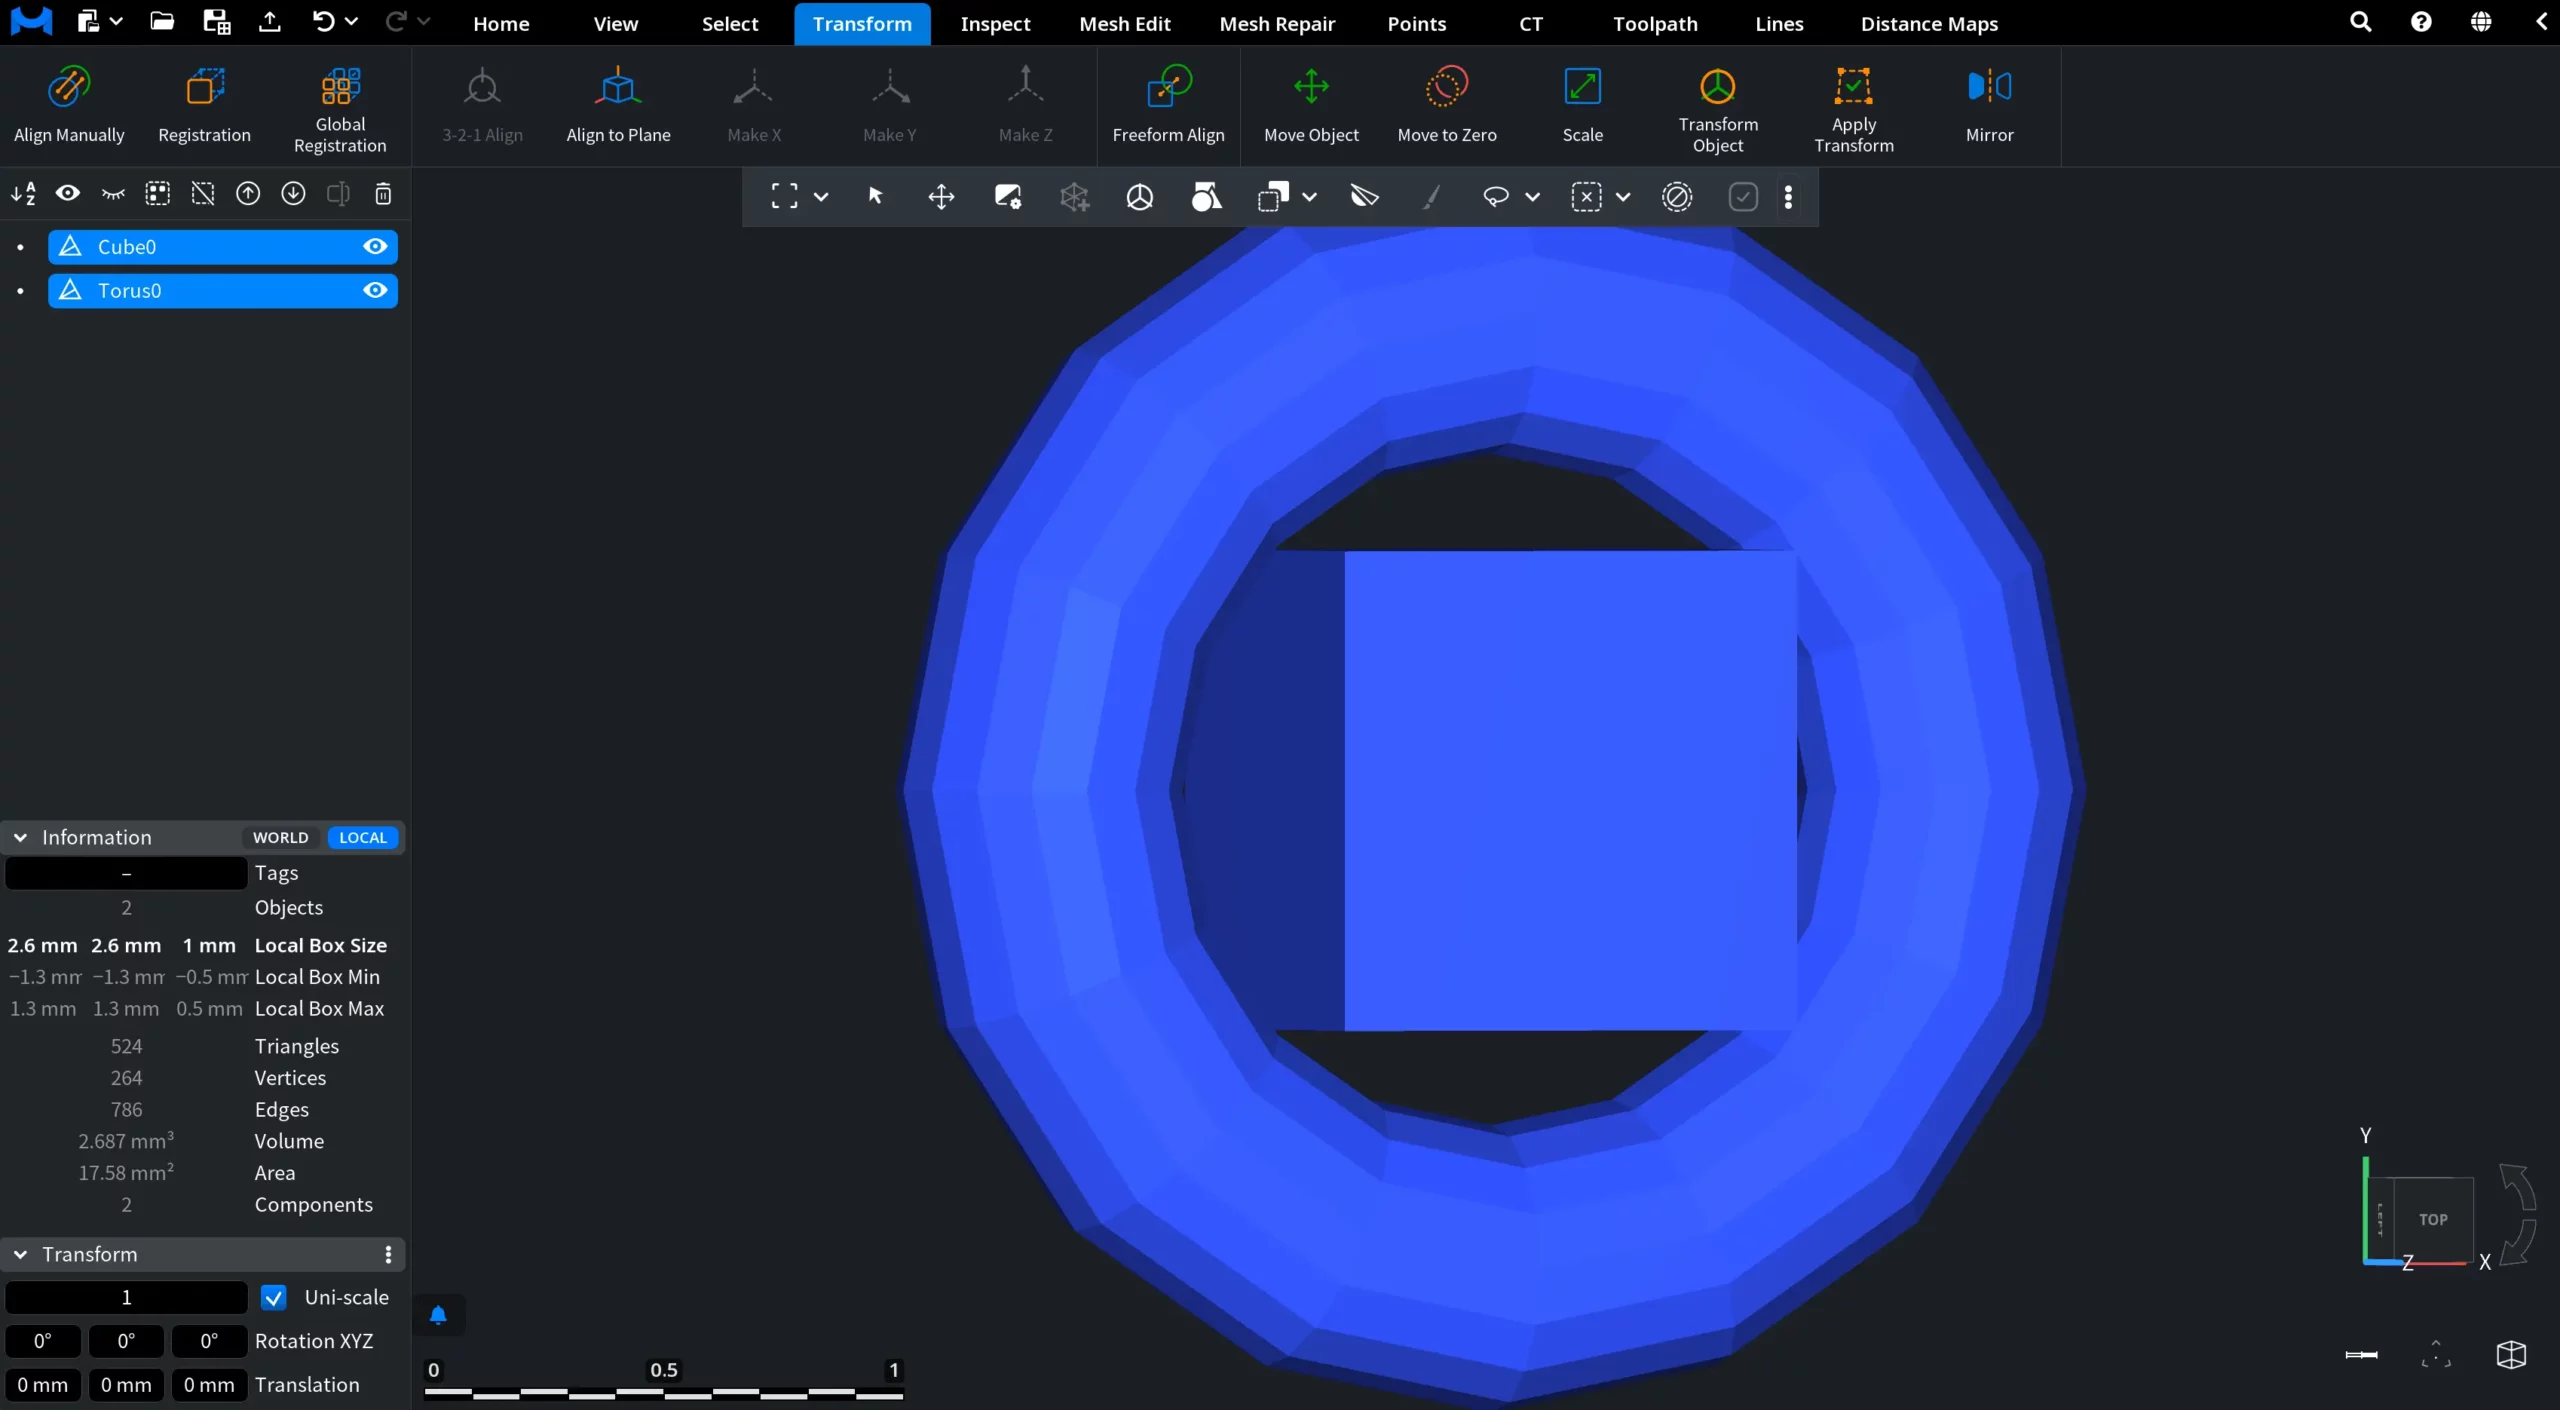
In the screenshot below, you can see the objects in the viewport before Align Manually is activated.
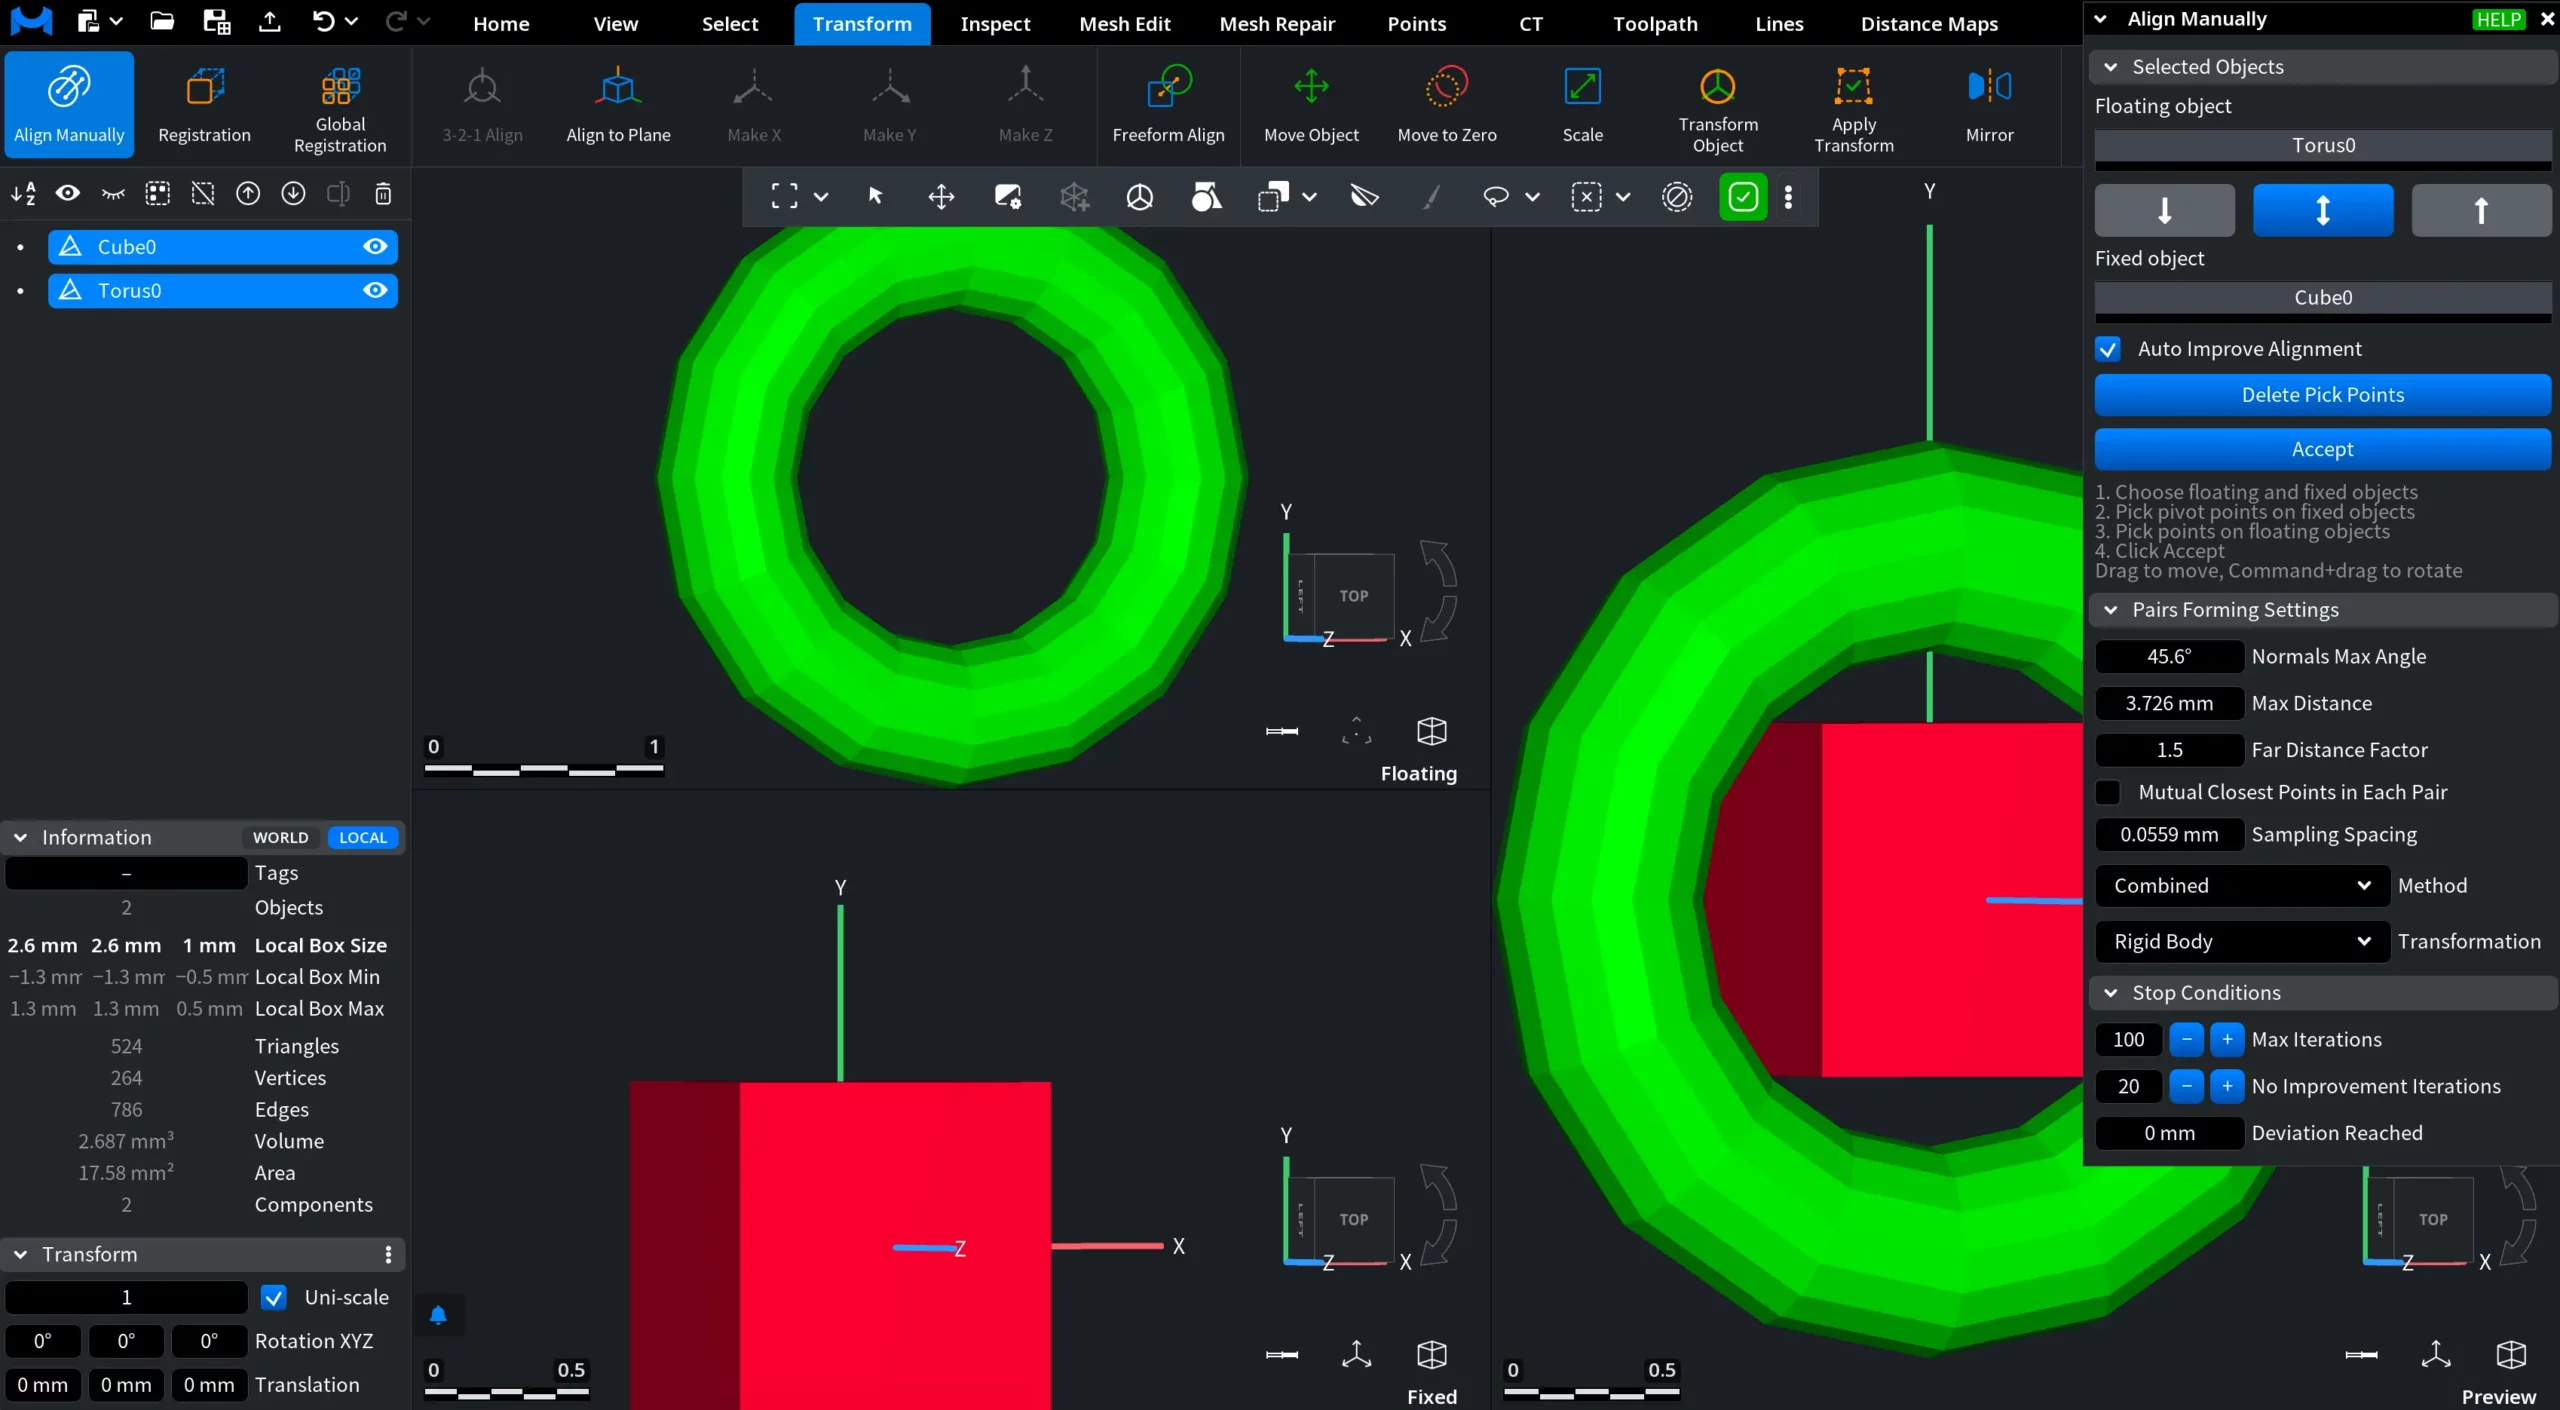
When the tool opens, the viewport is divided into three areas: the floating object, the fixed object, and a preview where both objects are shown together.
Align Two Objects Step by Step
- Select both objects and go to Transform › Align Manually.
- In Selected Objects, check which object is under Floating object and which is under Fixed object. Use the arrow buttons to change the roles.
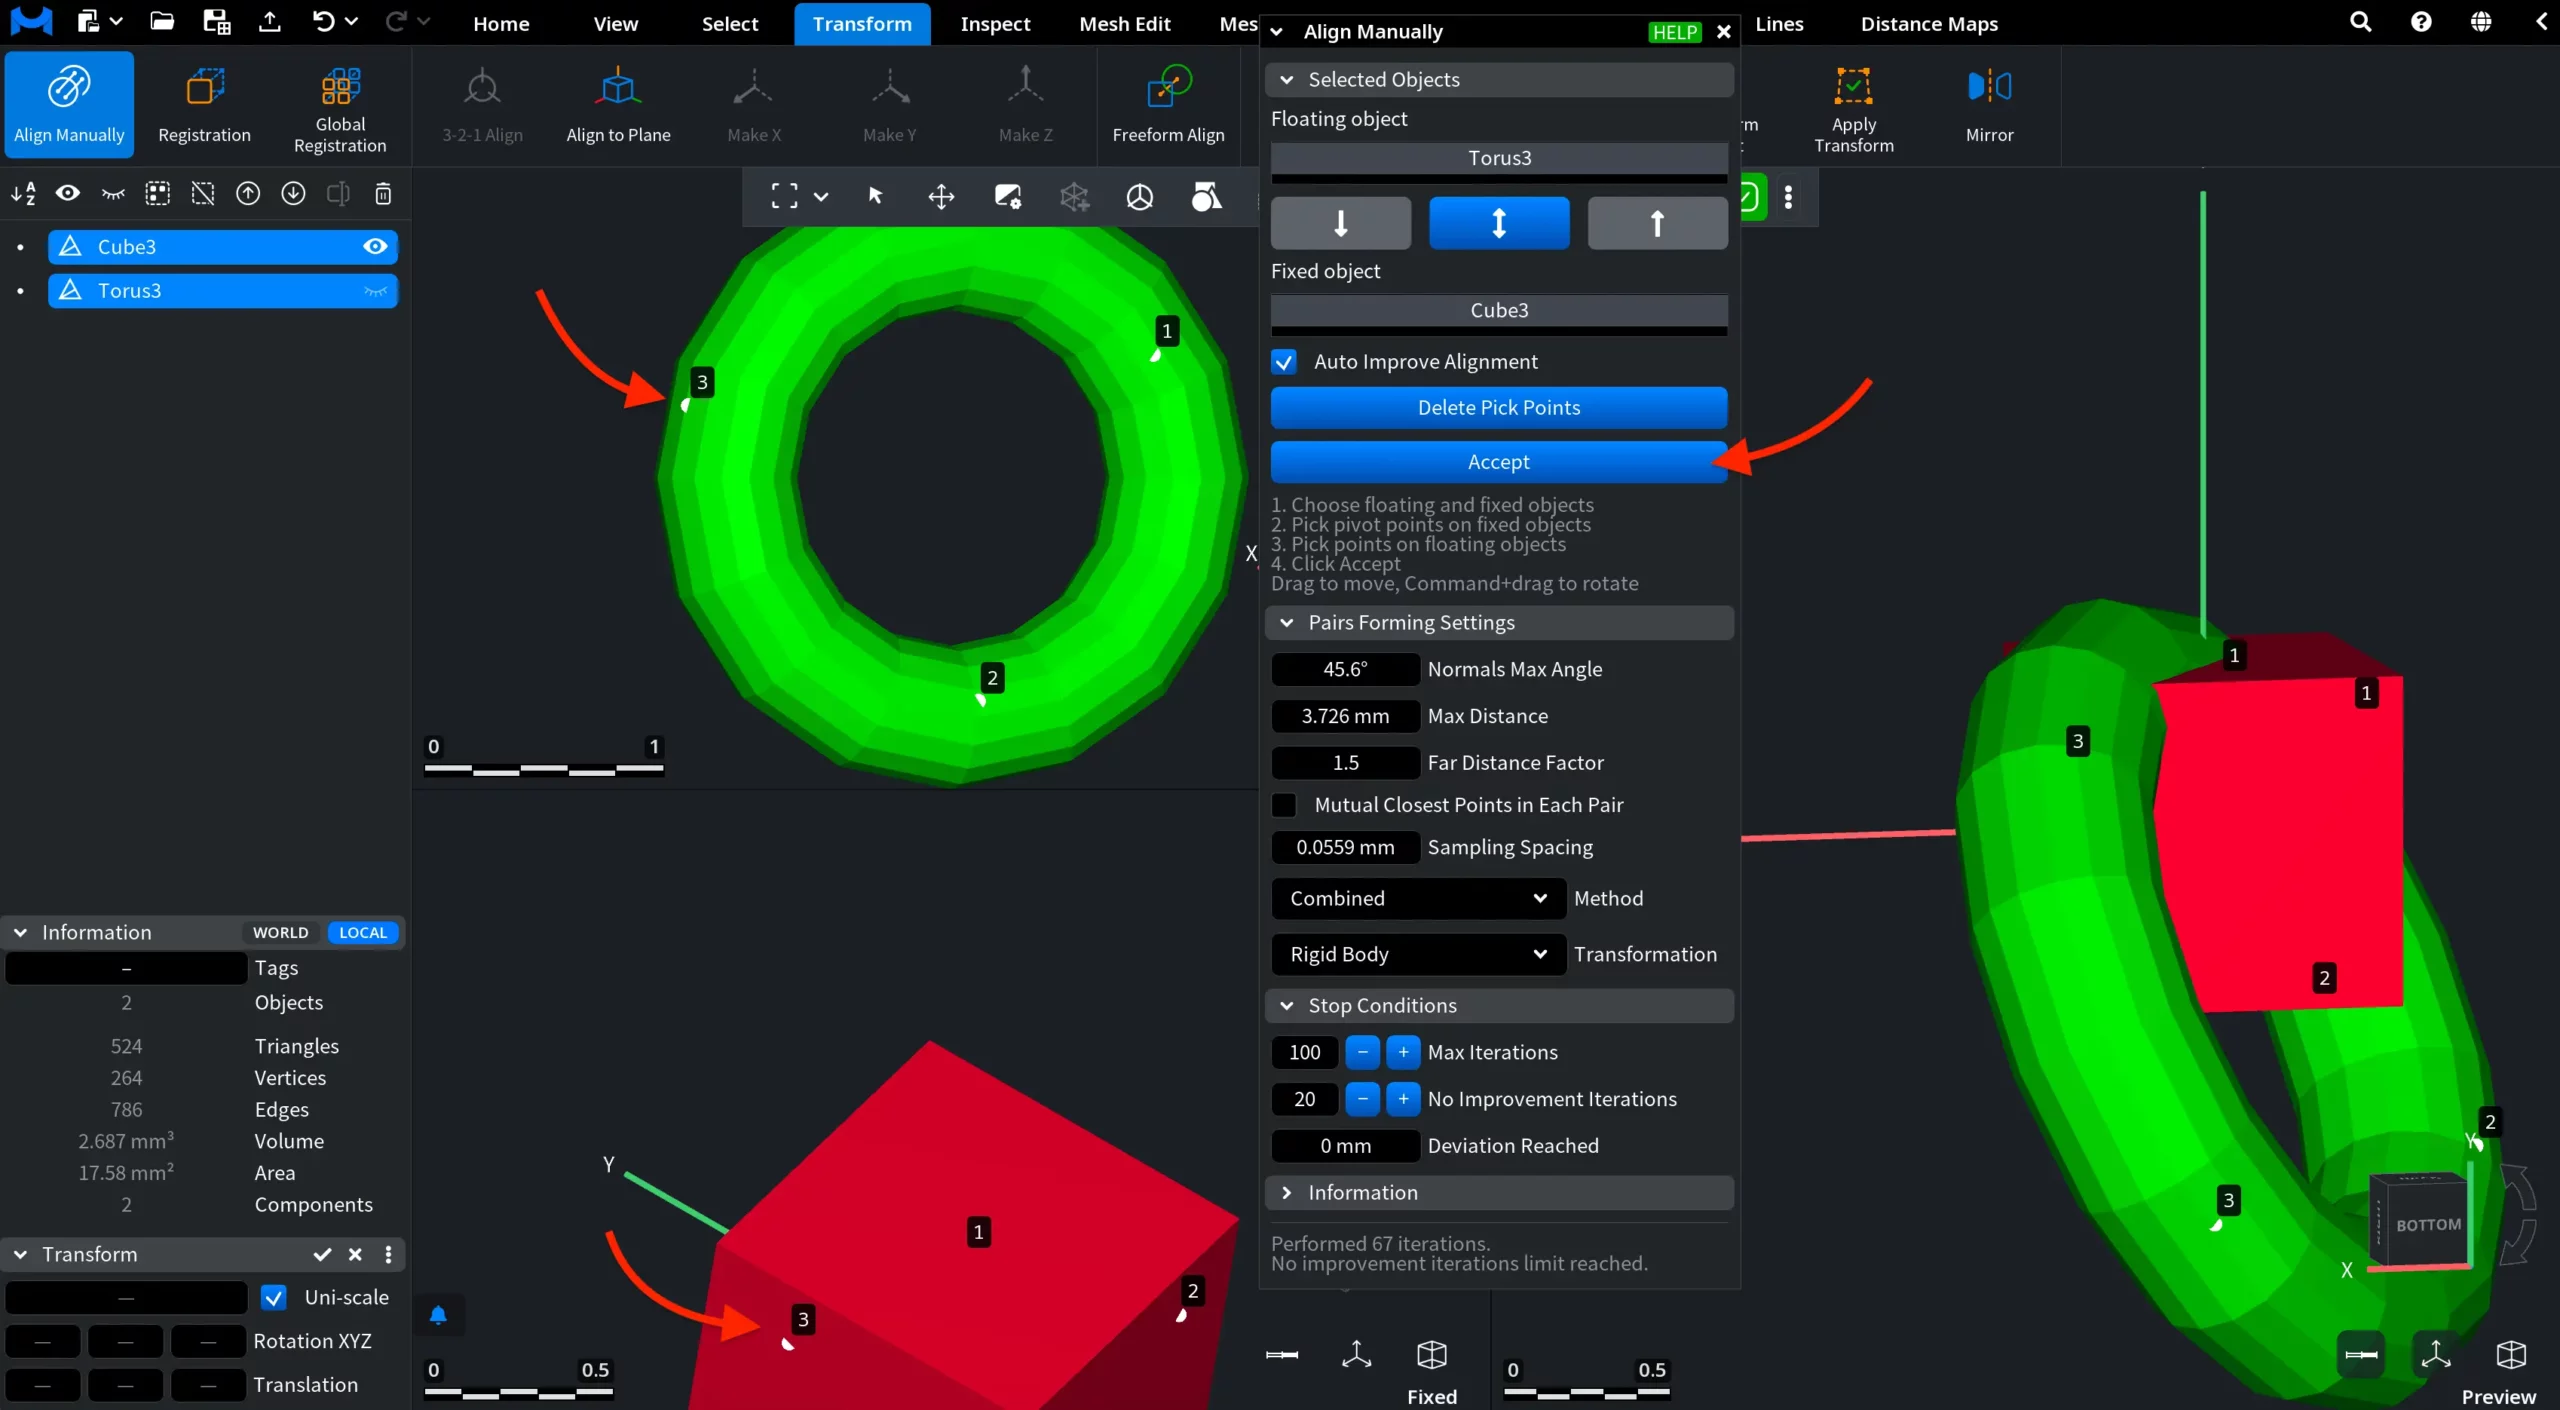
- Click a point on the fixed object. It gets the number 1.
- Click the matching point on the floating object. It also gets the number 1, and the floating object immediately moves so that the two points meet.
- Repeat for points 2, 3 and more. Points with the same number form a pair:
- with one pair the floating object is only shifted;
- with two pairs it is also turned so that the line between its two points runs along the line between the fixed points;
- with three or more pairs the tool finds the position that fits all pairs best.
- Check the result in the preview area. If a point is wrong, click Delete Pick Points and pick again.
- Click Accept. The floating object keeps its new position and the tool closes.
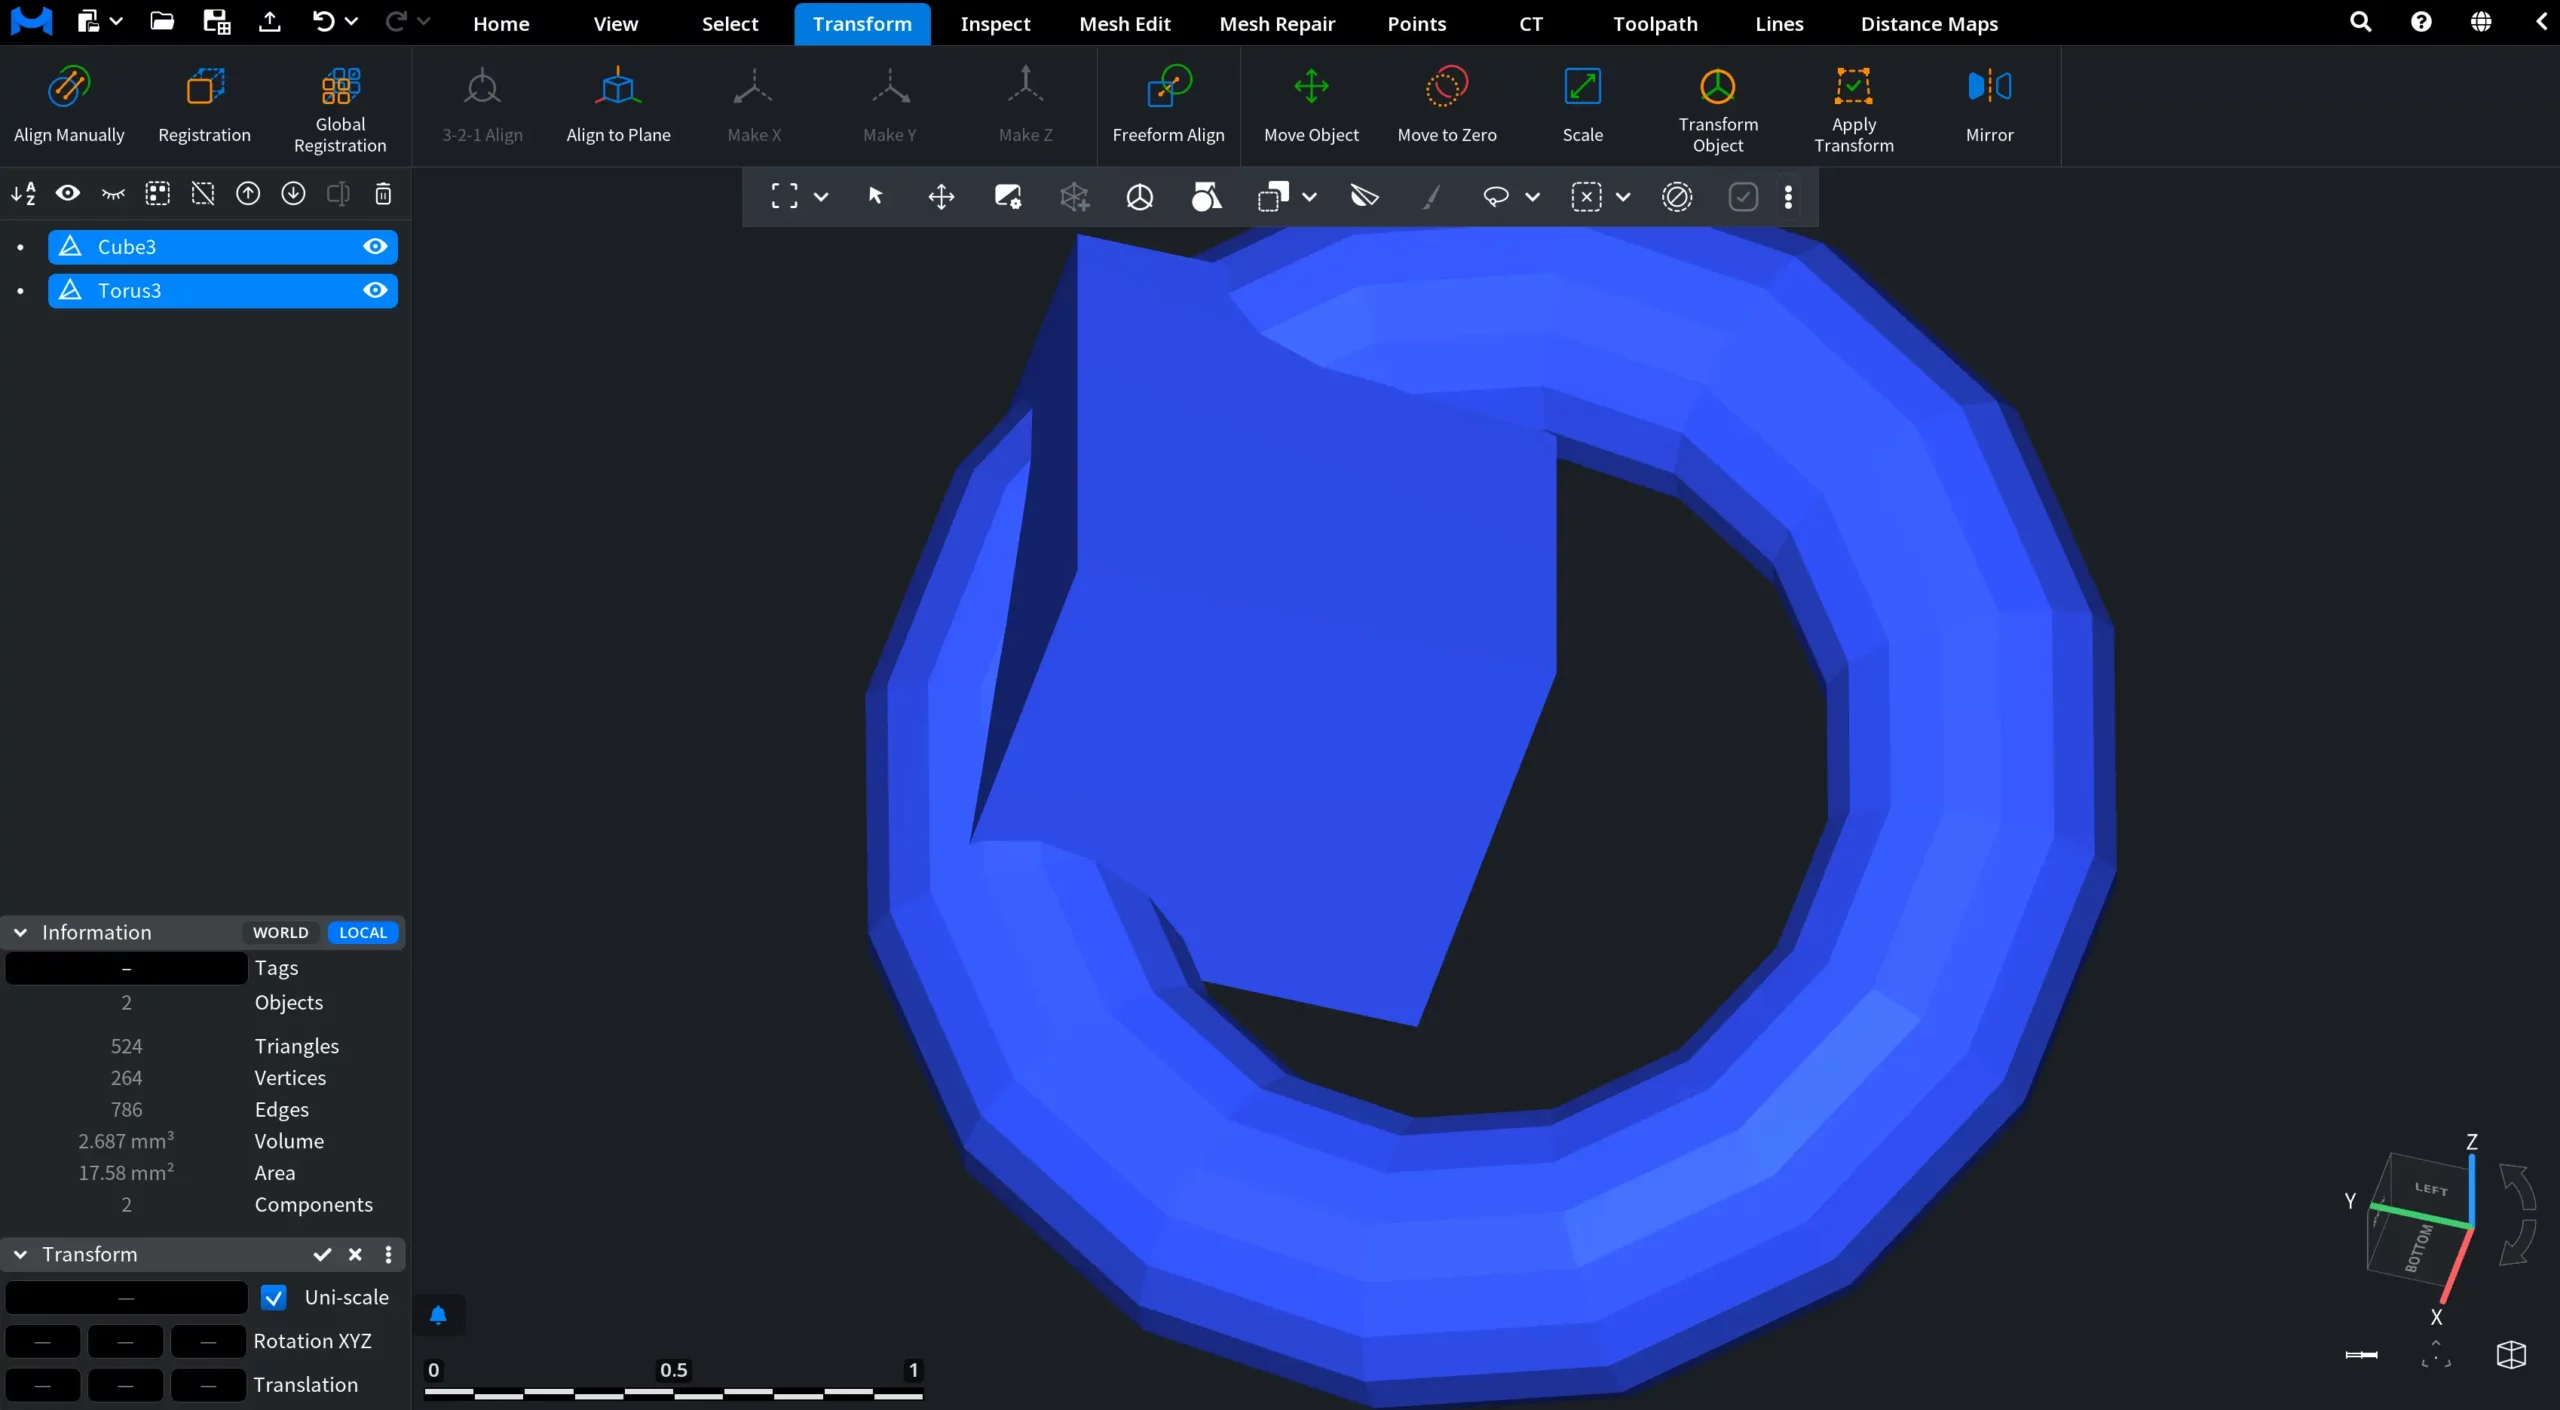
You can also move the floating object with the mouse: drag it to move it, or hold Ctrl (Cmd on macOS) while dragging to rotate it.
Auto Improve Alignment is selected by default. Starting from the third pair, the tool refines the position after each new pair with the ICP algorithm, the same one Registration uses, so the result is usually closer than the picked points alone.
Tips for Good Point Pairs
- Pick at least three pairs, spread over the whole object. Three points close together or on one line leave the object free to turn around them.
- On symmetric parts, take care that the points really match: picking the left side on one object and the right side on the other turns the object into a wrong position.
- Pick points on areas that exist on both objects. On a partial scan, avoid edges where the scan ends.
Align Several Objects
If you select three or more objects, the panel shows the lists Floating objects and Fixed objects. To select several objects in a list, hold Ctrl (Cmd on macOS); Shift selects or clears all of them. Then:
- Pick point pairs between the fixed object(s) and the floating object that is selected in the list.
- Click Accept. The aligned object becomes fixed, and the tool selects the next floating object.
- Repeat until all objects are fixed; then the tool closes.
If the panel shows Warning: objects have parent/child relations, one of the objects is a child of another in the Scene tree, so moving one also moves the other. Drag the child out of its parent in the Scene tree first.
ICP Settings
The Pairs Forming Settings, Stop Conditions and Information sections set up and report the ICP refinement used by Auto Improve Alignment. They are the same as in Registration; see the parameter reference. Defaults in Align Manually:
| Setting | Default |
|---|---|
| Method | Combined |
| Transformation | Rigid Body |
| Max Distance | The size of the largest object (diagonal of its bounding box) |
| Sampling Spacing | 1.5% of that size |
| Far Distance Factor | 1.5 |
| Max Iterations / No Improvement Iterations | 100 / 20 |
Refine the Alignment
Align Manually gives a good start position. To fit the objects precisely, select the two objects and run Registration; for three or more scans use Global Registration. To merge aligned point cloud scans into one mesh, use Scans to Mesh.


