
Scans to Mesh turns several point cloud scans of one object into a single mesh in one run. It fits the scans to each other, merges them into one cloud, cleans the cloud and builds the mesh. Use it when you scanned an object from several sides and each scan is a separate point cloud.
You find the tool in Points › Scans to Mesh.
Before You Start
- Point clouds only. Select at least two point clouds; with fewer the tool stays disabled. Meshes are not accepted: if your scans are meshes, turn them into clouds first with Mesh to Points.
- Scans need normals for the registration step. It runs first, on the scans as they are, and its default method Point-to-Plane uses their normals: scans without normals are not moved. Check Point Normals in the Information panel. If it says No, run Make Normals on each scan first, or choose Point-to-Point as the Method in the Global Registration section.
- Scans must be roughly aligned and overlap. The registration step only refines positions that are already close. If the scans lie far apart or are turned against each other, place them roughly first with Align Manually or Move Object.
Merge Scans Step by Step
-
In the Scene tree, select the point clouds: click the first one, then Ctrl+click (Cmd+click on macOS) the others.
-
Go to Points › Scans to Mesh. The panel opens with a Merge button, a list of step checkboxes and a settings section for each step.
-
For the first run, keep the default checkboxes: every step is on except Save Debug Objects.
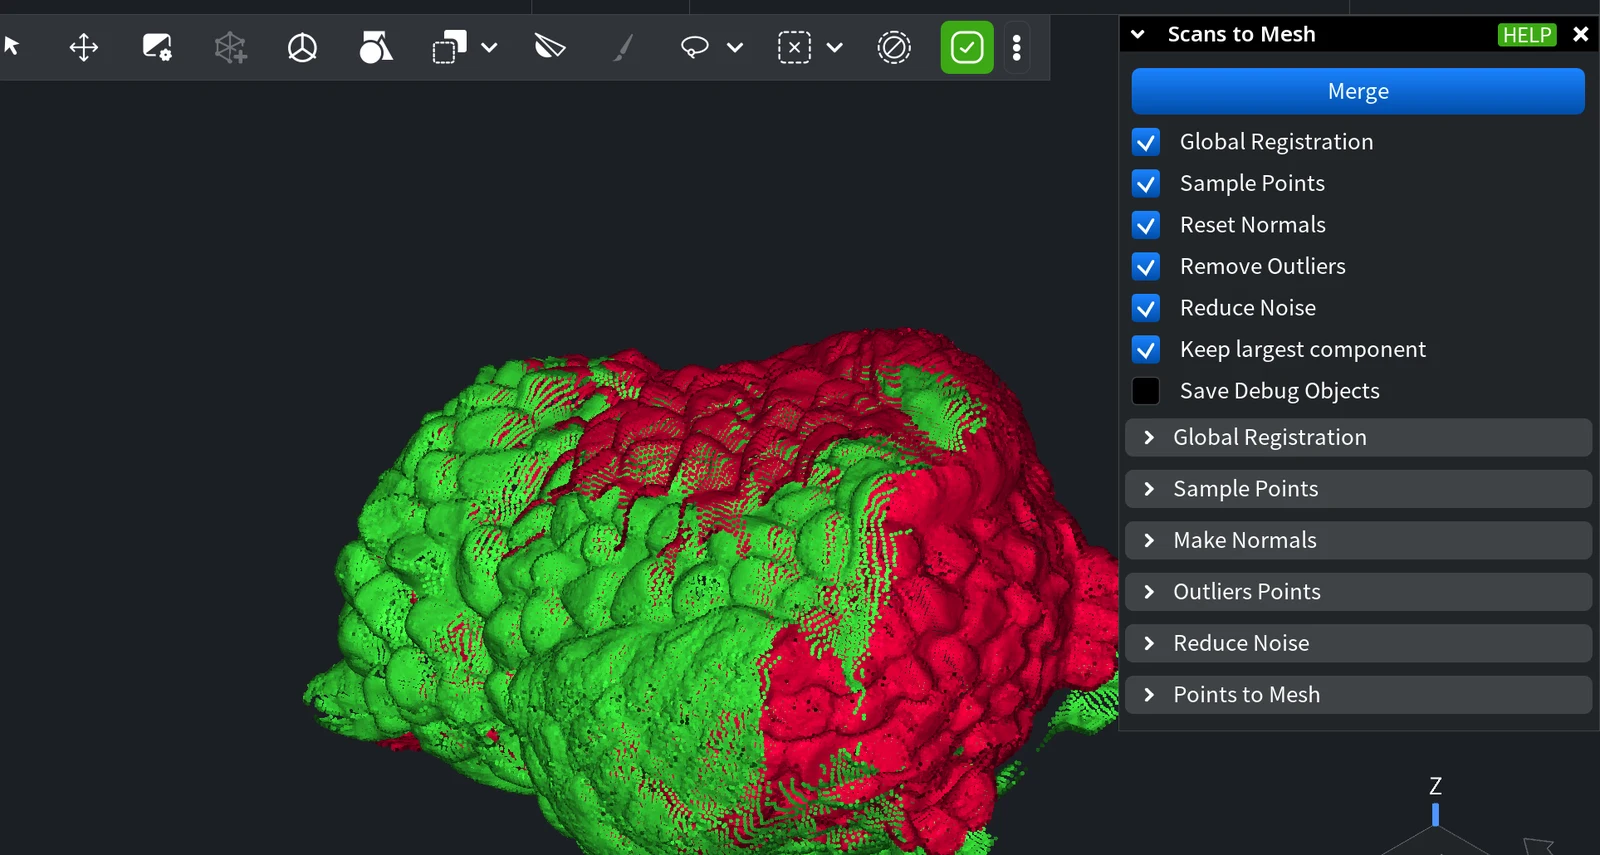
-
Click Merge. A progress bar shows the steps; on a large scan this can take a while.
-
The new mesh Scan Merged appears in the Scene tree and the panel closes. If the result is not good, press Ctrl+Z (Cmd+Z on macOS) to get the scans back, then open the tool again, change the settings and merge again.
What Happens When You Click Merge
The steps run in this order. Each checkbox turns its step on or off; the merge and the meshing always run.
| Step | Checkbox | What it does |
|---|---|---|
| 1. Register | Global Registration | Refines the position of every scan against the others with the ICP algorithm. It works on copies: your source clouds do not move. The scan that is highest in the Scene tree keeps its position. |
| 2. Merge | (always) | Joins the registered scans into one point cloud. |
| 3. Sample | Sample Points | Thins the merged cloud. Where scans overlap the cloud is denser, and sampling evens this out. |
| 4. Normals | Reset Normals | Removes the normals the scans had and computes new ones for the merged cloud. |
| 5. Clean | Remove Outliers | Finds and deletes stray points. The search repeats Iterations times (1–10, default 2). |
| 6. Smooth | Reduce Noise | Smooths the cloud to reduce scanner noise. |
| 7. Mesh | (always) | Builds triangles between the points, as Points to Mesh does. |
| 8. Clean up the mesh | Keep largest component | Deletes all separate mesh pieces except the largest one. |
Save Debug Objects keeps a copy of the data after each step: the registered scans (their names end with registered), Merged clouds, Sampled points, Removed normals, Made Normals, Removed outliers, Reduced Noise and Triangulated mesh (the mesh before Keep largest component). The copies are added hidden. Turn this option on when the result is wrong and you want to see which step caused it.
The Result
-
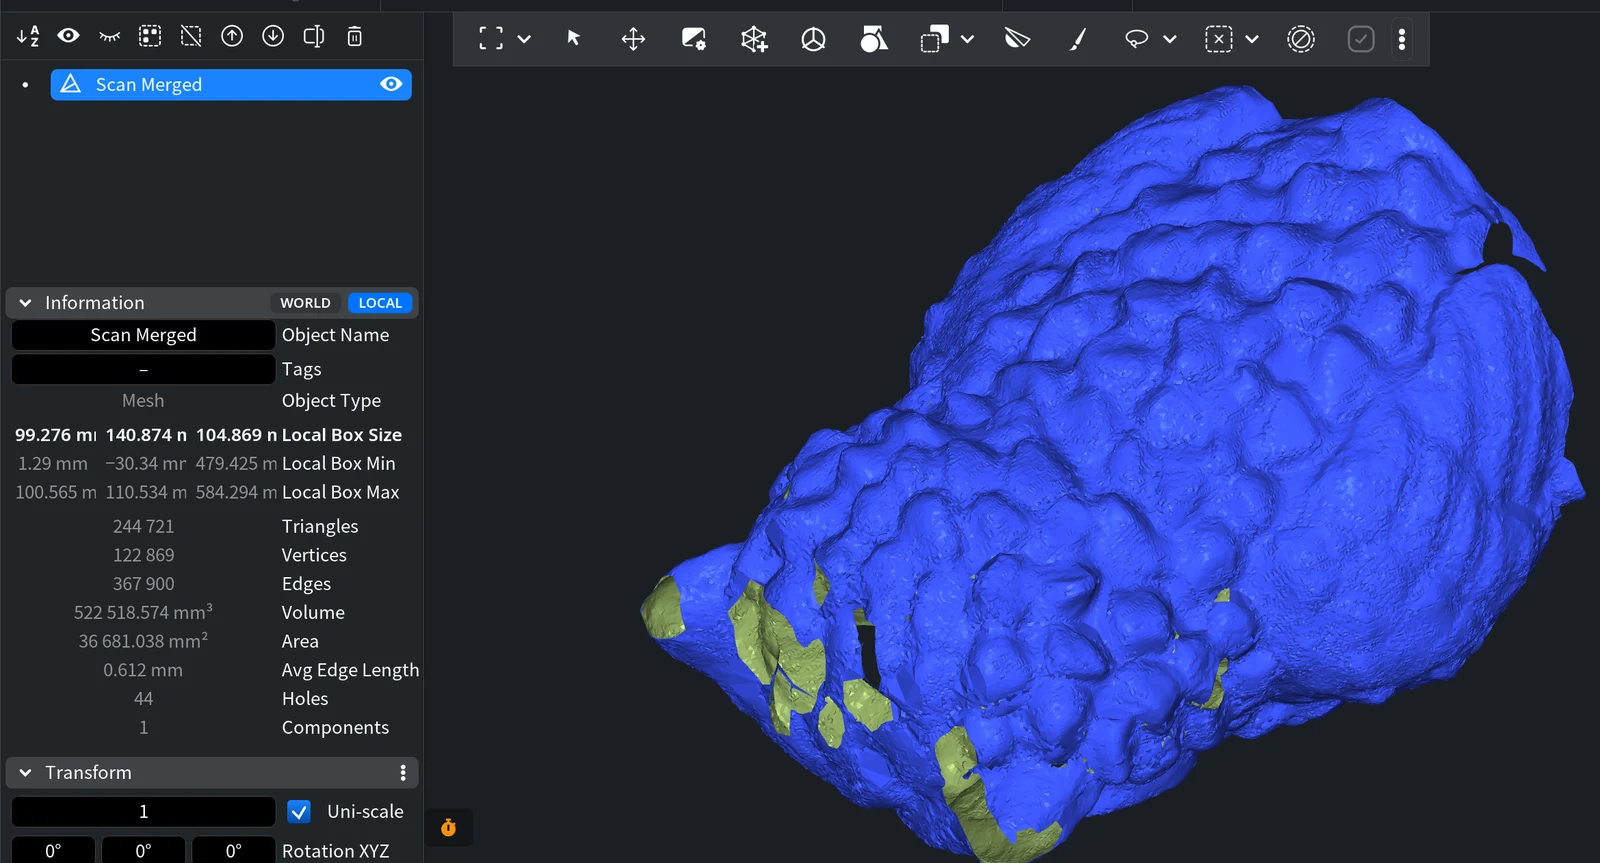
The mesh Scan Merged is added next to the source scans and selected.
In this example, two point cloud scans of an owl figurine became one mesh with 244 721 triangles in one component, with the default settings.
-
The source point clouds are removed from the scene. To keep them (hidden), turn on Preserve Point Cloud in the Points to Mesh section before you click Merge. Ctrl+Z (Cmd+Z) brings back the scene as it was before the merge.
-
The tool remembers your checkboxes and settings for the next time.
Settings of Each Step
Under the checkboxes the panel has a collapsible section for each step. The sections hold the same settings as the separate tools, so the articles on those tools explain them in detail.
| Section | Main settings | Details |
|---|---|---|
| Global Registration | Point pair filters (Normals Max Angle, Max Distance, Far Distance Factor), Sampling Spacing, Method, Max Group Size, Cascade Mode, the stop conditions (Max Iterations, No Improvement Iterations, Deviation Reached) | Global Registration, Registration parameters |
| Sample Points | Method (Uniform, Grid, Iterative) and its spacing or number of samples | Sample Points |
| Make Normals | Orientation, Nearest Neighbours | Make Normals |
| Outliers Points | Average Points Radius, the outlier types, Iterations | Select Outliers |
| Reduce Noise | Mode and its settings | Reduce Noise |
| Points to Mesh | Nearest Neighbours, Critical Angle, Fill Holes, Preserve Point Cloud | Points to Mesh |
Typical Problems
- The tool is greyed out. Fewer than two point clouds are selected, or the selected scans are meshes.
- The surface is doubled or has a step. The scans were too far apart for the registration step, or they have no normals (see Before You Start). Align them roughly first, or increase Max Distance in the Global Registration section.
- A part of the object is missing. Keep largest component deletes everything that is not connected to the largest piece, and Remove Outliers can delete thin details. Turn these steps off or use Save Debug Objects to find the step that removed the part.
- The mesh has holes. Open the Points to Mesh section and check Fill Holes, or increase Nearest Neighbours.
If you prefer to control each step yourself, run the same tools one by one: Global Registration, Sample Points, Make Normals, Select Outliers, and then Points to Mesh or Fusion.


