Noise is a common scanning artifact in geometric data. As such, it may appear as small irregular fluctuations, rough areas, scattered points, etc. Issues of this sort might distort the shape of the object and reduce data quality.
Reduce Noise
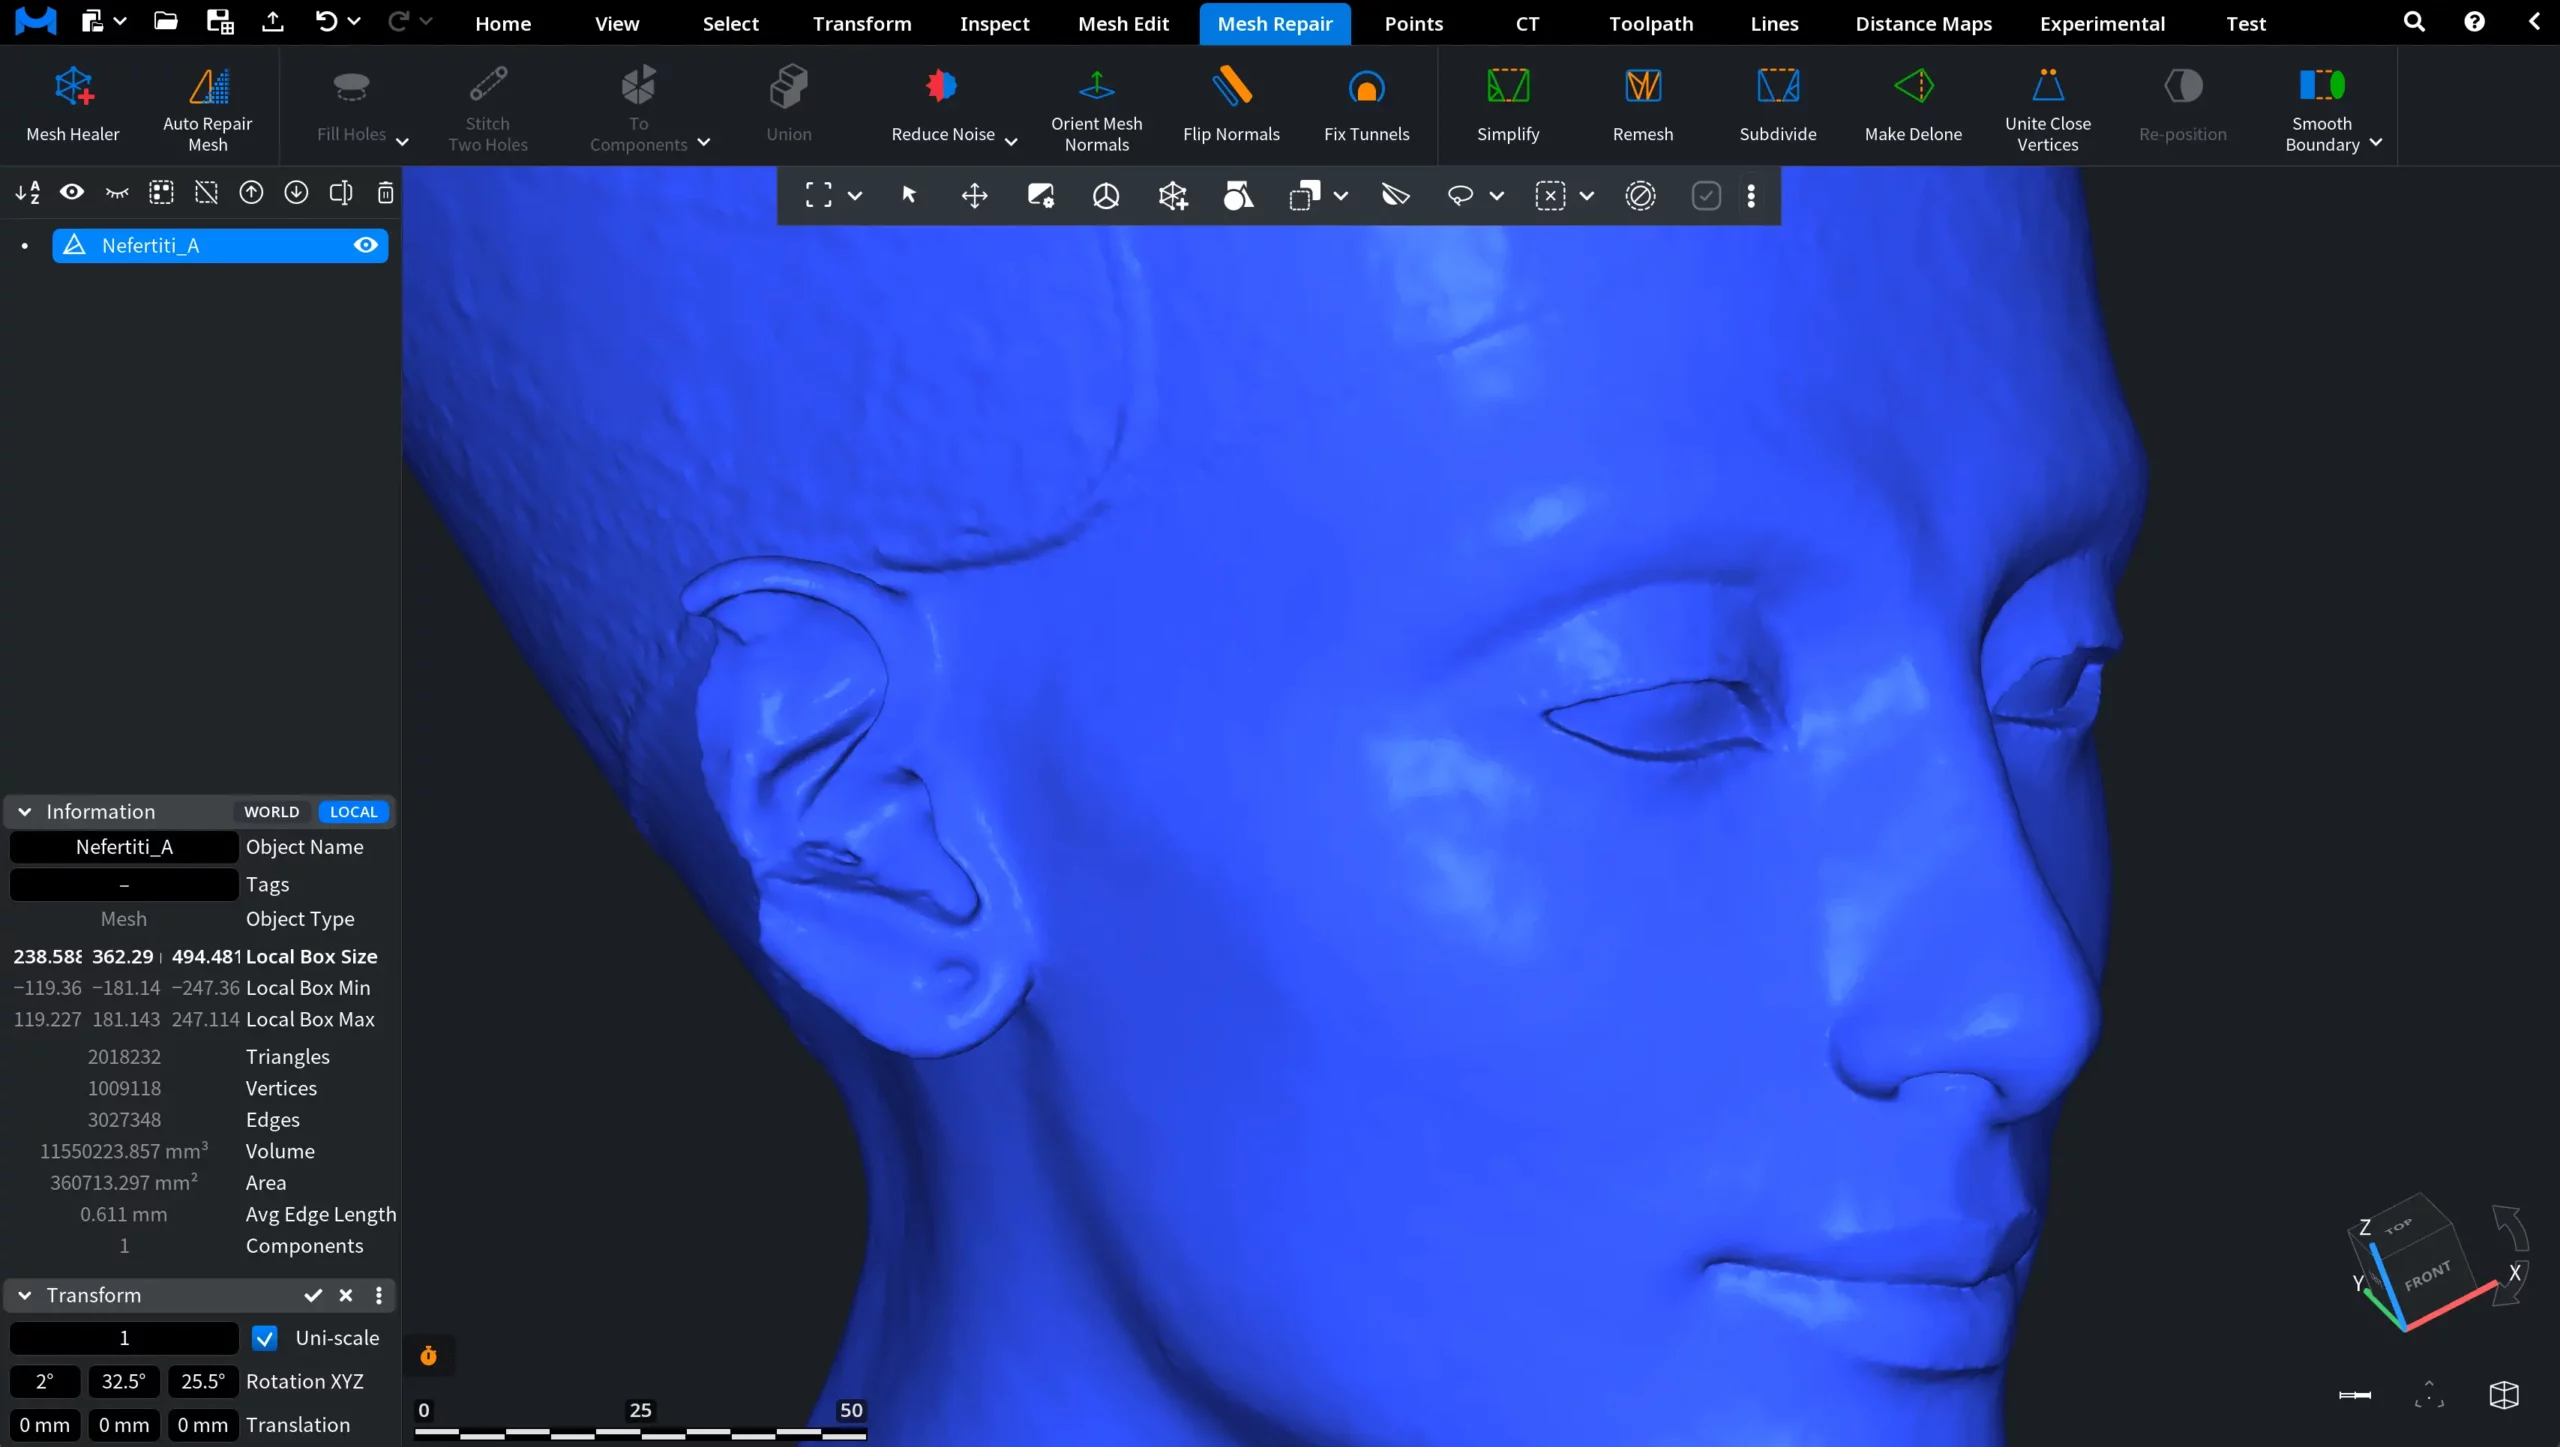
The Reduce Noise tool in MeshInspector smooths geometric data by reducing small surface irregularities while preserving the overall structure of the object. Our algorithm helps improve the consistency and visual quality of the model without significantly altering its main features. This operation can be applied to meshes, point clouds, and line data.
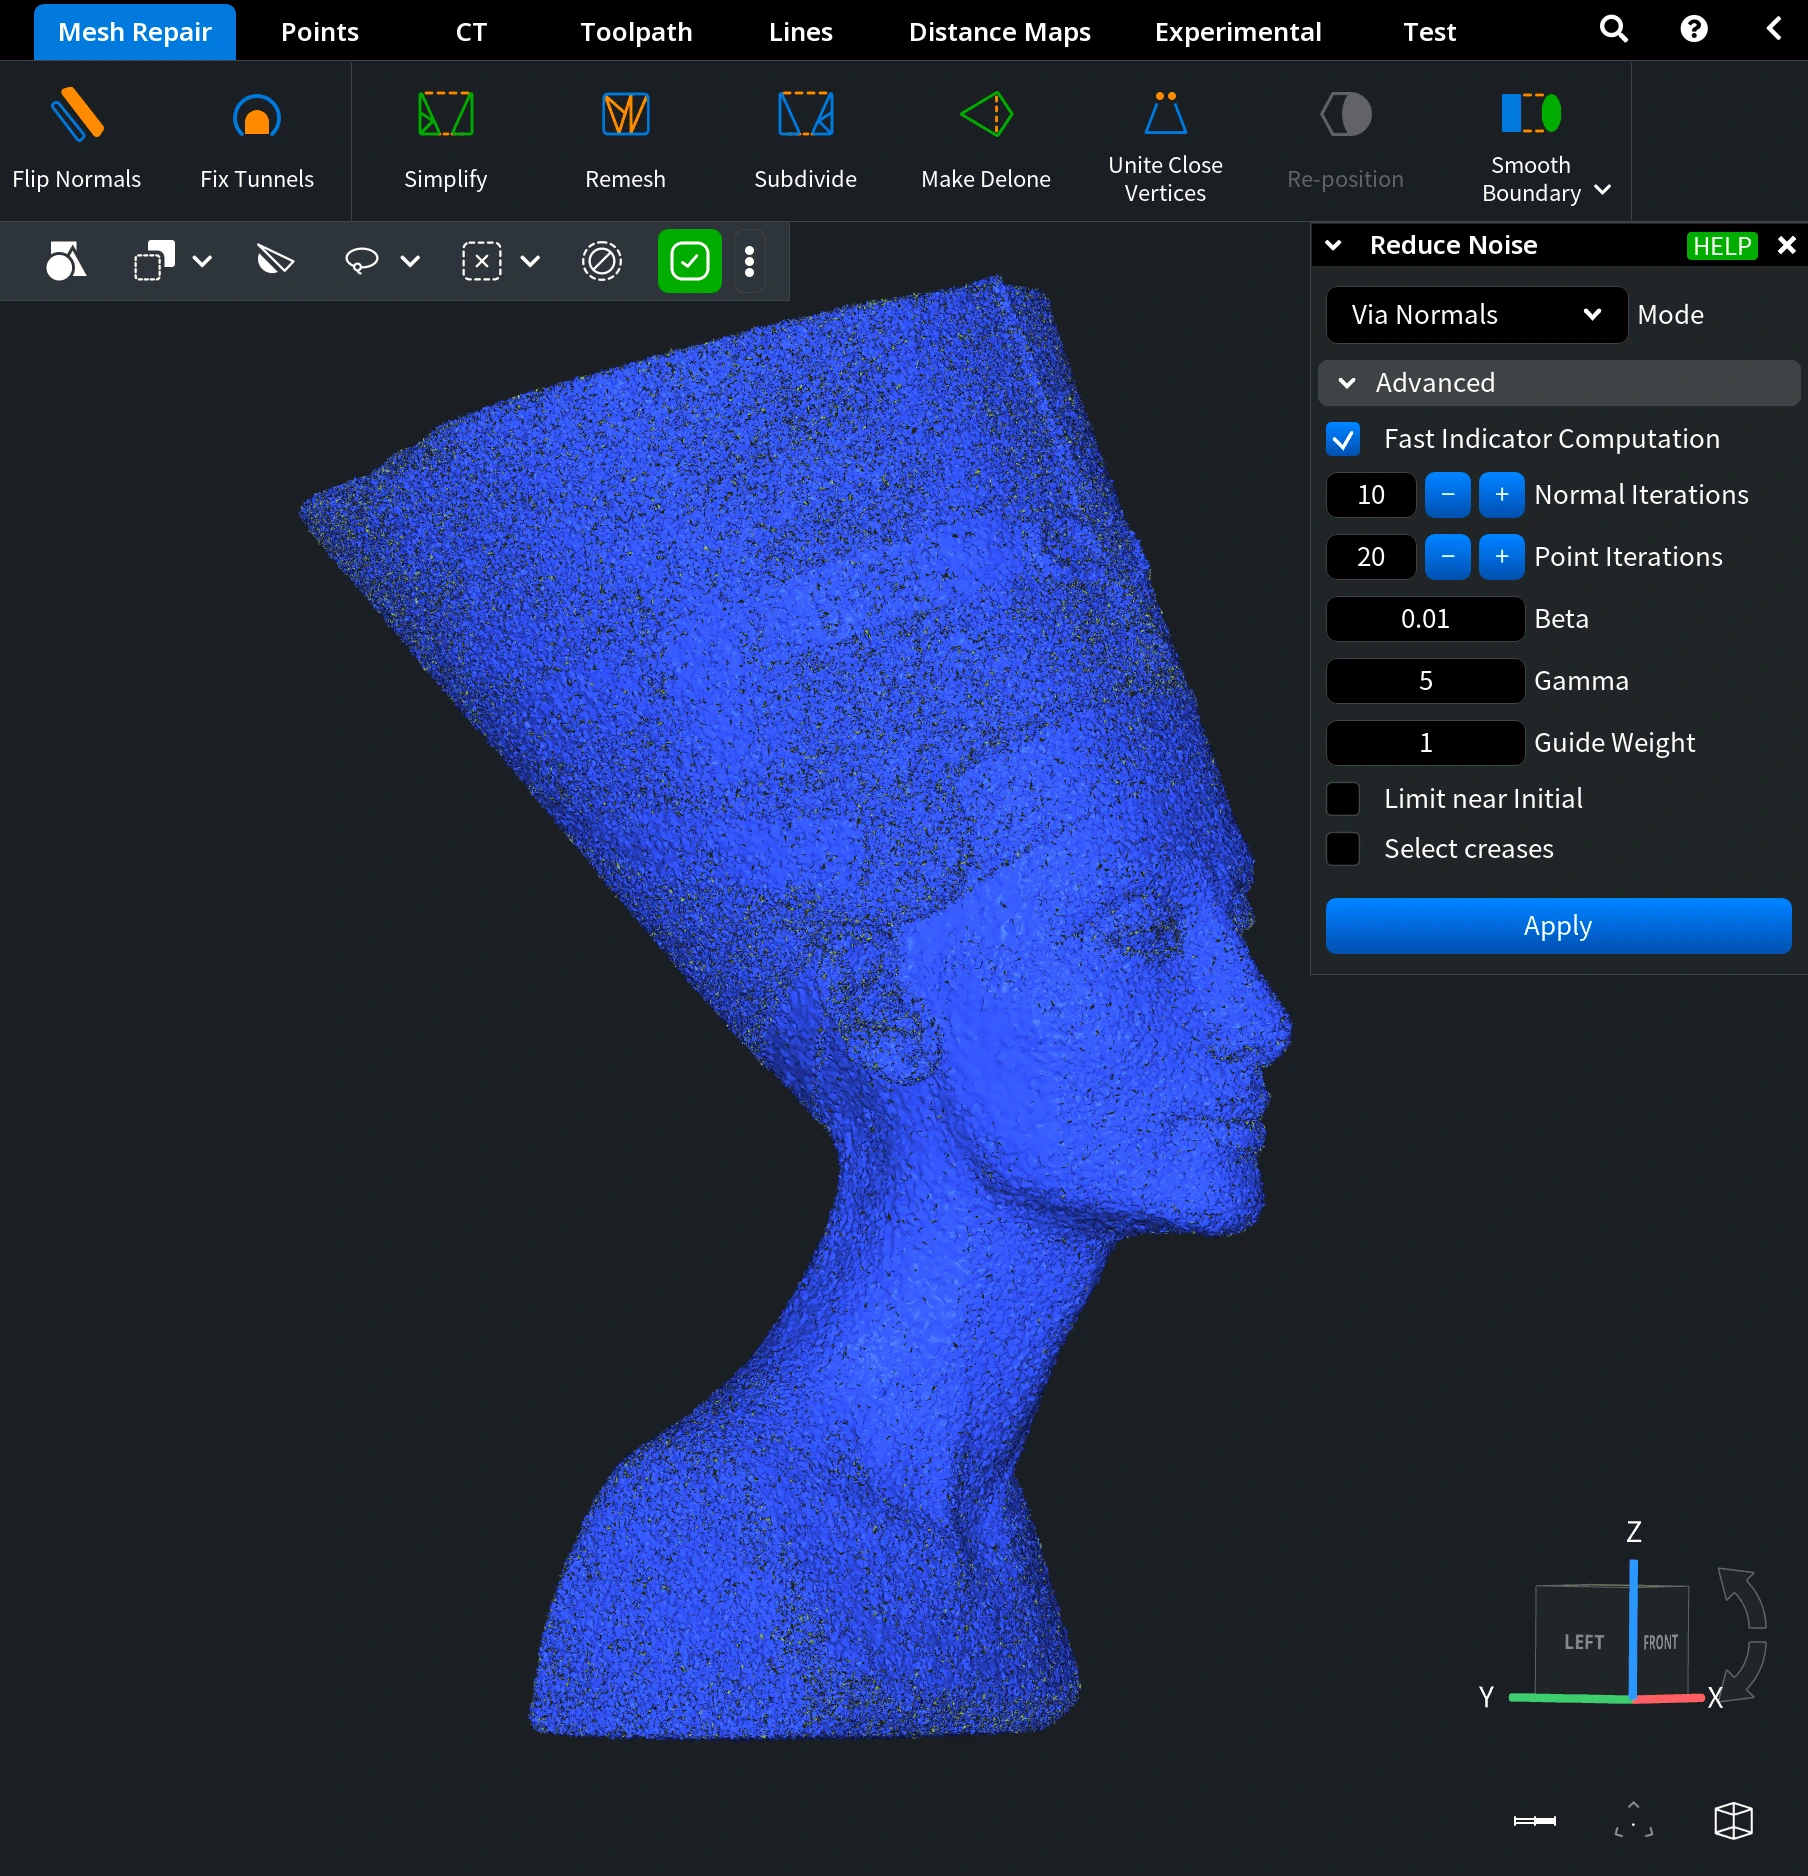
To access the Reduce Noise tool, open the Mesh Repair tab and click Reduce Noise.

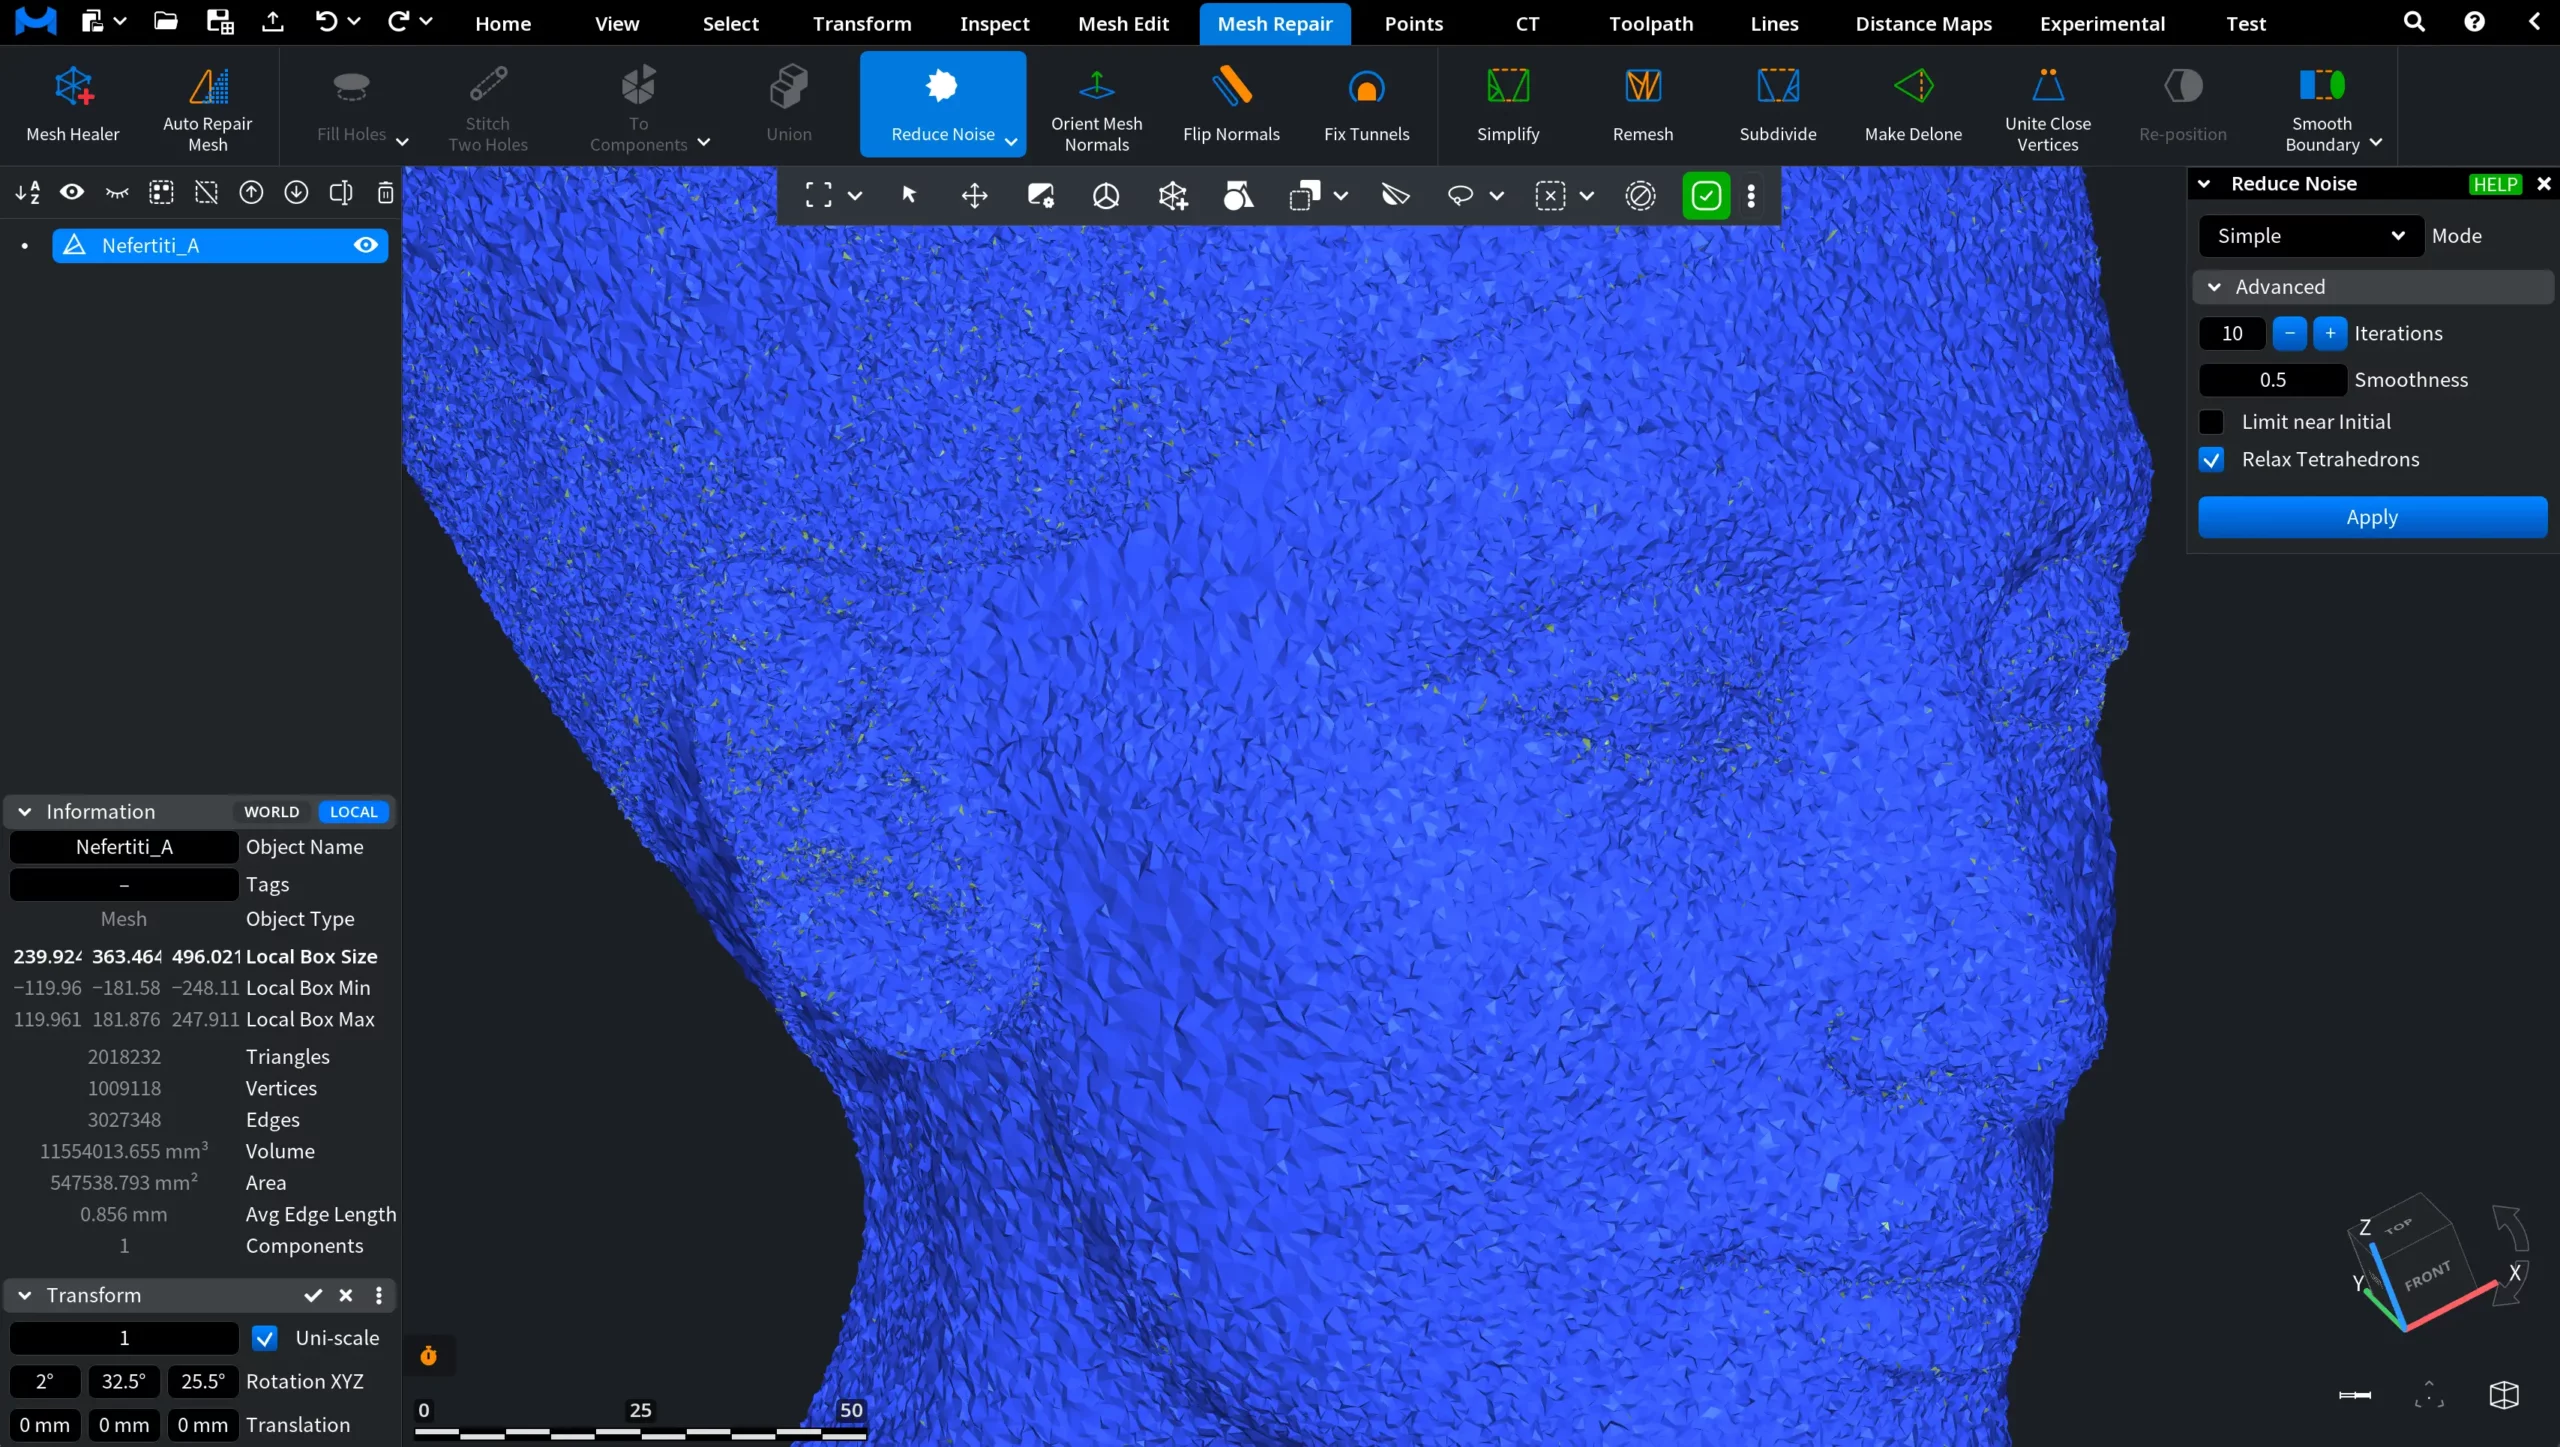
After clicking Reduce Noise, the tool panel opens on the right side of the interface. There, you can configure the noise reduction parameters and apply the operation to the selected geometry. In the example shown below, the model contains noticeable surface noise. The mesh appears covered with small irregular fluctuations and scattered points.
Mode
Start by selecting the smoothing Mode. The set of available parameters depends on the selected mode.
Via Normals
The Via Normals mode performs denoising in two main stages. First, the algorithm computes a smoothed normal field while detecting discontinuities such as sharp edges. After that, the vertex positions are updated to match the corrected normal field. This approach helps remove noise while preserving important geometric features of the model.
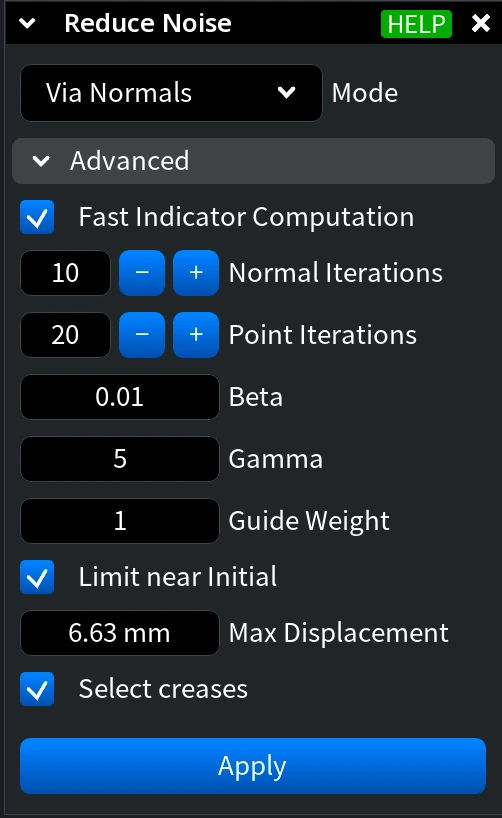
Advanced with Via Normals
Expanding the Advanced section reveals additional parameters that control how the denoising process is performed.
Fast Indicator Computation. When enabled, the algorithm uses a faster but approximate variation of the indicator computation. This option improves performance, especially for large models, but may slightly reduce the precision of the denoising result.
Normal Iterations defines the number of iterations used to smooth normals and detect creases. Increasing this value can improve the quality of the resulting normal field and crease detection, but it also increases computation time.
Point Iterations specifies how many iterations are used to update vertex positions based on the computed normals. Higher values generally improve smoothing quality, though they also increase processing time.
Beta. Beta controls how strongly sharp edges are preserved during smoothing. Smaller values keep edges sharper, while larger values produce smoother transitions.
Typical examples include:
0.001 – sharp edges
0.01 – moderately preserved edges
0.1 – smoother edges
Gamma. Gamma controls the overall amount of smoothing applied to the model. A value of 0 means no smoothing, while higher values increase the smoothing effect.
Guide Weight. Guide Weight determines how strongly the resulting points are attracted toward their original positions. This helps prevent global shrinkage of the model during smoothing. The value must be greater than zero.
Limit near Initial. When Limit near Initial is enabled, the displacement of each point during denoising is limited to prevent excessive movement away from its original position.
Max Displacement (available only when Limit near Initial is enabled) defines the maximum distance a point can move from its original location during the smoothing process.
Select creases. When enabled, MeshInspector highlights sharp edges detected during the denoising process. This helps identify preserved geometric features and visually verify crease detection.
Simple
The Simple mode is the fastest denoising option. It works well with a small number of iterations but may cause the model to shrink toward its center if too many iterations are applied.

Advanced with Simple
Expanding the Advanced section reveals additional parameters that control how the smoothing process is performed.
Iterations defines the number of times the algorithm is applied to each vertex. Increasing this value strengthens the smoothing effect but may also increase the risk of model shrinkage.
Smoothness controls how far each vertex moves toward its relaxed position during smoothing. A value of 0.5 moves the vertex halfway toward the computed target position. Values greater than 0.5 may lead to instability in the smoothing process.
Limit near Initial works the same way as in the Via Normals mode.
Max Displacement works the same way as in the Via Normals mode.
Relax Tetrahedrons. When Relax Tetrahedrons is enabled, the algorithm also relaxes tetrahedral elements during the smoothing process.
Equalize Tri Areas
The Equalize Tri Areas mode reduces noise by redistributing vertex positions so that neighboring triangles have more uniform areas. This helps smooth irregular surfaces while improving the consistency of triangle sizes across the mesh.
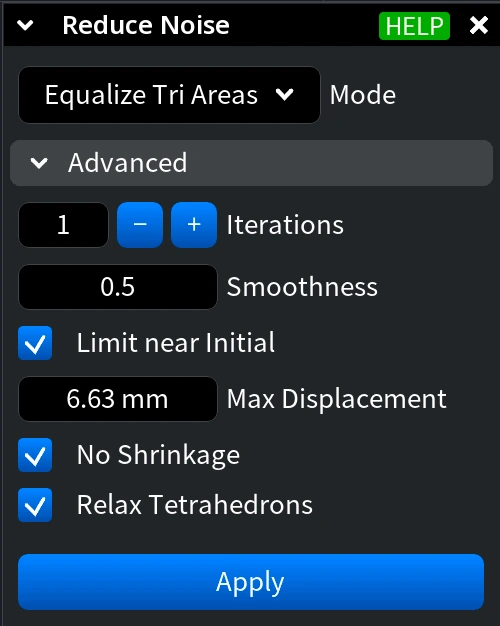
Advanced with Equalize Tri Areas
Everything else works the same as in the previous mode. The only additional parameter is No Shrinkage:
- When No Shrinkage is enabled, the algorithm prevents the surface from shrinking after multiple iterations of smoothing.
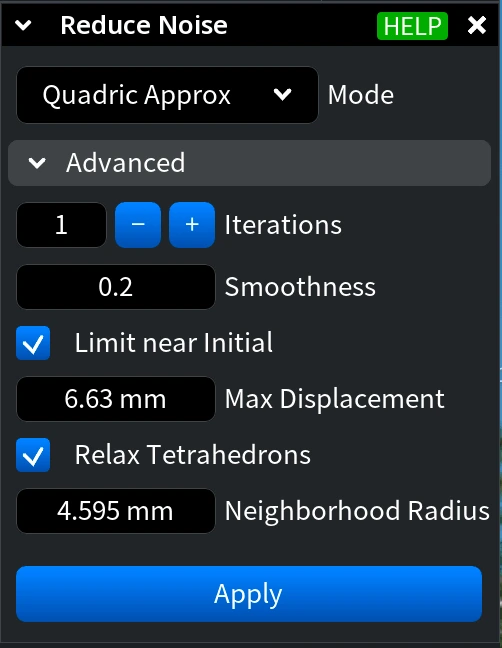
Keep Volume
The Keep Volume mode performs fast smoothing while preventing the object from global shrinkage.
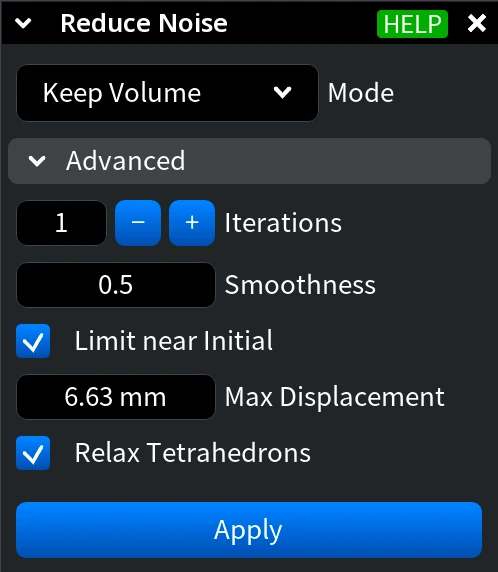
Advanced with Keep Volume
All parameters in this mode work the same as in the previous sections.
Planar Approx
The Planar Approx mode smooths the object by approximating each local neighborhood with a plane.
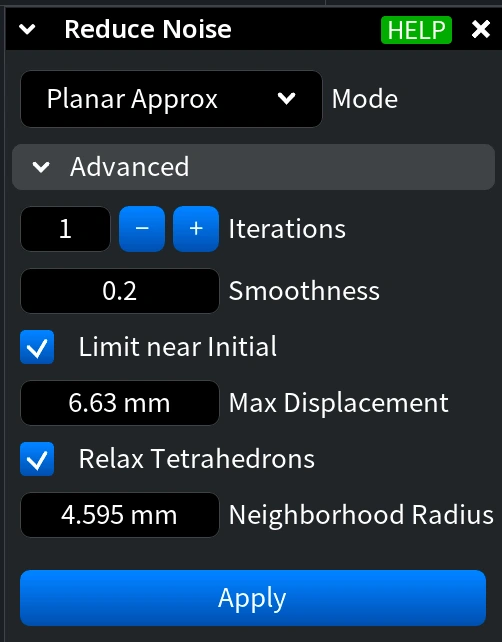
Advanced with Planar Approx
Most parameters in this mode work the same as in the previous sections, except for Neighborhood Radius.

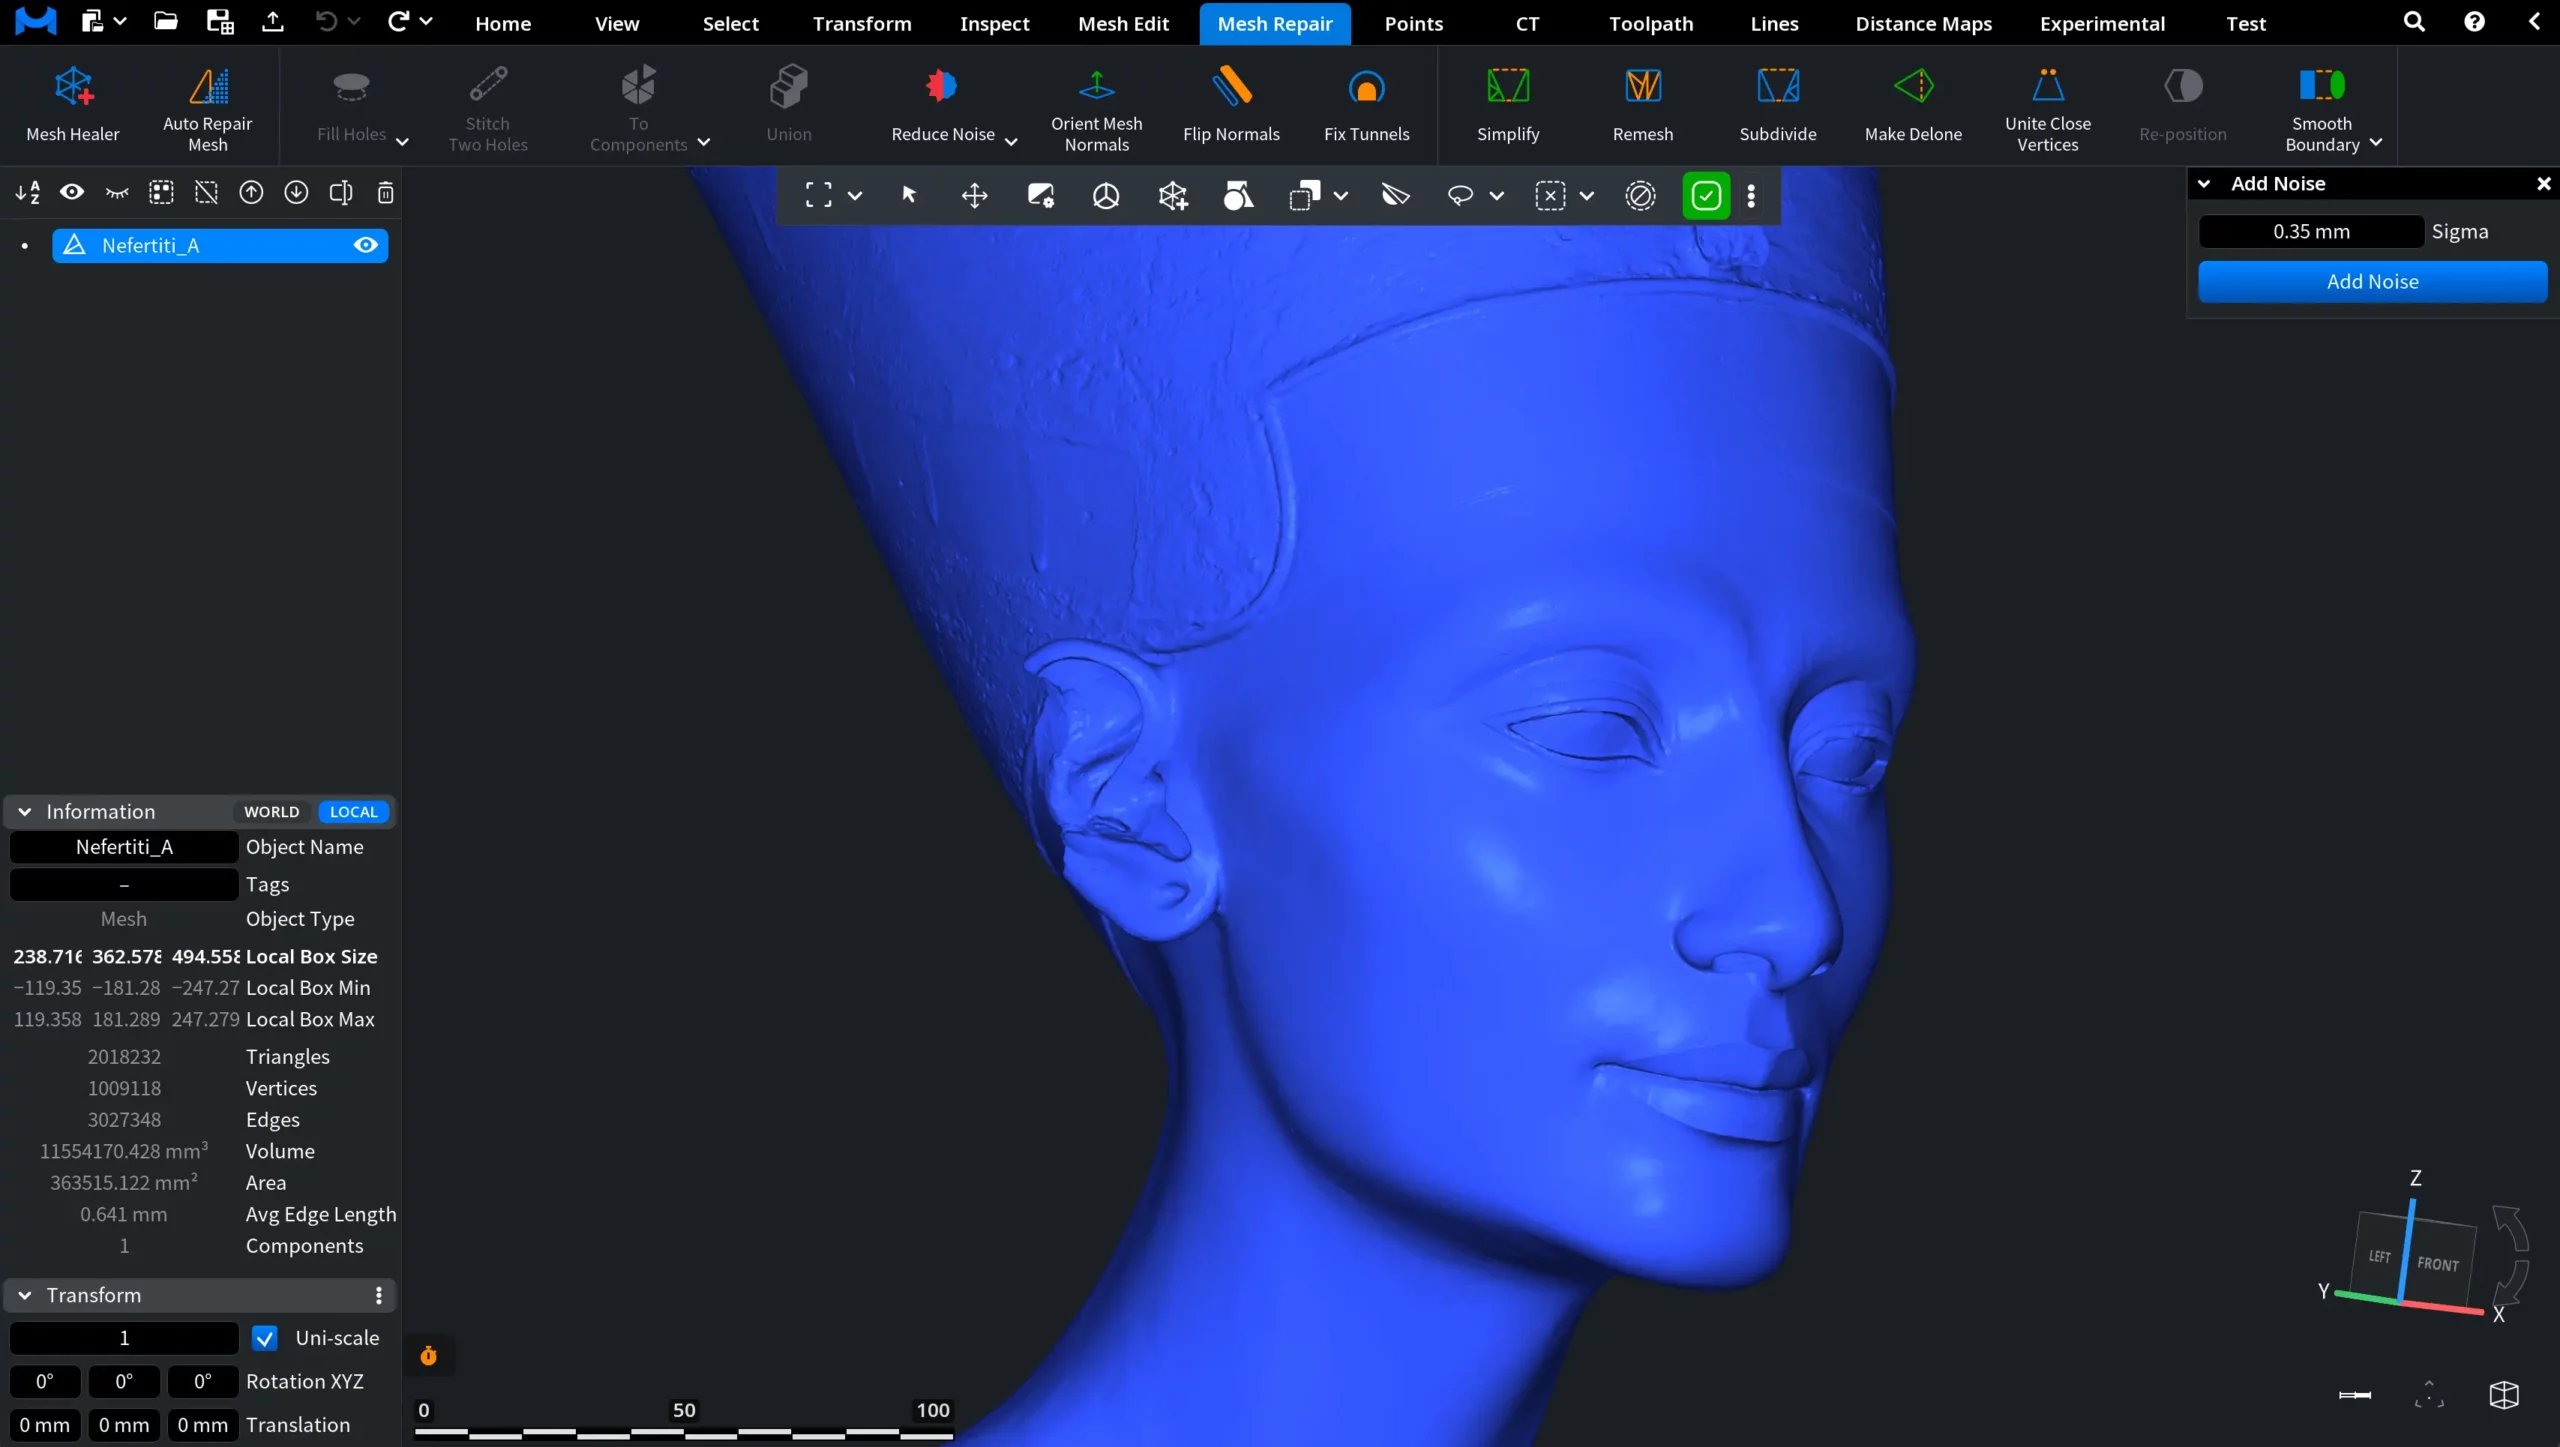
After you click, the Add Noise panel opens. There, you can adjust the Sigma parameter that defines the magnitude of the noise added to the mesh. To commit the operation, click Add Noise.

Before Add Noise
Here, you can see a 'clean' model without any added noise. The operation will be committed with Sigma at 0.35 mm.
After Add Noise
After the operation executed at 0.35 mm, you can see a noisier mesh.
