
Loads from YouTube (Google) when you press Play
Mesh Repair › Simplify reduces the number of triangles in a mesh while keeping its shape close to the original. This is also called decimation: the tooltip of the button reads "Decimate mesh - reduce the number of structural elements in the mesh while keeping the general shape close to the original." Use it when a mesh is too heavy to edit, print or send.

When you need Simplify
| Task | What to do |
|---|---|
| A heavy scan (millions of triangles) is slow to rotate, edit or repair | Use Tolerance with a small value: flat and smooth areas lose most triangles, fine detail stays |
| A model for 3D printing | Use Tolerance and keep it well below the smallest detail you need in the print, then check the file size |
| Sending or uploading a file with a size limit | Use Target Triangles or Percentage to get a known triangle count. A binary STL file takes 50 bytes per triangle, so 1 million triangles make about 50 MB |
| Only one part of the model is too dense | Select that part of the surface first: Simplify then works only inside the selection |
The numbers in Example: tolerance on a real part below show what different tolerances give on a real model.
Repair first, then simplify
Run Simplify as the last step:
- Fix the mesh with Mesh Healer or Auto Repair Mesh. Repairs add triangles: Fill Holes adds patches, and Auto Repair Mesh builds a completely new surface whose density depends on the voxel size you set. Triangles you remove before the repair can come back.
- Run Simplify to bring the triangle count down to what you need.
- If the result has long, thin triangles, run Make Delone to flip them into better-shaped ones without moving any vertex.
Simplify a mesh
- Select one mesh in the Scene tree. Simplify works with exactly one selected mesh.
- Optional: to simplify only a part of the mesh, select that part of the surface. The triangle counts in the panel then refer to the selection.
- Open Mesh Repair › Simplify. The panel opens on the right.
- Choose a mode: Target Triangles or Tolerance (described below).
- Turn on Preview to see the result before you commit it.
- Click Apply, then check the new triangle count in the Information panel on the left.
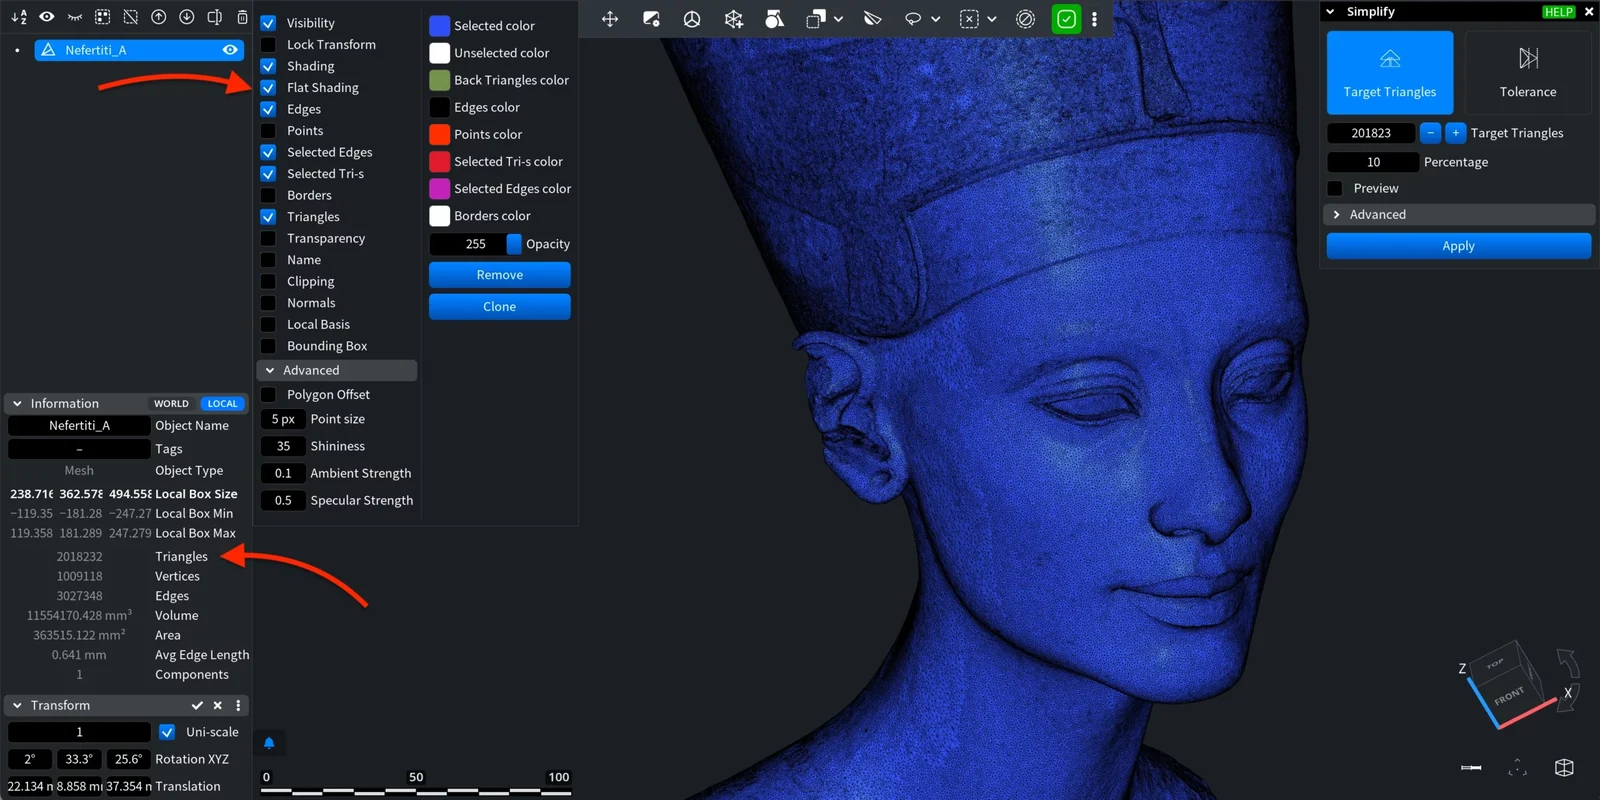
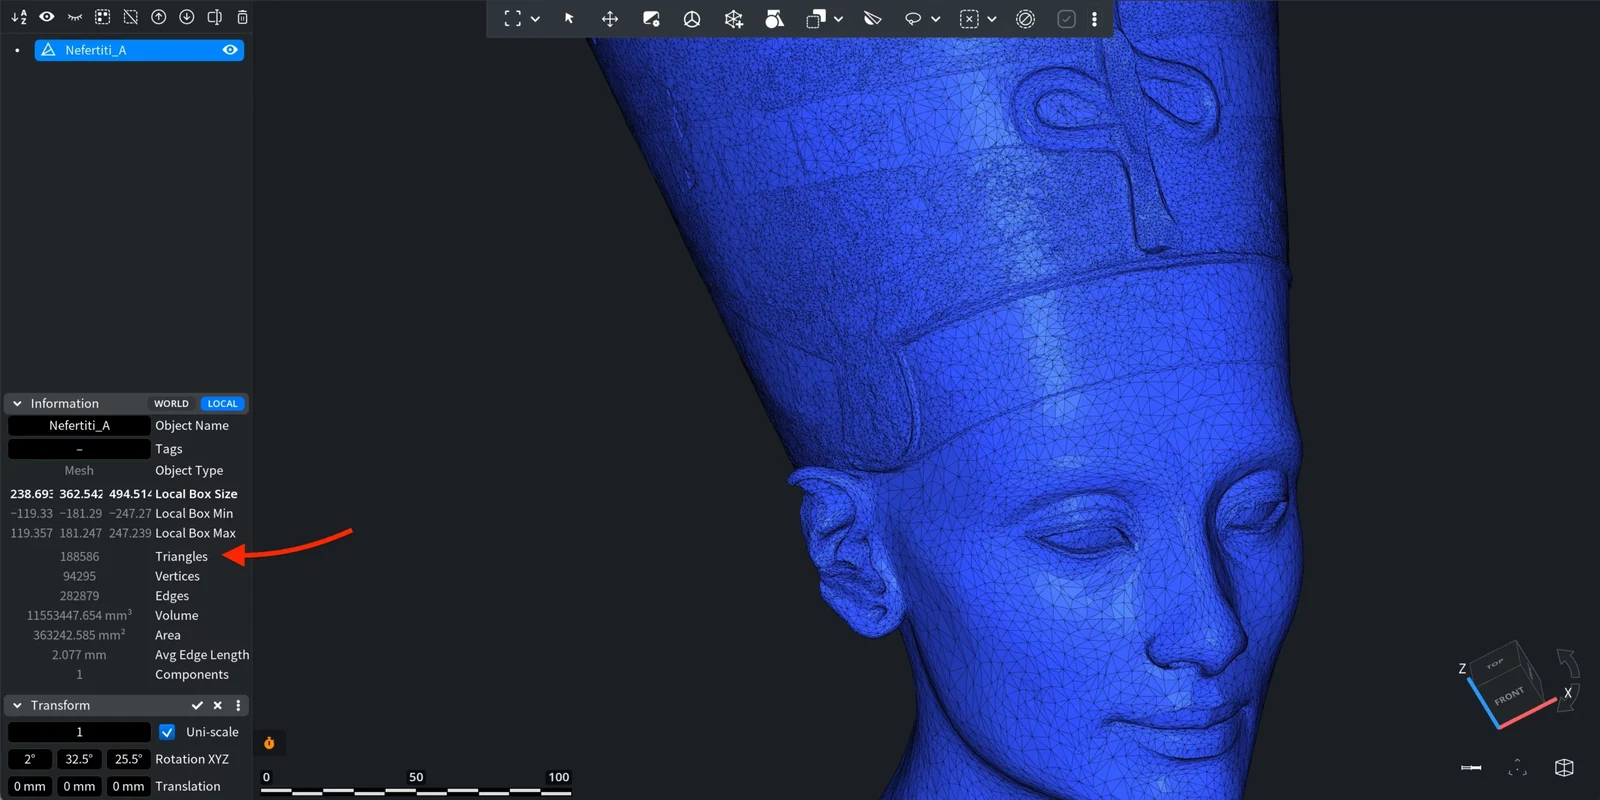
Before you start, look at the Information panel: it shows the number of triangles, vertices and edges of the selected mesh. In this example, the bust has 2,018,232 triangles, over 1 million vertices and more than 3 million edges. To see the triangles in the viewport, press L; we also turned on Flat Shading.
Target Triangles
Target Triangles is the default mode. You set how many triangles should remain, and MeshInspector removes triangles until it reaches that number (or stops earlier if mesh quality does not allow so few triangles).
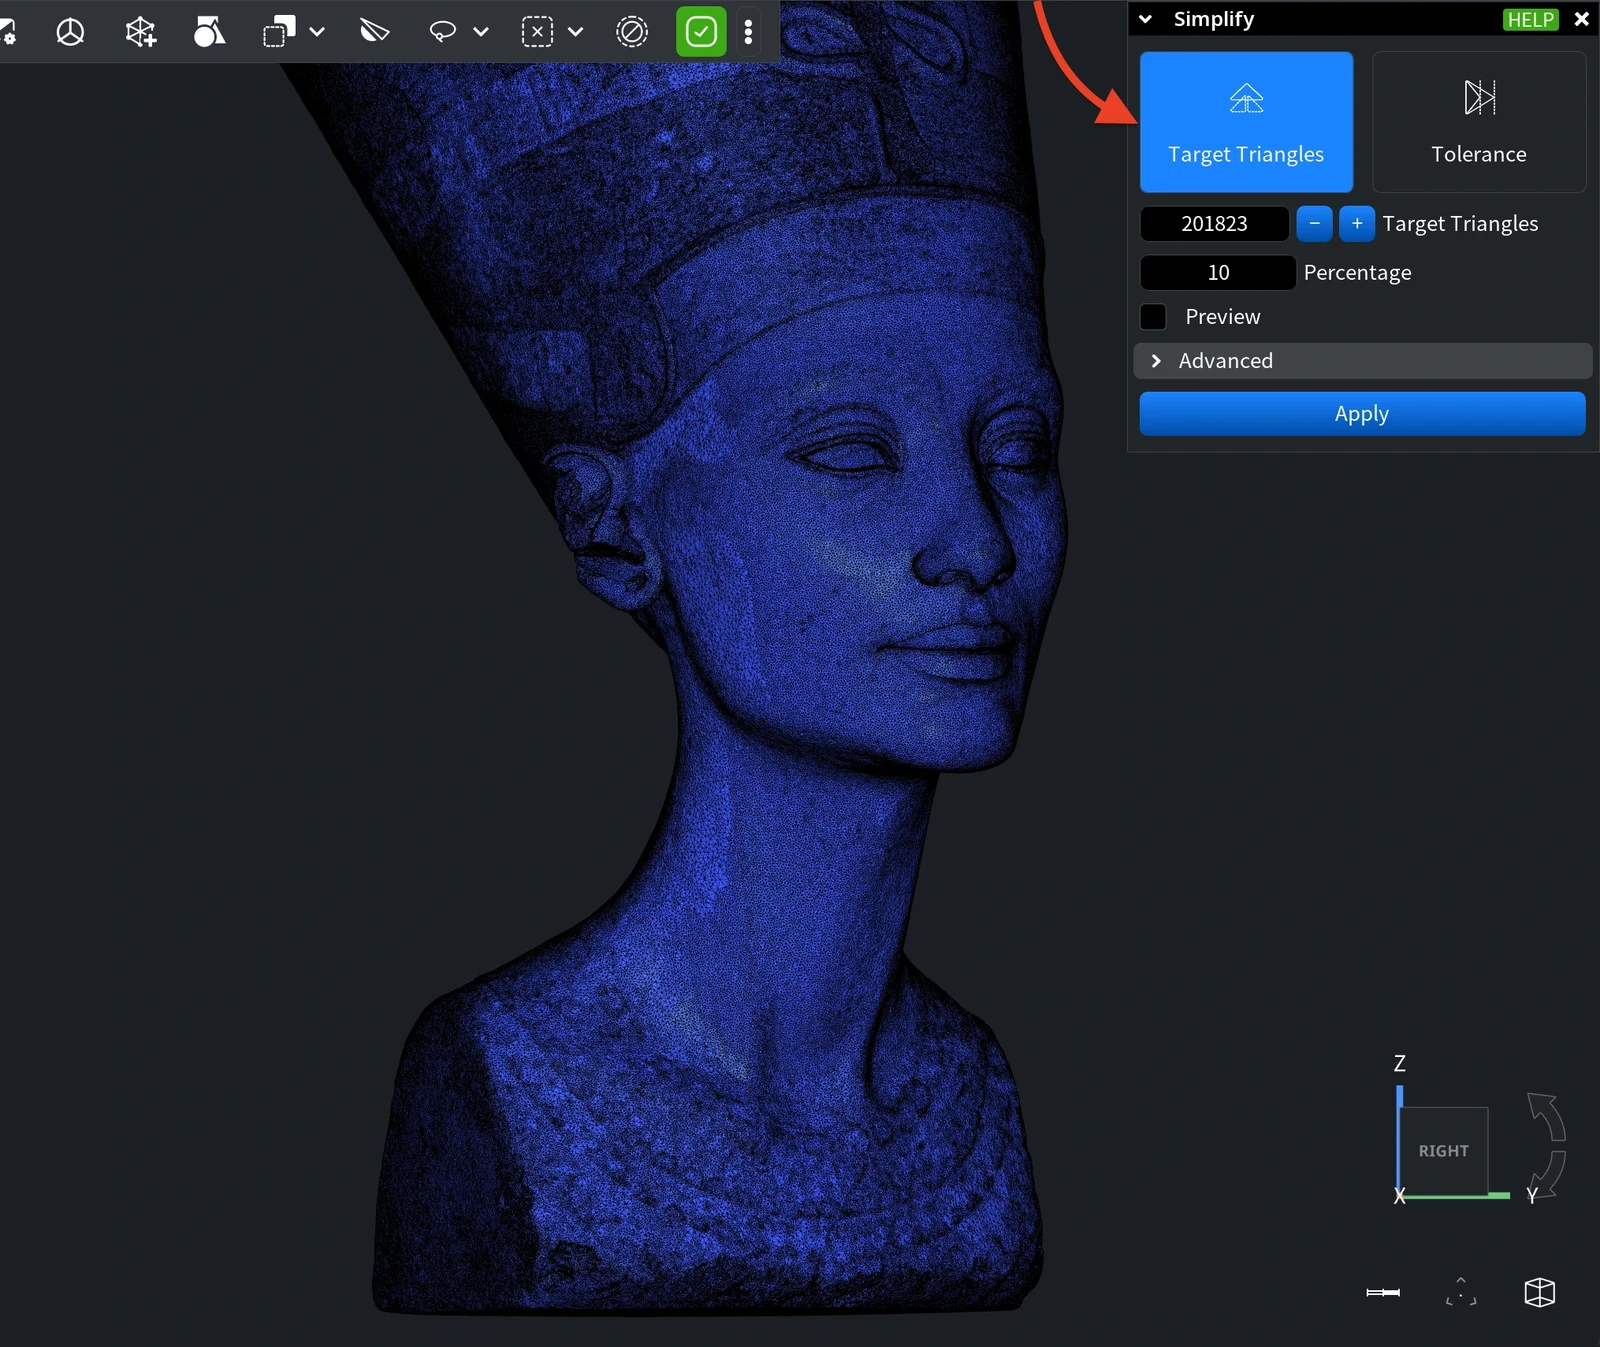
| Parameter | What it does | Default / tip |
|---|---|---|
| Target Triangles | The number of triangles left after simplification (in the selected region, if there is one). Type a value or use the – / + buttons | 10% of the current count |
| Percentage | The same target as a share of the current triangle count. Changing one field updates the other | 10% |
| Preview | Updates the mesh in the viewport while you change the parameters. It may freeze for a moment on very dense meshes | Off |
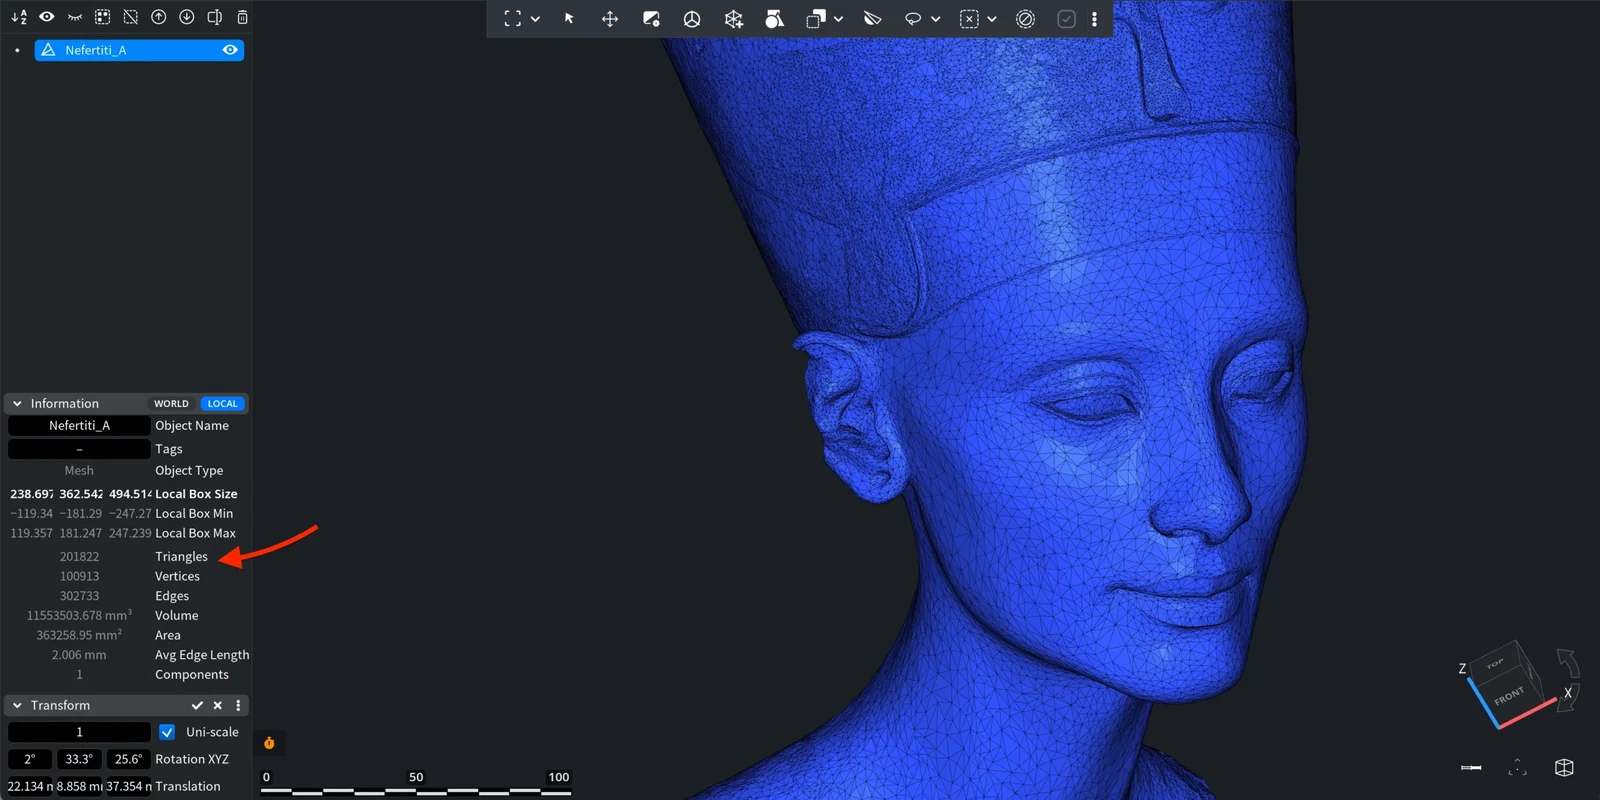
In this example, the bust goes from 2,018,232 to 201,823 triangles (10%). Click Apply: the model looks almost the same, but it has 10 times fewer triangles.
Tolerance
In Tolerance mode you do not set a triangle count. You set how far the simplified surface may move away from the original, and MeshInspector stops just before the estimated deviation exceeds this value. Flat and smooth areas lose many triangles, curved and detailed areas keep more.
| Parameter | What it does | Default / tip |
|---|---|---|
| Tolerance | The largest allowed distance between the simplified and the original surface, in model units (mm by default) | 0.1% of the bounding box diagonal of the mesh, set when you first open the tool |
| Preview | Same as above | Off |
If you switch Strategy to Shortest Edge First (see Advanced), the Tolerance field is replaced by Shortest Edge Length: simplification stops as soon as the shortest edge in the mesh is longer than this value. Its default is 0.25% of the bounding box diagonal.
To illustrate the mode, we applied a Tolerance of 5 mm to the bust.
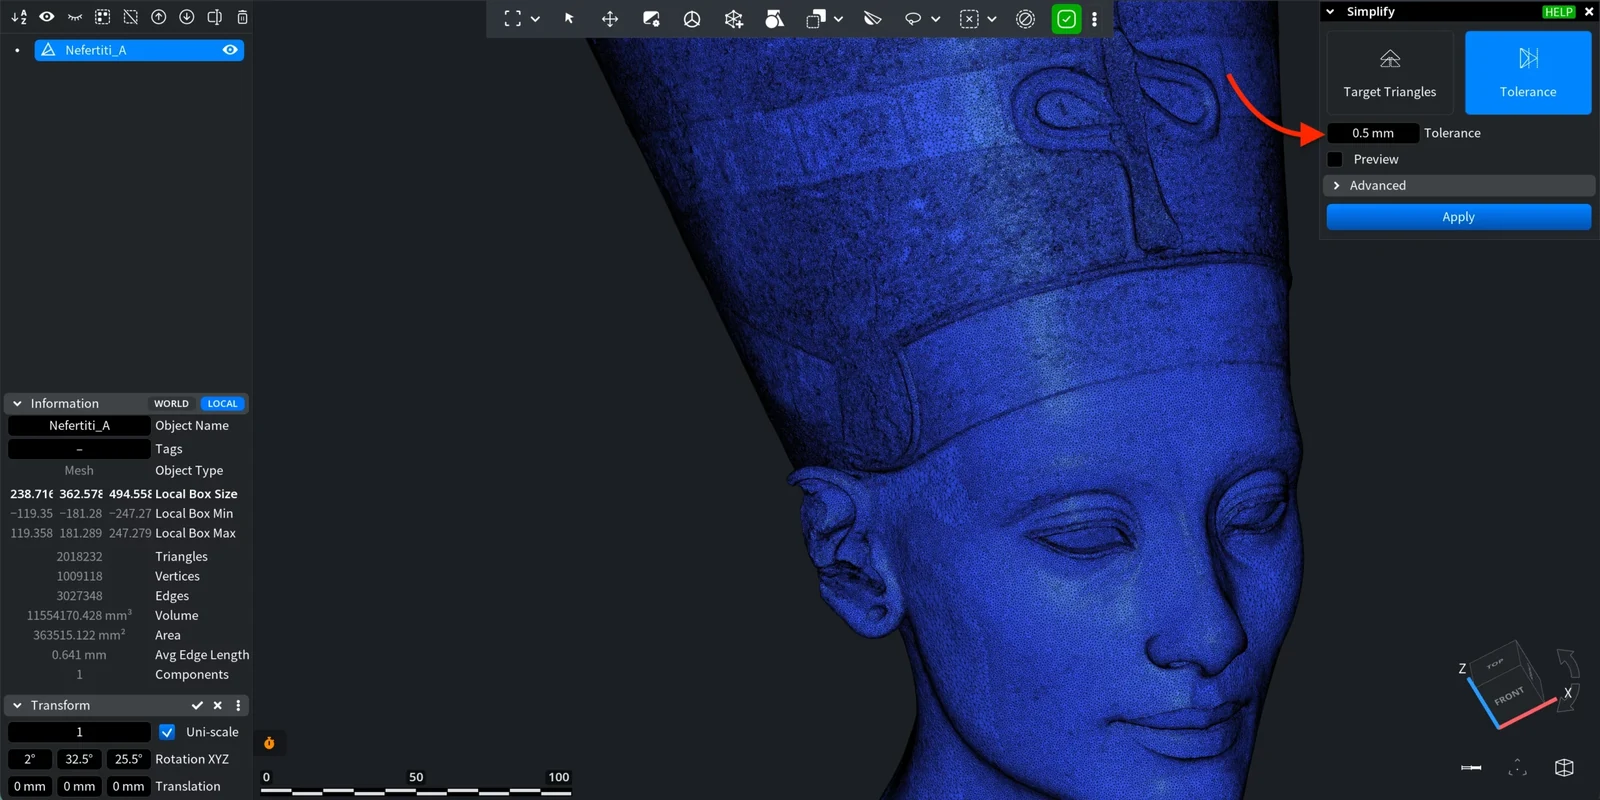
The mesh becomes much lighter while the face stays recognizable. Fine details such as eyelids, lips and small surface features become smoother, but the main proportions are preserved. Use a smaller value when fine details matter.
Example: tolerance on a real part
We simplified a mechanical part of 158 × 31 × 75 mm with 133,194 triangles (a 6.7 MB binary STL) with different Tolerance values and default Advanced settings. The deviation column is the largest distance between the original and the simplified surface, measured at the vertices.
| Tolerance | Triangles left | Share | Largest deviation | Time |
|---|---|---|---|---|
| 0.01 mm | 42,000 | 31.5% | 0.006 mm | 0.4 s |
| 0.02 mm | 28,160 | 21.1% | 0.011 mm | 0.4 s |
| 0.05 mm | 15,810 | 11.9% | 0.032 mm | 0.6 s |
| 0.1 mm | 10,634 | 8.0% | 0.042 mm | 0.5 s |
| 0.178 mm (the default for this part) | 7,790 | 5.8% | 0.067 mm | 0.5 s |
| 0.2 mm | 7,314 | 5.5% | 0.083 mm | 0.8 s |
For comparison, Target Triangles at 10% gave 13,318 triangles with a largest deviation of 0.032 mm.
- Even a very small tolerance removes many triangles: at 0.01 mm, two thirds of the triangles go, because flat faces of the part need only a few.
- In every run, the deviation measured at the vertices of the original part stayed below the Tolerance. Tolerance limits the error that Simplify estimates for each step; it is not a guaranteed distance between the two surfaces. So set it no higher than the accuracy you need (for a print or a measurement accurate to 0.05 mm, 0.05 mm or less), and compare the result with the original when accuracy is critical.
- Simplify is fast: each run took under a second on this part.
Advanced
Expand Advanced to change how edges are collapsed. The settings are the same for both modes. The defaults work for most meshes.
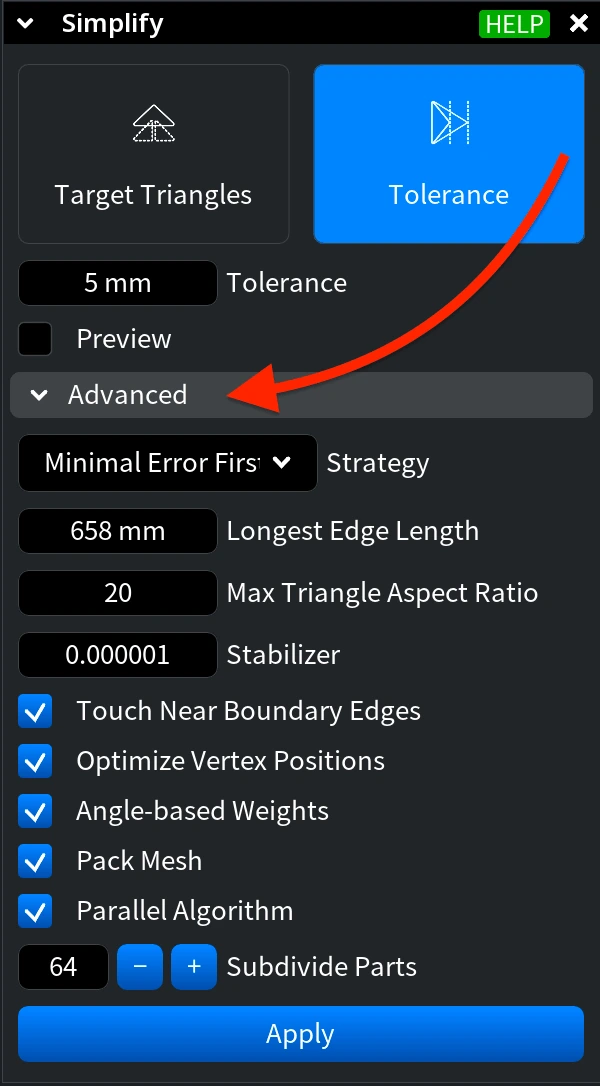
| Parameter | What it does | Default |
|---|---|---|
| Strategy | The order of edge collapses. Minimal Error First collapses the edge that adds the smallest error to the surface. Shortest Edge First collapses the shortest edge | Minimal Error First |
| Longest Edge Length | The longest edge that simplification may create. Lower it to avoid very large triangles | The bounding box diagonal |
| Max Triangle Aspect Ratio | The most stretched triangle that simplification may create | 20 |
| Stabilizer | A small value helps on completely flat parts of a mesh; with no flat areas, you can set it to 0 | 0.000001 |
| Touch Near Boundary Edges | Allows collapsing edges that have a vertex on a boundary (a hole edge or the border of the selection) | On |
| Optimize Vertex Positions | After each collapse, moves the remaining vertex to keep the local shape. When off, the edge collapses into one of its vertices, which keeps its position | On |
| Angle-based Weights | Weights the error measure by the angles of neighboring triangles | Off |
| Pack Mesh | Removes unused vertices, edges and triangles from the mesh at the end | On |
| Parallel Algorithm | Uses the parallel algorithm, which is faster; the sequential one is more precise | Off |
| Subdivide Parts | Shown with Parallel Algorithm: the number of parts processed in parallel. Larger numbers are usually faster but make the mesh less uniform | 64 |


