


Loads from YouTube (Google) when you press Play
Fill Holes closes holes (open boundaries) in a mesh by adding new triangles. You need it when a scan has gaps where the scanner could not see the surface, when a cut has left an opening, or when Mesh Healer leaves large holes open: for large holes, Mesh Healer sends you to Fill Holes.
You find the tool on the Mesh Repair tab. The arrow next to Fill Holes opens two more tools: Fill Holes with Extra Points and Bridge Fill All Holes.

Which mode and Fill Type do I need?
| Your task | Use |
|---|---|
| Close one hole and control the result | Fill Holes › Fill single |
| Close many holes with the same settings, skip some of them | Fill Holes › Fill All |
| A hole is too large or too complex to fill at once | Fill Holes › Make Bridge to split it, then fill the parts |
| Close all holes of the selected meshes in one click, no settings | Bridge Fill All Holes |
| You have scanned points of the missing area | Fill Holes with Extra Points |
| Two holes are the two edges of one missing strip | Stitch Two Holes |
| The hole is on a curved surface (scan of a face, tooth, sculpture) | Fill Type Smooth (default) or Natural |
| The hole is on a flat face (CAD part, a cut) | Fill Type Flat, or Basic for a denser patch |
After you click Fill Holes, a panel opens with three modes:
- Fill single
- Fill All
- Make Bridge
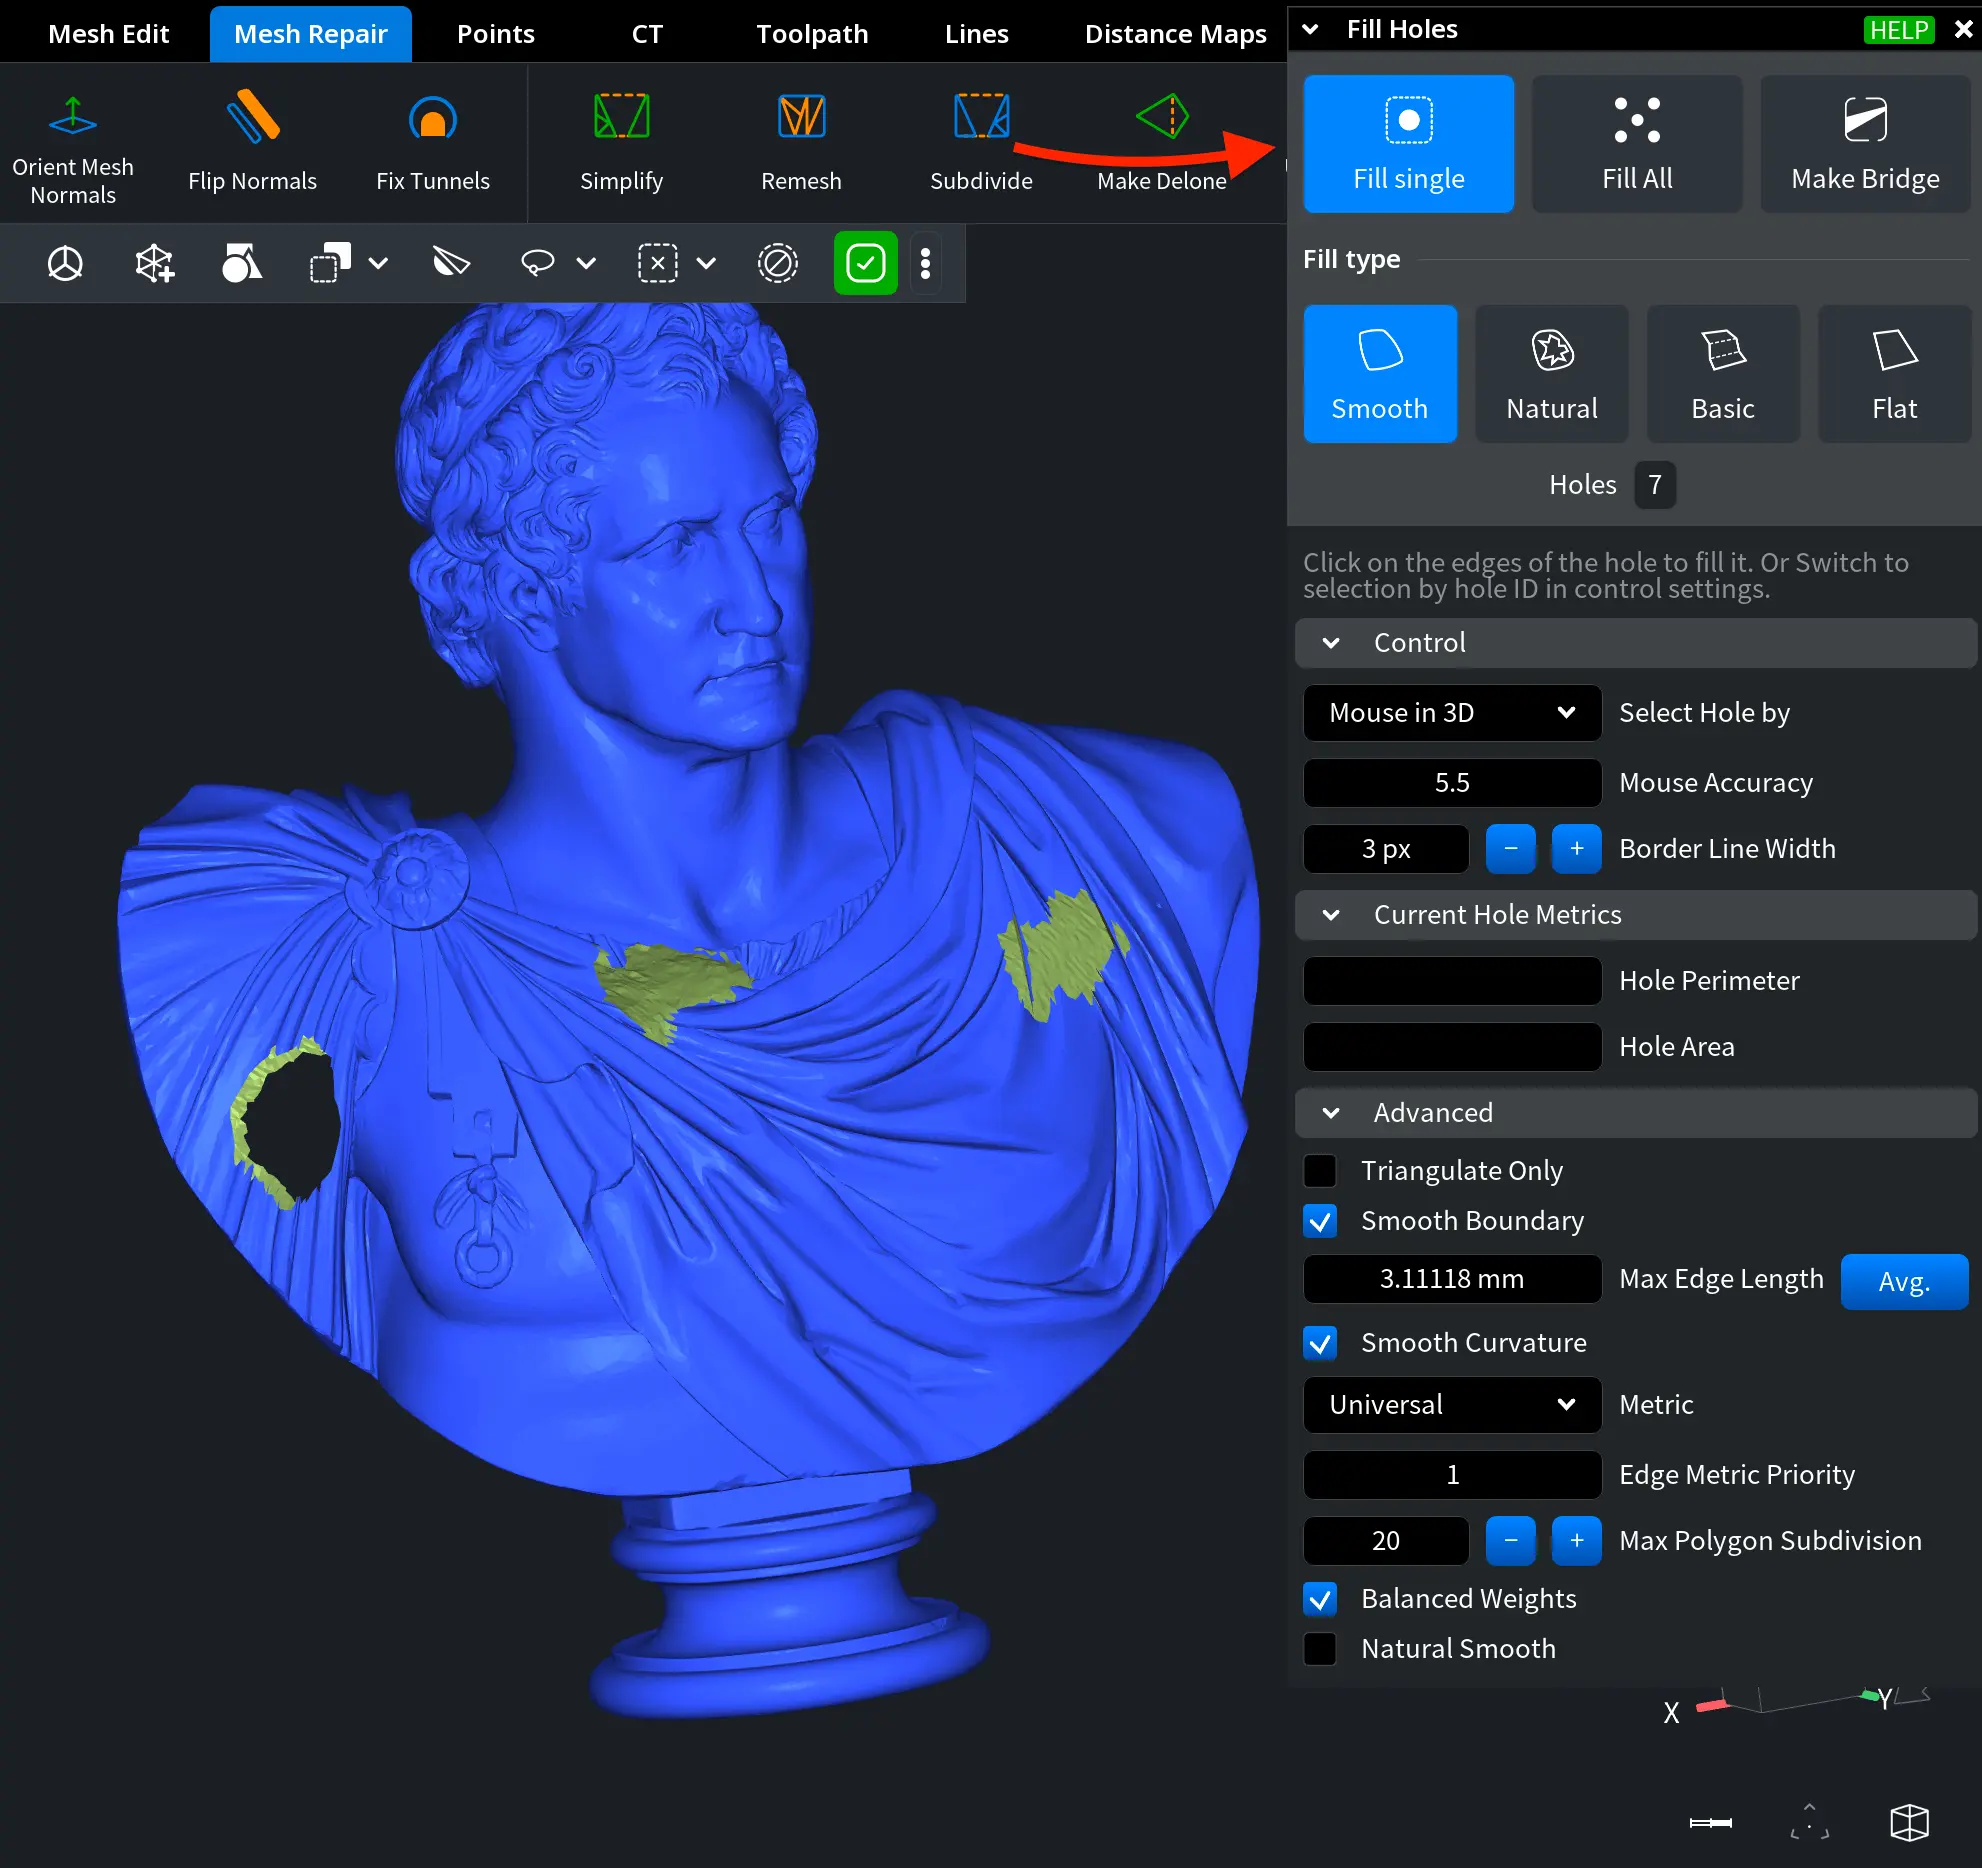
If the selected mesh has no holes, the button is not available and its tooltip says "ObjectMesh doesn't have any holes".
Fill single
Fill single fills one hole at a time. You select the hole by clicking its edge or by entering its Hole ID.
Fill Types
The Fill Type defines how MeshInspector builds the patch that closes the opening. Each Fill Type is a preset of the Advanced settings described below:
| Fill Type | What you get | What it sets in Advanced |
|---|---|---|
| Smooth (default) | A smooth surface that blends with curved areas around the hole | Metric Universal, Smooth Curvature on, Triangulate Only off |
| Natural | A smooth surface; edges around the patch are expanded and repositioned to keep the natural shape of the model | Same as Smooth, plus Natural Smooth on |
| Basic | A flat surface with more detailed triangulation (a higher resolution fill) | Metric Min Area, Smooth Curvature off, Triangulate Only off |
| Flat | A flat surface with the minimal number of triangles, no new vertices | Metric Min Area, Triangulate Only on |
Next to the Fill Type buttons, the panel shows the number of Holes found in the mesh.
Control
Select Hole by defines how you pick the hole to fill:
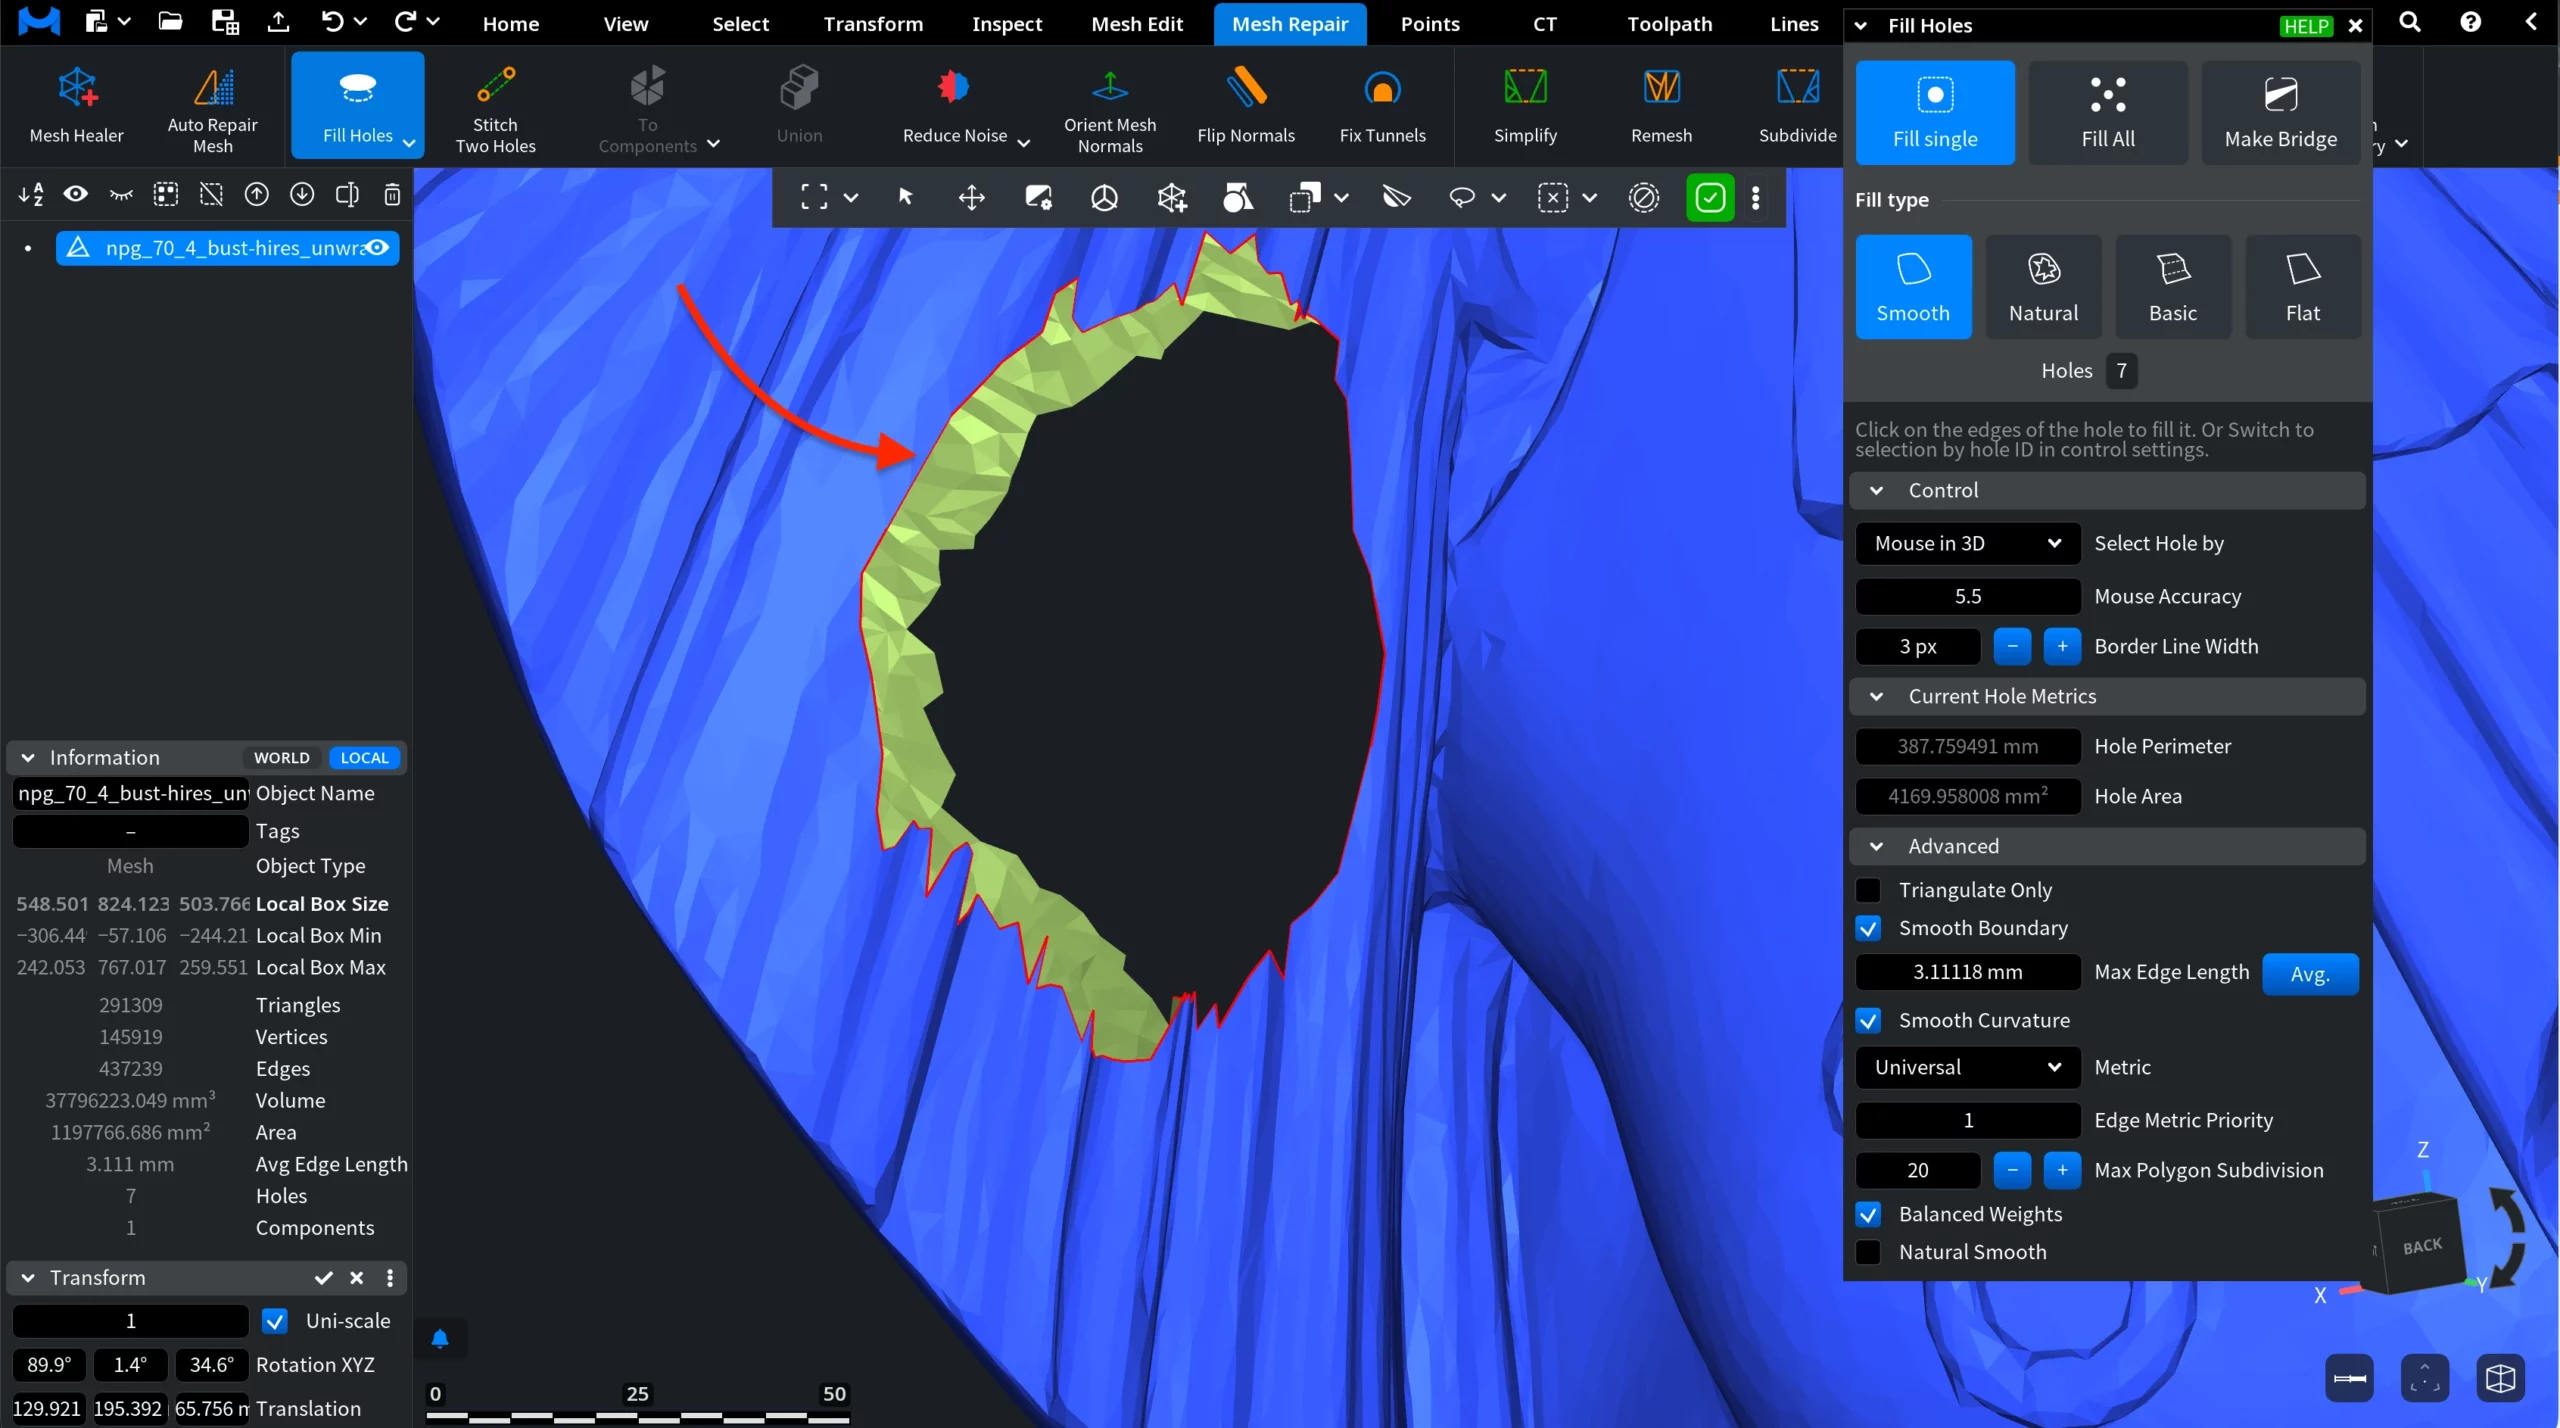
- Mouse in 3D (default): hover the cursor over the edge of the hole, and the hole edge is highlighted. Click to fill the hole.
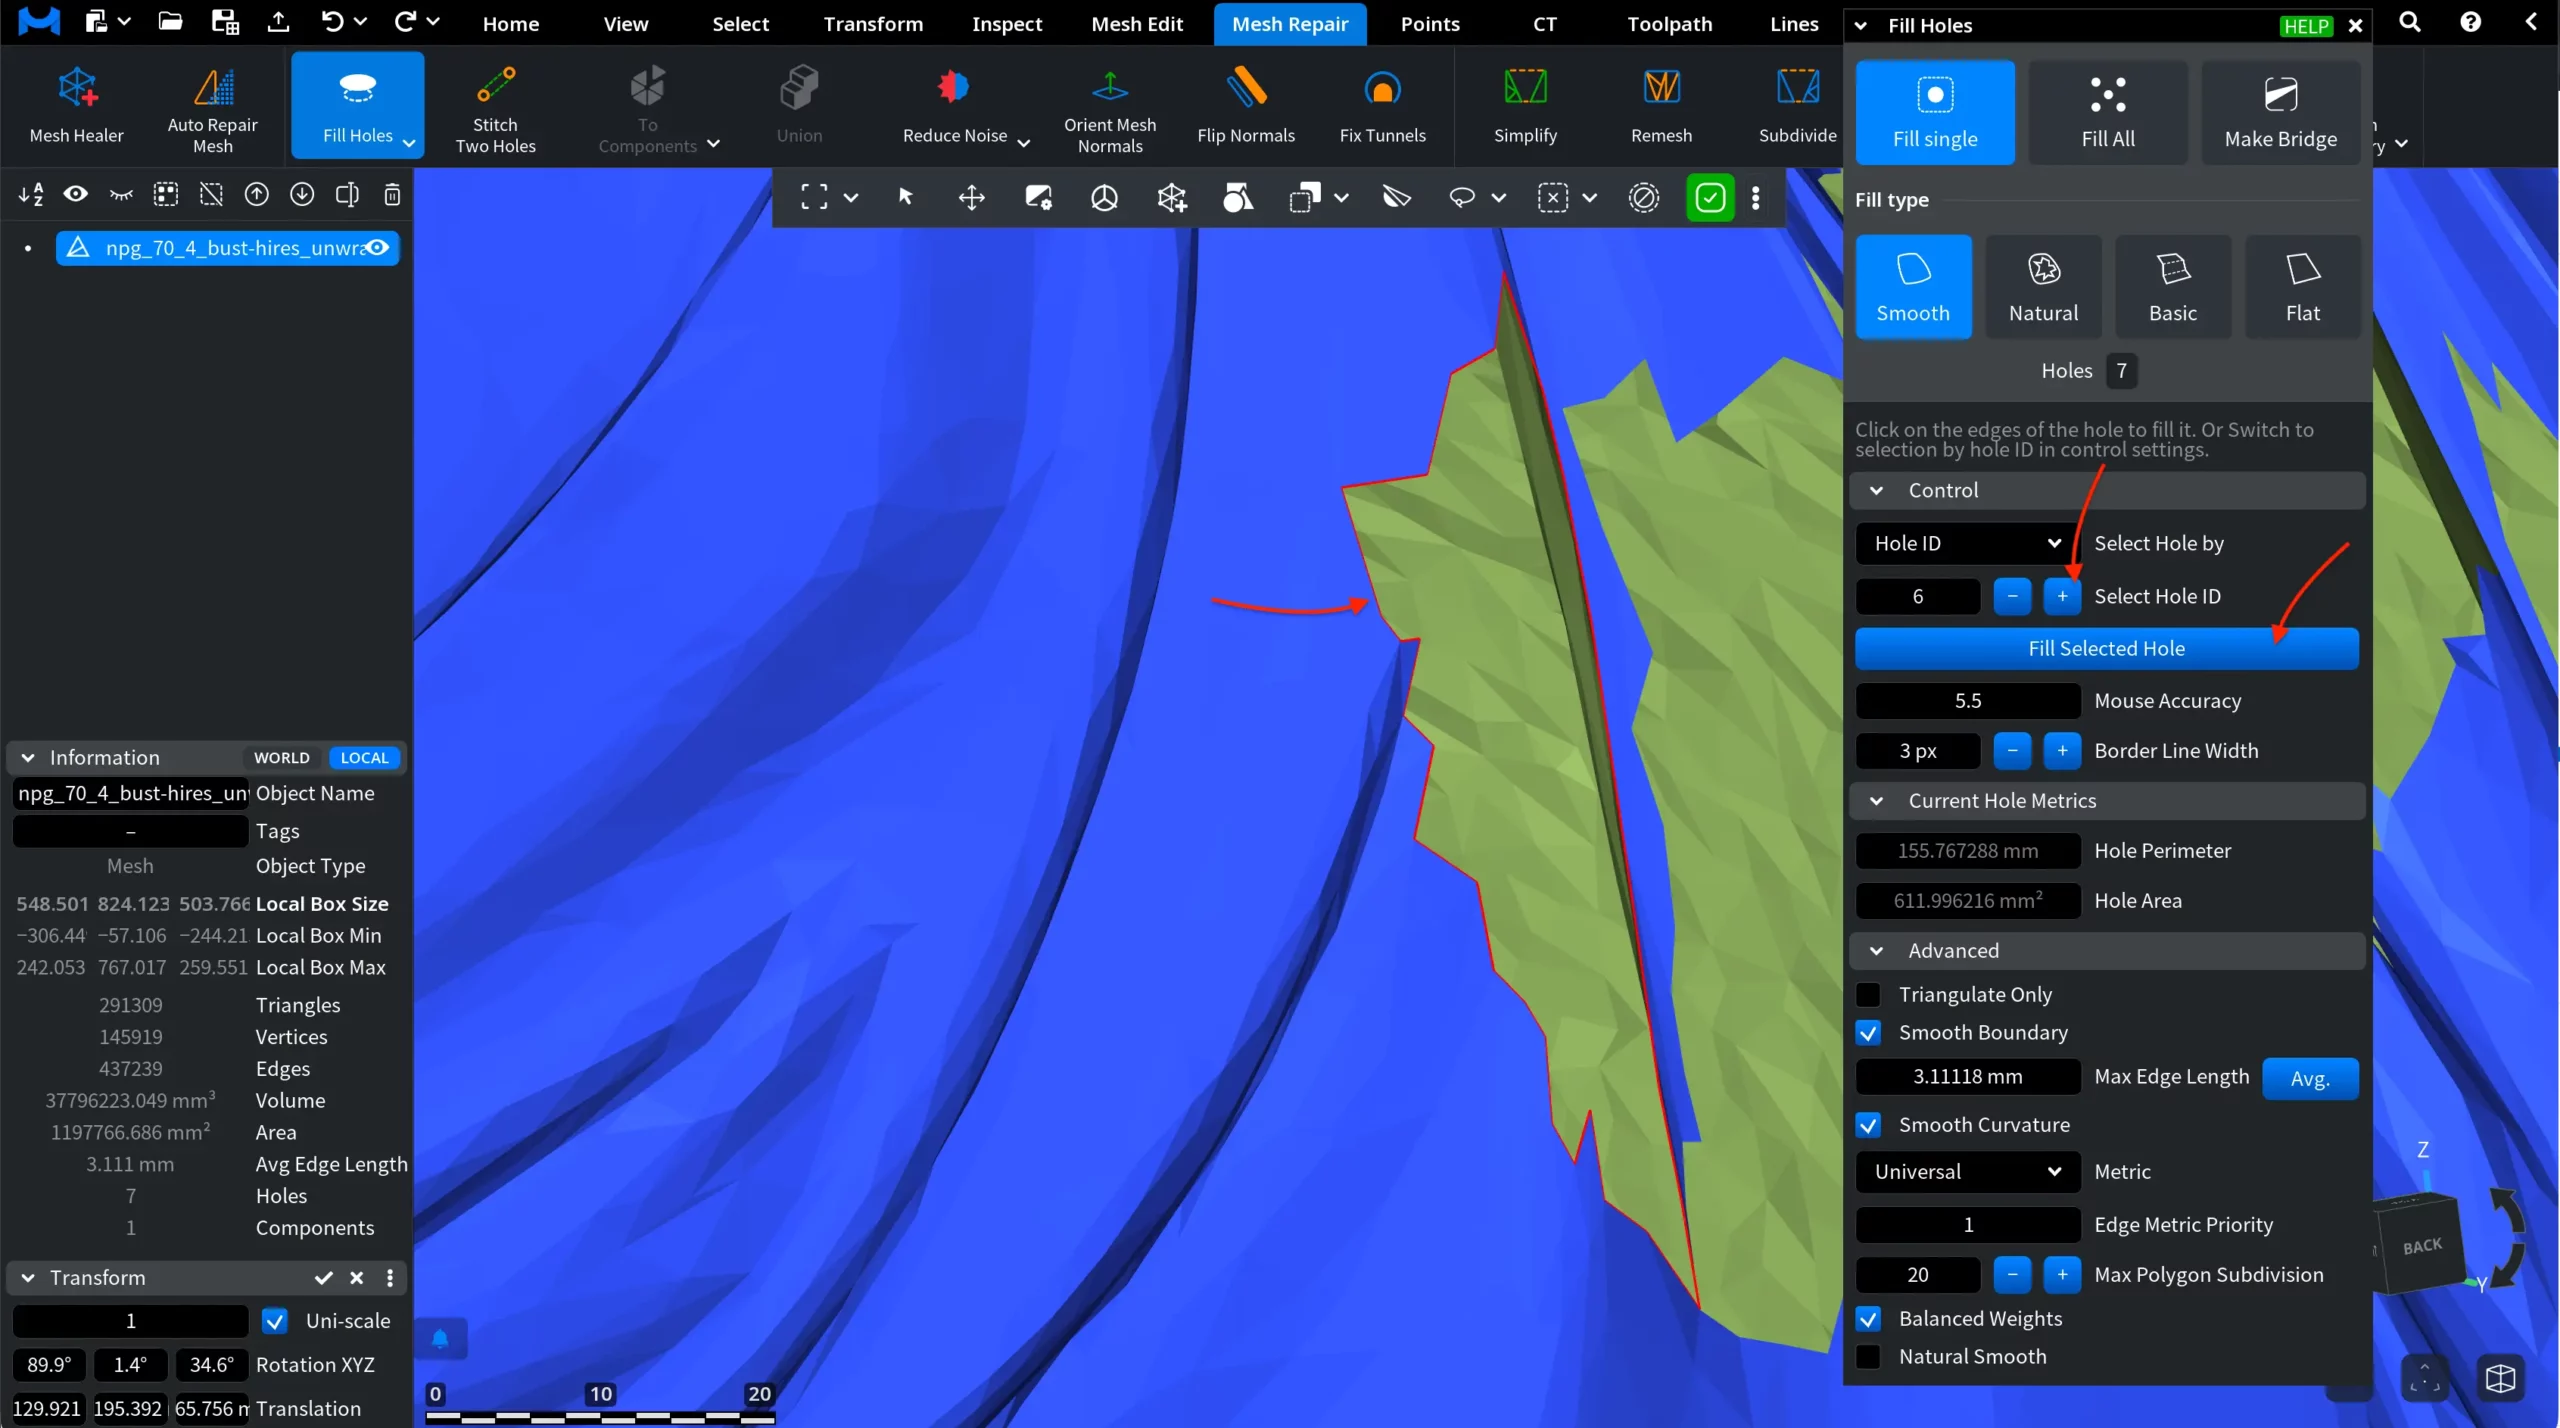
- Hole ID: enter the number of the hole in Select Hole ID (or use the plus and minus buttons), then click Fill Selected Hole.
Two more settings control the highlight:
- Mouse Accuracy: the hole boundary is highlighted if the cursor is closer to it than this value in pixels. A larger value makes holes easier to pick on dense meshes.
- Border Line Width: the width of the highlighted hole contour.
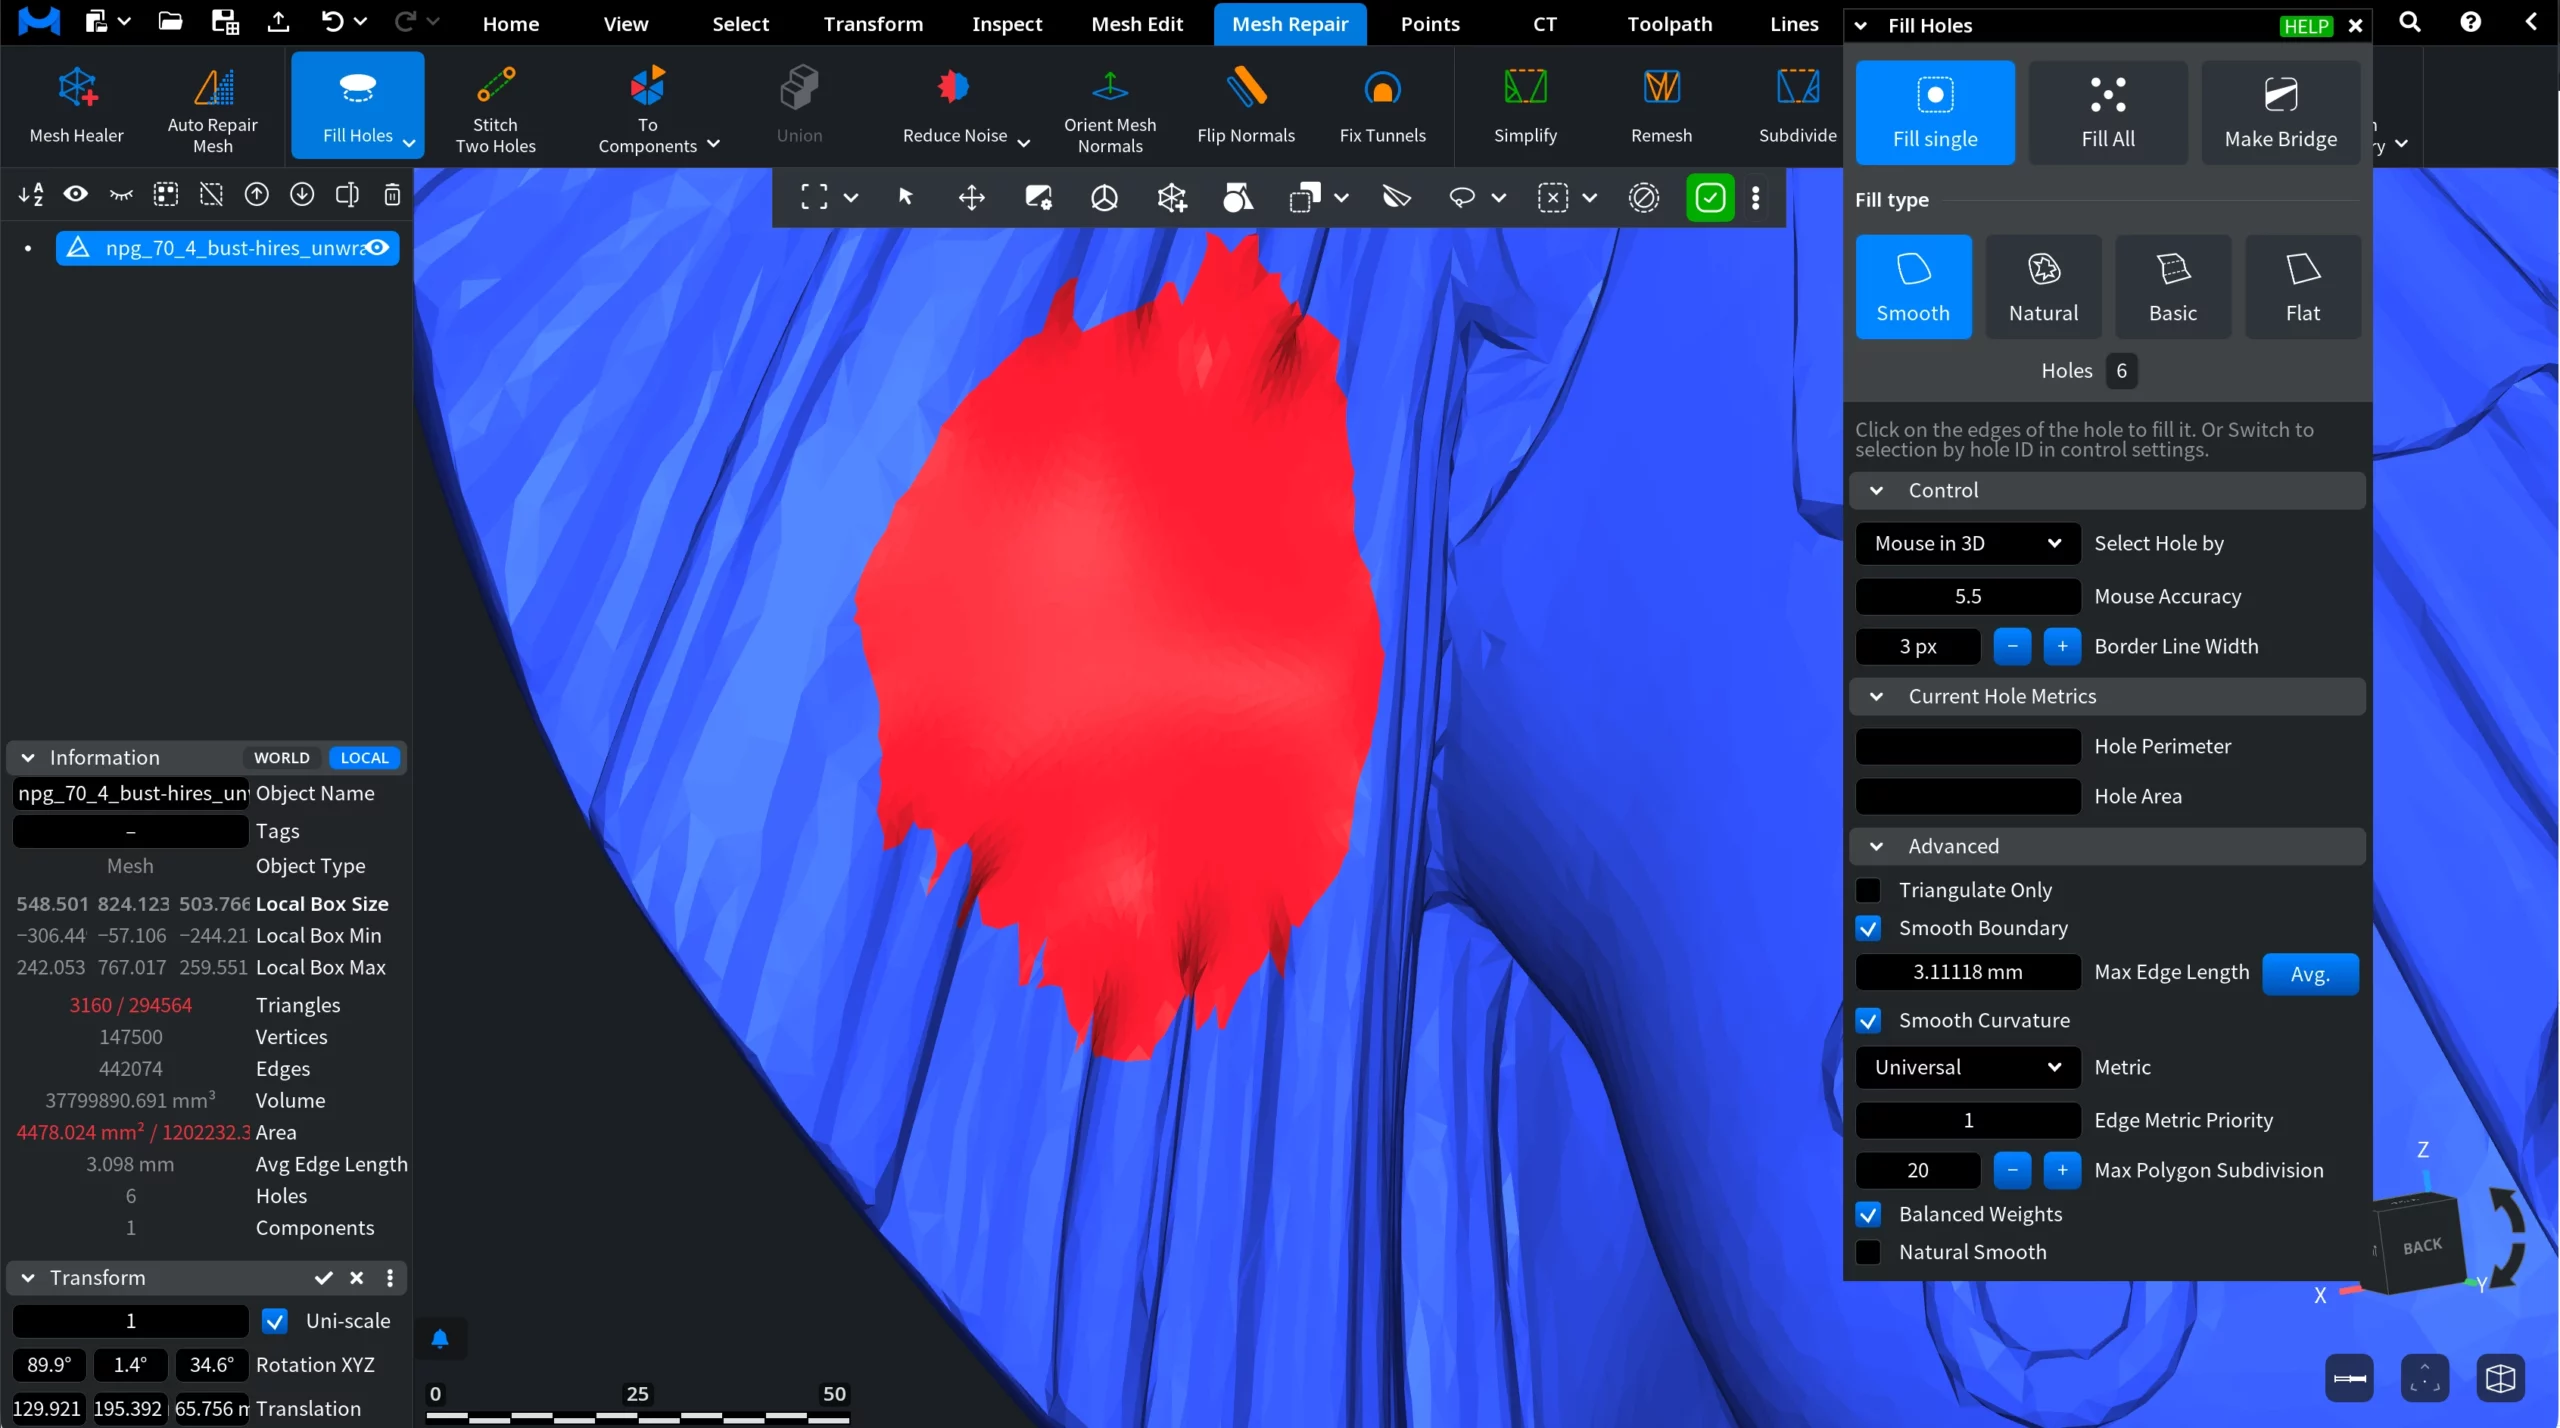
After the click, MeshInspector builds a patch with the selected Fill Type and closes the opening. The new triangles are selected, so you can see the patch.
With Hole ID, the chosen hole is highlighted in the viewport before you fill it, so you can check that it is the right one.
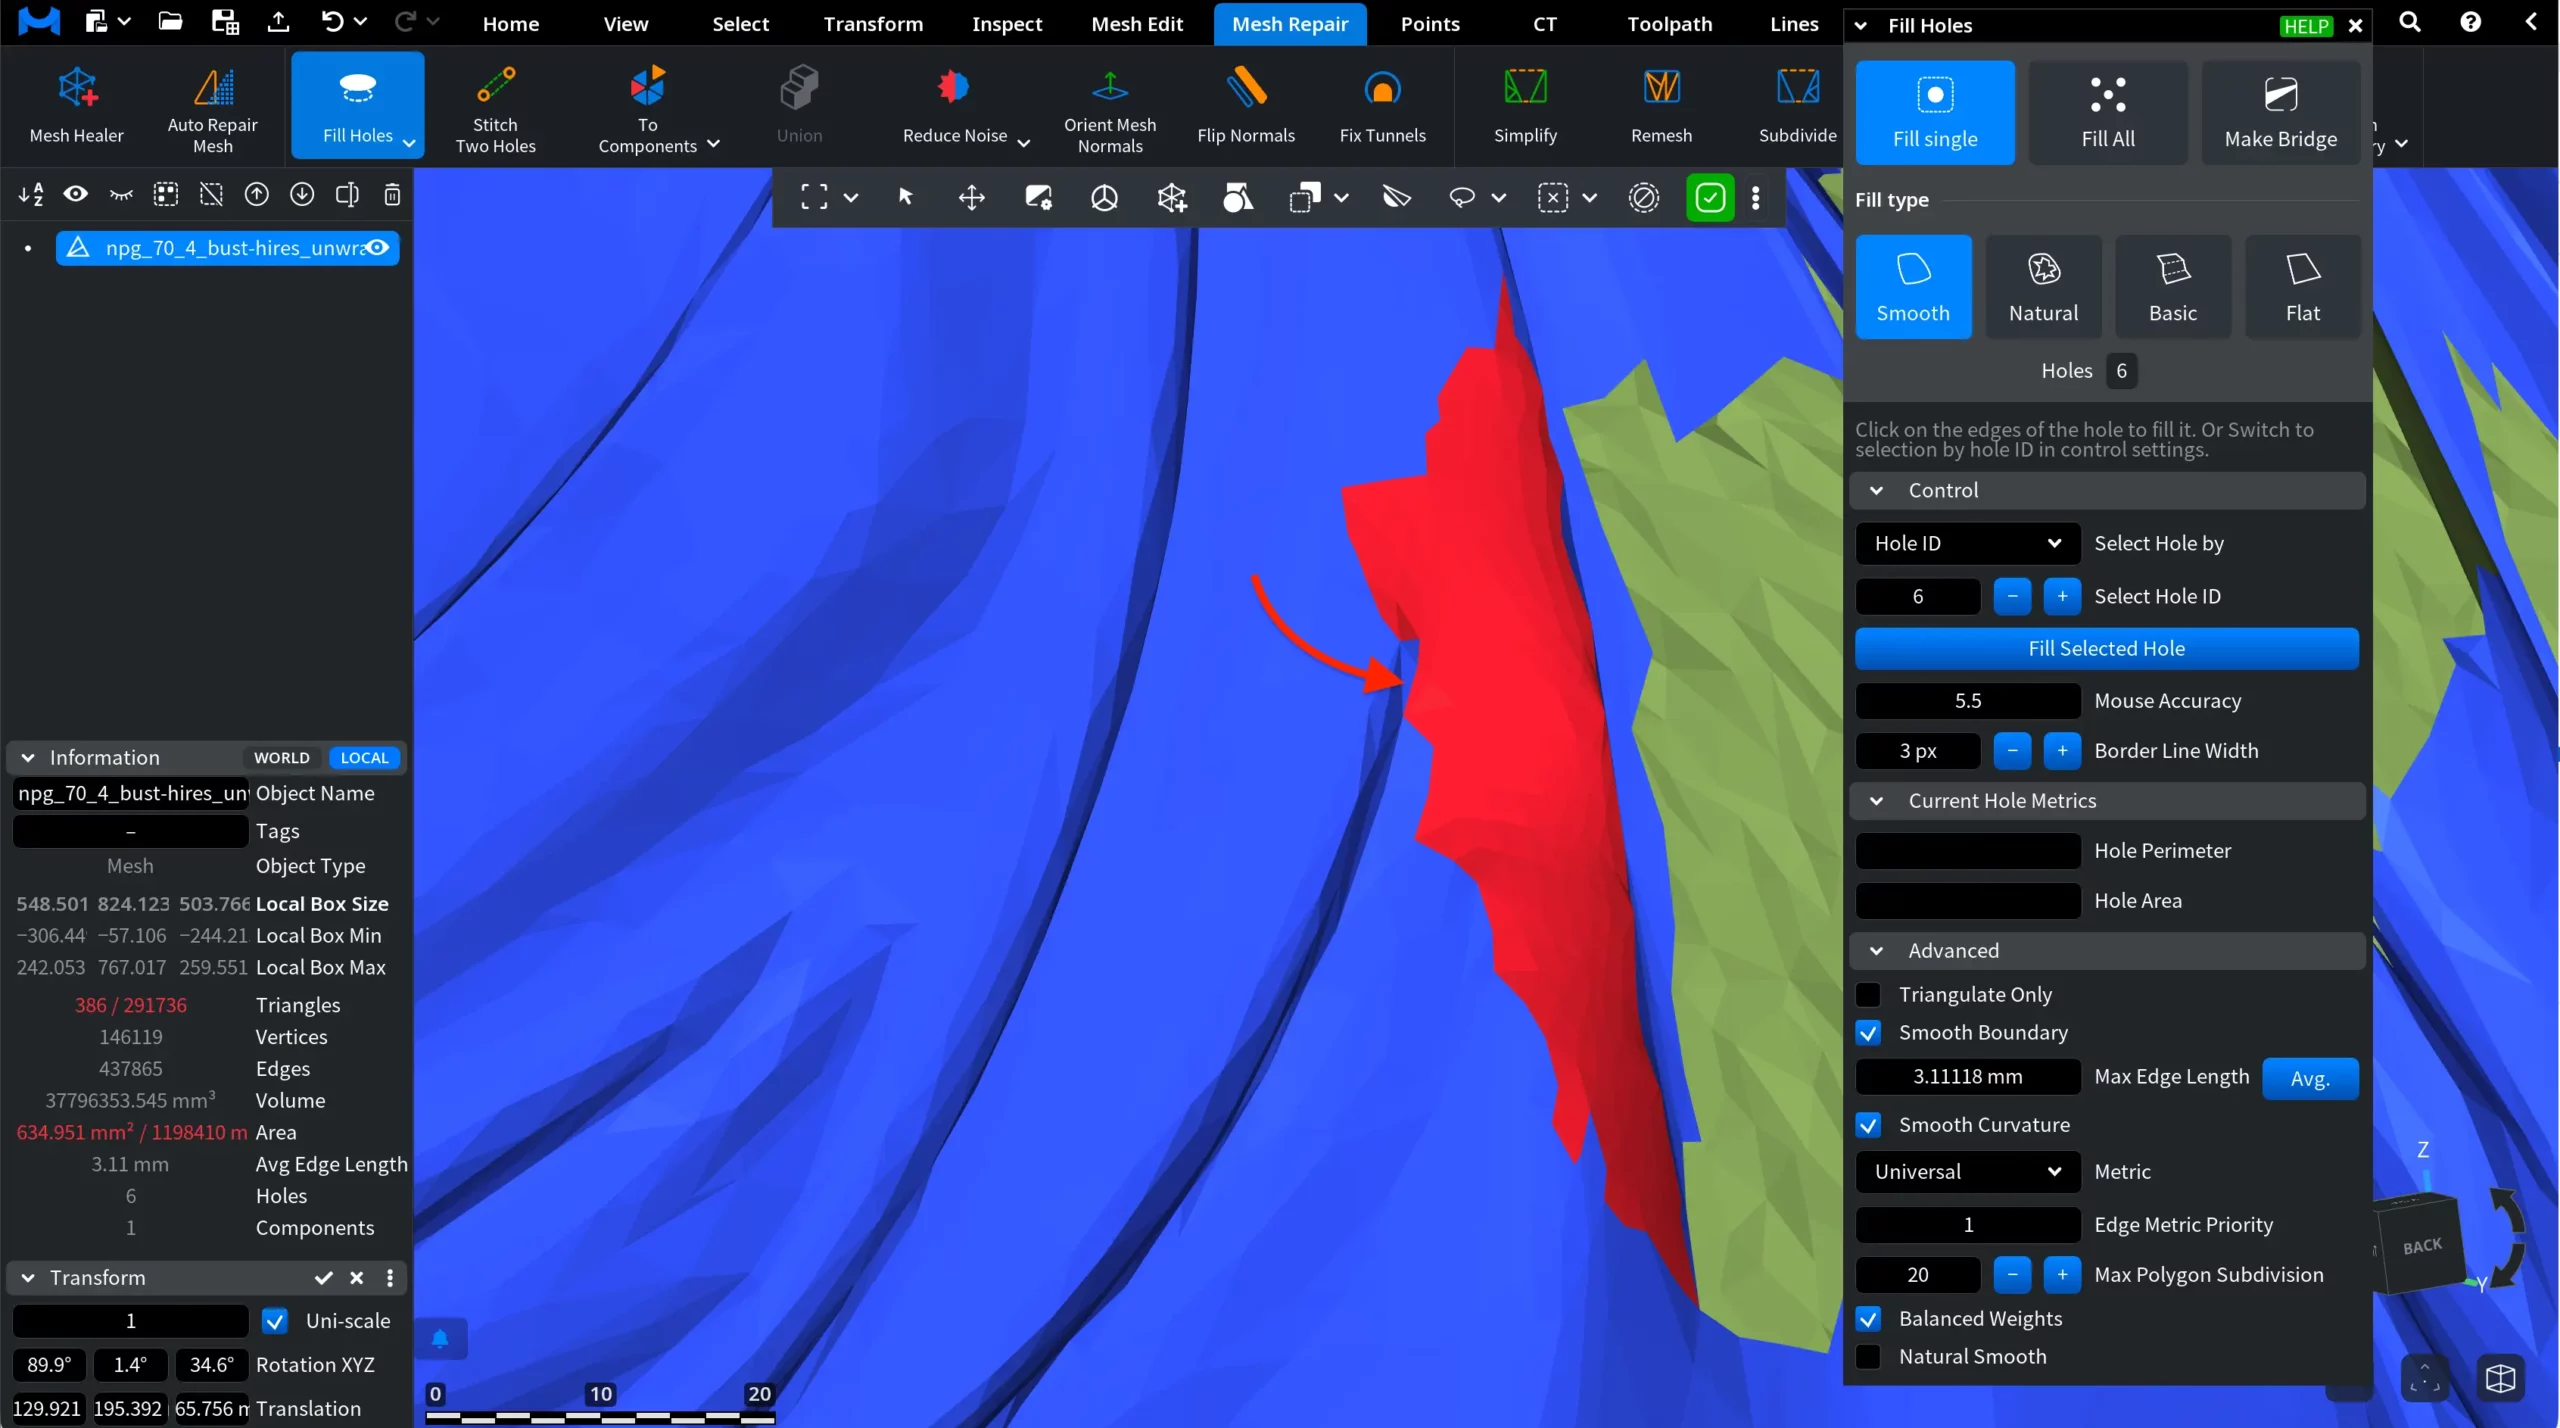
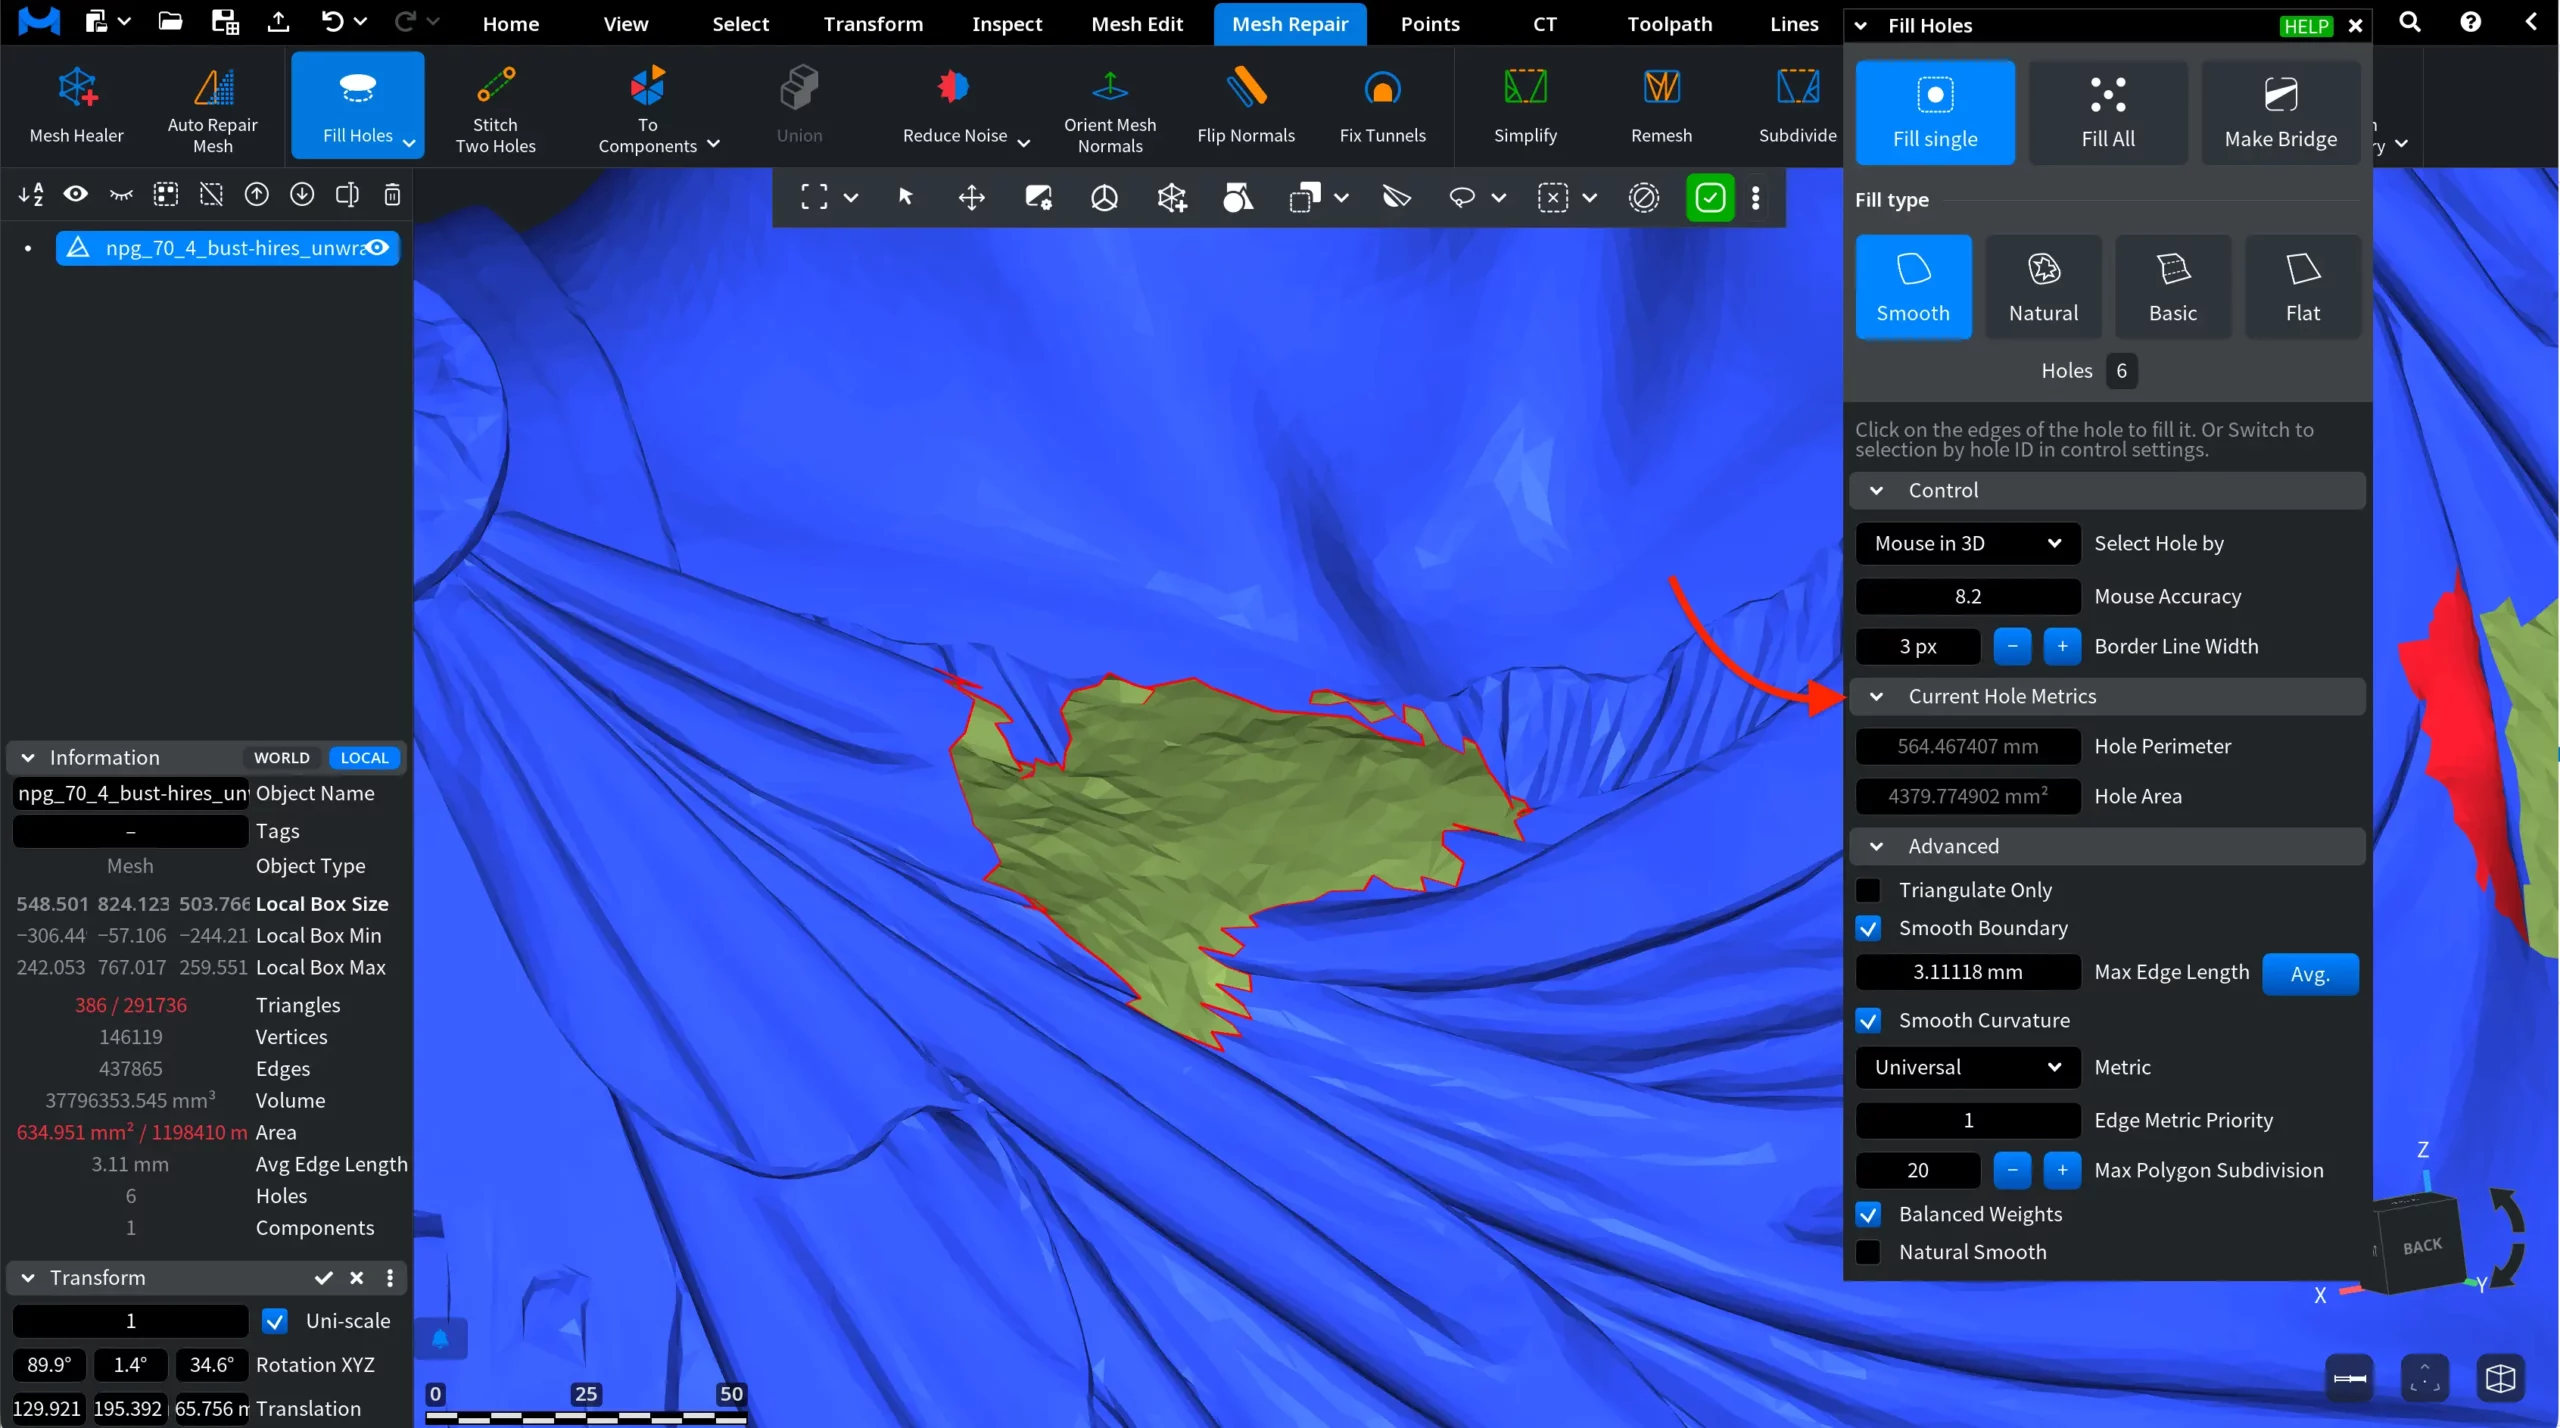
Current Hole Metrics
When a hole is highlighted (under the cursor or by its ID), the Current Hole Metrics section shows:
- Hole Perimeter: the length of the highlighted hole boundary.
- Hole Area: the area of the highlighted hole.
Advanced
The Advanced section fine-tunes the patch. Which settings you see depends on the other settings: for example, Triangulate Only hides all smoothing settings.
| Setting | What it does |
|---|---|
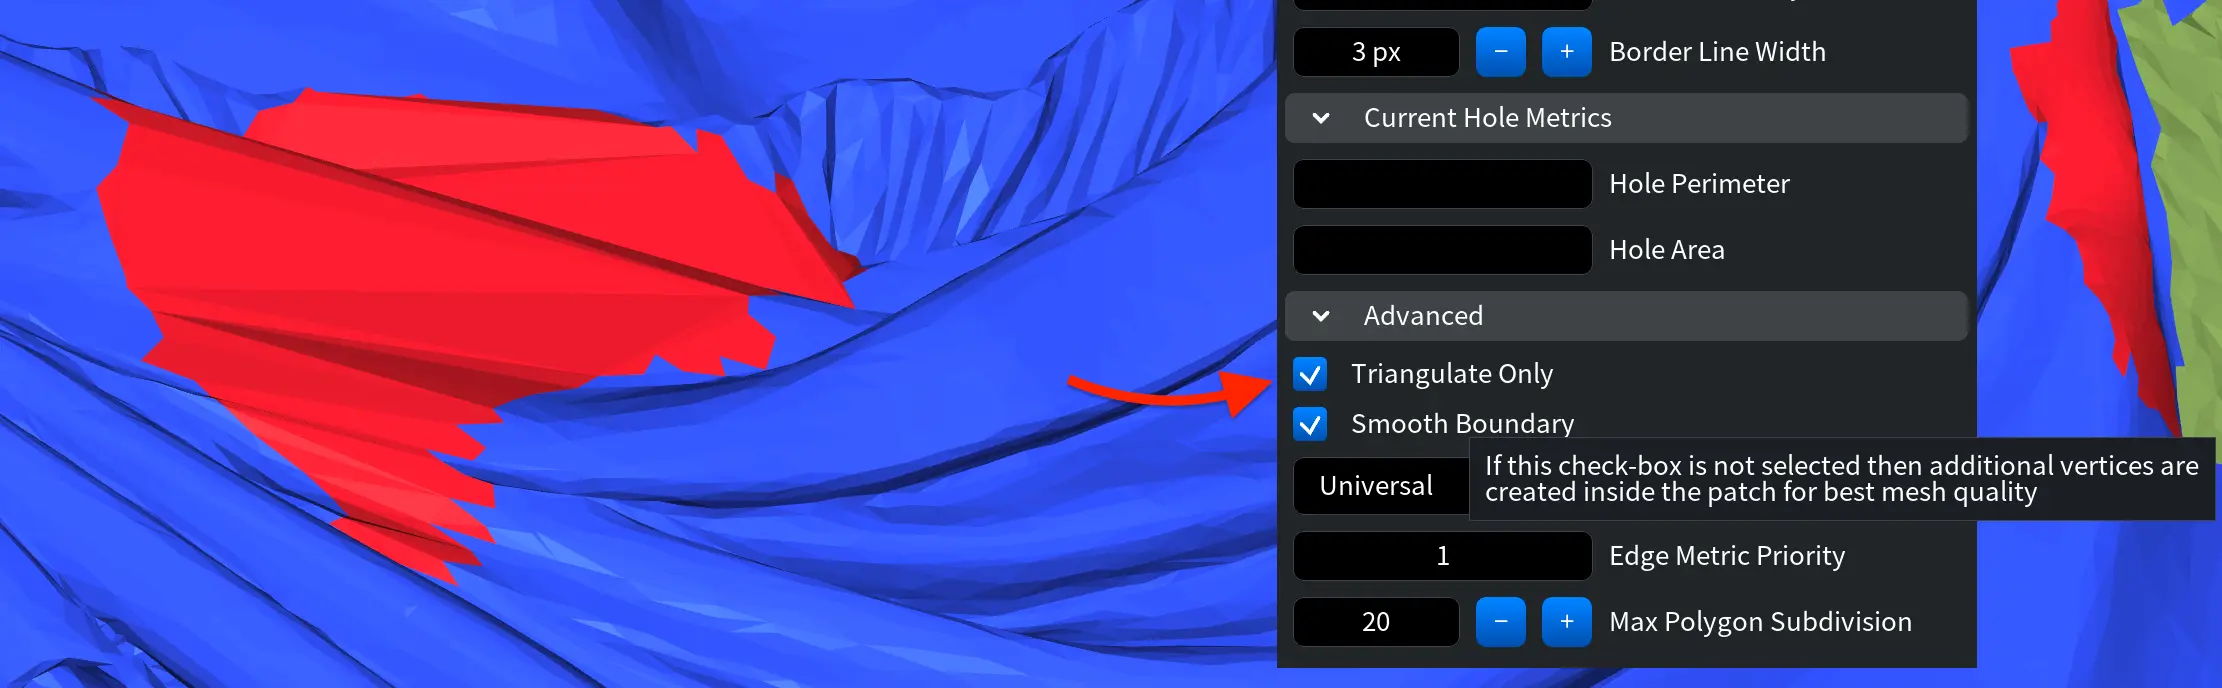
| Triangulate Only | On: the hole is closed with triangles between the existing boundary vertices only. Off: additional vertices are created inside the patch for better mesh quality. |
| Smooth Boundary | Makes a smooth angle between the patch and the triangles around the hole as well, not only inside the patch. |
| Max Edge Length | Subdivision of the patch stops when all its edges are shorter than this value. Avg. sets the average edge length of the mesh. |
| Smooth Curvature | Makes the patch smooth. |
| Metric | What the triangulation optimizes. See the list below. |
| Edge Metric Priority | Weight of the edge part of the metric: 0 ignores it, 1 is the default, larger values (up to 1000) make it much more important than the triangle part. Shown only for metrics that have an edge part. |
| Max Polygon Subdivision | The maximum number of polygon subdivisions on a triangle and two smaller polygons while the hole is triangulated. Default: 20. |
| Balanced Weights | On: weights recommended in the academic literature are used to position the new vertices smoothly. Off: unit weights, which tolerate degenerate triangles better. |
| Natural Smooth | Expands and repositions edges around the patch to keep the natural shape of the model. |
Metric options:
- Universal: a good result in an average case. It minimizes both the diameter of the circle around each triangle and the angle between neighboring triangles.
- Planar: made for holes that lie in one plane. It penalizes triangles whose normals look to the opposite side of the hole plane.
- Complex: minimizes the sum of a triangle metric for all triangles plus an edge metric for all edges inside and on the boundary of the patch.
- Min Area: minimizes the area of the patch. It is the best choice if the hole has a degenerate shape or is surrounded by degenerate triangles.
Fill All
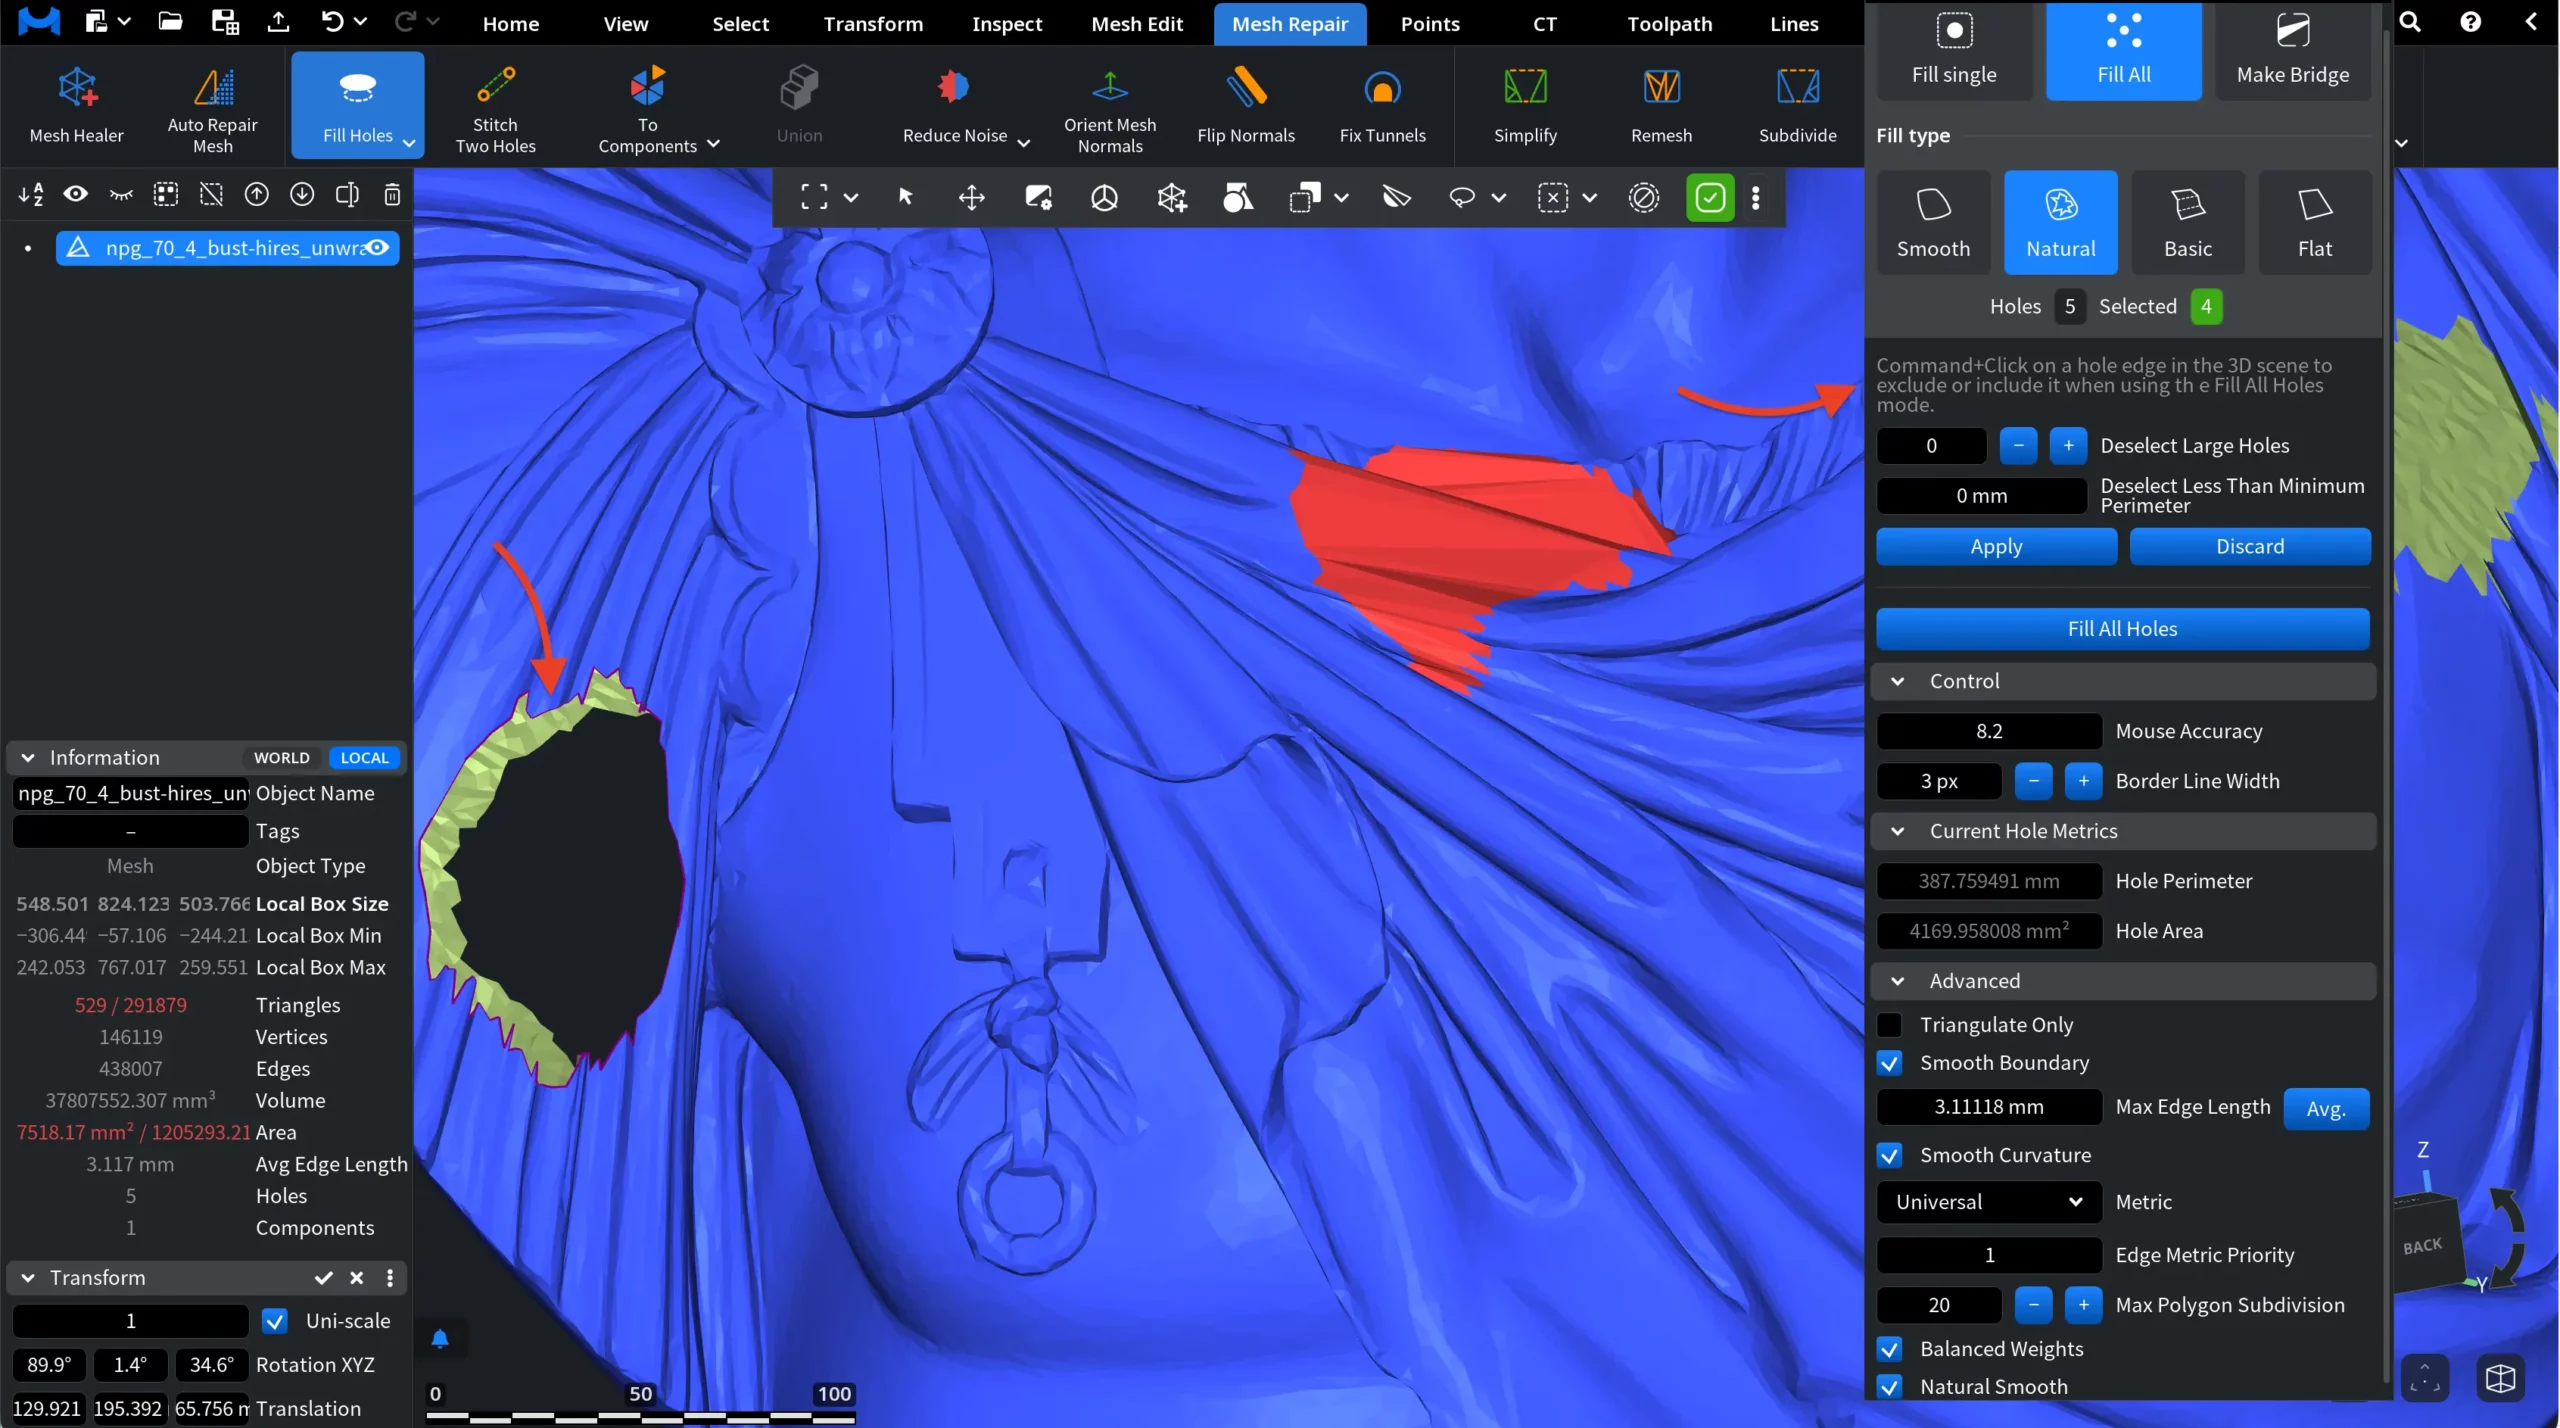
Fill All fills all holes of the mesh at once with the selected Fill Type and Advanced settings. You can exclude some holes first.
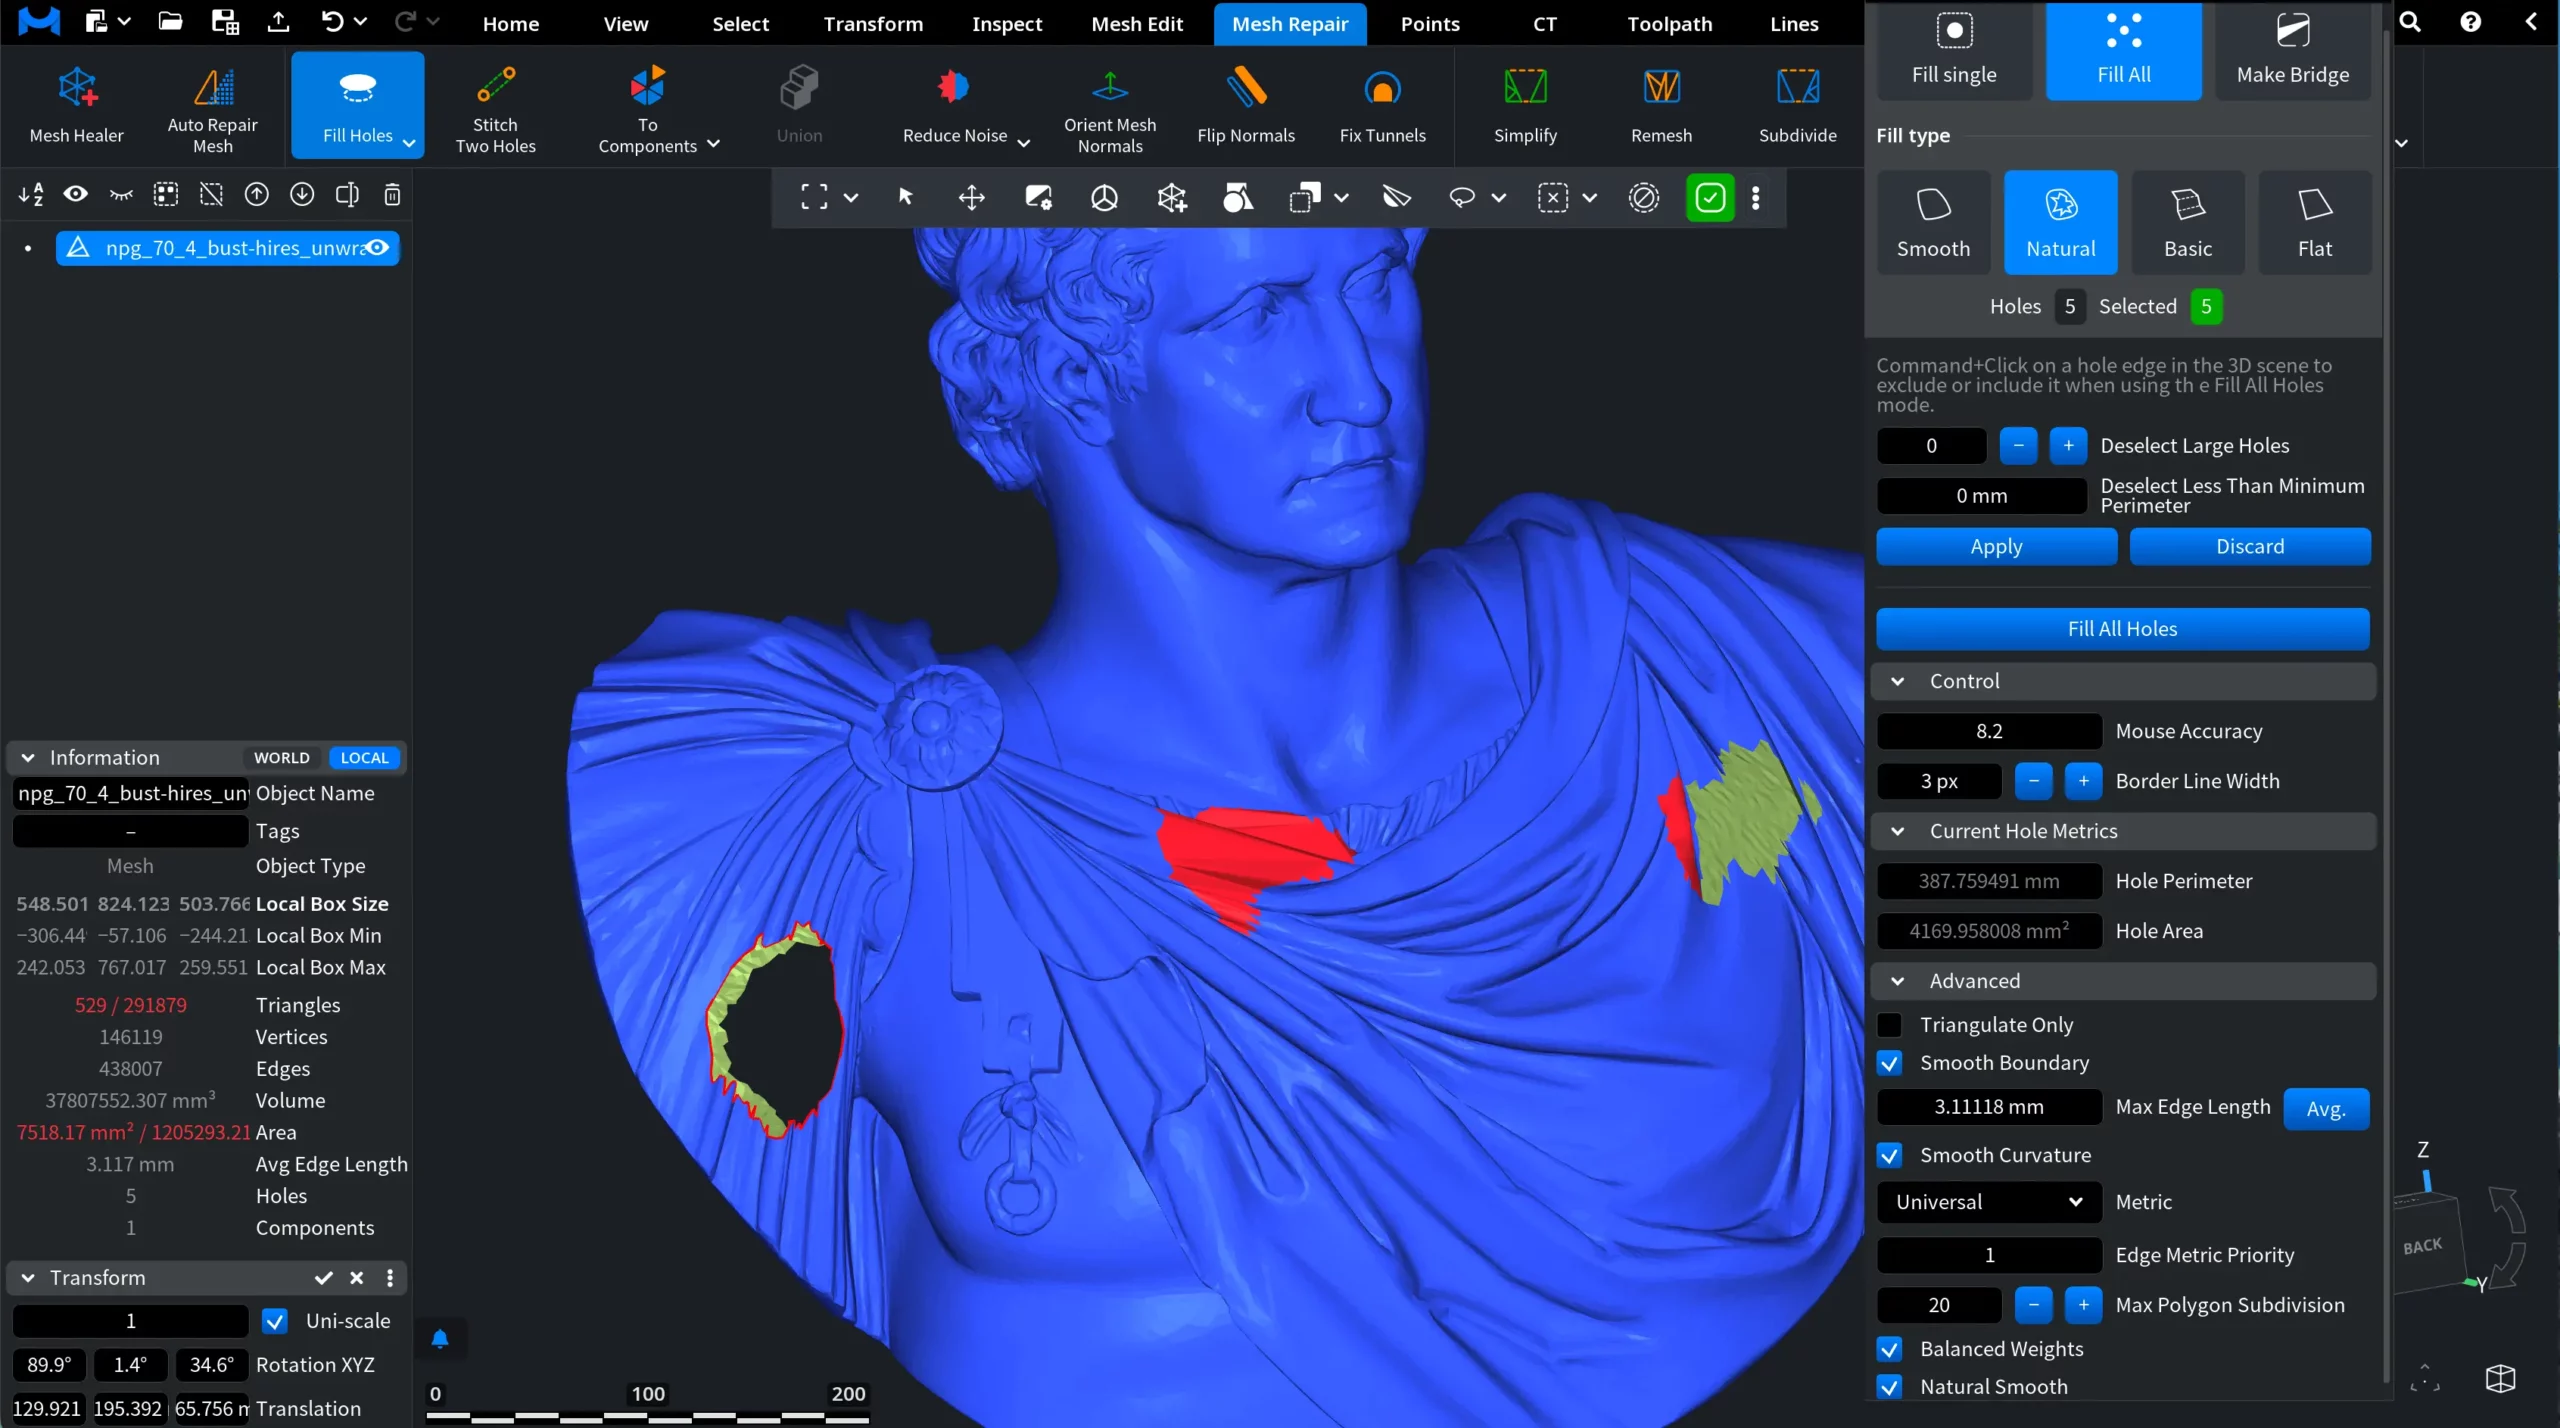
At the top of the panel, MeshInspector shows the number of Holes and the number of Selected holes that will be filled. By default, all holes are selected.
To exclude a hole or include it again, Ctrl+click its edge in the viewport (Cmd+click on macOS).
- Red edges mark holes that will be filled.
- Dark red edges mark holes that are excluded.
The Selected counter updates after each click.
Automatic Hole Filtering
You can also exclude holes by size:
- Deselect Large Holes deselects the given number of holes with the longest boundary. Use it to keep the open edge of a scan (for example, the bottom of a bust) open.
- Deselect Less Than Minimum Perimeter deselects all holes whose boundary is shorter than the given value.
Applying the Selection
- Apply applies these filters to the selection.
- Discard resets the selection changes.
Fill All Holes
Turn on Auto Connect Holes if closely located holes should be connected before they are filled; when it is off (the default), every hole is filled by itself. Then click Fill All Holes.
All other settings work the same as in Fill single.
Make Bridge
Make Bridge connects two hole edges with a strip of triangles. A bridge across one hole splits it into two smaller holes, which are easier to fill and give you more control over the result.
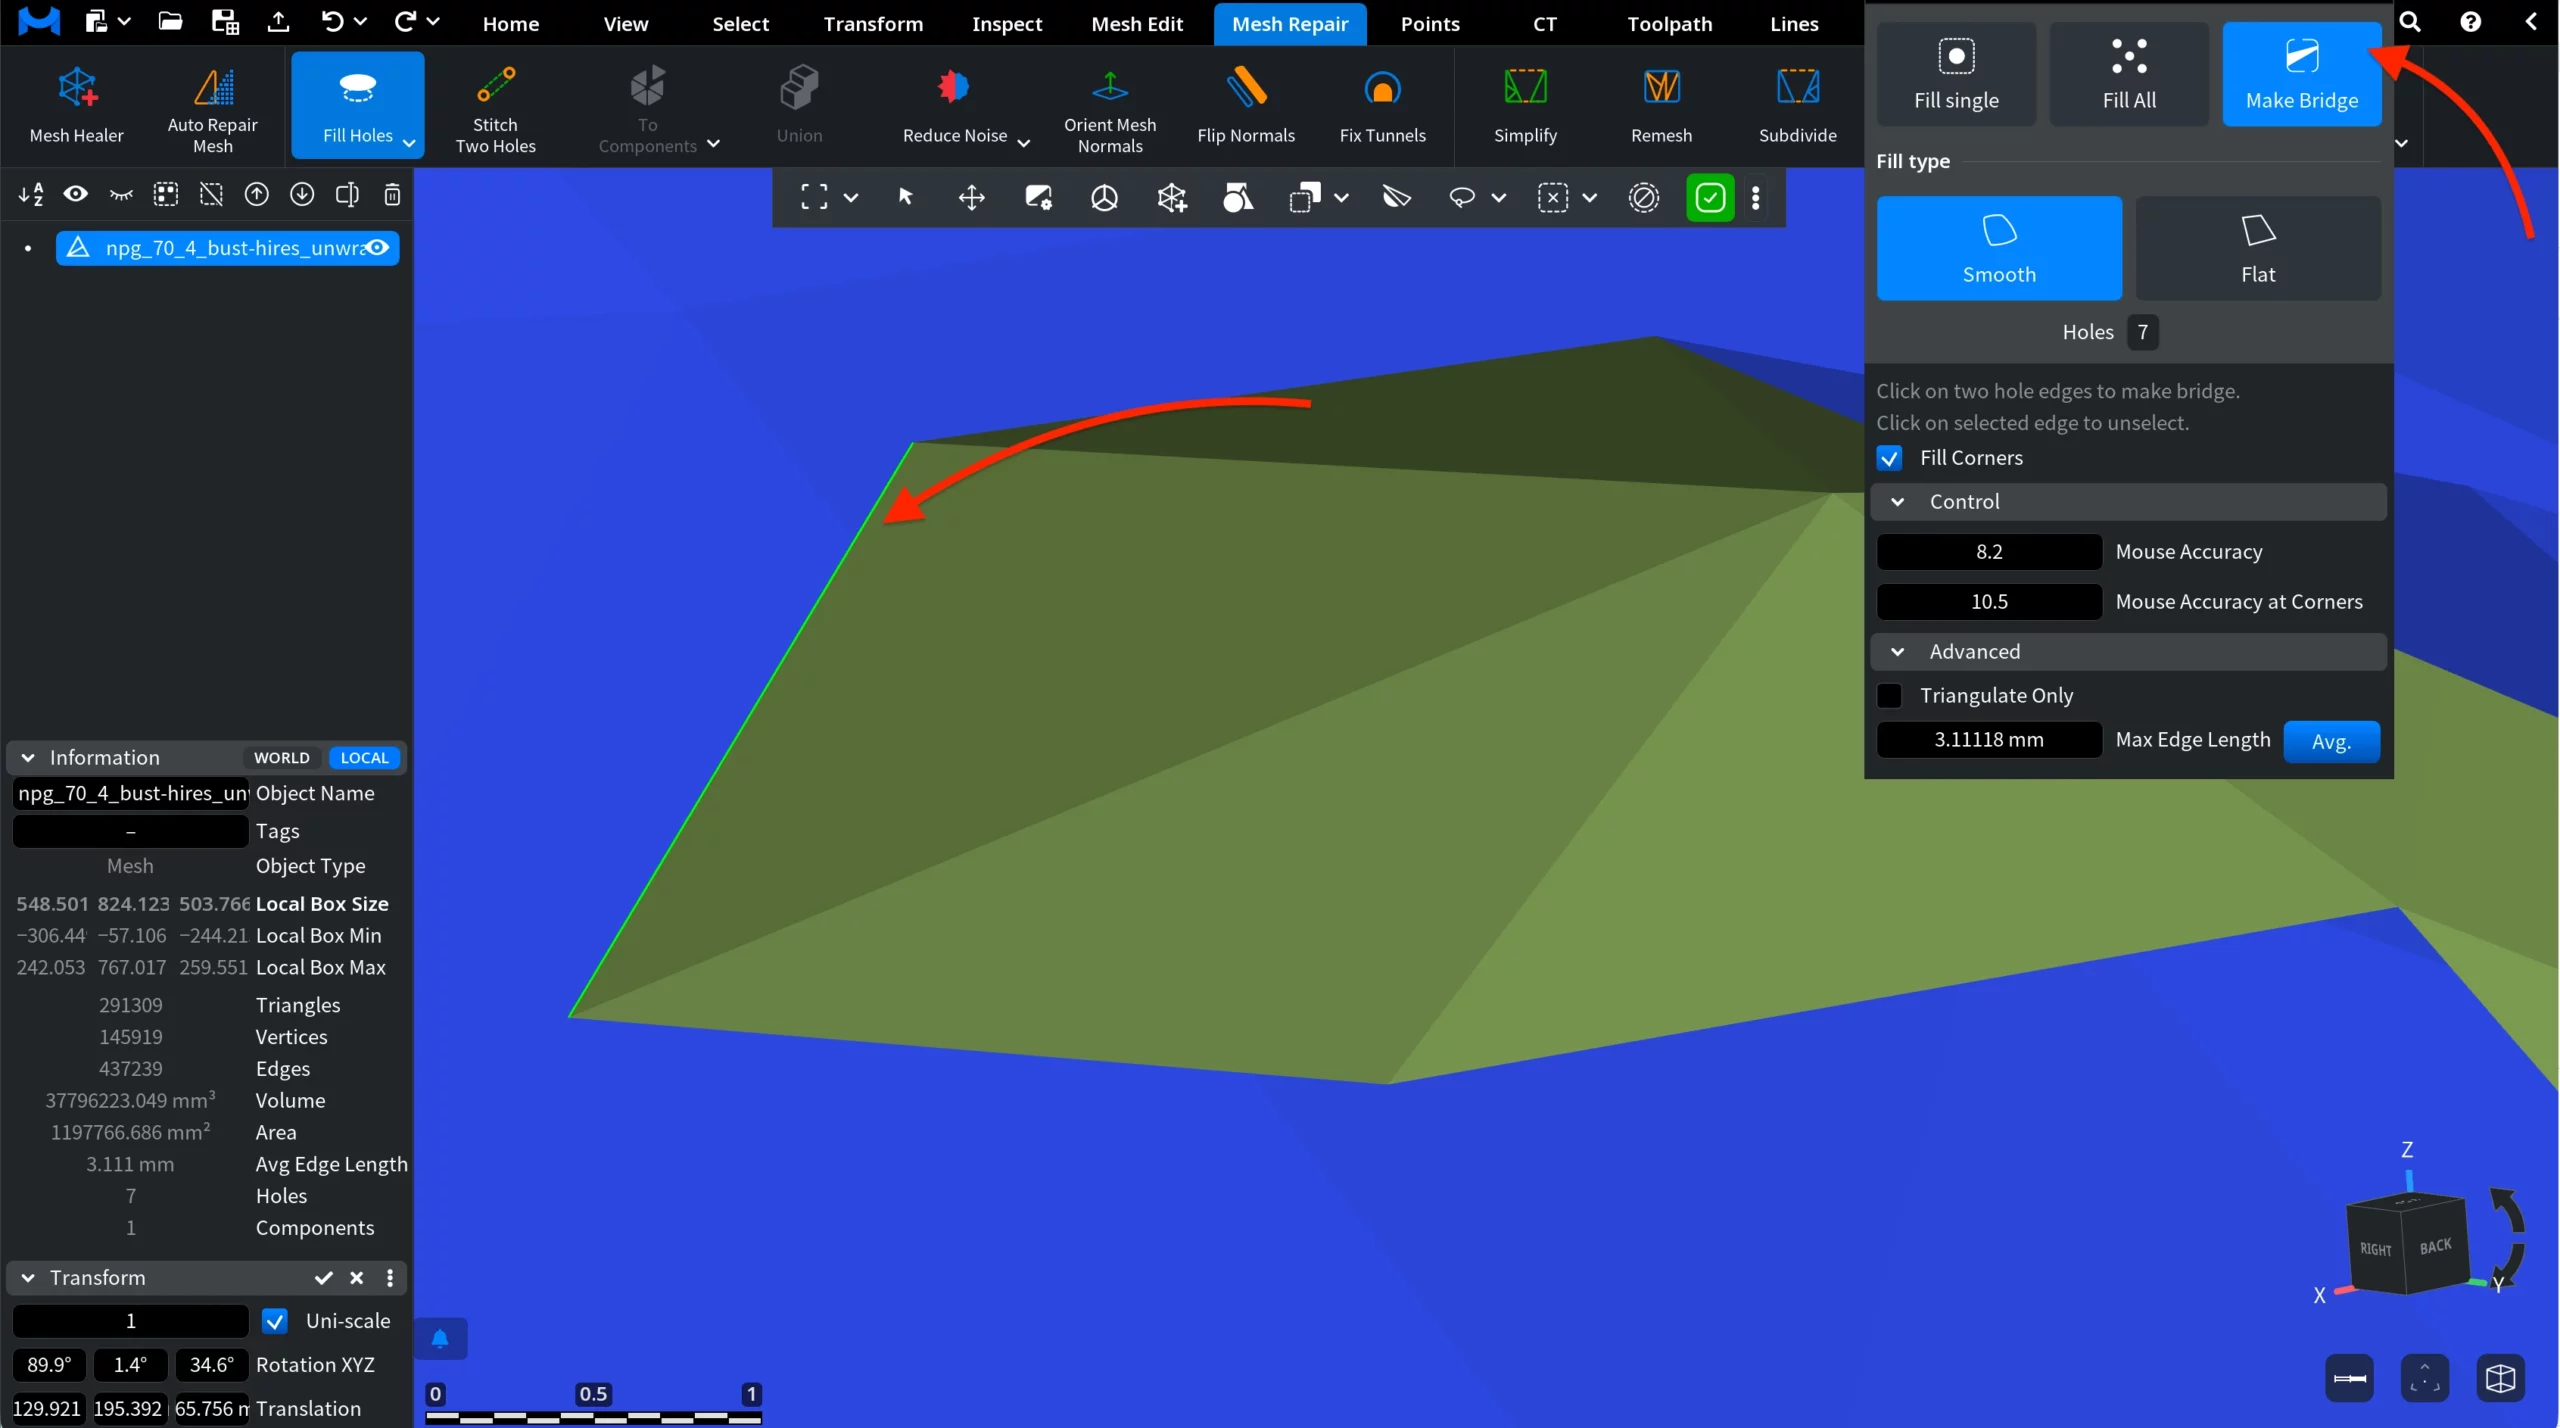
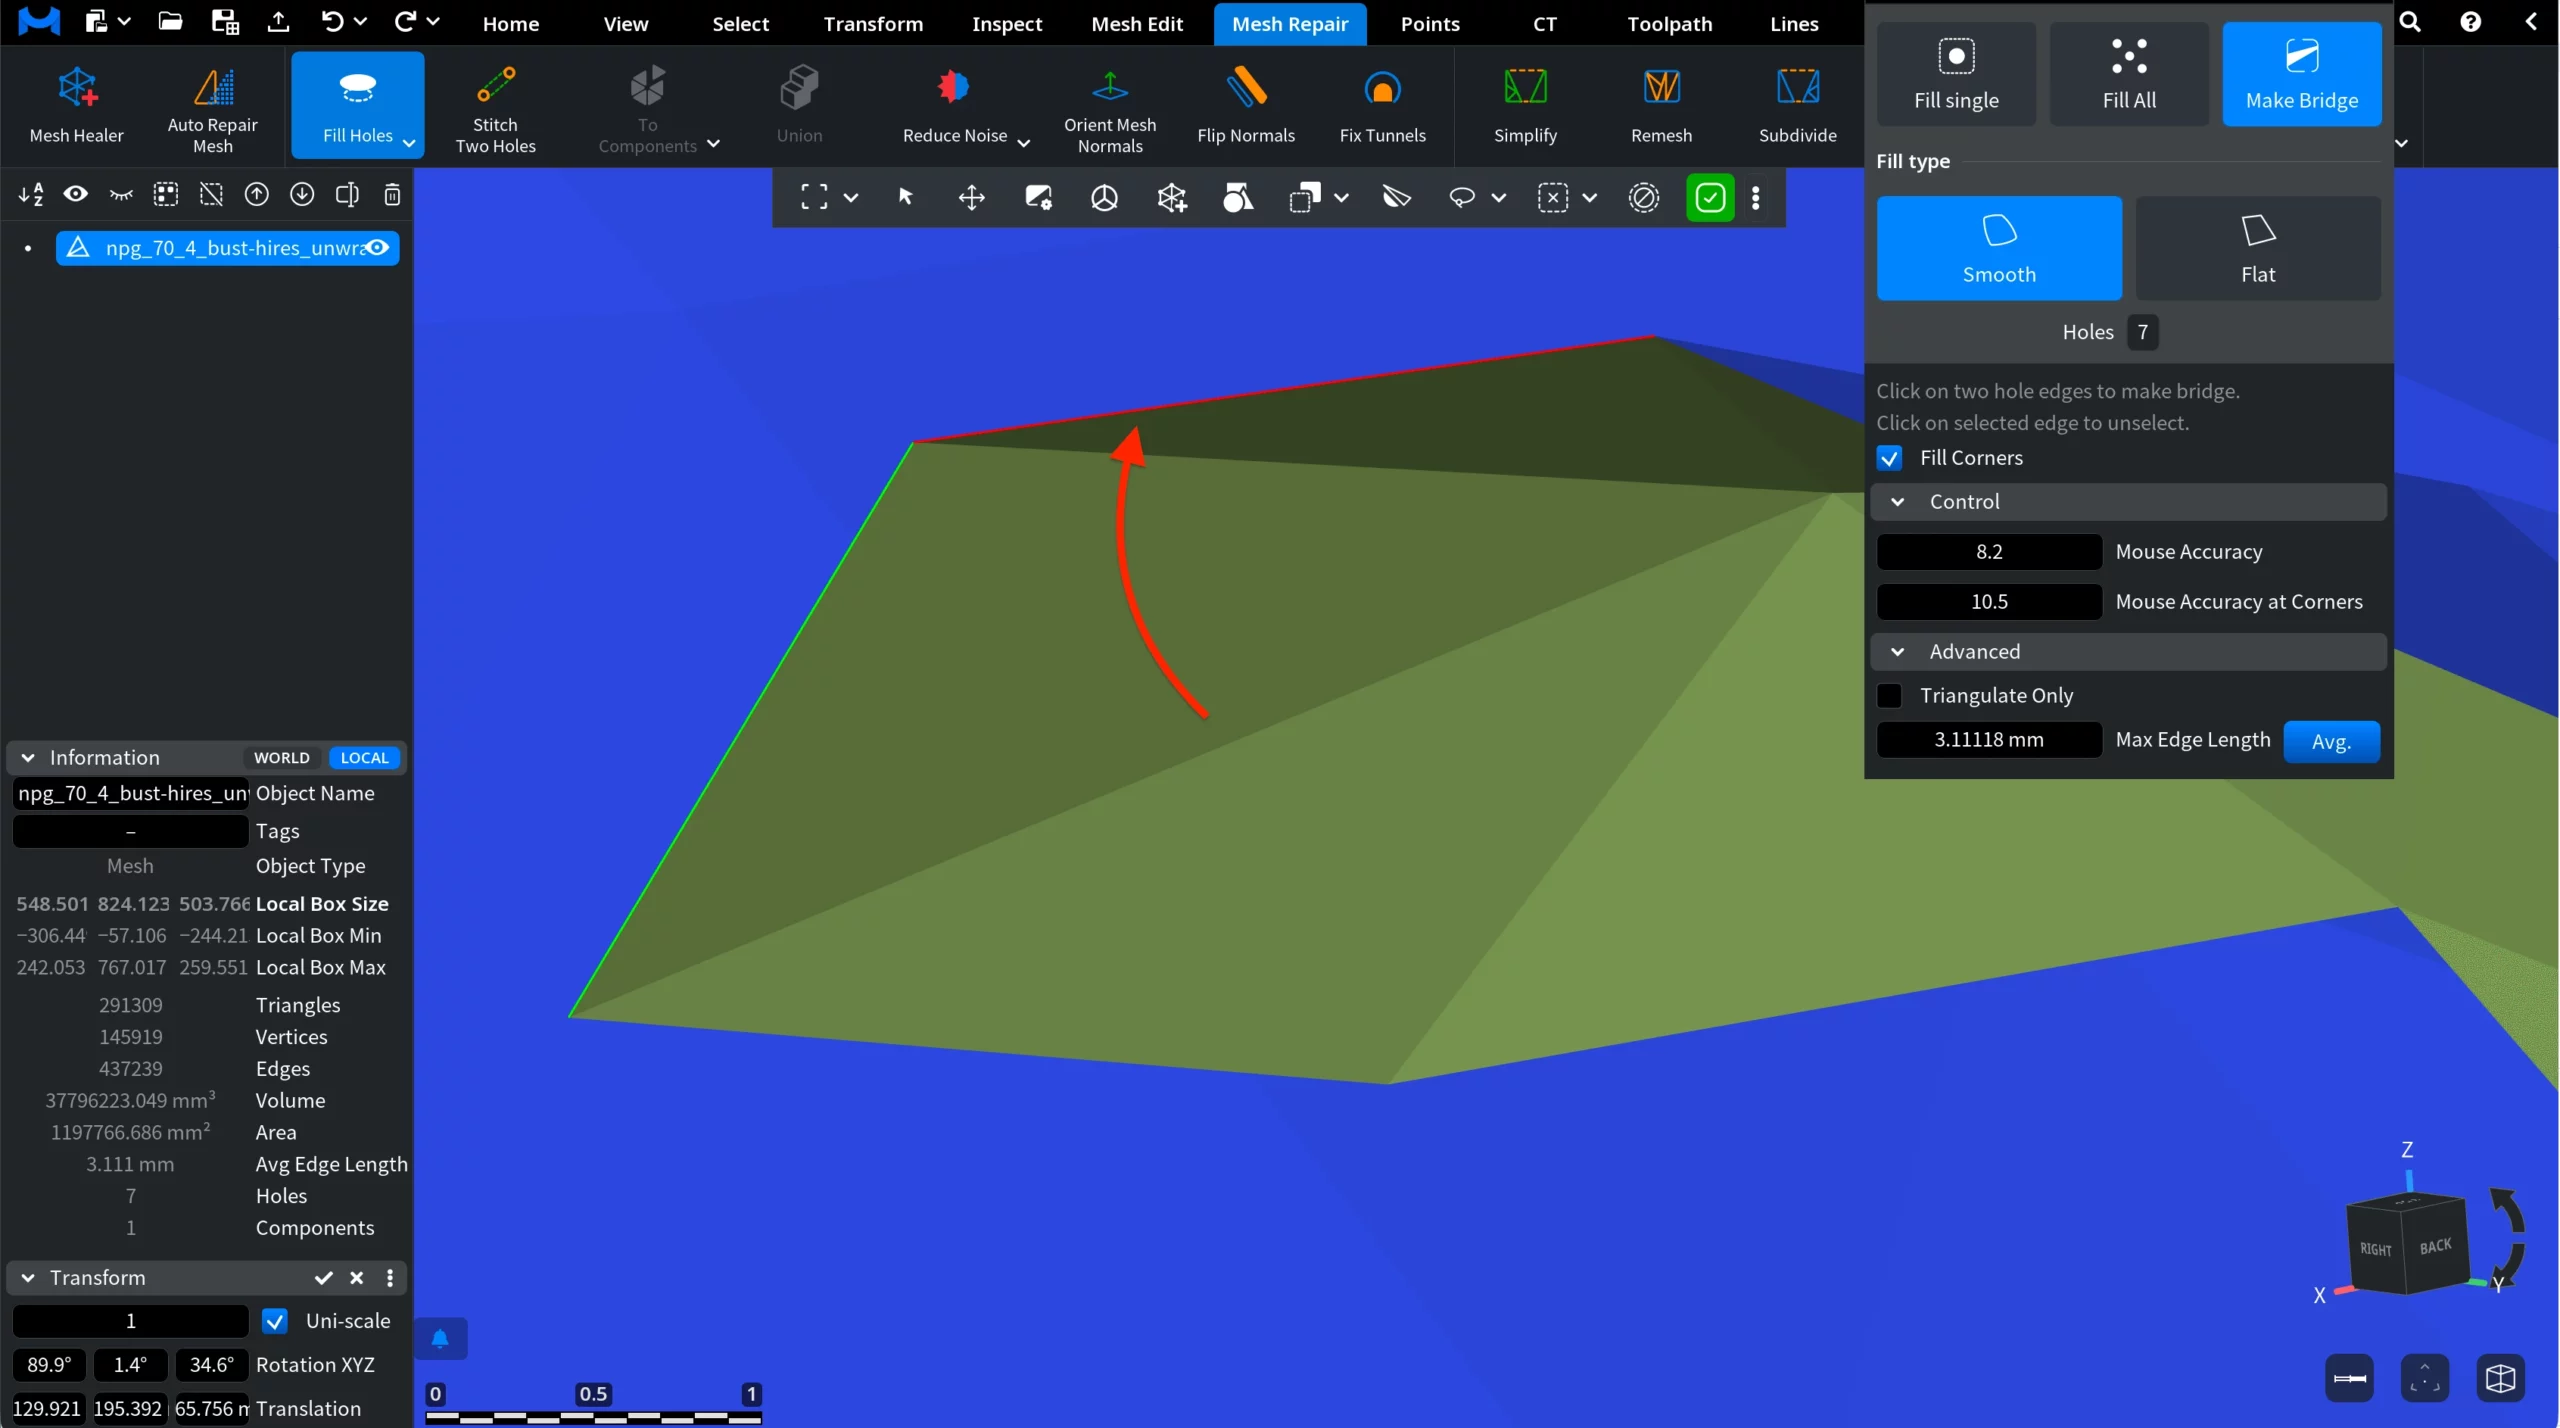
To make a bridge, click two hole edges in the viewport. The first selected edge turns green; click it again to unselect it. Then hover over the second edge (it is highlighted in red) and click it.
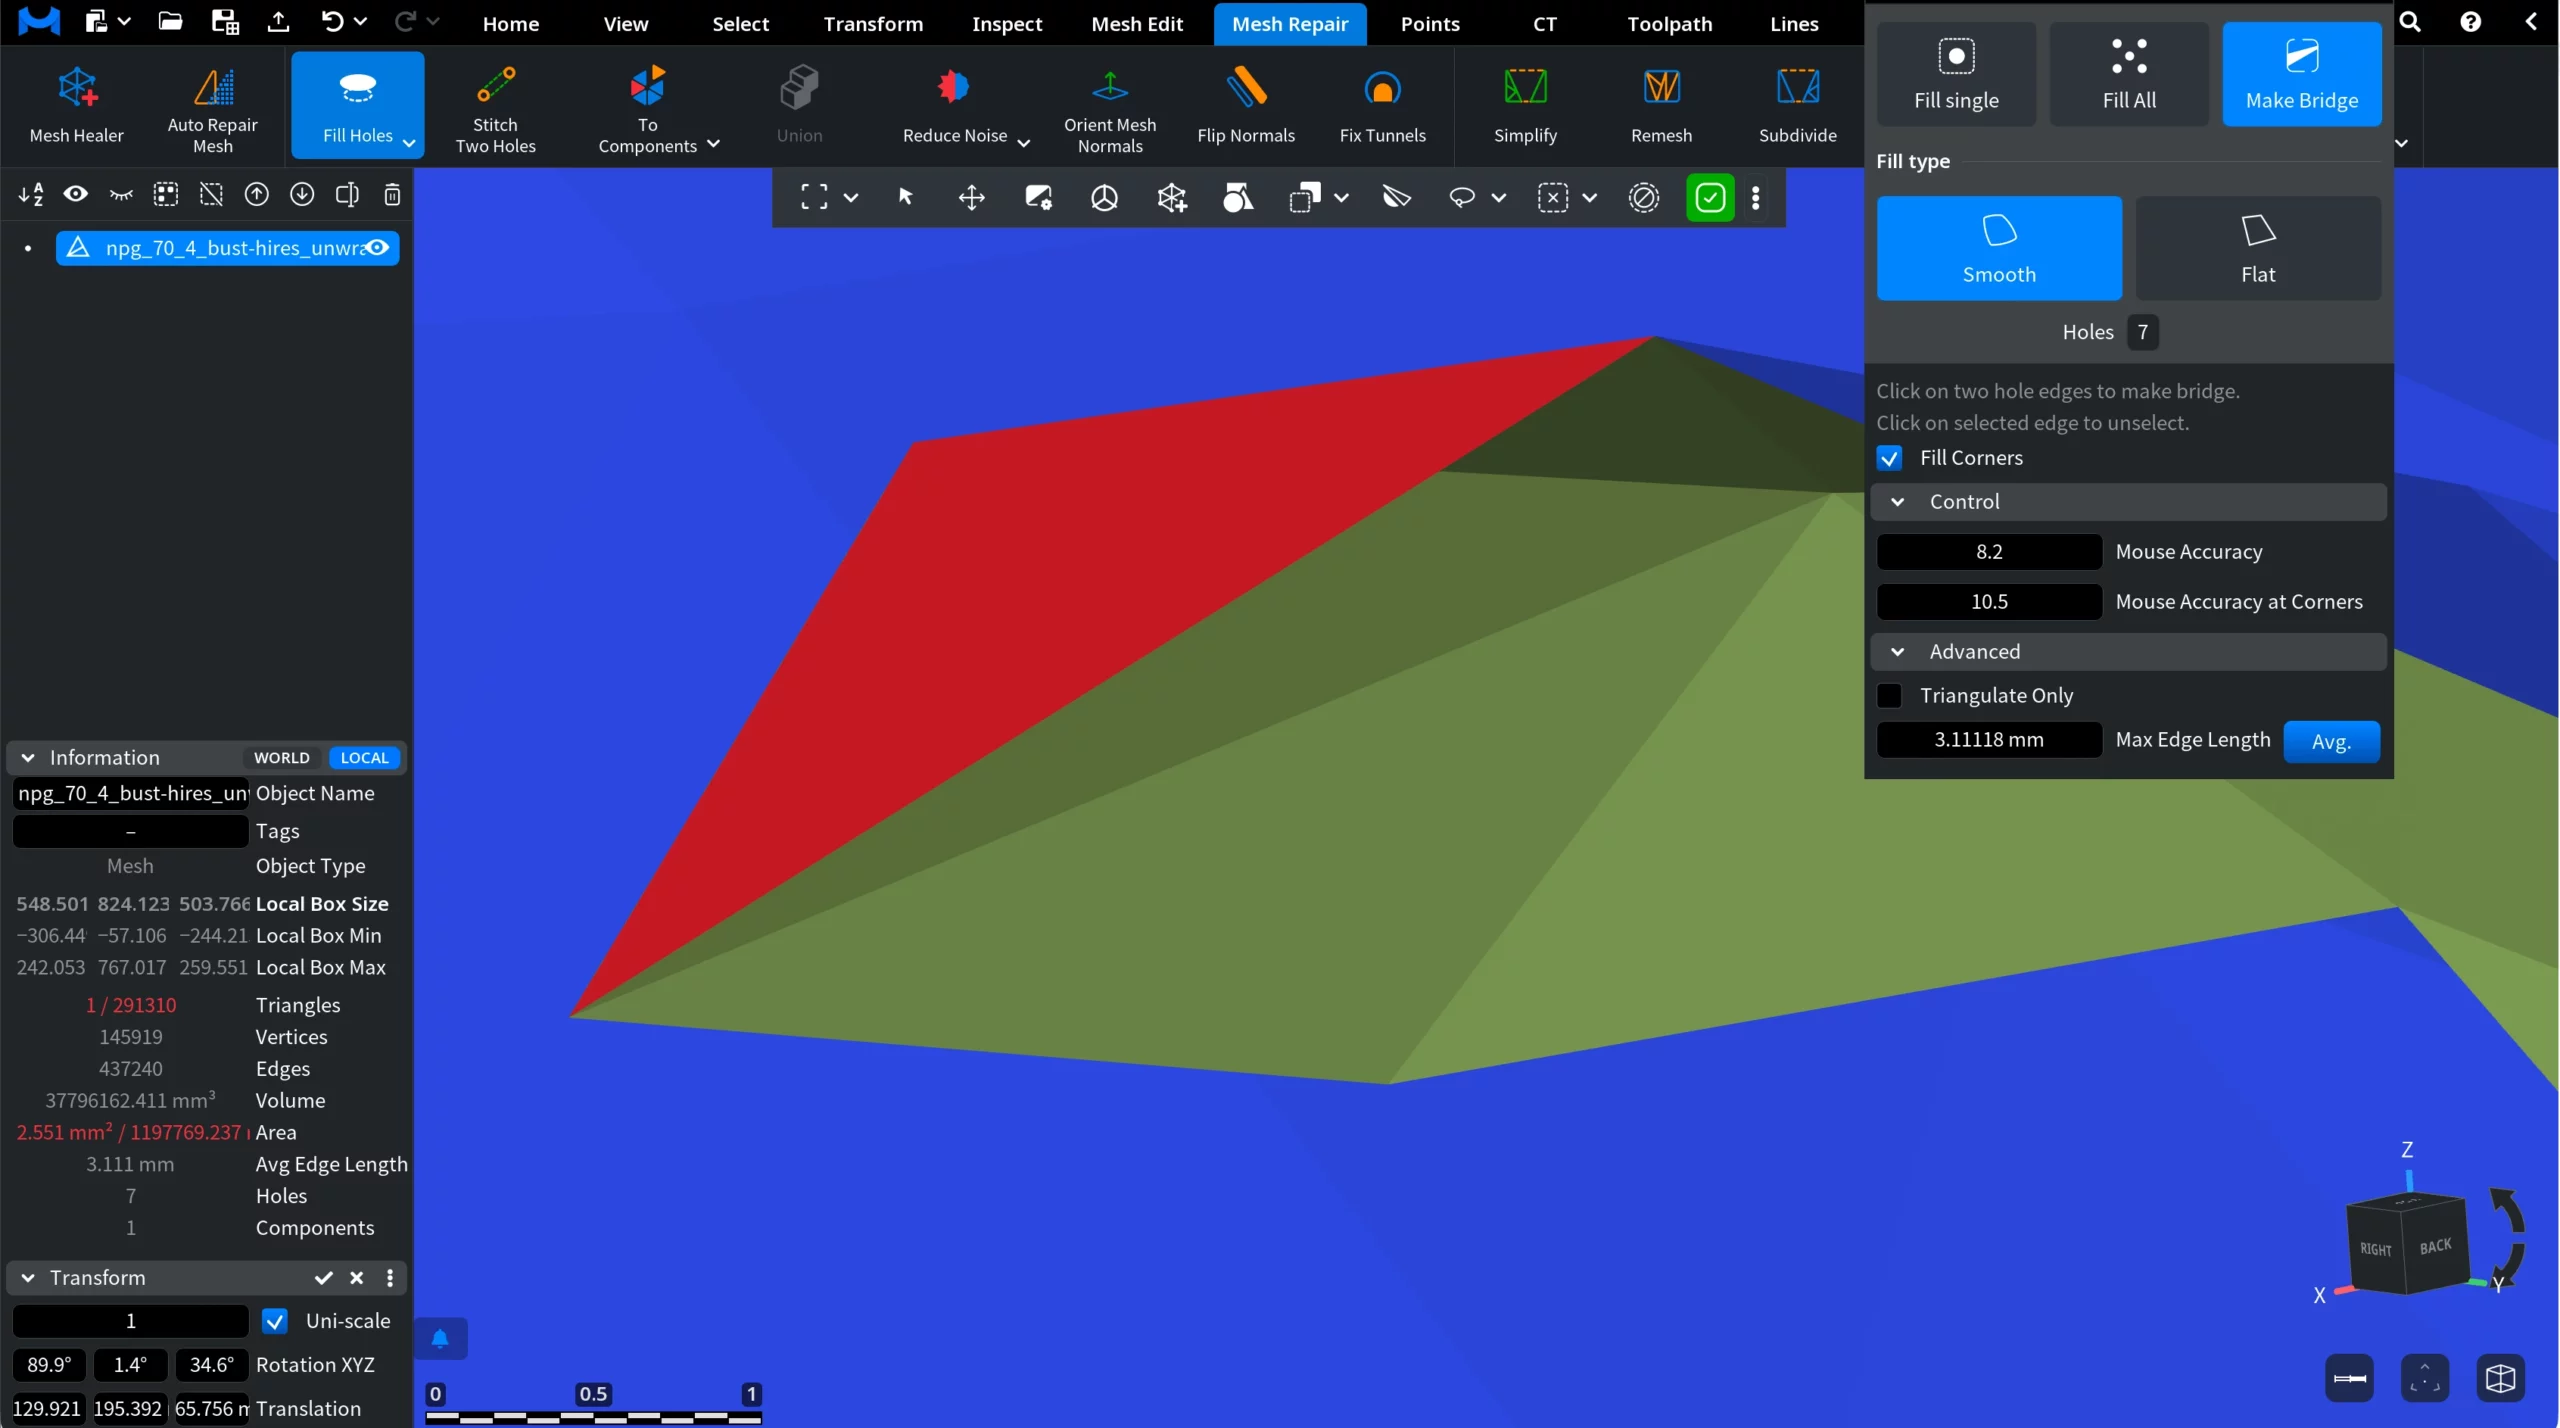
The bridge is created after the second click.
Fill Type
In Make Bridge mode, the Fill Type has two options:
- Smooth: additional vertices are created inside the bridge to make it visually smooth, including at its ends.
- Flat: a flat bridge without additional vertices.
Fill Corners
With Fill Corners on, you can click the corner between two neighboring boundary edges to add one triangle there. It is off by default.
Control
- Mouse Accuracy: a boundary edge is highlighted if the cursor is closer to it than this value in pixels.
- Mouse Accuracy at Corners: two neighboring boundary edges are highlighted if the cursor is closer to their common vertex than this value in pixels.
Higher values make edges easier to pick; lower values need more precise cursor placement.
Advanced
- Triangulate Only: the bridge is built without additional vertices.
- Max Edge Length: subdivision of the bridge stops when all its edges are shorter than this value.
- Avg. sets the average edge length of the mesh as Max Edge Length.
Bridge Fill All Holes
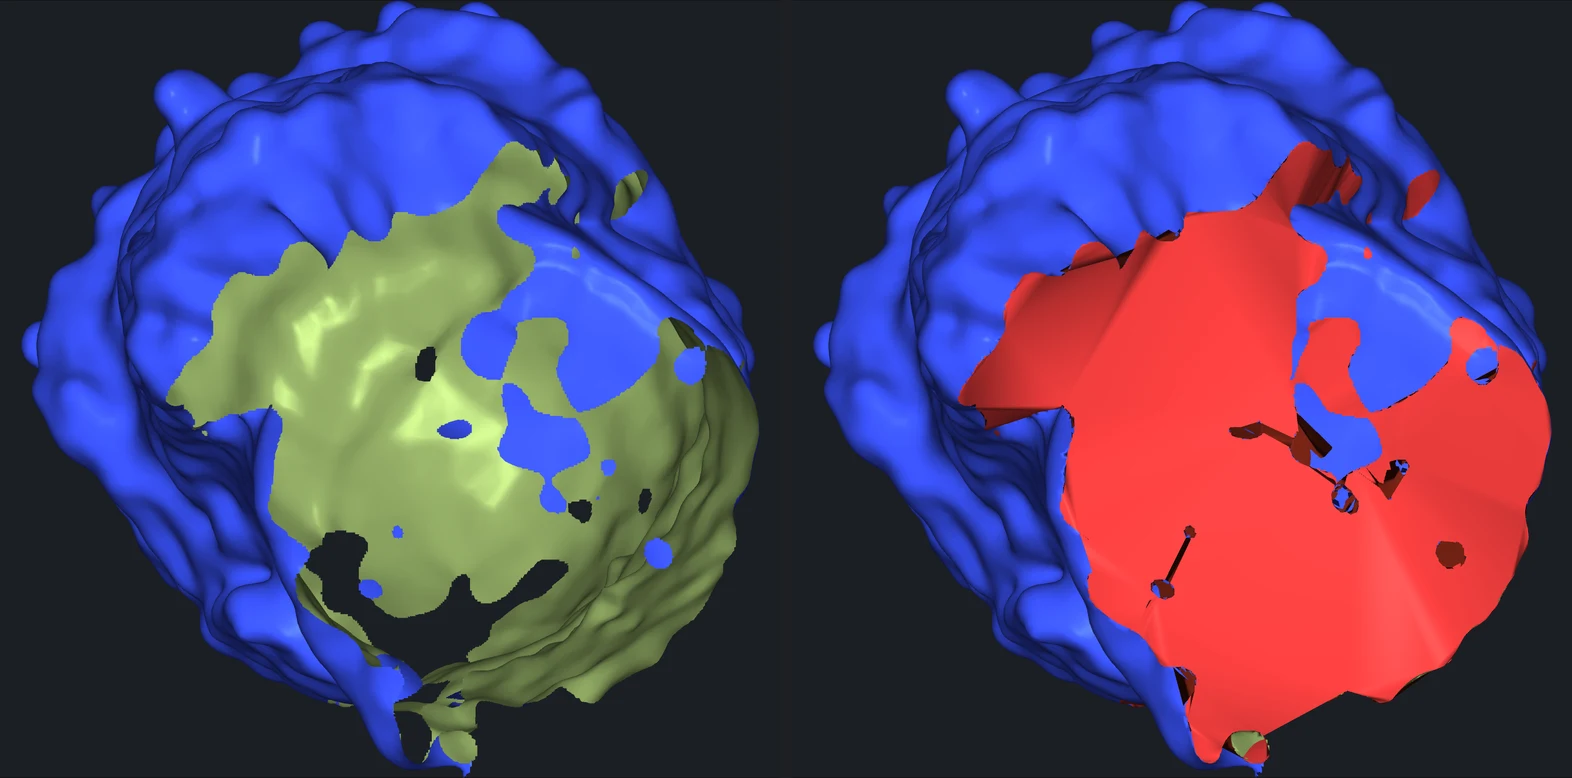
Bridge Fill All Holes connects the holes of every selected mesh with bridge edges and fills all the holes at once with extra triangles. It has no panel and no settings. Use it when you need a closed (watertight) mesh quickly, for example to close the large openings that stay in a scan after Mesh Healer.
To close all holes:
- Select one or more meshes in the scene tree.
- On the Mesh Repair tab, click the arrow next to Fill Holes and choose Bridge Fill All Holes.
What MeshInspector does:
- It finds pairs of boundary points on different holes that are the closest to each other and joins them with bridge edges, so nearby holes become one.
- It fills every remaining hole with triangles built on the existing boundary vertices: no new vertices are added inside the patches.
- The new triangles are selected, so you can see what was added.
- A mesh without holes is not changed. To undo, press Ctrl+Z (Cmd+Z on macOS).
On a real head scan with 29 holes, where the whole face area is missing, Bridge Fill All Holes left 0 holes and a closed mesh. It added 3,169 triangles, and the number of vertices stayed the same (37,220). The scan had 10 separate parts; after the tool it had 2, because the bridges also joined loose scan fragments to the head.
Keep in mind:
- Patches over large openings are made of long, thin triangles and are not smooth. If the shape of the patch matters, use Fill All with the Smooth Fill Type, which adds vertices inside the patch.
- The tool also fills openings that you may want to keep, such as the open bottom of a bust. To keep some holes open, use Fill All and exclude them.
- Bridges can cut through the surface and create self-intersections: on the same head scan, repaired with Mesh Healer first, it left 1,329 of them. Run Mesh Healer again afterwards; it removes them.
Fill Holes with Extra Points
Fill Holes with Extra Points finds holes and fills them with extra triangles, using points from the selected point cloud as vertices of the new triangles. Use it when you have measured points of the missing area, for example a point cloud from another scan, and want the patch to pass through these points instead of an interpolated surface.
To fill holes with points:
- In the scene tree, select one mesh and one point cloud: click the first, then Ctrl+click the second (Cmd+click on macOS).
- On the Mesh Repair tab, click the arrow next to Fill Holes and choose Fill Holes with Extra Points.
- Check the settings and click Apply (or press Enter).
| Setting | What it does | Default |
|---|---|---|
| Nearest Neighbours | The number of nearest points used to build the local triangulation. A too small value can give a poor triangulation and new holes; a too large value is slower. | 16 (from 6 to 99) |
| Critical Angle (in Advanced) | The angle between triangles in a fan of the local triangulation must be less than this value. | 90° |
| Fill Remaining Holes | Fills the holes that remain after the points are used. | On |
| Auto Detect Holes to Fill | The tool chooses which remaining holes to fill. Turn it off to set Max Hole Length: then all holes with a boundary shorter than this value are filled. | On |
| Preserve Point Cloud | Keeps the point cloud in the scene (hidden) next to the repaired mesh. When it is off, the point cloud is removed from the scene. | Off |
After Apply, the panel closes and the new triangles are selected.


