

Smooth Boundary adds triangles to the open boundary of a mesh to make it straighter, and Smooth Region Boundary moves the boundary vertices of a selected region to make its outline smoother. Use them when a ragged edge gets in the way: for example, to prepare the jagged edge of a scan before Fill Holes or Stitch Two Holes, or to get a smooth outline of a selection before you delete or process the selected faces.
| Smooth Boundary | Smooth Region Boundary | |
|---|---|---|
| Works on | All open boundaries (holes) of the selected meshes | The outline of the selected faces of one mesh |
| What it changes | Adds triangles; existing vertices do not move | Moves the vertices on the outline of the selection |
| Panel and settings | None: it runs at once | None: it runs at once |
| Where | Mesh Repair › Smooth Boundary | Mesh Repair, the arrow next to Smooth Boundary › Smooth Region Boundary |
Both tools run as soon as you click them. To undo, press Ctrl+Z (Cmd+Z on macOS).
Do not confuse the Smooth Boundary tool with the Smooth Boundary checkbox in the Advanced settings of Fill Holes: the checkbox only controls how a hole patch meets the surface around it.
Smooth Boundary
Meshes may contain irregular or jagged boundaries. As a result, the mesh boundary may not only look uneven but also be less suitable for further processing or visualization. MeshInspector’s Smooth Boundary tool helps address this issue by adding triangles along the mesh boundary to make it straighter and more regular. To start using this tool, open the Mesh Repair tab and click Smooth Boundary, as highlighted below.

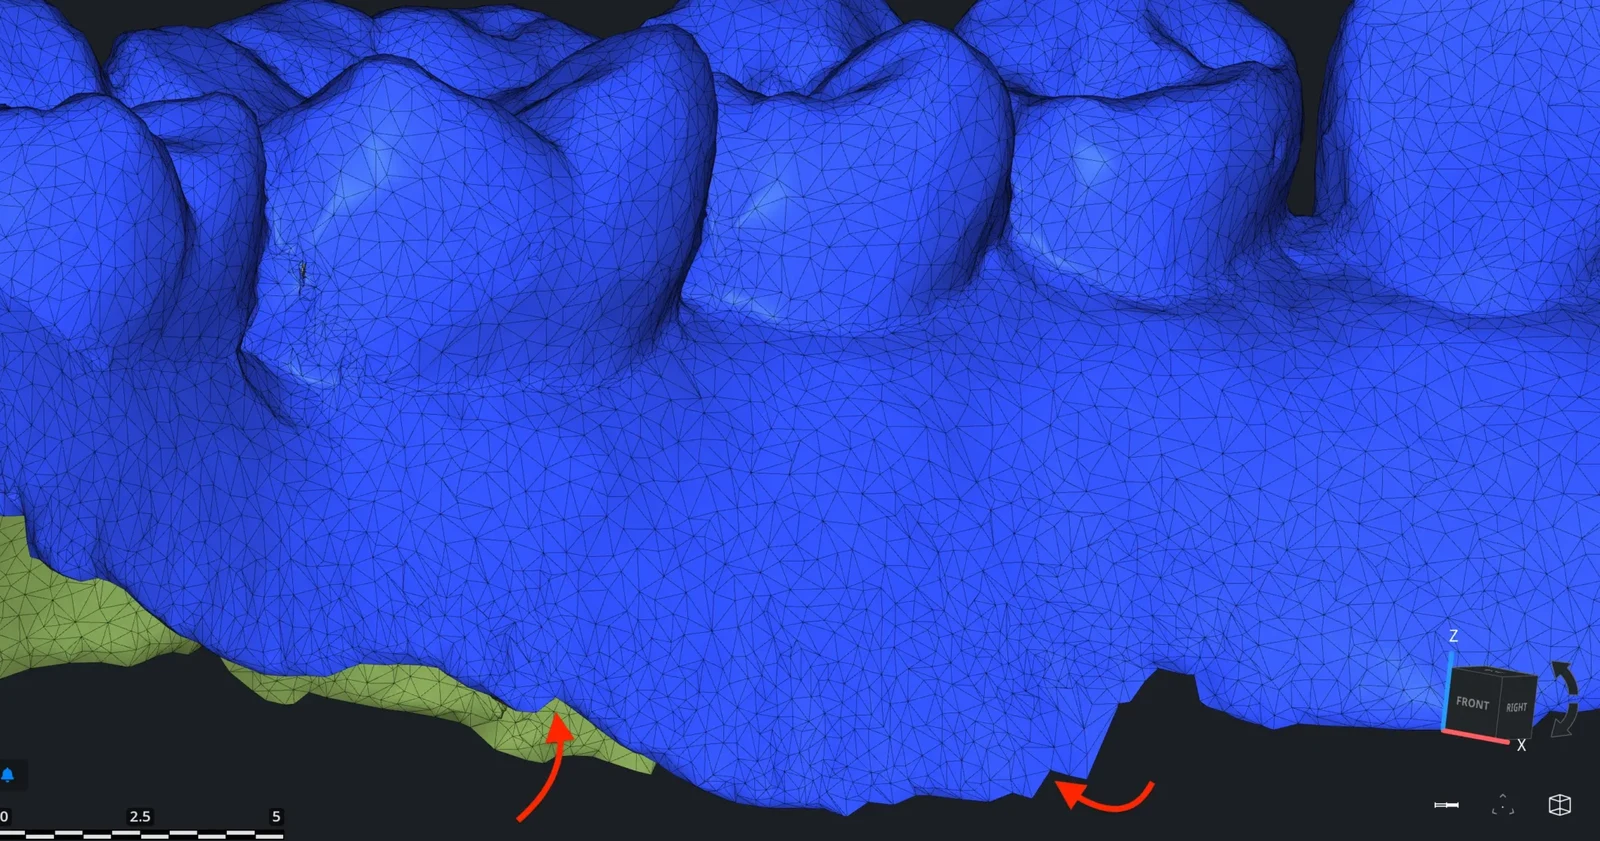
Before Smooth Boundary
In this example, the jaw model contains an open boundary with an uneven edge. As you can see in the zoomed-in view, the boundary follows quite an irregular path which is formed by the mesh triangles. Applying Smooth Boundary helps regularize this edge by smoothing the boundary and producing a more continuous outline.
After Smooth Boundary
After clicking Smooth Boundary, the mesh boundary is automatically regularized. The tool immediately analyzes the open edge and adds triangles where necessary to make the boundary straighter and more consistent.
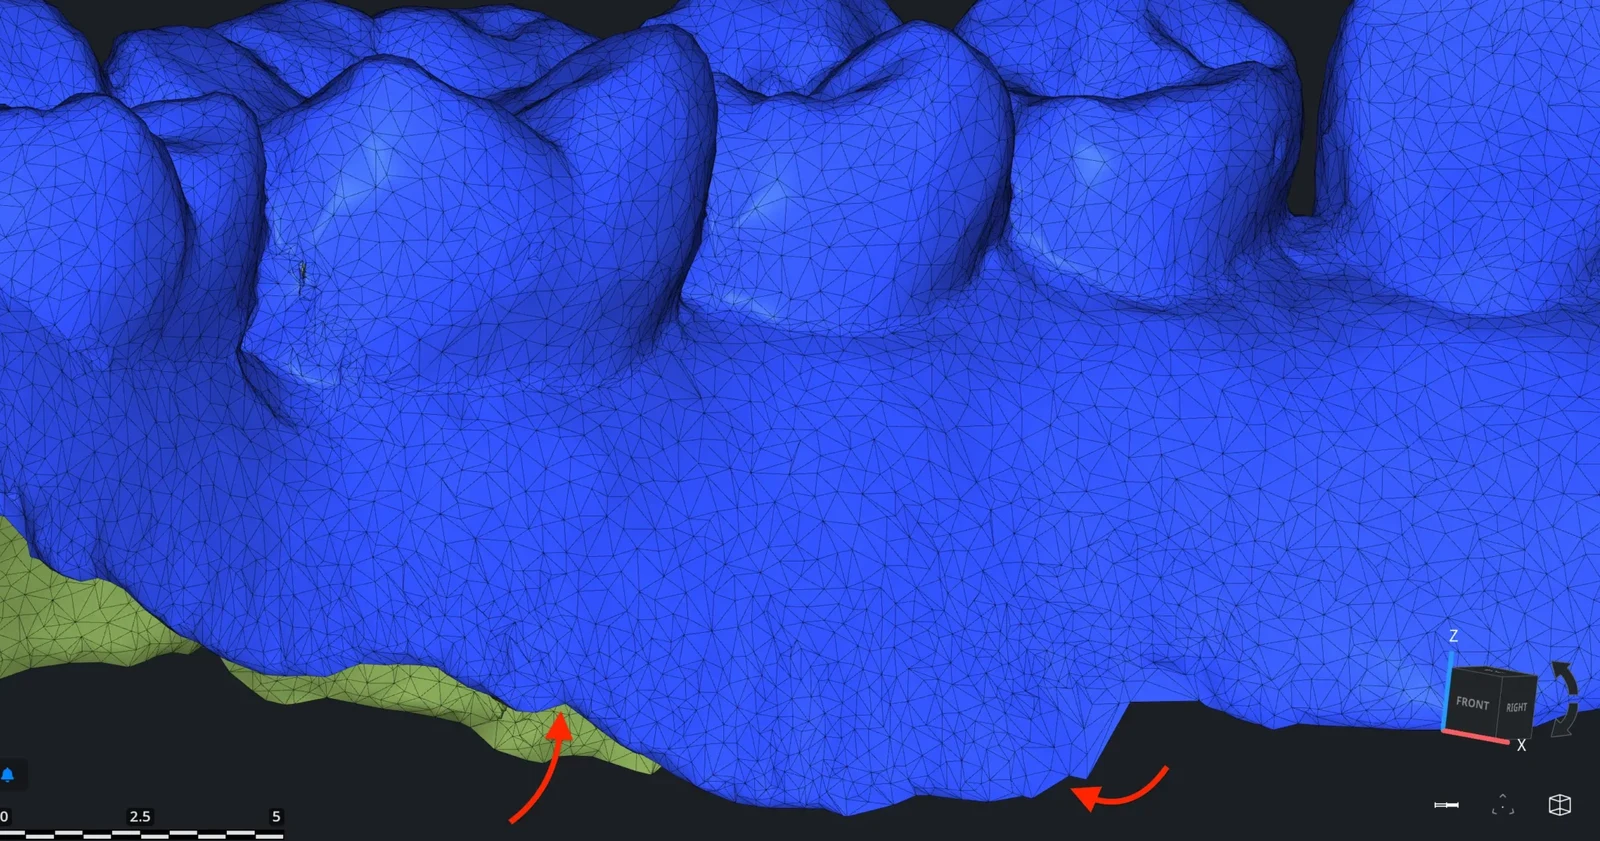
As shown in the highlighted areas, the previously uneven sections of the boundary become smoother and more continuous. The operation is applied at once, without a panel or settings.
What to expect
- Smooth Boundary works on every open boundary of every selected mesh. A new triangle is added only where it does not make a too thin triangle or a sharp fold with its neighbors.
- Existing vertices do not move, so the tool fills notches along the edge but does not straighten large waves of the boundary.
- Small holes can be closed completely. On a real head scan with 29 holes, Smooth Boundary added 1,602 triangles, kept all 37,220 vertices in place and left 19 holes: 10 small holes were closed. If you need to keep some small holes open, check the result.
Smooth Region Boundary
In some cases, it is necessary to smooth the boundary of only a specific part of the mesh rather than the entire model. For example, after selecting a group of faces, the boundary of the selected region may appear irregular or jagged. MeshInspector’s Smooth Region Boundary tool helps address this issue by moving boundary vertices of the selected region to make the boundary smoother.
To access this tool, open the Mesh Repair tab and click the dropdown next to Smooth Boundary, then select Smooth Region Boundary, as highlighted below.

Note: This button remains inactive until you select faces on the mesh. The tool becomes available only when a region of the mesh is selected.
Before Smooth Region Boundary
To activate this tool, we first selected a region of the mesh. In this example, we opened the Select tab, clicked Select Primitives, chose Lasso, and selected several faces on the jaw model. As shown in the image below, the selected faces are highlighted in red. The boundary of this selected region forms an uneven and irregular edge.
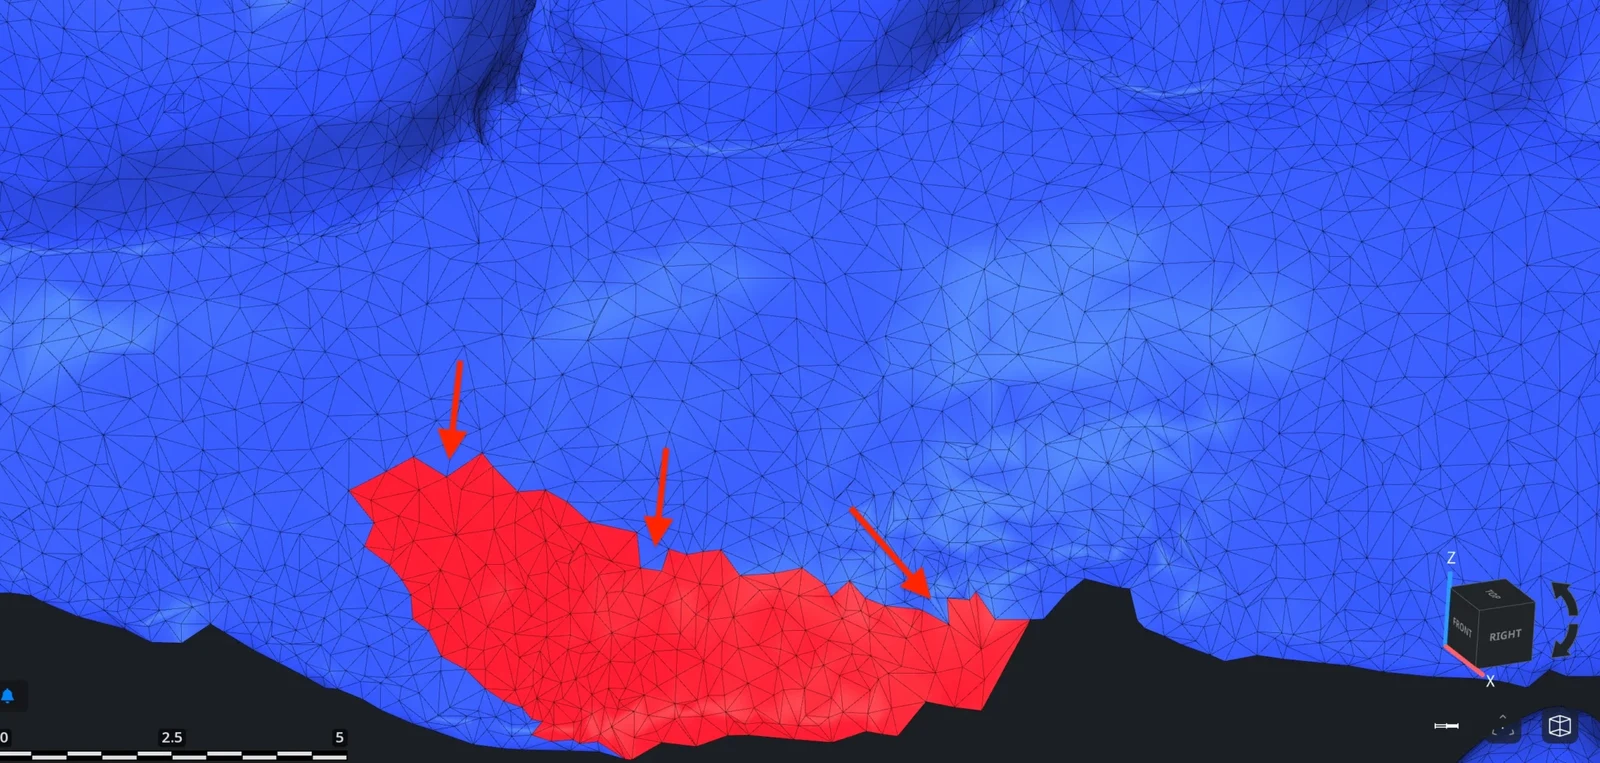
Once faces are selected, the Smooth Region Boundary tool becomes active and available for use.
After Smooth Region Boundary
After applying Smooth Region Boundary, the boundary of the selected region becomes smoother and more regular. The tool adjusts the positions of the boundary vertices of the selected faces to produce a more continuous outline.
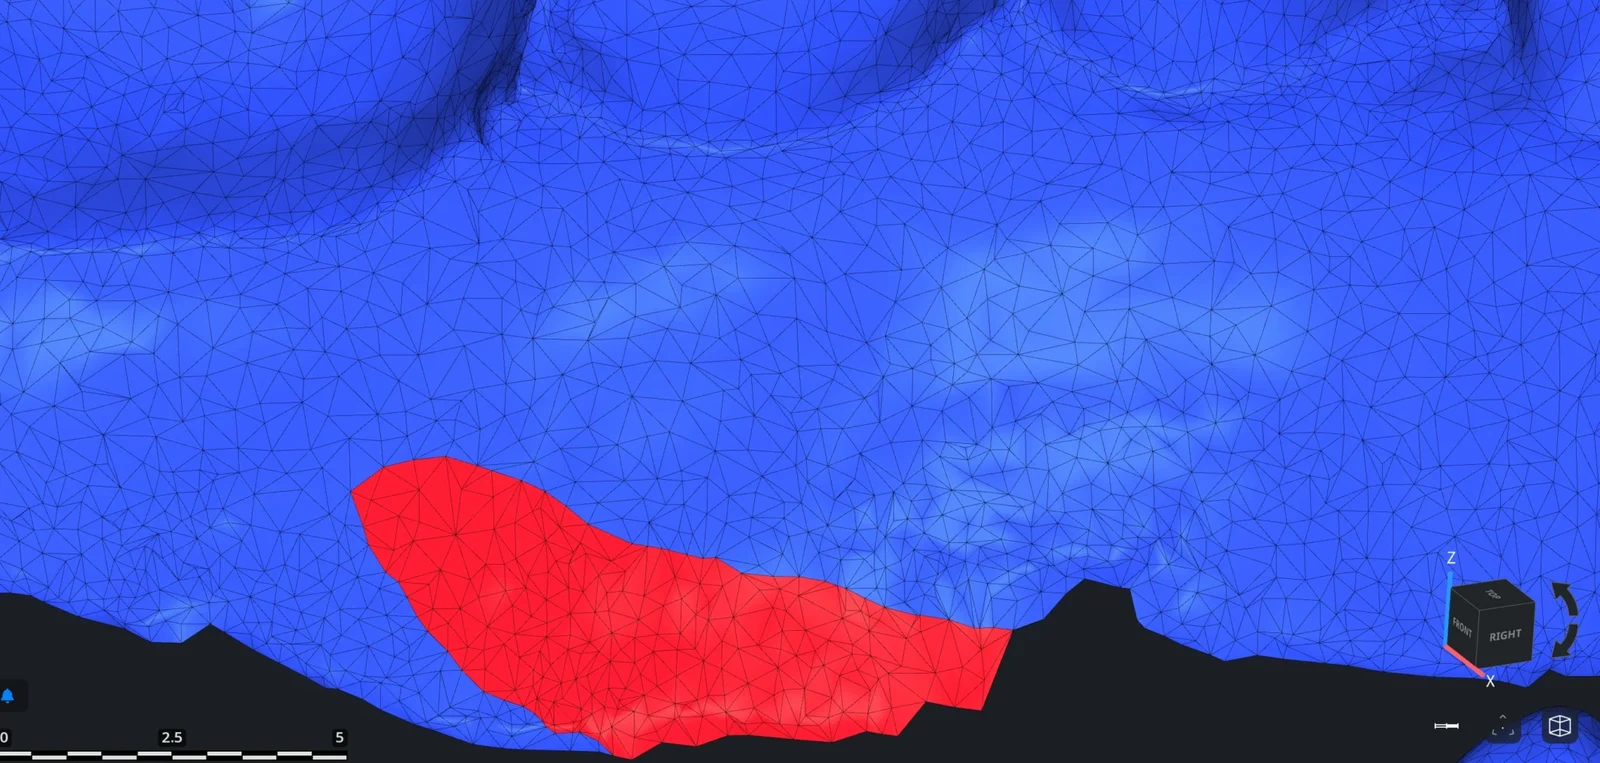
As shown in the example, the previously uneven edges of the selected region are now more consistent and better aligned with the surrounding mesh, resulting in a cleaner boundary.
What to expect
- Select exactly one mesh with selected faces. Without selected faces the button stays inactive, and its tooltip says "Selected ObjectMesh should have selected faces."
- The tool moves the vertices on the outline of the selection and slightly changes the triangles next to it, so the surface near the outline changes a little.
- The tool has no settings.
To close tiny gaps along a boundary, where two edges run next to each other with almost the same vertices, use Unite Close Vertices instead.


