
Flip Normals turns the selected meshes inside out: every normal starts to point the other way. If one mesh is selected and it consists of several separate parts, you can flip just one part. You need it when a whole model comes in inside out, or when one part of a model faces inward while the rest is correct.
To find and fix the wrong parts automatically, try Orient Mesh Normals first. Use Flip Normals when you know which part to flip, or when you want a model to face the opposite way.

Flip a whole mesh
- Select one or more meshes in the Scene tree.
- Click Mesh Repair › Flip Normals.
The normals flip at once, without a panel. The exception is one selected mesh with several connected components (Components above 1 in the Information panel): then Flip Normals opens a panel, and you click Flip All there.
Flip one component
When exactly one mesh is selected and it has more than one connected component, Flip Normals opens a panel with three buttons:
| Button | What it does |
|---|---|
| Flip All | Flips the whole mesh and closes the panel. |
| Flip Selected Components | Flips the components that contain selected triangles and closes the panel. |
| Enable Pick Component Mode | Lets you flip components by clicking them in the viewport. While it is on, the button reads Disable Pick Component Mode and the other two buttons are unavailable. |
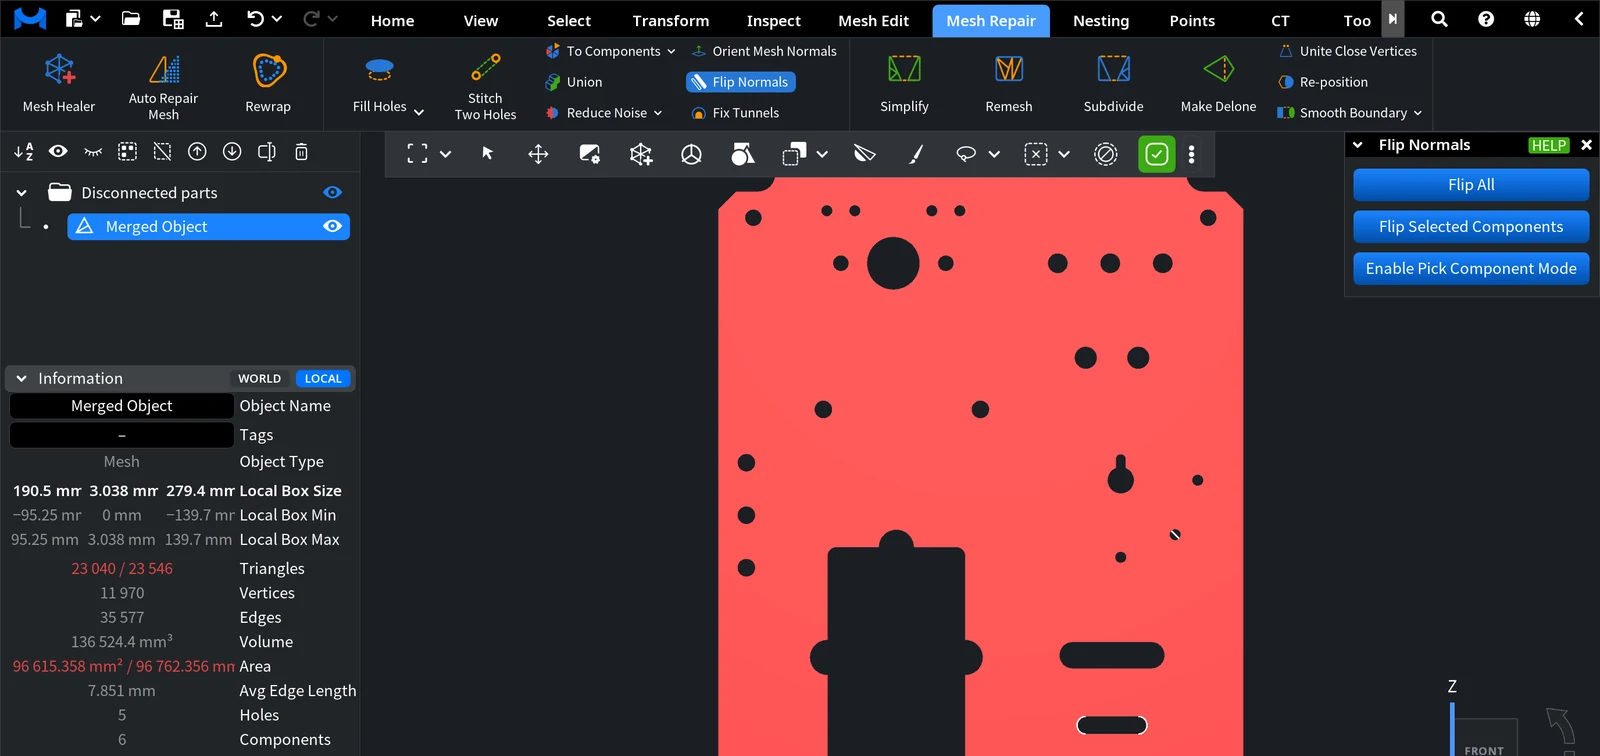
To flip components by clicking:
- Select the mesh and click Mesh Repair › Flip Normals.
- Click Enable Pick Component Mode. The panel shows Click on the components to change the normals.
- Click each inside-out component in the viewport. Every click flips the component under the cursor; a second click flips it back.
- Click Disable Pick Component Mode and close the panel.
To flip components by selection instead, select at least one triangle of each component (for example with Select › Select Primitives, or Select › Select Largest Component for the largest one), then click Mesh Repair › Flip Normals and Flip Selected Components.
Each flip is one step in the history, so Undo (Ctrl+Z, or Cmd+Z on macOS) reverts it.
Check the result
To see which way the normals point, open Inspect › Show Normals (see Show Normals). In the example below the surface is a flat mesh:
- The white lines are the normals and show the direction in which they point.
- The side of the mesh toward which the normals point is blue.
- The opposite side is olive green.
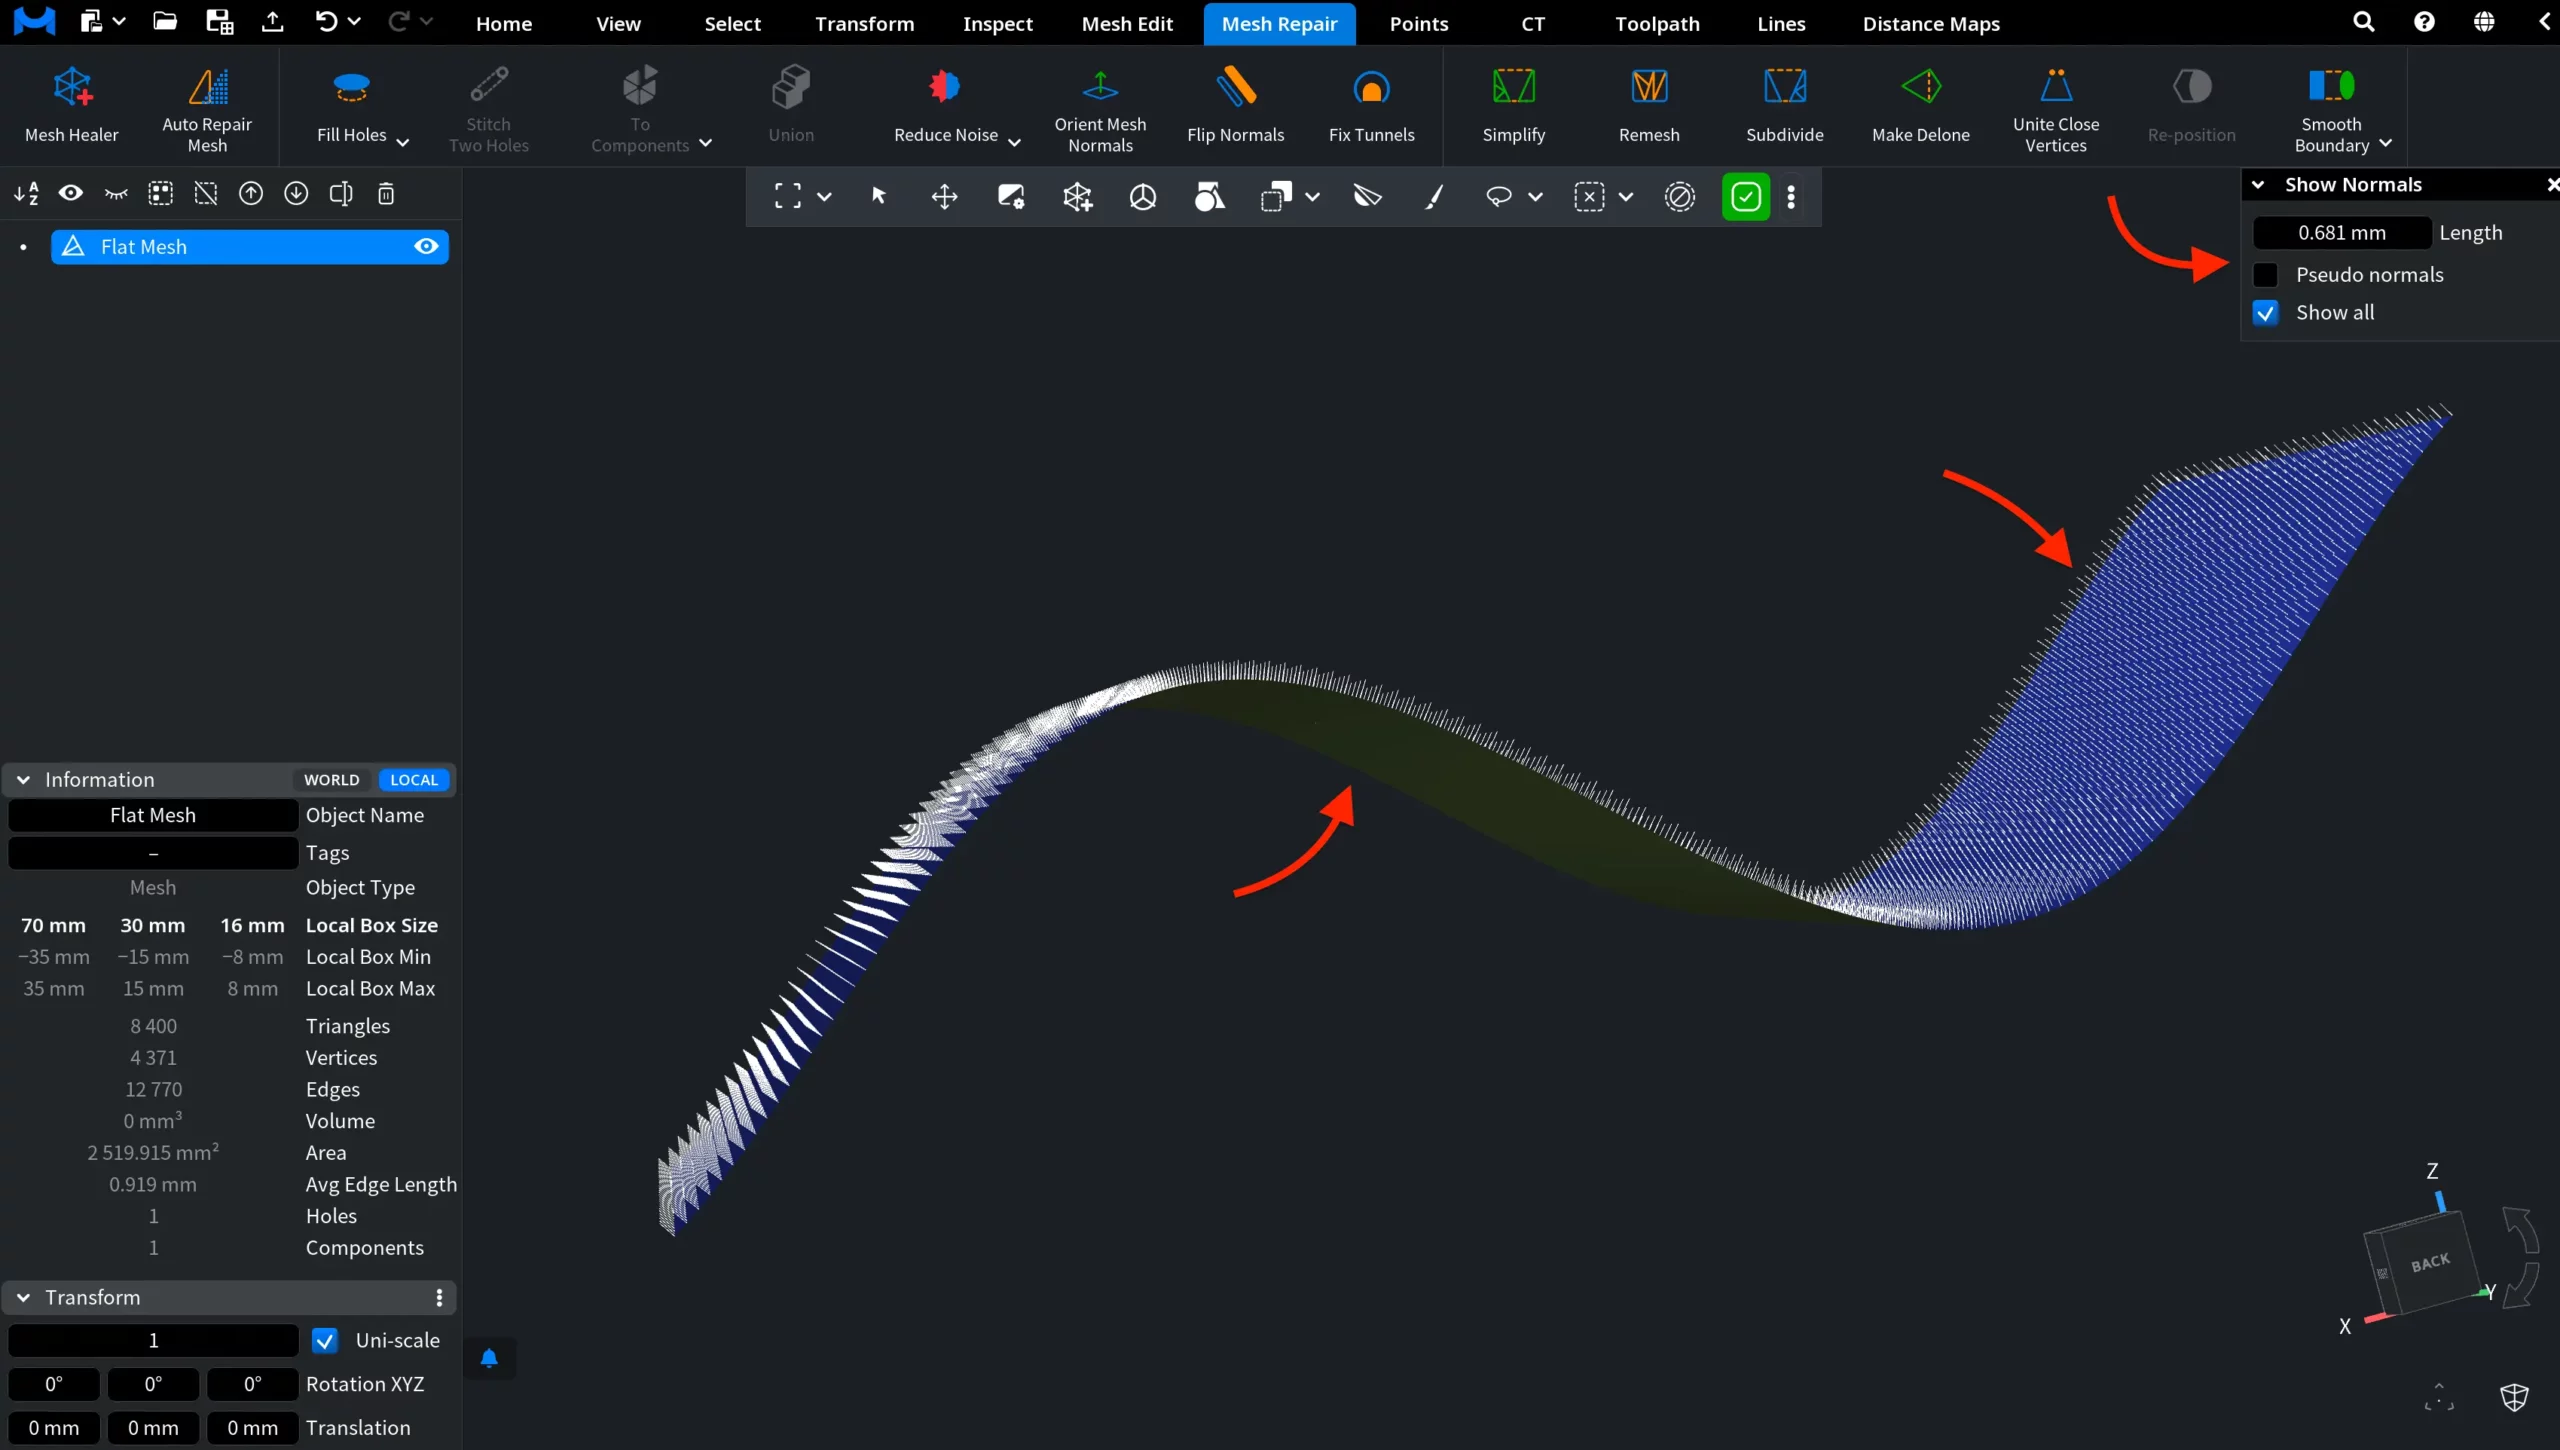
After Flip Normals, the colors of the two sides swap: the side that was blue is now olive green, and the opposite side is blue. The faces of the mesh are reversed, and the normals point the other way.
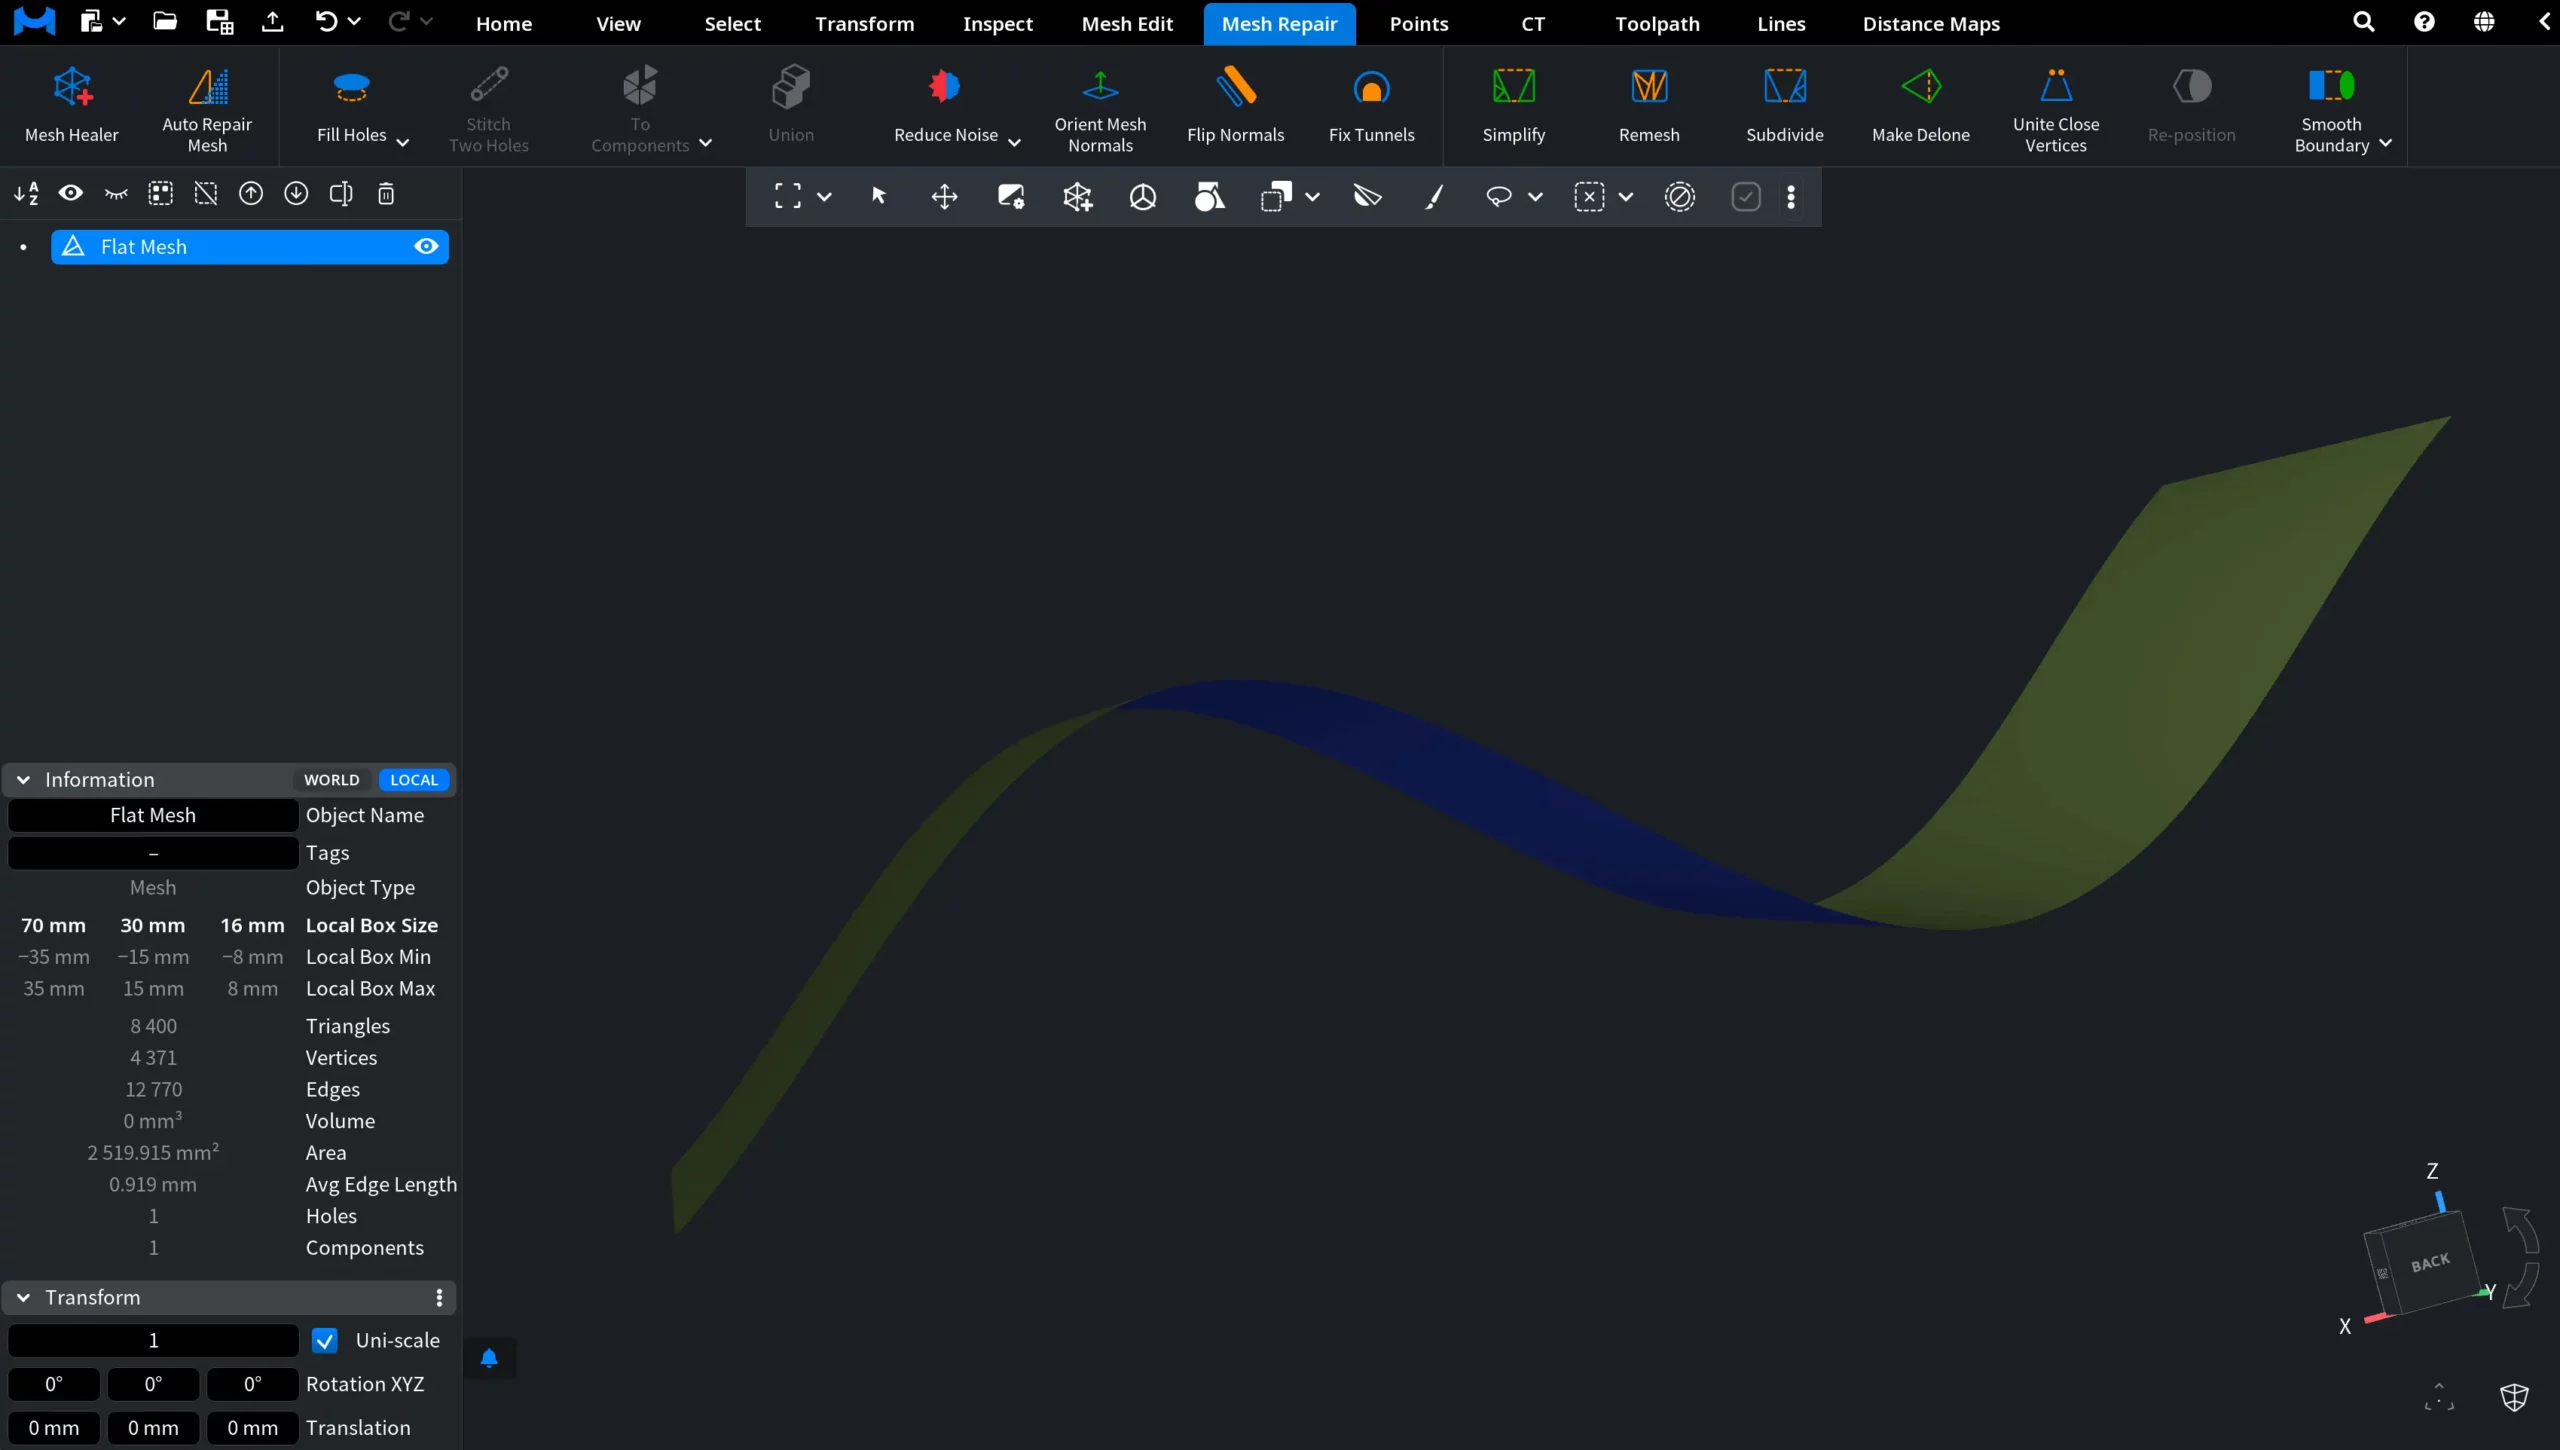
You do not need Show Normals for this check: the colors of the two sides already show the result.


