


A mesh often consists of several pieces that do not touch each other: the parts of an assembly, or a scan with small floating debris around the main surface. Each such piece is a connected component, and the Information panel shows their number in Components. Three tools in one ribbon group work with components:
| Tool | What it does | Result in the Scene tree |
|---|---|---|
| To Components | Makes a separate object from each connected component | New objects replace the original |
| Keep Largest Component | Deletes all components except the largest one | The same object, without the other parts |
| Force Components | Cuts one mesh into the number of parts you set | New objects replace the original |
To Components is a button on the Mesh Repair tab. Keep Largest Component and Force Components are in its drop-down list: click the arrow next to To Components.

To Components
To Components makes a separate mesh object from each connected component of the selected mesh. Use it to hide, color, edit or export the parts of a model one by one, or to find the pieces you want to delete.
- Select one or more meshes in the Scene tree.
- Click Mesh Repair › To Components.
The tool works at once, without a panel:
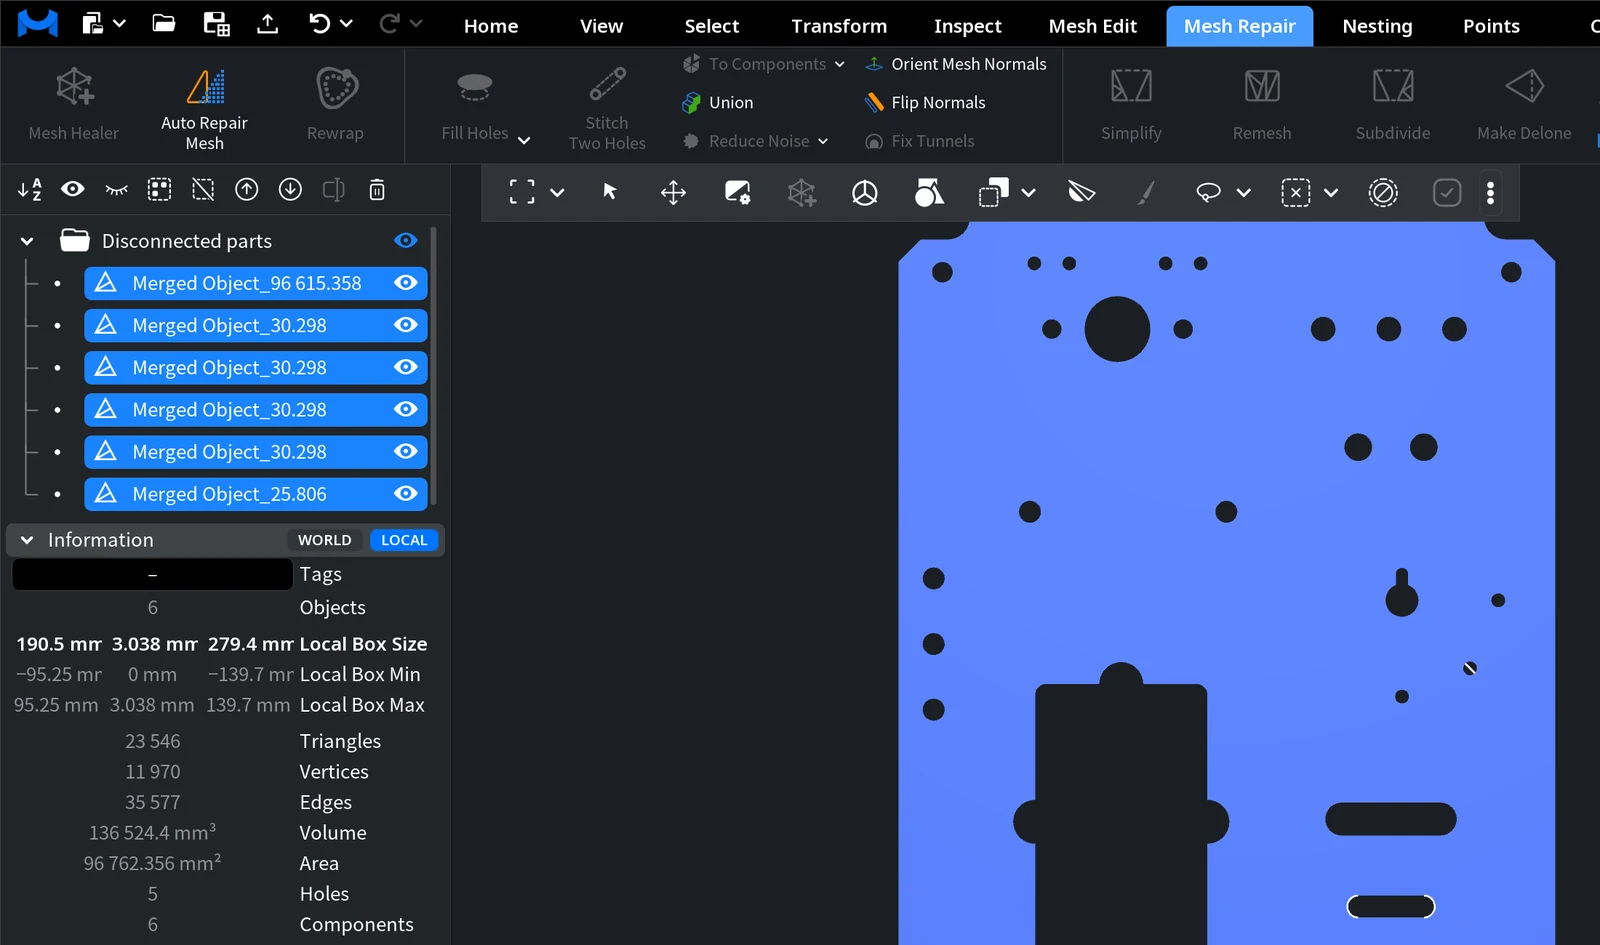
- Each component becomes a new object. Its name is the name of the original object plus the area of the component, so the parts are easy to tell apart by size.
- The new objects replace the original object in the Scene tree and stay selected. Objects that were nested in the original move into the first new object.
- At most 100 components of a mesh get their own objects. If a mesh has more components, the 100 largest get their own objects, and all smaller ones are collected in one more object. MeshInspector shows a warning about it.
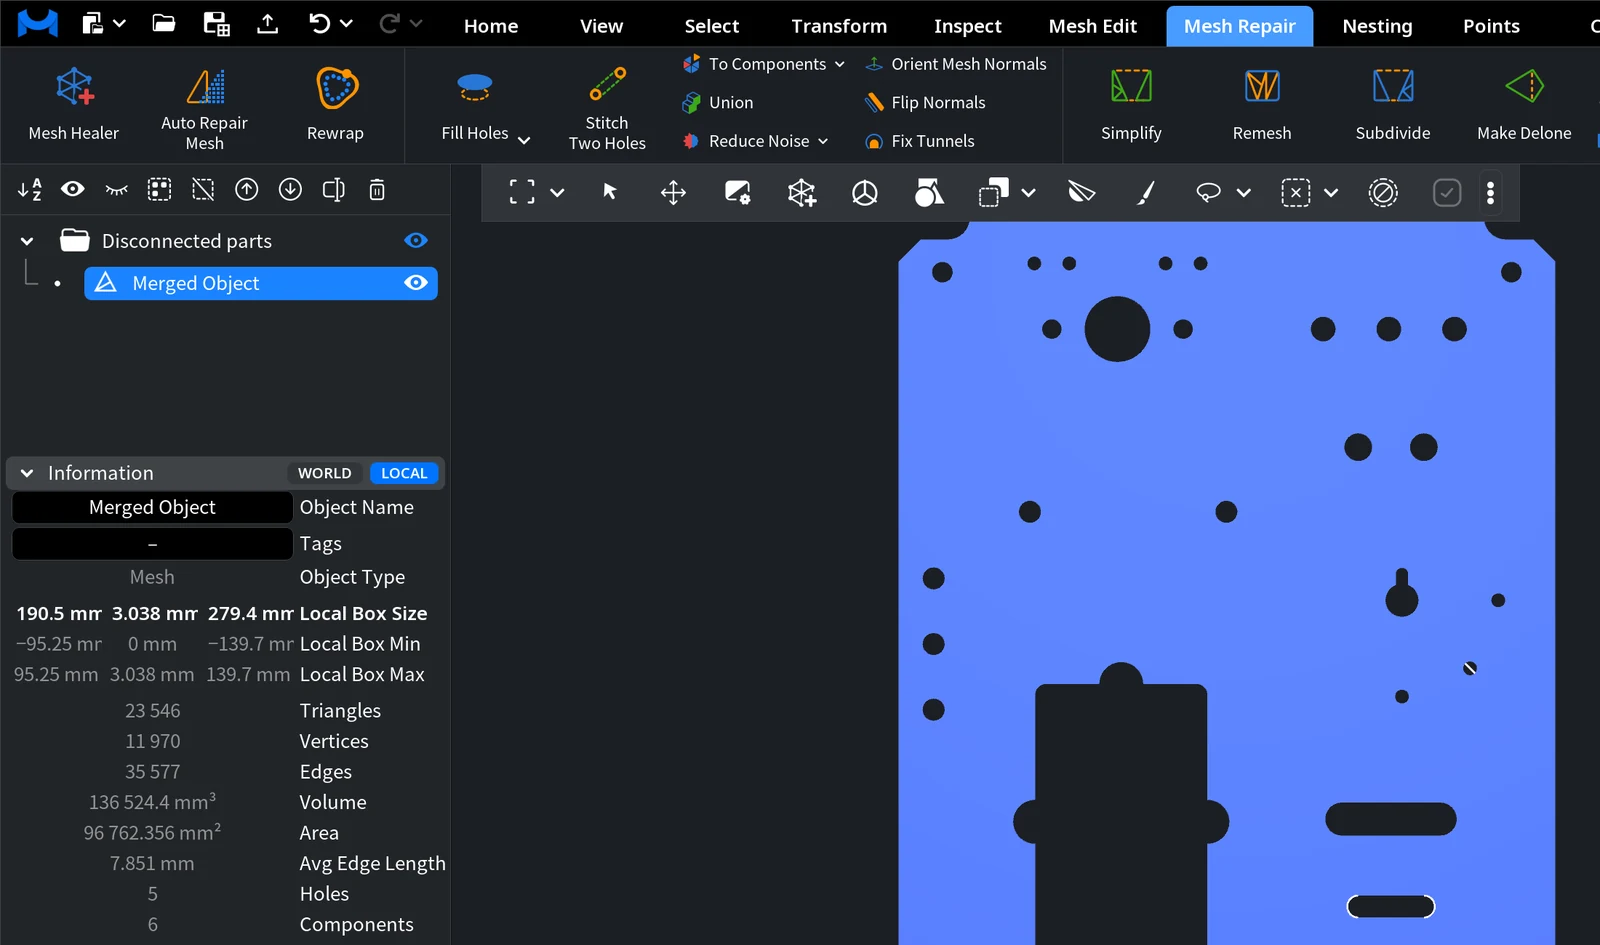
In this example, a plate model came with five small loose fragments, so the Information panel shows 6 Components:
After To Components, the Scene tree lists six objects: the plate, whose name ends with its area (96 615.358), and five fragments with areas of about 26 to 30.
The button is unavailable when every selected object has only one component; the tooltip then says All selected objects have only one component. To get the original object back, use Undo (Ctrl+Z, or Cmd+Z on macOS).
If the mesh has selected triangles, To Components and Keep Largest Component work only with them, and the unselected part of the mesh is not kept. To work with the whole mesh, clear the selection first with Select › Clear Selections.
Keep Largest Component
Keep Largest Component deletes all connected components of the selected mesh except the largest one. It is the quickest way to remove floating debris from a scan.
- Select one or more meshes in the Scene tree.
- Click the arrow next to Mesh Repair › To Components and choose Keep Largest Component.
- Choose the Criterion and click Apply. MeshInspector deletes the other components and closes the panel.
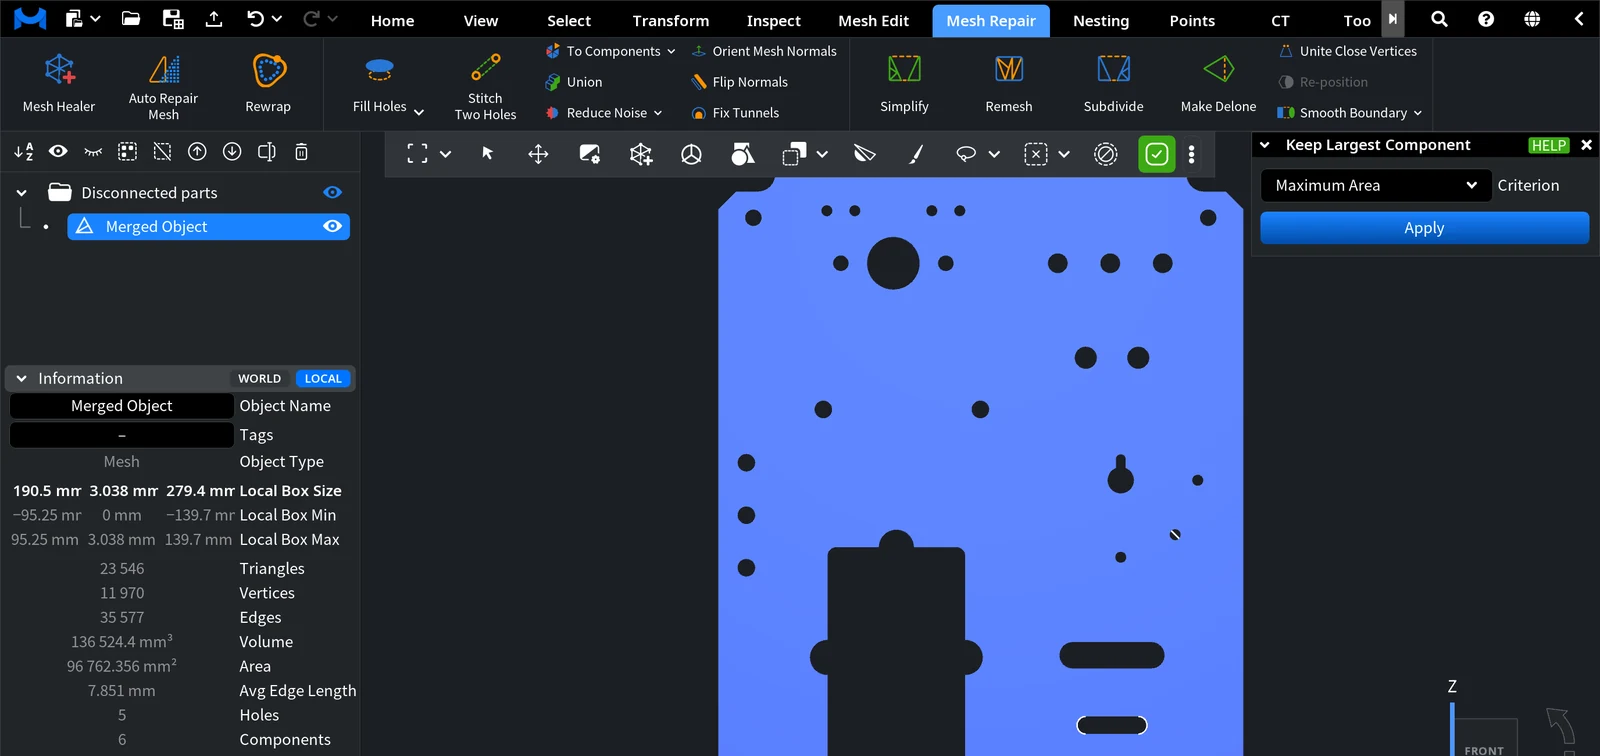
| Criterion | Which component stays |
|---|---|
| Maximum Area (default) | The component with the largest surface area |
| Maximum Absolute Volume | The component with the largest absolute volume, whatever its sign is |
| Maximum Positive Volume | The component with the largest positive volume (its normals look outside) |
| Minimum Negative Volume | The component with the smallest negative volume (its normals look inside) |
The volume criteria are intended for closed or almost closed components; the panel shows this note when you choose one. For a scan with debris, keep the default Maximum Area.
On the plate from the example above, Keep Largest Component with Maximum Area left 1 component. The Holes count fell from 5 to 0, because the deleted fragments were open pieces.
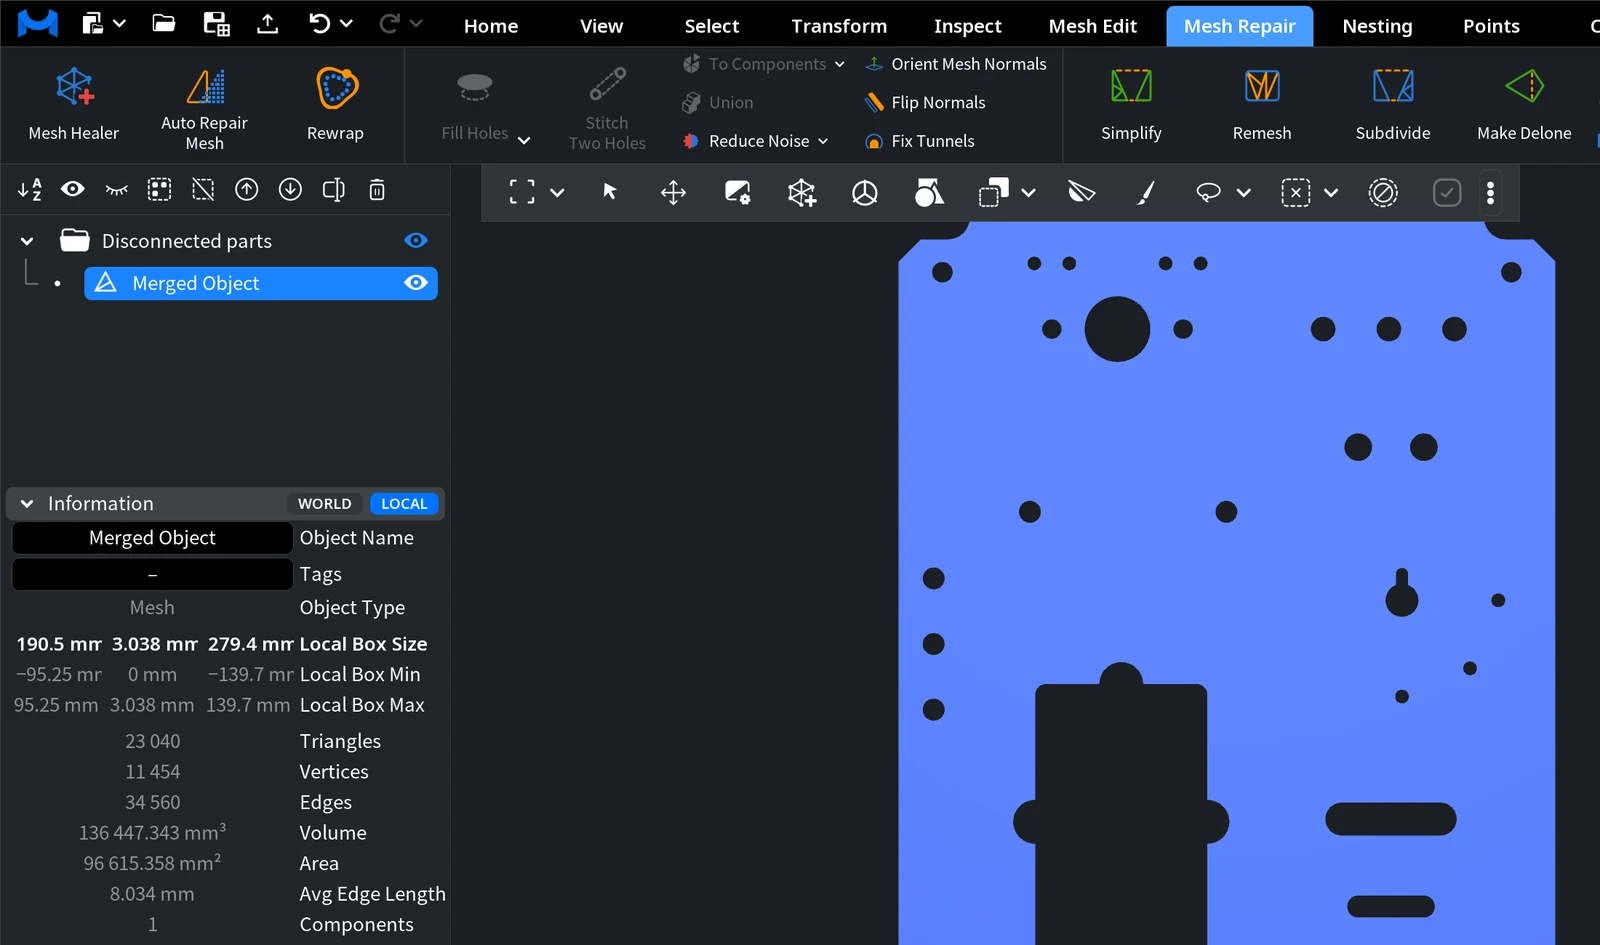
The result stays in the same object, and Undo returns the deleted parts. To look at the small parts before you delete them, run To Components first. To delete only the parts below a set share of the area (Minimum Area) and keep the large ones, use the Disconnected Parts check of the Mesh Healer; it also joins large parts that intersect.
Force Components
Force Components cuts one mesh into the number of parts you set, whether or not the mesh has separate components.
- Select exactly one mesh in the Scene tree.
- Click the arrow next to Mesh Repair › To Components and choose Force Components.
- Set Components, the number of objects to split the mesh into: type a value or use the – and + buttons. The default is 2, the maximum is 128.
- Click Apply.
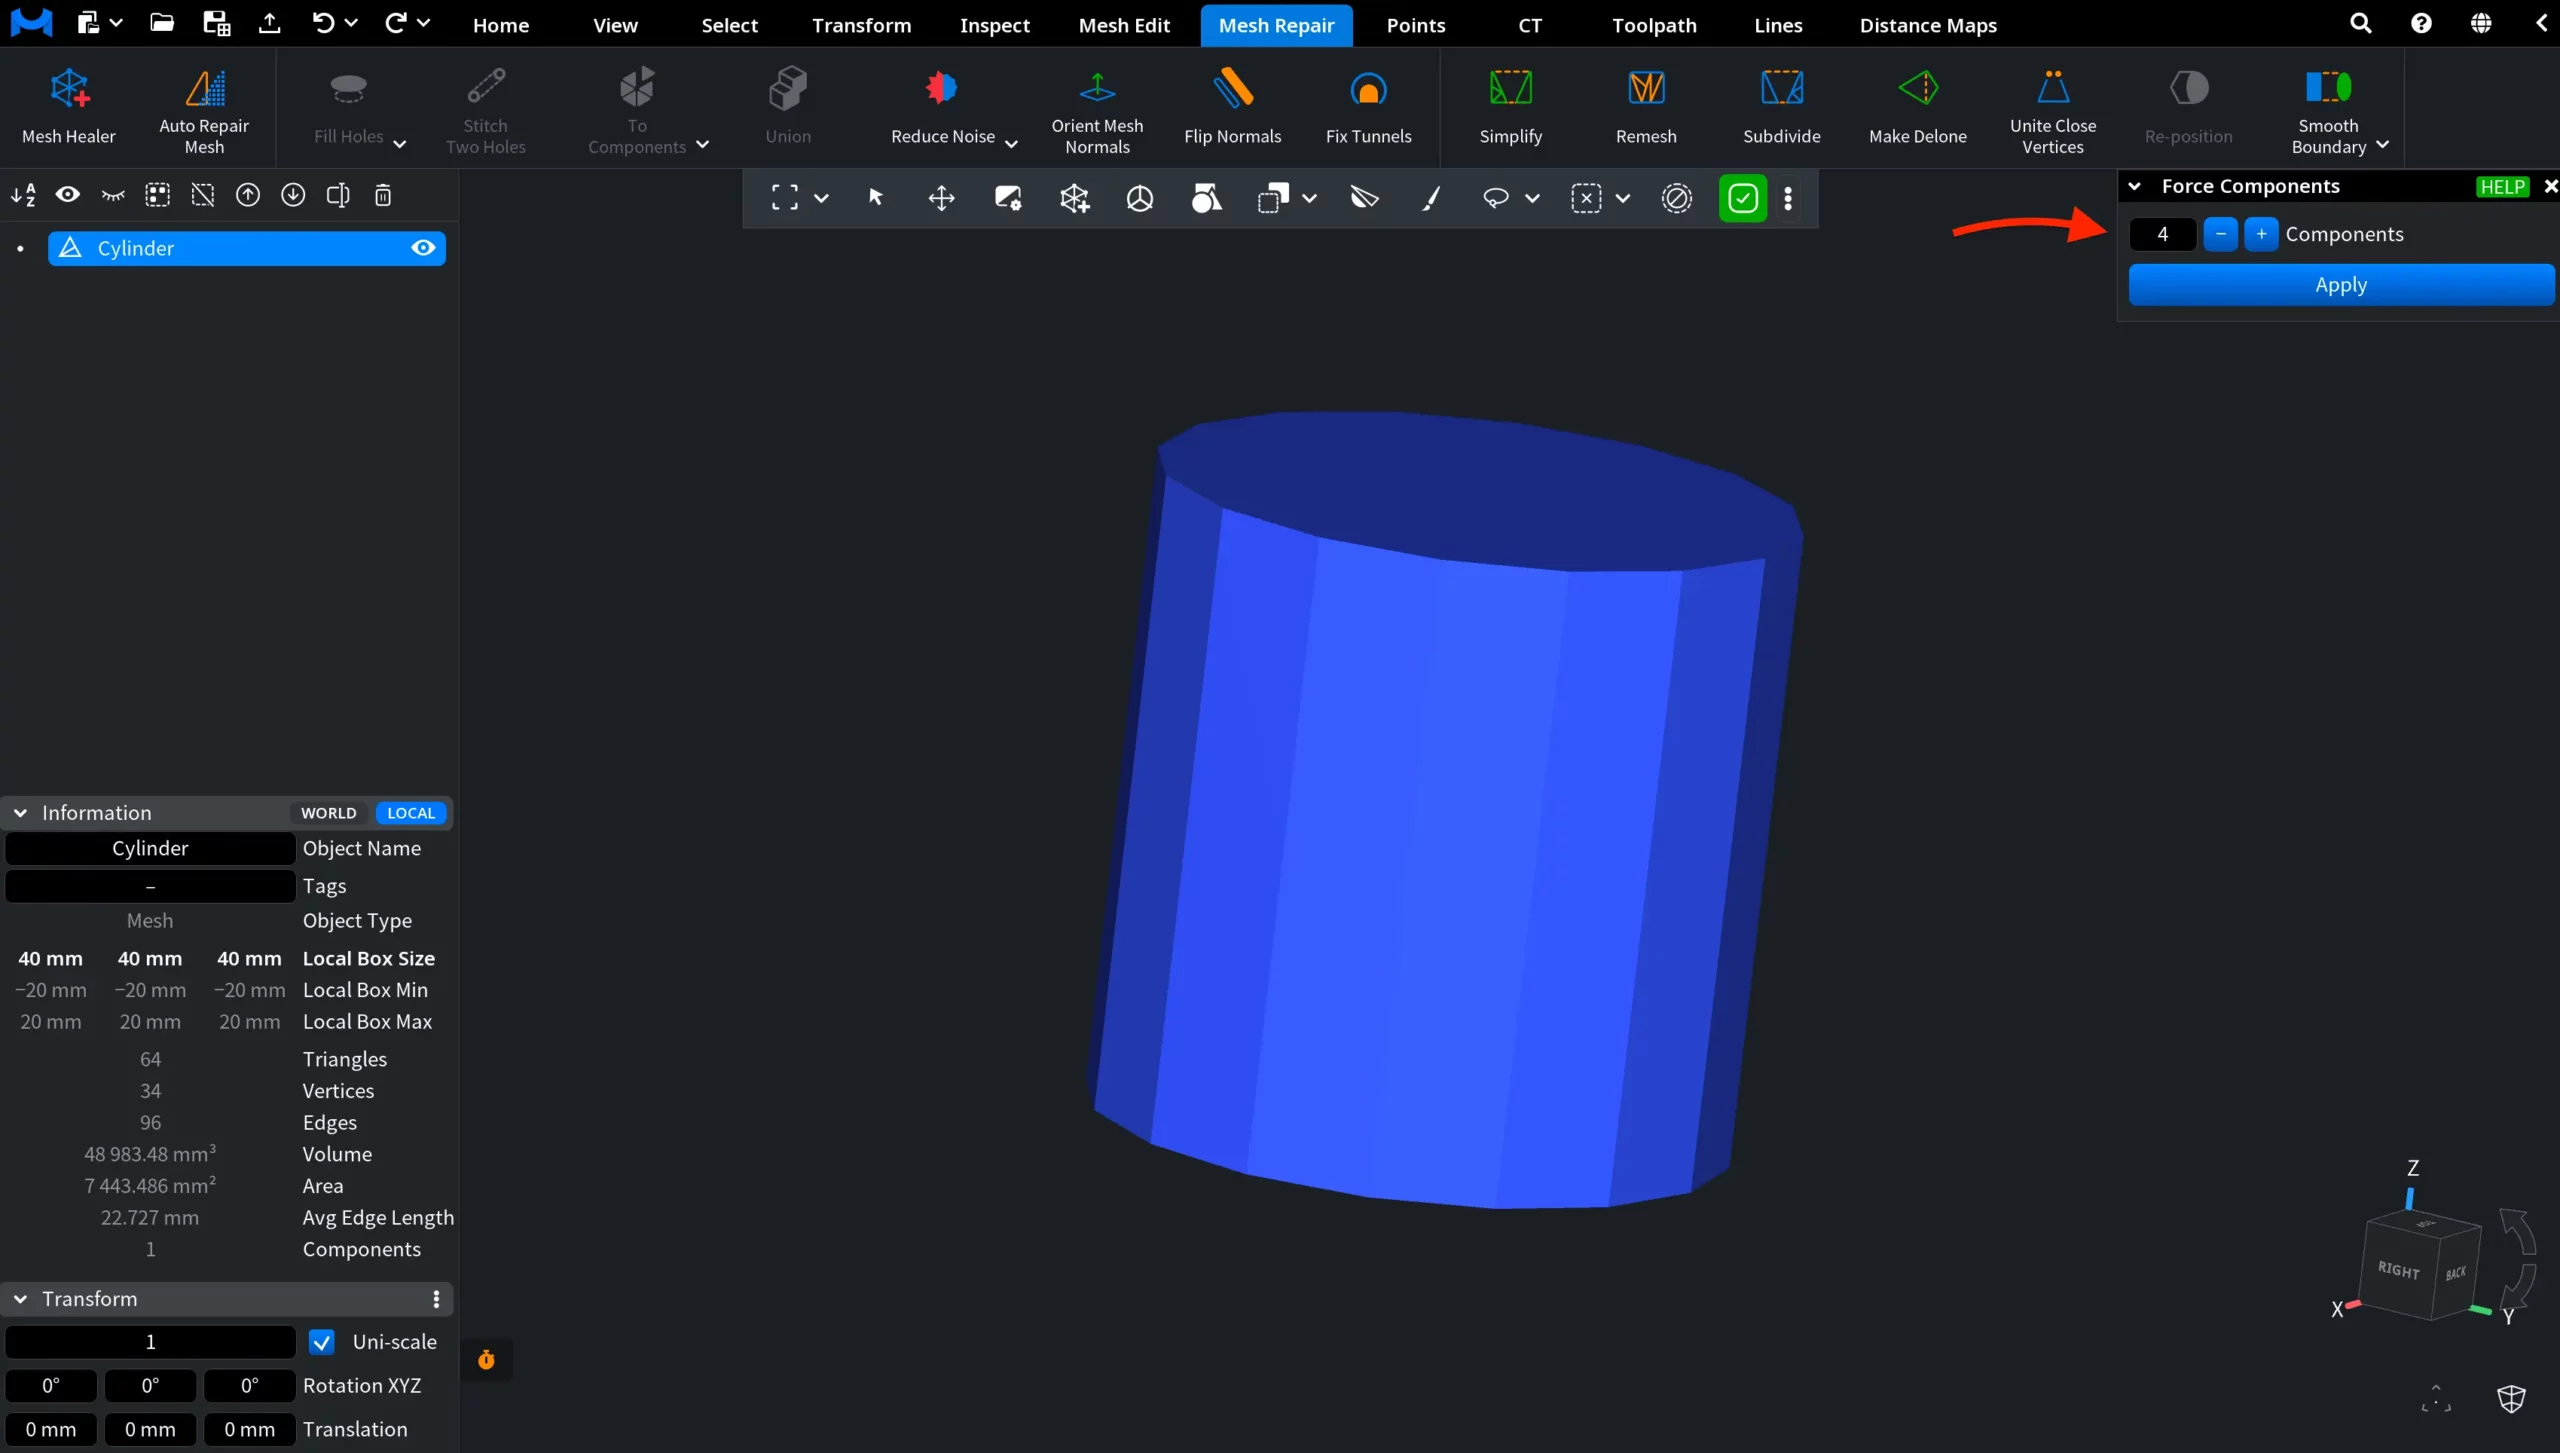
MeshInspector takes the triangles in the order in which they are stored in the mesh and gives each part the same number of triangles (the last part can get fewer). The cut does not follow the shape of the model: depending on the triangle order in the file, a part can be one solid piece or a set of patches from different places. The parts are named after the original object with _1, _2 and so on added, they replace the original mesh in the Scene tree, and the panel closes. Undo returns the original mesh.
In the example below, a cylinder was split into four parts; two of them are hidden to show the cut.
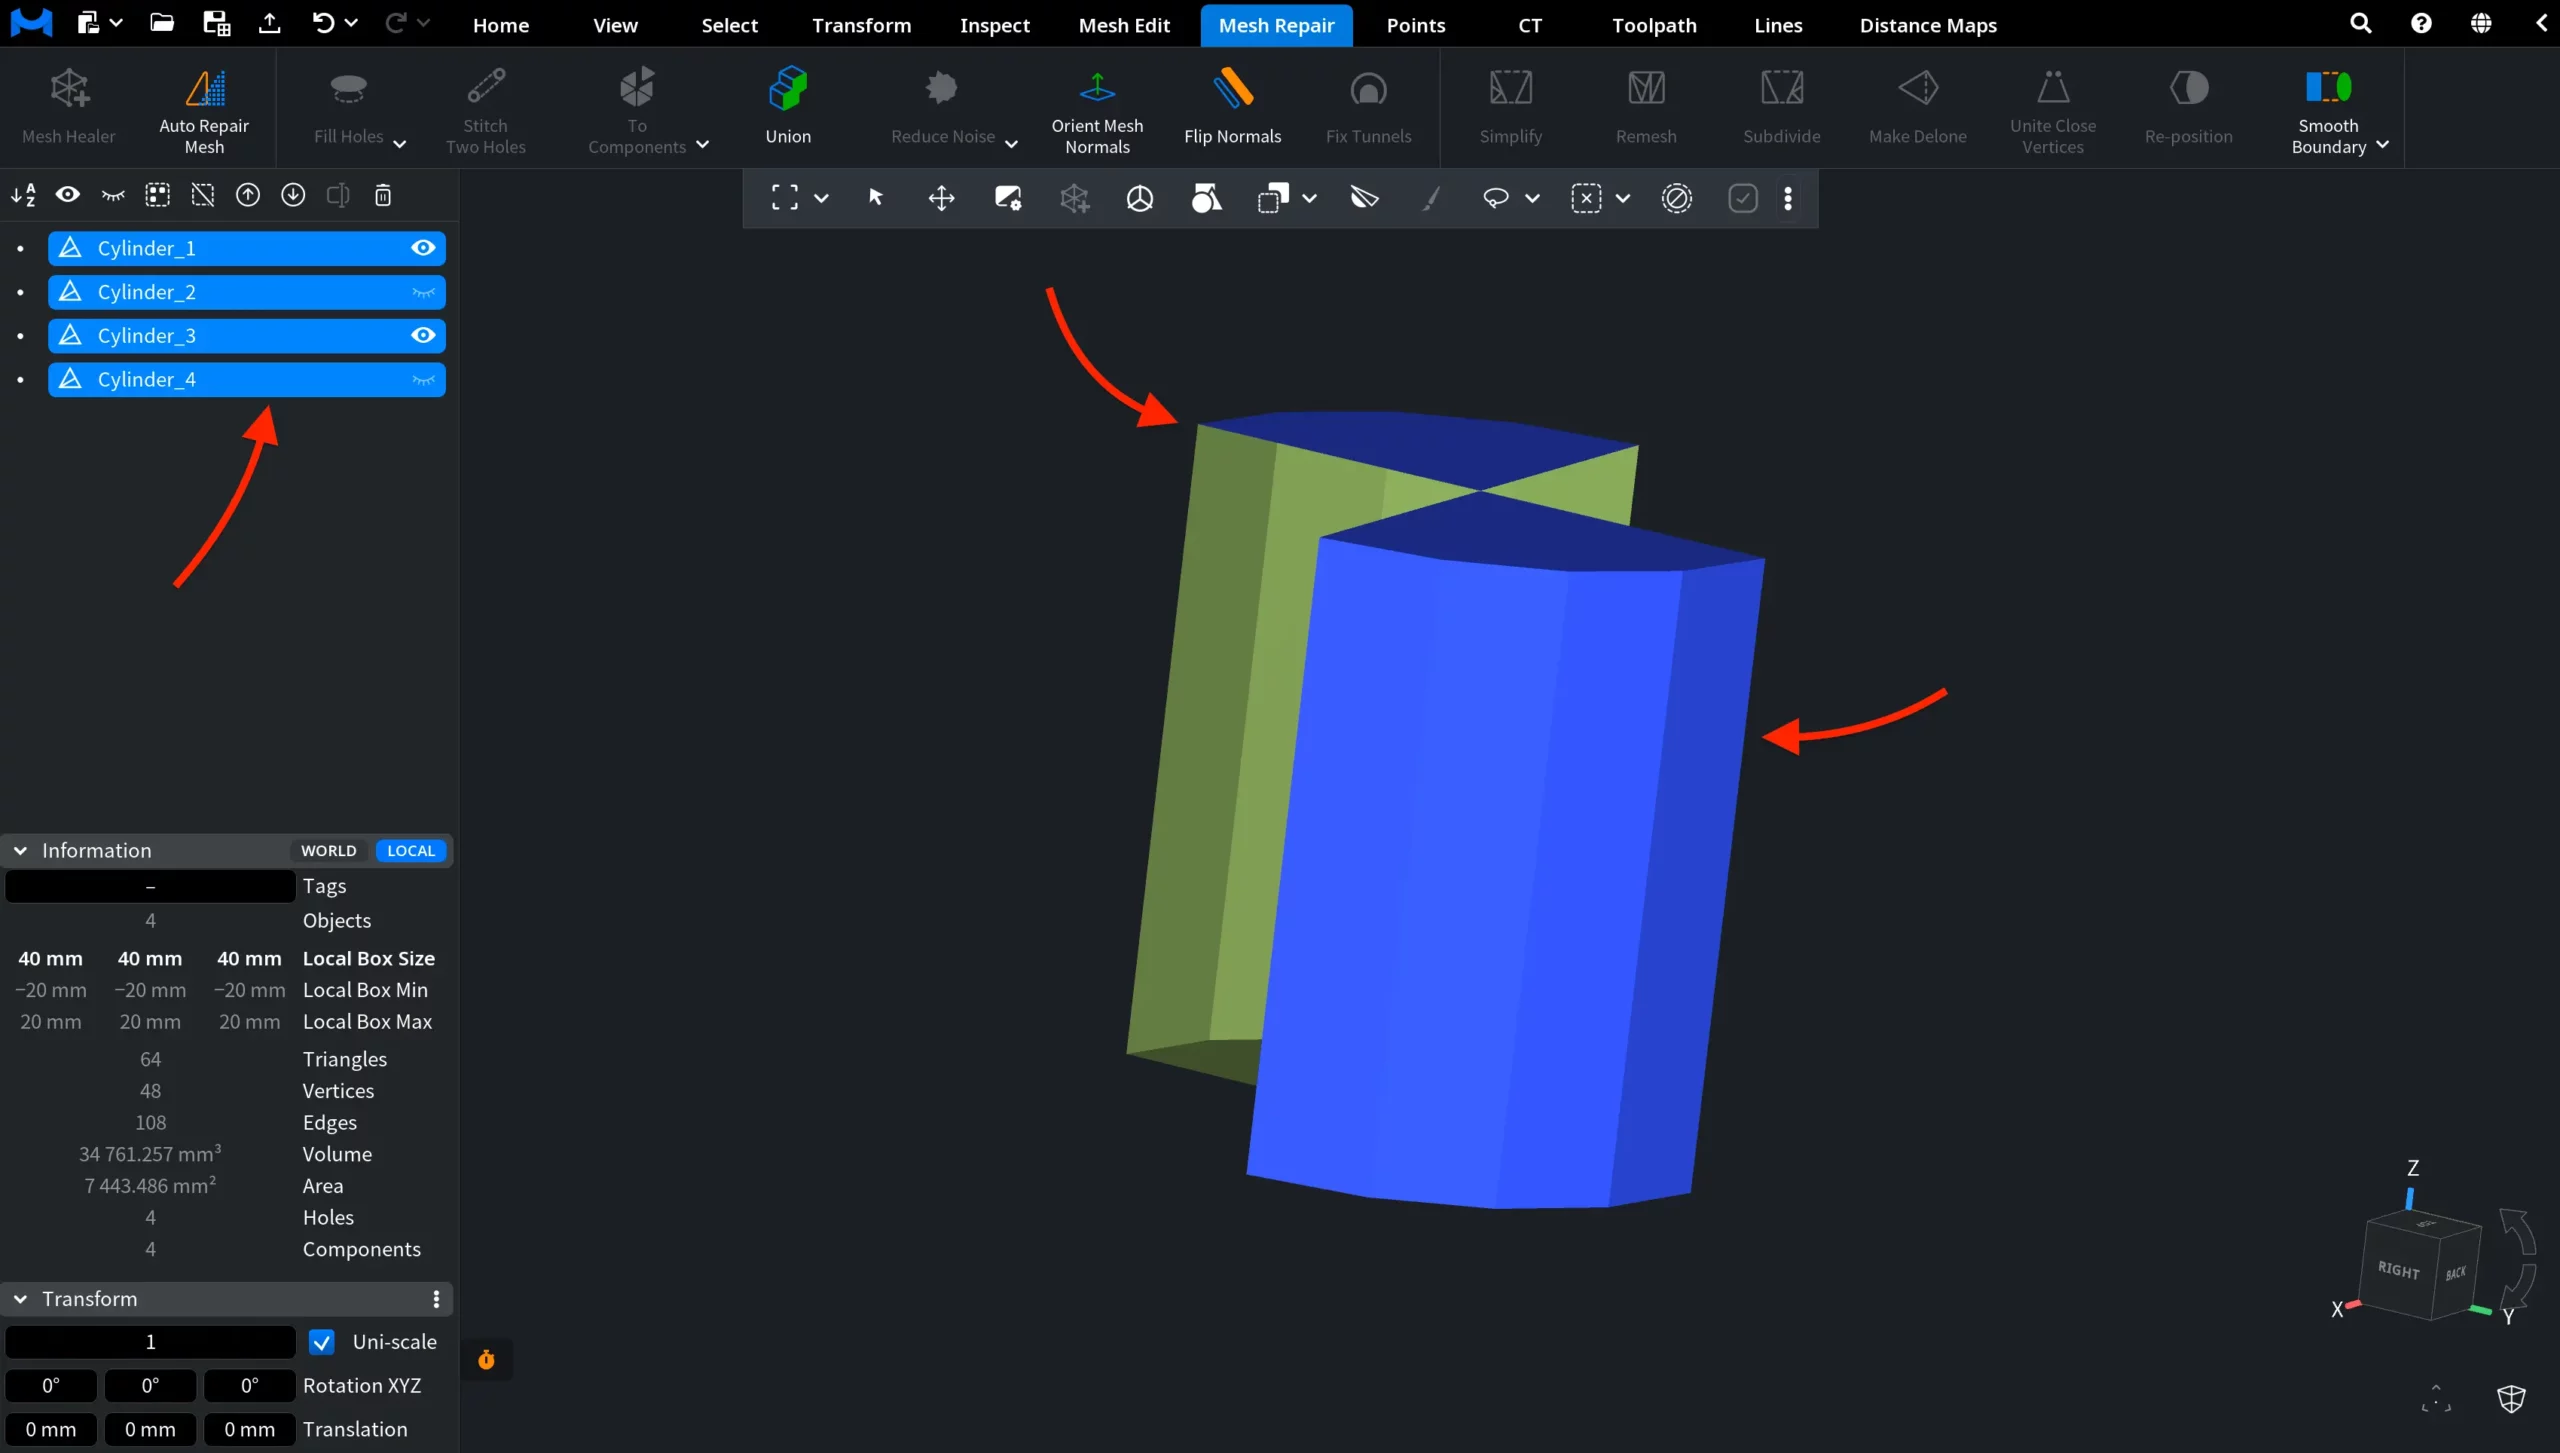
Use Force Components when you need a mesh as several objects with a similar number of triangles and the shape of the cut does not matter. To split a model into its real parts, use To Components.
Components of lines
The Lines tab has the same group: Lines › To Components with Keep Largest Component and Force Components in the drop-down list.
- To Components makes a separate lines object from each connected polyline. The name gets the length of the polyline added.
- Keep Largest Component keeps the longest polyline and deletes the others. When only lines objects are selected, it works at once, without a panel.
- Force Components works only with one selected mesh, also when you open it from the Lines tab.
Point clouds have their own tools on the Points tab: see Force Components for point clouds.


