Make X, Make Y, and Make Z, located under the Transform tab, are quick orientation tools that rotate an object based on a selected feature. Each command places the feature in the plane perpendicular to the corresponding global axis, aligning the feature normal with that axis.

These tools work with meshes and point clouds that have a suitable child feature, such as a plane. Hold Shift while applying a command to orient the object in the opposite direction.
Make X
Make X instantly rotates the object so that the selected feature is oriented in the YZ plane and its normal is aligned with the X axis. Hold Shift to reverse the orientation.

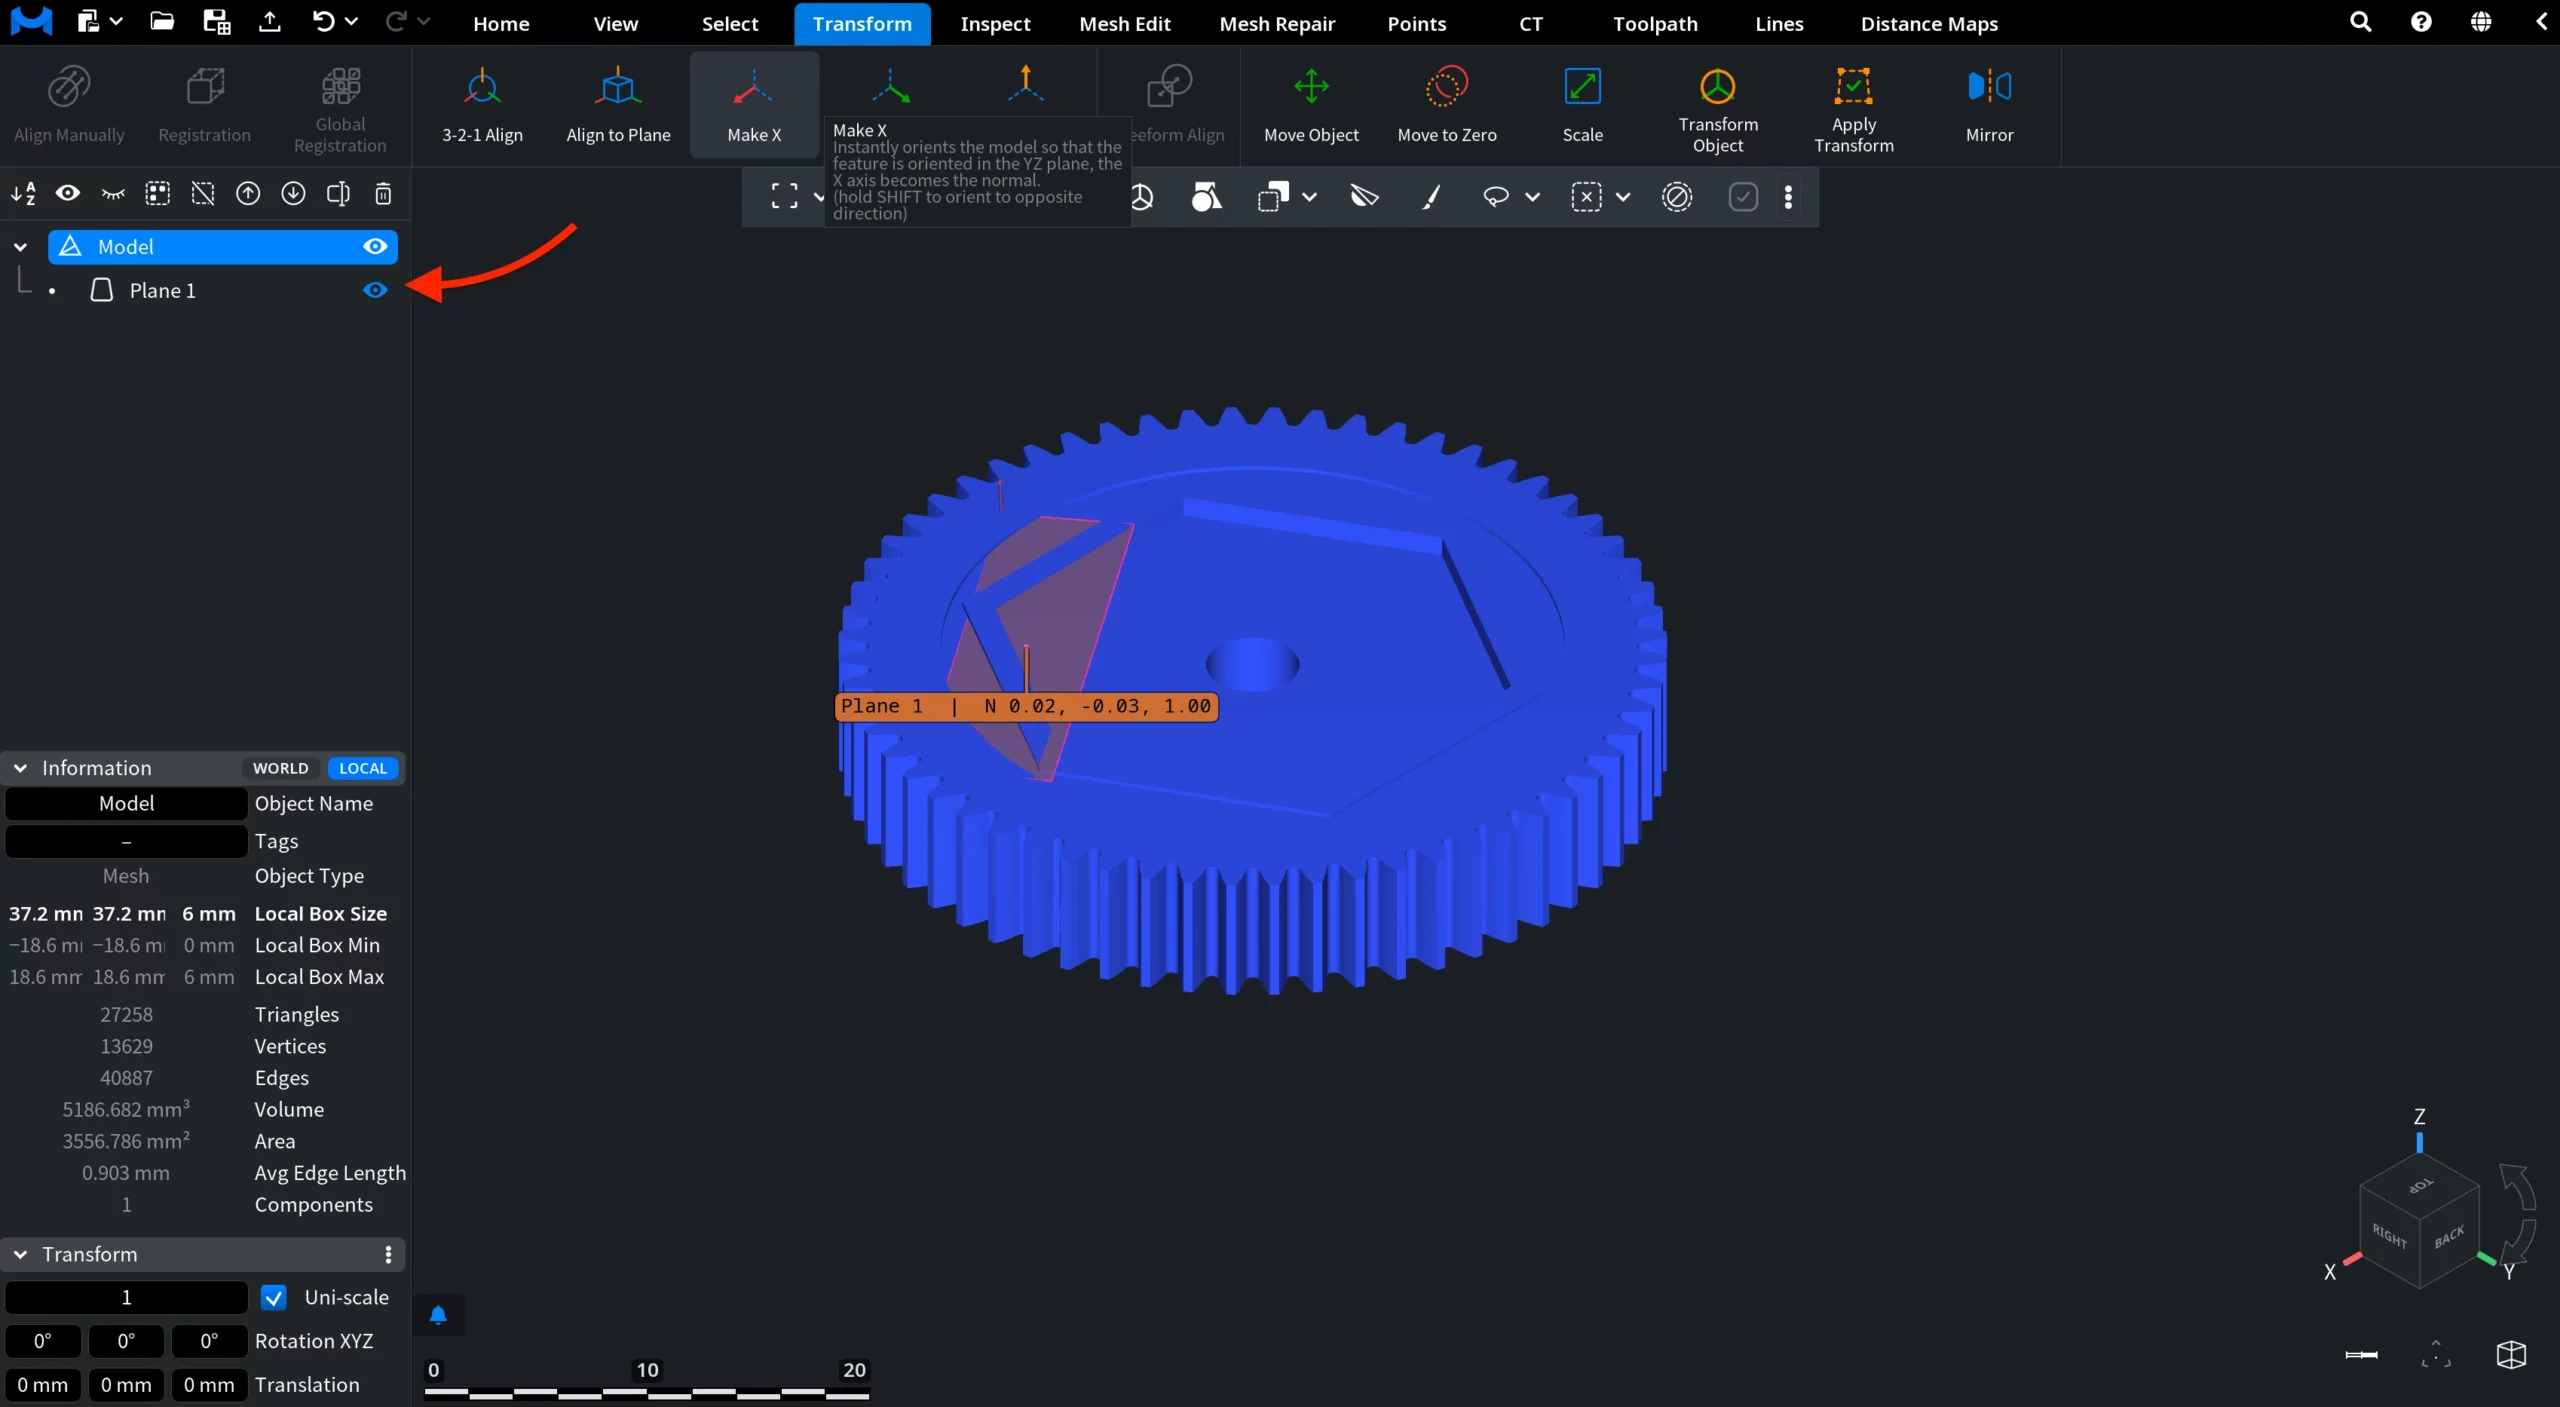
In the screenshot below, we have created a reference plane using the Plane tool under the Inspect tab. The plane appears as a child feature of the object in the scene tree. Once the plane is selected, the Make X tool under the Transform tab becomes available.
Before applying Make X, the plane normal is still close to the global Z axis, as indicated by the displayed values: N 0.02, -0.03, 1.00.

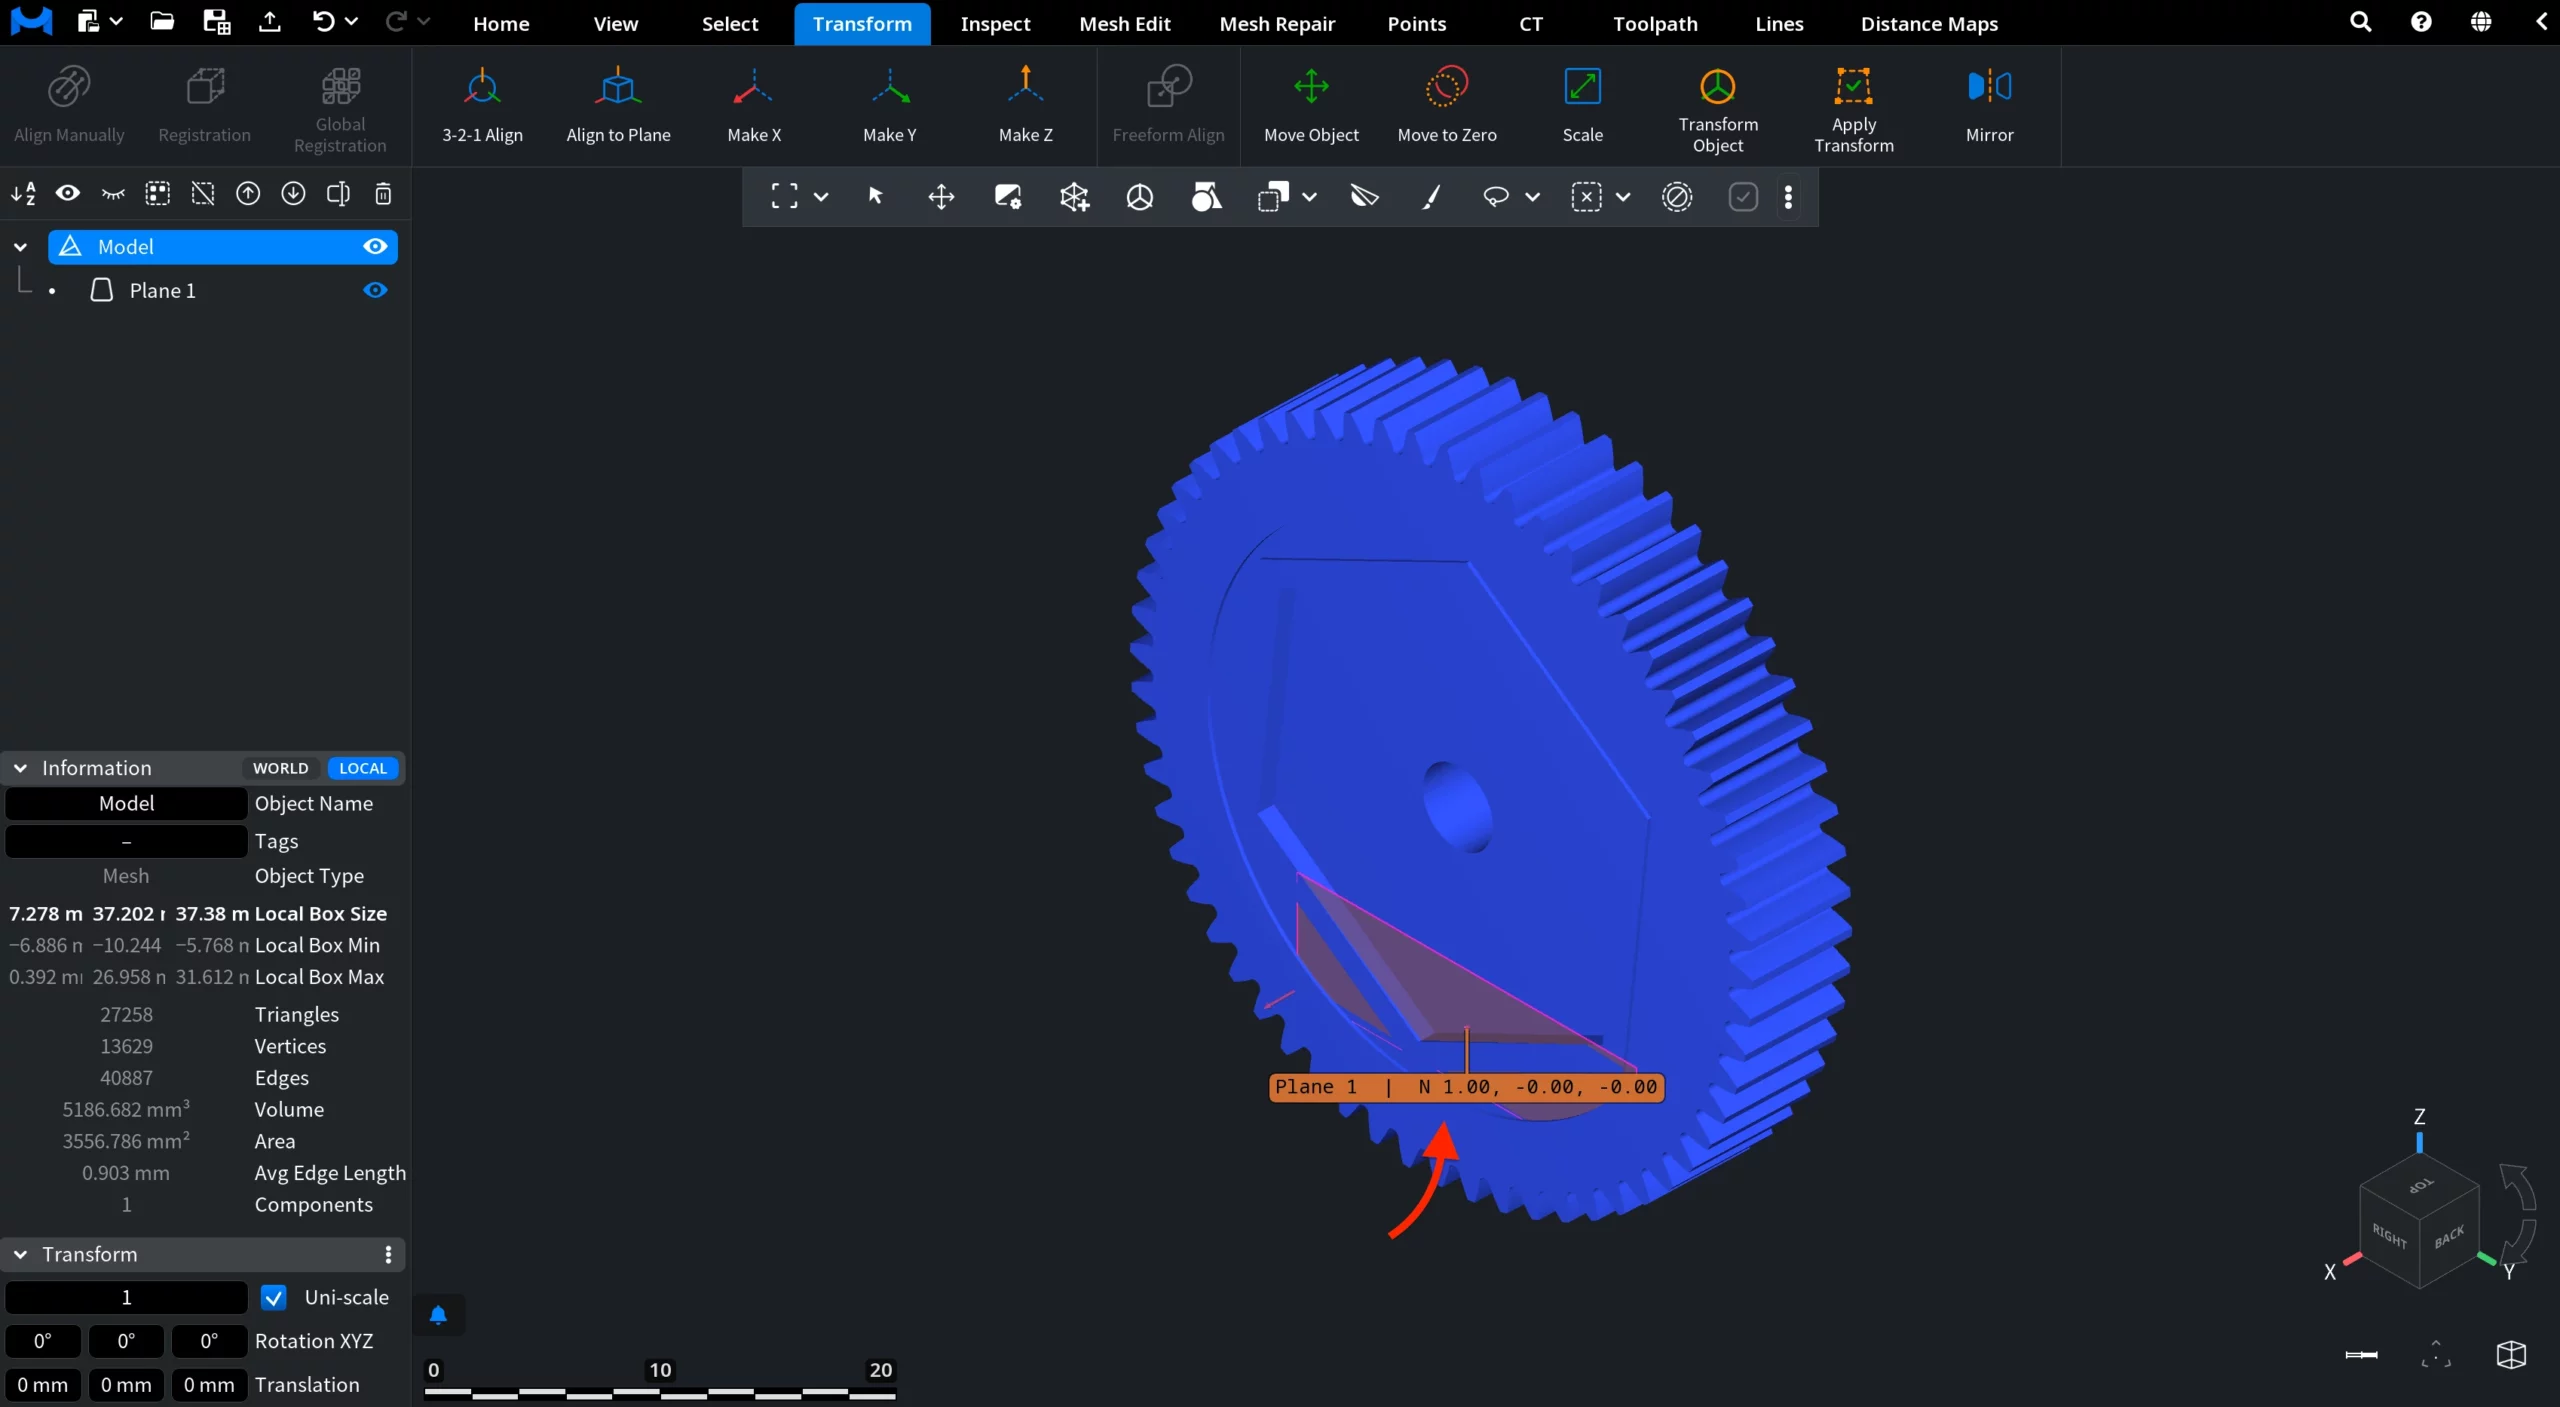
In the next screenshot, you can see the result after clicking Make X. The object has been rotated so that the selected plane is now oriented in the YZ plane, and its normal is aligned with the global X axis. This is confirmed by the displayed normal values: N 1.00, -0.00, -0.00.
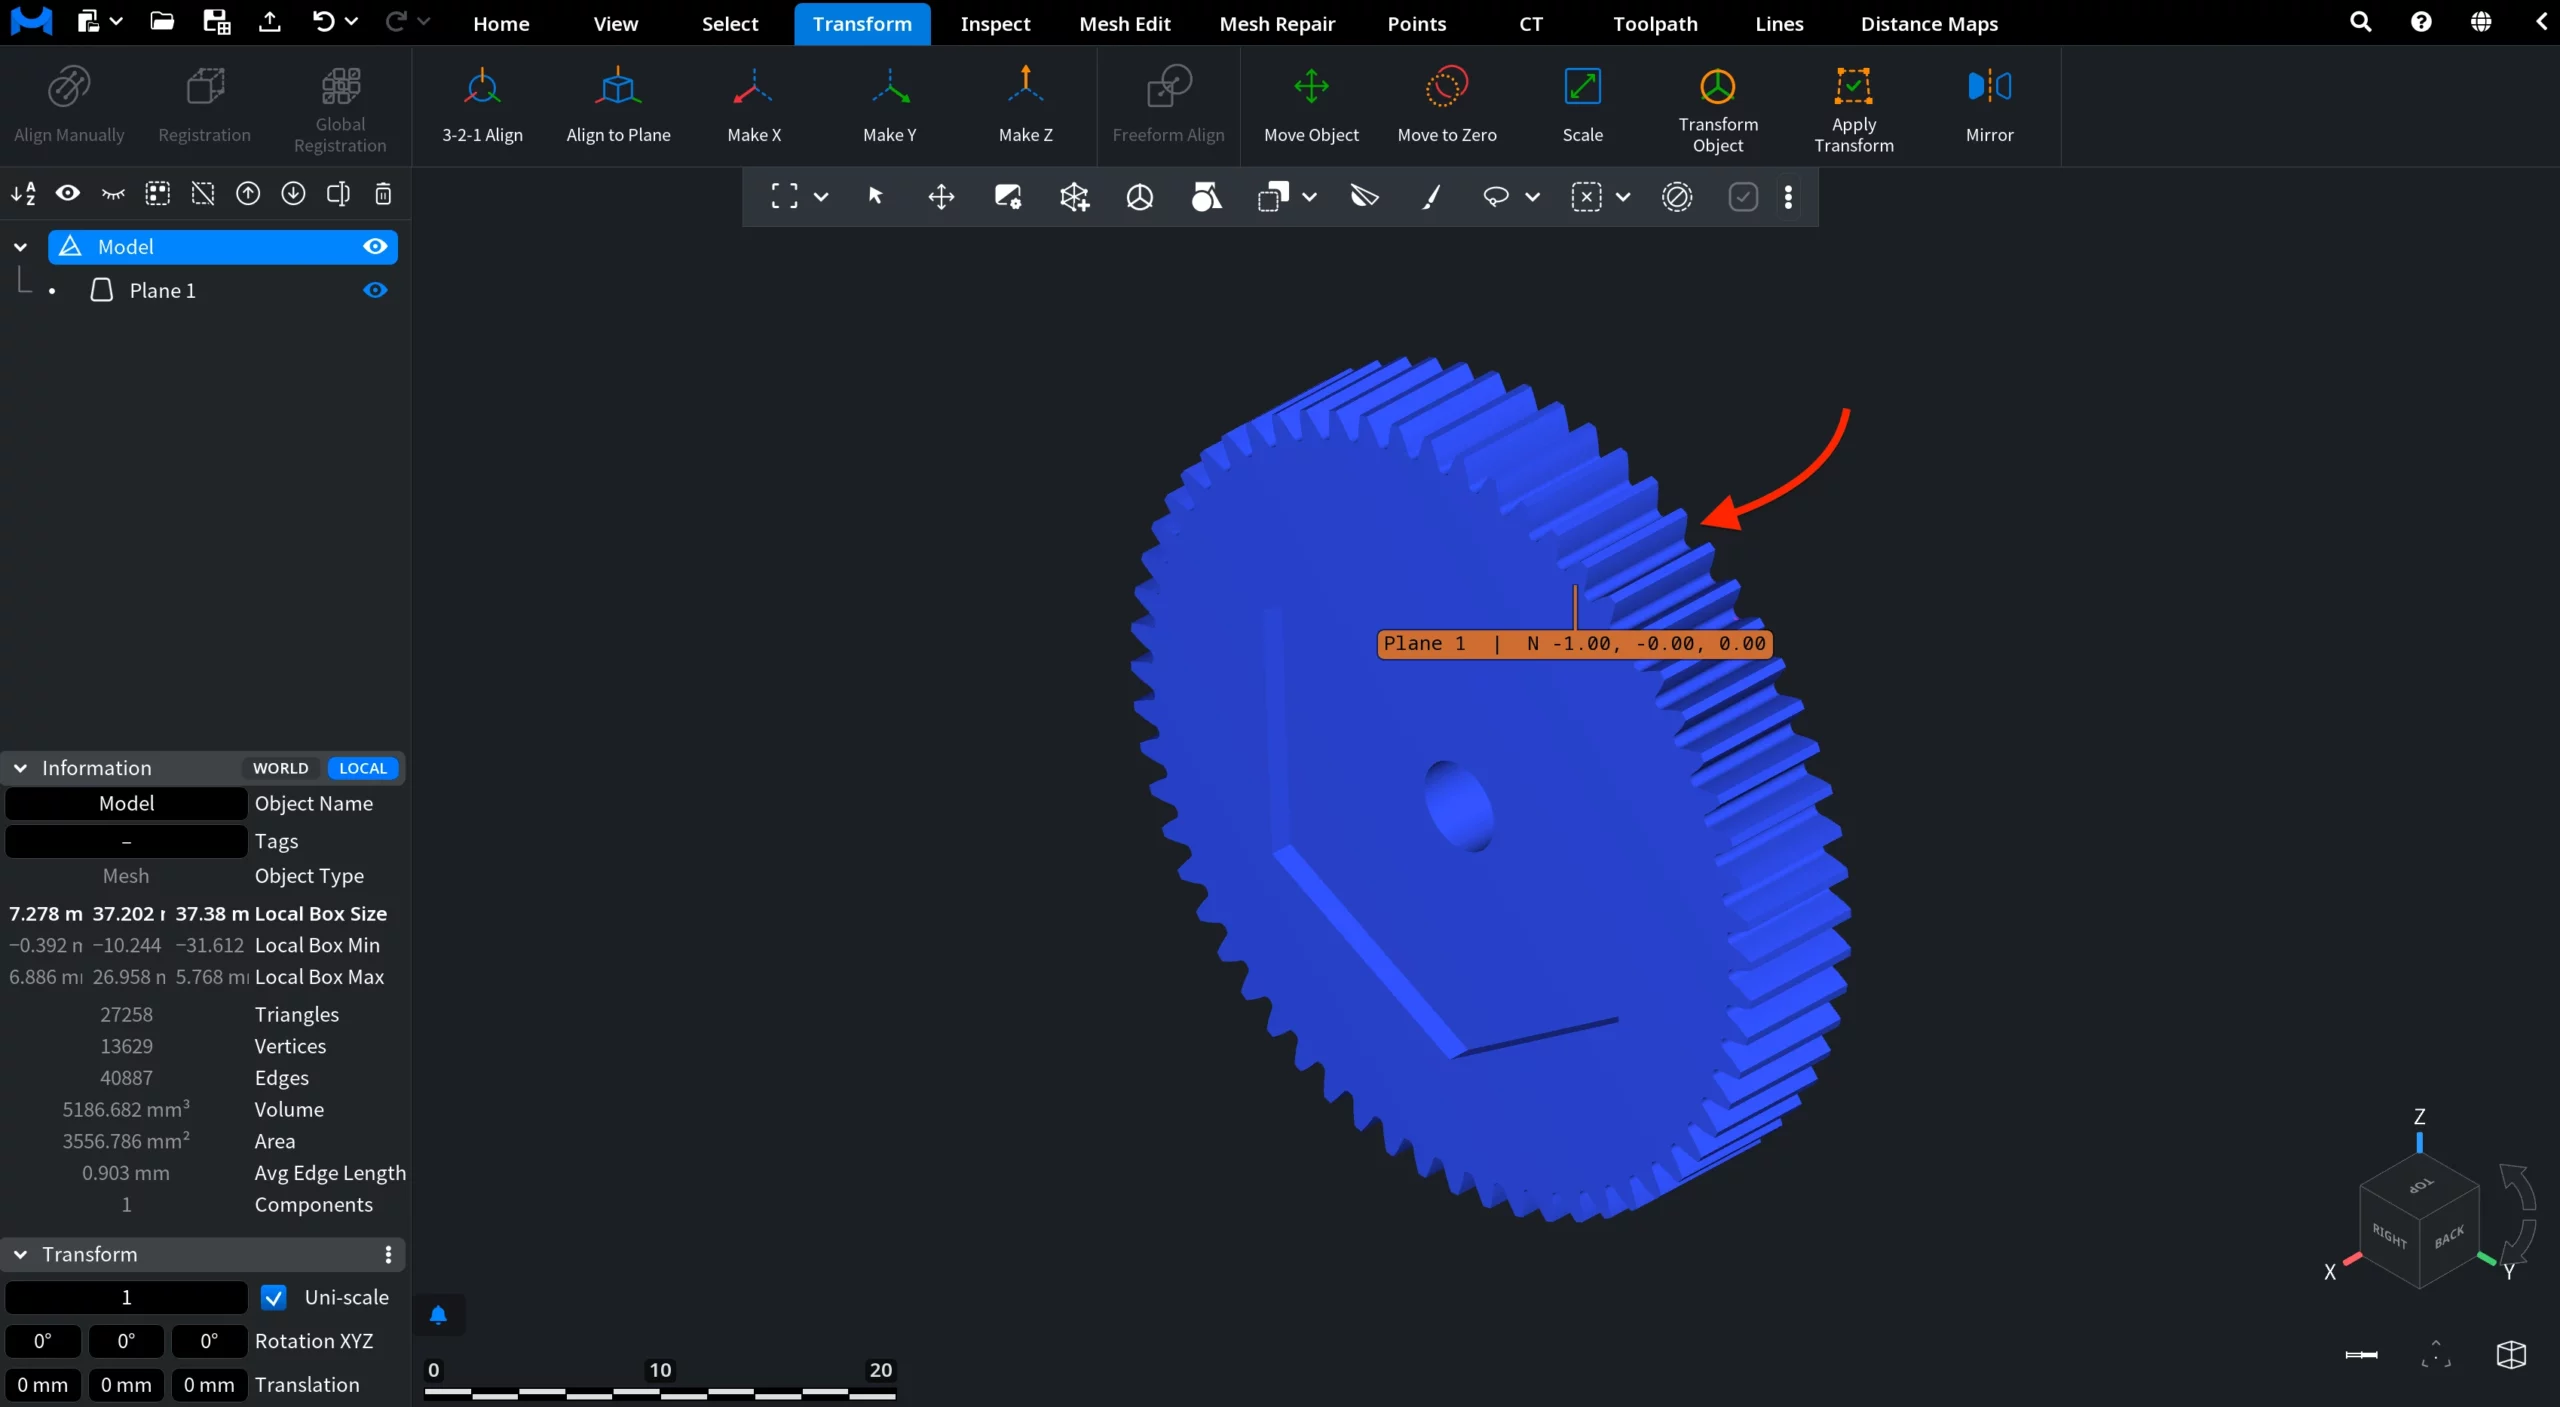
That is, the model is reoriented in a single step according to the selected reference plane. If you hold Shift while applying Make X, the object is oriented in the opposite direction, so the plane normal aligns with the negative X axis, as shown below.
Make Y
Make Y instantly rotates the object so that the selected feature is oriented in the ZX plane and its normal is aligned with the Y axis.
Hold Shift while applying Make Y to orient the object in the opposite direction, aligning the feature normal with the negative Y axis.
Make Z
Make Z instantly rotates the object so that the selected feature is oriented in the XY plane and its normal is aligned with the Z axis.
Hold Shift while applying Make Z to orient the object in the opposite direction, aligning the feature normal with the negative Z axis.
The workflow is the same for all three tools: create or select a suitable child feature, choose the required command under the Transform tab, and hold Shift when the opposite orientation is needed.
How the Make X, Make Y, and Make Z Tools Work in MeshInspector