The Partial Shell tool, located under the Mesh Edit tab, allows you to apply a shell offset with a non-uniform offset distance. Unlike a regular offset operation, Partial Shell is intended for cases where the mesh should not be thickened or expanded evenly across the entire surface.
To open the tool, go to Mesh Edit, click the small arrow next to the Offset tool, and select Partial Shell from the dropdown menu.

Partial Shell: Parameters
Once the Partial Shell tool is activated, the Partial Shell panel appears on the right. From there, you can configure how the shell offset should be applied to the selected mesh.
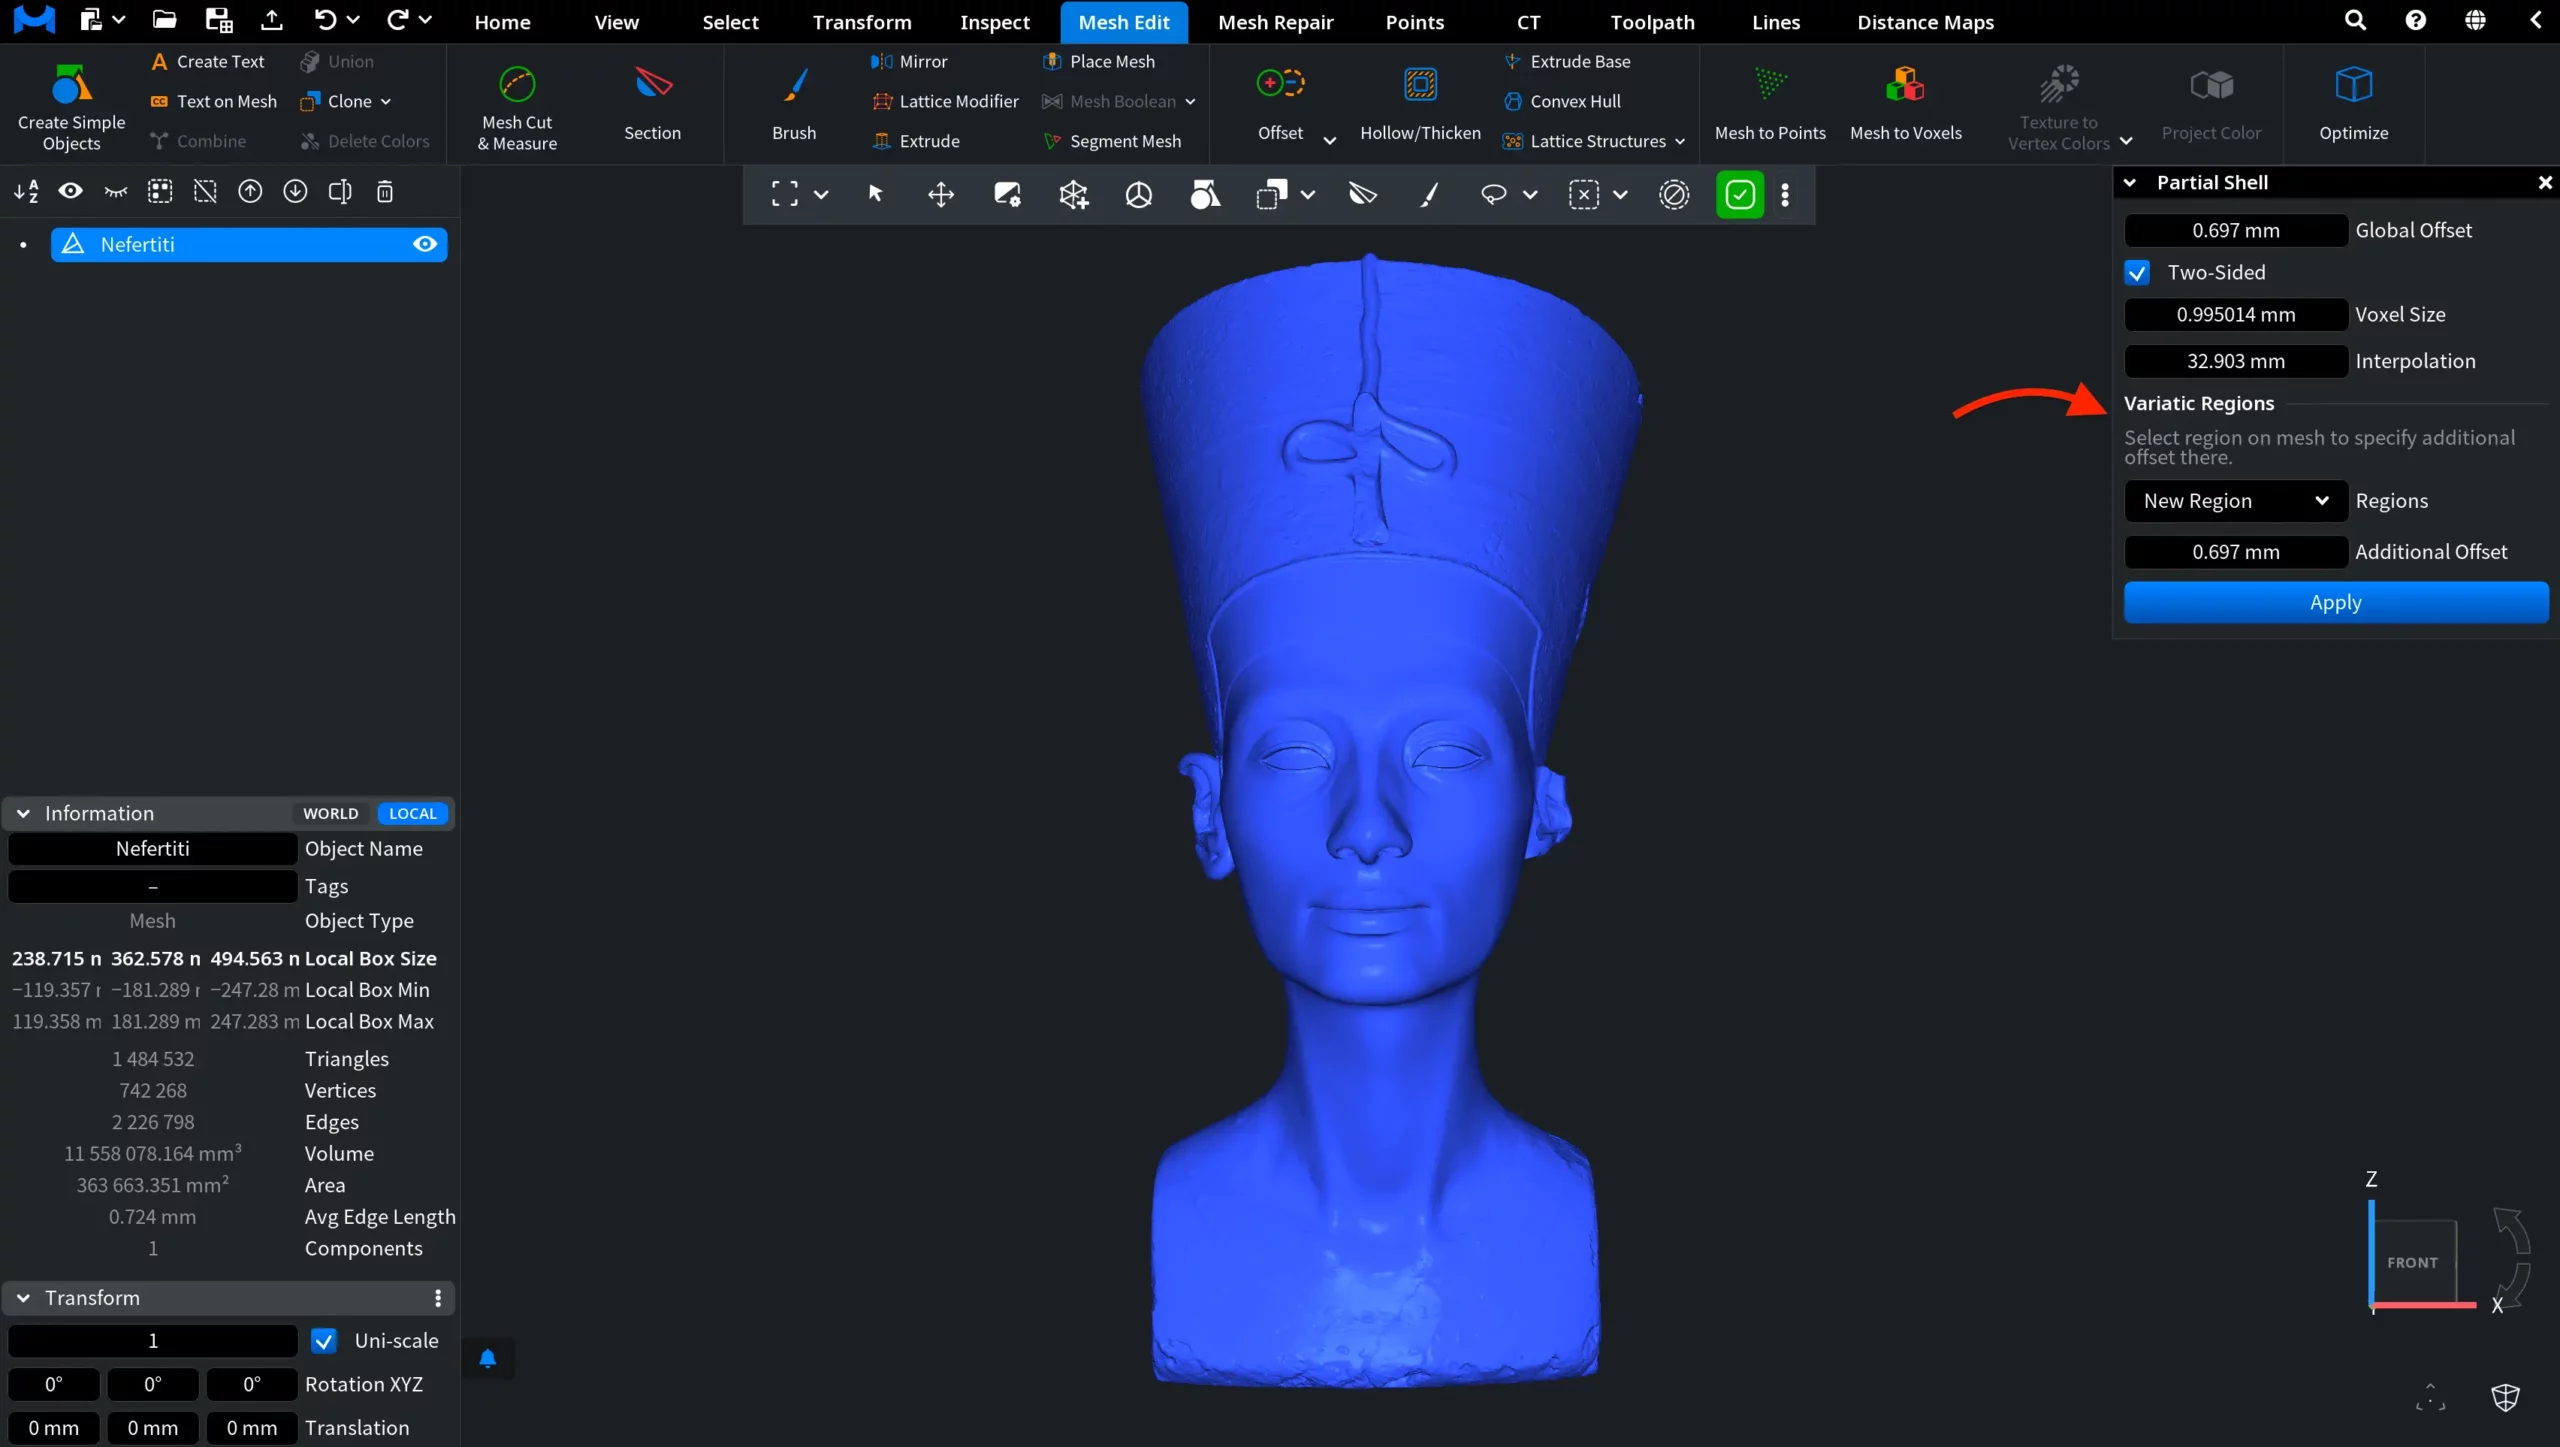
The upper part of the panel defines how the general offset is applied to the whole mesh.
Global Offset defines the base offset distance applied to the entire mesh. This value sets the main shell thickness before any additional regional offsets are specified.
Two-Sided controls whether the shell is built on both sides of the original surface. If this option is disabled, Partial Shell builds only the positive part of the shell.
Voxel Size defines the size of the cubical voxel used during the operation. A smaller voxel size produces a more detailed result, while a larger value produces a coarser result.
Interpolation controls the smoothness of transitions between regions with different offset values. A larger value makes the transition between variadic region offsets smoother.
Variatic Regions
The Variatic Regions section lets you select a region on the mesh to specify an additional offset there. This is what allows Partial Shell to create a non-uniform shell thickness.
First, select the area of the mesh where the additional offset should be applied. To do this, go to the Select tab and click Select Primitives. You can use any available selection mode, depending on the shape and size of the target area. In this example, we use the Rect selection mode to select the lower part of the bust. The selected area is highlighted directly on the model in red.
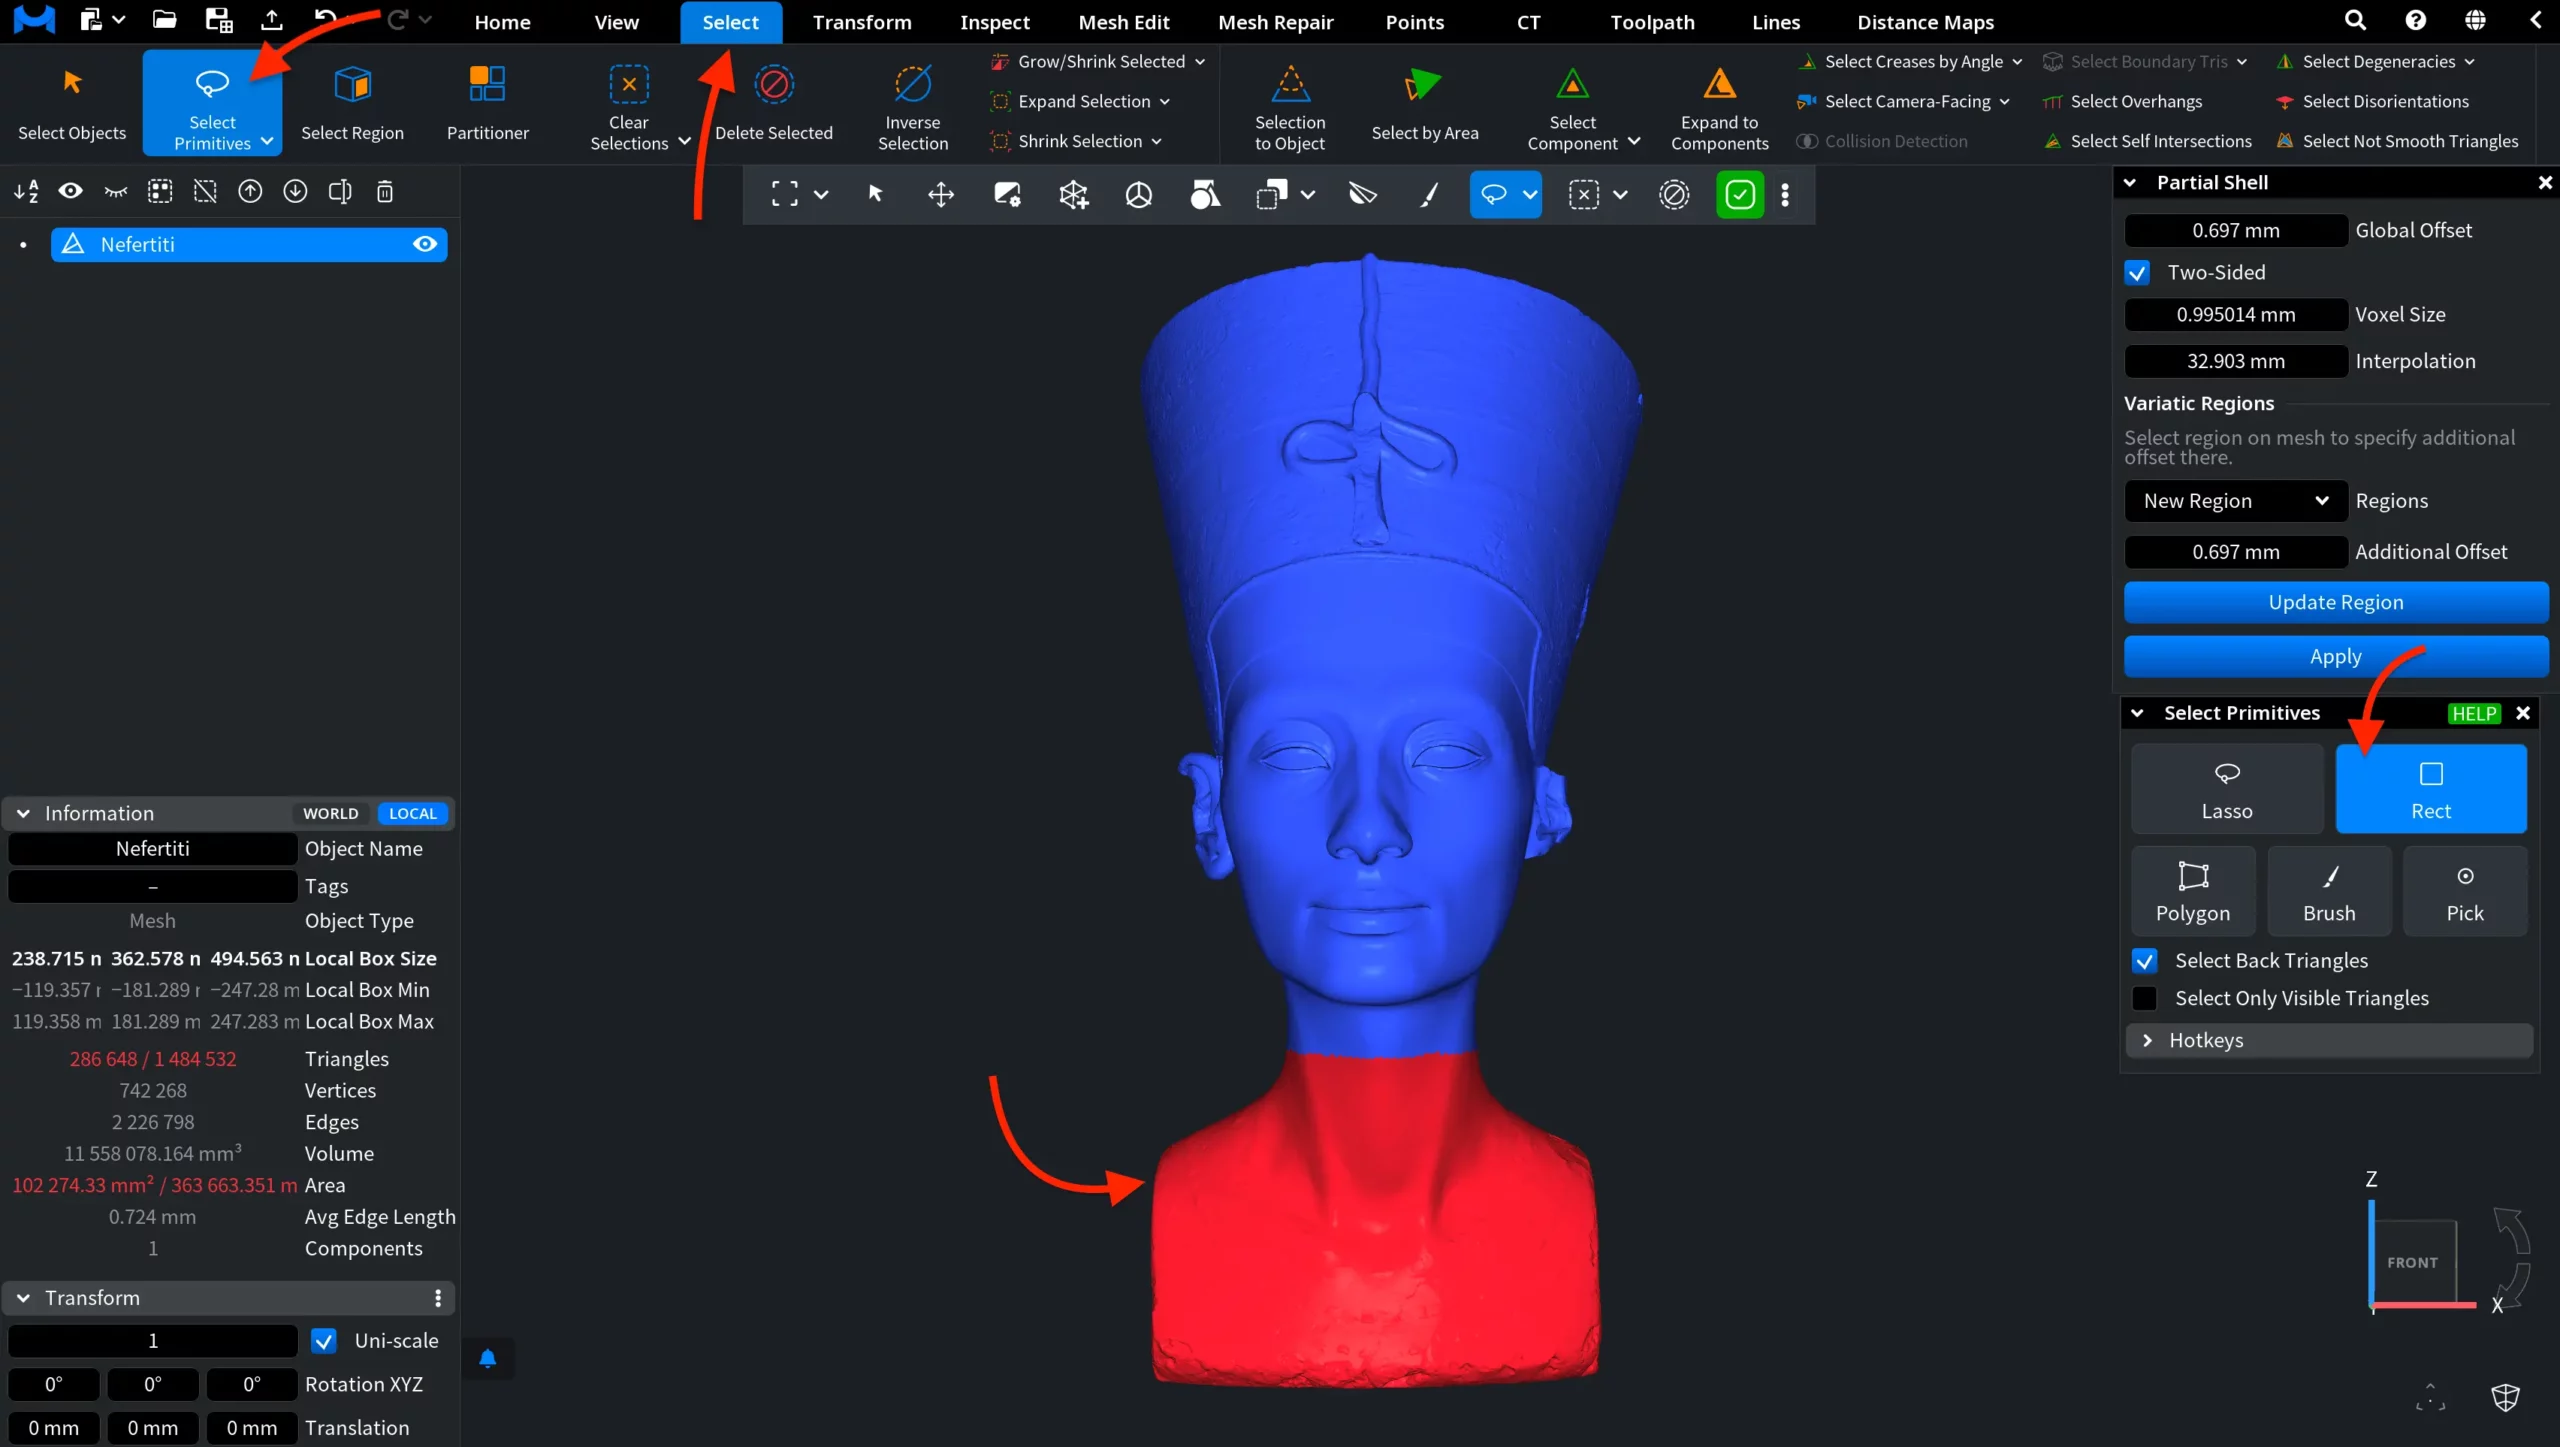
The Partial Shell tool remains active while you work with the selection tools, so you can define the region without closing the Partial Shell panel. After the required area is selected, go back to the Partial Shell panel and click Update Region. This saves the current mesh selection as a variatic region. The first region you update is saved as 1 in the Regions dropdown list.
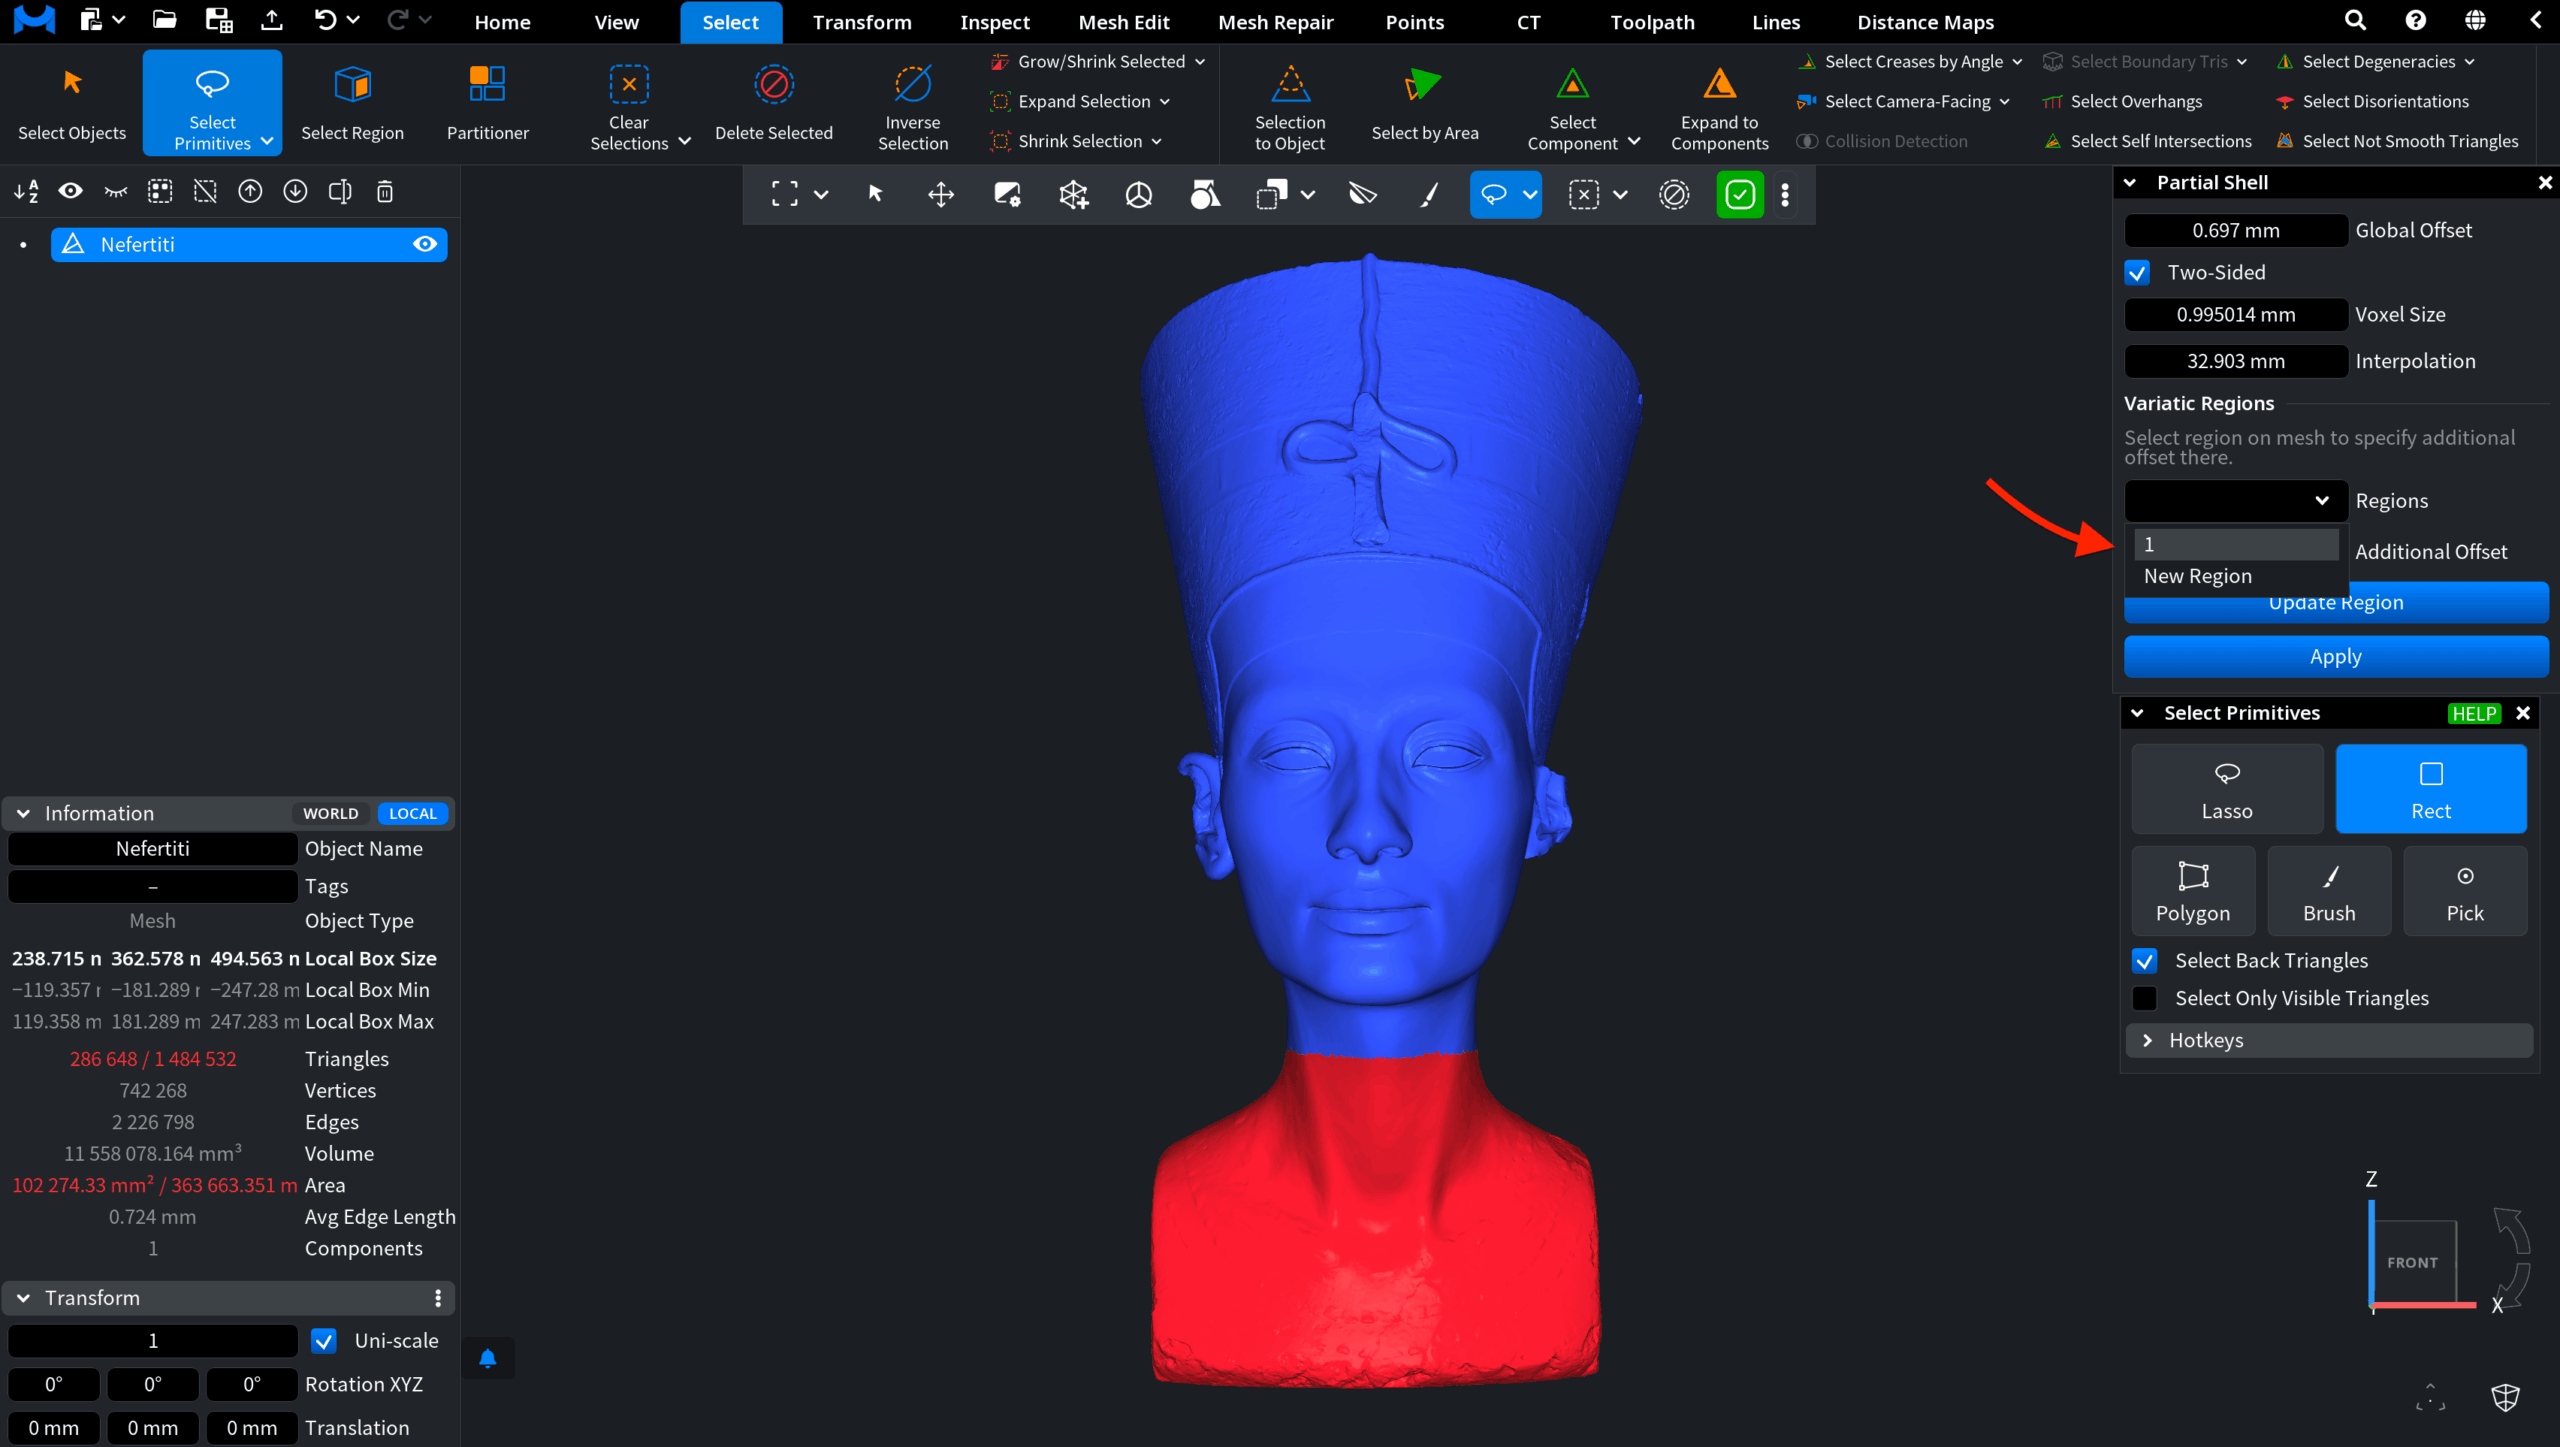
To add more regions:
- Return to New Region in the Regions field.
- Select the area for your new region.
- Click Update Region again.
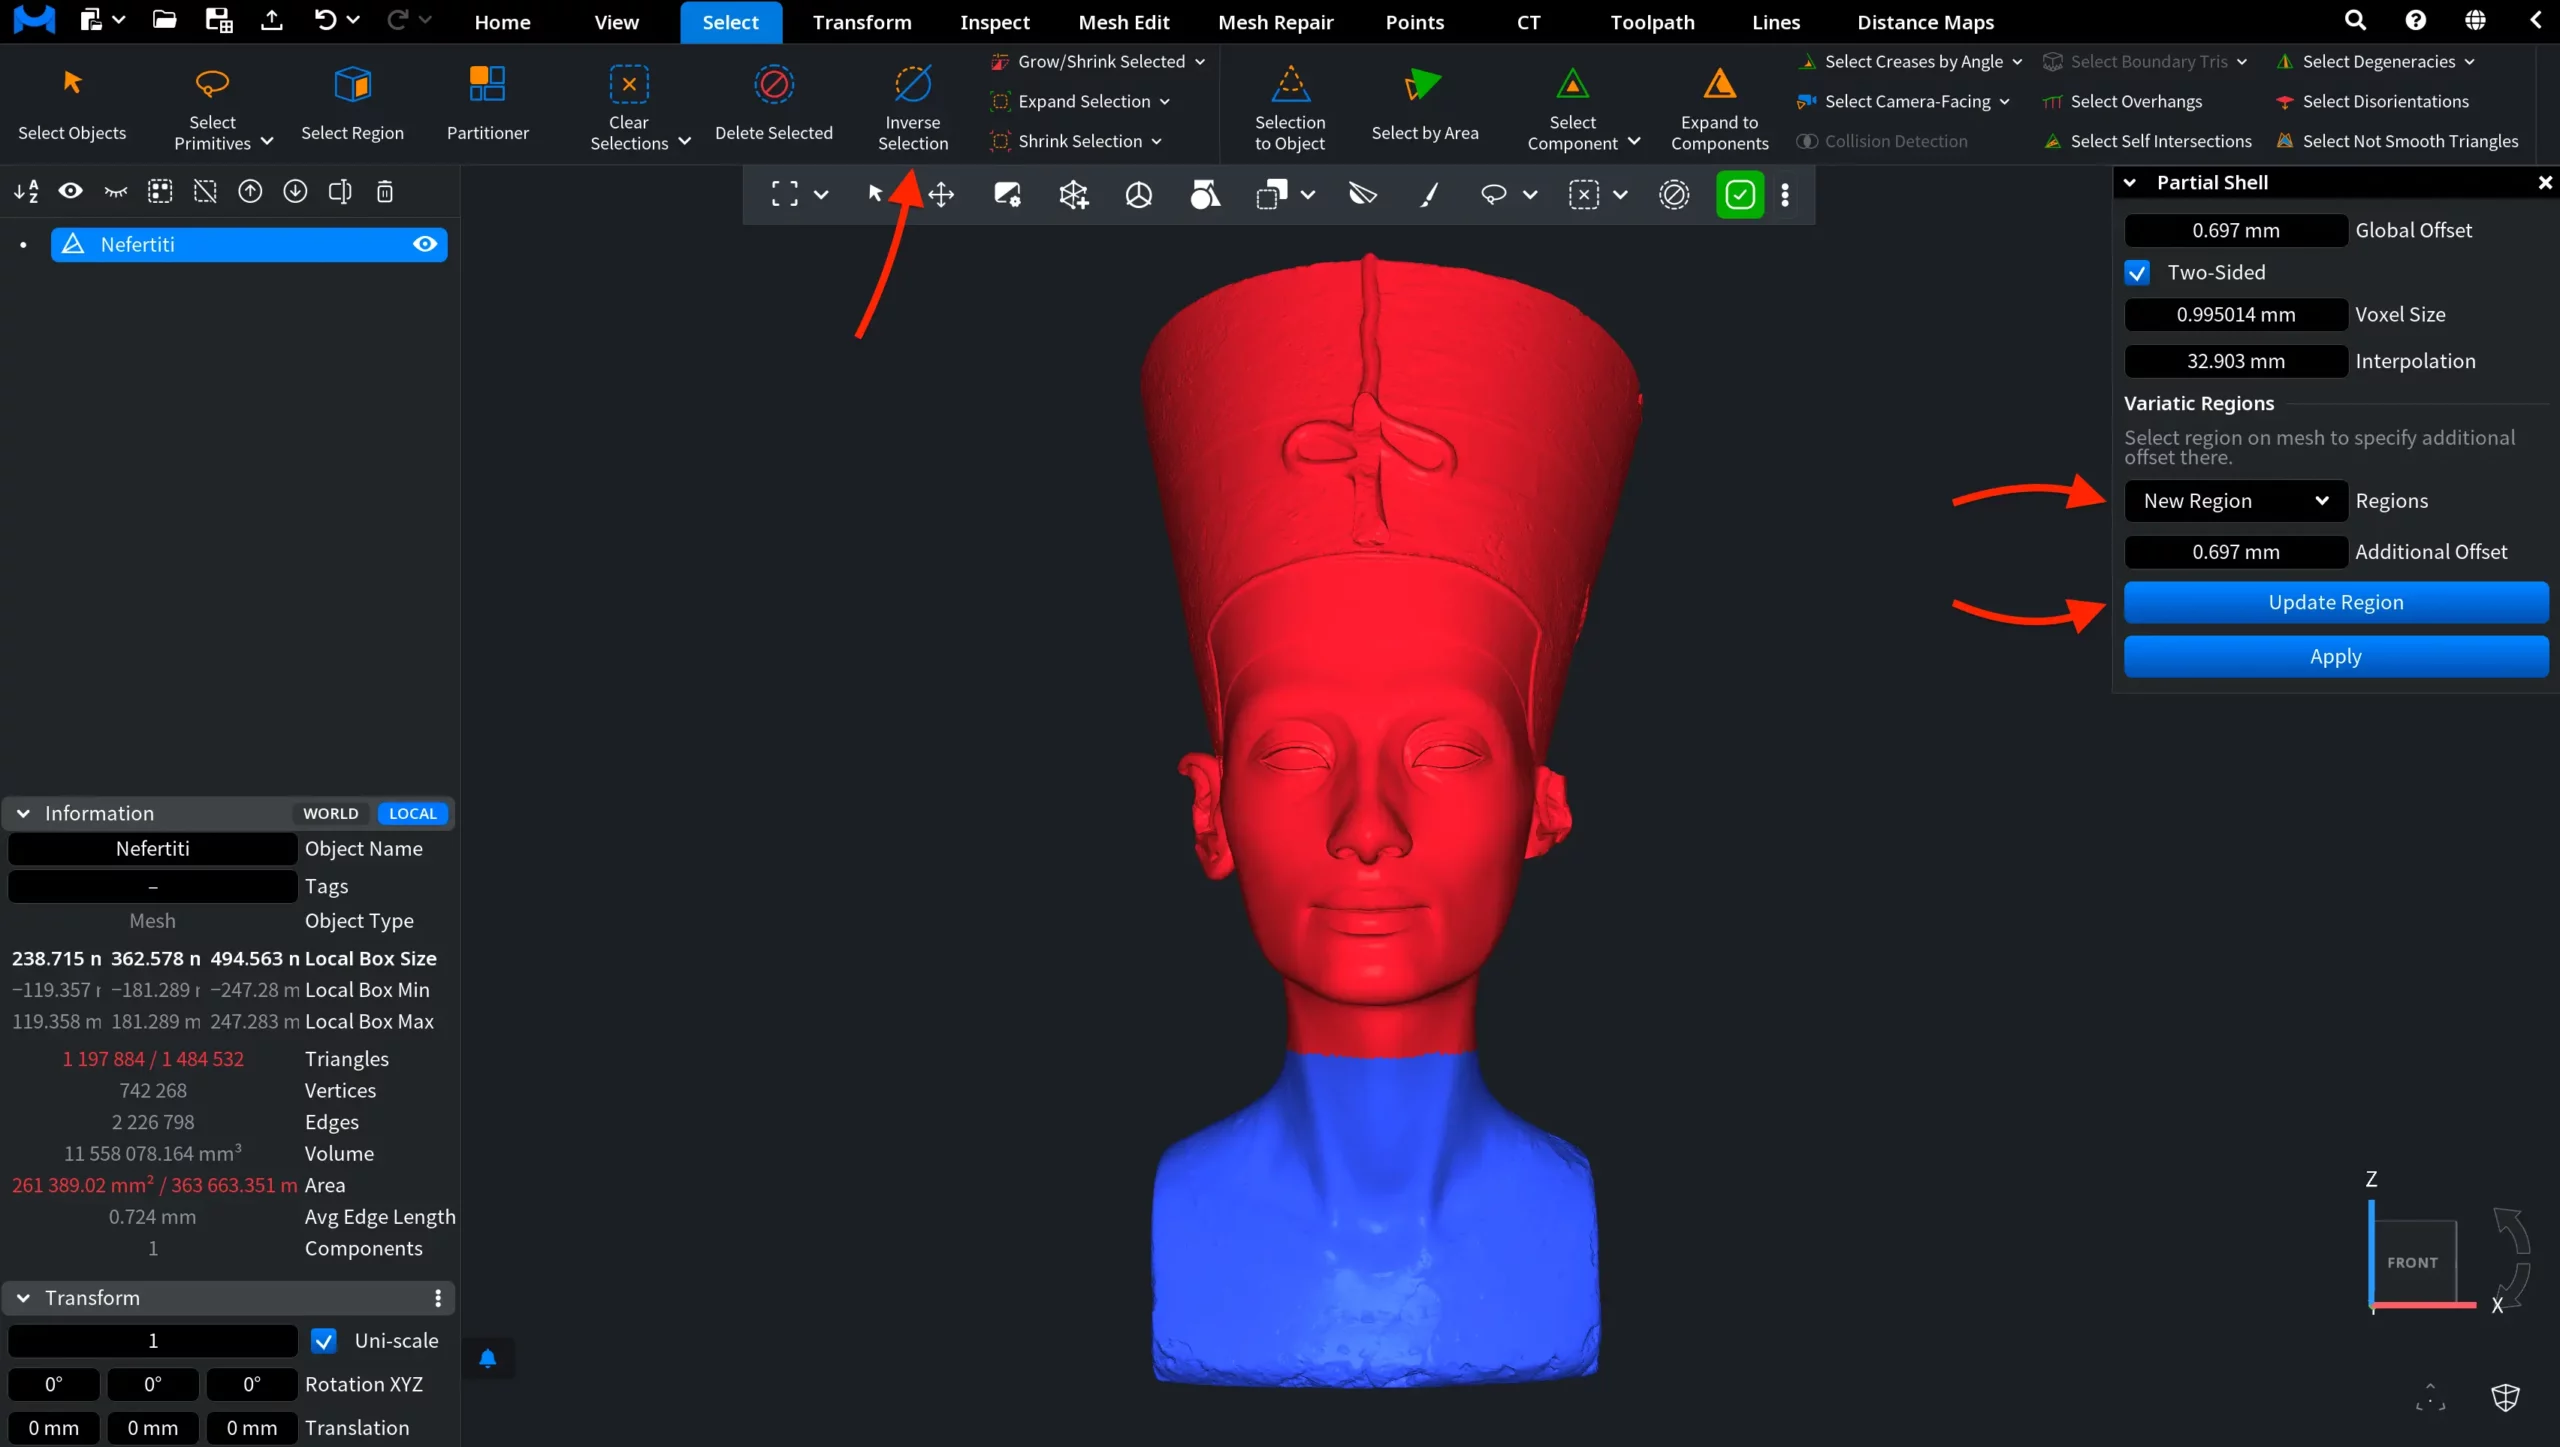
The new regions will be saved as 2, 3, 4, and so on. In the screenshot above, we selected the upper part of the mesh by applying Inverse Selection under the Select tab.
For each region, Additional Offset defines the extra offset applied to it. This value is added to the Global Offset, allowing the selected area to receive a different shell thickness from the rest of the mesh. After configuring the global offset and the variatic region settings, click Apply to create the partial shell.
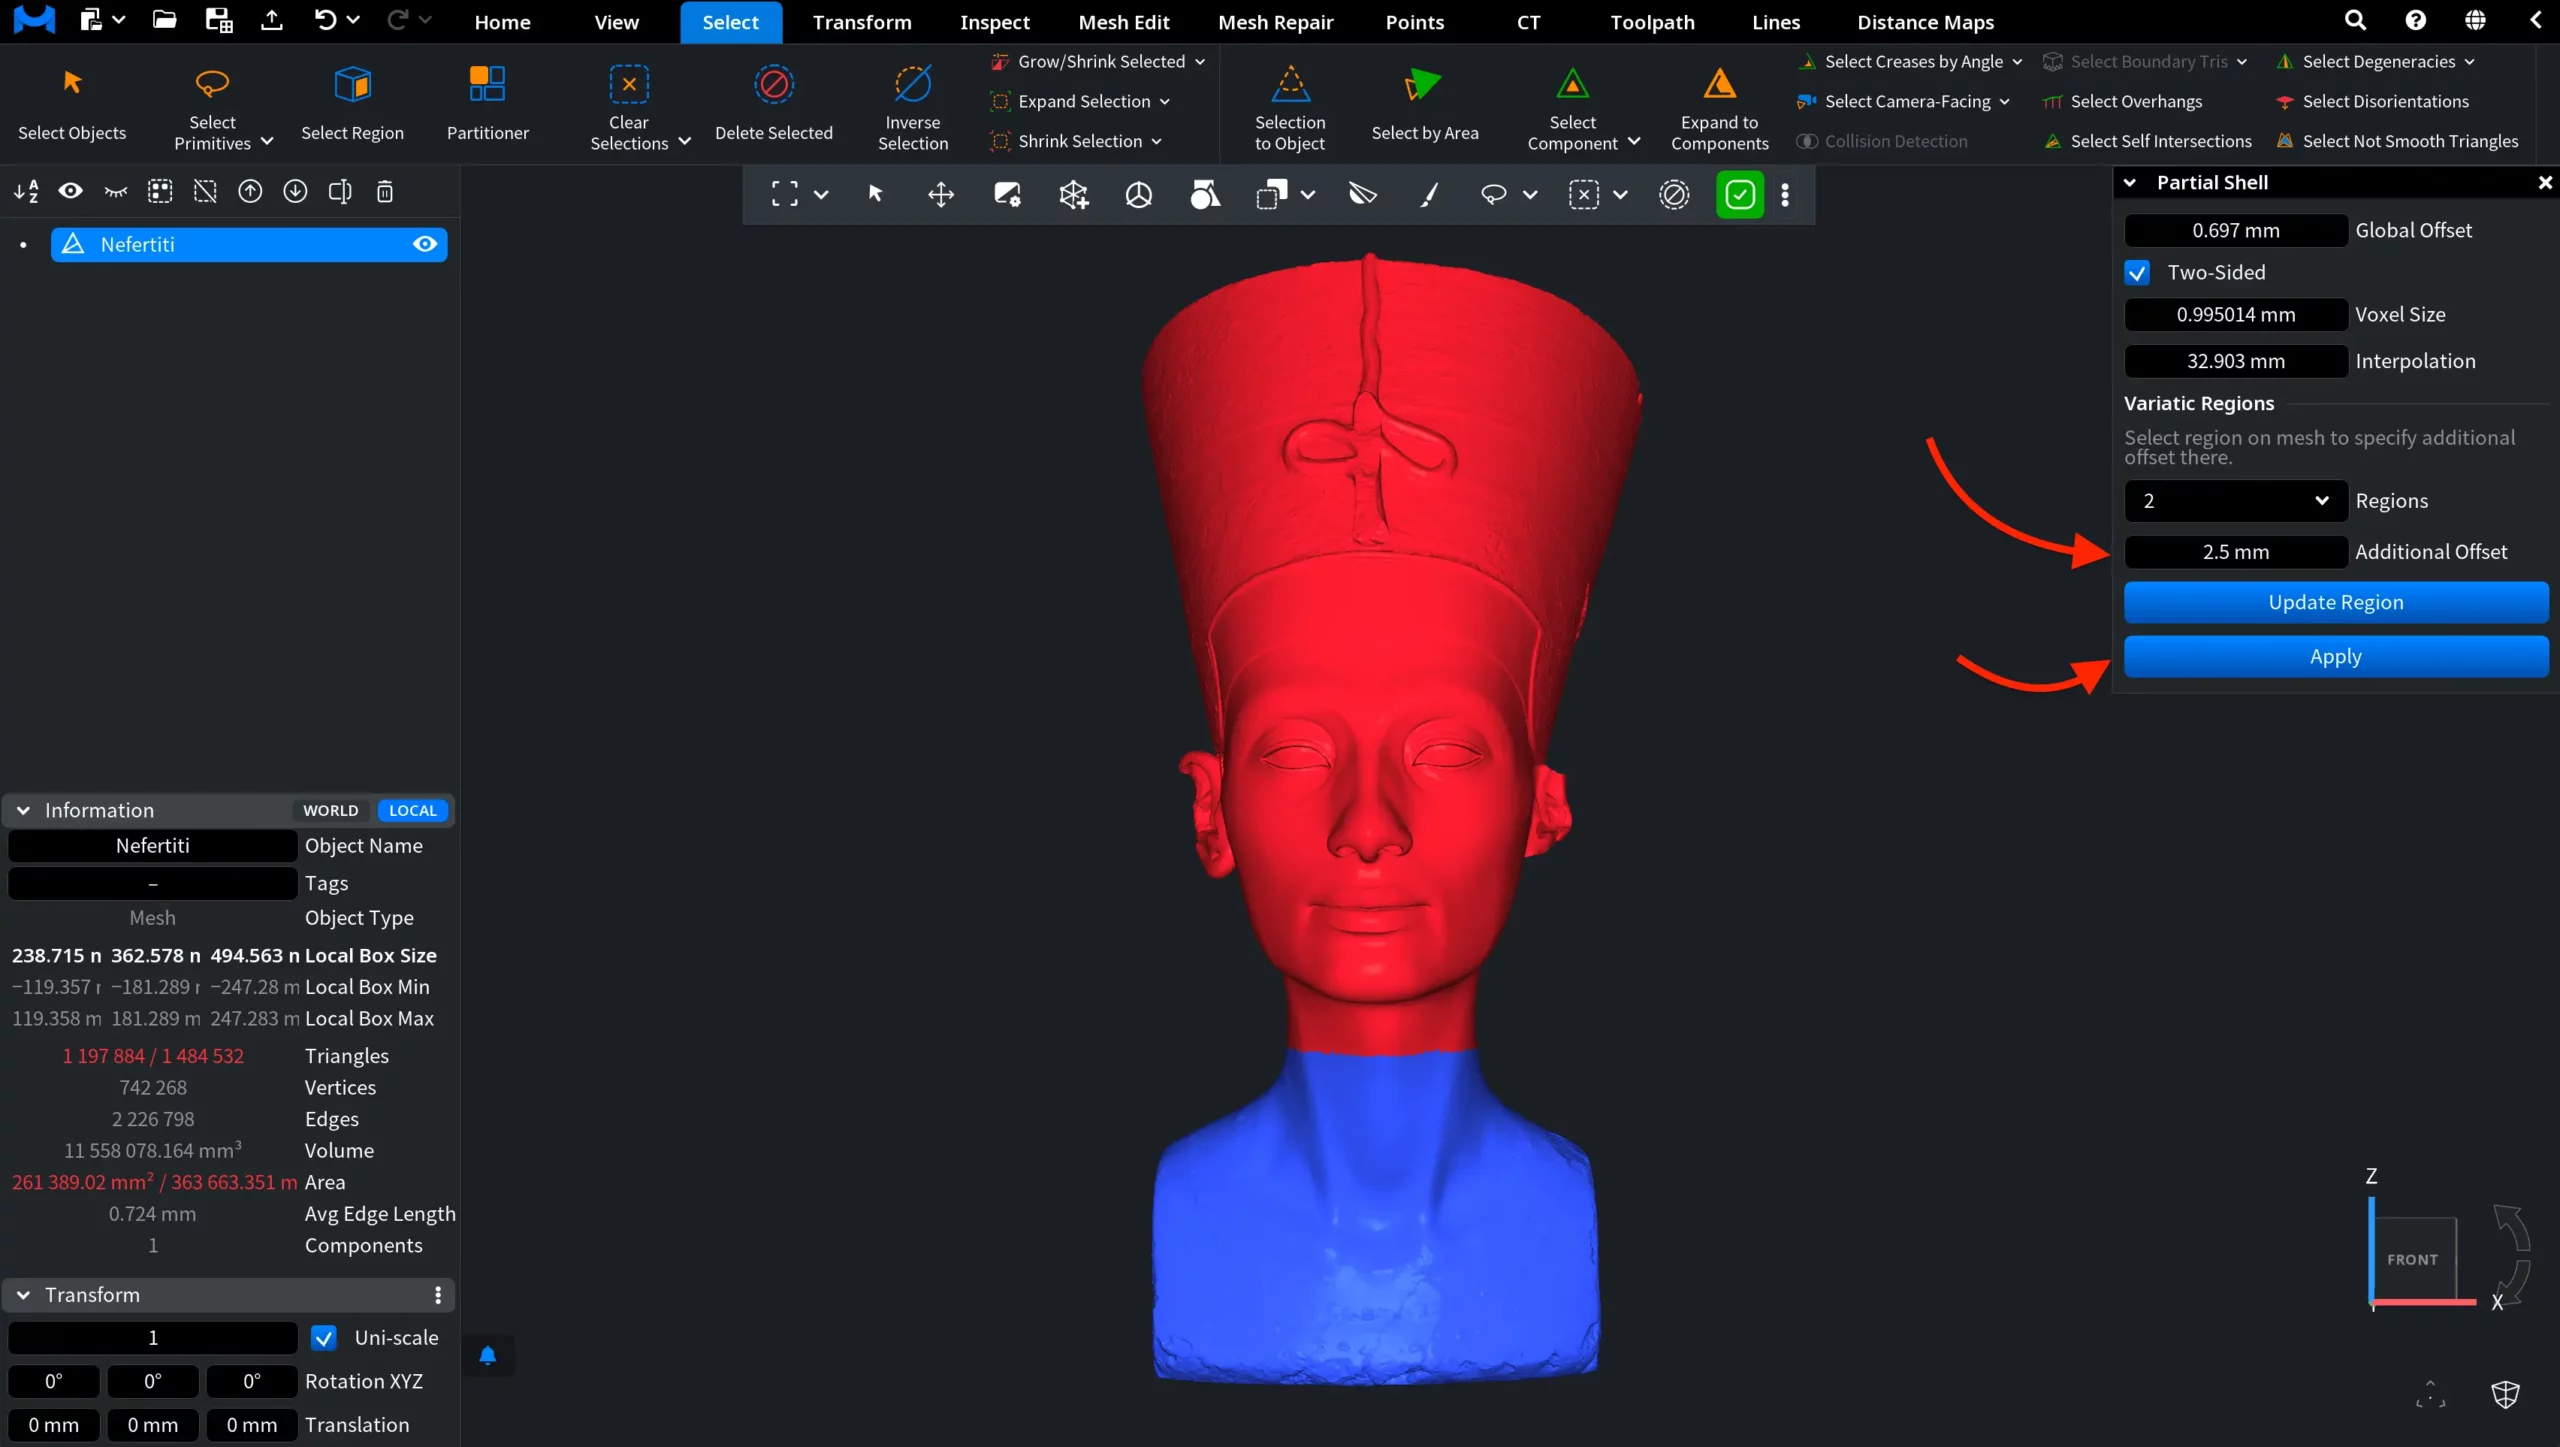
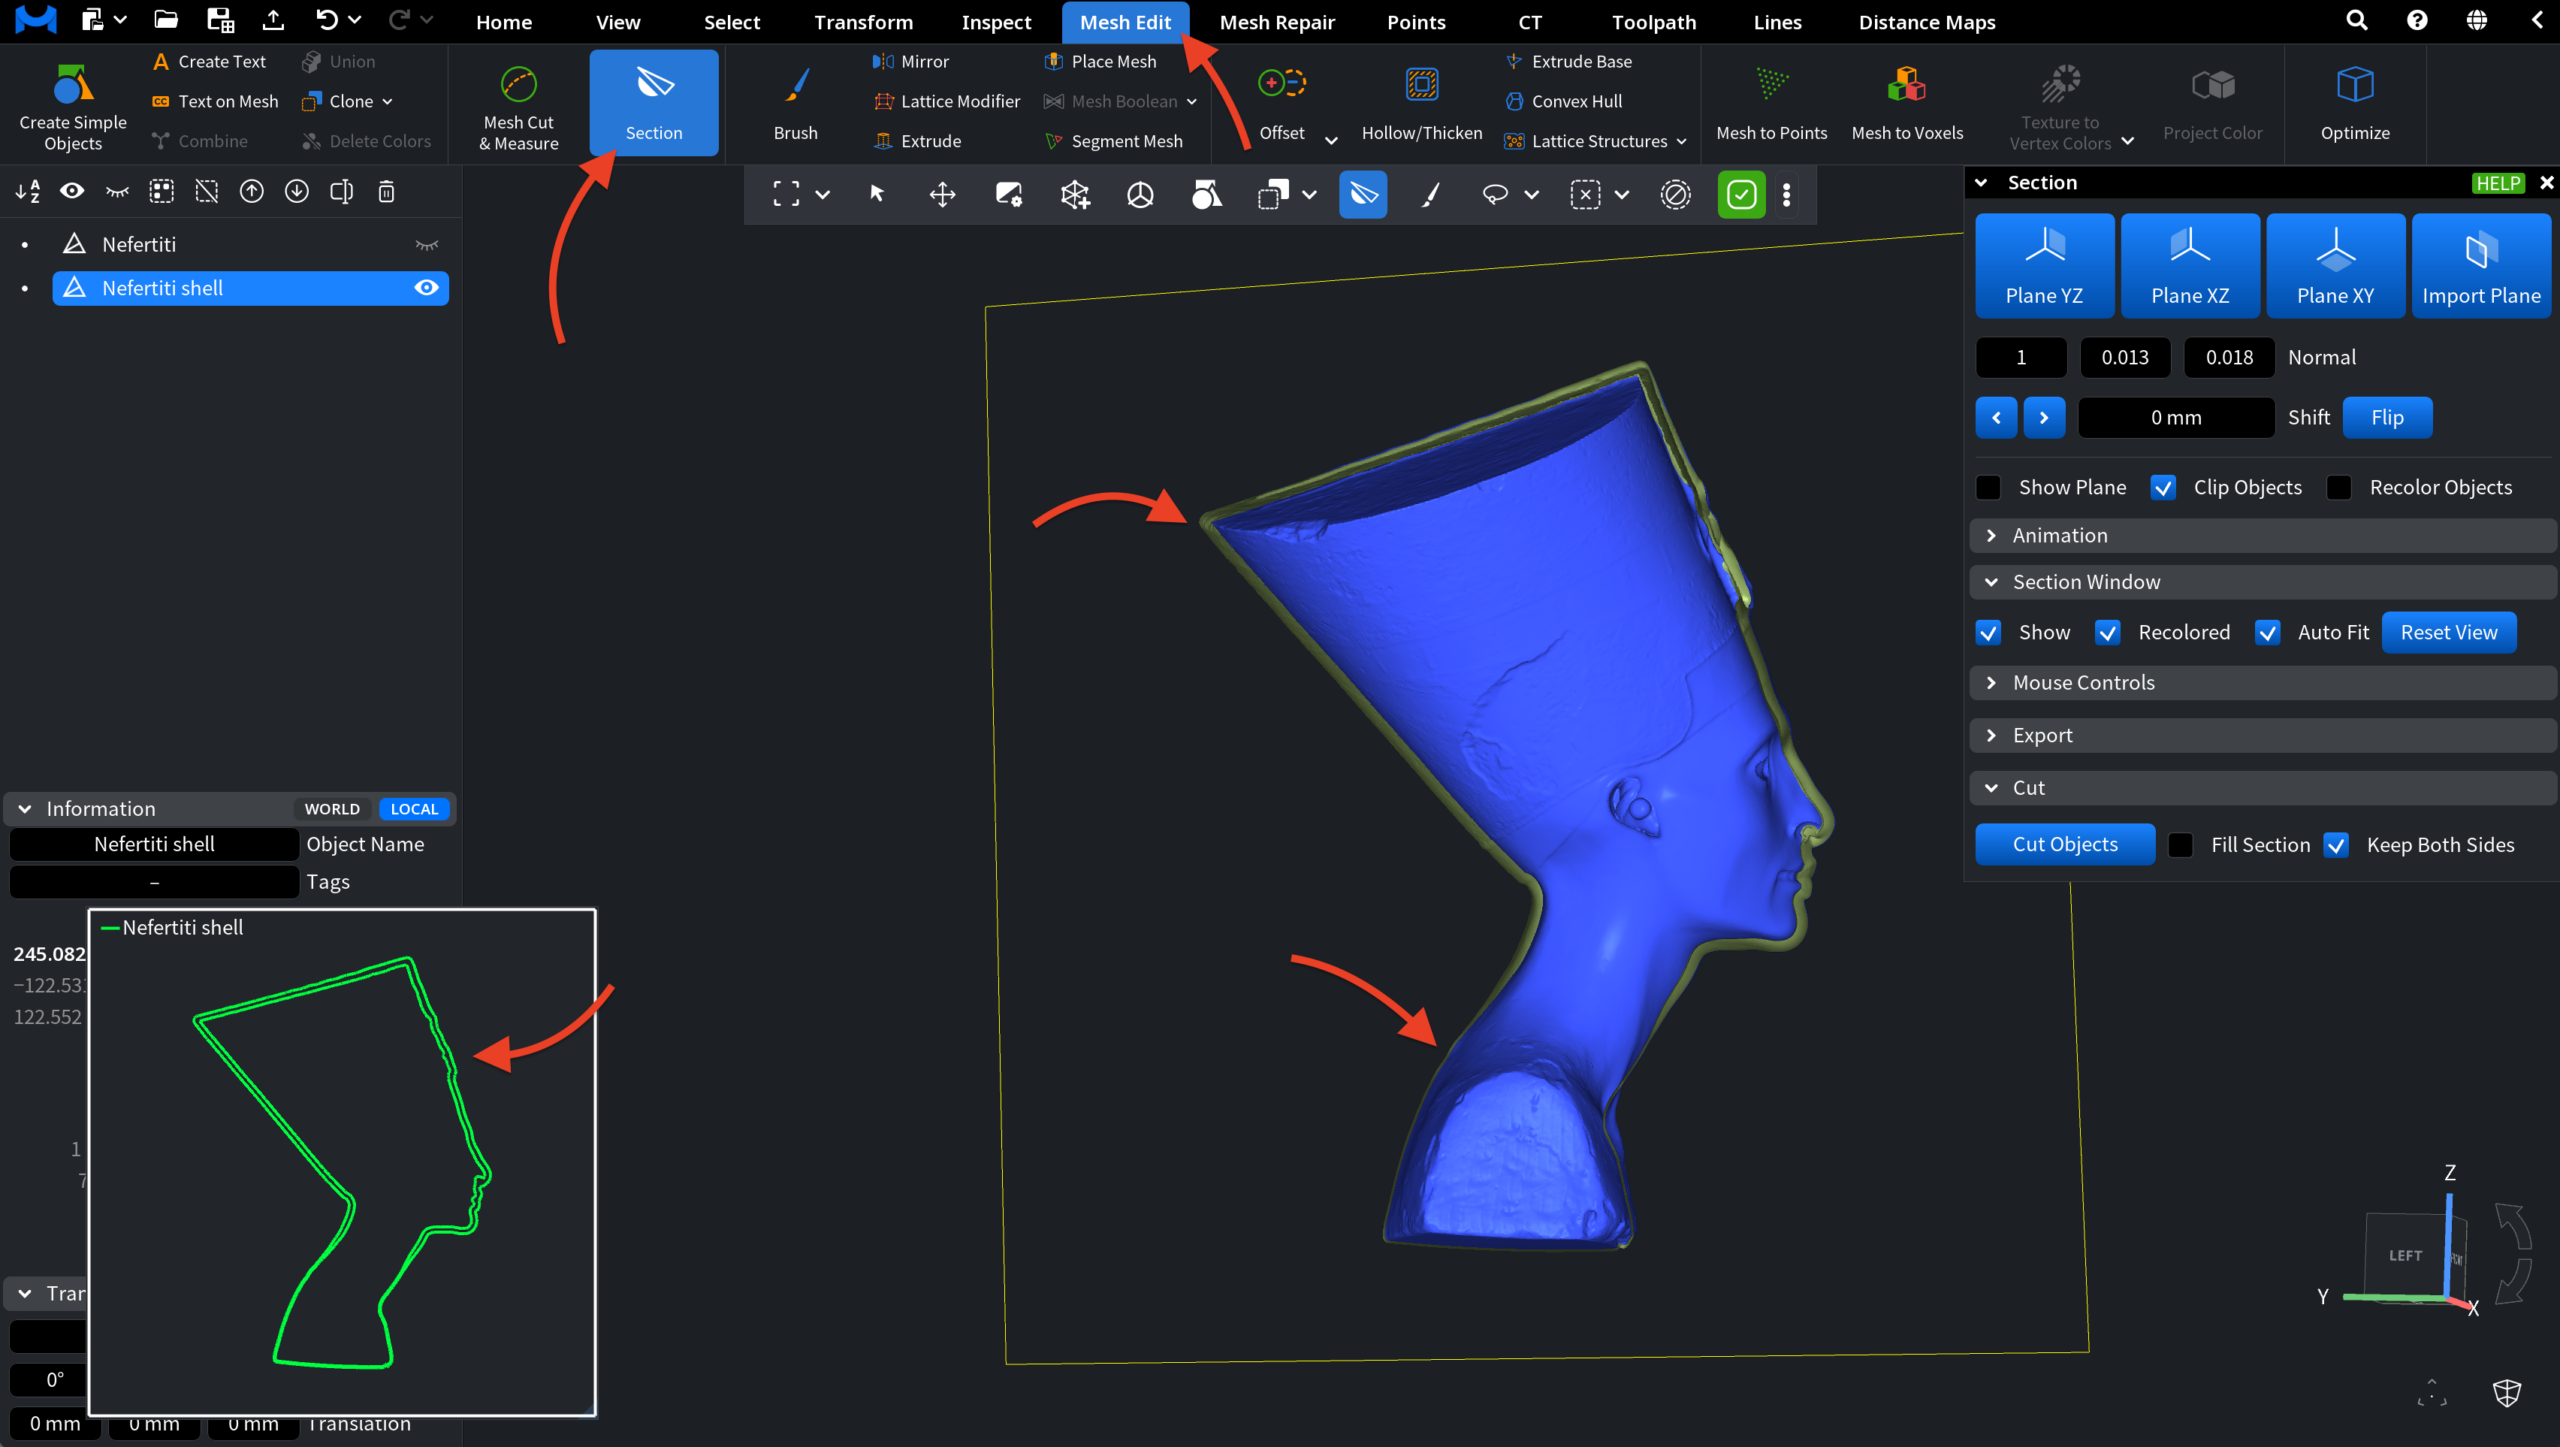
The selected variatic regions receive the additional offset, while the rest of the mesh follows the general shell settings. In the example below, you can see the result of a Partial Shell operation with:
- Global Offset at 0.697 mm.
- Additional Offset applied to the lower part at 1 mm.
- Additional Offset applied to the upper part at 2.5 mm.
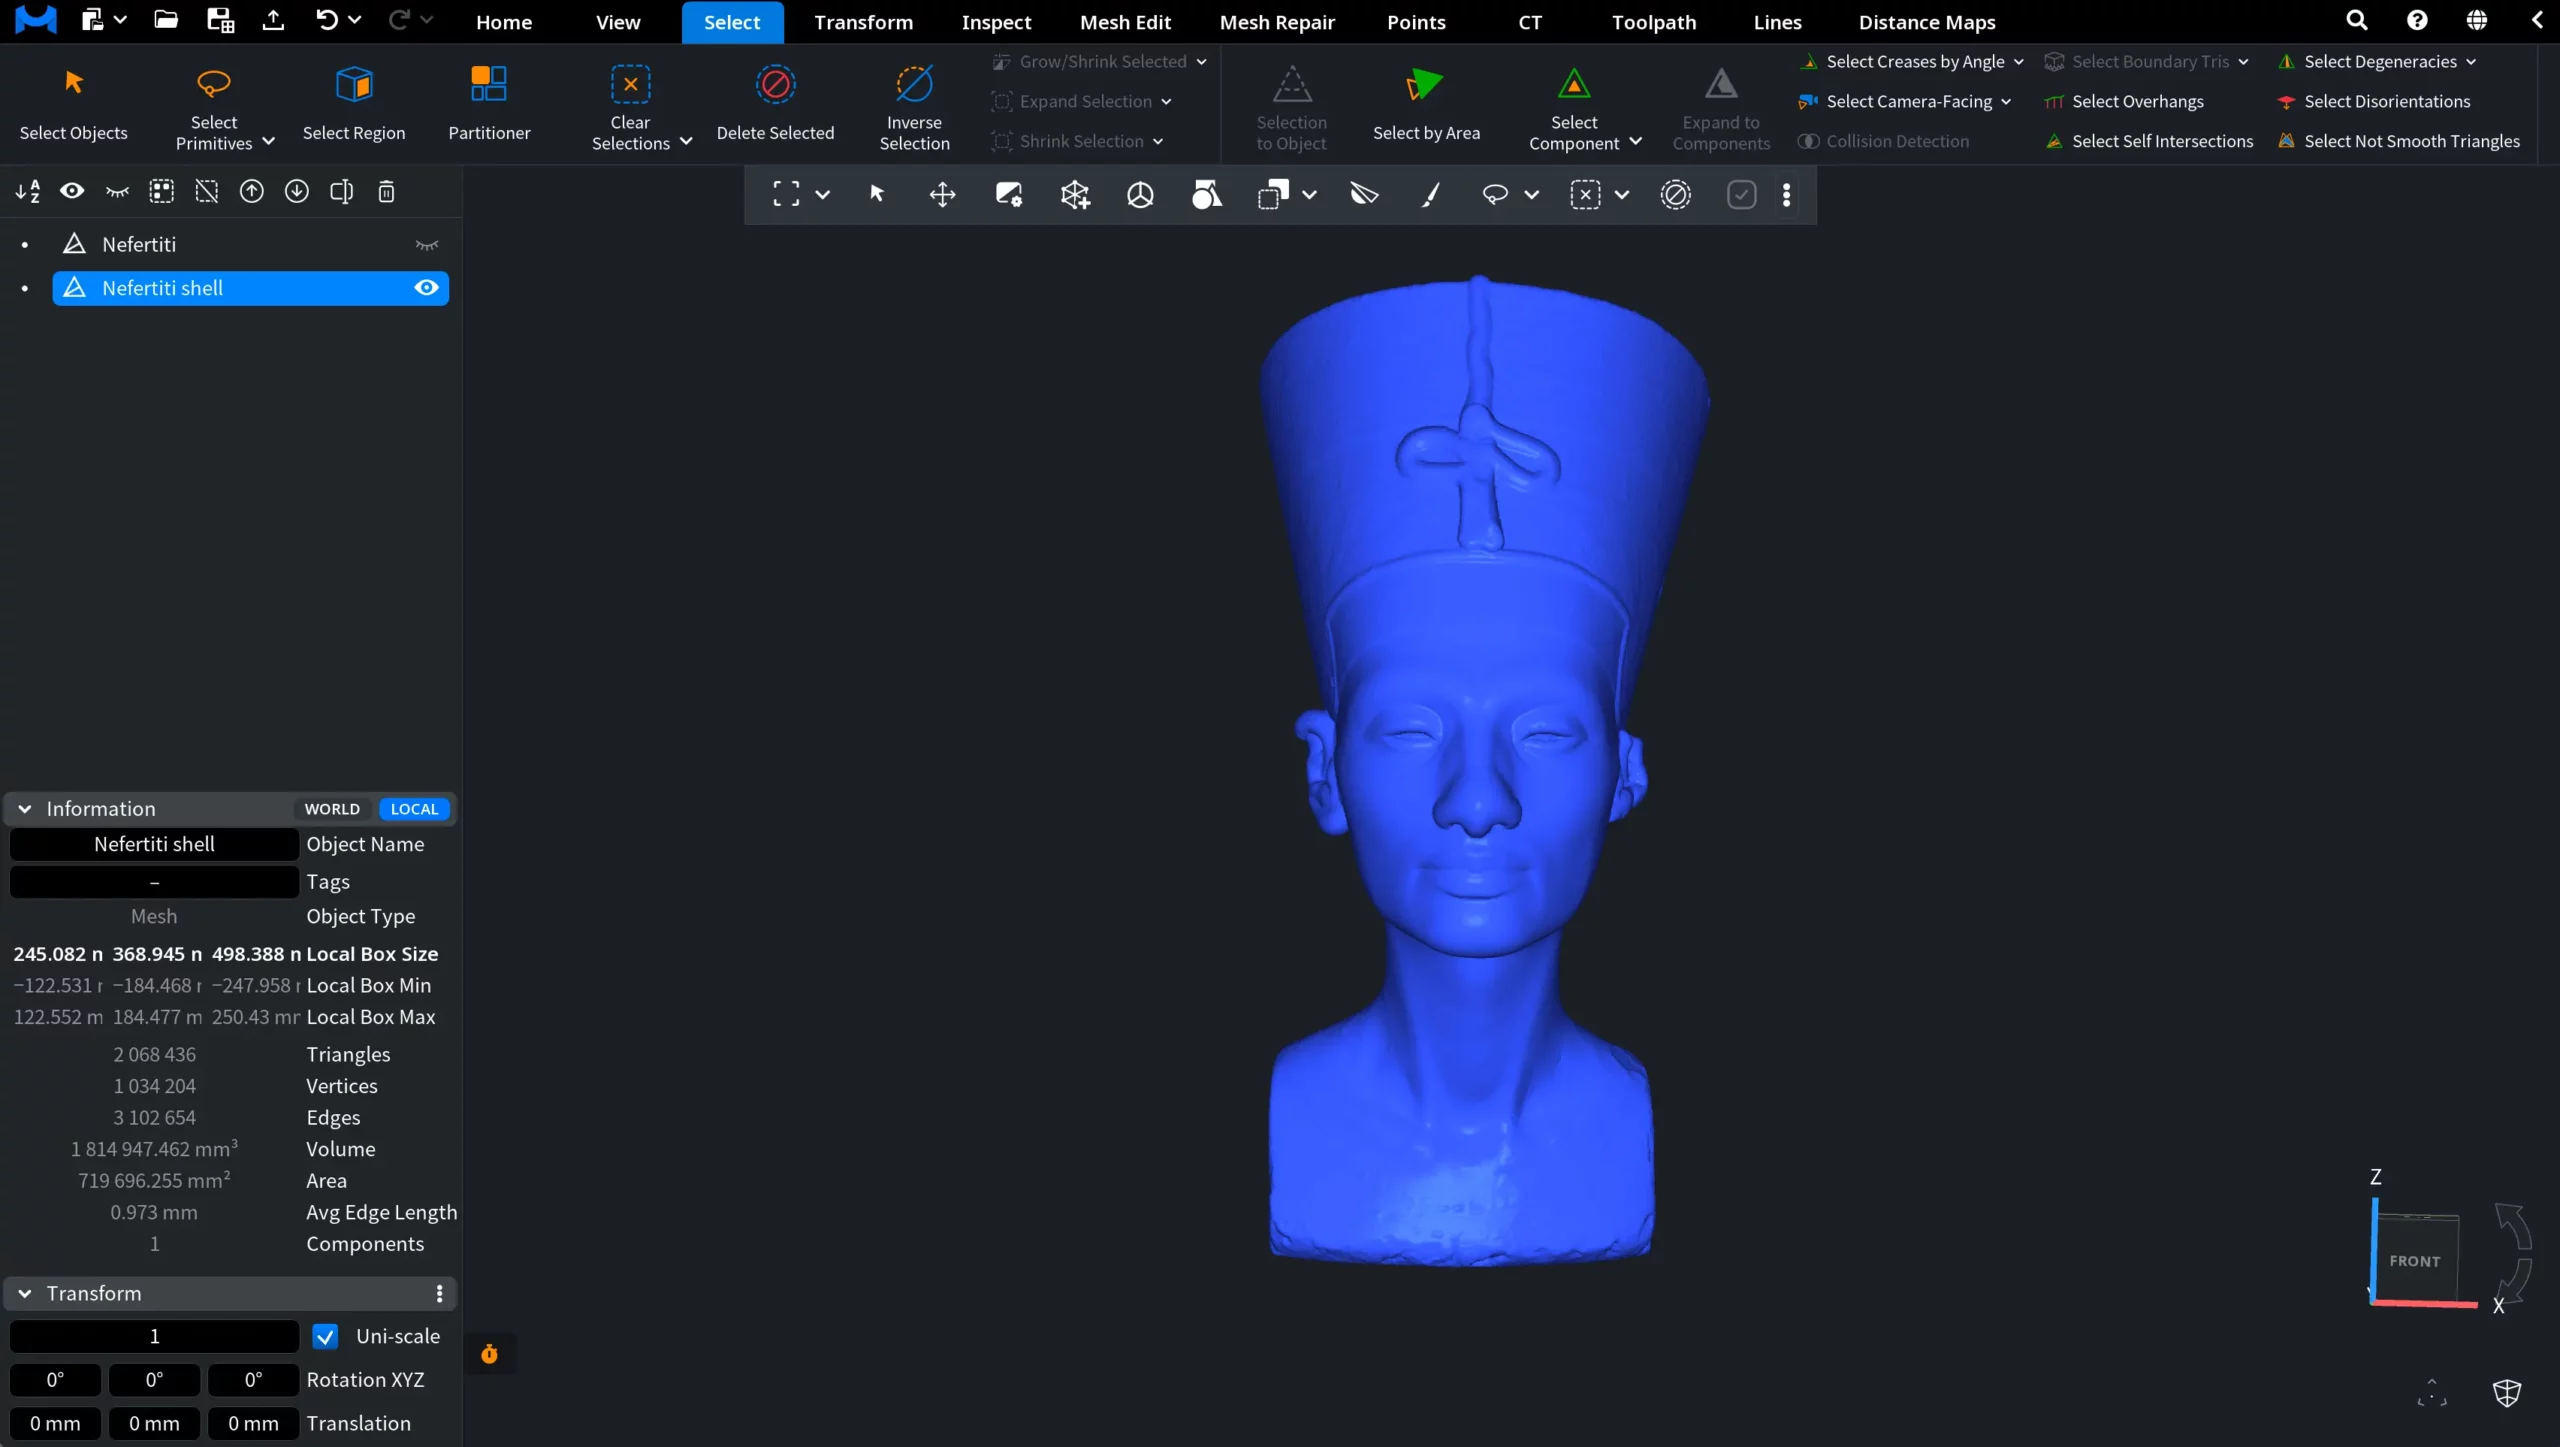
To see what has happened inside the model, we used the Section tool under the Mesh Edit tab and drew a plane. As you can see, the shell thickness in the upper part is clearly greater than in the lower part, just as intended.