The Flip Normals tool, located under the Mesh Repair tab, reverses the normals of active mesh objects. If only one mesh object is active, the tool can also reverse the orientation of individual components. To flip the normals of one or more meshes, select the object(s) in the scene tree and click Flip Normals under the Mesh Repair tab.

To demonstrate how the tool works, we loaded a flat mesh and enabled Show Normals under the Inspect tab. In the viewport:
- The white lines represent the mesh normals and show the direction in which they point.
- The side of the mesh toward which the normals point is displayed in blue.
- The opposite side is displayed in olive green.
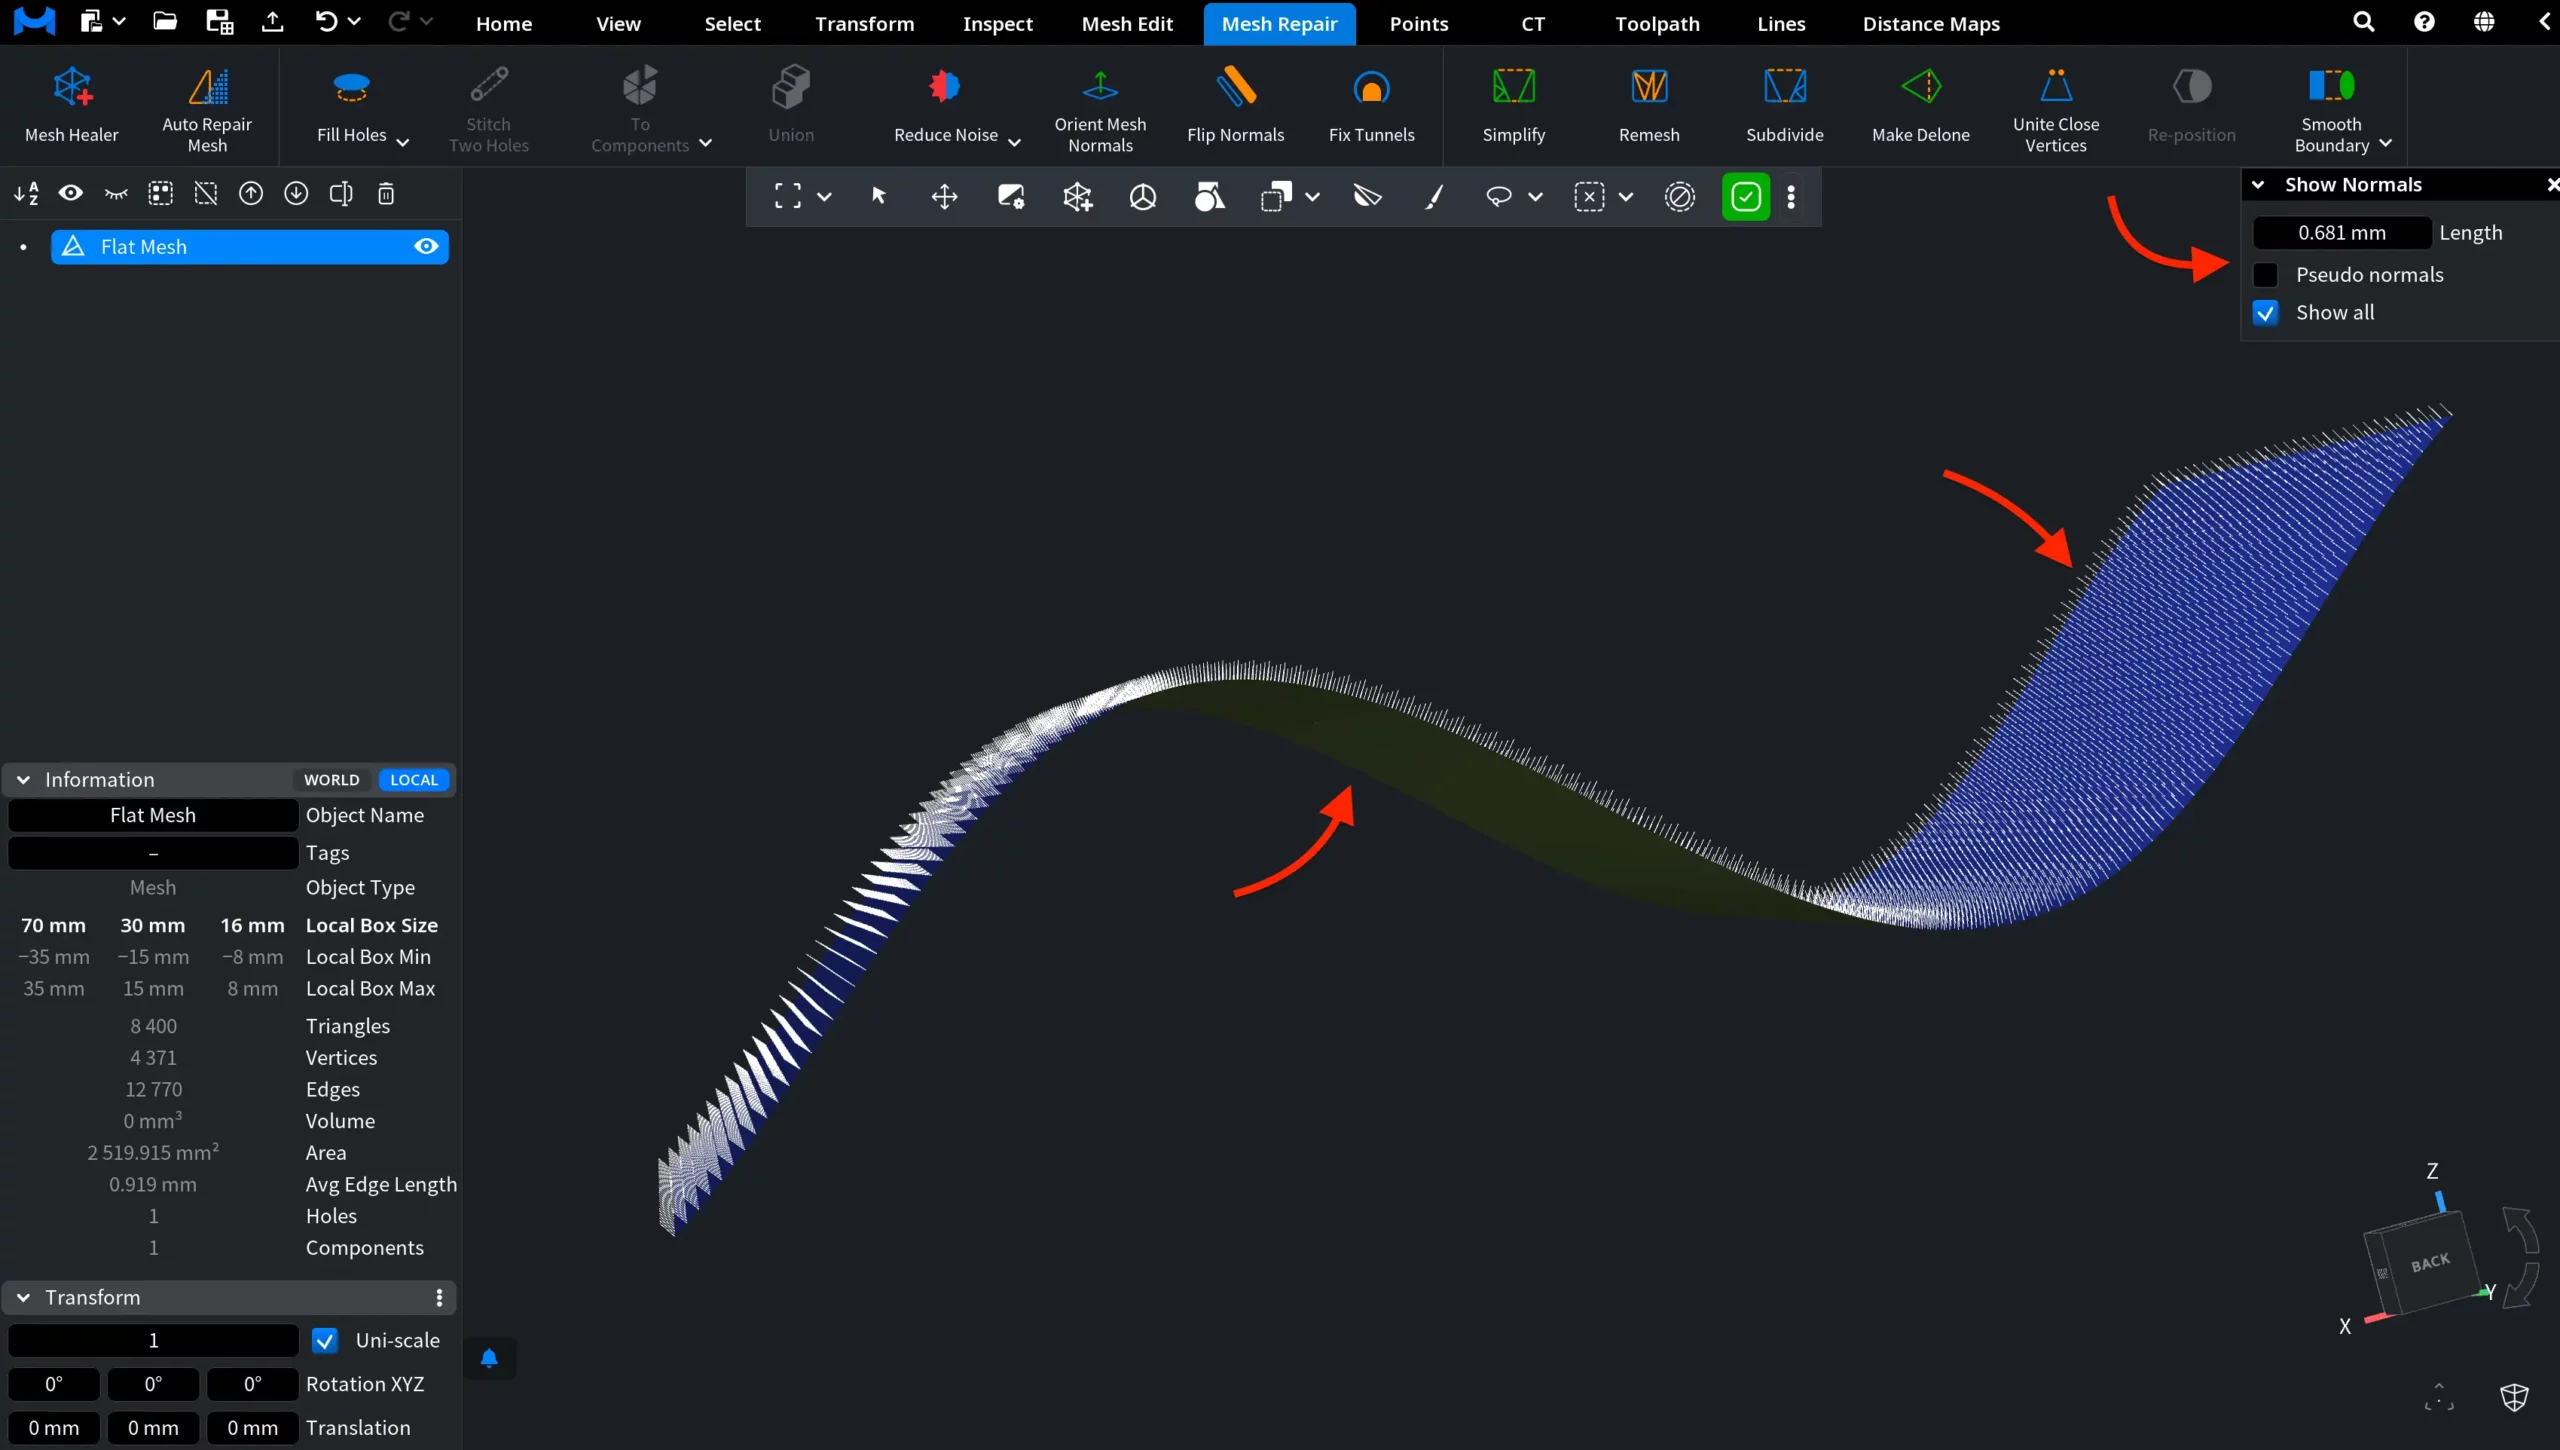
After clicking Flip Normals, MeshInspector automatically closes the Show Normals panel. However, you do not need to enable Show Normals again to verify the result.
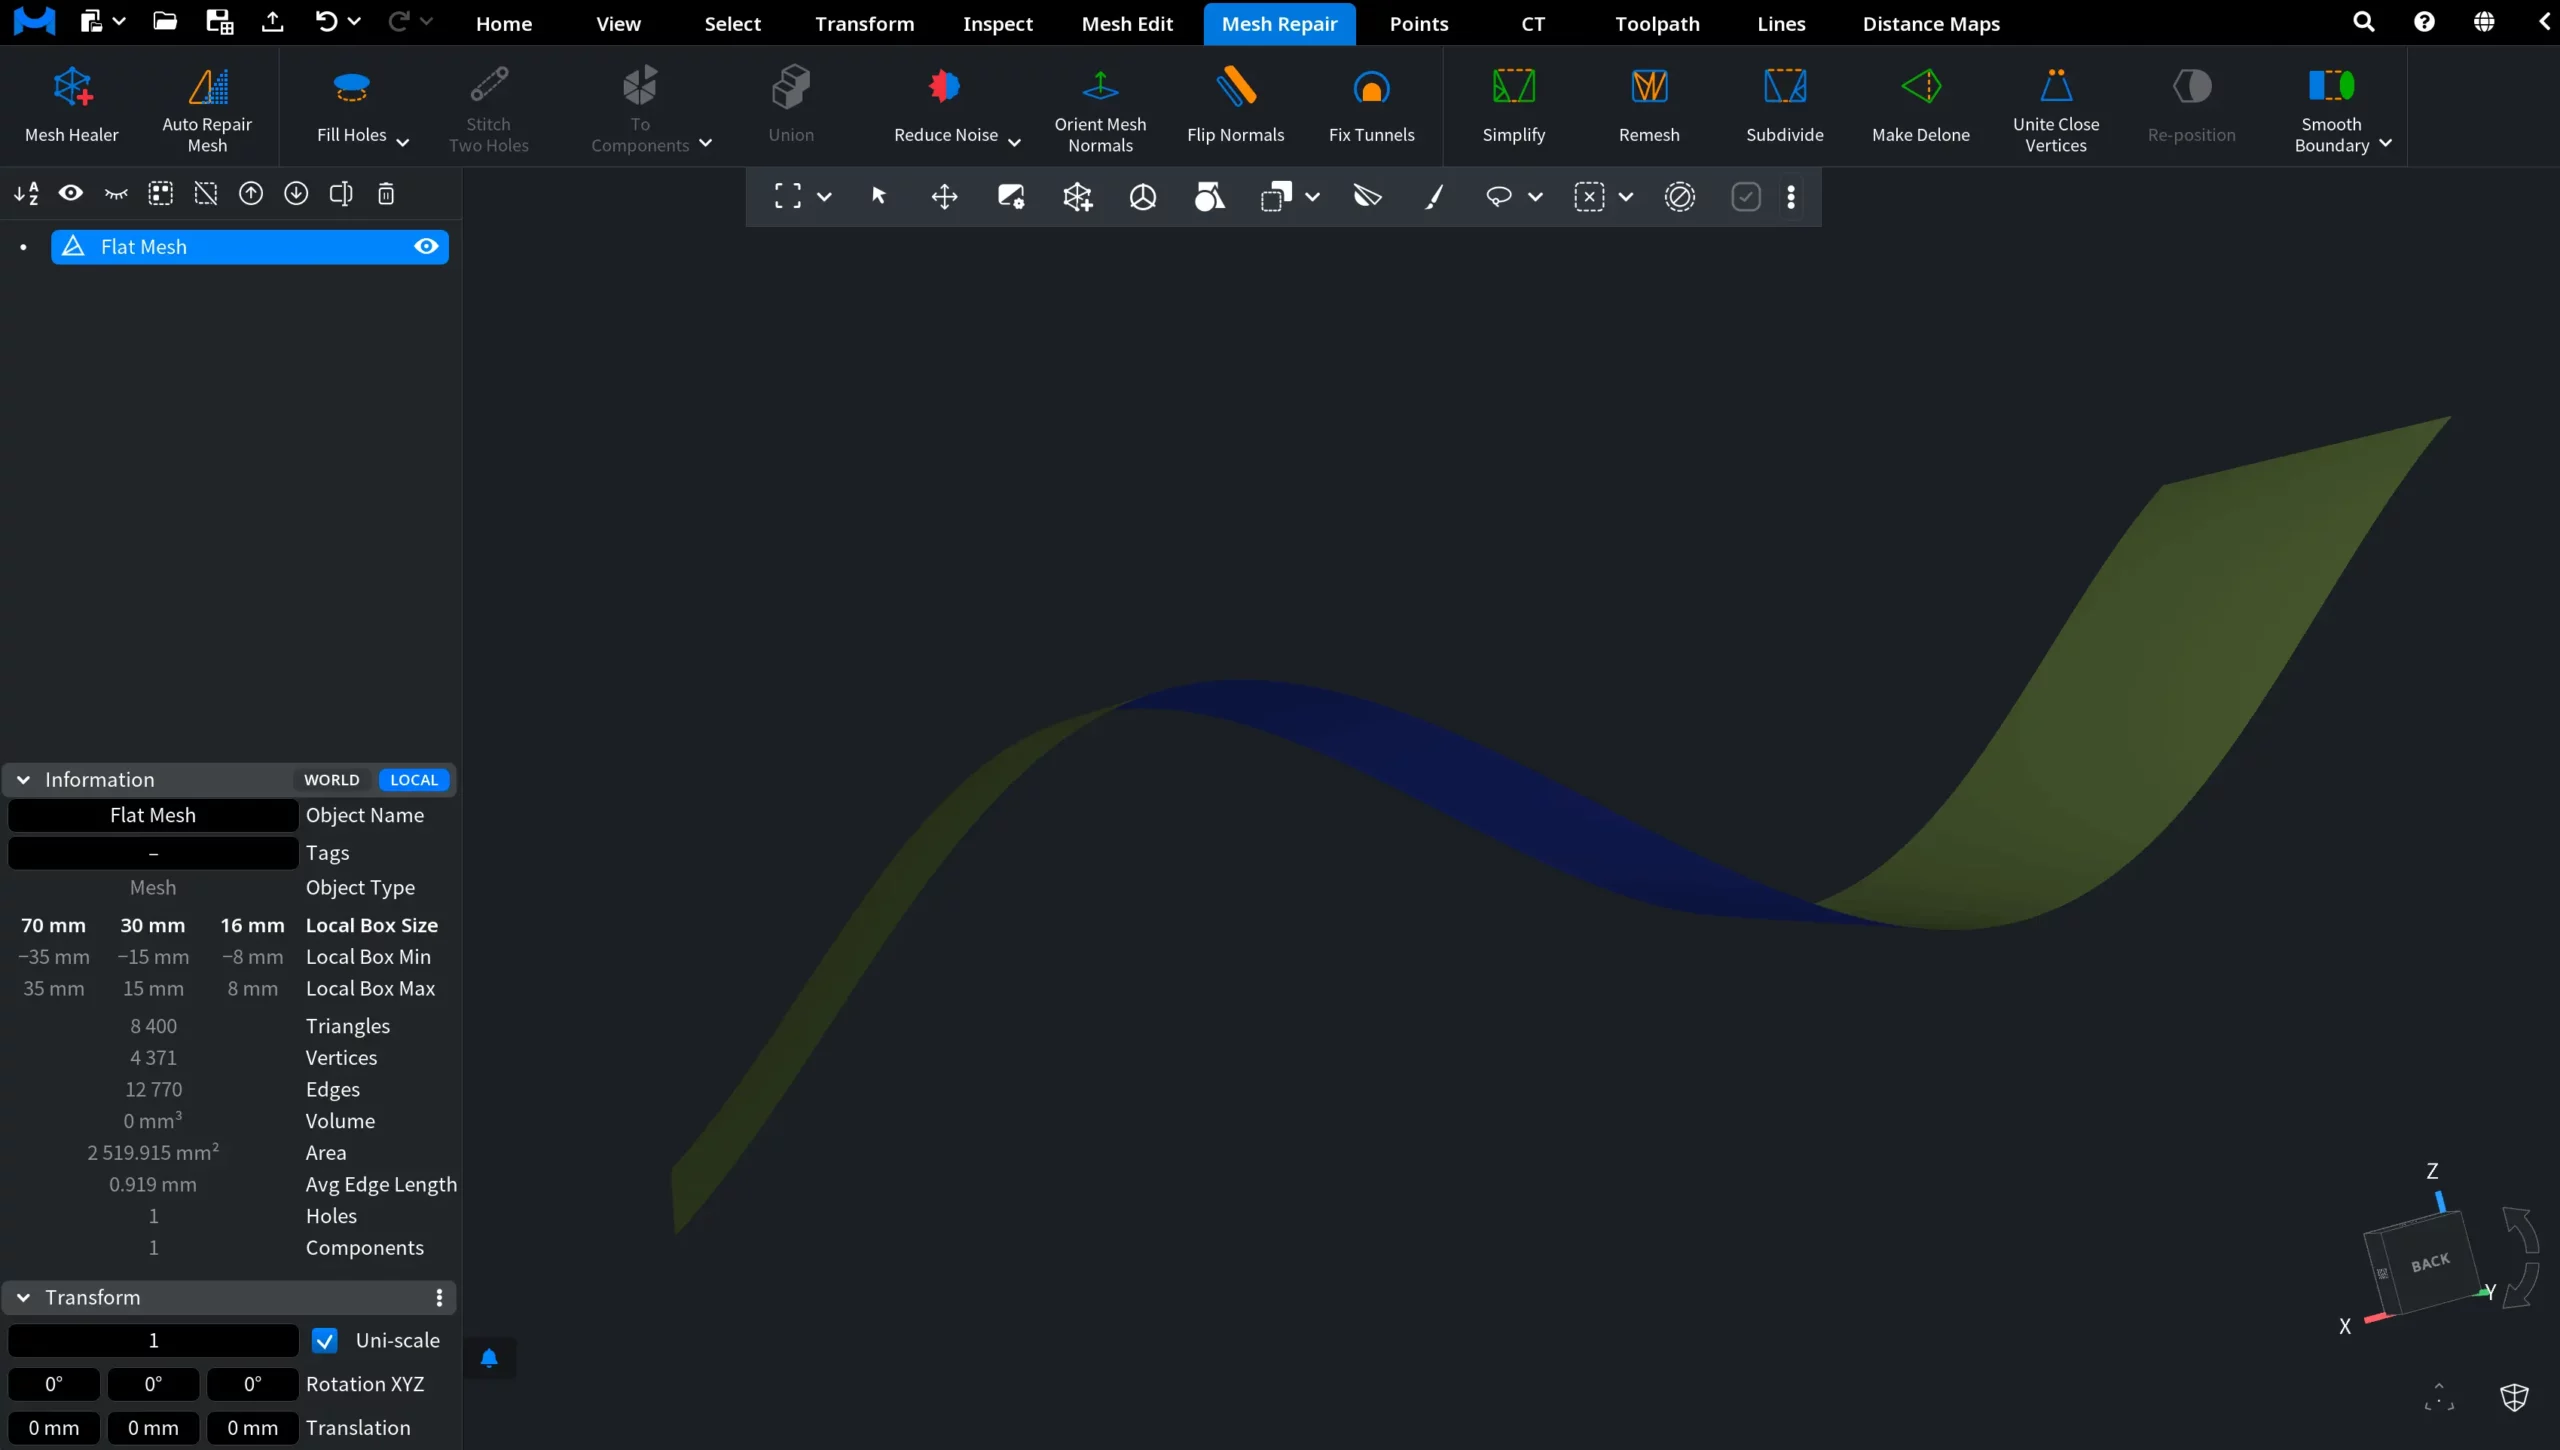
The surface colors indicate that the normals have been flipped successfully: the side that was previously blue is now olive green, while the opposite side is blue. This means that the orientation of the mesh faces has been reversed and the normals now point in the opposite direction.
Guide to the Flip Normals Tool for Meshes in MeshInspector