The Face Selector tool in MeshInspector is designed to streamline the selection process in your 3D modeling projects, offering precision and ease. This guide will walk you through the functionalities and settings of the Face Selector tool to help you make the most out of your 3D models.
Accessing the Face Selector Tool

1. Open MeshInspector and navigate to the 'Select' tab.
2. Locate the “Select Primitives” tool and click on the dropdown menu.
3. Choose “Face Selector” to activate the tool. The Tool Settings window will open, presenting various settings tailored for specific tasks.
Selection Modes Explained
The Face Selector tool offers several modes to cater to different selection needs:
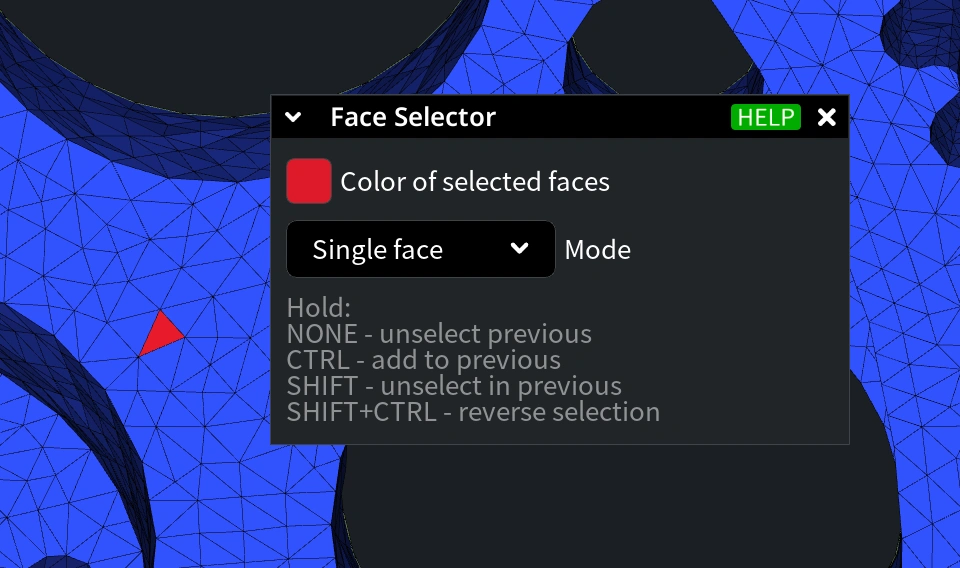
Single Face Mode:
Select a single triangle under your cursor, suitable for minor adjustments.
Polygon Model Mode:
Click and drag to draw a boundary line around the desired area. Adjust the “line width” to set the boundary line's thickness.
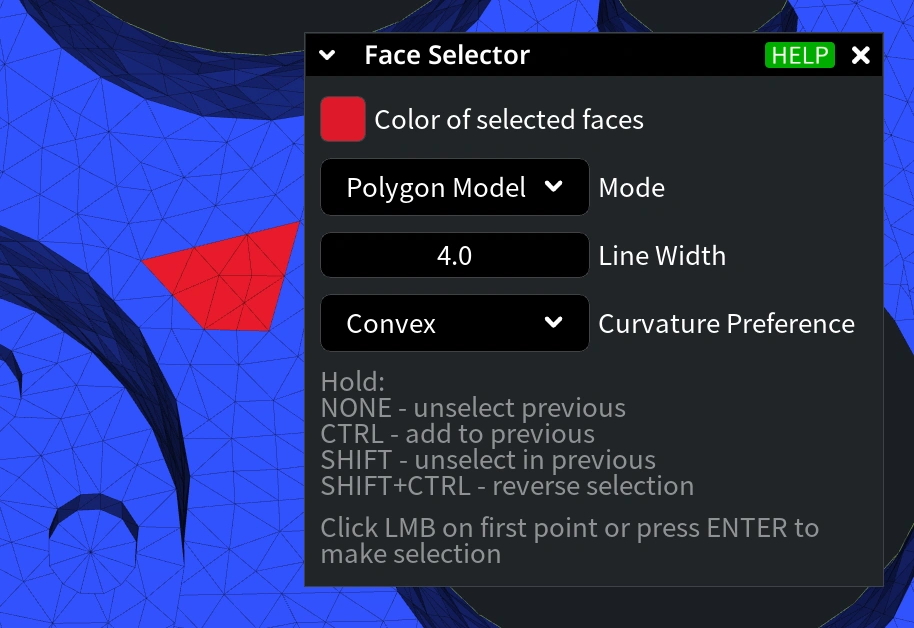
Curvature Preference:
Opt between “Geodesic” for the shortest boundary, “Convex” for a longer boundary through convex areas, or “Concave” for a longer path through concave areas.
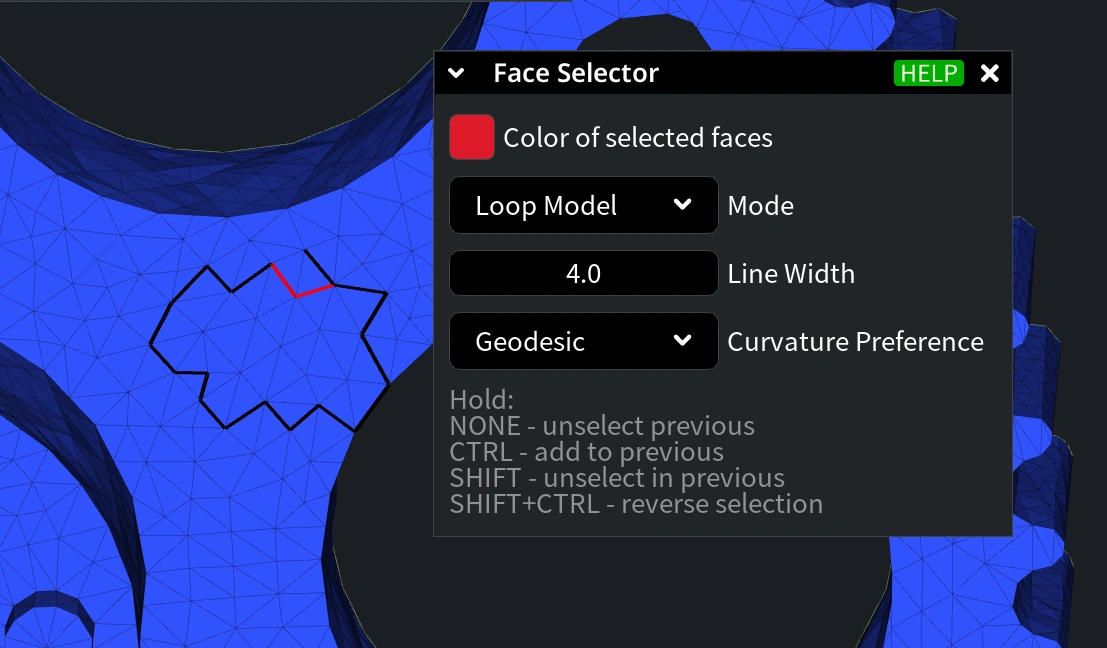
Loop Model Mode:
Press and drag your mouse to encircle your area of interest. This mode also allows for “Line Width” and “Curvature Preferences” adjustments.
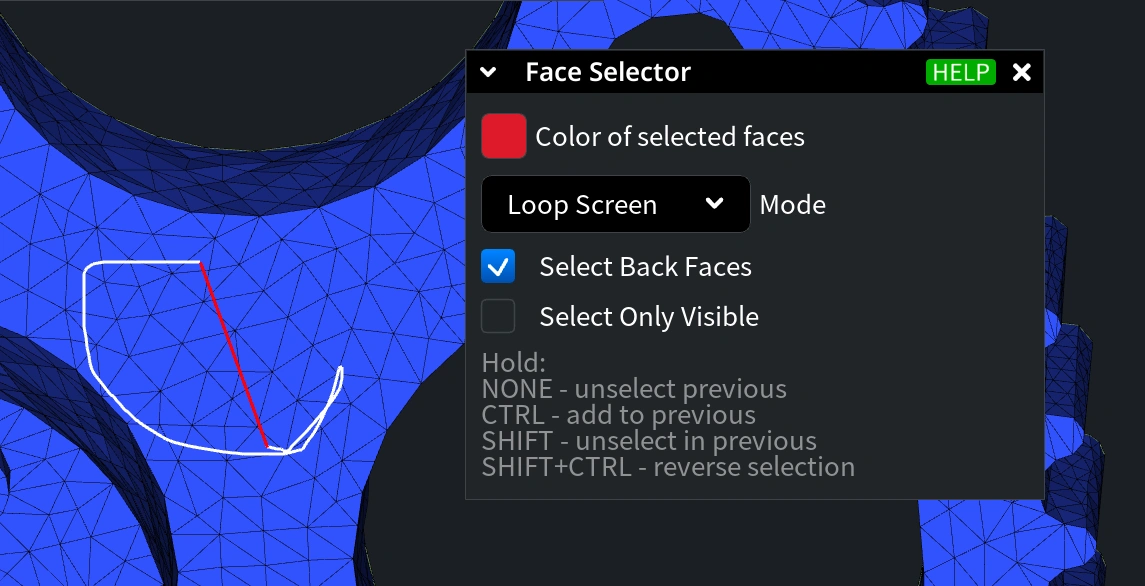
Loop Screen Mode:
Define the boundary directly on the screen by pressing and moving the mouse, ideal for outlining your selected area directly.
Enhancing Selection Precision
To further refine your selection, the Face Selector tool includes checkbox options:
- Select Back Faces: Enables the selection of faces not visible from the current camera view.
- Select Only Visible: Limits selection to faces that are not obscured by other elements.
Brush Screen Mode
Utilize the brush tool to paint over the area you intend to select. This mode includes options for “Select Back Faces” and “Select Only Visible,” offering nuanced control over your selection.
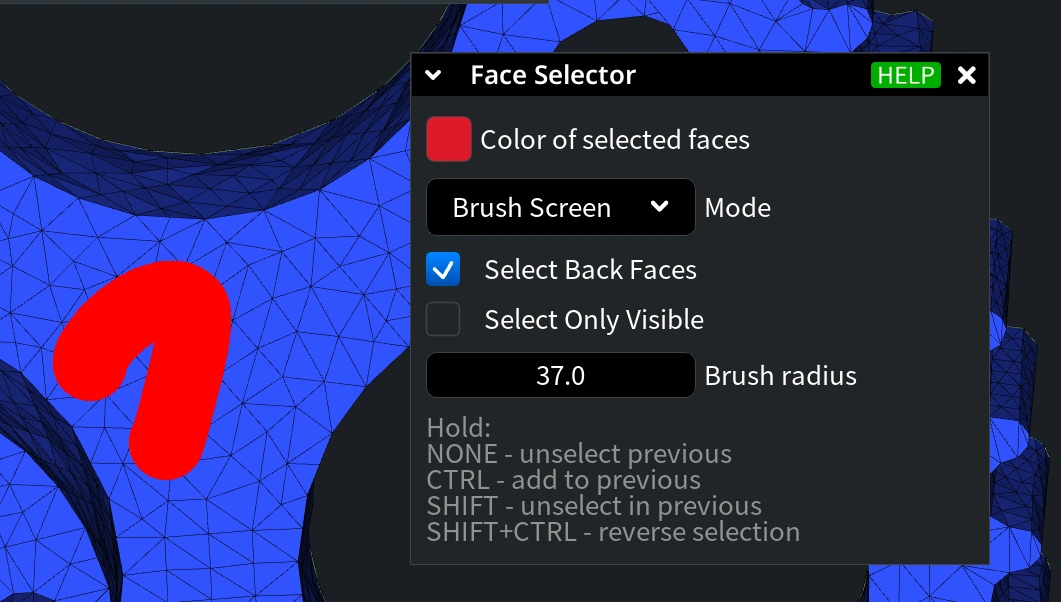
Keyboard Shortcuts for Enhanced Flexibility
- NONE: Clears your previous selection.
- CTRL (Hold): Adds more faces to your existing selection.
- SHIFT: Removes faces from your selection.
- SHIFT + CTRL: Inverts your current selection.
Conclusion
The Face Selector tool in MeshInspector empowers you with detailed control over the selection process in your 3D processing efforts. By utilizing the various modes and settings provided, you can achieve precise and efficient selections, enhancing your workflow.
If you have any questions or require further assistance, please visit our help center or contact us at support@meshinspector.com. Our team is always here to help.