Measure Angle is an inspection tool that lets you measure edges that you select on objects of interest. When activated, Measure Angle enables angle construction directly in the viewport. To start working with it, go to the Inspect tab and click on Measure Angle.

Once you click on it, a dedicated panel will open.
Measurement Modes and Settings
There are two main ways to use Measure Angle, depending on the active settings.
1. The first way is to assign points:
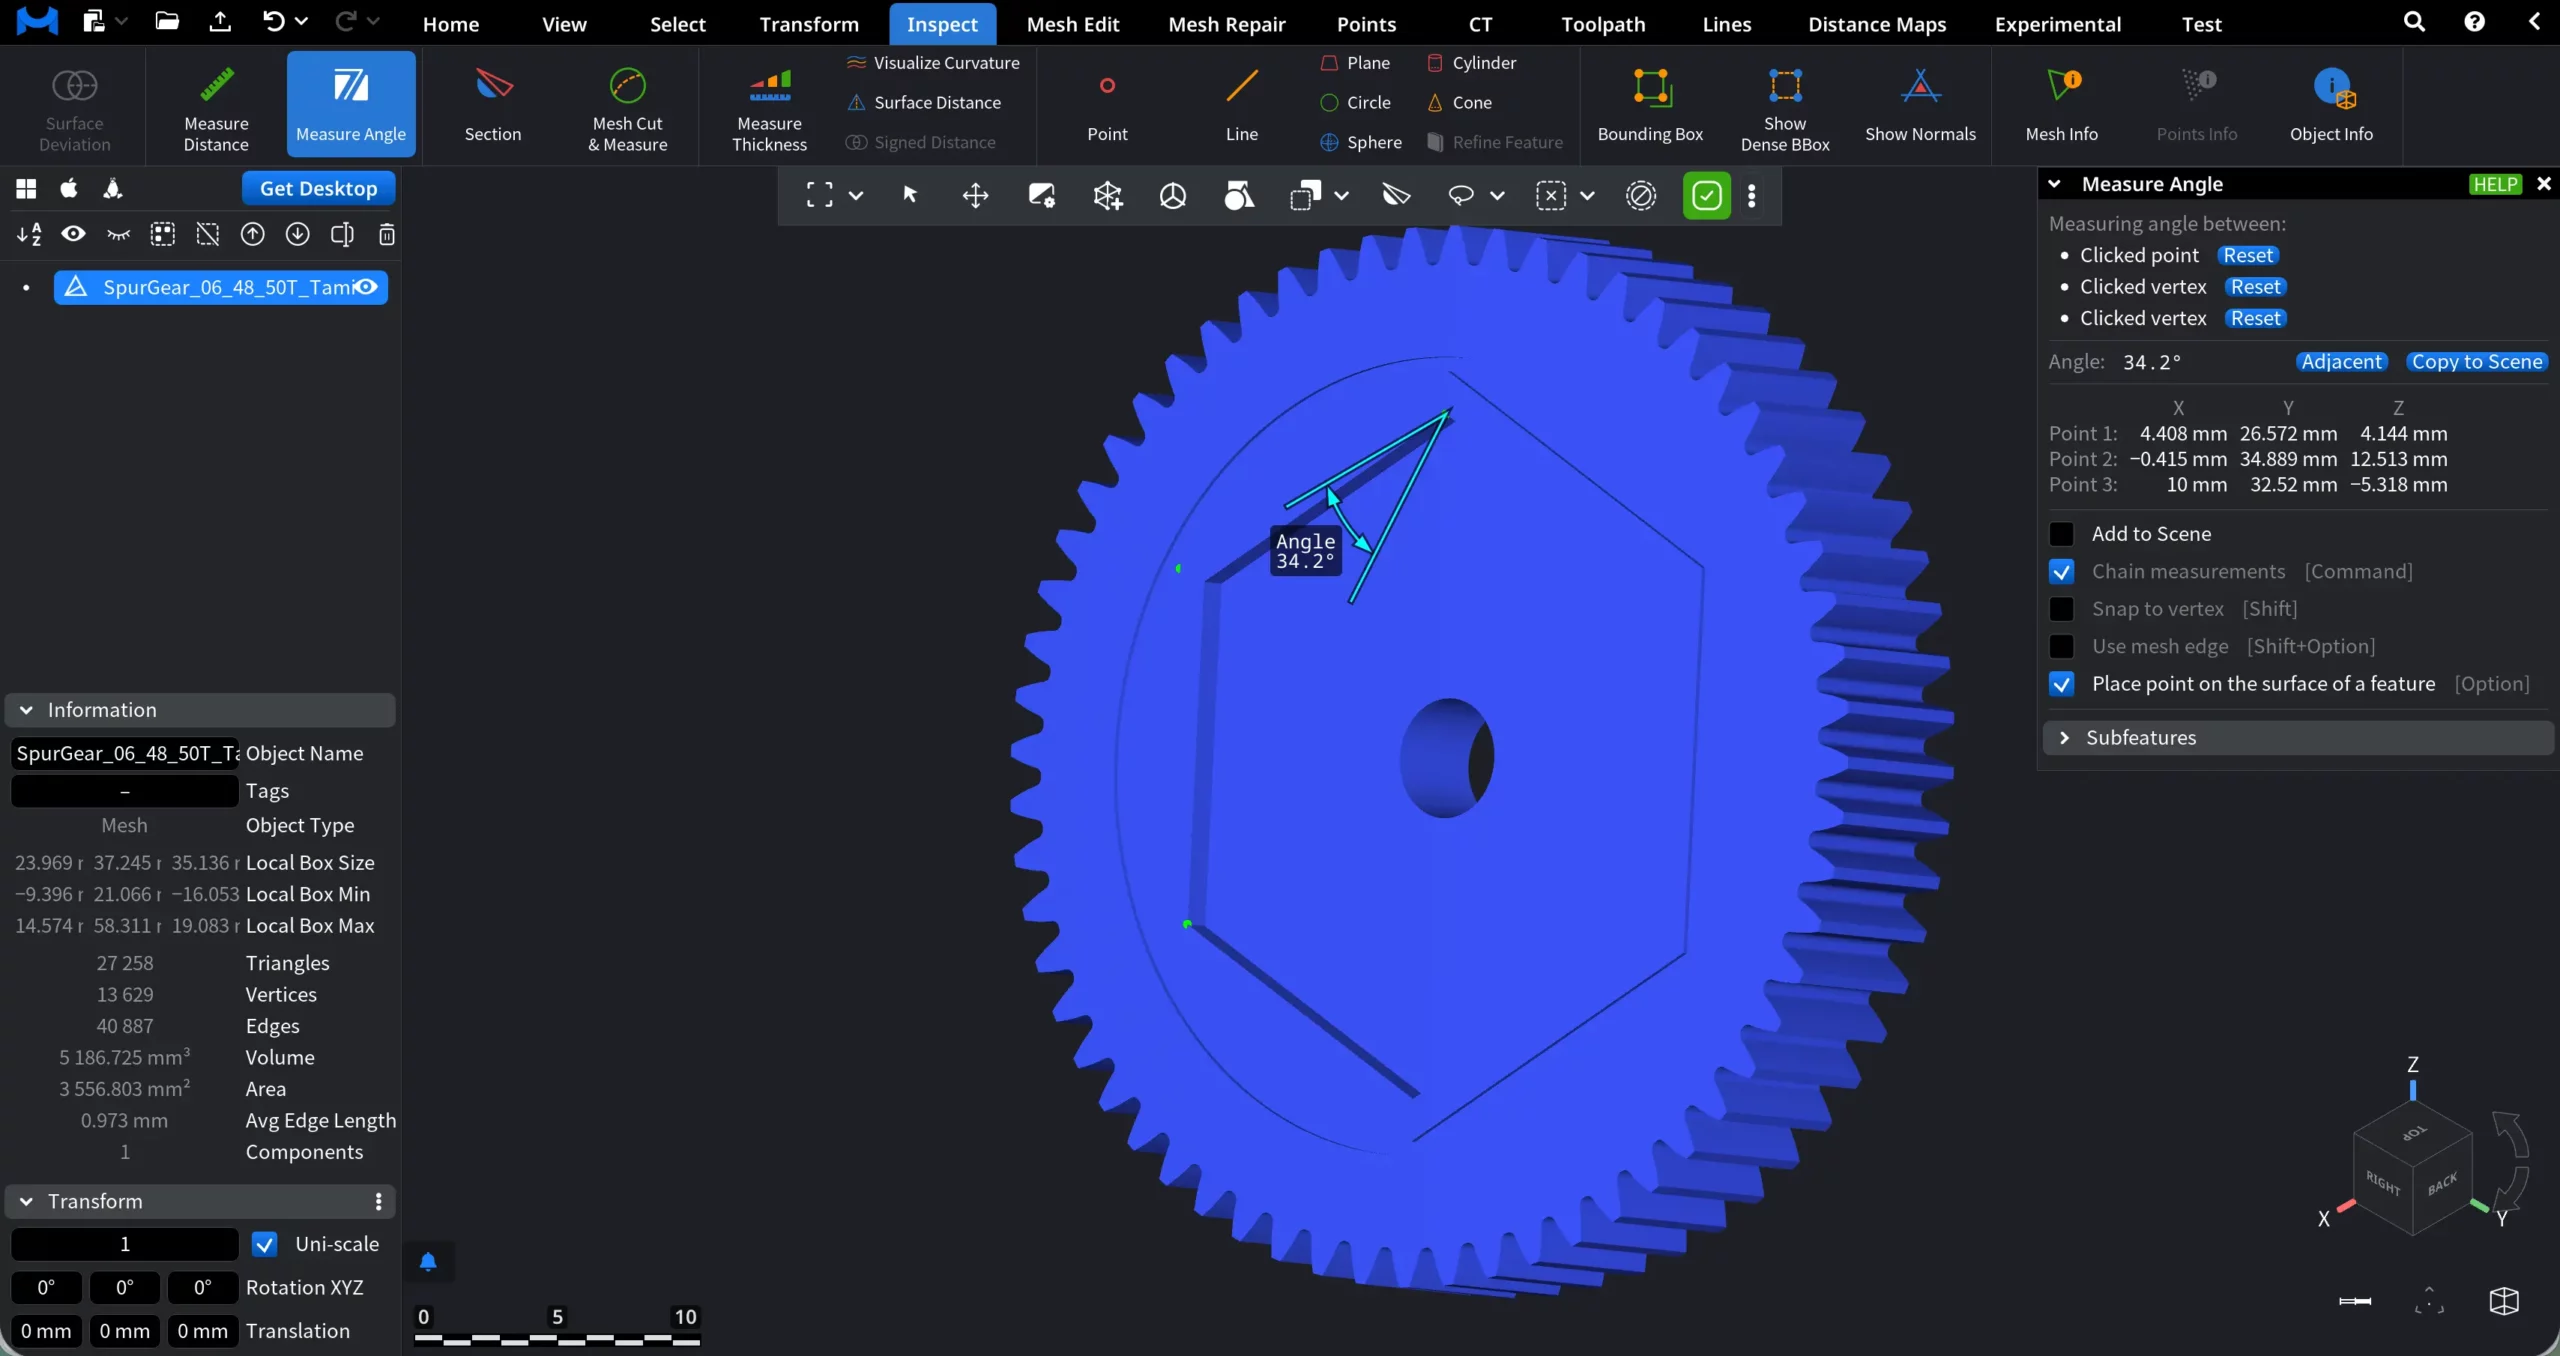
- Default behavior. By default, when you hover the cursor over the model and click, a point is assigned at the clicked location (Point 1 in the screenshot).
- Snap to Vertex. When Snap to Vertex is enabled (or when holding Shift while clicking), points can be placed on vertices only (Point 2 in the screenshot). This mode ensures maximum precision when working with mesh vertices.
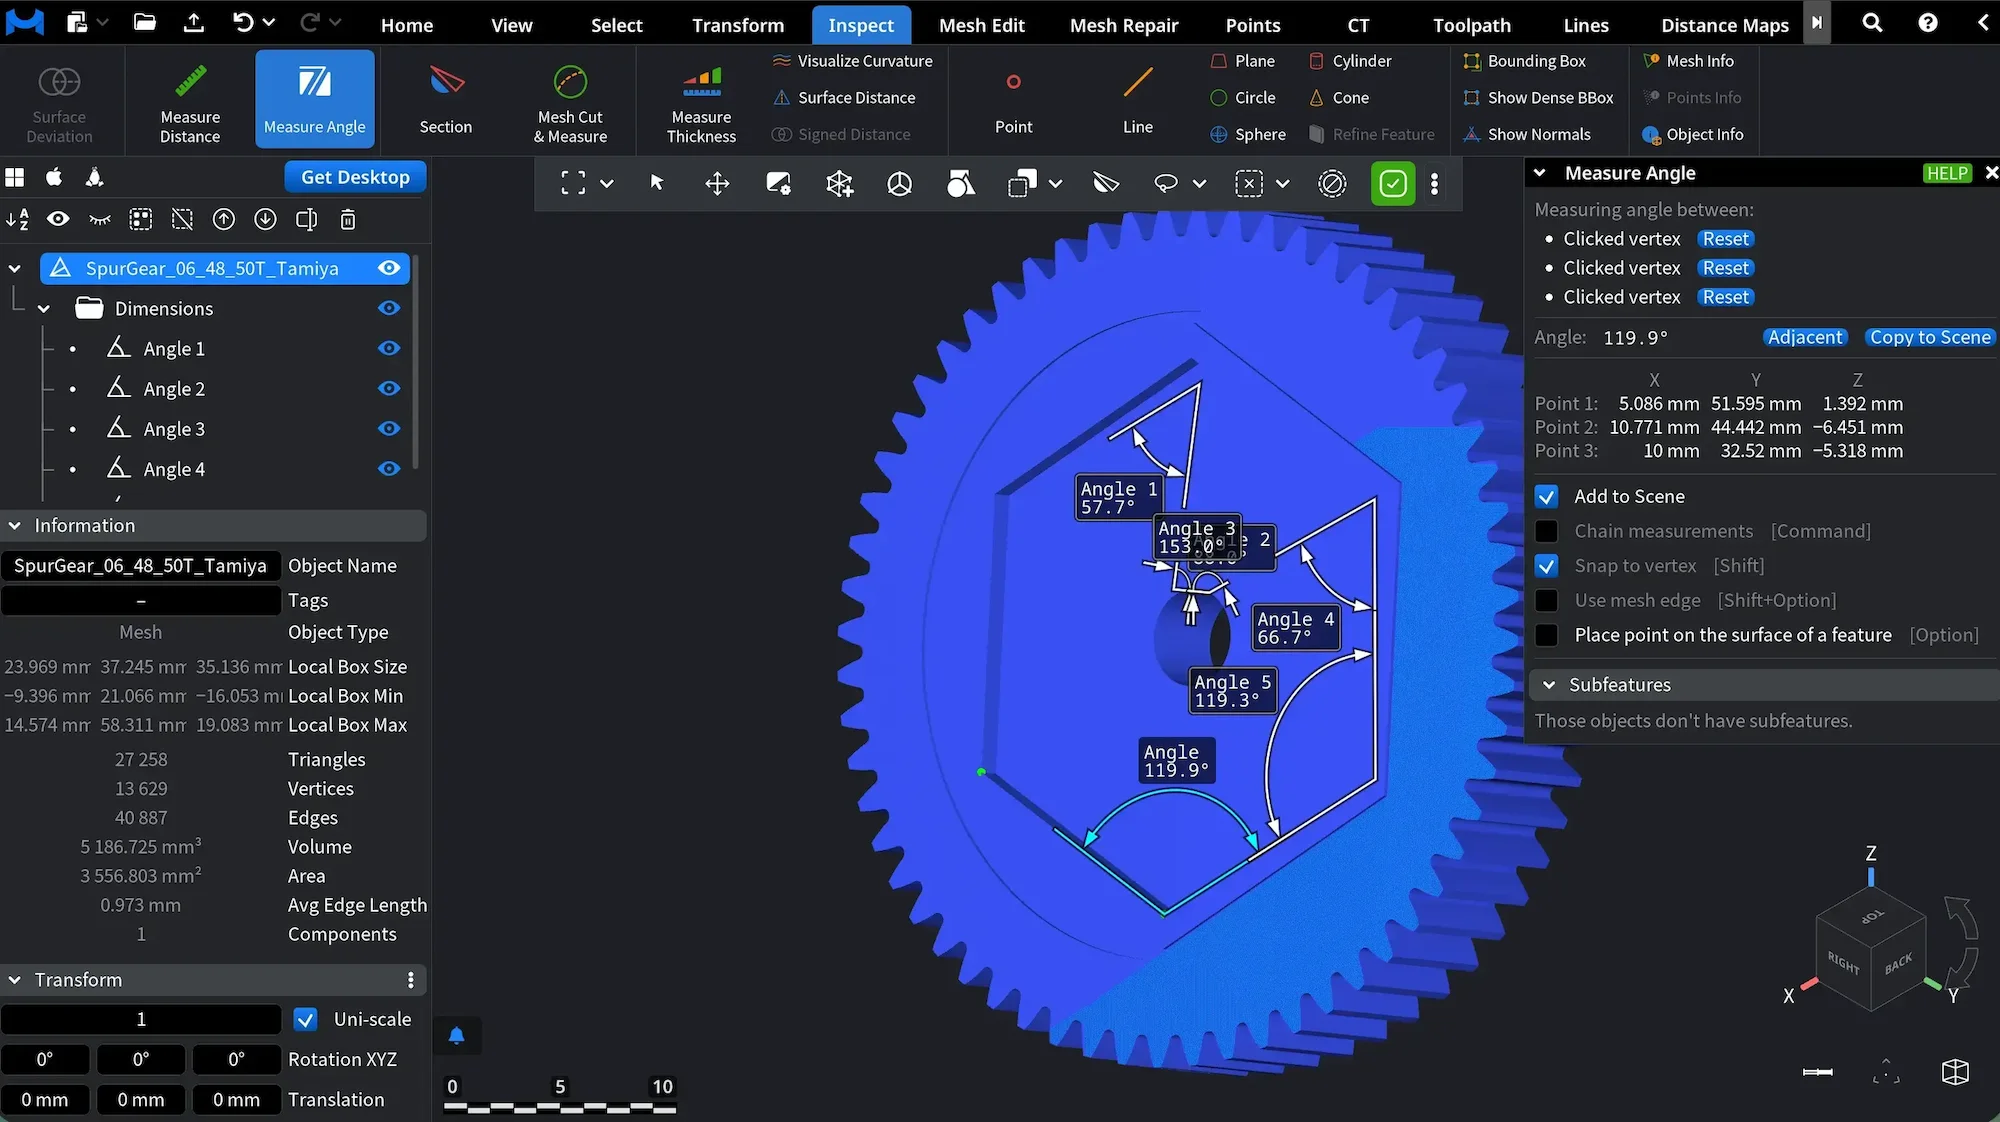
- Place point on the surface of a feature. When Place point on the surface of a feature is enabled (or when holding Option while clicking), points are constrained to the surface of the selected geometric feature. This option can be combined with Snap to Vertex, allowing you to control both feature context and point precision (Point 3 in the screenshot).
Any selected point can be deleted by clicking the Reset button located next to it. After that, you can add a new one.
2. The second way is to Use mesh edge (available for triangle-based objects only). When Use mesh edge is enabled (by checking the box or holding Shift and Option), angle measurement is based on existing mesh edges instead of freely placed points.
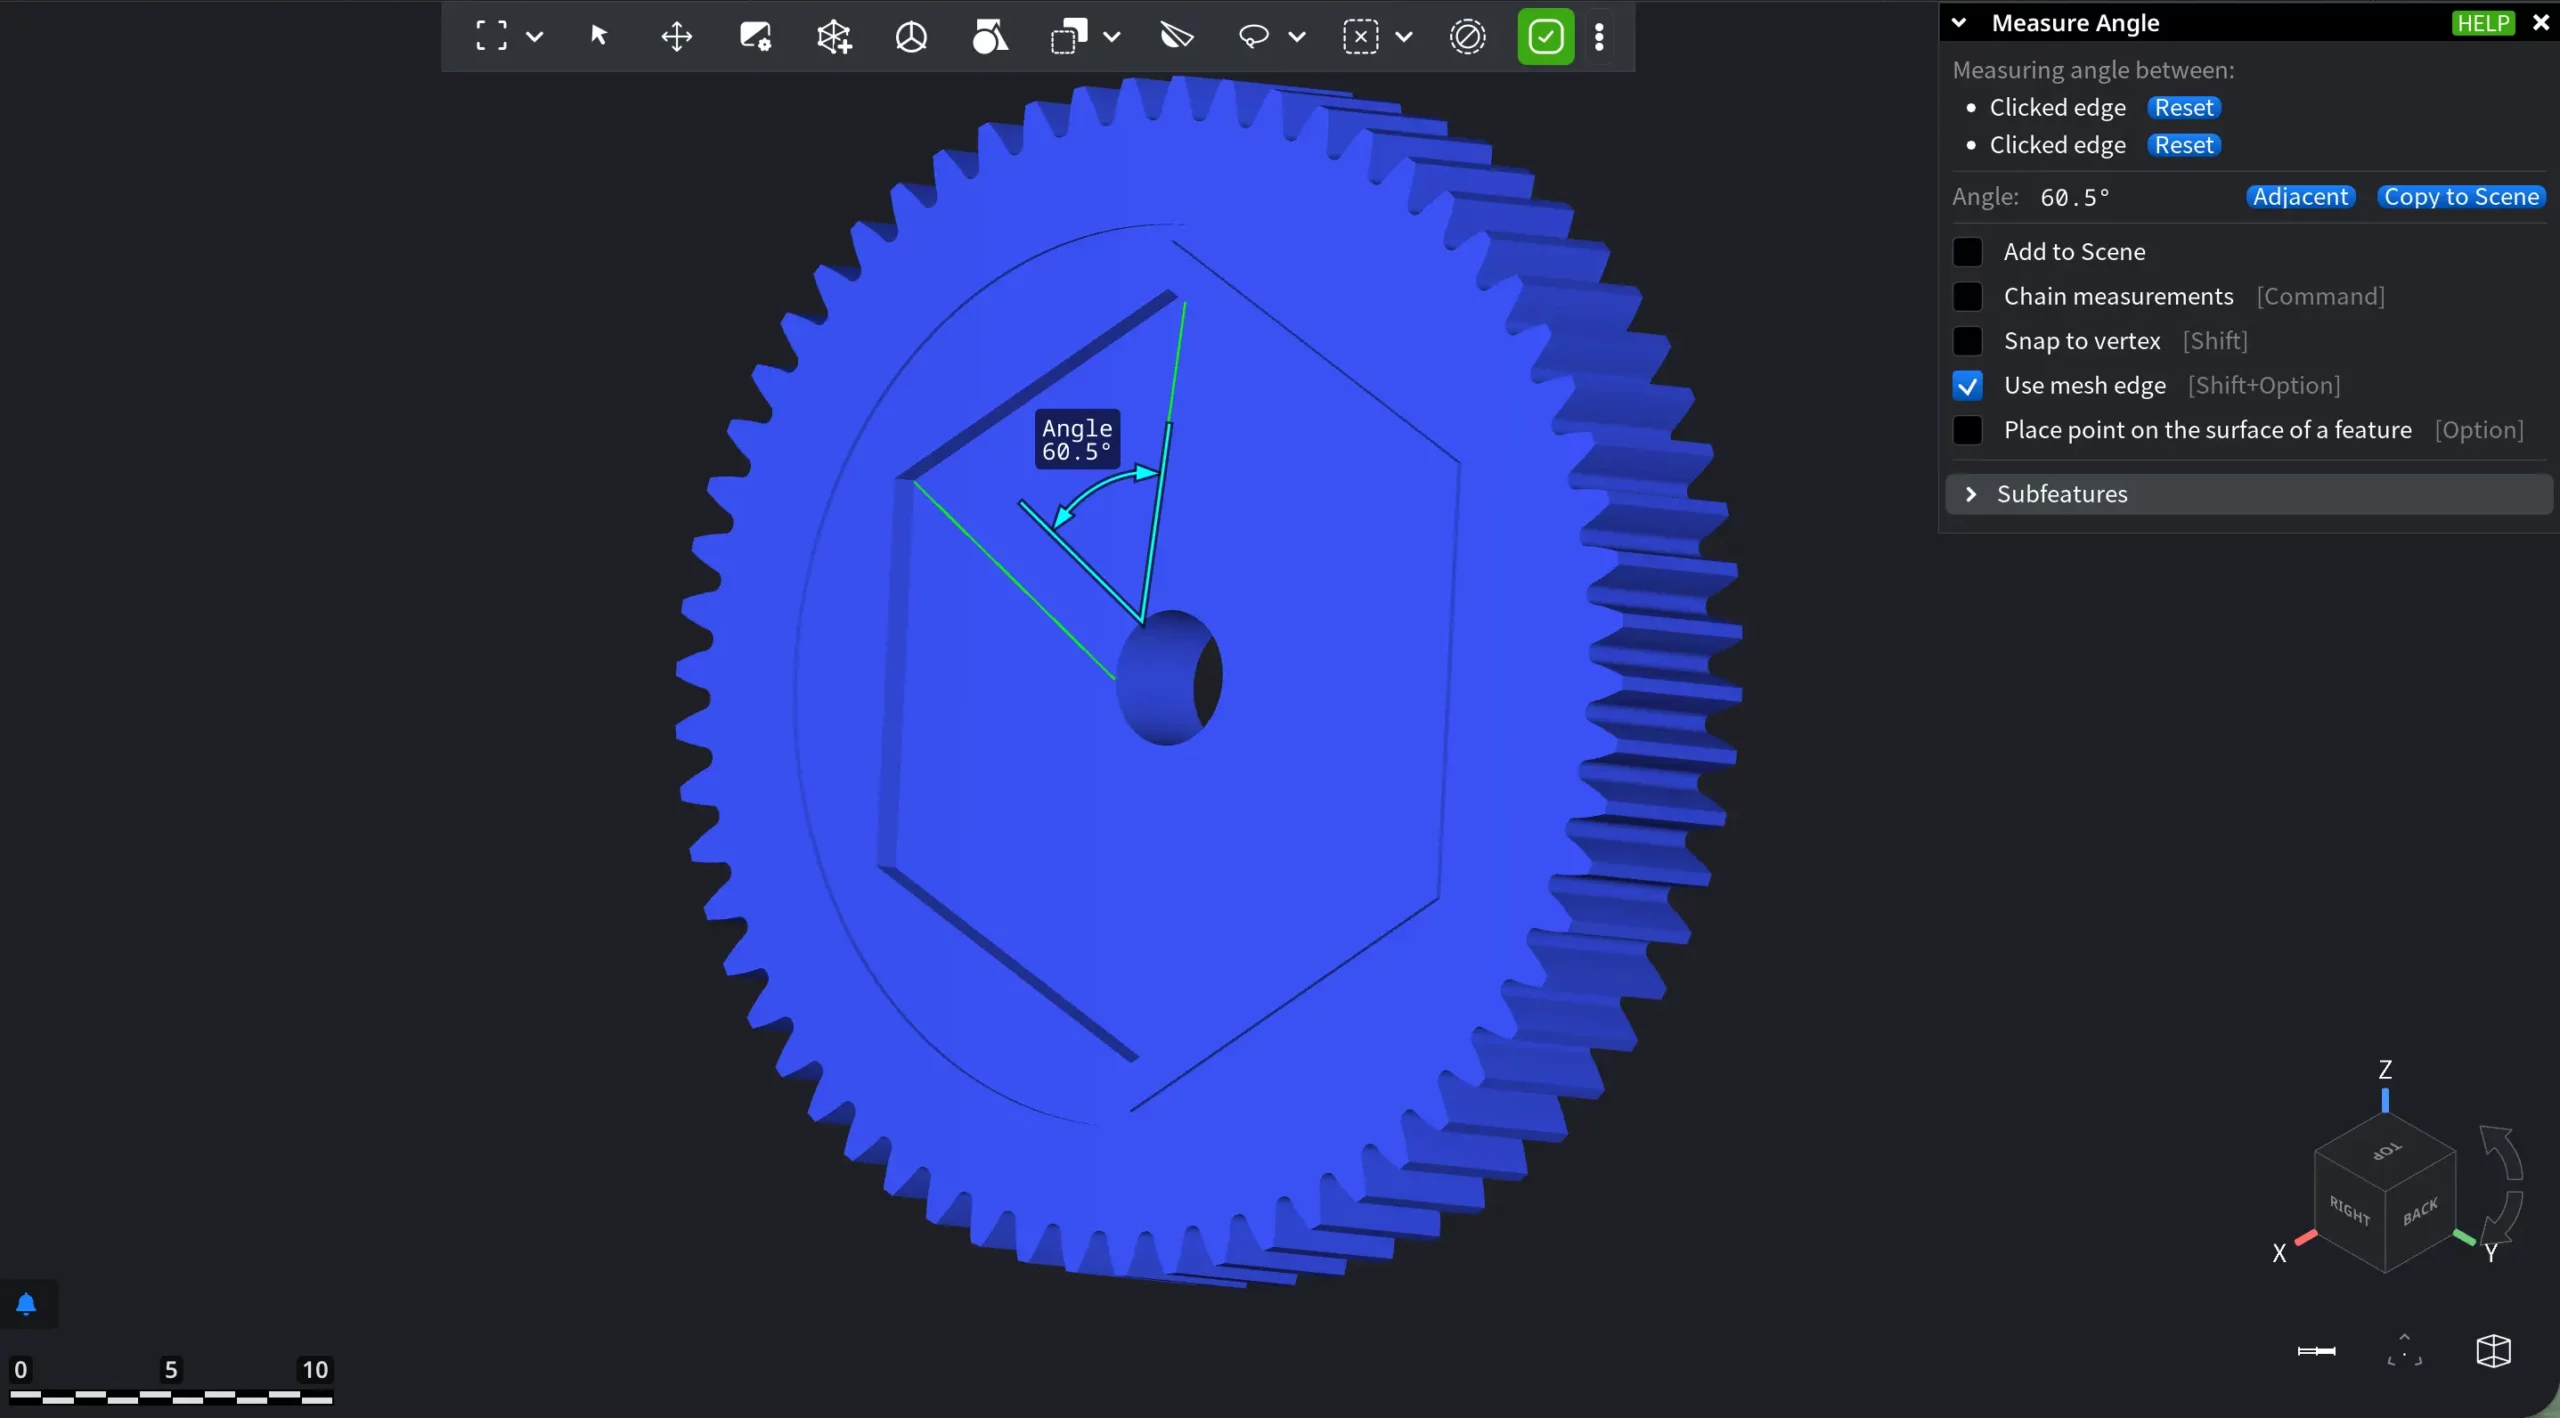
In this mode:
- Clicking on the model selects a mesh edge rather than an arbitrary surface point.
- Each selected edge defines a direction vector derived from the underlying triangle geometry.
- The measured angle is computed between the two selected edges.
Again, edges can be deleted through the blue Reset button, located next to it.
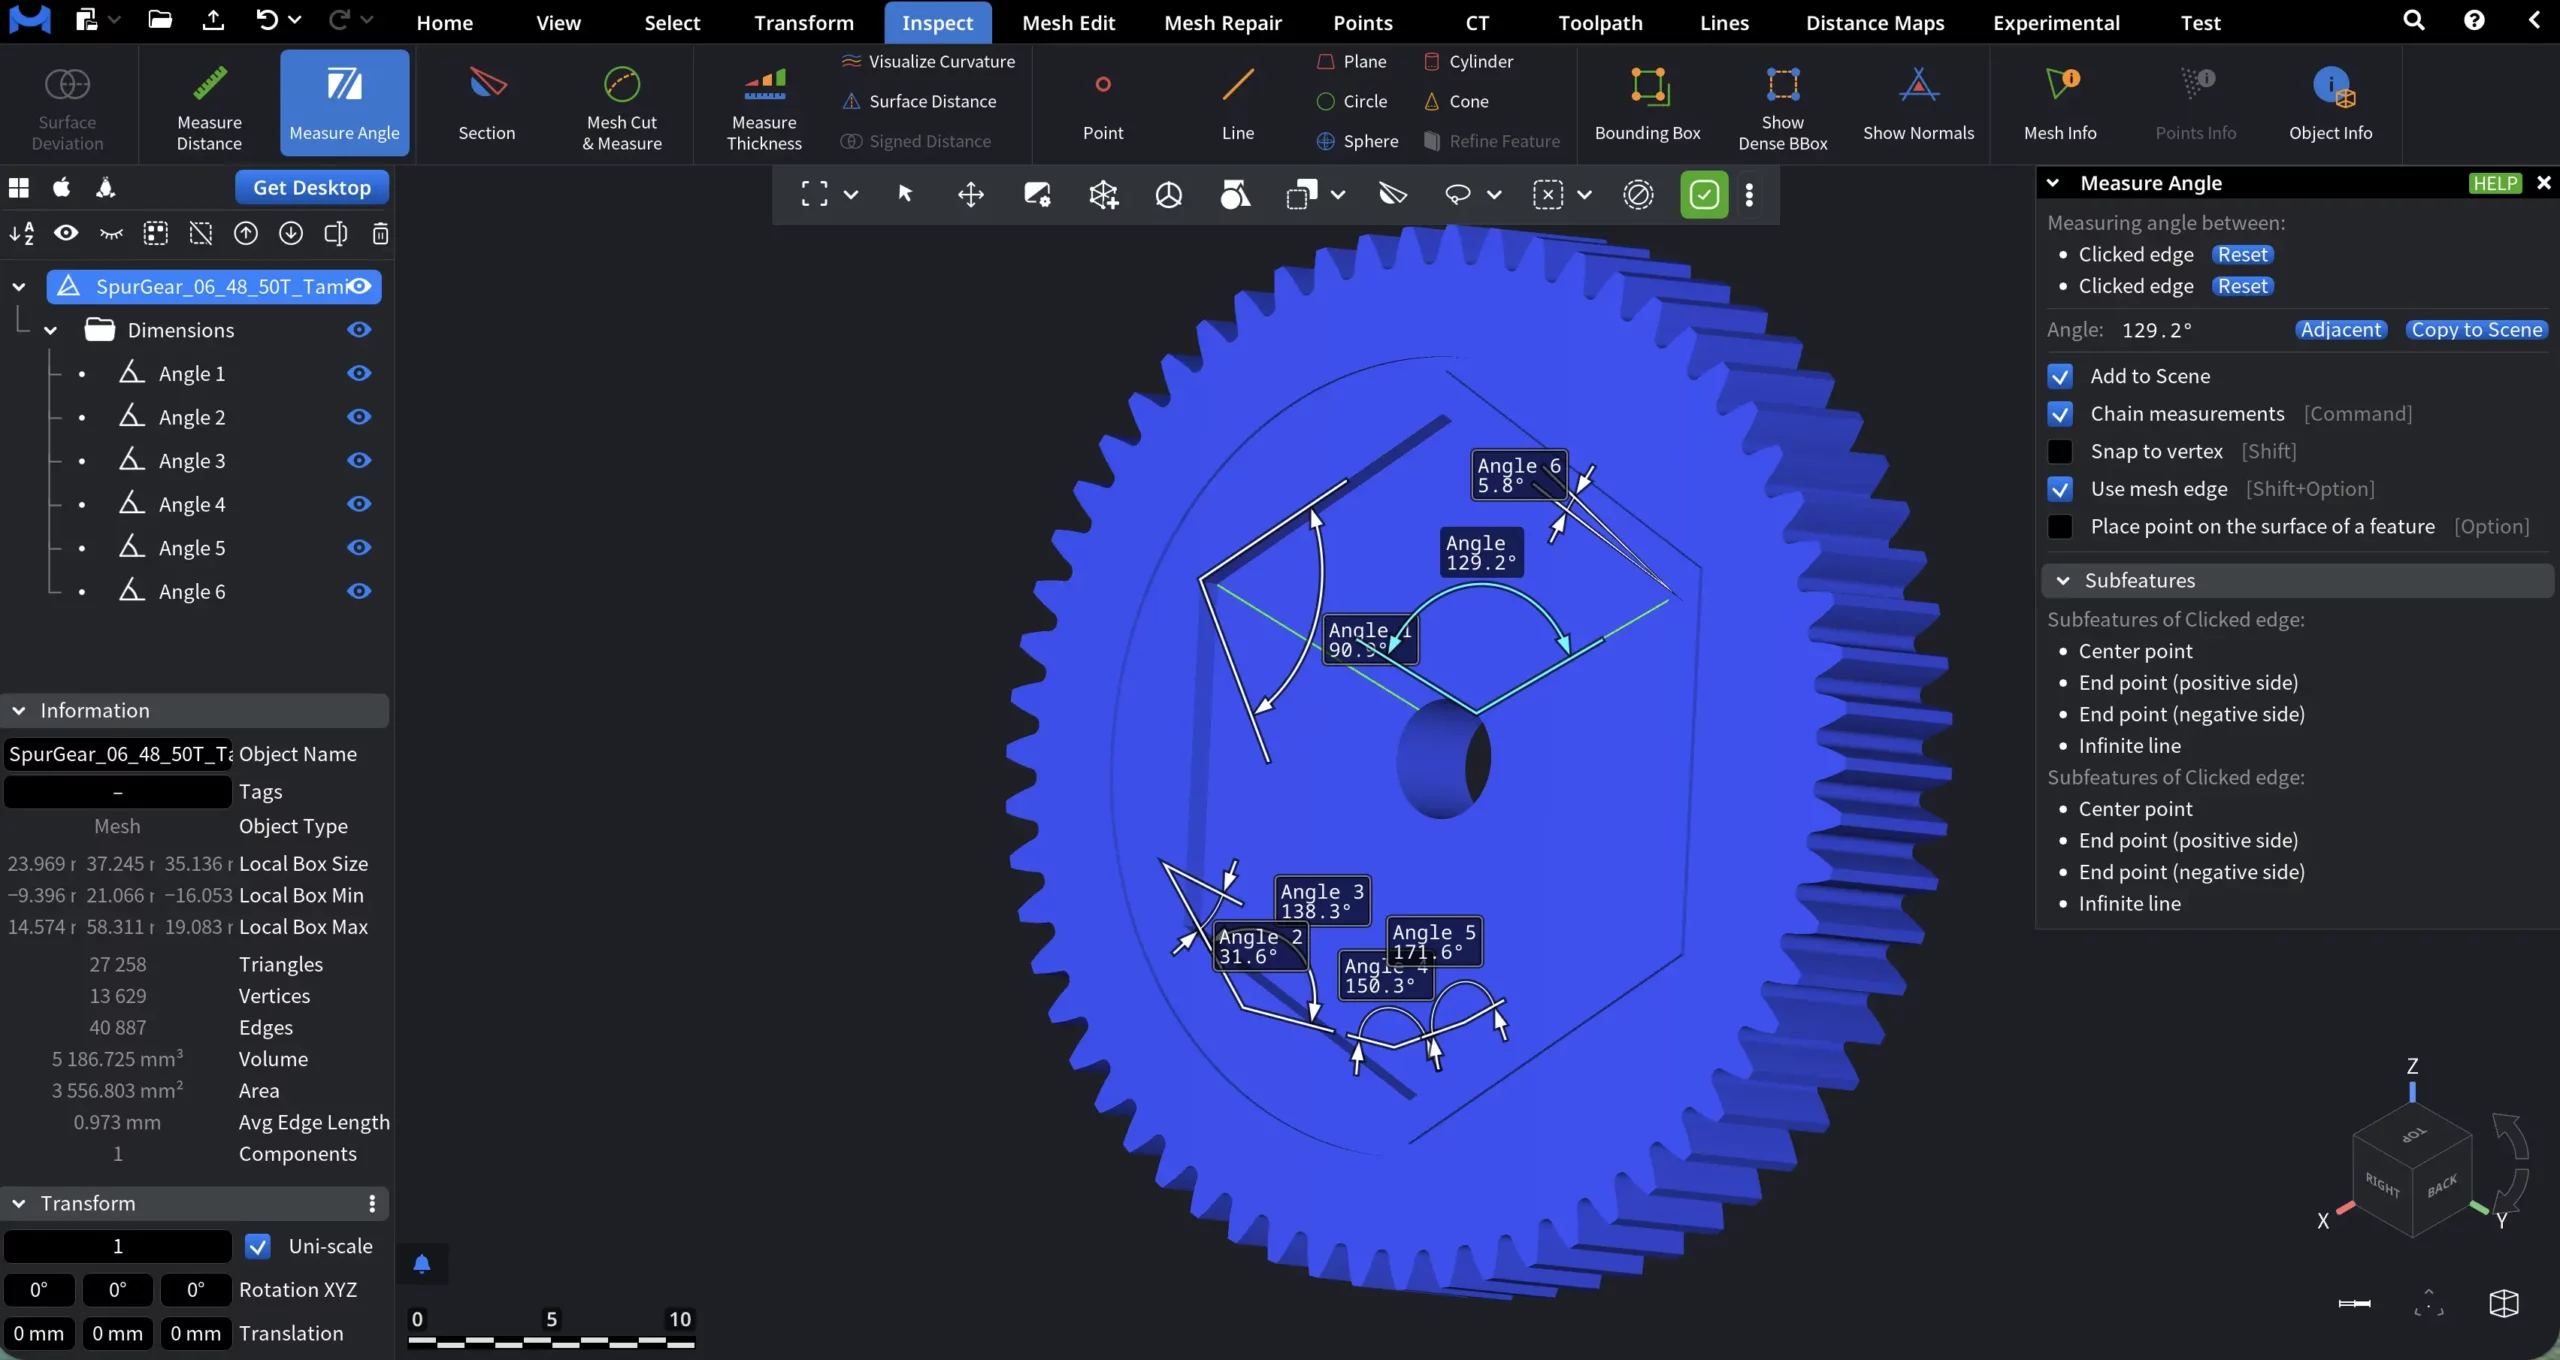
Also, with Use mesh edge, Subfeatures of the newly created measurements emerge and can be used for further calculations.

Chain measurements
If you enable Chain measurements, Measure Angle switches from a single, isolated measurement to a continuous measurement mode. In it, each new angle measurement automatically starts from the previously selected one, allowing you to build a sequence of connected angle measurements without resetting the tool.
- Point-based measurement. When measuring angles using points, the last picked point becomes the starting point for the next angle. Each subsequent click extends the chain.
- Mesh edge–based measurement. When Use mesh edge is enabled, the last selected edge becomes the reference for the next angle. Each new edge selection adds another angle to the chain.
Saving the Measurement Results
With Measure Angle, the Add to Scene setting is active by default. With it, once you finalize the angle measurement by clicking on the fourth point or third edge, the results of the previous measurements are saved and added to the scene. They can also be accessed through the scene tree in the Dimensions folder.
If you disable Add to Scene, no previous results will be used and the measurement will start anew. If you want to save a particular measurement, press the blue Copy to Scene button. No new angle will be created in the scene, but the reference point or edges will be displayed. They will disappear once you start a new measurement.
Adjacent
Next to Copy to Scene button, assigned to the resulting angle, you can find Adjacent. It cycles through all valid angular sectors formed by the selected references. Each click selects the next adjacent angle in a counterclockwise order and updates the displayed arc and value accordingly.