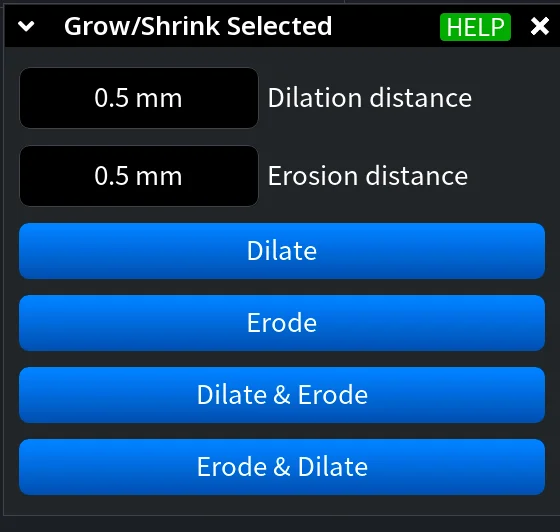
Clicking Grow/Shrink Selected, located under the Select tab, allows you to expand (dilate) or contract (erode) the current region selection by a specified distance.

Once you click it, a dedicated panel opens with the following settings:
- Dilation distance controls how far the current selection expands outward.
- Erosion distance controls how far the current selection contracts inward.
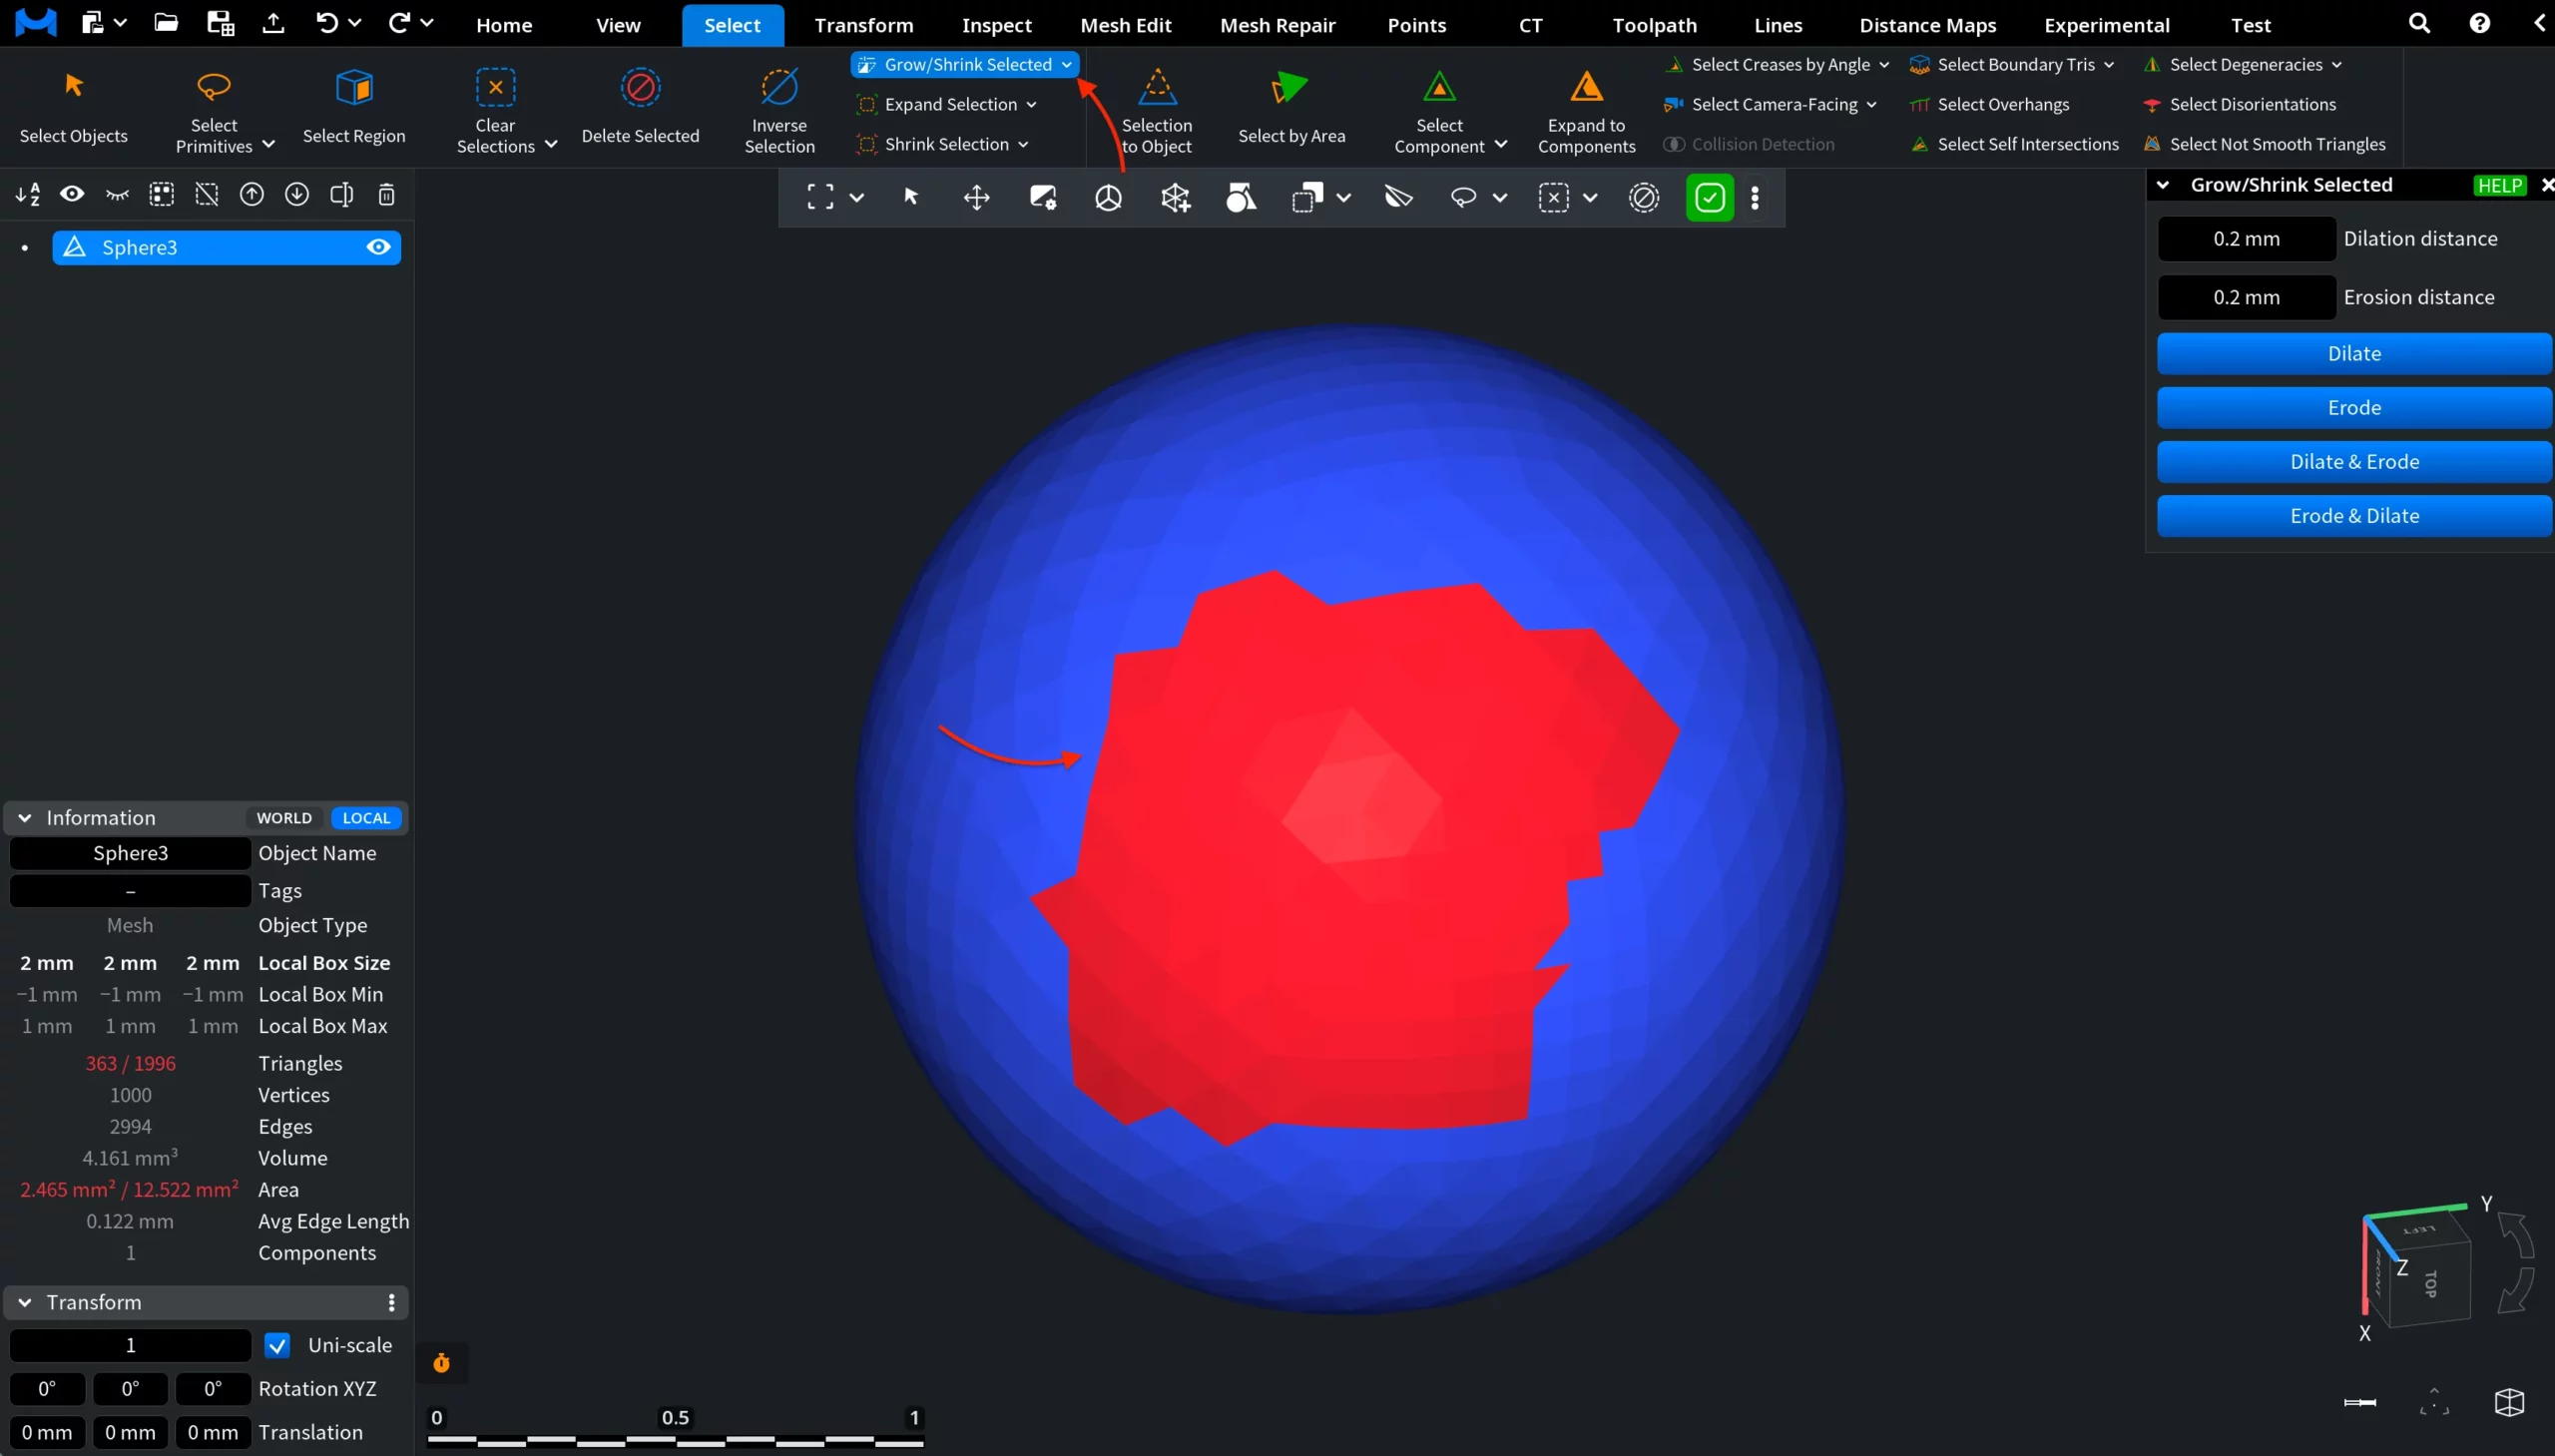
As the name of the Grow/Shrink Selected tool suggests, the corresponding button becomes active only after performing a Select Primitives or Select Region operation, just as shown in the screenshot below.
The following actions are available:
- Dilate expands the selection by the specified dilation distance.
- Erode shrinks the selection by the specified erosion distance.
- Dilate & Erode expands the selection first, then contracts it.
- Erode & Dilate contracts the selection first, then expands it.
Below, you can see the result of a Dilate operation performed with Dilation distance set to 0.2 mm.
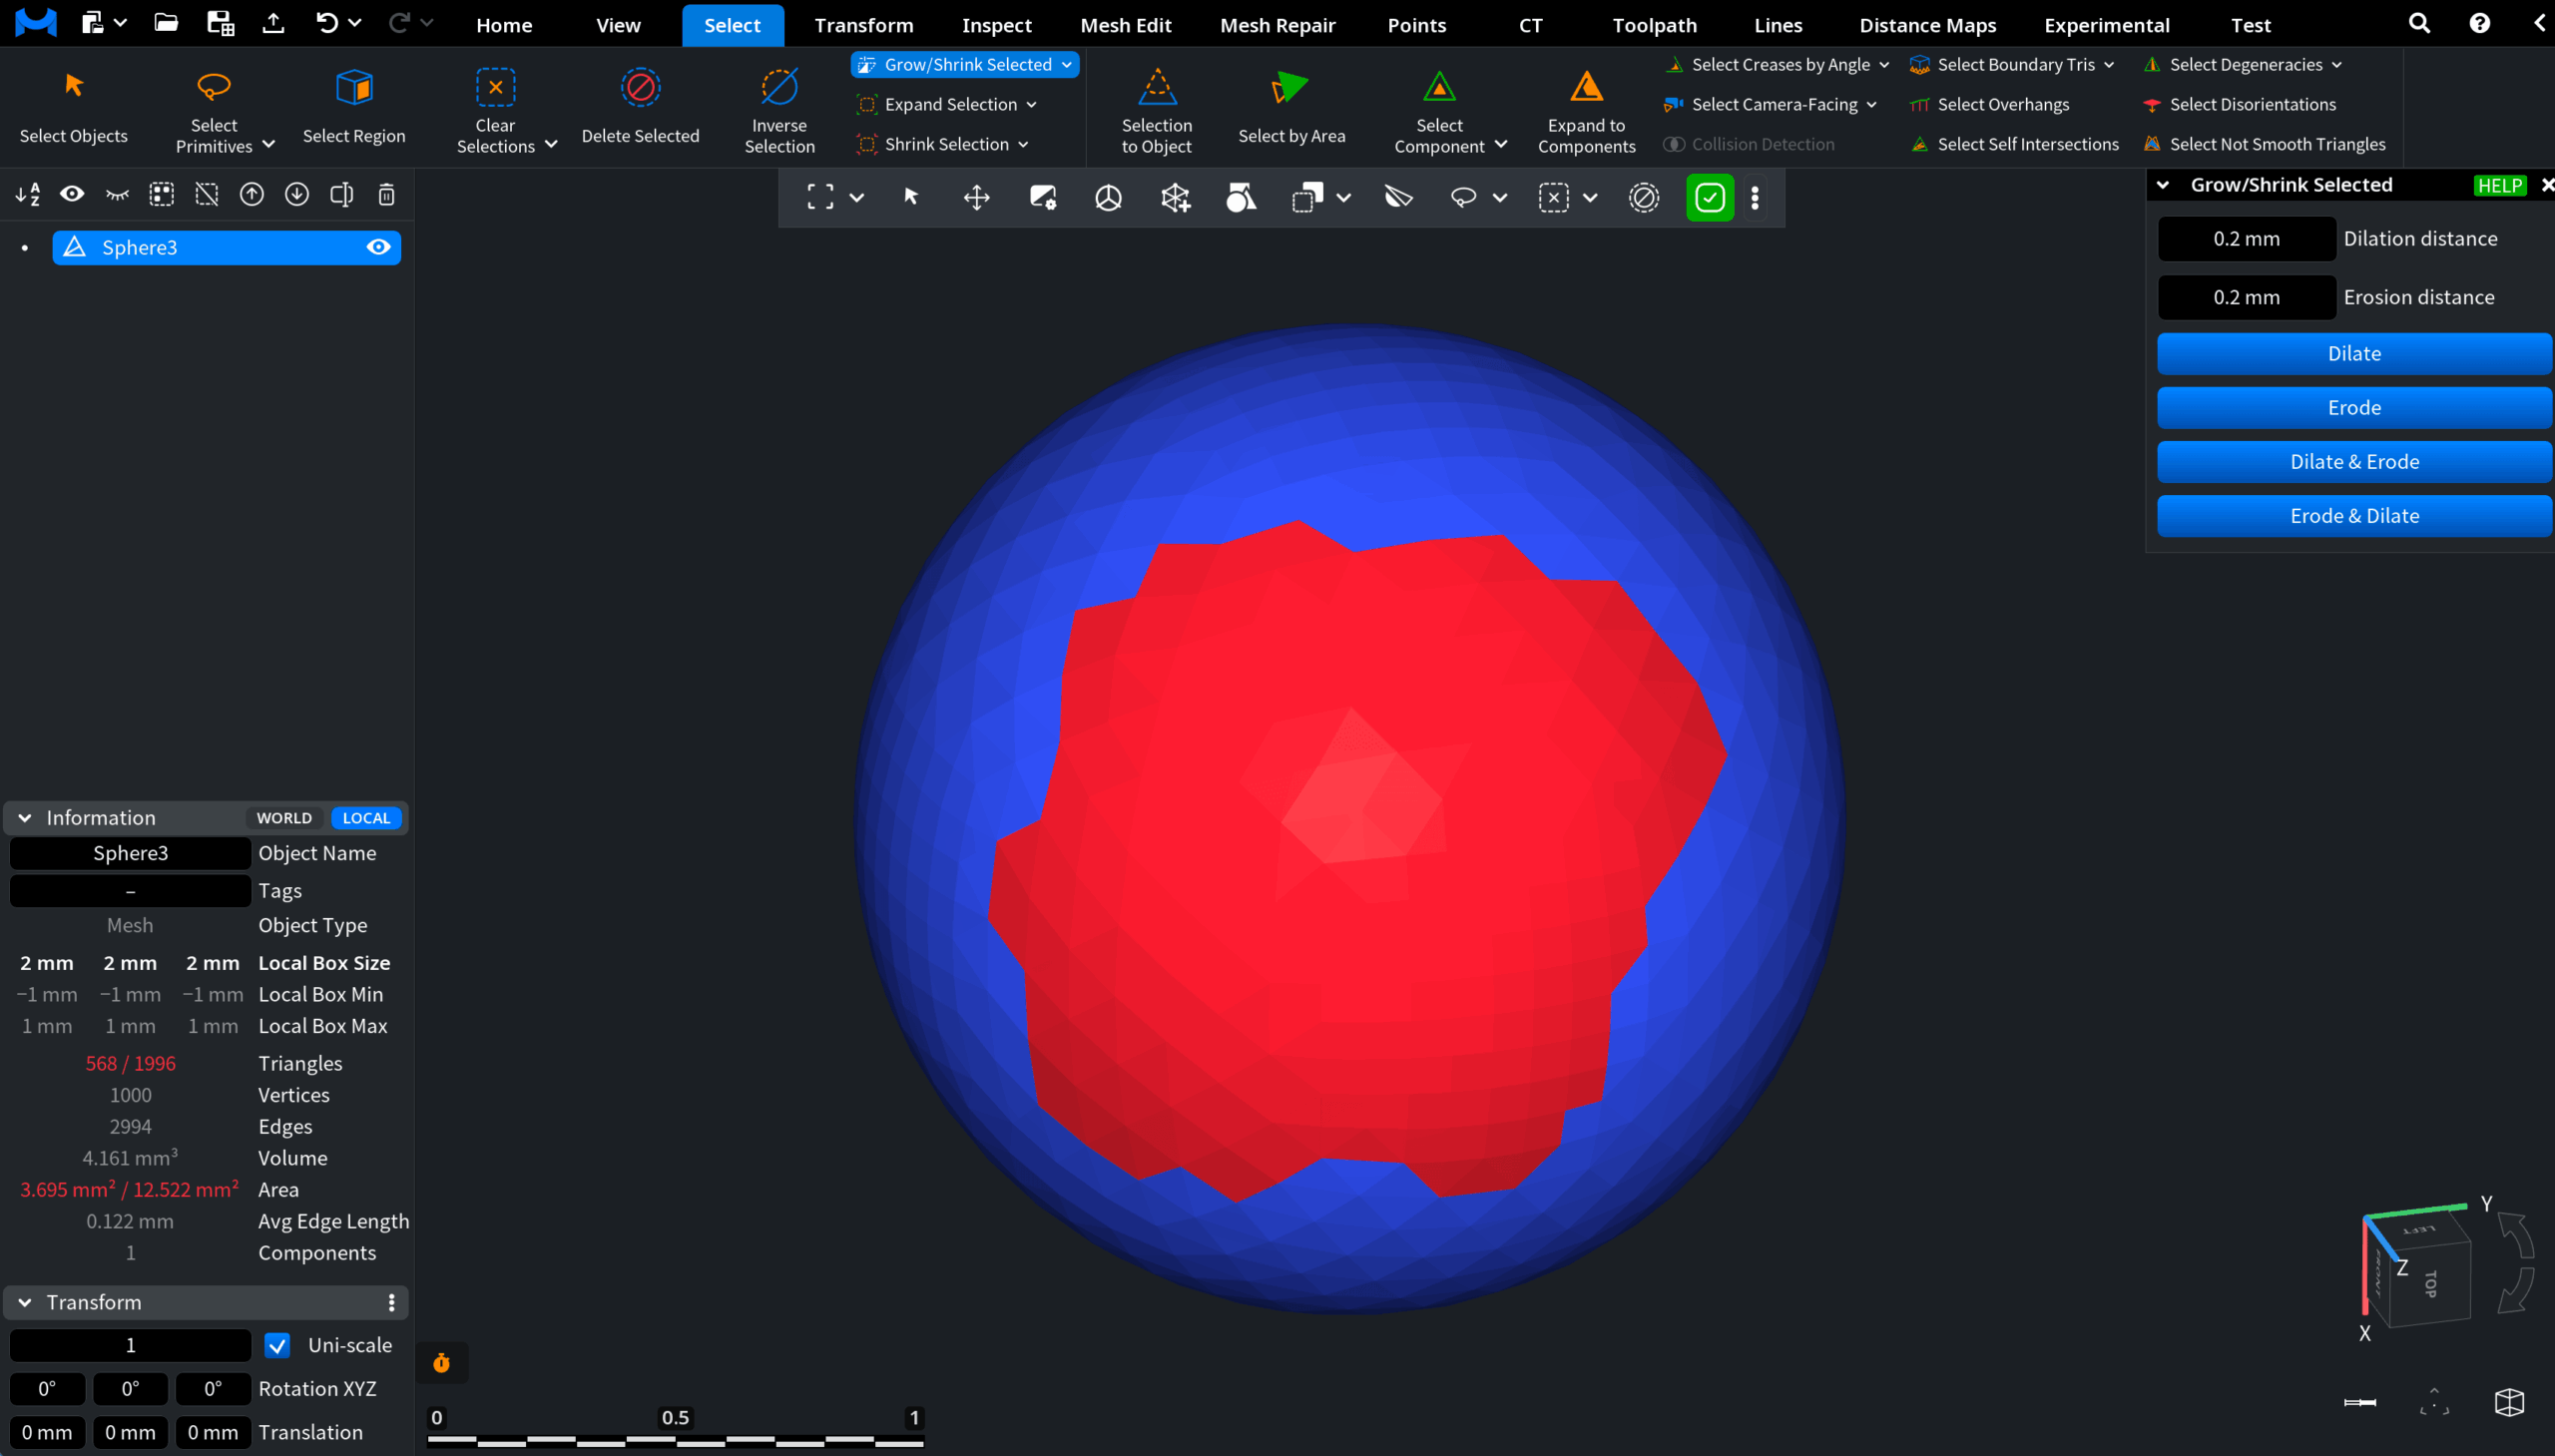
Note: The Grow/Shrink Selected panel stays active, so you can run a second round of Dilate or proceed with other available operations.