Select Overhangs: Settings and Controls
When Select Overhangs is activated, a settings panel appears with the following options and direction vector controls:
Direction defines the reference direction used to detect overhangs:
- To X, To Y, and To Z analyze overhangs relative to the corresponding global axis.
- To Camera analyzes overhangs relative to the current camera view.
Layer Step defines the distance between analysis layers. Smaller values result in finer and more detailed overhang detection.
Max Overhang Distance sets the maximum overhang distance allowed within a layer during the analysis. Triangles exceeding this value are classified as overhangs.
Smooth Out Overhangs, when enabled, removes small overhang artifacts and noise, preserving only larger and more meaningful overhang regions in the selection.
After adjusting the parameters, click Apply to update the selection based on the specified criteria.
Select Overhangs: Example
In this screenshot, Select Overhangs has been configured relative to the current camera view via the To Camera option. After applying the analysis, overhanging triangles were automatically detected and highlighted in red.
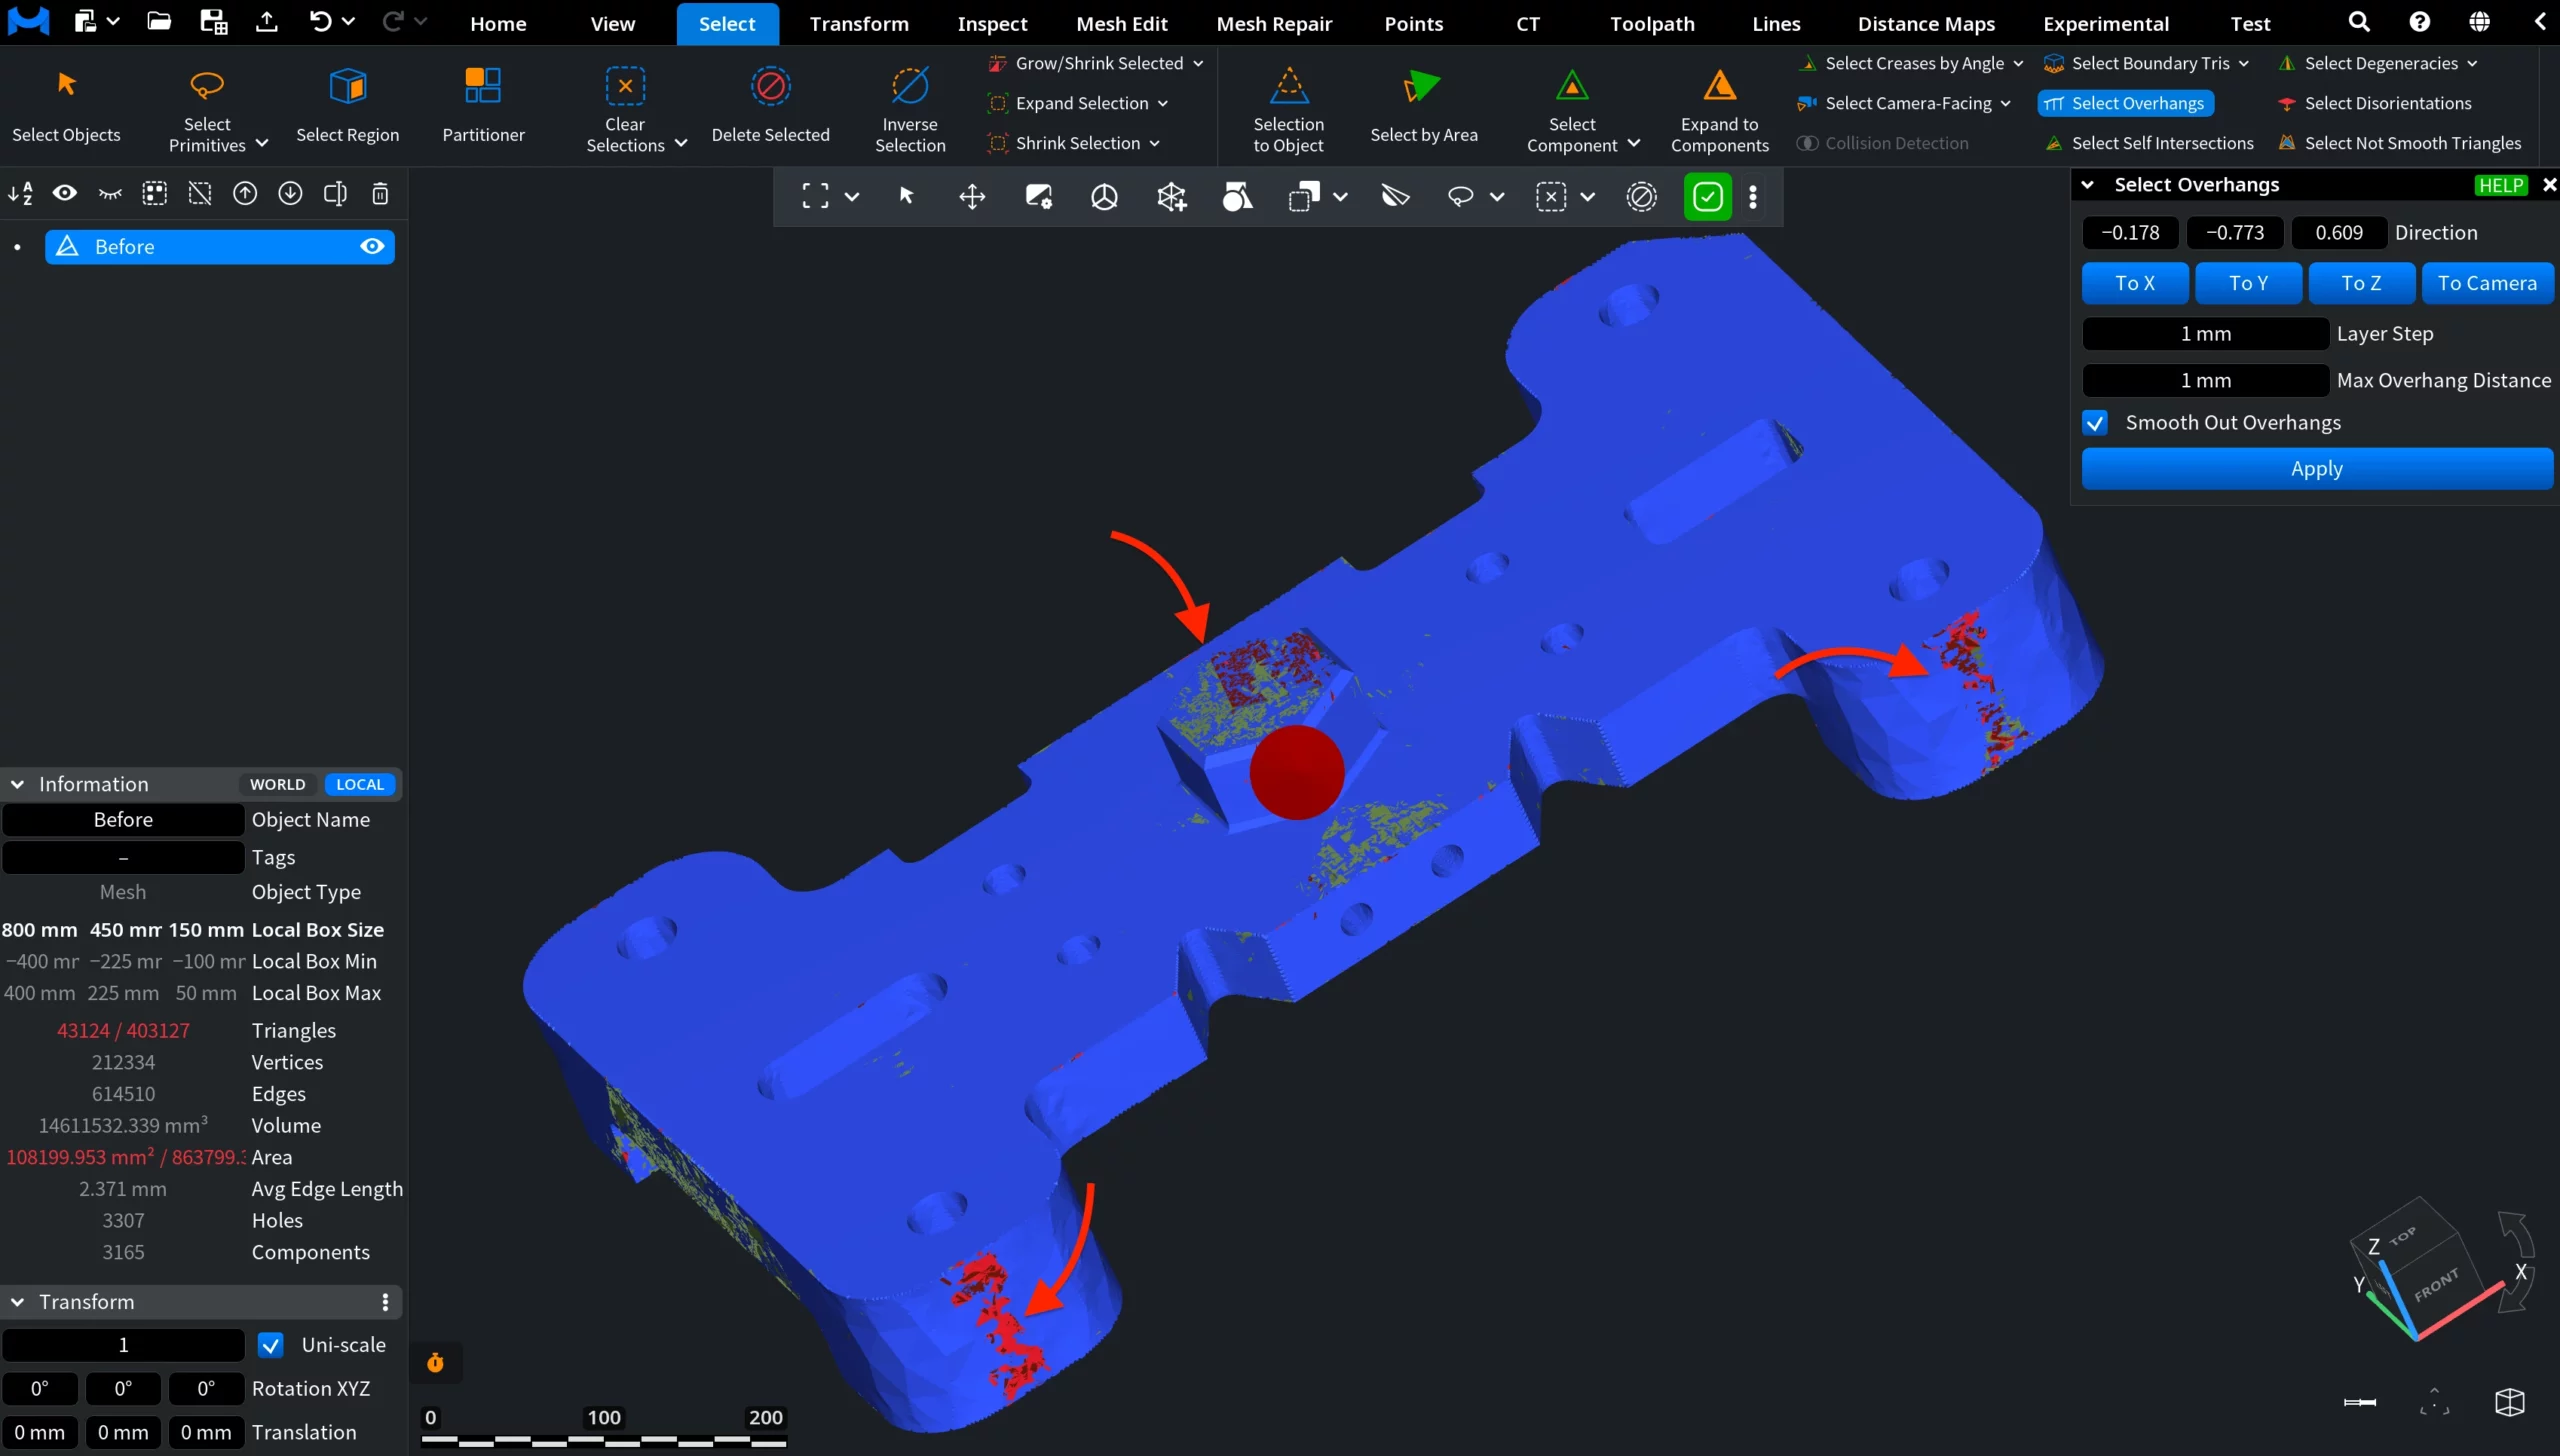
These regions represent areas of the mesh that extend outward relative to the selected viewing direction and may require additional support during manufacturing or 3D printing.
