3D models often need extra elements. These might include both functional connectors and slots and decorative parts, e.g., logos. MeshInspector’s ‘Place Mesh’ tool gives you a simple way to position, embed, or merge such mesh objects onto other ones.
With this tool, one can:
- Add connectors to assemble large 3D prints.
- Create matching slots in corresponding parts.
- Place logos or other decorative objects onto surfaces.
In all cases, you are free to position your shapes exactly where you need them. Watch the embedded video below to see ‘Place Mesh’ in action as a universal tool for attaching objects to meshes. Or simply follow this guide.
Preparing the Scene
Before you place an object, you need:
- A target mesh. i.e., the 3D model you are attaching objects to.
- An object to place, i.e., connectors, logos, or any other mesh.
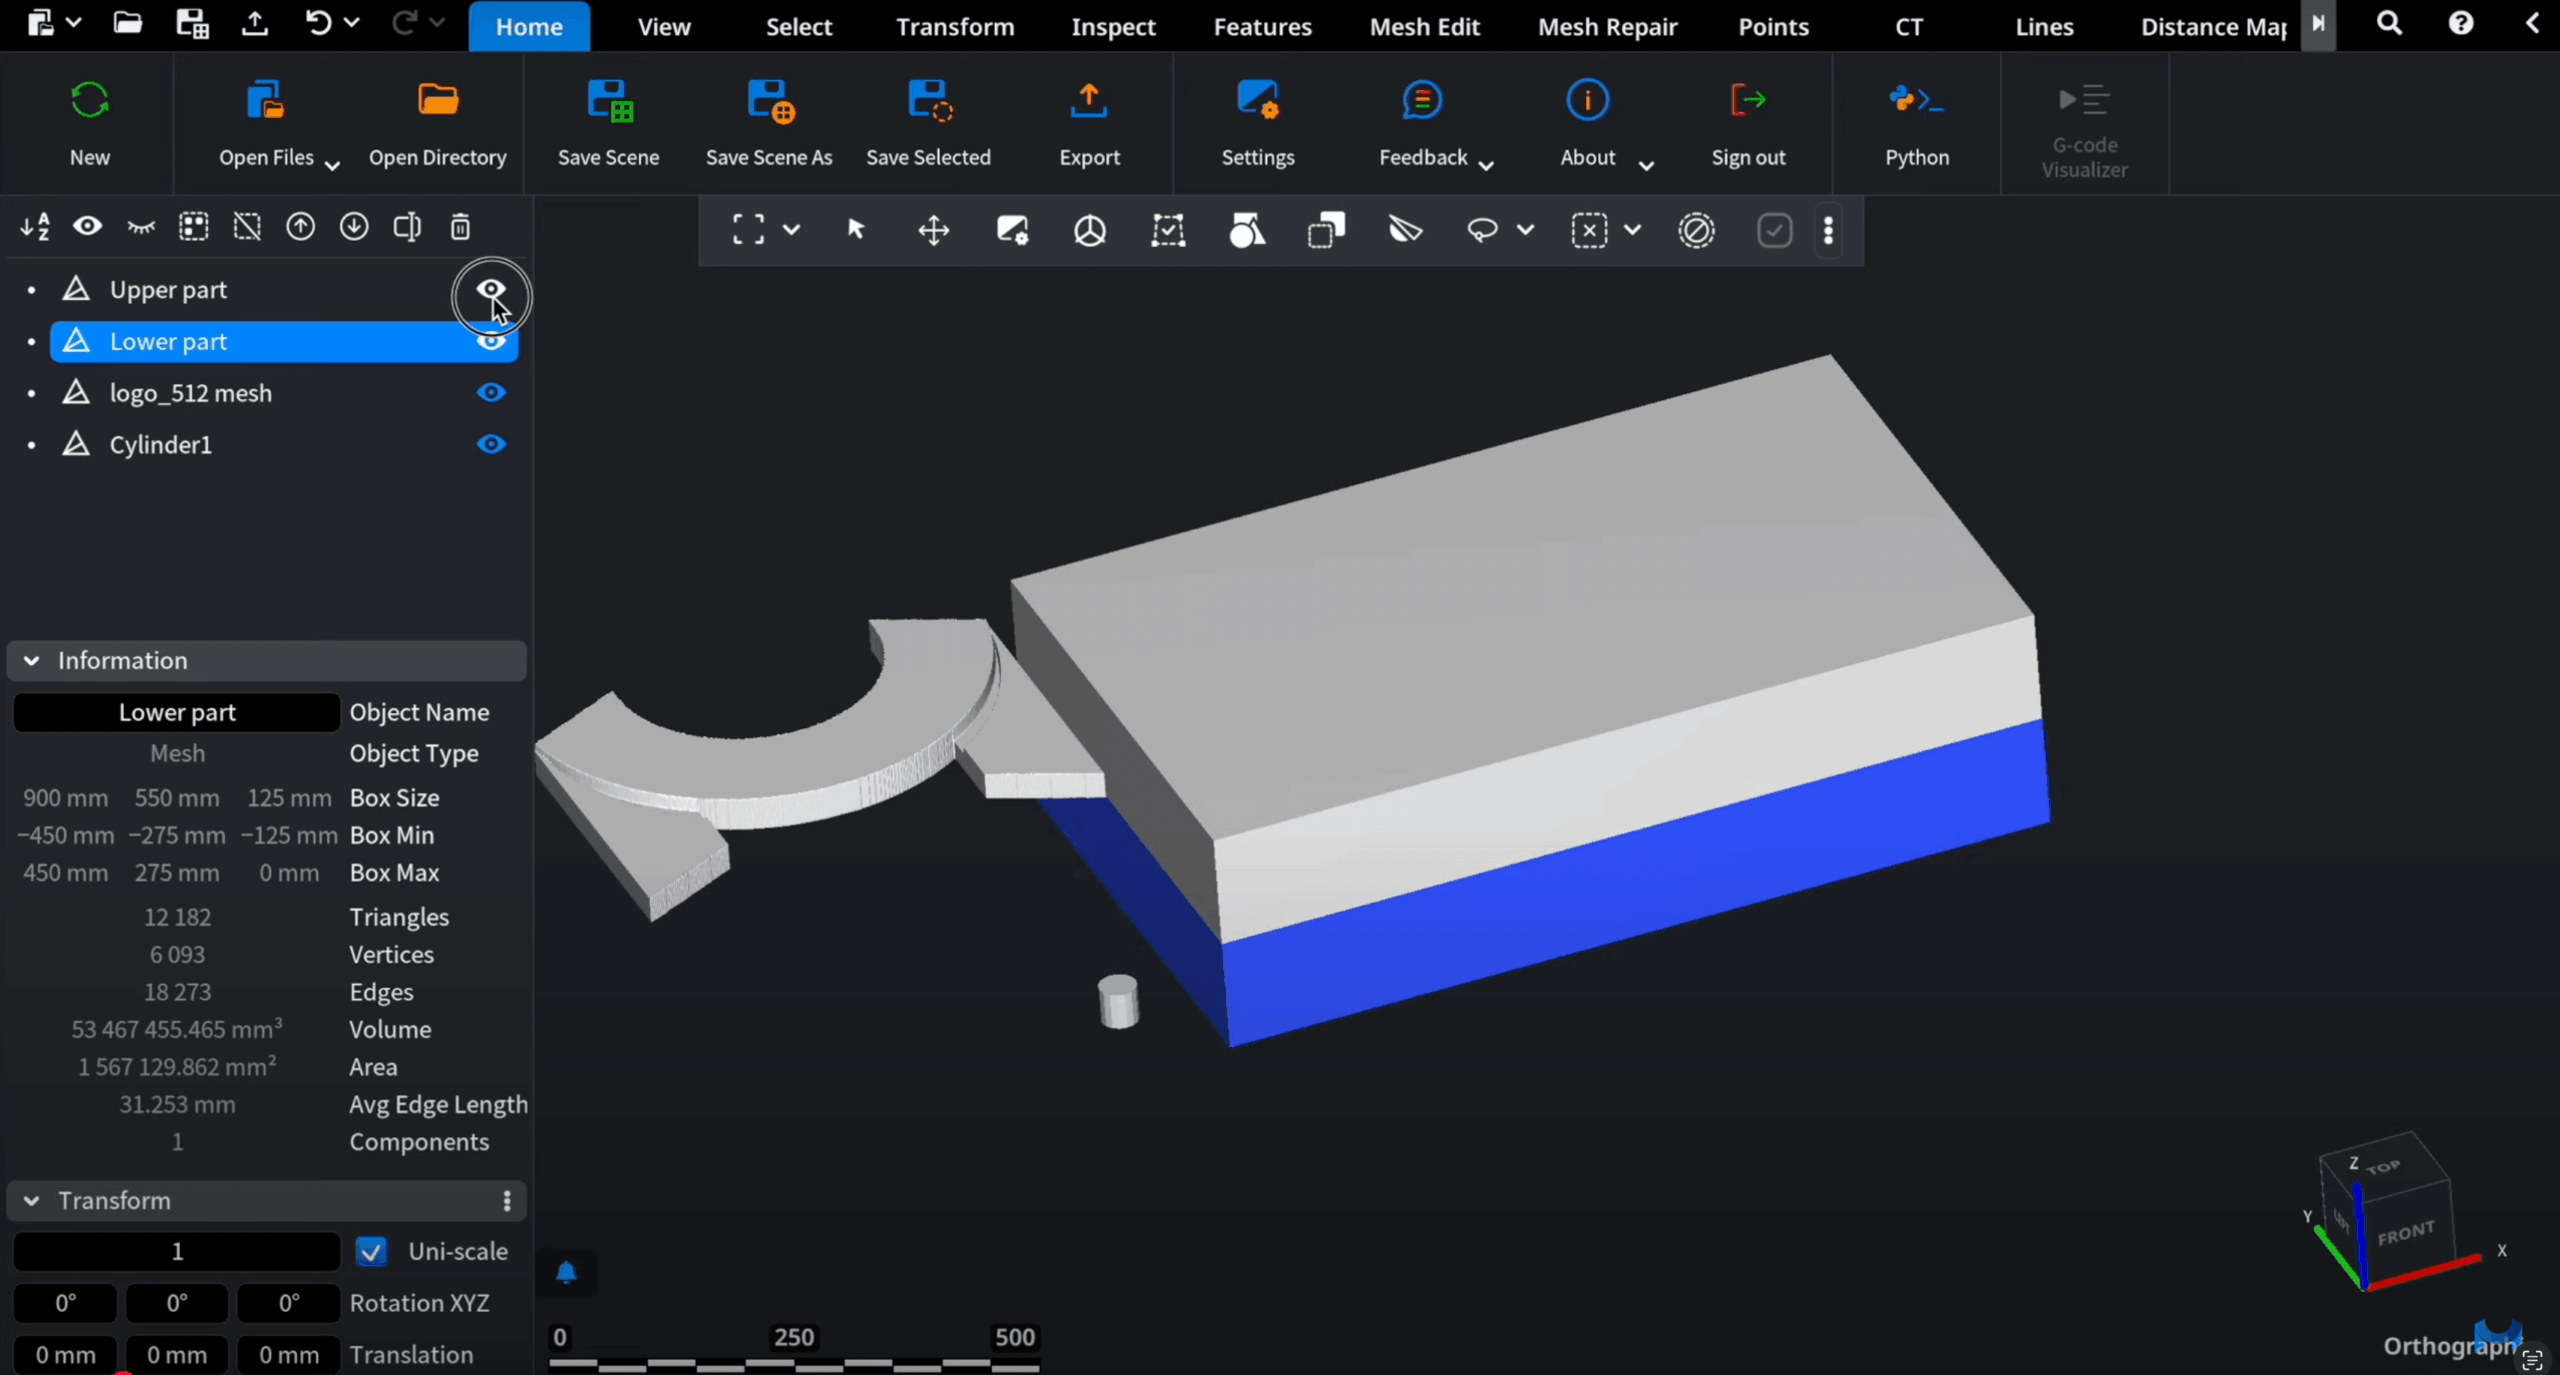
In the picture below, you can see a simple scene prepared for editing: two main parts, a connector (a cylinder), and a logo.
How to Add Objects to the Scene
To prepare a scene like that, you will need to add objects to attach to it. There are two ways to add an object:
- Create a primitive. Go to ’Mesh Edit,’ then click on ‘Create simple object.’ Choose from available options (e.g., ‘Cylinder’ as a connector) and click ’Create.’
- Upload a mesh. Go to ’Home,’ click on ‘Open Files’ and import a pre-made object.
Placing Objects with ‘Place Mesh’
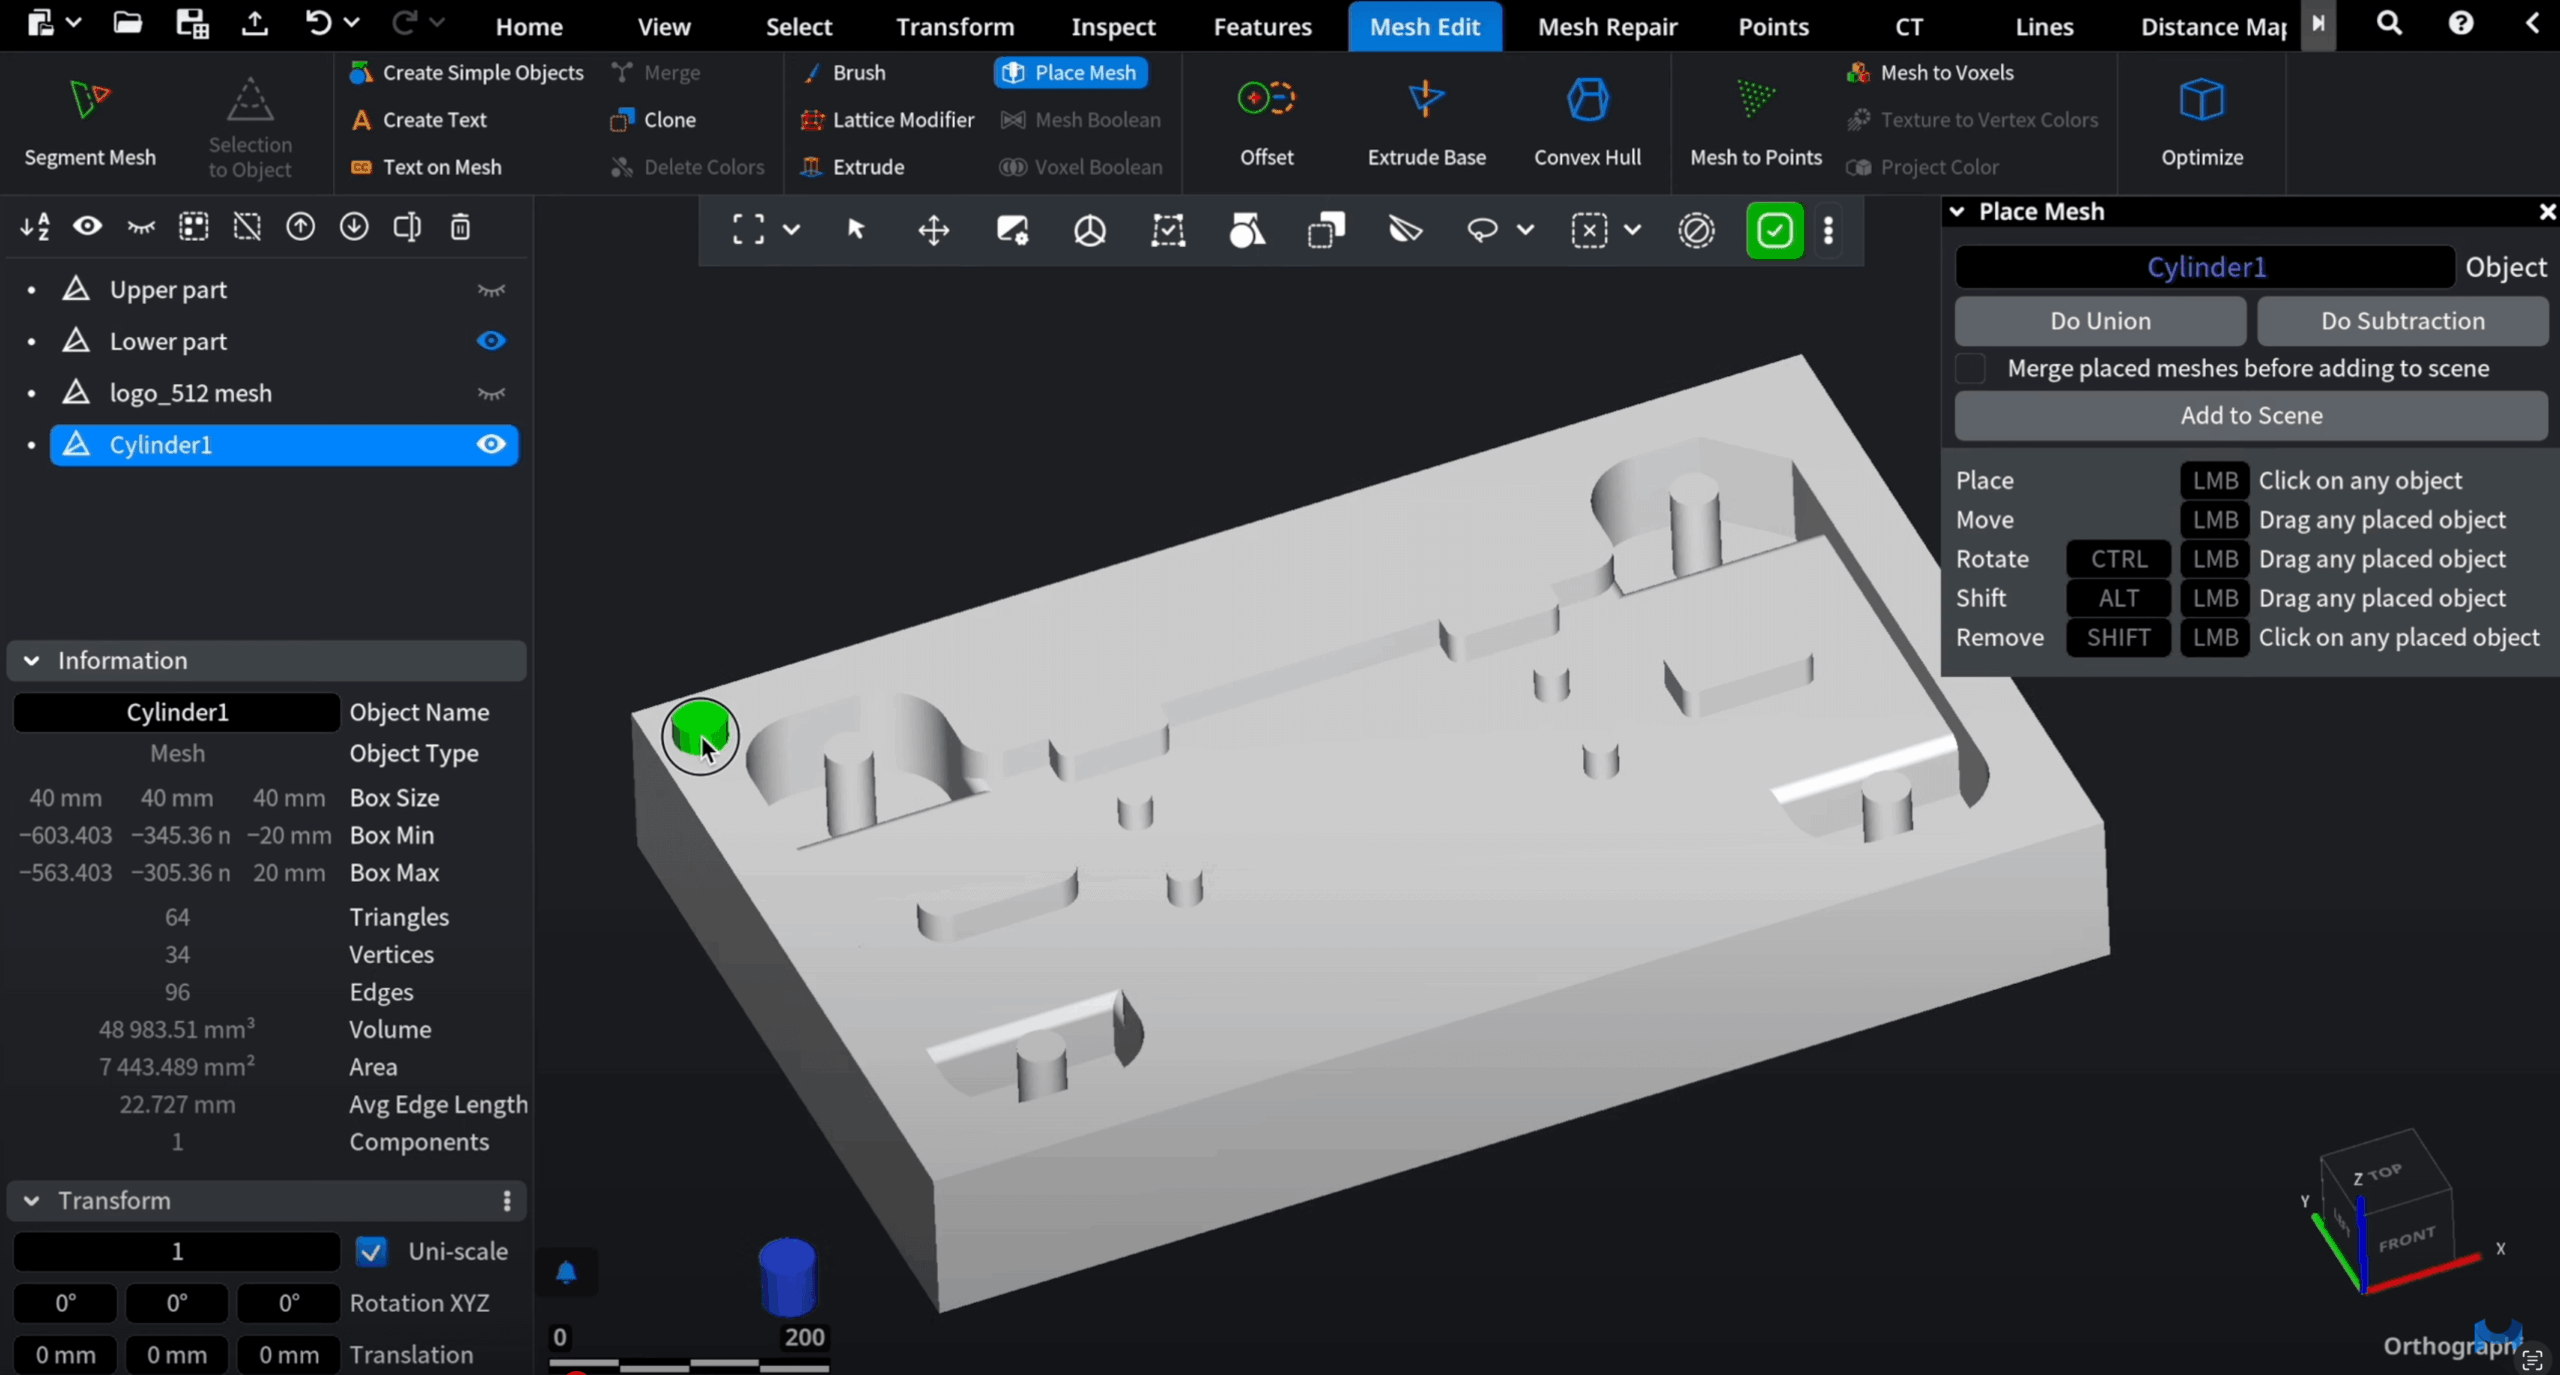
First, make sure that both the target mesh and the object to attach are visible.
- In the scene tree, select the object to be placed.
- Go to ’Mesh Edit,’ then choose ‘Place Mesh.’
- Hover the object to be placed over the target mesh with your cursor. A green preview shows where the object will be positioned.
- Click to place the object. Repeat as needed. A new instance of the object to place is created after each click.
Placement Controls
As long as ’Place Mesh’ is active, you can fine-tune how objects are positioned:
- To rotate them, hold Ctrl and move the cursor.
- To adjust depth, hold Alt and drag to embed more or less deeply into the surface (by default, placement is halfway in).
- To remove them, hold Shift and click on a placed object.
- To move them, drag to reposition.
What to Do Next
There are two main workflows after placing objects:
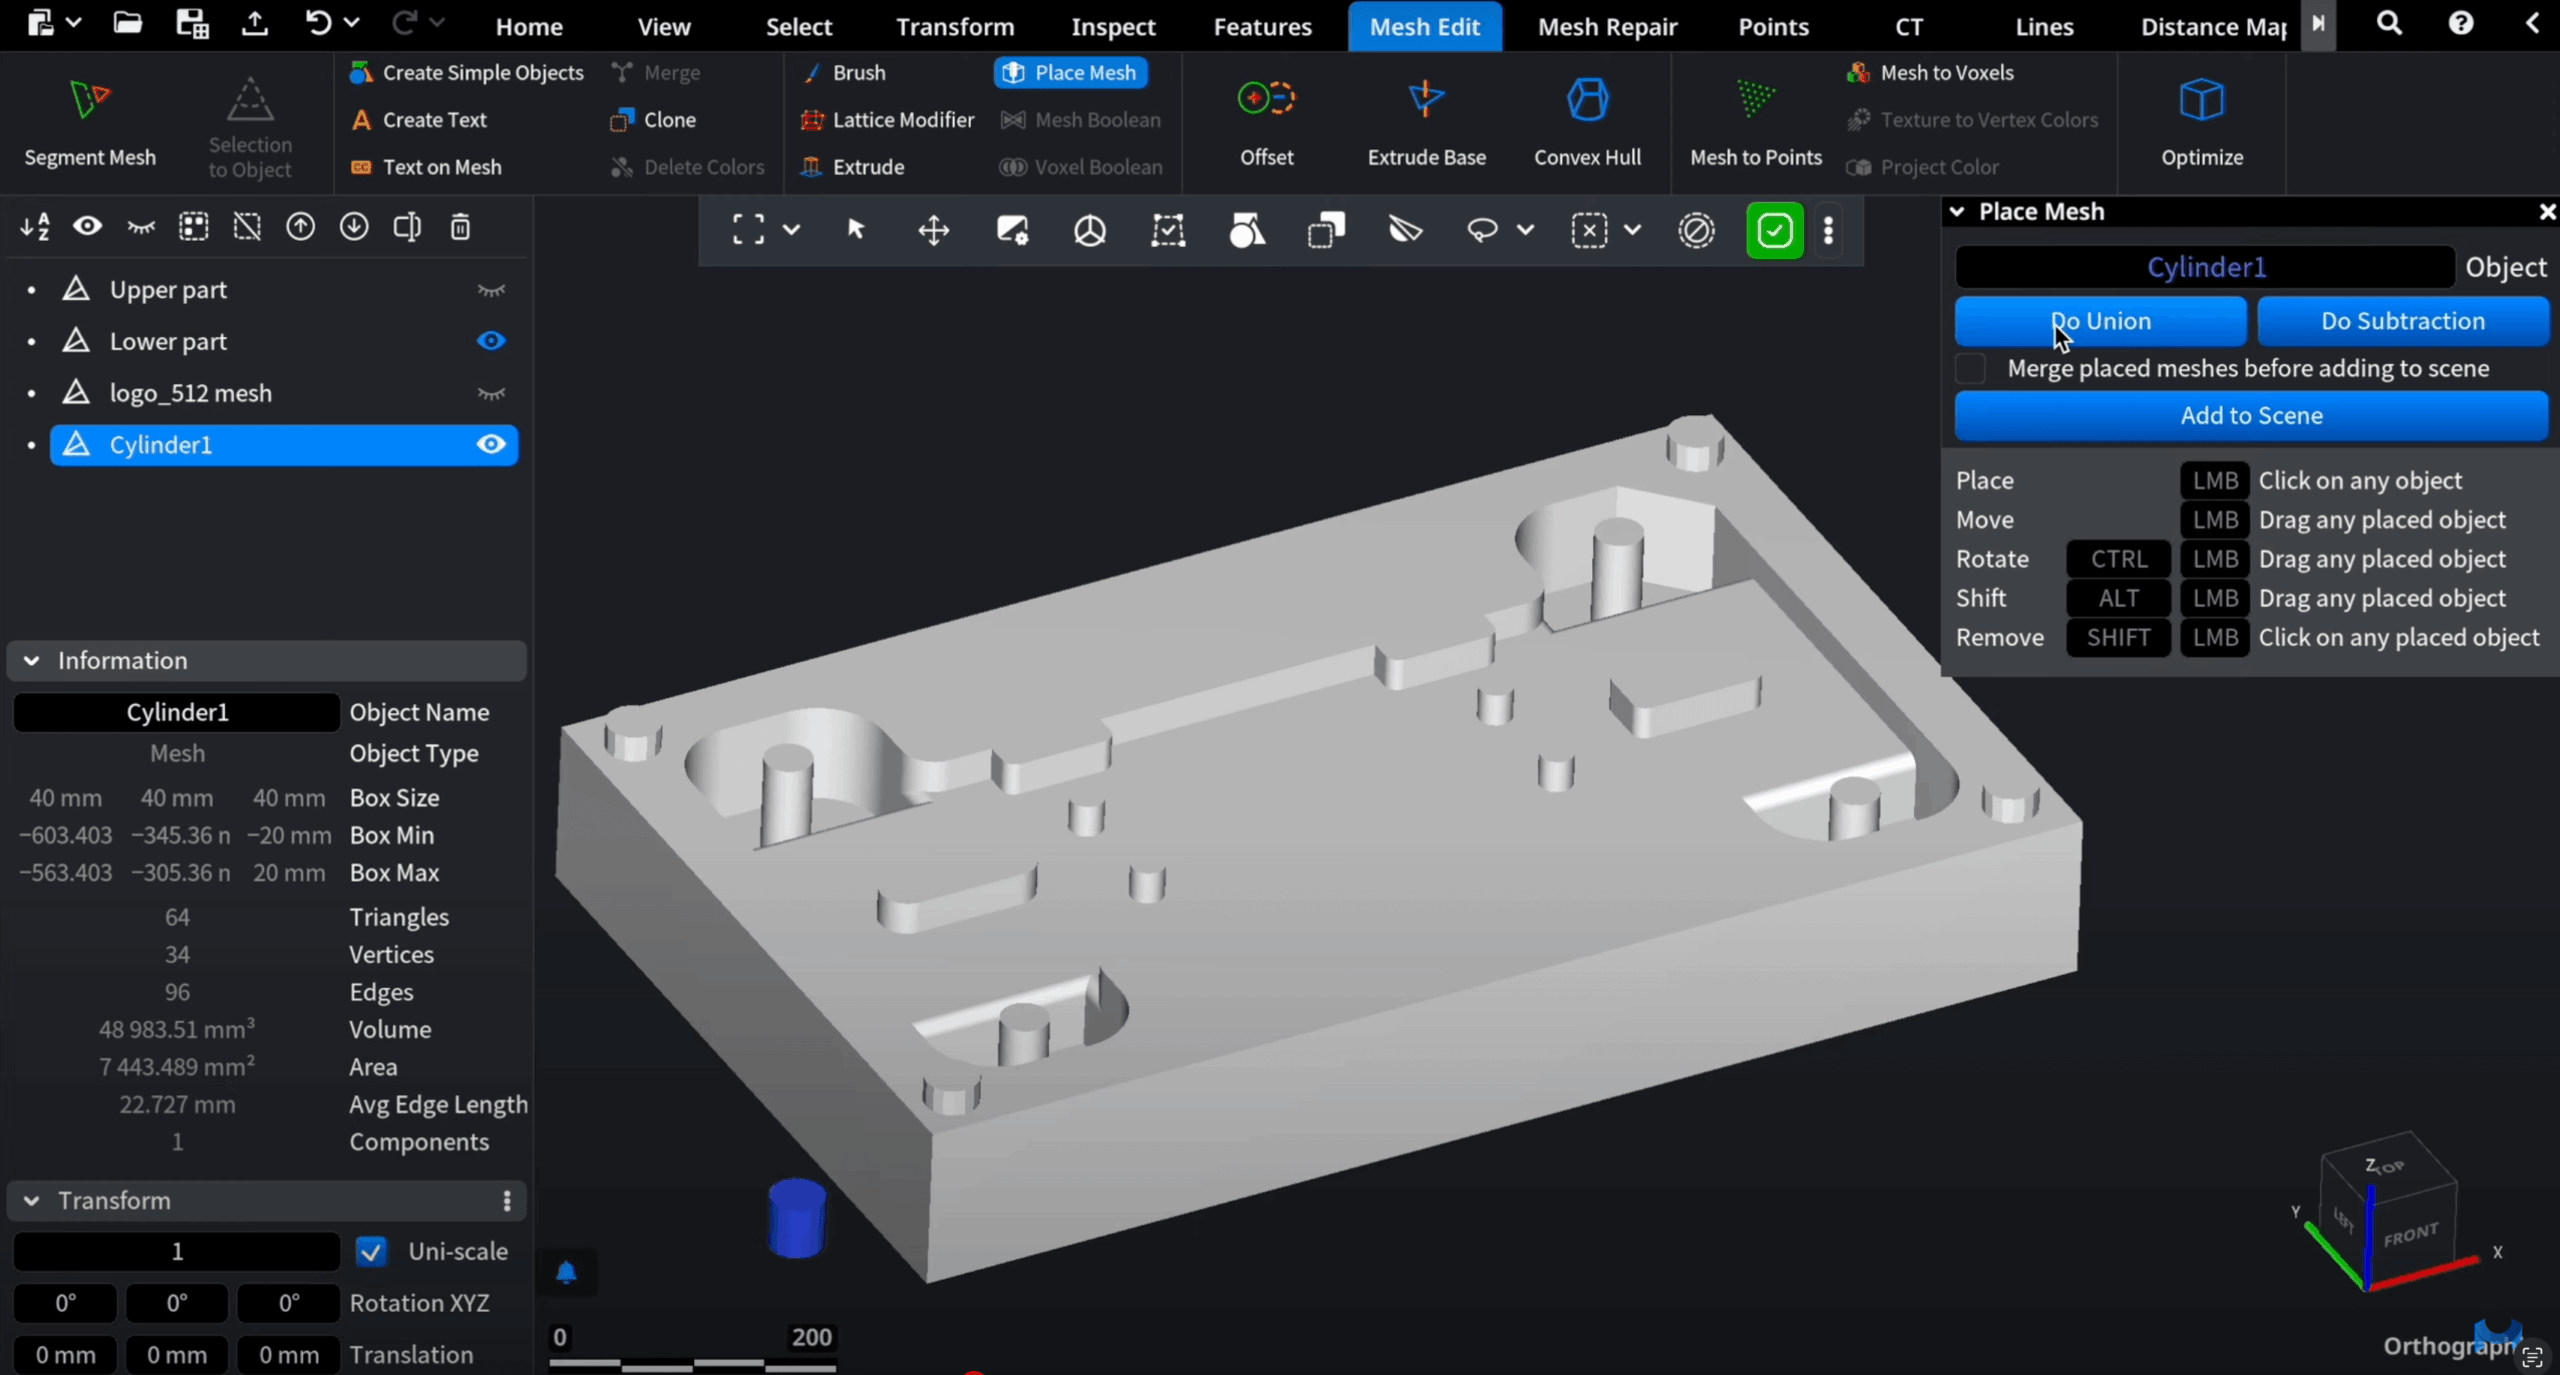
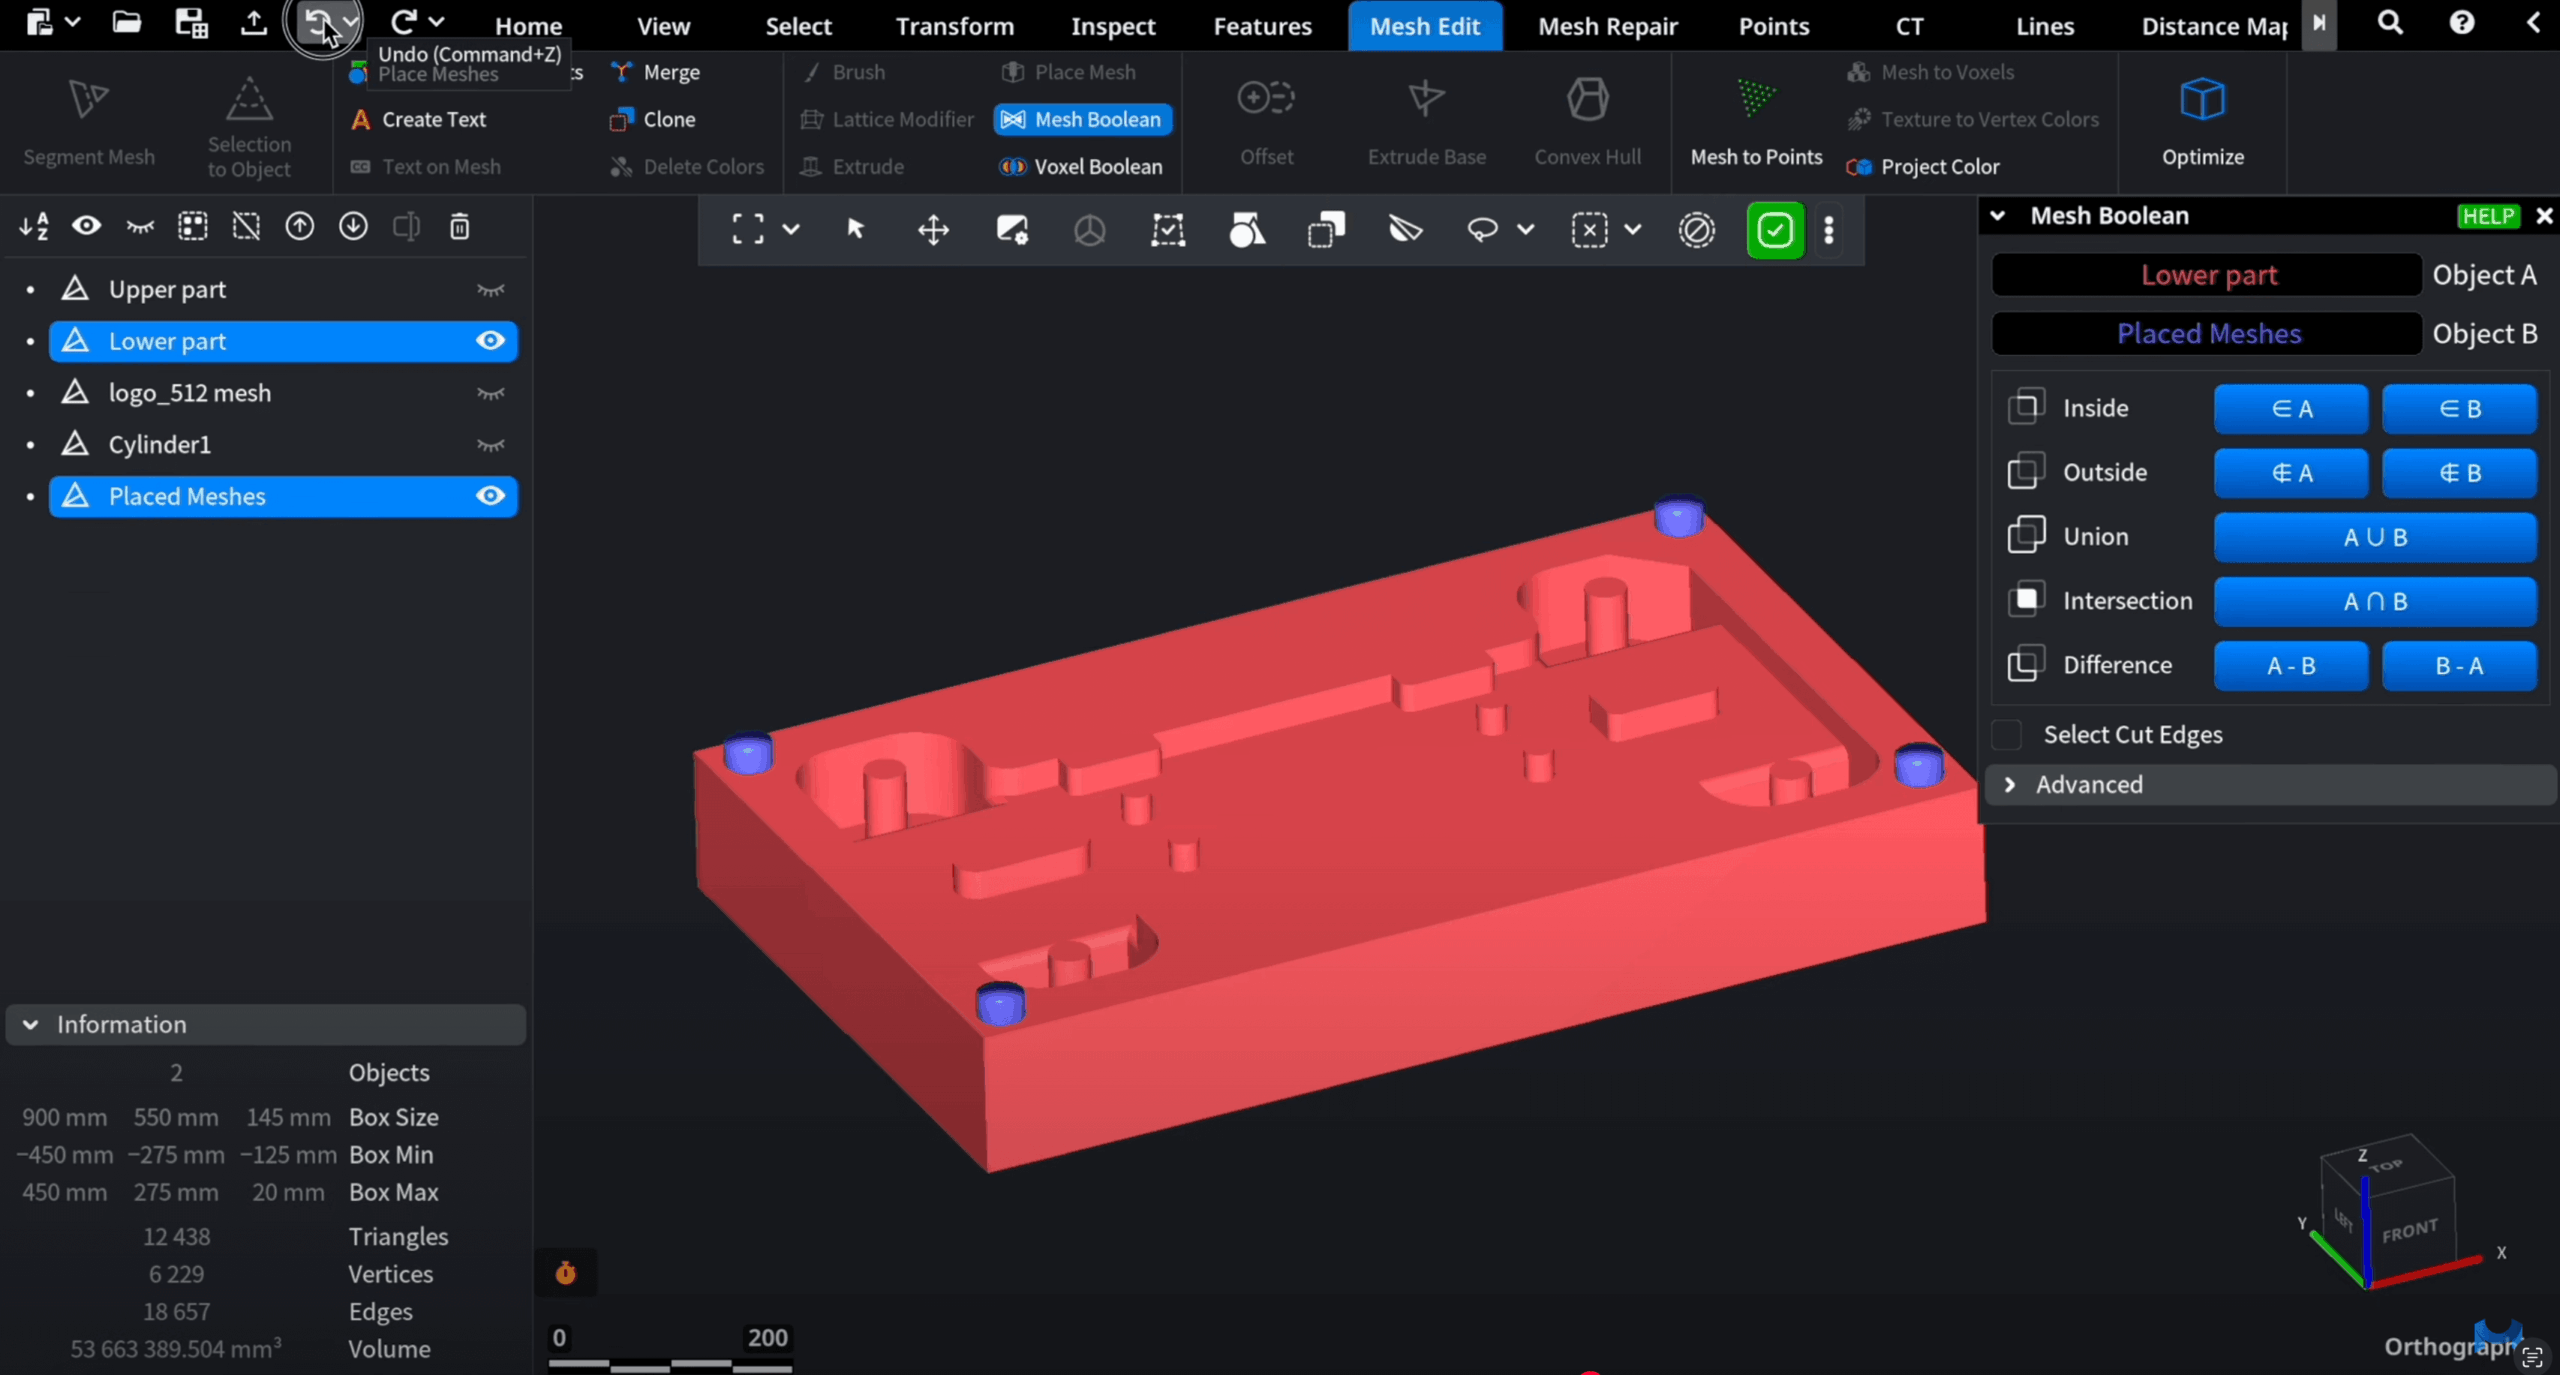
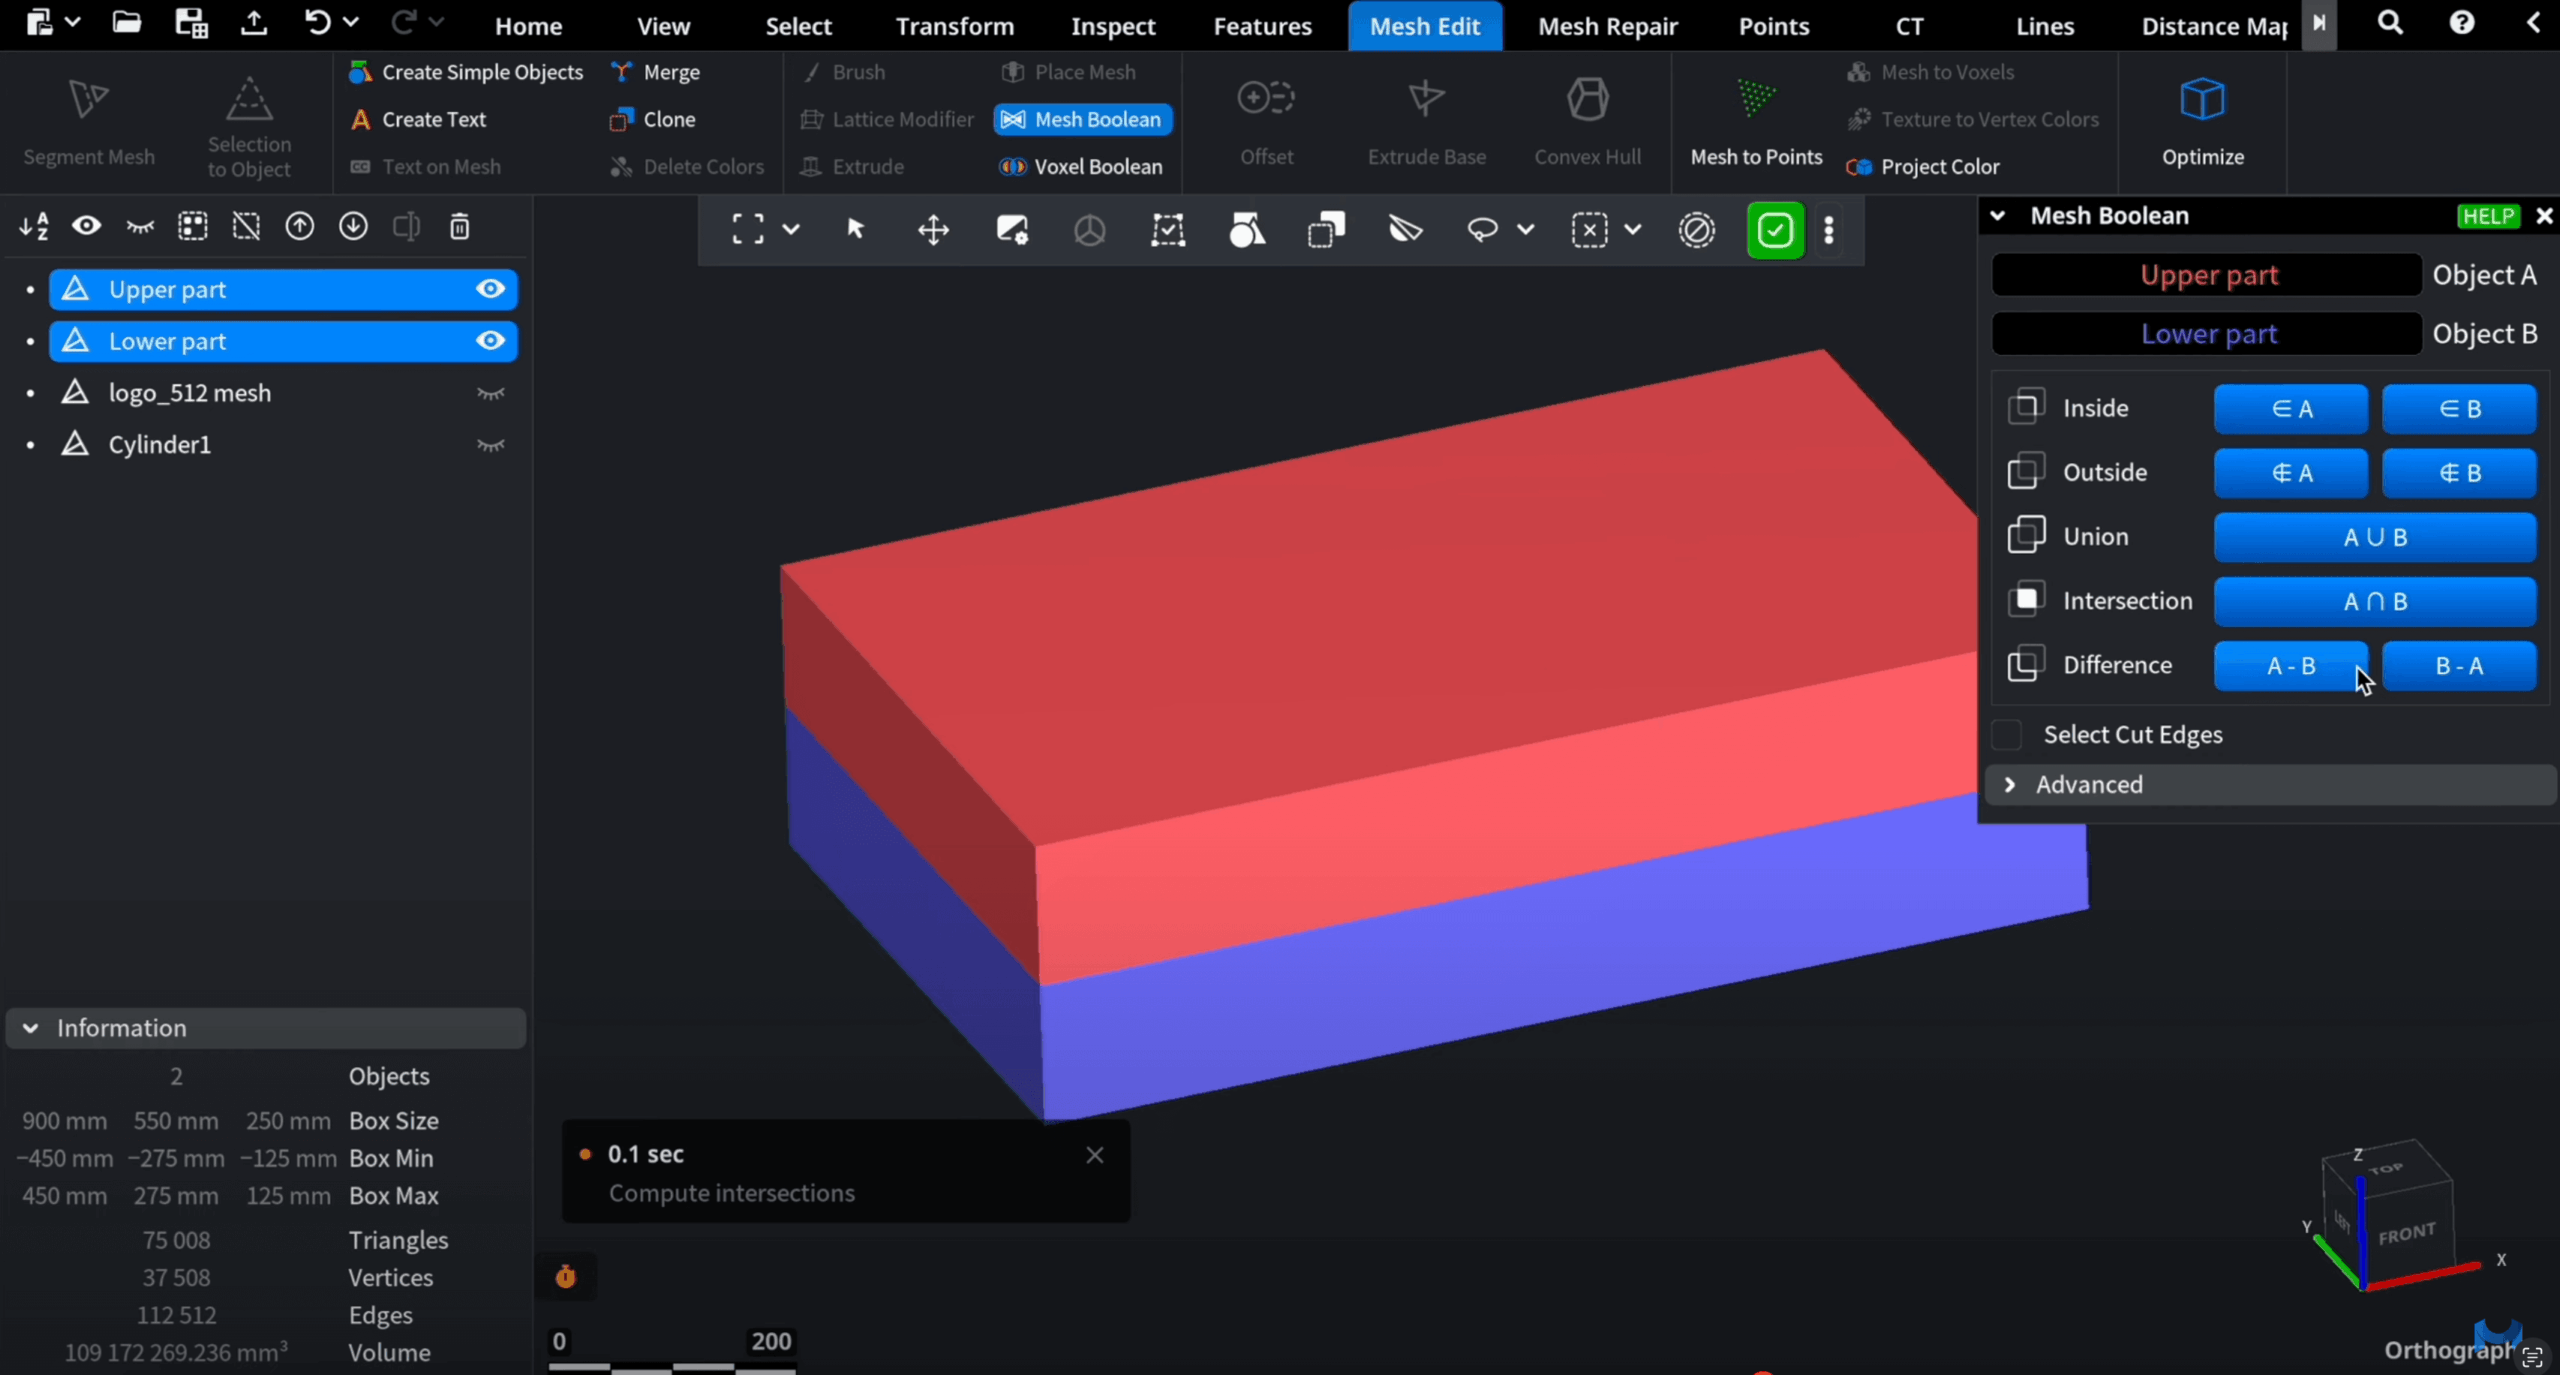
A. Direct Boolean to Merge or Subtract Immediately
- Place objects on the target mesh.
- In the ’Place Mesh’ panel, click ’Do Union’ to merge.
- Or choose ’Do Subtraction’ to cut matching slots.
B. Add to Scene to keep objects separate first
- Place objects on the target mesh.
- In the ’Place Mesh’ panel, select ’Add to Scene.’
- The objects appear in the scene tree as separate meshes.
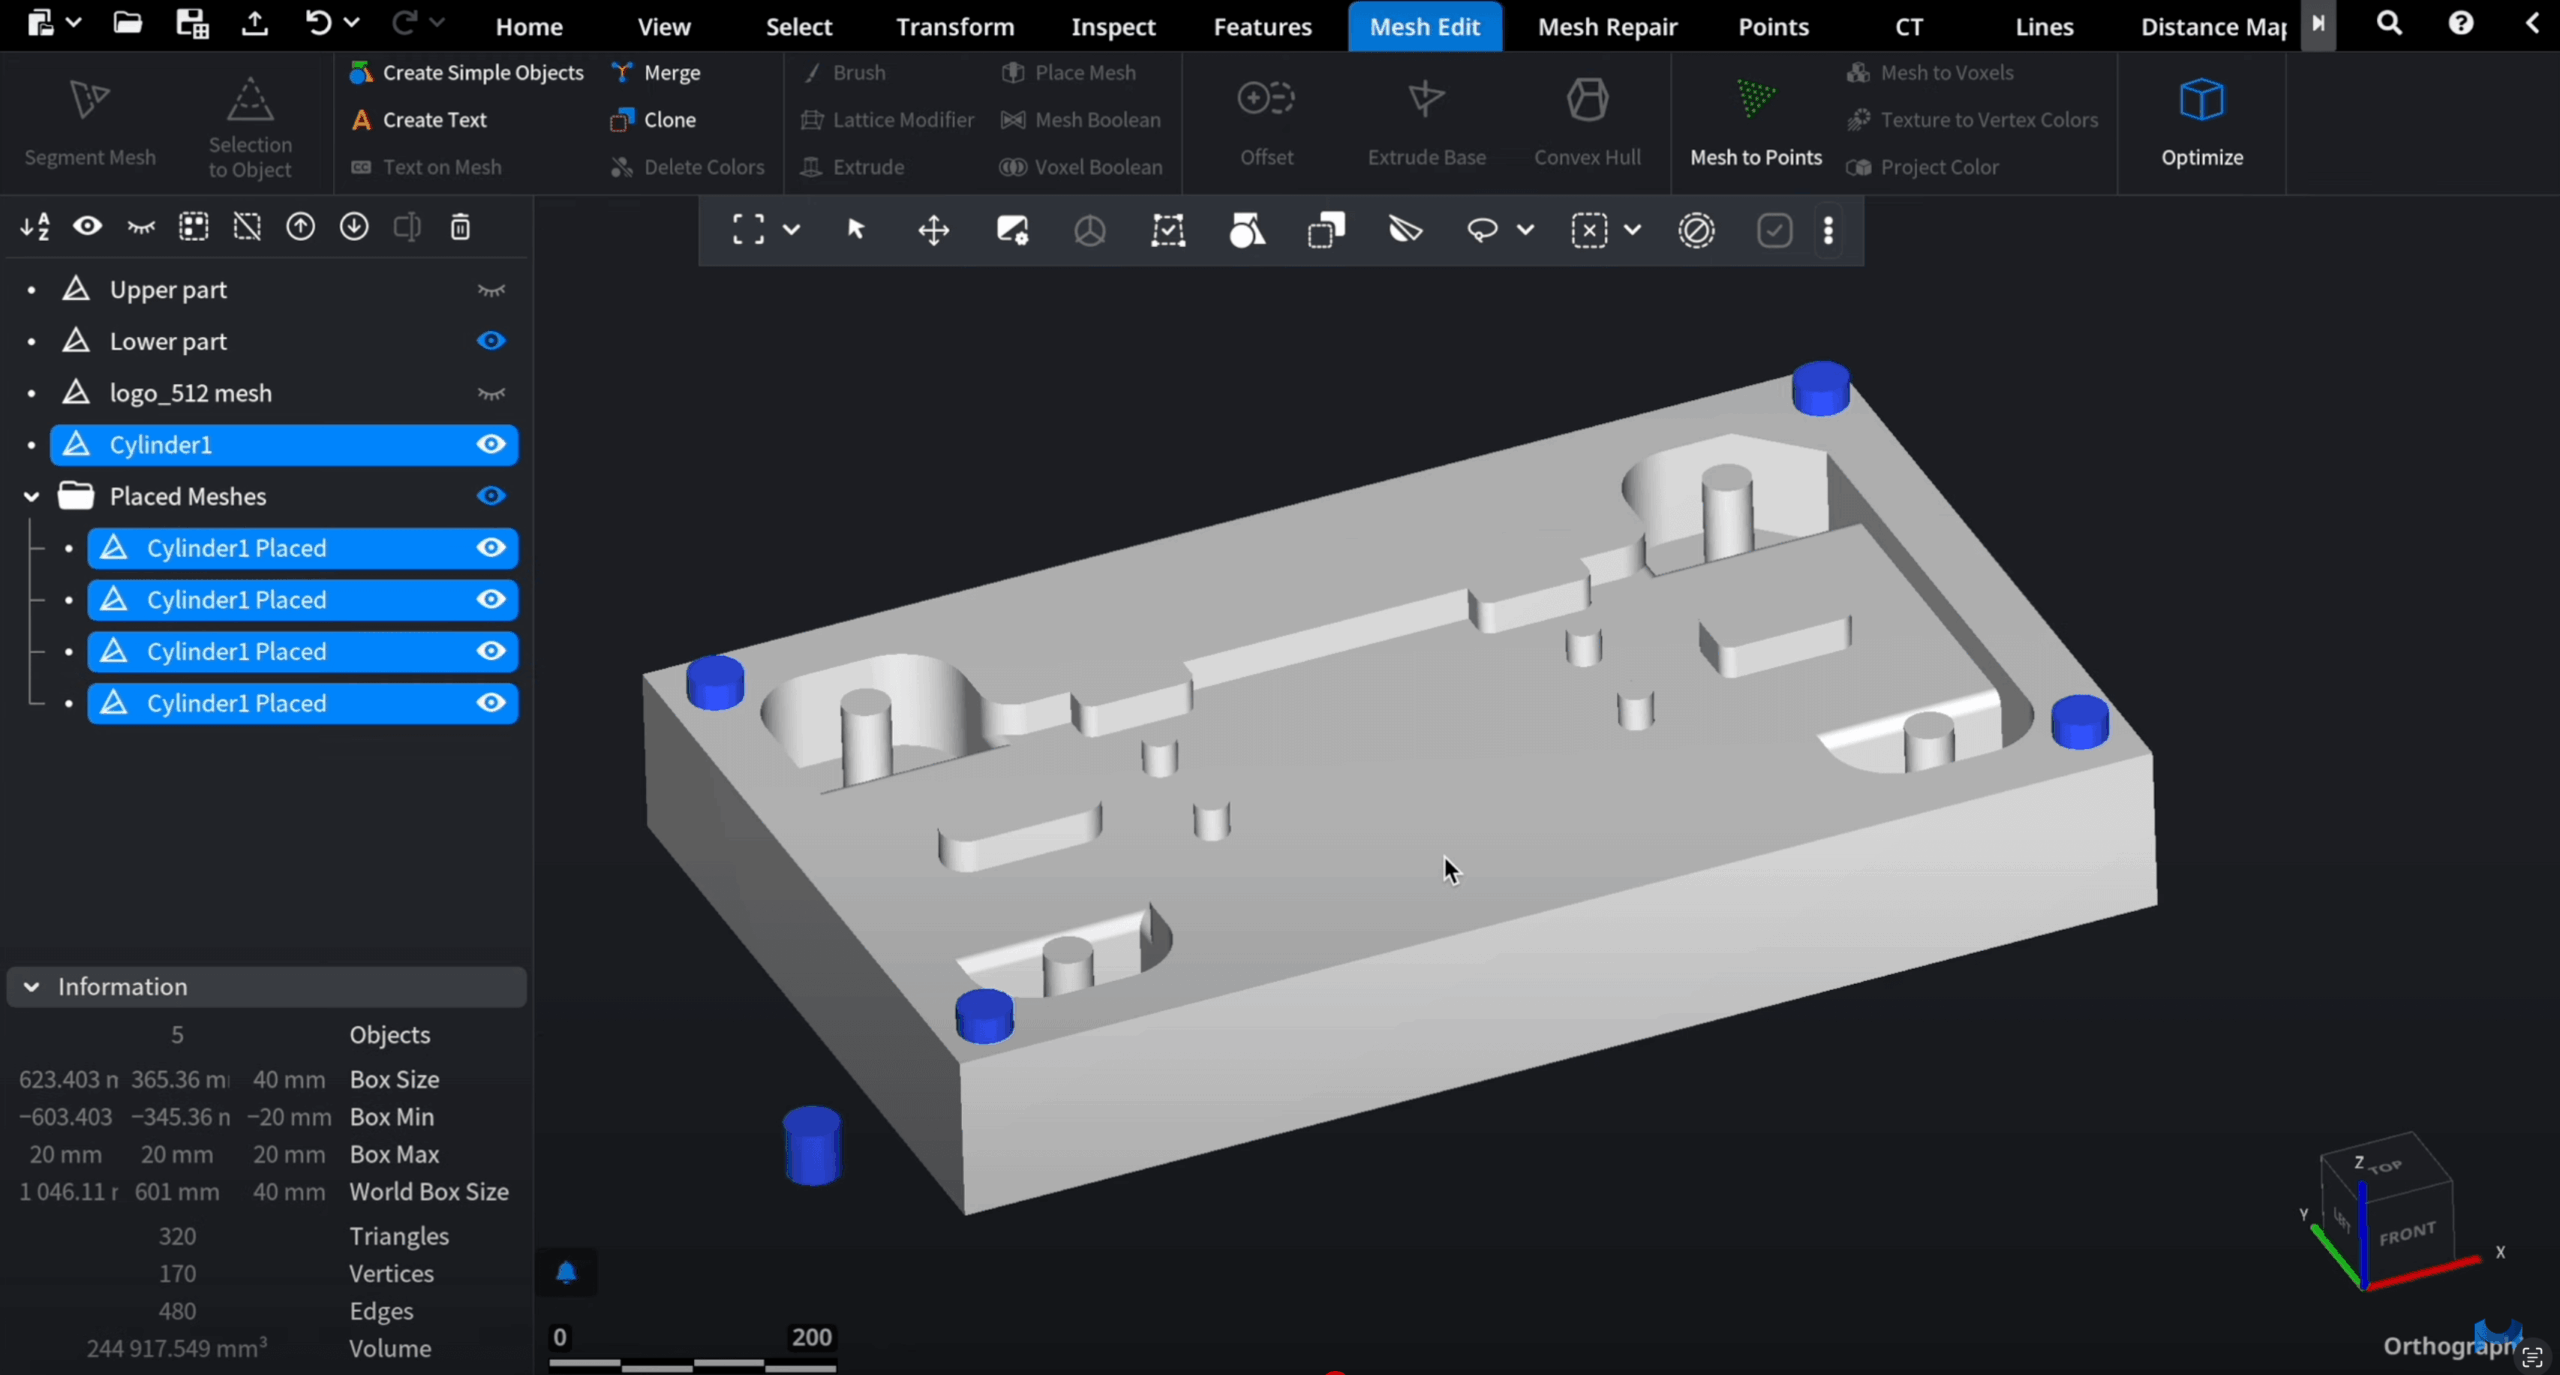
Optionally enable ’Merge placed meshes before adding to scene’ to group them. This second method is useful if you want more control, for example, applying Boolean operations to groups of connectors.
Examples
Connectors and slots. Place cylinders on one part, merge them, then subtract from the matching part to create precise slots.
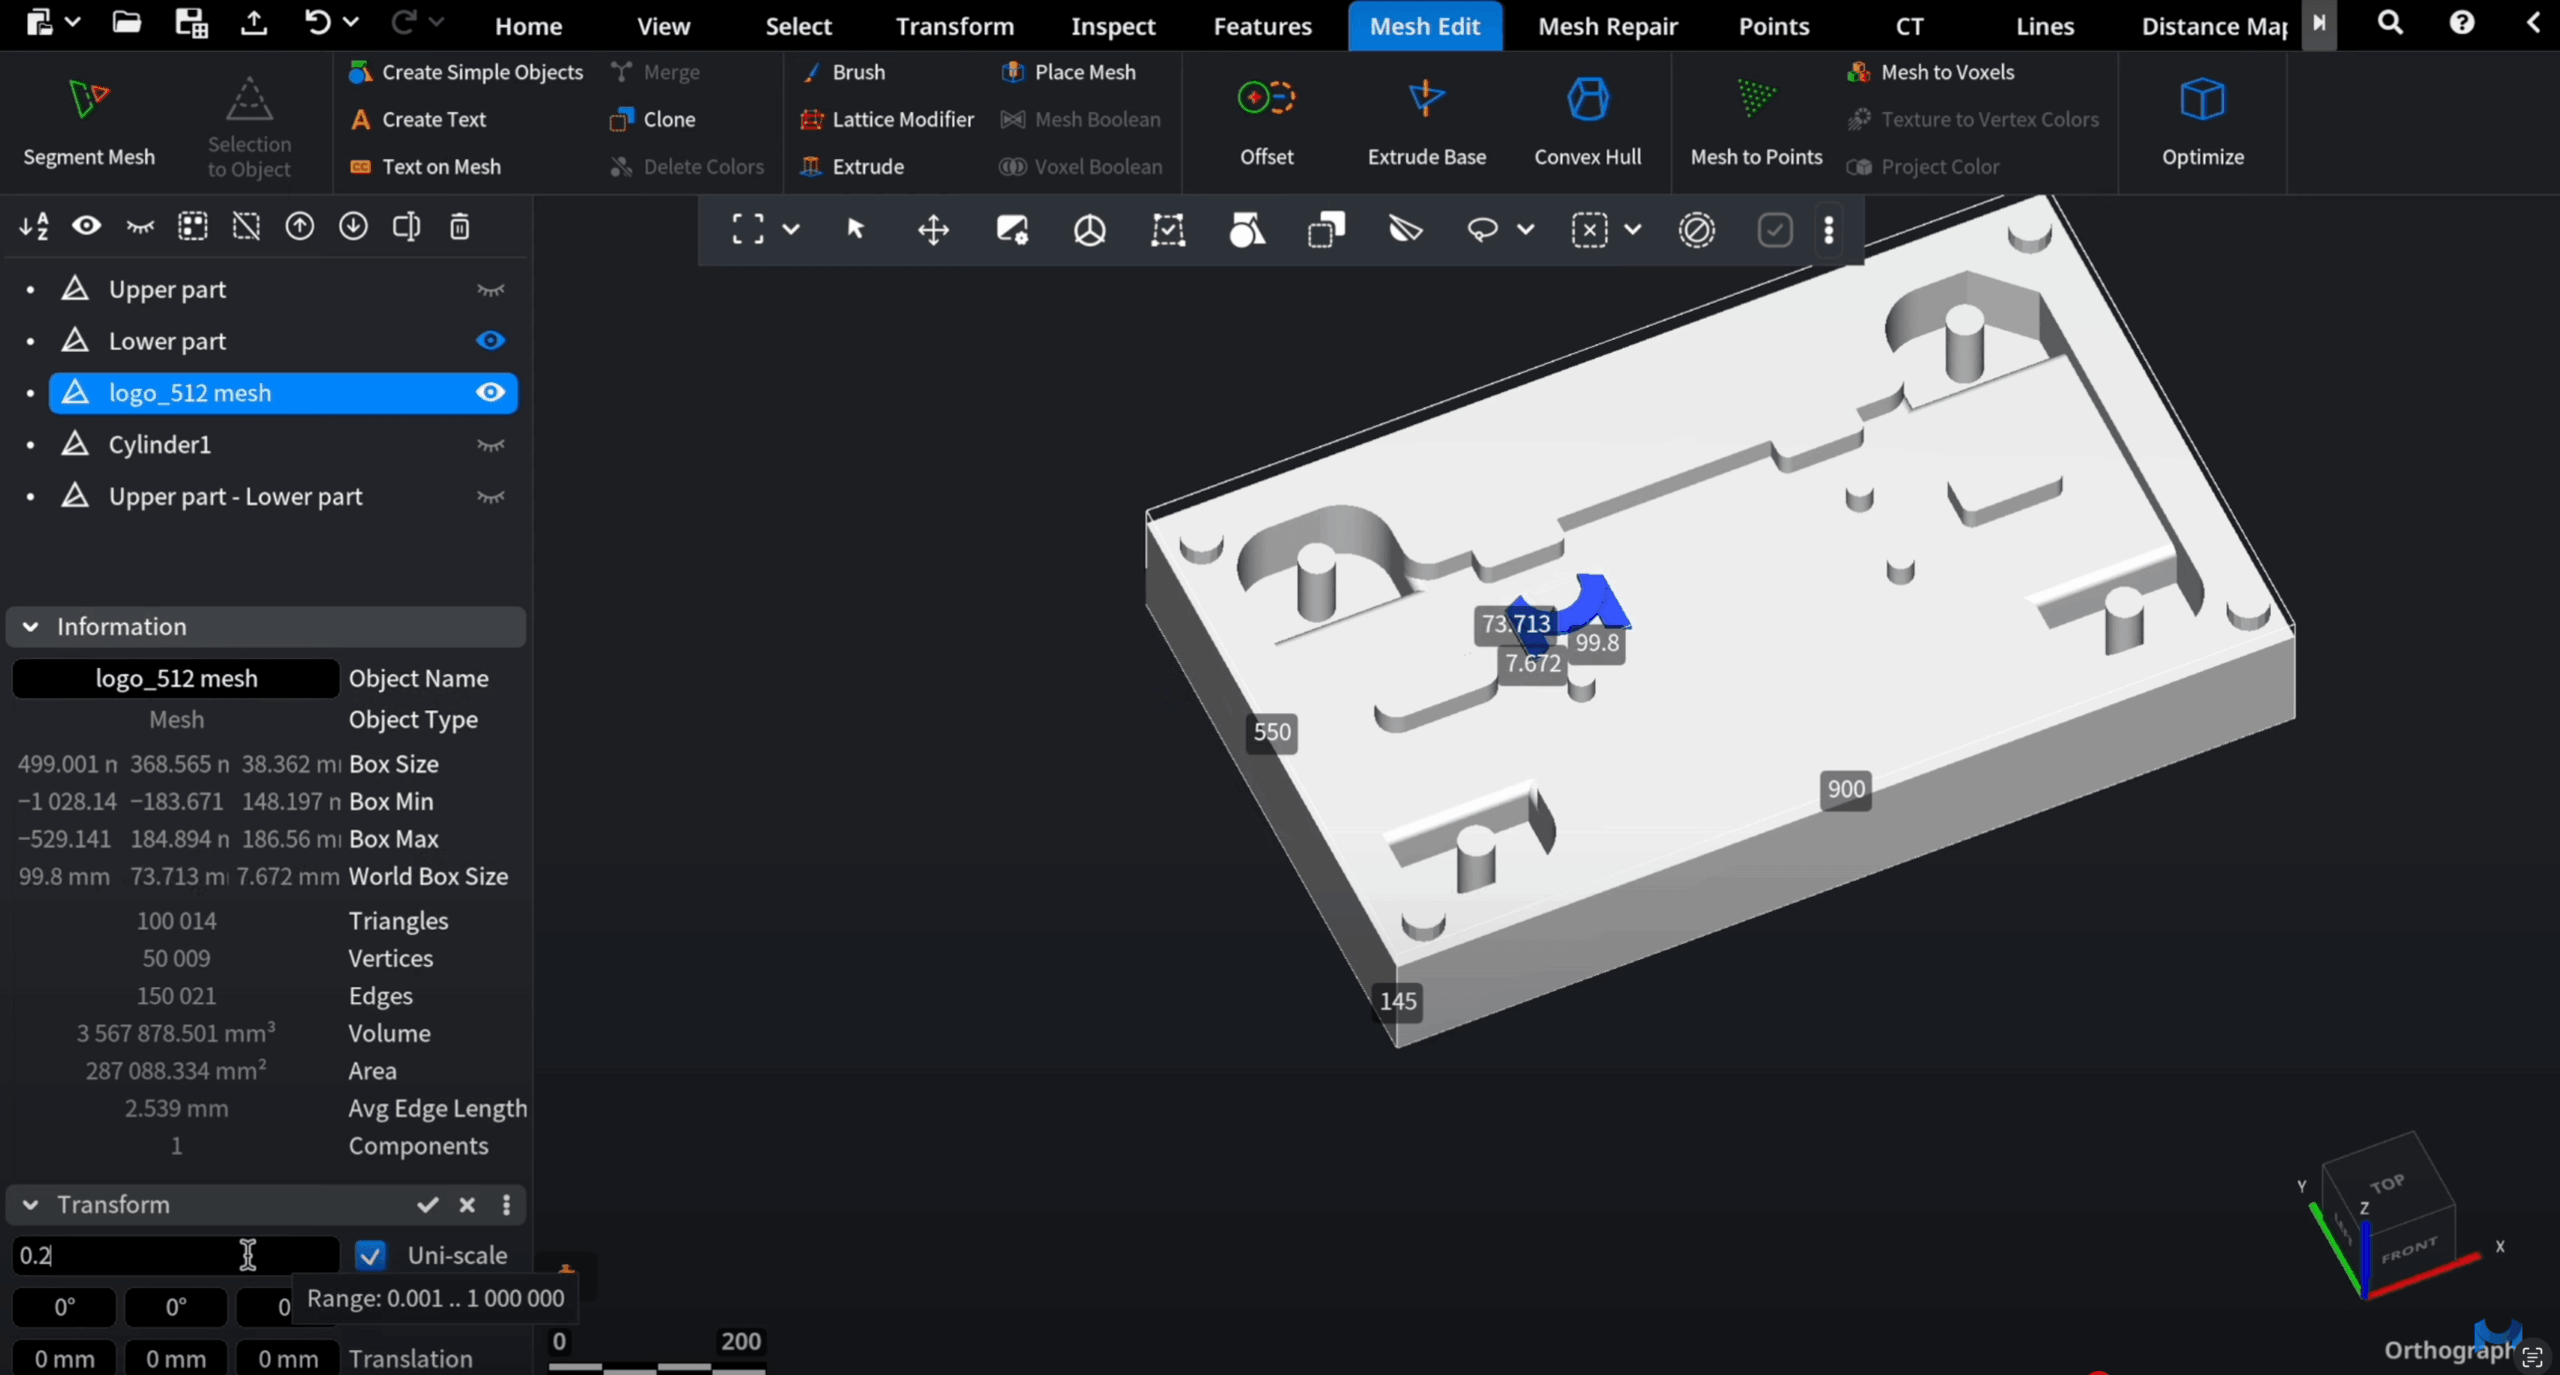
Logos and decorative parts. Import a logo, resize it in the ’Transform’ tab when needed, place it, and merge it into the target mesh.
Finalizing for 3D Printing
Once objects are placed and merged:
- Group the resulting meshes.
- Open ’Mesh Repair,’ then ‘Mesh Healer’ to fix issues that might affect printing.
- Export the ready-to-print model.