The Image to Distance Map tool, located under the Distance Maps tab, allows you to create a distance map from an image file. The tool loads an image and allows you to convert its pixel data into distance-map data, creating a new Distance Map object in the Scene tree after import.

After you click Image to Distance Map, MeshInspector opens a file selection window. Here, you can choose the image that will be used as the source for the new distance map.
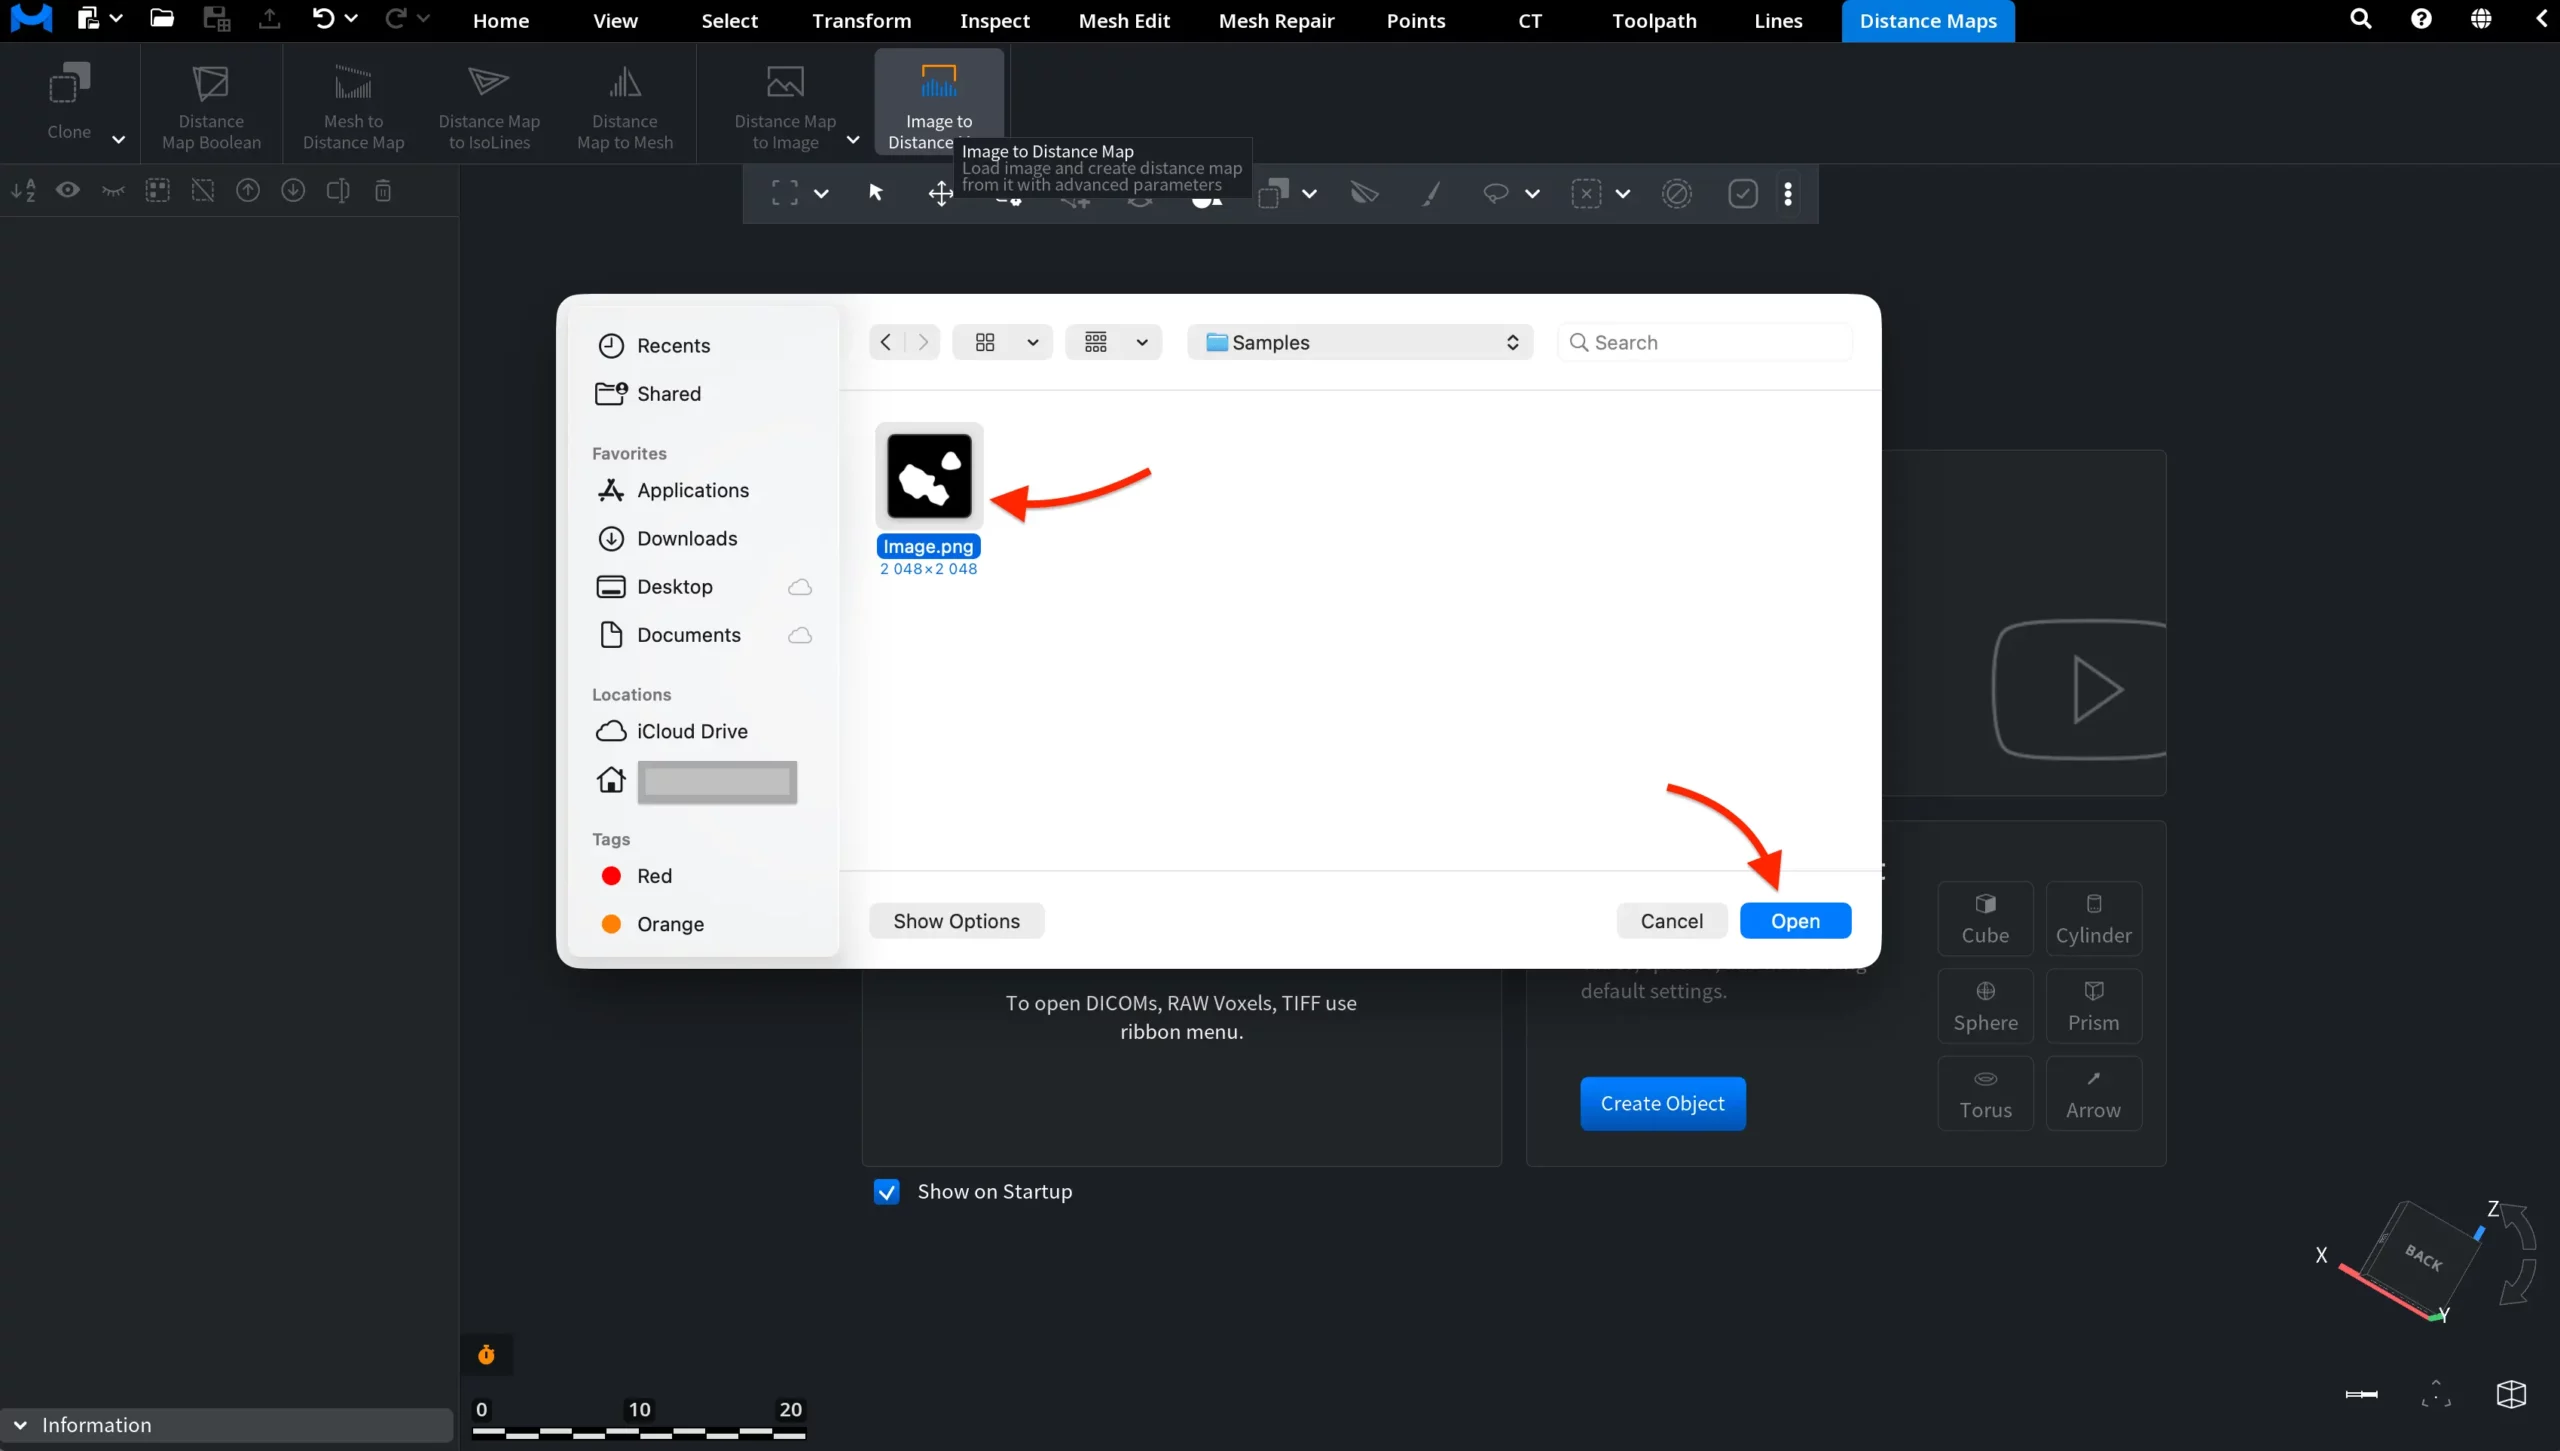
Select the required image file and click Open. MeshInspector loads the selected image and opens the Image to Distance Map panel. It contains the settings used to control how the image will be interpreted and converted.
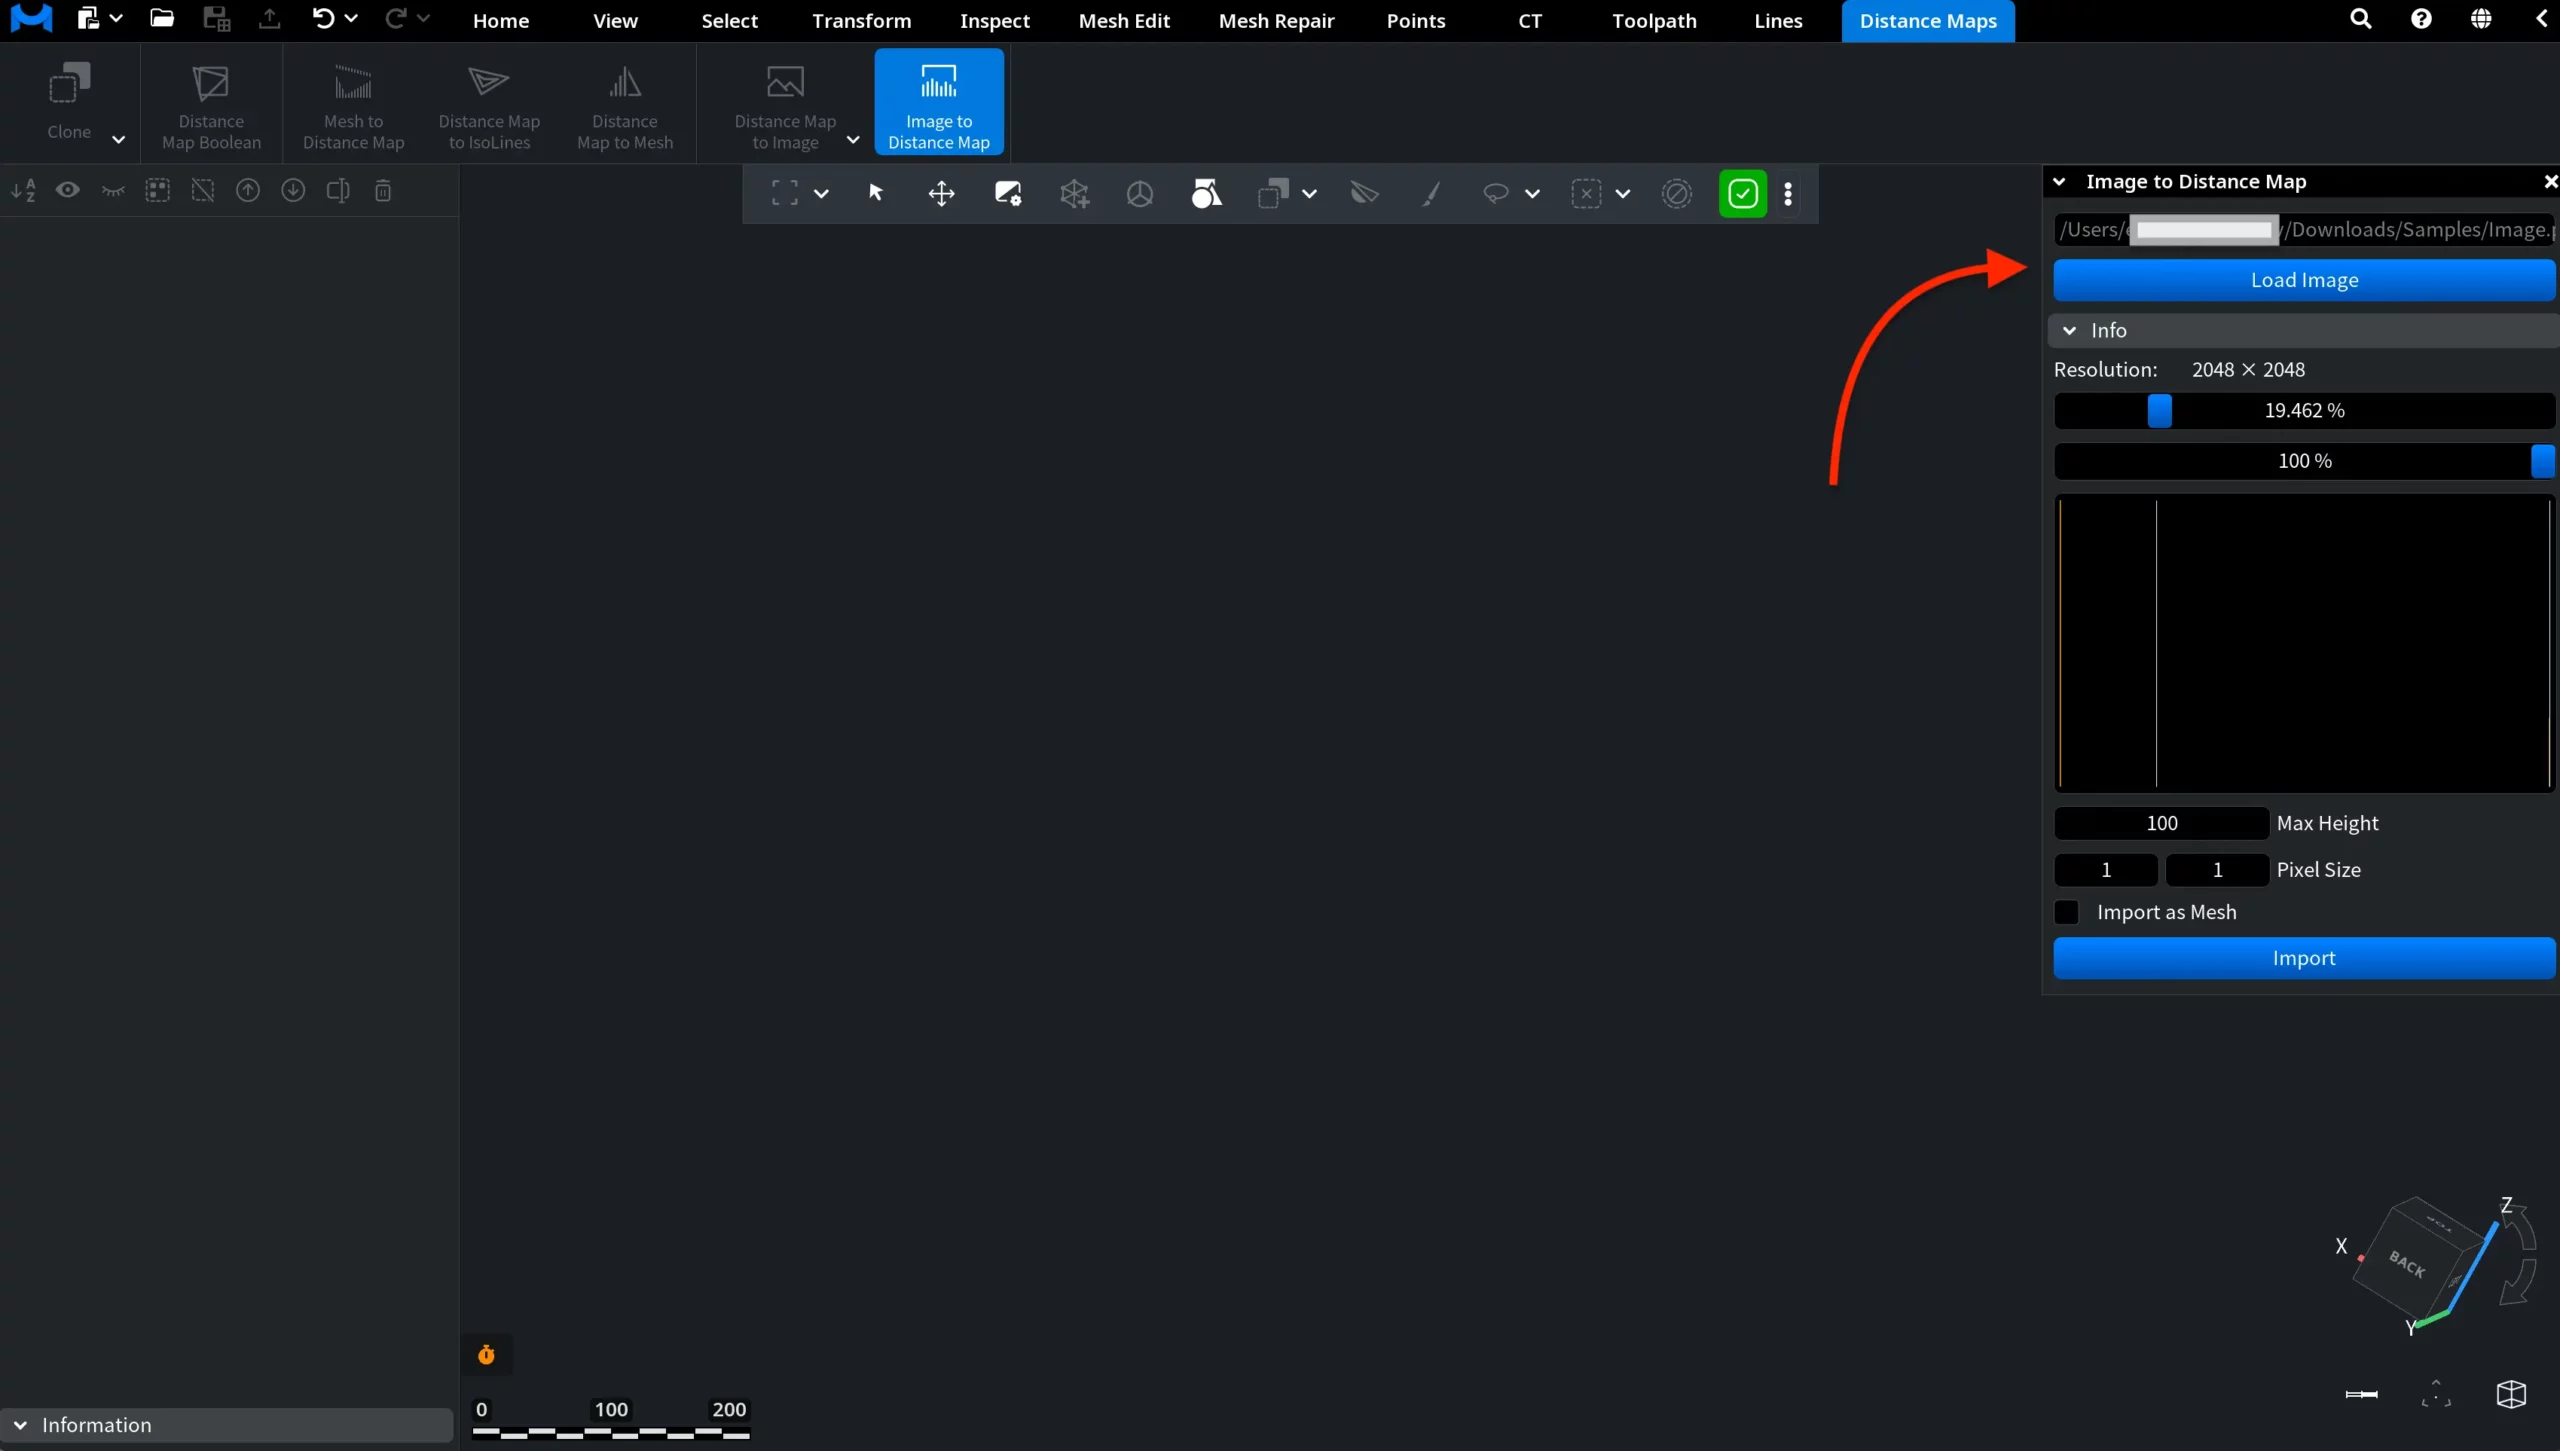
The panel contains the following elements:
- The file path field shows the currently selected image. If you need to choose another file, click Load Image.
- The Info section shows the resolution of the loaded image. In this example, the image resolution is 2048 × 2048.
- The upper percentage slider defines the cutoff for valid image values during conversion. Image values lower than this percentage of white are treated as invalid.
- The lower percentage slider controls the upper boundary of the image-value range used during conversion. Values within the selected range are used to generate the distance map.
- The central value area shows how the loaded image values are distributed and interpreted before import.
- Max Height defines the height value assigned to the white color in the image.
- Pixel Size defines the size of one image pixel in world space. Changing this value affects the physical scale of the resulting distance map.
- Import as Mesh allows you to import the result as a mesh object instead of a distance map.
After configuring the required settings, click Import to create the object. In the example below, the image was imported with the default settings.
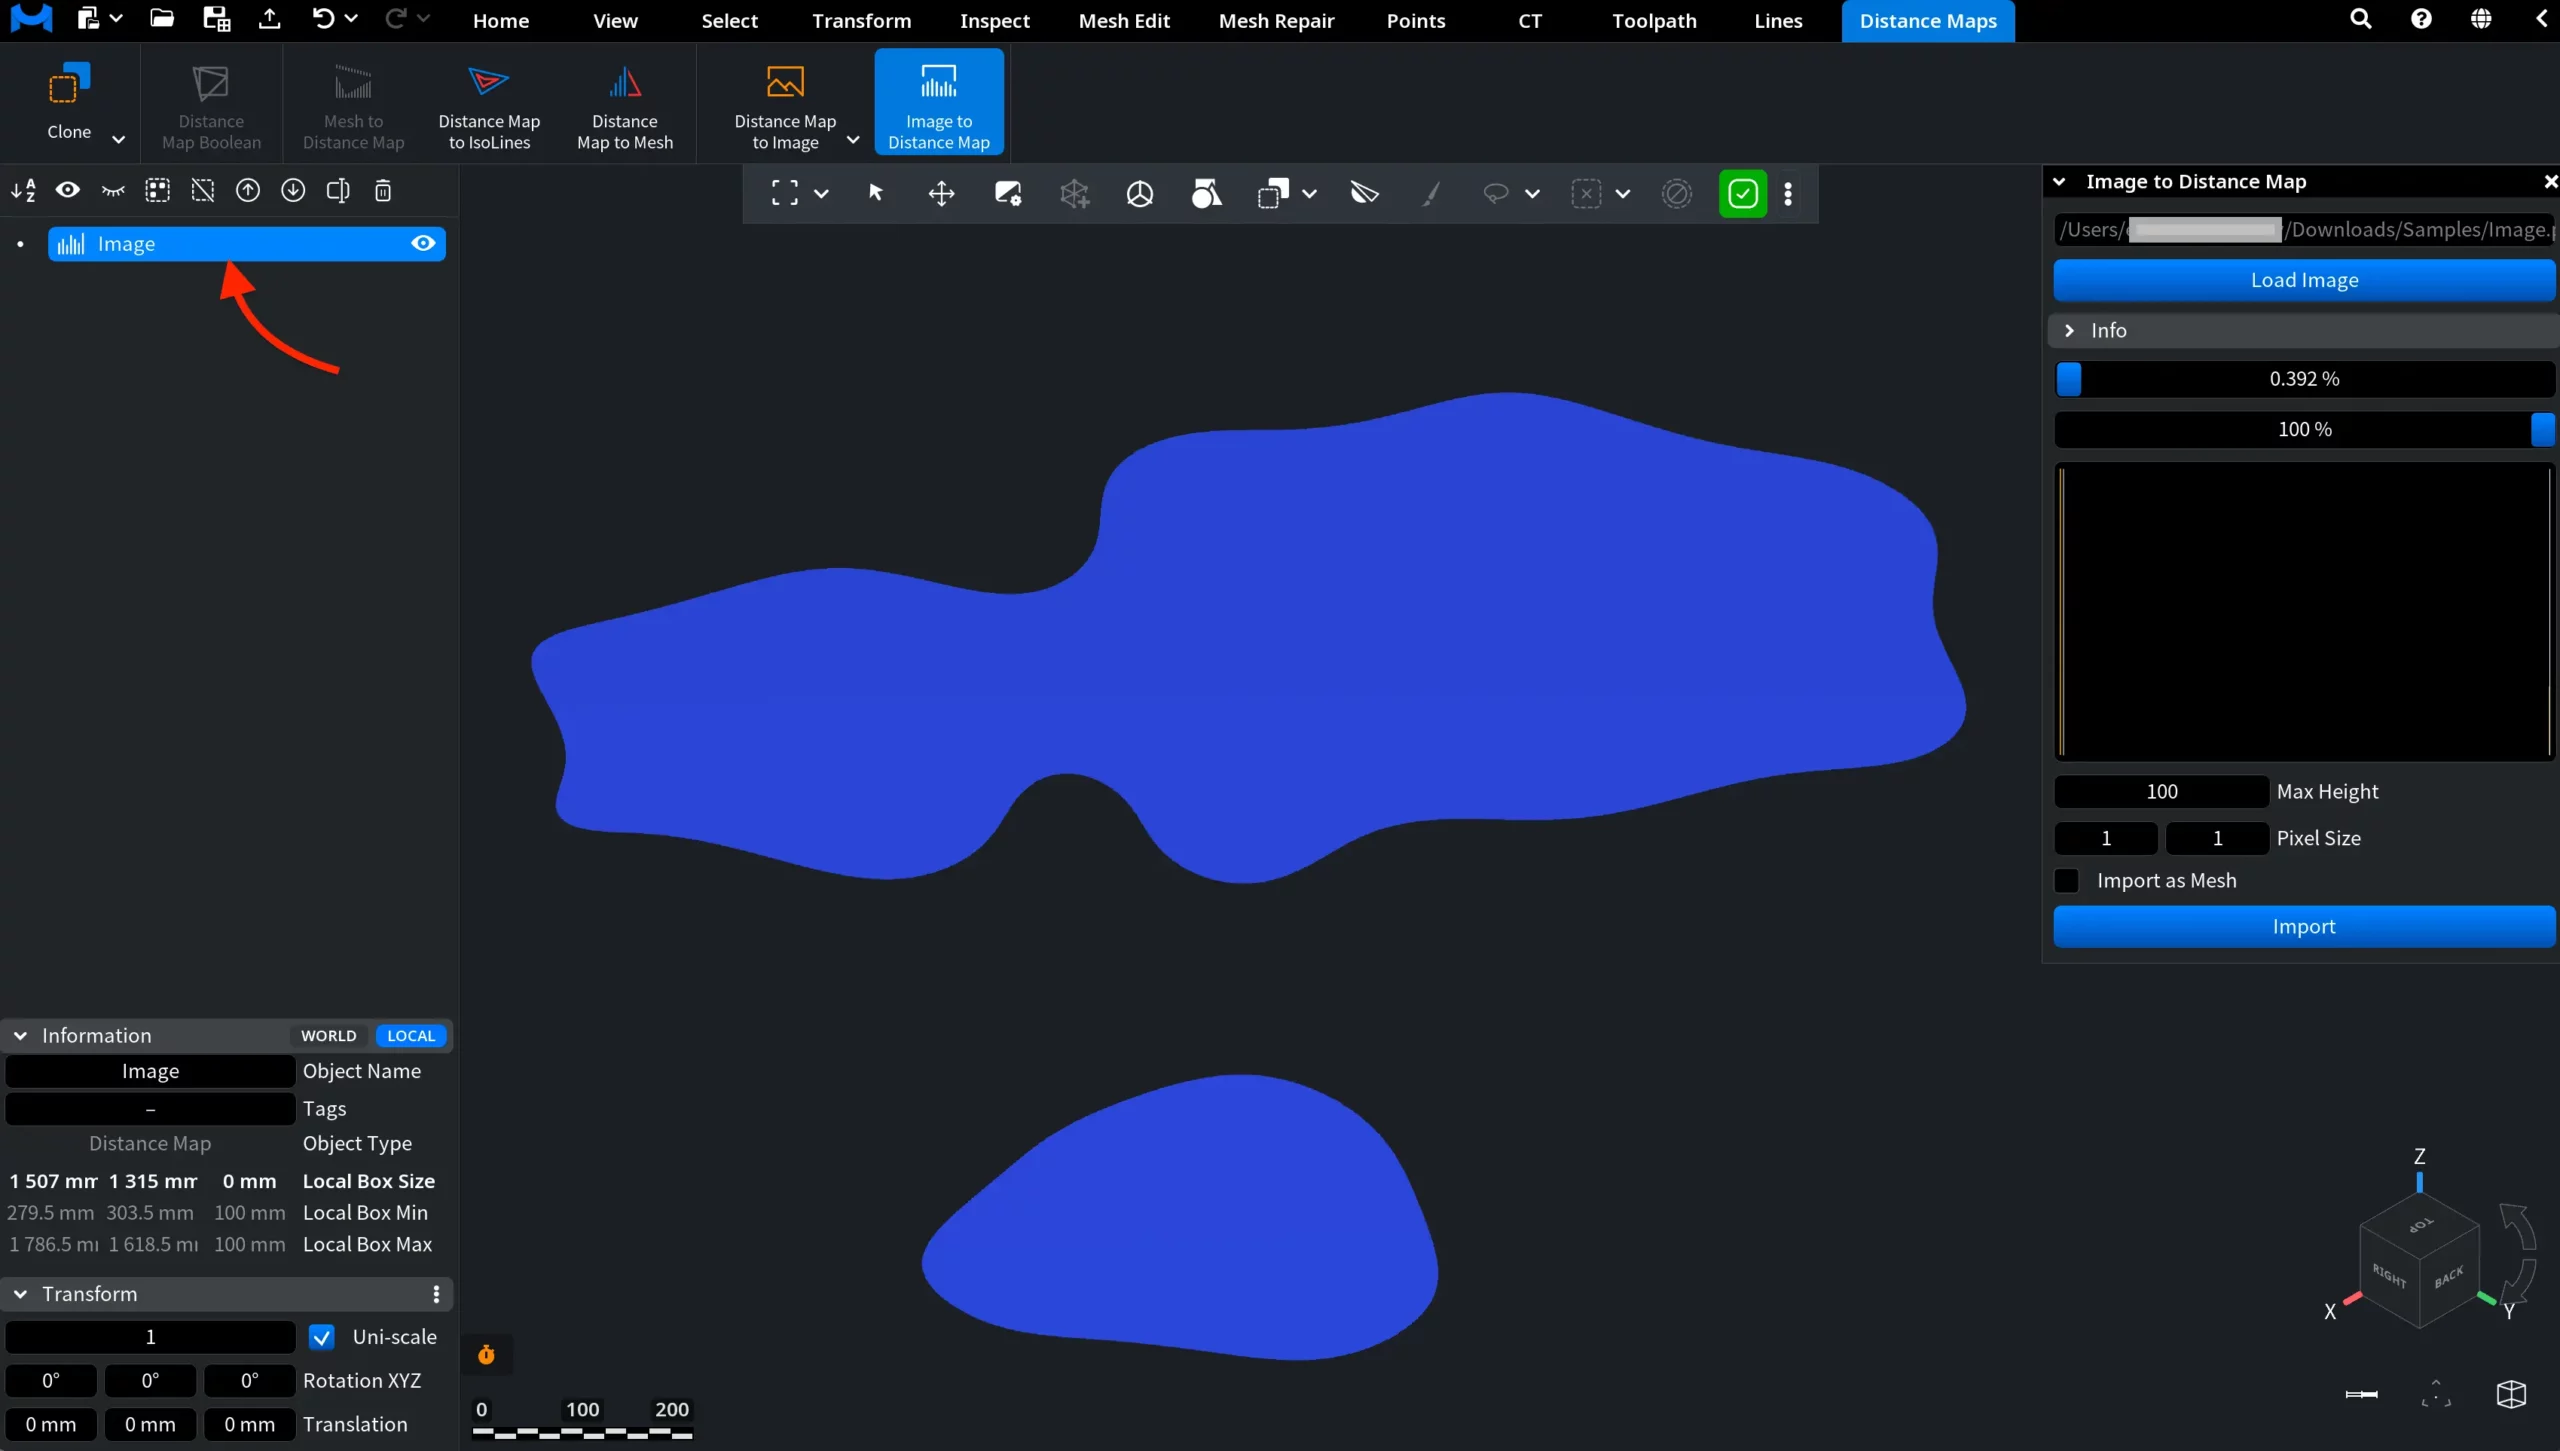
MeshInspector creates a new Distance Map object and adds it to the Scene tree. The generated distance map appears in the viewport and reflects the values interpreted from the source image.