Convert 3D models from .3MF to .OBJ file format and prepare for printing in one app.


Watch our quick tutorial or read:
Compare 3MF to OBJ converters and find the best fit for your workflow.
|
MeshInspector
|
MeshInspector
|
Other Converters
|
|
|---|---|---|---|
| Speed |
Ultra-fast Local processing
|
Fast
|
Slow
|
| File Size Limits |
Unlimited
|
Unlimited
|
File size limit (50 MB)
|
| File Number Limits |
Unlimited
|
Unlimited
|
Usually single file only
|
| Folder Support |
Full folder import
|
Full folder import
|
Not supported
|
| Assembly Conversion |
Partial or full assembly
|
Partial or full assembly
|
Not supported
|
| Mesh Validation |
Integrated
|
Integrated
|
Not supported
|
| Auto Mesh Repair |
Advanced
|
Advanced
|
Not supported
|
| Mesh Repair Options |
Advanced
|
Advanced
|
Not supported
|
| Accuracy Control |
Full
|
Full
|
Not supported
|
| 3D Viewer |
Advanced
|
Advanced
|
Basic or no preview
|
| 3D Editor |
Advanced
|
Advanced
|
Not supported
|
| Security & Privacy |
100% Local
|
SSL + Auto-delete
|
Files often stored on servers
|
| Cross-Platform |
Windows, macOS, Linux
|
All devices
|
Web only, limited mobile UX
|
| Suitable for |
Professionals and engineers
|
Quick online conversions
|
Not recommended
|
Join thousands of engineers who trust MeshInspector for their 3D file conversion needs. Start converting today with no limits and professional results.
Powered by MeshInspector technology for reliable file conversion.
If your workflow involves different modeling tools, MeshInspector can cover your needs when converting 3MF files to OBJ. With MeshInspector, you can easily change and export a 3MF model as a single OBJ file.
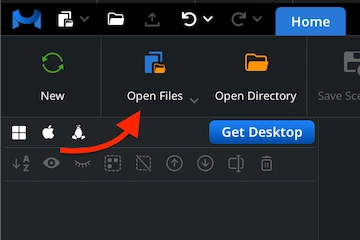
Start MeshInspector. Under the ‘Home’ tab, click on ‘Open Files.’ Import your .3mf model from your storage.
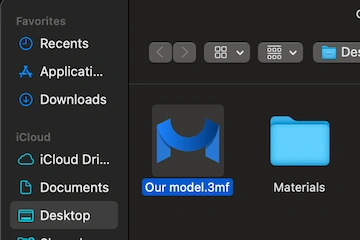
The window will prompt you to locate your file. Choose the target .3mf. Press ‘Upload’ or double-click to add it.
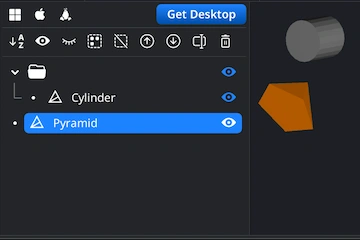
Your 3MF file will appear as a polygonal mesh. You can examine every surface.
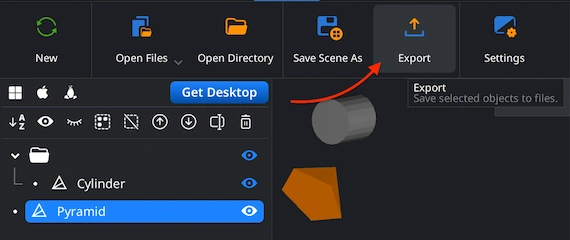
In the Scene Tree, select the mesh you want to export to make it active. Next, click the ‘Export’ icon located on the top toolbar. This will open the export dialog, where you can choose the desired output format, change the name, and confirm the export to complete the process.
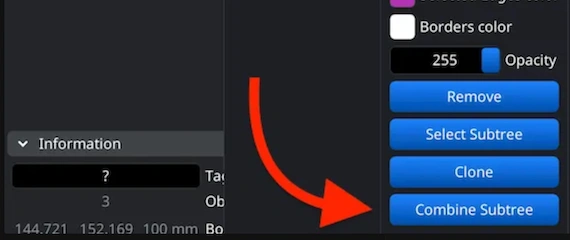
If your 3MF project includes several components, combine them before exporting. Select them within the Scene Tree, group them, and then right-click the new group to choose ‘Combine Subtree’. Your OBJ will be generated as a single model.
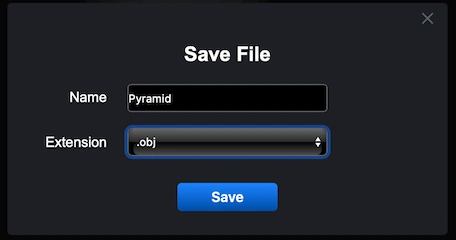
After pressing ‘Export’, the ’Save File’ dialog will appear. Assign a name to your output model and open the ‘Extension’ dropdown menu. Pick .obj among the available alternatives. Confirm to initiate the 3MF to OBJ conversion by clicking on ‘Save’.
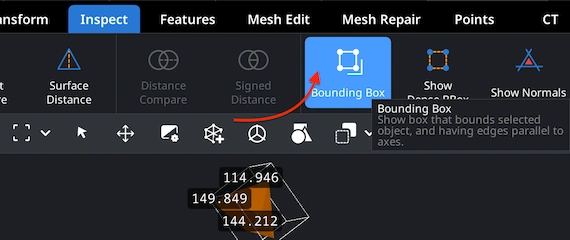
To verify that the exported mesh preserved its physical proportions, reload the resulting .obj file into MeshInspector. Go to the ‘Inspect’ tab and click ‘Bounding Box.’ This will show you all current measurements and help confirm scale accuracy.
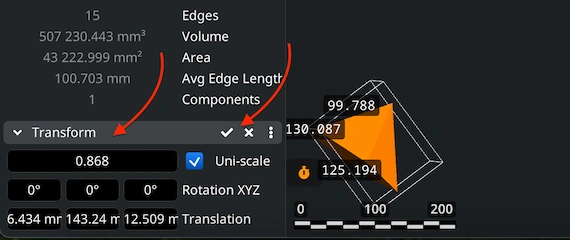
If you find the object too large or too small, use ‘Transform’. Move the Scale slider to resize your model. Do not forget to finalize changes by clicking on the checkbox. This ensures your OBJ export fits correctly into any downstream workflow.
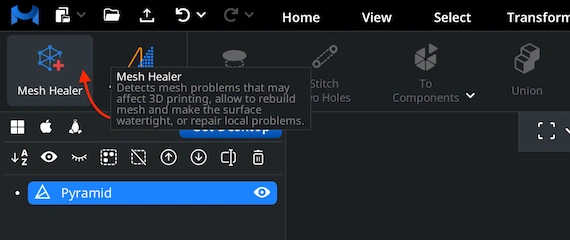
Before finalizing the export, it would be wise to confirm that your mesh is error-free. We can take care of this. Open the ‘Mesh Repair’ tab and choose the ‘Mesh Healer’ functionality from the top-left corner. This tool helps ensure structural integrity and watertight geometry.
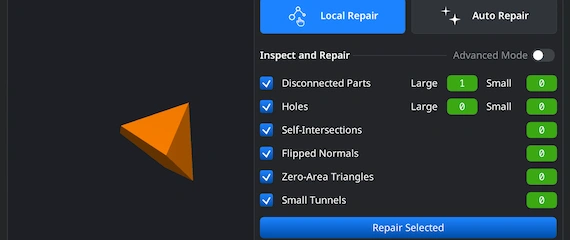
We provide two modes. 'Local Repair' detects and fixes disconnected areas, holes, flipped normals, degenerate faces, or narrow tunnels. You can also enable ‘Thin Walls’ and ‘Undercuts’ to verify printability or structural strength. 'Auto Repair' performs a full automatic rebuild.
100% Secure
No data leaves your device
works great thx
Clean geometry and fast. Thank you.
My rendering engine was refusing to open the client file. This fixed the compatibility issue in two seconds. Big thanks for the solution.