
Prepare and convert 3D models from .STL to .GLTF file format in one app.


Watch our quick tutorial or read:
Compare STL to GLTF converters and find the best fit for your workflow
|
MeshInspector
|
MeshInspector
|
Other Converters
|
|
|---|---|---|---|
| Speed |
Ultra-fast Local processing
|
Fast
|
Slow
|
| File Size Limits |
Unlimited
|
Unlimited
|
File size limit (50 MB)
|
| File Number Limits |
Unlimited
|
Unlimited
|
Usually single file only
|
| Folder Support |
Full folder import
|
Full folder import
|
Not supported
|
| Assembly Conversion |
Partial or full assembly
|
Partial or full assembly
|
Not supported
|
| Mesh Validation |
Integrated
|
Integrated
|
Not supported
|
| Auto Mesh Repair |
Advanced
|
Advanced
|
Not supported
|
| Mesh Repair Options |
Advanced
|
Advanced
|
Not supported
|
| Accuracy Control |
Full
|
Full
|
Not supported
|
| 3D Viewer |
Advanced
|
Advanced
|
Basic or no preview
|
| 3D Editor |
Advanced
|
Advanced
|
Not supported
|
| Security & Privacy |
100% Local
|
SSL + Auto-delete
|
Files often stored on servers
|
| Cross-Platform |
Windows, macOS, Linux
|
All devices
|
Web only, limited mobile UX
|
| Suitable for |
Professionals and engineers
|
Quick online conversions
|
Not recommended
|
Join thousands of engineers who trust MeshInspector for their 3D file conversion needs. Start converting today with no limits and professional results.
Powered by MeshInspector technology for reliable file conversion.
Transforming single STL files or their combinations into GLTF format is a frequent operation. The MeshInspector program serves as a dependable option for this. This walkthrough explains how to obtain a unified single GLTF file from your STLs.
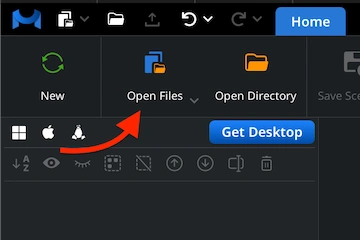
First of all, start with opening the MeshInspector program. Under the ‘Home’ tab, hit ‘Open Files’ to import your STL model.
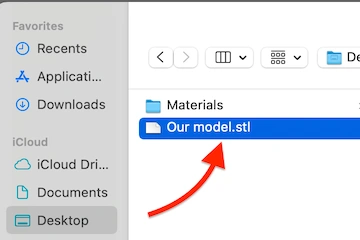
In the dialog that appears, locate your .stl file, select it, and confirm the choice by clicking ‘Upload’ or double-clicking it.
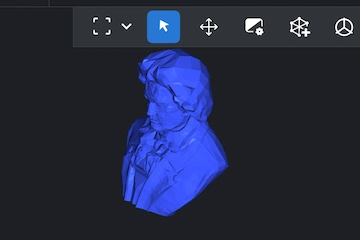
After import, your STL mesh will appear in the viewport as a triangulated structure. We render it with exact fidelity.
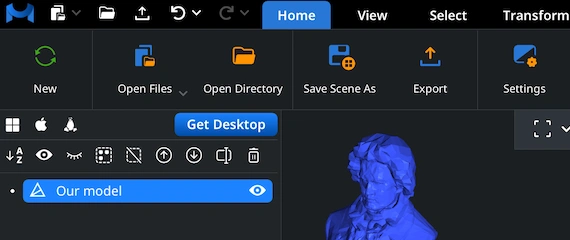
Then, to initiate the STL-to-GLTF conversion workflow, right-click your model in the Scene Tree. This action selects and ‘activates’ the mesh. This ‘blue’ status signals to you that the STL object is totally ready for export at any moment.
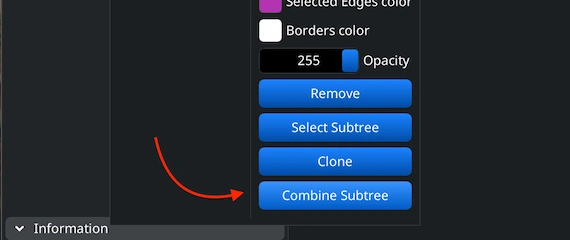
When your future STL project is a multi-component one, you can merge components into a single object before exporting. Highlight all necessary components in the Scene Tree, group them, then right-click and choose ‘Combine Subtree’ to unify.
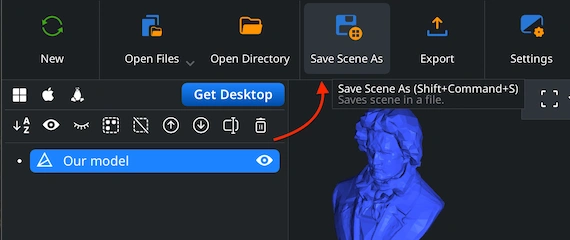
When working with the GLTF format, the proper method to convert your STL file through MeshInspector is by selecting ‘Save Scene As’ in the ‘Home’ tab, instead of using the ‘Export’ way.
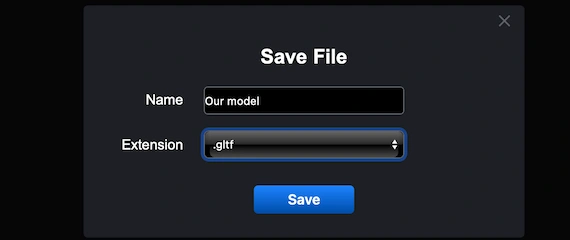
Once you choose ‘Save Scene As’ from the ‘Home’ tab, a ’Save File’ dialog will open. Here, you can rename your project and switch the output type to GLTF before confirming the save.
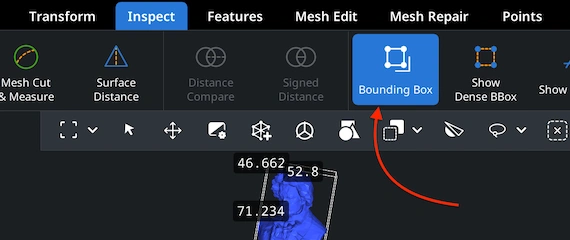
After generating the GLTF file, you can upload it and review its overall scale. Open the ‘Inspect’ tab. Enable ‘Bounding Box’ to display the GLTF’s full dimensions and confirm that its proportions are accurate for your needs.
To modify the size or overall proportions of your GLTF model, rely on the ‘Transform’ panel. Move the Scale slider until you achieve the desired dimensions, then apply the adjustment by clicking the checkmark icon.
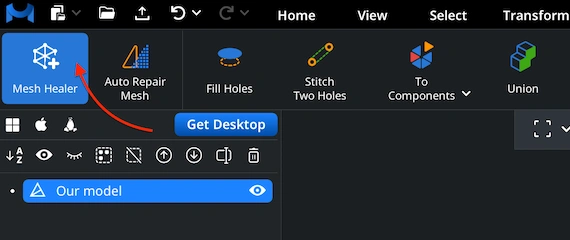
MeshInspector comes with a built-in ‘Mesh Healer’ utility available under the ‘Mesh Repair’ tab. This tool automatically scans the geometry for structural errors. Then, it can resolve them, so that your model remains solid, consistent, and suitable for any downstream purpose.
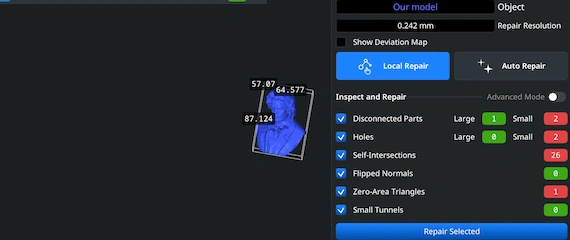
Under ‘Mesh Repair’, the ‘Local Repair’ functionality resolves individual geometry flaws, e.g., isolated components or surface holes. To confirm print readiness, you can also run ‘Thin Walls’ and ‘Undercuts’ checks. For severe cases, apply ‘Auto Repair’ to rebuild your GLTF.
100% Secure
No data leaves your device
looks good thx