
Prepare and convert 3D models from .OBJ to .GLTF file format in one app.


Watch our quick tutorial or read:
Compare OBJ to GLTF converters and find the best fit for your workflow.
|
MeshInspector
|
MeshInspector
|
Other Converters
|
|
|---|---|---|---|
| Speed |
Ultra-fast Local processing
|
Fast
|
Slow
|
| File Size Limits |
Unlimited
|
Unlimited
|
File size limit (50 MB)
|
| File Number Limits |
Unlimited
|
Unlimited
|
Usually single file only
|
| Folder Support |
Full folder import
|
Full folder import
|
Not supported
|
| Assembly Conversion |
Partial or full assembly
|
Partial or full assembly
|
Not supported
|
| Mesh Validation |
Integrated
|
Integrated
|
Not supported
|
| Auto Mesh Repair |
Advanced
|
Advanced
|
Not supported
|
| Mesh Repair Options |
Advanced
|
Advanced
|
Not supported
|
| Accuracy Control |
Full
|
Full
|
Not supported
|
| 3D Viewer |
Advanced
|
Advanced
|
Basic or no preview
|
| 3D Editor |
Advanced
|
Advanced
|
Not supported
|
| Security & Privacy |
100% Local
|
SSL + Auto-delete
|
Files often stored on servers
|
| Cross-Platform |
Windows, macOS, Linux
|
All devices
|
Web only, limited mobile UX
|
| Suitable for |
Professionals and engineers
|
Quick online conversions
|
Not recommended
|
Join thousands of engineers who trust MeshInspector for their 3D file conversion needs. Start converting today with no limits and professional results.
Powered by MeshInspector technology for reliable file conversion.
In 3D workflows, mesh data often needs to move seamlessly between tools and platforms. Converting from OBJ to GLTF is a common step here. MeshInspector fully enables you to perform this conversion.
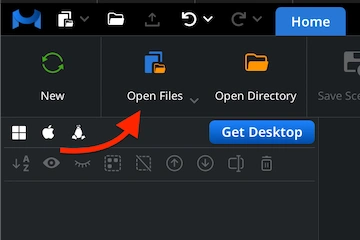
If you make the decision to employ the MeshInspector program as your assistant, go to ‘Open Files.’ This is the first step—importing your model first. Our versatile program supports both individual OBJ files and complete OBJ project archives.
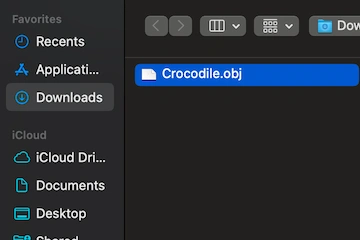
Click ‘Browse’, locate your file, and confirm the selection. If you are working with the web version, upload your OBJ project as a zipped archive with all texture maps and material files. The desktop version allows you to open a single OBJ file.
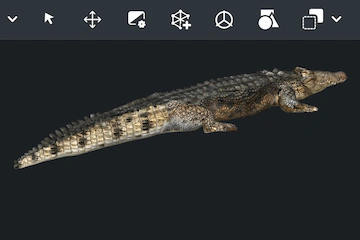
After importing a full zip archive, your model will appear in the workspace. Again, OBJ files can store not just geometry, but also materials and color data. MeshInspector automatically sees these components and displays them with high visual accuracy.
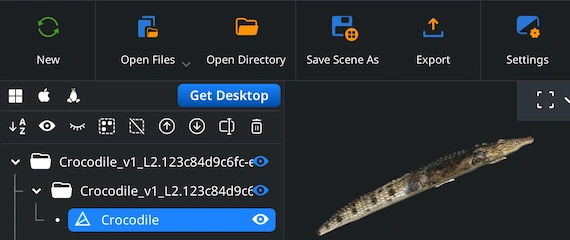
To begin a successful OBJ-GLTF conversion workflow, all you need to do is to simply right-click your OBJ model in the Scene Tree. After that, the object will be ready for the next step.
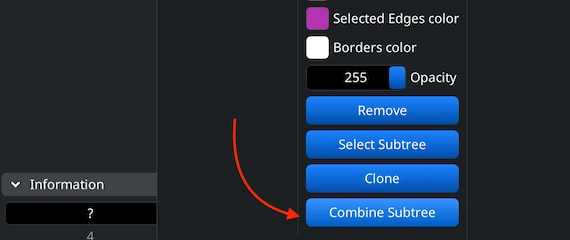
If your OBJ project contains multiple components, you can export them as a unified model. Select them, right-click, and choose ‘Group.’ Next, right-click the new group and select ‘Combine Subtree.’
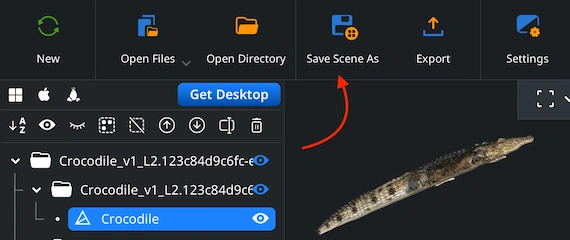
When the GLTF file format is involved, your way to convert an OBJ file to it is with our ‘Save Scene As’ button under the ‘Home’ tab, not the ‘Export’ button.
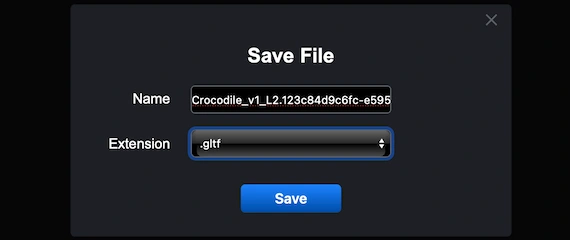
After hitting ‘Save Scene As’ under the ‘Home’ tab, you will see a ‘Save File’ window where you can give the file a new name and conveniently change its format to GLTF.
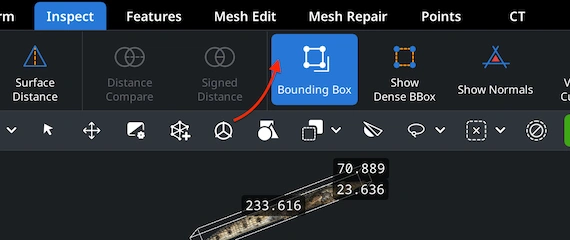
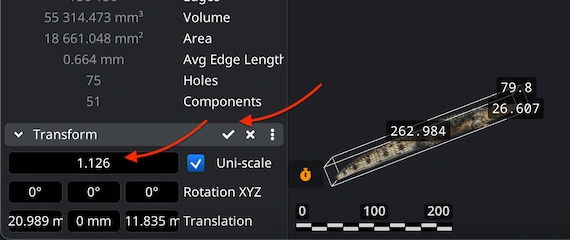
The resulting GLTF file based on our previous scene can be inspected. To check the size, activate ‘Bounding Box’ under the ‘Inspect’ tab to see all its dimensions.
To change your GLTF model’s size or volume, go to the ’Transform’ panel. Adjust the scale slider to reach the desired proportions and confirm the changes with the checkmark.
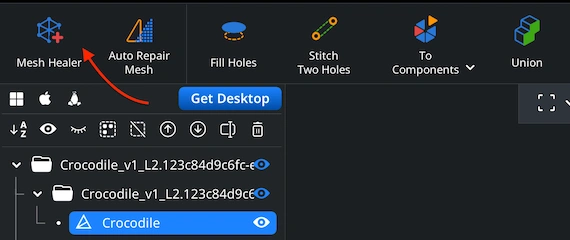
MeshInspector features a built-in ’Mesh Healer’ tool, found under the ’Mesh Repair’ tab. This powerful and intuitive-to-use utility automatically scans your model for geometry flaws to repair them. As such, it helps you achieve a clean, error-free, and print-ready object.
Under ‘Mesh Repair,’ ‘Local Repair’ focuses on individual flaws, such as disconnected components or holes. Also, you can resort to 'Thin Walls' and 'Undercuts' checks to validate printability, for the best quality. ‘Auto Repair’ will rebuild the model from scratch.
100% Secure
No data leaves your device
Optimized the file size drastically for my AR project. Runs smooth on mobile now. Thank you for the great compression.
so fast thx ⚡