Convert 3D models from .OBJ to .STL (Stereolithography) file format and prepare for printing in one app.


Watch our quick tutorial or read:
Compare OBJ to STL converters and find the best fit for your workflow.
|
MeshInspector
|
MeshInspector
|
Other Converters
|
|
|---|---|---|---|
| Speed |
Ultra-fast Local processing
|
Fast
|
Slow
|
| File Size Limits |
Unlimited
|
Unlimited
|
File size limit (50 MB)
|
| File Number Limits |
Unlimited
|
Unlimited
|
Usually single file only
|
| Folder Support |
Full folder import
|
Full folder import
|
Not supported
|
| Assembly Conversion |
Partial or full assembly
|
Partial or full assembly
|
Not supported
|
| Mesh Validation |
Integrated
|
Integrated
|
Not supported
|
| Auto Mesh Repair |
Advanced
|
Advanced
|
Not supported
|
| Mesh Repair Options |
Advanced
|
Advanced
|
Not supported
|
| Accuracy Control |
Full
|
Full
|
Not supported
|
| 3D Viewer |
Advanced
|
Advanced
|
Basic or no preview
|
| 3D Editor |
Advanced
|
Advanced
|
Not supported
|
| Security & Privacy |
100% Local
|
SSL + Auto-delete
|
Files often stored on servers
|
| Cross-Platform |
Windows, macOS, Linux
|
All devices
|
Web only, limited mobile UX
|
| Suitable for |
Professionals and engineers
|
Quick online conversions
|
Not recommended
|
Join thousands of engineers who trust MeshInspector for their 3D file conversion needs. Start converting today with no limits and professional results.
Powered by MeshInspector technology for reliable file conversion.
MeshInspector can cover your needs when you are converting OBJ files to STLs. This step-by-step guide will show you how to change and export your OBJ model as a single STL file by relying on our program’s intuitive UI.
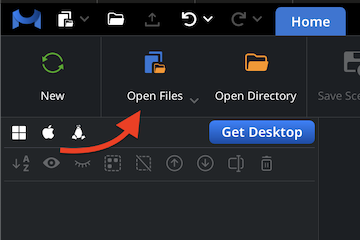
To initiate your quick and easy-to-perform conversion from the OBJ format to STL files, launch the MeshInspector program. Once it is up and running, go to the Home tab and click ‘Open Files’ to import your OBJ model, no matter how large it might be.
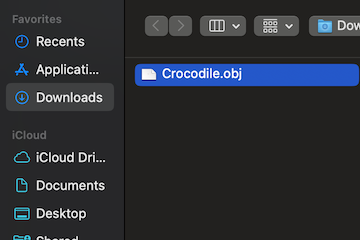
The program prompts you to select an OBJ. Click ‘Browse’, navigate, and confirm your choice. Note: if you are working on OBJ projects via the web version, they must be uploaded as zipped archives. On desktop, you can upload a single OBJ file.
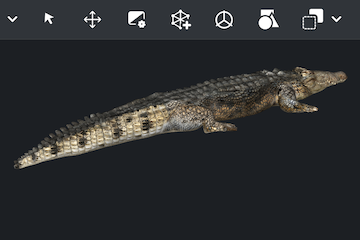
Once imported as a .ZIP, your .OBJ appears, ready for inspection. OBJ files may contain not only geometry but also textures and color data. MeshInspector can recognize all these, rendering them accurately. As a result, you are free to view the model from all angles.
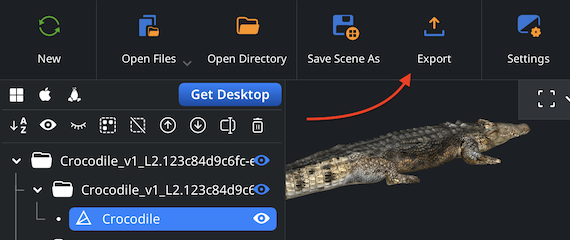
We will now proceed to export our OBJ model to convert it into another format. Locate your model in the scene tree. Right-click on it to open the context menu, then select the ‘Export’ option.
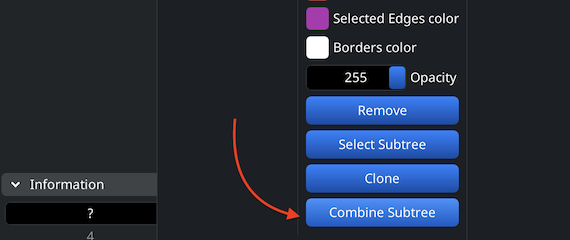
You can export several elements at once. Select what you are planning to export, right-click on them, then choose ‘Group’. After that, click on the resulting group and choose ‘Combine subtree.’ The tree can now be exported.
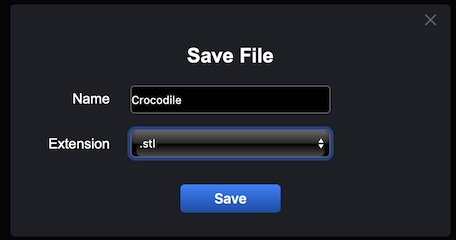
In the dialog window, opt for STL from the ‘Extension’ dropdown. Then, our program will save your model in the STL format. Click ‘Save’ to complete the OBJ to STL conversion.
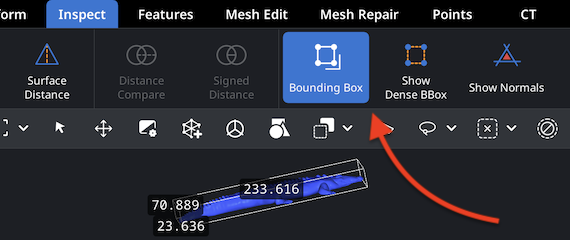
Go to the ‘Inspect’ tab and select ‘Bounding Box’ to check your STL’s dimensions. All measurements will be displayed, making it possible to verify the eventual export scale.
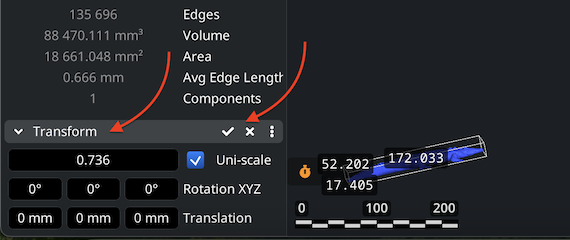
To modify the STL’s scale and volume, use ‘Transform’ under the ‘Information’ section. Adjust the Scaling bar, apply changes by clicking on the checkmark, and verify the dimensions.
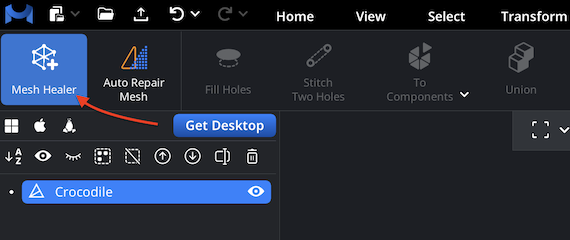
MeshInspector includes the dedicated ‘Mesh Healer’ tool, located right under the ‘Mesh Repair’ tab. This helpful and potent feature is designed to automatically detect and, subsequently, fix geometry issues that may interfere with successful 3D printing. Using it ensures a clean surface.
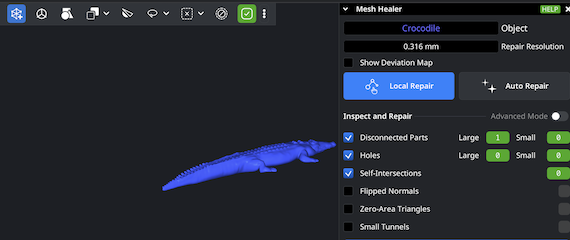
Click ‘Mesh Healer’ to open a panel displaying all detected mesh problems: holes, flipped normals, non-manifold edges, zero-area triangles, or self-intersections. You can fix selected issues using ‘Local Repair’, or perform a full rebuild with ‘Auto Repair’, which reconstructs the mesh from scratch, in its entirety.
100% Secure
No data leaves your device
Saved my print. Thanks for doing God's work.
Usually these online tools break the details but this one kept everything sharp. Really appreciate the quality here.
Simple and effective.
I made this model in VR and it was a mess of holes. This cleaned it up so well so i can actually print it without errors.😅
printing now thx!! 🥳