
Convert OFF files to STL format ready for precise 3D printing or analysis.


Watch our quick tutorial or read:
Compare OFF to STL converters and find the best fit for your workflow.
|
MeshInspector
|
MeshInspector
|
Other Converters
|
|
|---|---|---|---|
| Speed |
Ultra-fast Local processing
|
Fast
|
Slow
|
| File Size Limits |
Unlimited
|
Unlimited
|
File size limit (50 MB)
|
| File Number Limits |
Unlimited
|
Unlimited
|
Usually single file only
|
| Folder Support |
Full folder import
|
Full folder import
|
Not supported
|
| Assembly Conversion |
Partial or full assembly
|
Partial or full assembly
|
Not supported
|
| Mesh Validation |
Integrated
|
Integrated
|
Not supported
|
| Auto Mesh Repair |
Advanced
|
Advanced
|
Not supported
|
| Mesh Repair Options |
Advanced
|
Advanced
|
Not supported
|
| Accuracy Control |
Full
|
Full
|
Not supported
|
| 3D Viewer |
Advanced
|
Advanced
|
Basic or no preview
|
| 3D Editor |
Advanced
|
Advanced
|
Not supported
|
| Security & Privacy |
100% Local
|
SSL + Auto-delete
|
Files often stored on servers
|
| Cross-Platform |
Windows, macOS, Linux
|
All devices
|
Web only, limited mobile UX
|
| Suitable for |
Professionals and engineers
|
Quick online conversions
|
Not recommended
|
Join thousands of engineers who trust MeshInspector for their 3D file conversion needs. Start converting today with no limits and professional results.
Powered by MeshInspector technology for reliable file conversion
Dealing with 3D geometry in the OFF format? Then file conversion is of importance to you. The MeshInspector program offers a fast, accurate, and user-friendly way to convert OFF models into STLs with perfect geometry preservation. With a few clicks, you will export your project as a solid STL file, suitable for your professional activities.
To kick off the OFF-to-STL conversion flow, launch the MeshInspector program. Once our UI is open, head to the ‘Home’ tab. Click on ‘Open Files’ to upload your OFF model.
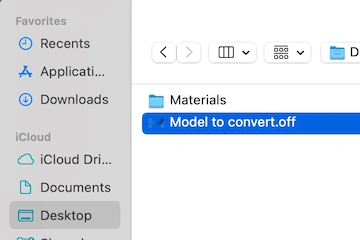
In the dialog window that appears, find your OFF file. Once it is found, select it. Click ‘Upload’ (or double-click its name). MeshInspector will be quick to load the OFF file.
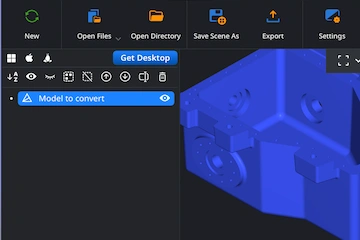
After import, your OFF model appears as a polygonal surface mesh. It is 100% ready for further processing and editing. Rotate, zoom, or inspect it from any possible angle.
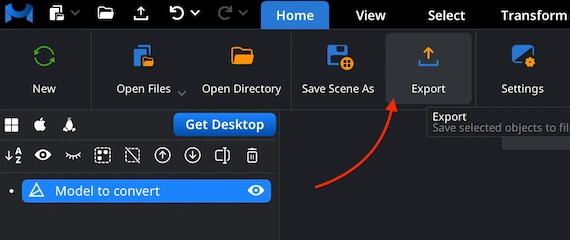
When your OFF model is ready for export, find it in the Scene Tree. Right-click the desired object. Then choose ‘Export’ to open the export dialog and get prepared for STL output.
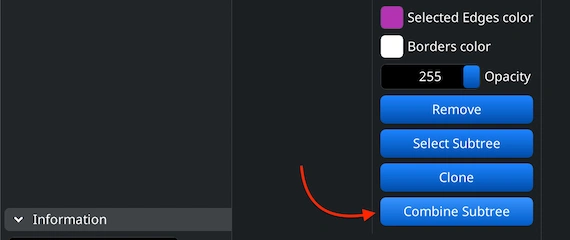
If the OFF contains multiple objects, merge them before exporting. Select all elements in the Scene Tree, right-click, and choose ‘Group’. Then, right-click the new group and select ‘Combine Subtree.’
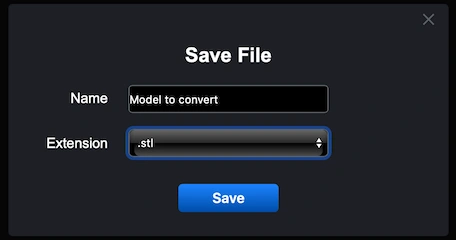
After clicking ‘Export’, our ‘Save File’ dialog will appear. Rename your file if needed and open the ‘Extension’ dropdown list. Choose .stl as the output format. MeshInspector will then perform the OFF-to-STL conversion.
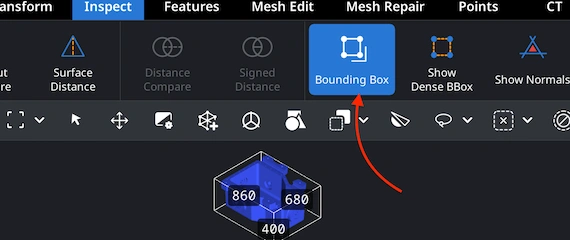
Once exported, reopen your STL file in MeshInspector to check its scale. Go to the ‘Inspect’ tab and activate ‘Bounding Box’ to display overall dimensions and ensure your STL model’s proportions are fine for you after conversion.
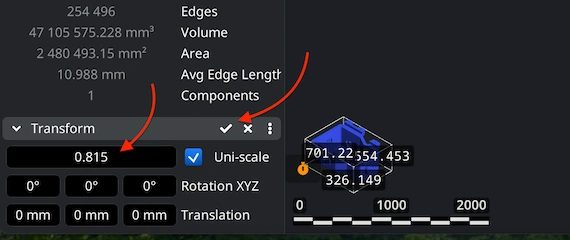
If the STL does not match your expectations in terms of size, navigate to the ‘Transform’ section under ‘Information’. Employ the Scale slider to adjust the size. Once satisfied, confirm your choice. Click the checkmark icon.
100% Secure
No data leaves your device
Printed the shape perfectly.