
Convert PLY meshes to lightweight GLTF files optimized for web or AR visualization.


Watch our quick tutorial or read:
Compare PLY to GLTF converters and find the best fit for your workflow.
|
MeshInspector
|
MeshInspector
|
Other Converters
|
|
|---|---|---|---|
| Speed |
Ultra-fast Local processing
|
Fast
|
Slow
|
| File Size Limits |
Unlimited
|
Unlimited
|
File size limit (50 MB)
|
| File Number Limits |
Unlimited
|
Unlimited
|
Usually single file only
|
| Folder Support |
Full folder import
|
Full folder import
|
Not supported
|
| Assembly Conversion |
Partial or full assembly
|
Partial or full assembly
|
Not supported
|
| Mesh Validation |
Integrated
|
Integrated
|
Not supported
|
| Auto Mesh Repair |
Advanced
|
Advanced
|
Not supported
|
| Mesh Repair Options |
Advanced
|
Advanced
|
Not supported
|
| Accuracy Control |
Full
|
Full
|
Not supported
|
| 3D Viewer |
Advanced
|
Advanced
|
Basic or no preview
|
| 3D Editor |
Advanced
|
Advanced
|
Not supported
|
| Security & Privacy |
100% Local
|
SSL + Auto-delete
|
Files often stored on servers
|
| Cross-Platform |
Windows, macOS, Linux
|
All devices
|
Web only, limited mobile UX
|
| Suitable for |
Professionals and engineers
|
Quick online conversions
|
Not recommended
|
Join thousands of engineers who trust MeshInspector for their 3D file conversion needs. Start converting today with no limits and professional results.
Powered by MeshInspector technology for reliable file conversion.
3D professionals often need to move between file formats for different purposes. PLY-GLTF is one of these routines. With MeshInspector, you are empowered to convert PLY files to GLTF. Our program will take care that all details are preserved with precision.
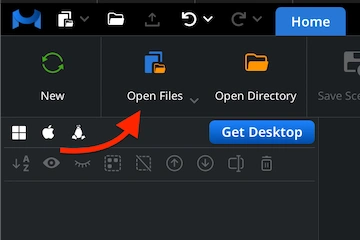
Start the MeshInspector program. Then, head to the ‘Home’ tab. Click ‘Open Files’ to begin the import. Our program can open both individual files and entire archives.
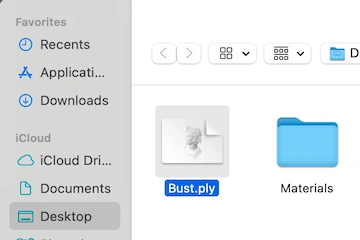
In the dialog window, navigate to your .ply file, select it, and confirm by clicking ‘Upload’ or simply double-clicking the file to load it into the MeshInspector program.
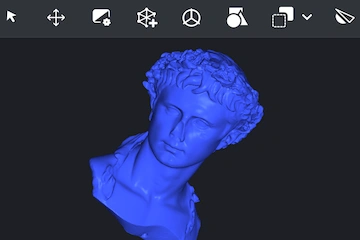
Once the PLY file is loaded, this PLY will appear as a triangulated surface mesh for editing or export. The MeshInspector program accurately reads and displays all data.
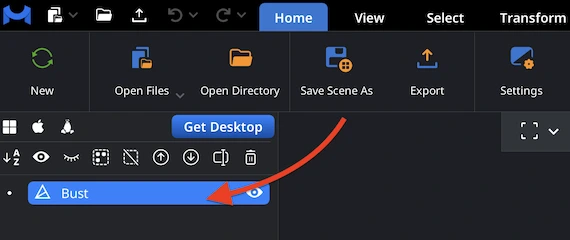
To kick off a smooth and successful PLY-to-GLTF conversion flow, just right-click your PLY model. It will be highlighted in the Scene Tree. This simple action activates the object and prepares it for the following step.
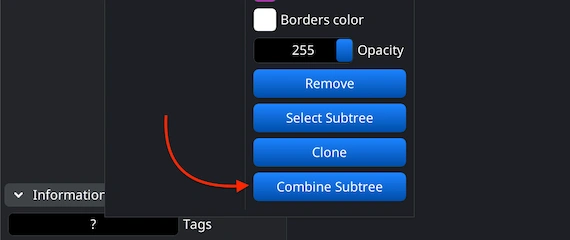
If your future project contains multiple meshes to keep together, it is best to unite them first. In the Scene Tree, highlight all the elements, group them, then right-click the group to select ‘Combine Subtree.’
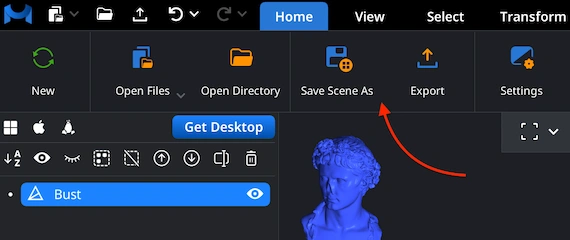
When you are working with the GLTF format, the correct way to convert your PLY file is by using the ‘Save Scene As’ option located under ‘Home’. This method ensures that all data is properly saved in GLTF, unlike the ‘Export’ feature, intended for other formats.
After selecting the ‘Save Scene As’ route from the ‘Home’ tab, a ’Save File’ dialog will appear. Here, MeshInspector’s end-users can, first, assign a new name to your future GLTF project, and switch the output format to GLTF before confirming the save.
100% Secure
No data leaves your device
scans look good on web. thank you.