
Convert 3D models from .PLY to .STL (Stereolithography) file format and prepare for printing in one app.


Watch our quick tutorial or read:
Compare PLY to STL converters and find the best fit for your workflow.
|
MeshInspector
|
MeshInspector
|
Other Converters
|
|
|---|---|---|---|
| Speed |
Ultra-fast Local processing
|
Fast
|
Slow
|
| File Size Limits |
Unlimited
|
Unlimited
|
File size limit (50 MB)
|
| File Number Limits |
Unlimited
|
Unlimited
|
Usually single file only
|
| Folder Support |
Full folder import
|
Full folder import
|
Not supported
|
| Assembly Conversion |
Partial or full assembly
|
Partial or full assembly
|
Not supported
|
| Mesh Validation |
Integrated
|
Integrated
|
Not supported
|
| Auto Mesh Repair |
Advanced
|
Advanced
|
Not supported
|
| Mesh Repair Options |
Advanced
|
Advanced
|
Not supported
|
| Accuracy Control |
Full
|
Full
|
Not supported
|
| 3D Viewer |
Advanced
|
Advanced
|
Basic or no preview
|
| 3D Editor |
Advanced
|
Advanced
|
Not supported
|
| Security & Privacy |
100% Local
|
SSL + Auto-delete
|
Files often stored on servers
|
| Cross-Platform |
Windows, macOS, Linux
|
All devices
|
Web only, limited mobile UX
|
| Suitable for |
Professionals and engineers
|
Quick online conversions
|
Not recommended
|
Join thousands of engineers who trust MeshInspector for their 3D file conversion needs. Start converting today with no limits and professional results.
Powered by MeshInspector technology for reliable file conversion.
Preoccupied with preparing 3D data? The MeshInspector program will address your needs by converting PLY files to STL. With MeshInspector, you are well-positioned to easily change and export your model as a single STL file, while being perfectly and universally equipped to preserve precision and proper mesh integrity.
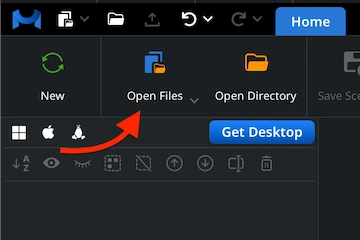
To start converting a PLY to STL, launch the MeshInspector program: navigate to the ‘Home’ tab. Click on ‘Open Files’ for loading 3D data.
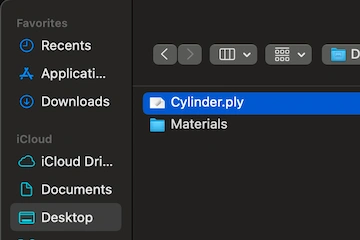
In the dialog window that appears, locate your .ply file. Once your PLY is found, select it by clicking ‘Upload’ or by double-clicking.
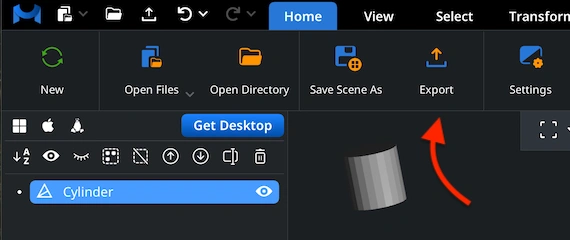
After loading, the file will appear as a triangulated surface mesh, ready for subsequent operations. MeshInspector supports all data from PLY files.
When the PLY model is fully loaded and can be examined, your next step is to select what you want to export in the Scene Tree. For this purpose, make use of the ‘Export’ icon on the top toolbar.
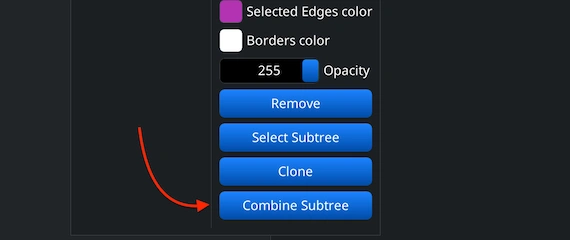
In case your PLY contains multiple elements, merge them before exporting. In the Scene Tree, select and group them. Then right-click on the group. Choose ‘Combine Subtree’ to unite them.
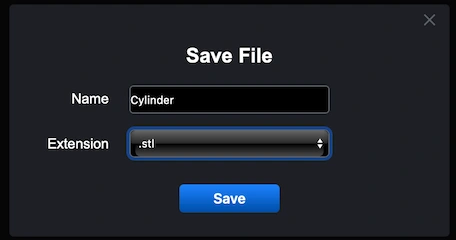
Once you hit ‘Export,’ ‘Save File’ will appear. You can rename the file if necessary and select the desired output format in the ‘Extension’ dropdown list. Opt for .stl. The MeshInspector program will export the object (as a binary STL file).
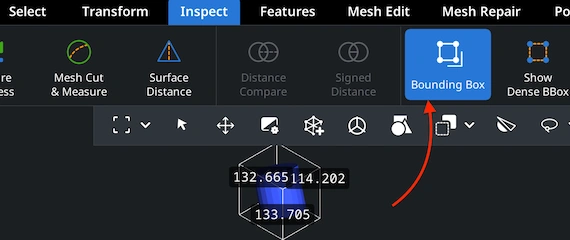
To validate your converted STL file, reopen it in MeshInspector. Go to ‘Inspect’ and select ‘Bounding Box.’ Our advanced and feature-rich software will calculate and display dimensions. This will allow you to verify that proper scaling was secured.
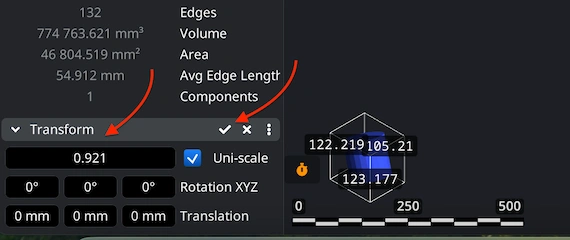
Need to fine-tune the model’s scale? Head to ‘Transform’ under the ‘Information’ panel. Adjust the scaling slider to enlarge or shrink the mesh. Confirm your changes by clicking the checkbox. The updated size and volume will be applied.
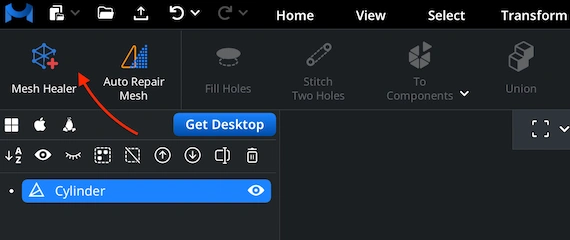
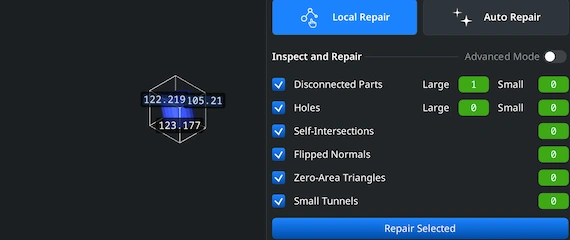
Before completing your PLY-to-STL conversion scenario, it is a must to provide for the mesh integrity. Switch to the ‘Mesh Repair’ tab and open ‘Mesh Healer.’ This tool analyzes geometry errors and prepares the model for repair. Fixing these prevents problems.
Choose between two repair modes. 'Local Repair' detects and fixes specific issues, e.g., disconnected elements, small holes, etc. You can also activate ‘Thin Walls’ and ‘Undercuts’ for printability. ‘Auto Repair' rebuilds entire models, for complete restoration.
100% Secure
No data leaves your device
processed the cloud fast. thank you.
Scan data was too noisy but this smoothed it out enough to print. Really appreciate the clever processing here. Thanks guys!
printable now thx