
Convert single parts or full assemblies from .STEP to .STL (Stereolithography) file format and prepare 3D models for printing in one app.


Watch our quick tutorial or read:
Compare STEP to STL converters and find the best fit for your workflow
|
MeshInspector
|
MeshInspector
|
Other Converters
|
|
|---|---|---|---|
| Speed |
Ultra-fast Local processing
|
Fast
|
Slow
|
| File Size Limits |
Unlimited
|
Unlimited
|
File size limit (50 MB)
|
| File Number Limits |
Unlimited
|
Unlimited
|
Usually single file only
|
| Folder Support |
Full folder import
|
Full folder import
|
Not supported
|
| Assembly Conversion |
Partial or full assembly
|
Partial or full assembly
|
Not supported
|
| Mesh Validation |
Integrated
|
Integrated
|
Not supported
|
| Auto Mesh Repair |
Advanced
|
Advanced
|
Not supported
|
| Mesh Repair Options |
Advanced
|
Advanced
|
Not supported
|
| Accuracy Control |
Full
|
Full
|
Not supported
|
| 3D Viewer |
Advanced
|
Advanced
|
Basic or no preview
|
| 3D Editor |
Advanced
|
Advanced
|
Not supported
|
| Security & Privacy |
100% Local
|
SSL + Auto-delete
|
Files often stored on servers
|
| Cross-Platform |
Windows, macOS, Linux
|
All devices
|
Web only, limited mobile UX
|
| Suitable for |
Professionals and engineers
|
Quick online conversions
|
Not recommended
|
Join thousands of engineers who trust MeshInspector for their 3D file conversion needs. Start converting today with no limits and professional results.
Powered by MeshInspector technology for reliable file conversion.
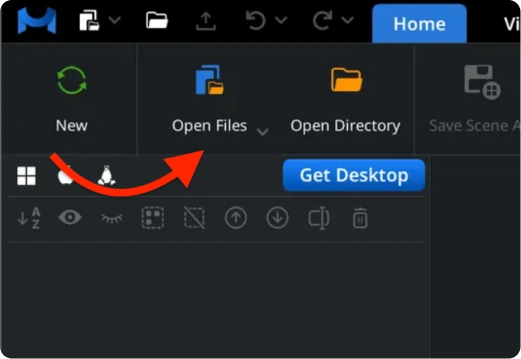
Click ‘Open Files’ in the top toolbar under the ‘Home’ section.
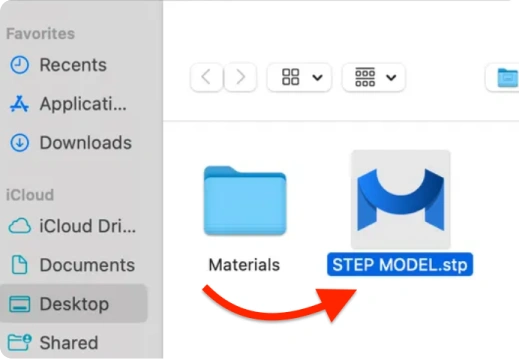
In the dialog window that appears, navigate to your .step or .stp file, select it, and upload it.
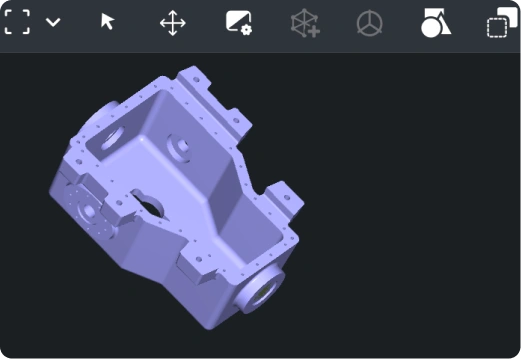
Once loaded, your model will appear in the workspace as a triangular mesh ready for preview and further STEP to STL conversion.
We handle large assemblies with no file size limits, letting one export individual parts or entire models. In ‘Scene Tree,’ click the part, then select ‘Export’.
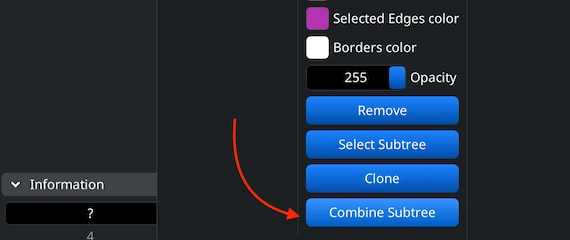
To export an entire assembly as one mesh, upload your STEP file and combine its parts. In ‘Scene Tree’, select the desired group, right-click, and choose ‘Combine Subtree’ to merge components. Then repeat the ‘Export’ action from previous steps.
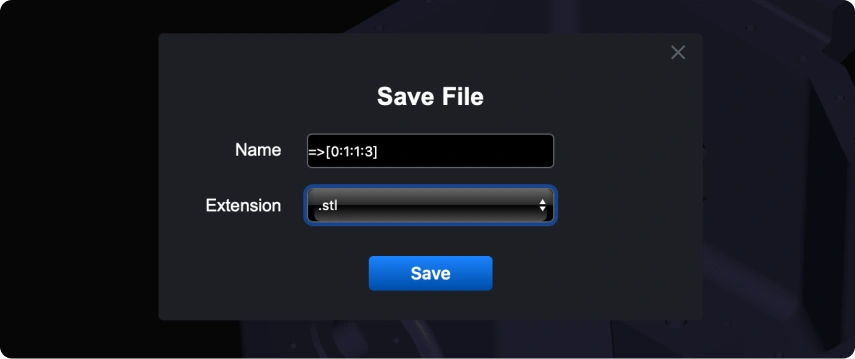
In the dialog window, choose STL under ‘Extension.’ The program saves it in Binary STL format. Click ‘Save’ to complete the STEP to STL conversion.
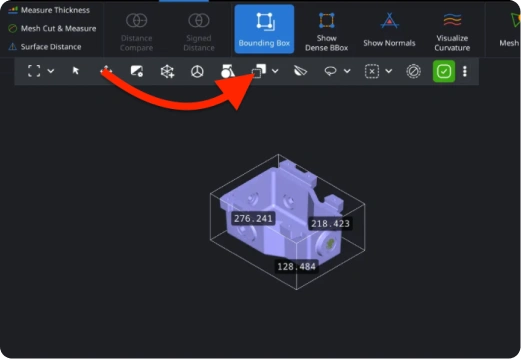
After conversion, use MeshInspector to check your model’s dimensions. Go to ‘Inspect’ and open ‘Bounding Box’ to verify that the mesh fits your printer.
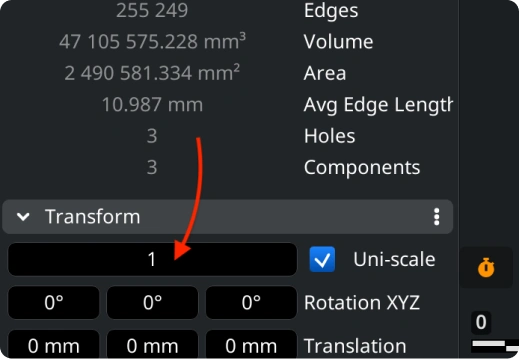
If the scale needs adjustment, use the ‘Transform’ in the lower left and drag the scaling bar. This will ensure your STEP to STL conversion results in a correctly sized and print-ready model. Do not forget to save the results.
If the scale needs adjustment, use the ‘Transform’ in the lower left and drag the scaling bar. This will ensure your STEP to STL conversion results in a correctly sized and print-ready model. Do not forget to save the results.
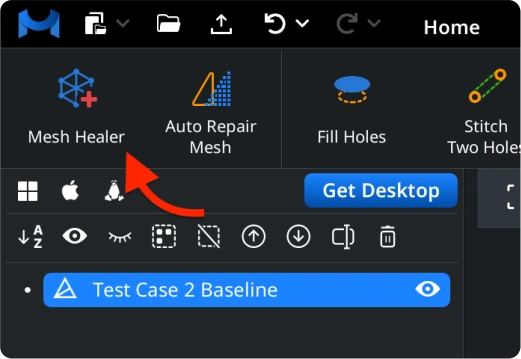
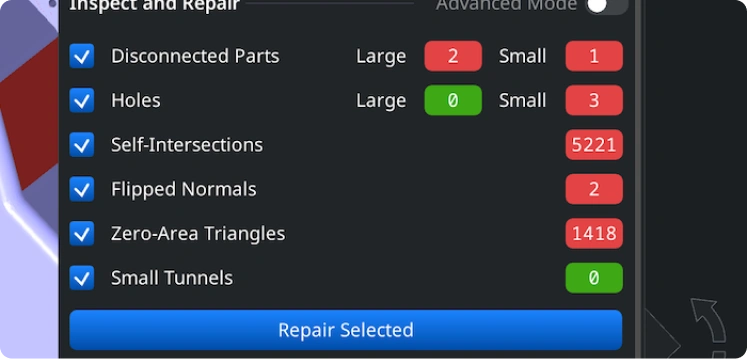
The ‘Mesh Healer’ tool can detect and fix disconnected parts, holes, self-intersections, flipped normals, zero-area triangles, as well as small tunnels. On top of that, you can employ ’Thin Walls’ and ’Undercuts’ checks to confirm printability before exporting. This step secures top-quality results from your STEP to STL conversion.
100% Secure
No data leaves your device
needed to send a prototype to the printer asap and this handled the complicated geometry without complaining. really grateful for this.
Solid mesh, no errors.
I use this because my school lab computers are so slow. This is instant and free.
Curves look smooth on the mesh.
My mac died so i had to prep the file on my phone. Cannot believe it actually worked so smoothly. 🙌