Convert STEP CAD assemblies to GLTF format for fast, browser-based 3D viewing.


Watch our quick tutorial or read:
Compare STEP to GLTF converters and find the best fit for your workflow.
|
MeshInspector
|
MeshInspector
|
Other Converters
|
|
|---|---|---|---|
| Speed |
Ultra-fast Local processing
|
Fast
|
Slow
|
| File Size Limits |
Unlimited
|
Unlimited
|
File size limit (50 MB)
|
| File Number Limits |
Unlimited
|
Unlimited
|
Usually single file only
|
| Folder Support |
Full folder import
|
Full folder import
|
Not supported
|
| Assembly Conversion |
Partial or full assembly
|
Partial or full assembly
|
Not supported
|
| Mesh Validation |
Integrated
|
Integrated
|
Not supported
|
| Auto Mesh Repair |
Advanced
|
Advanced
|
Not supported
|
| Mesh Repair Options |
Advanced
|
Advanced
|
Not supported
|
| Accuracy Control |
Full
|
Full
|
Not supported
|
| 3D Viewer |
Advanced
|
Advanced
|
Basic or no preview
|
| 3D Editor |
Advanced
|
Advanced
|
Not supported
|
| Security & Privacy |
100% Local
|
SSL + Auto-delete
|
Files often stored on servers
|
| Cross-Platform |
Windows, macOS, Linux
|
All devices
|
Web only, limited mobile UX
|
| Suitable for |
Professionals and engineers
|
Quick online conversions
|
Not recommended
|
Join thousands of engineers who trust MeshInspector for their 3D file conversion needs. Start converting today with no limits and professional results.
Powered by MeshInspector technology for reliable file conversion.
The MeshInspector program is a solution that is widely used by 3D data professionals. As such, it serves as an invaluable tool for those who need to convert STEP models into GLTF files. This brief guide will walk you, step by step, through the process of transforming your STEP model into a single, clean, and optimized GLTF file.
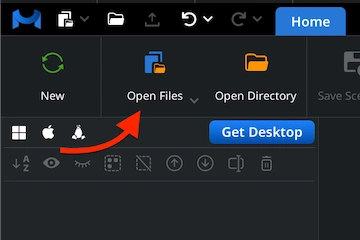
Begin by launching MeshInspector. Once the program is running, navigate to the ‘Home’ tab. Click on ‘Open Files’ to choose the STEP model you want to convert.
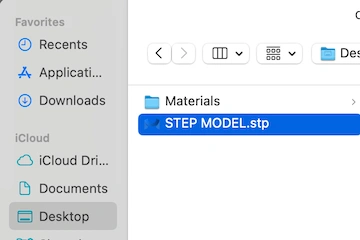
A file selection window will appear. Locate your .step (or .stp) file, then select it. Finally, it is time to confirm your choice by clicking ‘Upload’ or double-clicking the file name.
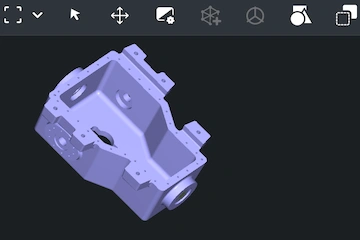
Once imported, your STEP will appear in the viewport. The MeshInspector program always preserves the precision of the original files, all while providing flexibility for editing.
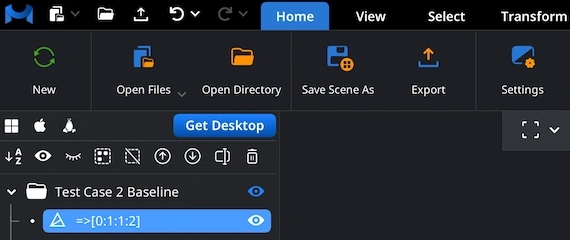
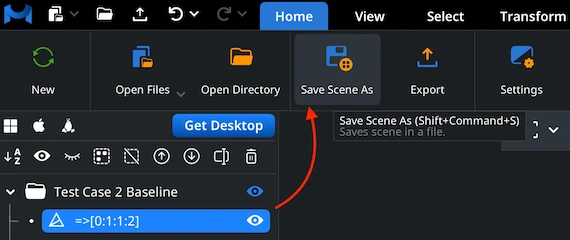
To begin your STEP-to-GLTF conversion workflow, select your model in the Scene Tree by right-clicking. This highlights and activates the mesh. The blue outline indicates that it is ready for export: MeshInspector handles large assemblies efficiently. You can export either single models or assemblies.
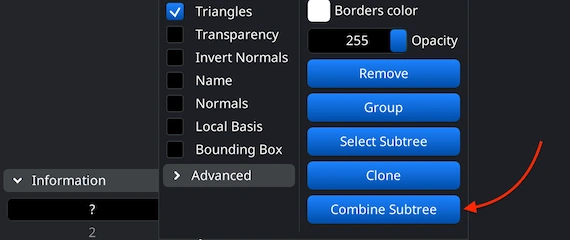
To export an entire assembly as a single mesh: after loading your STEP file, combine its parts. In the Scene Tree, select the desired group, right-click, and choose ‘Combine Subtree’ to merge the components. If no group is selected, simply highlight the files you want to unite, right-click on them, and choose ‘Group.’
For GLTF output, the correct approach in the MeshInspector program is to select ‘Save Scene As’ under the Home tab. This option generates a proper GLTF scene, while the ‘Export’ command is intended for other formats.
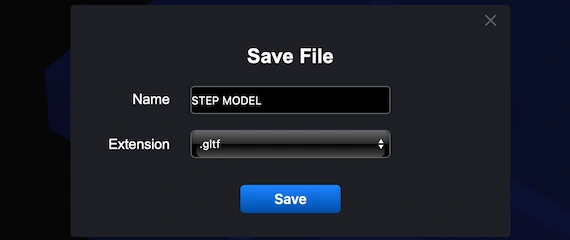
When you select ‘Save Scene As’ in the ‘Home’ tab, MeshInspector opens the ’Save File’ dialog. Here, you can update the file name when necessary and then choose GLTF as the output format before saving.
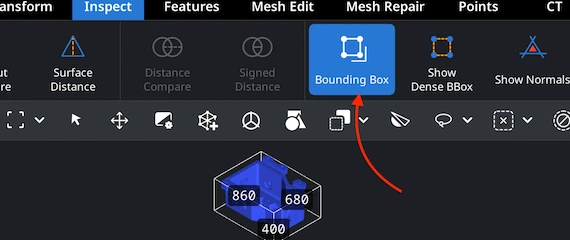
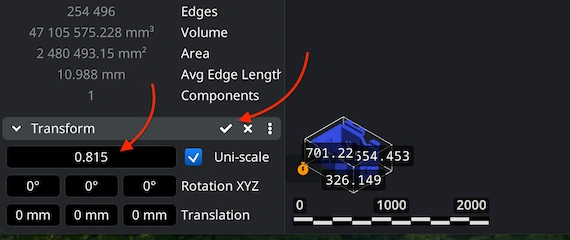
After the GLTF file is created, you can reopen it in MeshInspector to evaluate its real-world scale. Go to the ’Inspect’ tab. Turn on ‘Bounding Box.’ It outlines the GLTF model’s full spatial extent, so you are able to verify that height, width, and depth remain consistent with your project’s requirements.
To modify your GLTF object’s overall proportions, access the ’Transform’ panel under ‘Information.’ There, you can adjust the Scale slider until the geometry matches your preferred size. When the GLTF looks just right, confirm the transformation using the checkmark icon to apply it.
100% Secure
No data leaves your device
Client can view it on phone now. Thanks!