Convert STL meshes to PLY files for detailed visualization and mesh analysis.


Watch our quick tutorial or read:
Compare STL to PLY converters and find the best fit for your workflow.
|
MeshInspector
|
MeshInspector
|
Other Converters
|
|
|---|---|---|---|
| Speed |
Ultra-fast Local processing
|
Fast
|
Slow
|
| File Size Limits |
Unlimited
|
Unlimited
|
File size limit (50 MB)
|
| File Number Limits |
Unlimited
|
Unlimited
|
Usually single file only
|
| Folder Support |
Full folder import
|
Full folder import
|
Not supported
|
| Assembly Conversion |
Partial or full assembly
|
Partial or full assembly
|
Not supported
|
| Mesh Validation |
Integrated
|
Integrated
|
Not supported
|
| Auto Mesh Repair |
Advanced
|
Advanced
|
Not supported
|
| Mesh Repair Options |
Advanced
|
Advanced
|
Not supported
|
| Accuracy Control |
Full
|
Full
|
Not supported
|
| 3D Viewer |
Advanced
|
Advanced
|
Basic or no preview
|
| 3D Editor |
Advanced
|
Advanced
|
Not supported
|
| Security & Privacy |
100% Local
|
SSL + Auto-delete
|
Files often stored on servers
|
| Cross-Platform |
Windows, macOS, Linux
|
All devices
|
Web only, limited mobile UX
|
| Suitable for |
Professionals and engineers
|
Quick online conversions
|
Not recommended
|
Join thousands of engineers who trust MeshInspector for their 3D file conversion needs. Start converting today with no limits and professional results.
Powered by MeshInspector technology for reliable file conversion.
In case you need to switch between various 3D formats, the MeshInspector program will efficiently manage all your STL-to-PLY conversion tasks. That is, you can convert and export your STL model to PLY in just a few steps, ensuring data accuracy and optimal quality. The process remains smooth and reliable.
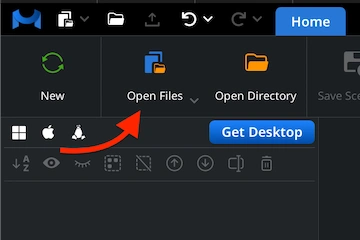
Launch the MeshInspector program, open your source model. Click ‘Open Files’ on the Home tab and choose the .stl file you are going to work on.
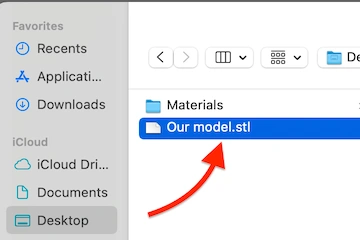
In the file dialog, locate an STL. You can either click ‘Browse’ and select it or simply drag and drop into the workspace. We will be quick to load and visualize it.
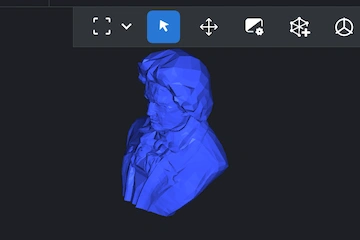
Your STL will be rendered as a triangulated surface mesh. Keep in mind that STL files store geometry only. It will be immediately ready for export.
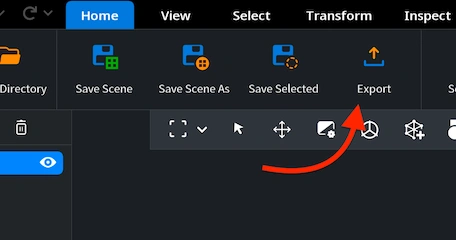
Your next destination point is the ‘Export’ button under the ‘Home’ tab. With your STL model chosen in MeshInspector’s scene tree, click on it.
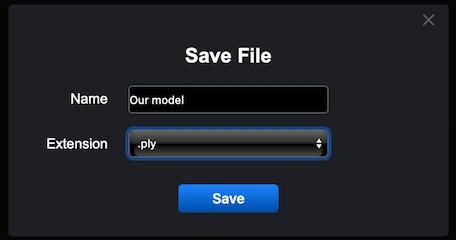
After clicking ’Export,’ a ’Save File’ dialog will appear. You can rename your file if needed and open the ’Extension’ dropdown to pick the correct output format. Choose .ply from the list, then press ’Save.’ MeshInspector will generate a single PLY file from your GLTF model.
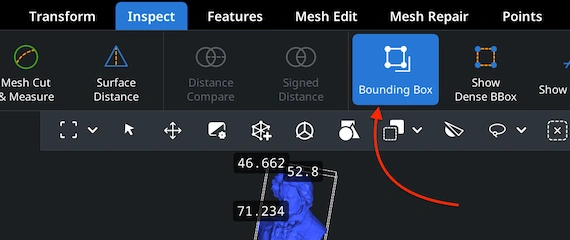
Reopen your freshly generated .ply file in MeshInspector. Go to the ‘Inspect’ tab and click ‘Bounding Box.’ This is how you confirm the model’s physical dimensions and ensure scale consistency.
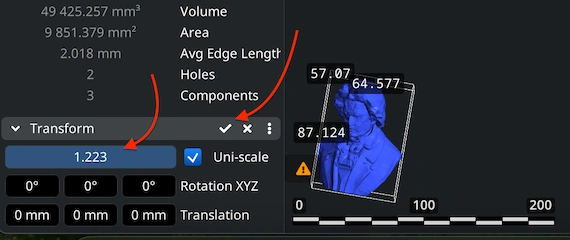
If necessary, adjust your model’s size. In the Scene Tree, find the ‘Transform’ section below 'Information'. Move the scaling slider or type in custom values. Confirm by clicking the checkmark.
100% Secure
No data leaves your device
Research software required this specific input. Data was kept 100% accurate. Thank you for the precision folks.