
Overview
MeshInspector for desktop has a built-in Python window. You write a script, press Run and see the result in the scene and in the output field. A script can do two kinds of work:
- Drive the interface: open tabs and tools, set their parameters and press their buttons, just like you do with the mouse.
- Work with geometry directly: load, process and save meshes with MeshLib, the geometry library MeshInspector is built on.
Use it when you repeat the same steps on many files, when you need exactly the same processing every time, or when you want to try a MeshLib processing step and see the result at once.
If you prefer to describe the task in words and let an AI assistant do the clicks and write the script, connect the assistant over MCP: see MCP configuration instruction for MeshInspector users.
Running Python Inside MeshInspector
You do not need to install Python: MeshInspector includes its own interpreter and the MeshLib modules.
- Open the Home tab and click Python. The Python window opens on the right.
- Type or paste a script into the large field at the top. You can also click Load Example to insert a sample script, or Open File to load a
.pyfile. - Click Run. Everything the script prints, and the error message if it fails, appears in Output.
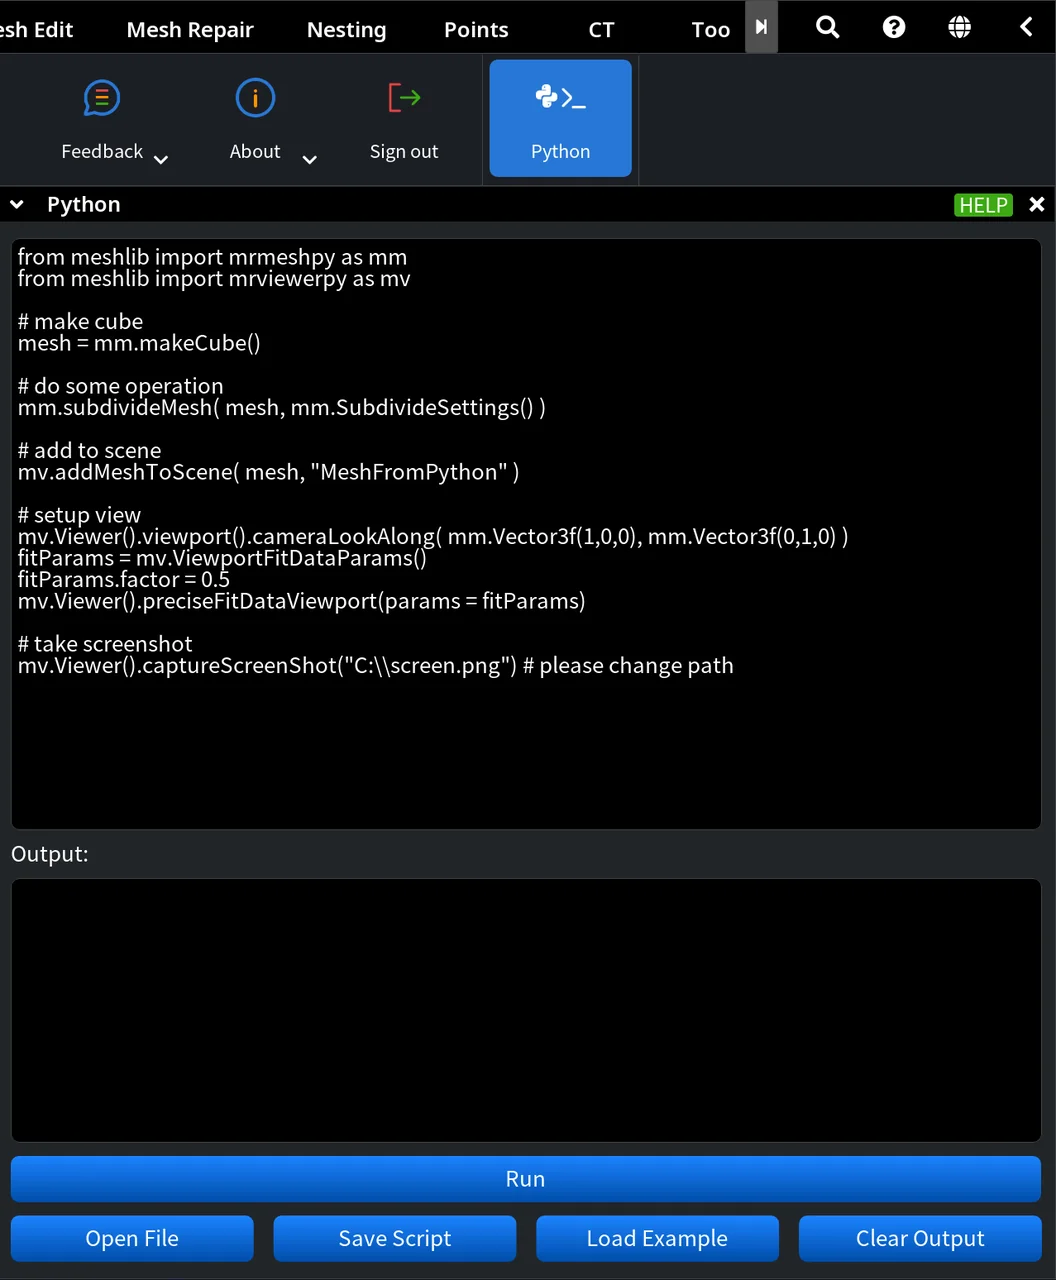
The buttons of the window:
| Button | What it does |
|---|---|
| Run | Runs the script in the field. The button is unavailable while a script is running. |
| Open File | Loads a Python script (.py) from disk. |
| Save Script | Saves the script in the field to a file. |
| Load Example | Inserts a sample script: it makes a cube, subdivides it, adds it to the scene and sets up the view. |
| Clear Output | Clears the Output field. |
Your first script
Paste this script and click Run. It creates a torus, adds it to the scene and fits the view to it.
from meshlib import mrmeshpy as mm
from meshlib import mrviewerpy as mv

mesh = mm.makeTorus(1.0, 0.3, 32, 16)
mv.addMeshToScene(mesh, "Torus")
mv.Viewer().preciseFitDataViewport()
print("Triangles:", mesh.topology.numValidFaces())
The torus appears in the scene tree as Torus, and Output shows:
Triangles: 1024
Prerequisites and API Environment
- Desktop only. The web version of MeshInspector has no Python window.
- Plan. The Python tool is part of the Professional plan (and of the trial). Without it the button is unavailable.
- Scripts from the command line. Starting MeshInspector with a script as a command-line argument needs a plan above Professional (Developer or a MeshLib plan).
- Reduced standard library. The built-in Python 3.10 has a reduced standard library. In MeshInspector 2.5.9,
os,re,time,mathandcollectionsare available, whilejson,pathlib,glob,shutilanddatetimeare not. NumPy is not included either. Useosandos.pathto work with files and folders.
Two Main Modules
Both modules are always available in the Python window:
mrviewerpycontrols MeshInspector: the scene (add, select and read objects), the Ribbon, the tool windows and the camera.mrmeshpyis the MeshLib geometry library: loading and saving meshes and processing them (repair, simplification, Boolean operations and more).
Import them at the start of every script:
from meshlib import mrviewerpy as mv
from meshlib import mrmeshpy as mm
The Ribbon as a tree
Scripts reach the interface through a tree of named entries, and a path is the list of names that leads to one of them:
- the path
['RibbonTabs']holds the Ribbon tabs (Home, View, Mesh Edit, Mesh Repair and others); - the path
['Ribbon']holds the tools of the tab that is open now; - an open tool window is an entry of its own, for example
['Mesh Healer'], and its buttons and fields are inside it.
So a script walks the tree in the same order as you click: tab, then tool, then the parameters of the tool. This script lists the tabs:
from meshlib import mrviewerpy as mv

tabs = mv.uiListEntries(['RibbonTabs'])
print("Available tabs:", [t.name for t in tabs])
In MeshInspector 2.5.9 the output looks like this (the list can differ on another computer or plan):
Available tabs: ['CT', 'Distance Maps', 'Home', 'Inspect', 'Lines', 'Mesh Edit', 'Mesh Repair', 'Nesting', 'Points', 'Select', 'Toolpath', 'Transform', 'View']


