
Build Plate describes the printer that the Nesting tool packs parts for: the space the parts may use, the margins around it, the smallest gap between parts, shrinkage compensation, the layer height for slice export and whether parts may be stacked in height. Each plate is saved as a preset, so you describe a printer once and then pick it by name. Build Plate is available on every plan.
Where to find it
- Nesting tab › Build Plate.
- The Nesting tool lists the same presets under Build Plate Setup: pick one in Select Existing, or open Advanced to see and change its values.

How to add a plate
- Click Nesting › Build Plate. If no plate is saved yet, Select Existing shows Add New Plate and the fields are ready to fill; otherwise click Add.
- Type a Name, for example the model of the printer.
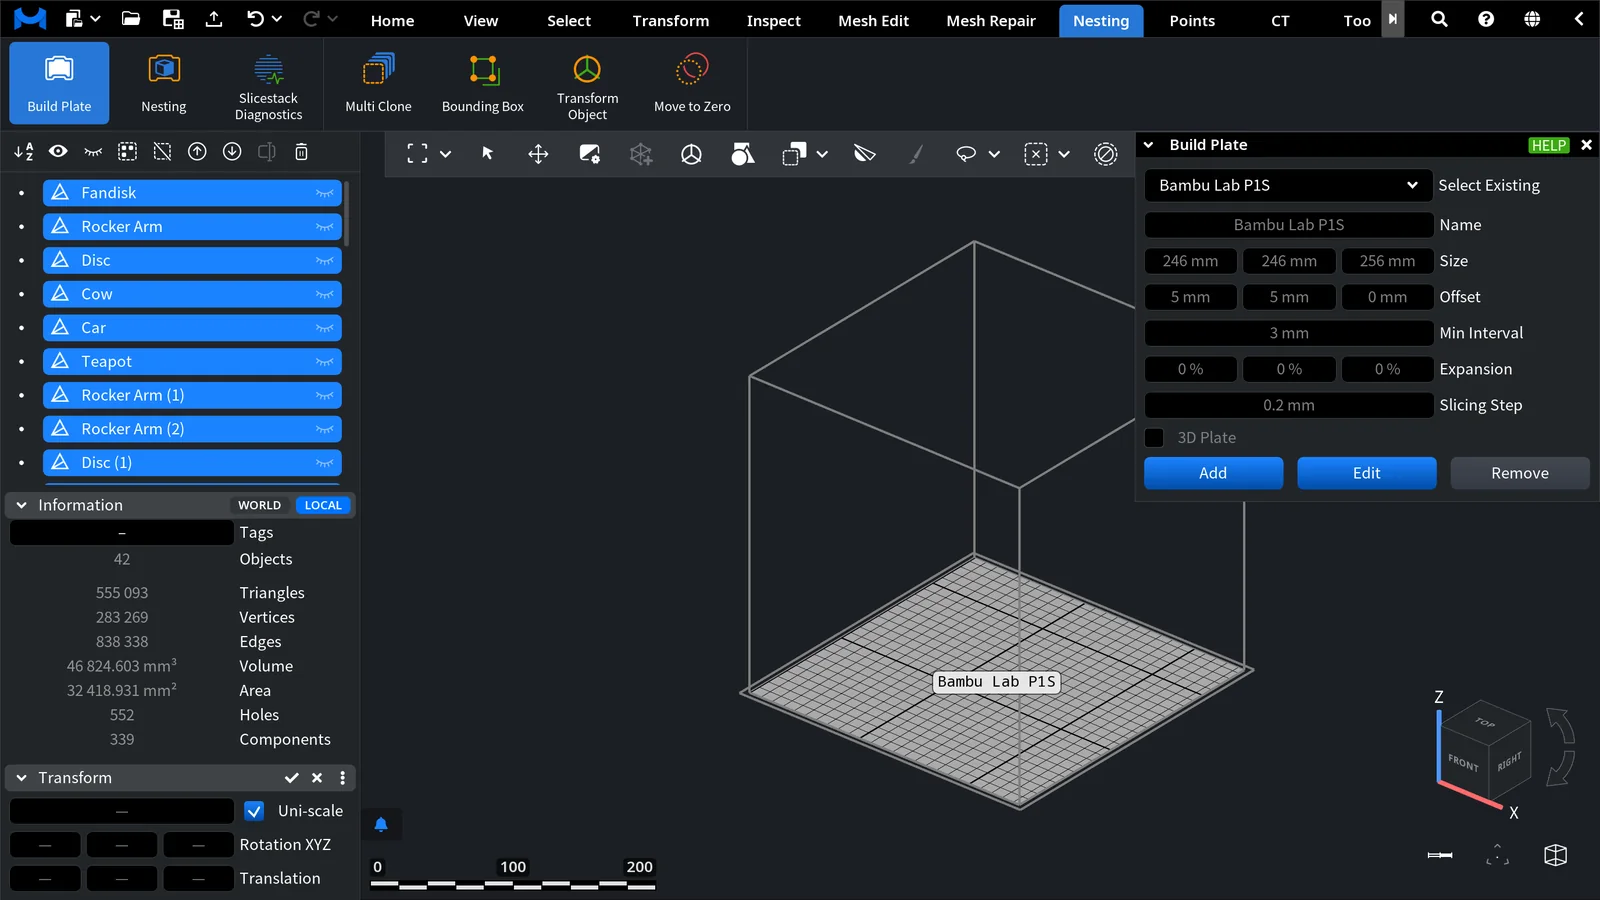
- Set Size, Offset, Min Interval, Expansion, Slicing Step and 3D Plate (see "Settings" below). The viewport shows the plate as a box with a grid floor and the name of the plate.
- Click Save.
How to change or remove a plate
- Pick the plate in Select Existing. Its values are shown read-only, with the buttons Add, Edit and Remove under them.
- Click Edit to change the values. Save keeps the changes (a new Name renames the preset), Discard brings back the saved values.
- Click Remove to delete the selected preset.
Settings
| Setting | What it sets |
|---|---|
| Name | The name of the preset in Select Existing and on the plate in the viewport. |
| Size | The space the parts may use, in X, Y and Z: the build volume of the printer minus the margins. |
| Offset | Where that space starts, in X, Y and Z: the margins. Keep Z at 0 so that the parts stand on the bed. |
| Min Interval | The smallest gap between parts. The Interval of the Nesting tool cannot be set below it. |
| Expansion | Enlarges the parts per axis, in percent (up to 50 %), to compensate for shrinkage. It is applied to the exported parts; the parts in the scene keep their size. 0 % means no compensation. |
| Slicing Step | The layer height of Export 3mf Slicestack in the Nesting tool. At 0 that export is unavailable. |
| 3D Plate | Allows stacking parts in height: the Nesting tool can then use Allow 3D Nesting. Leave it off when every part must stand on the bed, as on an FDM printer. |
Example plates
These are the two printers of the nesting video tutorial. Both beds get 5 mm margins: Size is the bed minus 2 × 5 mm in X and Y, and Offset is 5 mm in X and Y.
| Printer | Size, mm | Offset, mm | Min Interval | Slicing Step | 3D Plate |
|---|---|---|---|---|---|
| Bambu Lab P1S | 246 × 246 × 256 | 5 × 5 × 0 | 3 mm | 0.2 mm | Off |
| Formlabs Fuse 1+ | 155 × 155 × 300 | 5 × 5 × 0 | 3 mm | 0.11 mm | On |
The Bambu Lab P1S is an FDM printer, so every part has to stand on the bed. The Formlabs Fuse 1+ is an SLS printer: the powder holds the parts, so they can be stacked in levels.
Result
The preset is saved with the settings of the app and stays available in later sessions. The plate you leave selected is remembered: the Nesting tool opens with it next time. To nest parts on it, see How to Nest Parts on a Build Plate.


