This example takes a batch of parts all the way to a print file for a powder printer, where the parts may be stacked in height. It uses the tools of the Nesting tab in order: Multi Clone, Build Plate, Nesting and Slicestack Diagnostics. The printer is a Formlabs Fuse 1+ (SLS), as in the second half of the nesting video tutorial. Each step links to the guide of its tool.
1. Make copies of the parts
The scene holds 14 parts: two mechanical parts, a disc and three models (a cow, a car and a teapot), with copies of the smaller ones. An SLS chamber takes a whole batch, so make more copies:
- Select all parts in the Scene Tree.
- Click Nesting › Multi Clone, set Copies to 2 and click Apply.
Each part now has two copies: 42 parts in total. See Clone and Multi Clone for the other settings.
2. Describe the printer
- Click Nesting › Build Plate and then Add (with no saved plates, the fields are ready to fill).
- Type the Name Formlabs Fuse 1+ and set Size to 155 × 155 × 300 mm and Offset to 5 × 5 × 0 mm: the 165 mm bed with 5 mm margins.
- Set Min Interval to 3 mm and Slicing Step to 0.11 mm, the layer height of the printer.
- Switch 3D Plate on: the powder holds the parts, so they may be stacked.
- Click Save and close Build Plate.
The settings are explained in How to Set Up a Build Plate.
3. Nest the parts in levels
- Select all 42 parts and click Nesting › Nesting.
- In Select Existing, pick Formlabs Fuse 1+.
- Open Options and make sure that Allow 3D Nesting is on. It is available because the plate has 3D Plate on.
- Click Auto Nest. In this example the status reads 42/42 nested: all parts fit into the chamber in levels and fill 19.48 % of it up to the top of the stack.
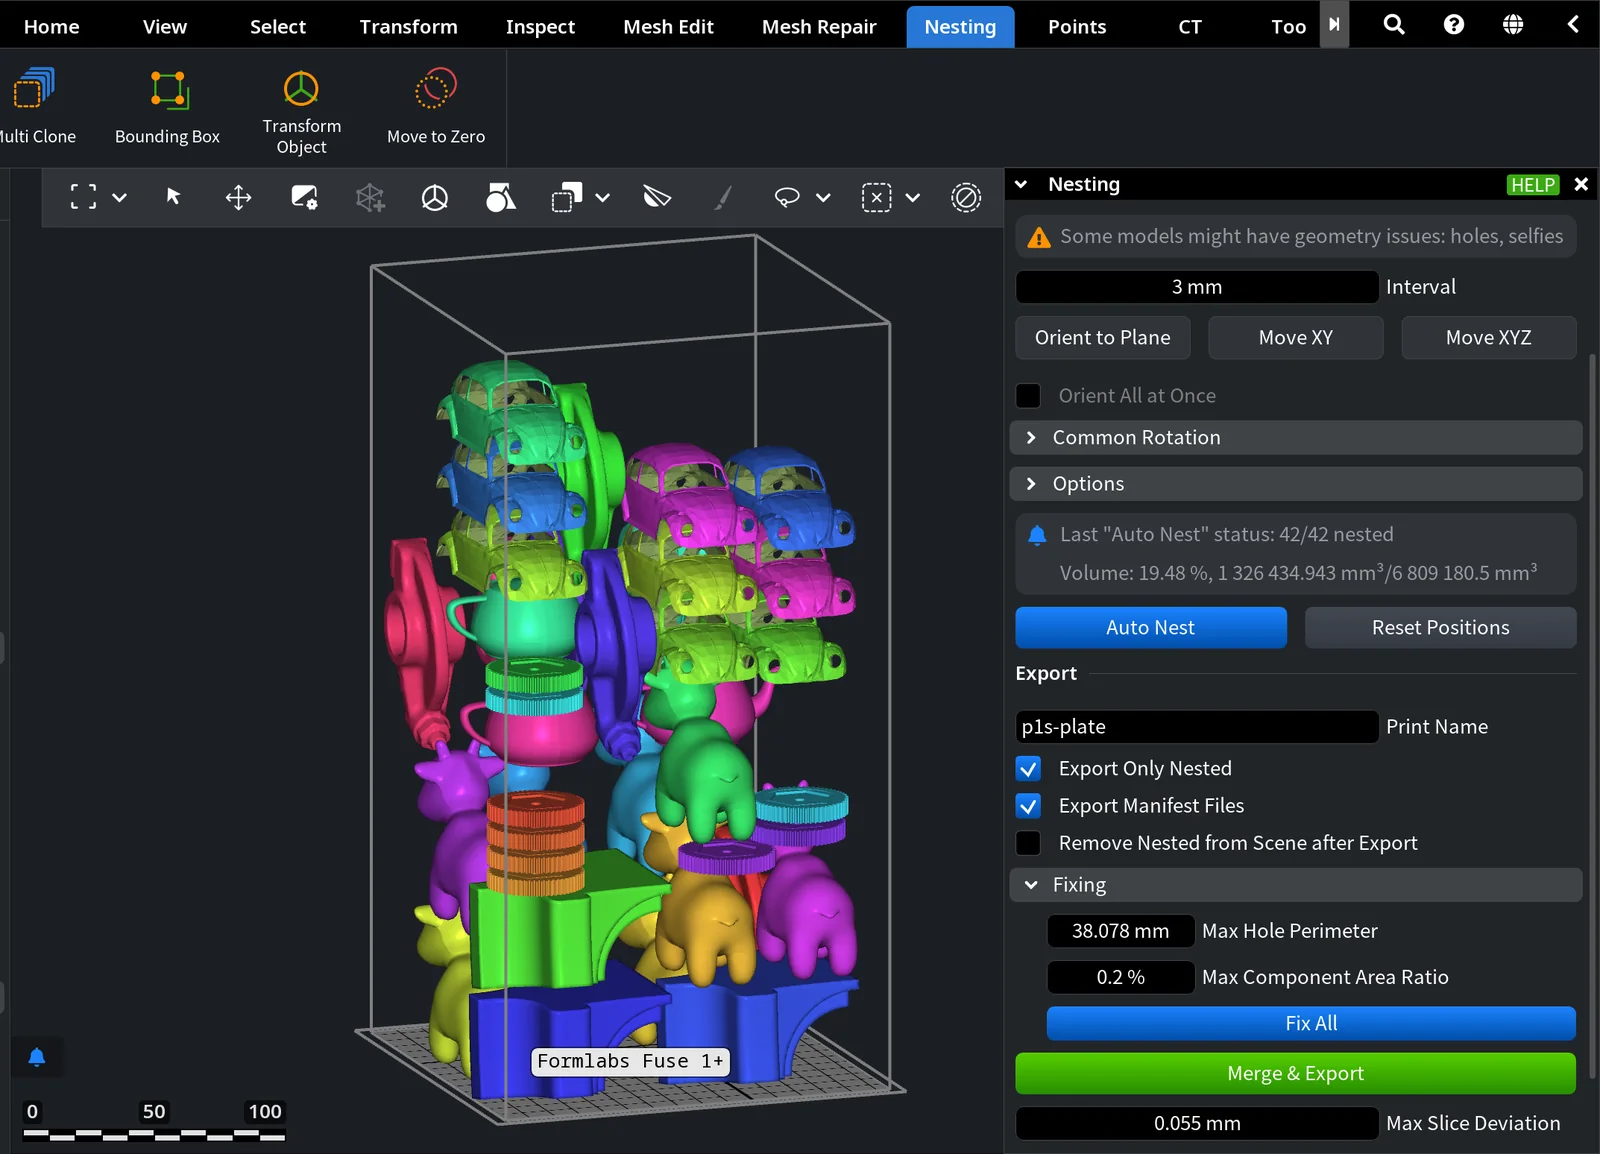
4. Adjust a part by hand
To move one part within the stack, click Move XYZ and drag the part: it moves in the plane of the screen, so in a front view it goes up and down the stack. Click Move XYZ again to leave the mode. The other ways to adjust the nest are in How to Nest Parts on a Build Plate.
5. Export a 3MF slice stack
- Type the Print Name, here fuse-batch.
- Set Max Slice Deviation to 0.055 mm, half the Slicing Step of the plate. The tool sets this value by itself when it opens with this plate already selected. 0 keeps the contours of the slices unsimplified.
- Click Export 3mf Slicestack and choose where to save the file.
The tool slices every part at 0.11 mm and closes. Next to the 3MF slice stack, Export Manifest Files adds a PDF report and a CSV list of the parts, and by default the desktop app also saves a JSON file with the plate and the nesting options.
6. Check the slices
- Click Nesting › Slicestack Diagnostics and open the exported 3MF file.
- Go through the parts in Slicestack. Each entry shows the number of slices with issues out of all slices of the part.
In this batch, the mechanical parts and the disc, whose meshes are closed and clean, passed every slice. The cow, the car and the teapot have holes in their meshes (the car and the teapot also have self-intersections), and they had slices with issues, for example Cow (28/607). Repair such parts, nest and export again, and check the new file. How to read the table and the colors of the slices is explained in How to Check a 3MF Slice Stack.
Result
A print file for a powder printer, 42 parts in levels, with a report and a list of the parts, checked slice by slice. For an FDM printer the steps are the same with 3D Plate off; finish with Merge & Export to get one STL for the slicer.


