
Loads from YouTube (Google) when you press Play
Nesting packs the selected parts onto the build plate of a 3D printer for one print job. Auto Nest looks for a place for every part; then you can move parts by hand, repair mesh issues and export the plate as one merged mesh (an STL for the slicer of an FDM printer) or as a 3MF slice stack with the layers of every part. Nesting requires the Professional plan.
Before you start
- Save a preset for your printer with Build Plate.
- Load the parts. To fill the plate, make copies with Multi Clone.
- Select the parts in the Scene Tree: Nesting works with the selected meshes only.
Where to find it
Nesting tab › Nesting. The button is available when at least one mesh is selected.
How to nest parts
- Select the parts and click Nesting. The parts move to the center of the plate, each in its own color. The colors are only for nesting: the parts get their own colors back when the tool closes.
- Under Build Plate Setup, pick the plate in Select Existing. Advanced shows the values of the plate, and you can change them there as in Build Plate.
- Set Interval, the gap between parts. It cannot be smaller than the Min Interval of the plate.
- Click Auto Nest. The status under the options shows how many parts found a place, for example 14/14 nested, and Volume: the share of the plate, measured up to the top of the highest part, that the parts fill.
- Parts that do not fit are moved off the plate, next to it, and a warning says how many were not nested. Reset Positions puts all parts back where they were before nesting.
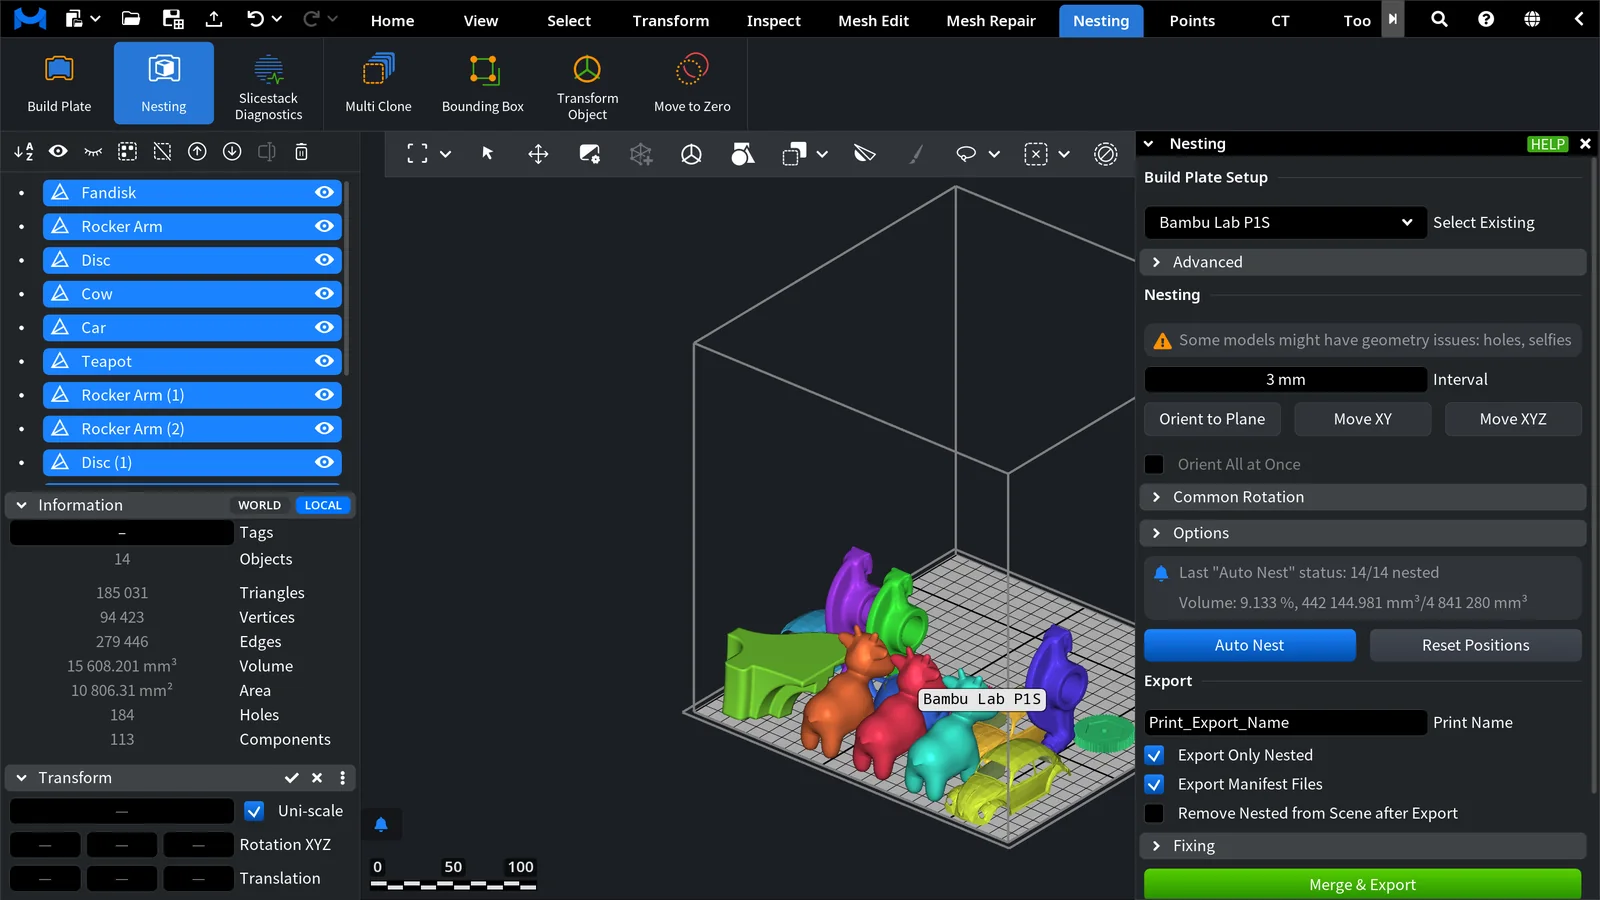
Adjust the nest by hand
The three buttons under Interval switch on a manual mode; click the same button again to leave it.
| Button | What it does |
|---|---|
| Orient to Plane | Click a face of a part to lay the part on that face. With Orient All at Once on, every part gets the same rotation, which is useful when all parts have the same initial orientation. |
| Move XY | Drag a part across the plate. |
| Move XYZ | Drag a part in the plane of the screen, which also moves it up and down a stack. |
Common Rotation turns all parts by the same angles: enter Angle XYZ and click Apply to All.
Options
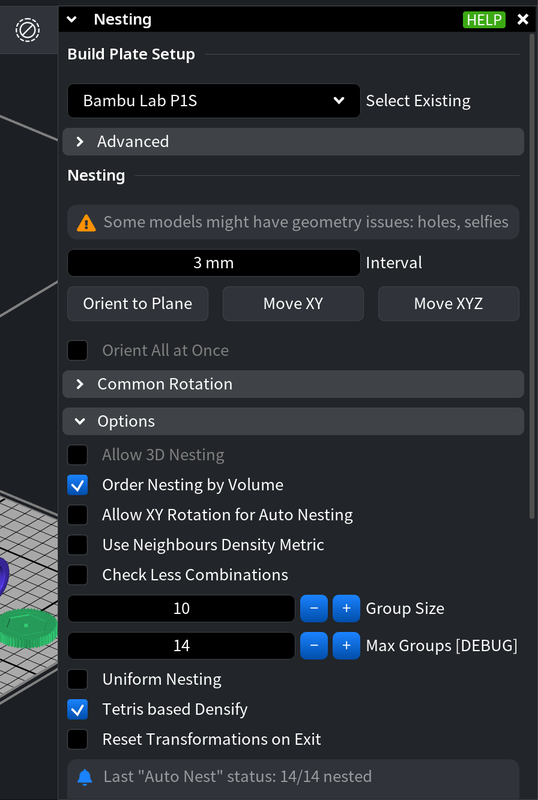
- Allow 3D Nesting: stacks parts in height. Available only when 3D Plate is on for the selected plate.
- Order Nesting by Volume: places the biggest parts first. When it is off, the parts are placed in the order of the Scene Tree. On by default.
- Allow XY Rotation for Auto Nesting: lets Auto Nest turn the parts on the plate for a tighter layout.
- Use Neighbours Density Metric: prefers the places with the densest neighborhood.
- Check Less Combinations: tries fewer placements for each part.
- Group Size: nests the parts in groups of this size, one group after another.
- Uniform Nesting: looks for the interval that spreads the parts evenly. It locks Interval and turns off Tetris based Densify.
- Tetris based Densify: compacts the nest after each group. On by default.
- Reset Transformations on Exit: returns the parts to their original positions when you close the tool.
After changing an option, click Auto Nest again to rebuild the nest.
Fixing
Nesting does not check the parts for self-intersections, so the note at the top of the panel mentions them until the parts are fixed. If a part has holes, a Warning window also opens when the tool starts. Fixing repairs the parts before export:
- Max Hole Perimeter: holes with a perimeter up to this length are filled.
- Max Component Area Ratio: pieces smaller than this share of the surface of the part are removed.
- Fix All: applies both settings to every part and repairs self-intersections. If issues remain, a warning names them.
Fixing changes the meshes of the parts. Check the exported slices with Slicestack Diagnostics after any repair.
Export
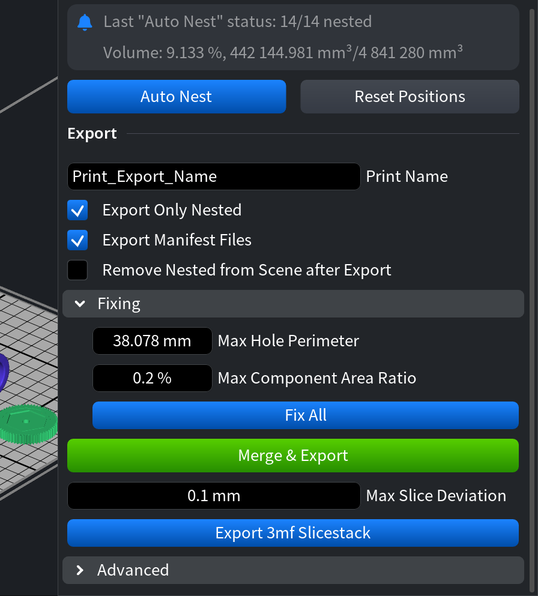
- Print Name: the name of the exported files (Print_Export_Name by default).
- Export Only Nested: leaves out the parts that are not on the plate. On by default.
- Export Manifest Files: writes a PDF report and a CSV list of the parts next to the exported file. Not available in the web version.
- Remove Nested from Scene after Export: deletes the exported parts from the scene when the tool closes.
- Merge & Export: saves all nested parts as one mesh in their places on the plate, for example an STL for the slicer of an FDM printer.
- Max Slice Deviation: how far Export 3mf Slicestack may simplify the contours of the slices. 0 turns the simplification off. When the tool opens, it is set to half the Slicing Step of the selected plate; after picking another plate, set it again.
- Export 3mf Slicestack: writes a 3MF file with one slice stack per part, sliced at the Slicing Step of the plate. It is unavailable when the Slicing Step is 0.
Expansion of the plate is applied to the exported parts. After a successful export the tool closes. By default the desktop app also saves a JSON file with the plate and the nesting options next to the export; Advanced › Import Config at the bottom of the panel loads the plate and the on/off options from such a file.
Result
Merge & Export gives one mesh file with every nested part in its place on the plate. Export 3mf Slicestack gives a 3MF file with the slices of every part; open it in Slicestack Diagnostics to check the slices before printing. A full example for an SLS printer, with parts stacked in levels, is in From Parts to a Print-Ready Build Plate.


