
Rotator turns the scene continuously around the vertical axis. Use it to present a model, record a video of it, or check its shape from all sides without touching the mouse.
Where to find it
View tab › Rotator. The tool has no default shortcut.

How to use it
- Click Rotator. Rotation starts immediately and the Rotator panel opens.
- Set the Speed and choose whether Rotate Camera is on.
- The tool remains active, and the rotation continues until you click Rotator again to disable it.
Options
- Speed defines the rotation speed in degrees per second, from −360 to 360 (5 by default):
- positive values rotate in one direction;
- negative values rotate in the opposite direction.
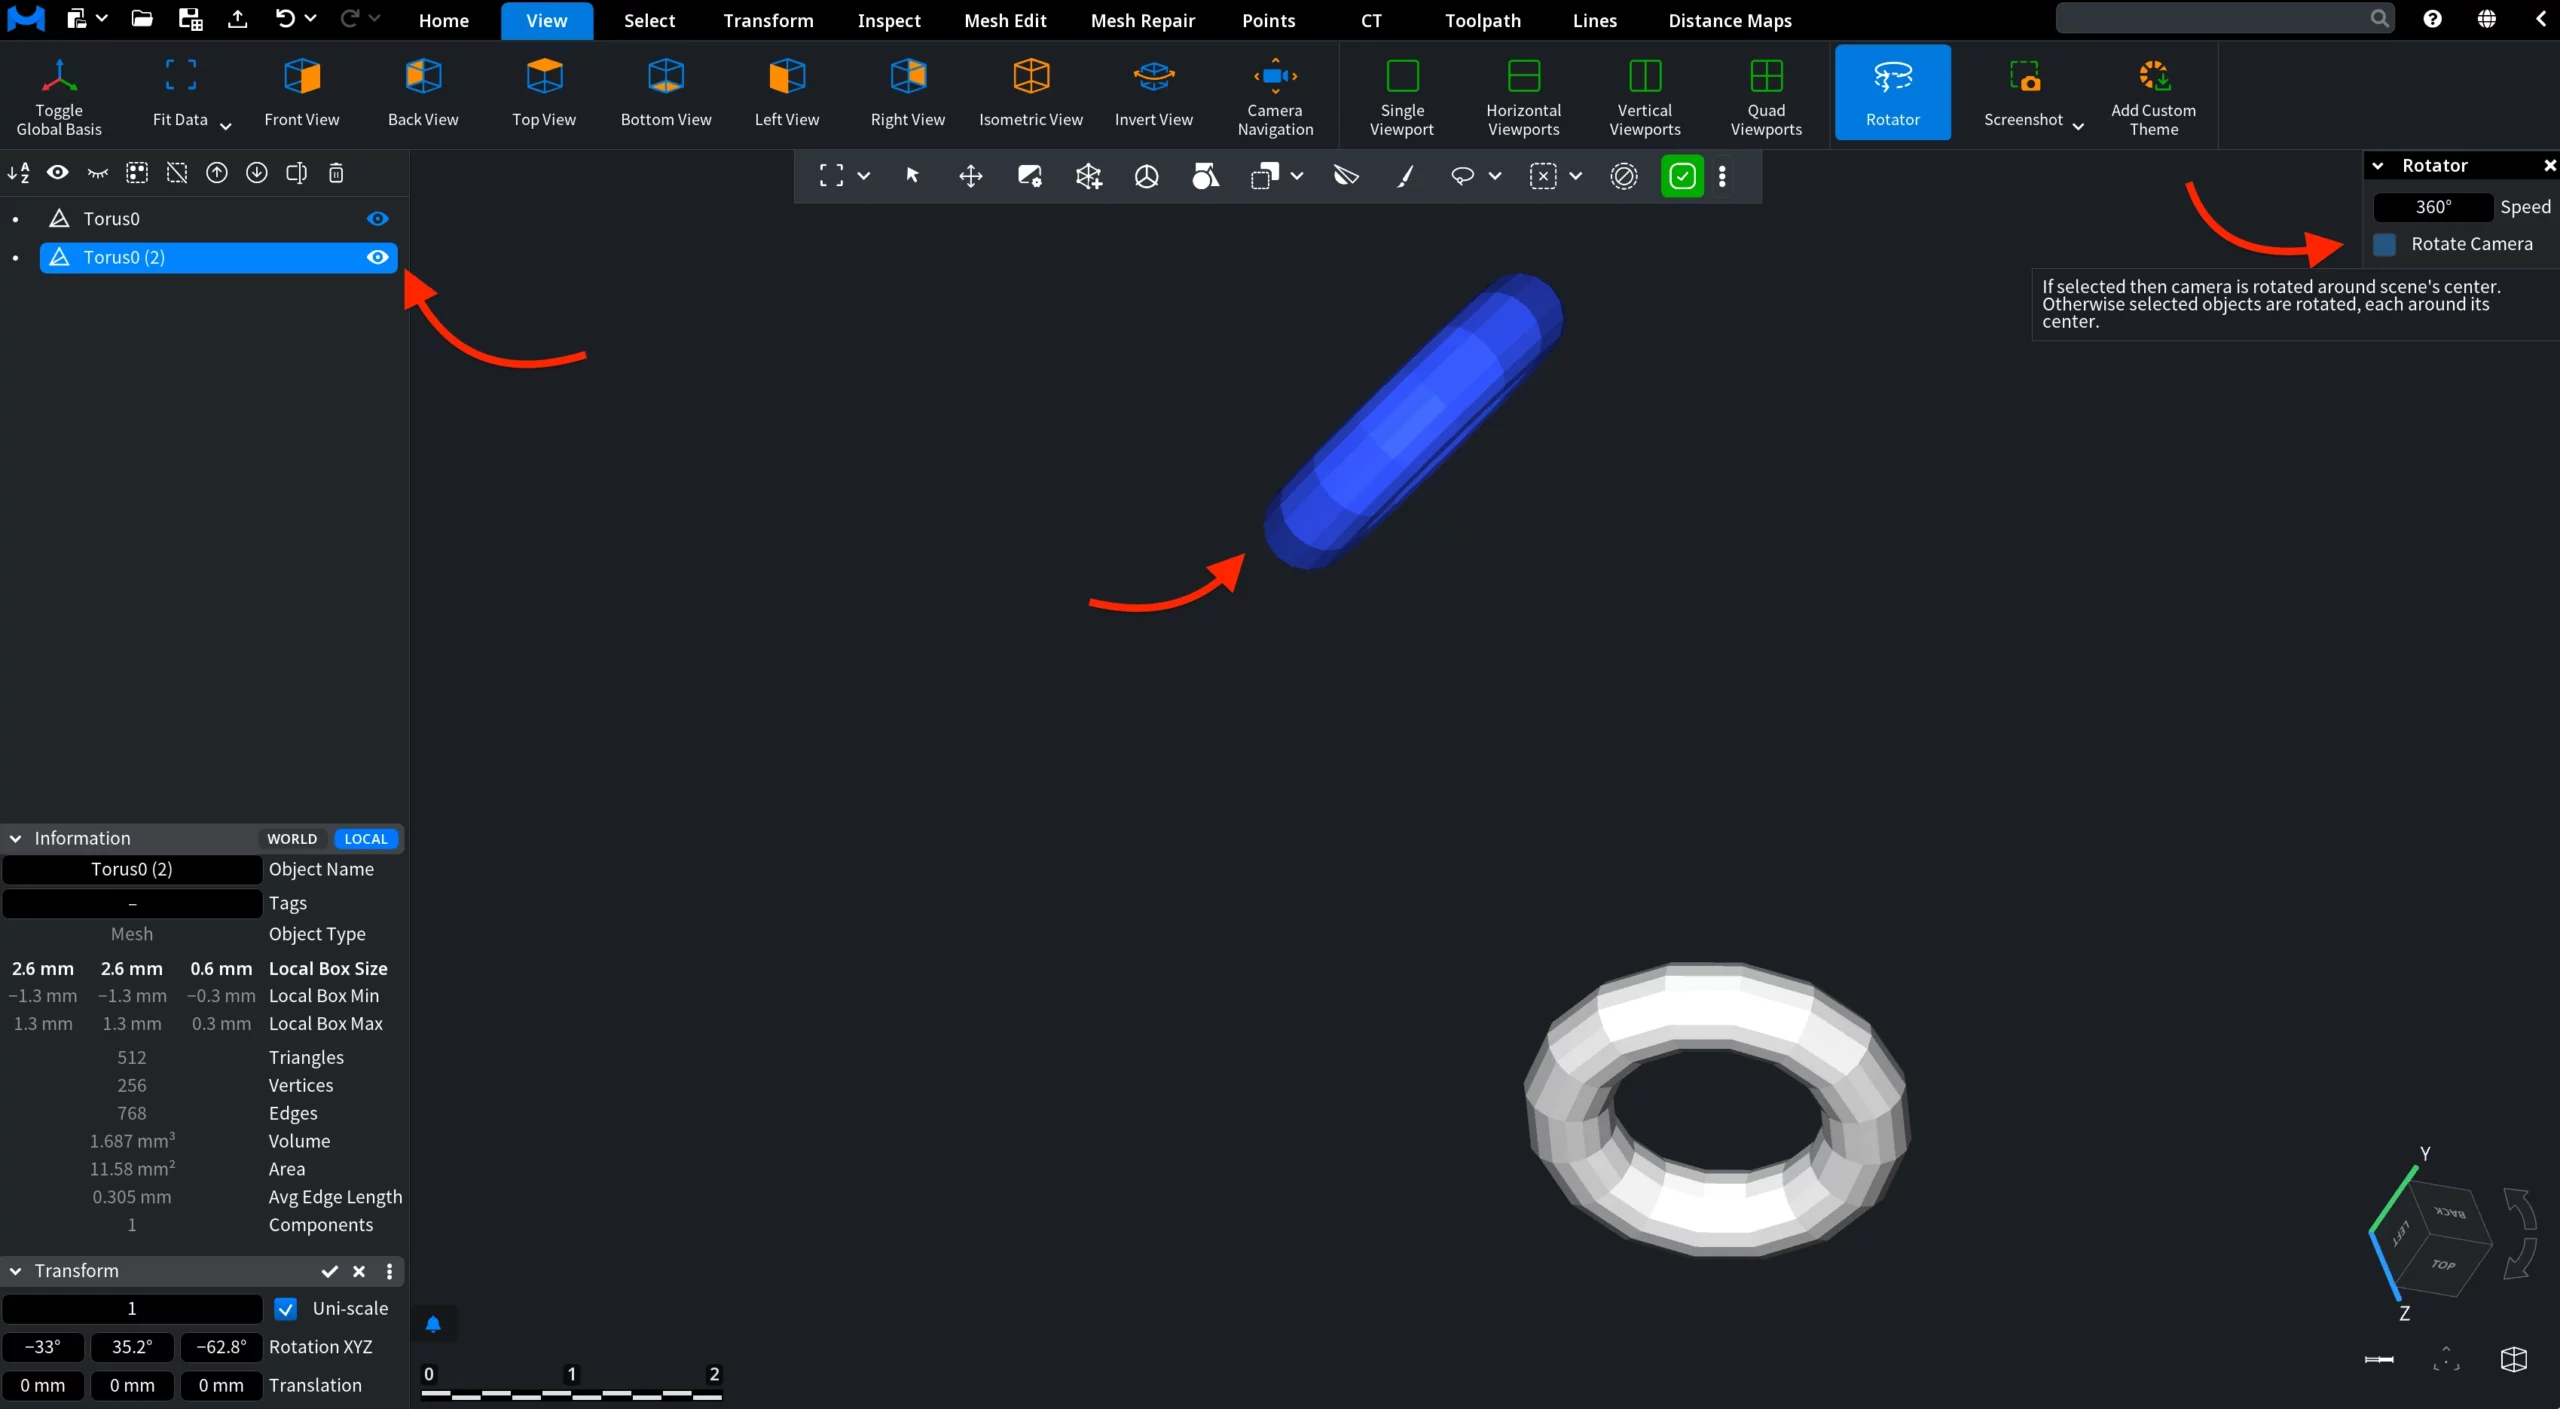
- Rotate Camera (on by default): when it is enabled, the camera rotates around the scene's center. When it is disabled, the selected objects are rotated, each around its own center.
Result
In the screenshot below, the selected blue object is rotating because Rotate Camera is disabled. The unselected white object remains still, since in this mode Rotator rotates only the selected object around its own center.
Tips
- The axis of rotation is the vertical direction of the screen, through the center of the scene. Pick a standard view first (for example, Front View) to choose which model axis is vertical.
- With Rotate Camera disabled, the objects really turn: their position changes and the rotation is added to the undo history. Press Ctrl+Z (macOS: Cmd+Z) to return them.
- To show a model, keep Rotate Camera enabled: only the view changes.


