The Refine Feature tool, located under the Inspect tab, refines an existing feature object so that it better matches a reference mesh or point cloud. It is intended for feature objects that have already been created in the scene. In MeshInspector, such feature objects might include points, lines, planes, circles, spheres, cylinders, and cones.

In the screenshot below, you can see a mesh together with three feature objects created from it: a plane, a line, and a point. Plane 1 is selected and will be refined against the mesh.
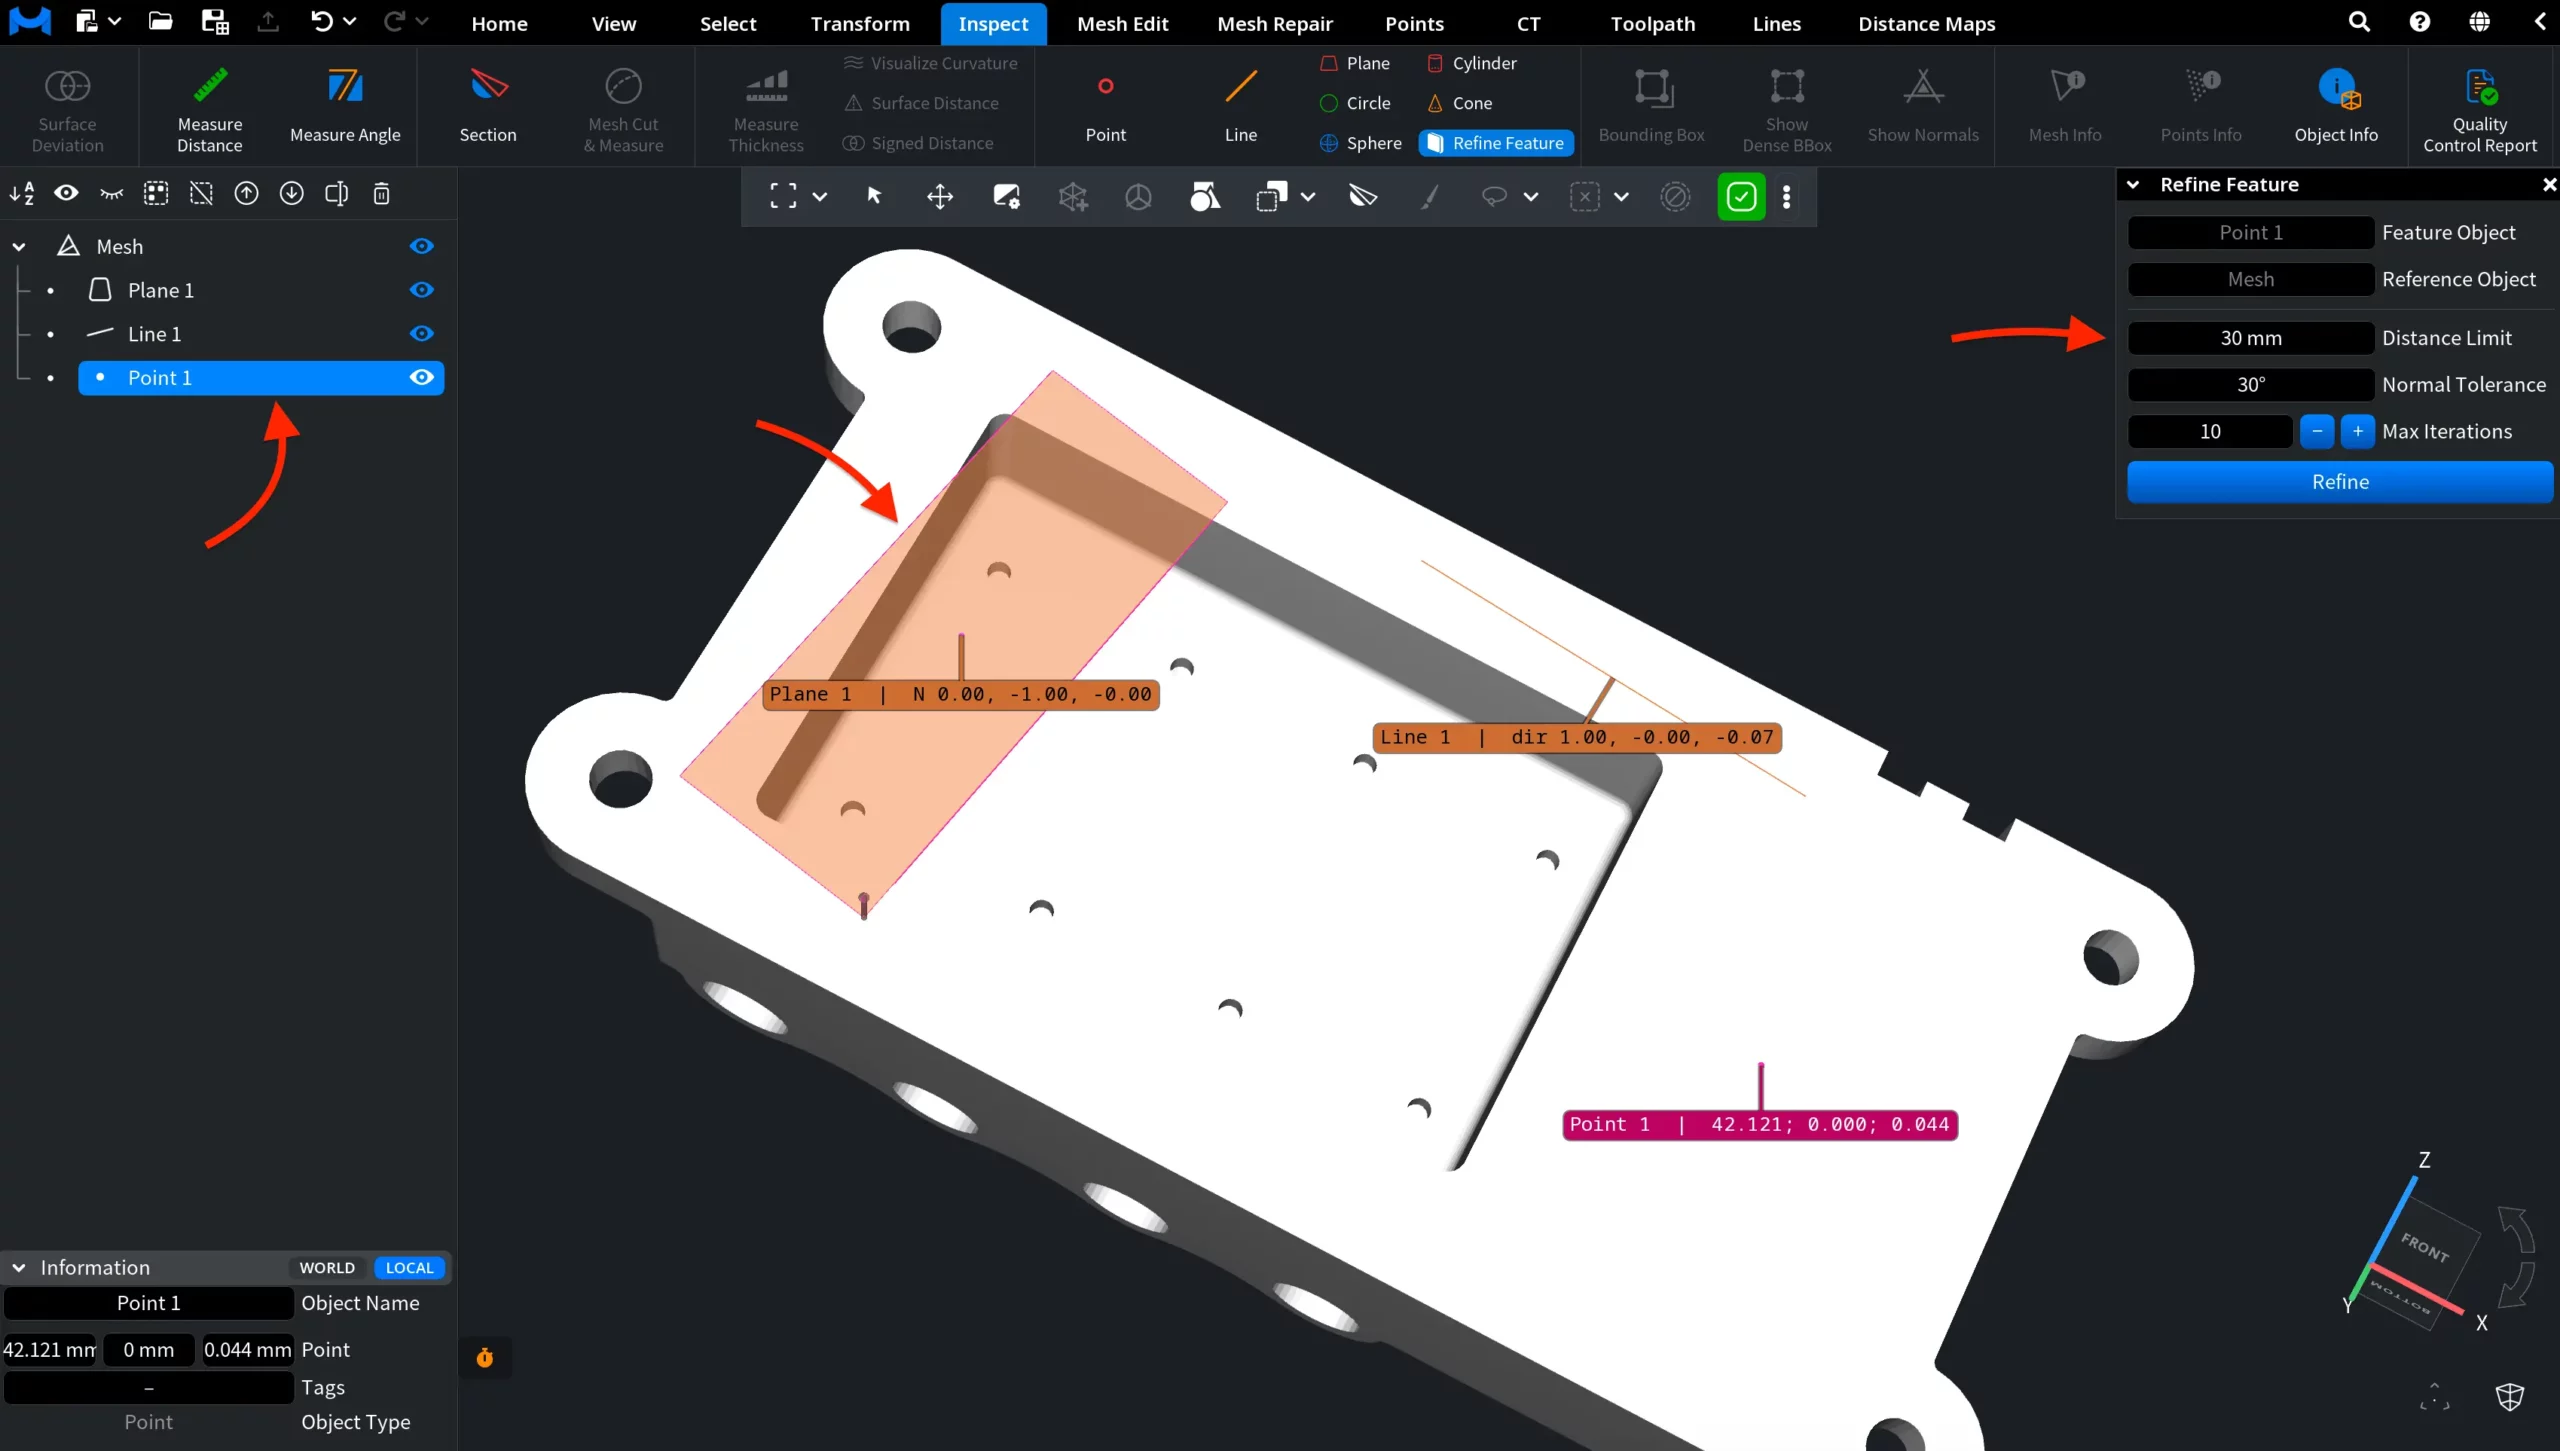
Clicking Refine Feature opens a dedicated panel with the following fields and settings:
- Feature Object shows the feature that will be refined. In this example, the selected feature is Plane 1.
- Reference Object shows the mesh or point cloud against which the feature will be refined. Here, the reference object is the mesh from which the features were created.
- Distance Limit sets the maximum distance from the reference model to the feature within which geometry can be considered during refinement.
- Normal Tolerance sets the maximum allowed angle between the normal of the reference model and the normal of the feature.
- Max Iterations specifies the maximum number of refinement iterations performed while MeshInspector searches for a stable set of points.
- Refine starts the operation using the selected feature, reference object, and settings.
After clicking Refine, MeshInspector adjusts the selected feature so that it better matches suitable geometry on the reference object. In this example, Plane 1 was refined against the mesh using a Distance Limit of 30 mm, a Normal Tolerance of 30°, and up to 10 iterations.
With these settings, MeshInspector searches for mesh geometry within the specified distance whose surface normals are sufficiently close to the plane orientation, and iteratively updates the feature based on the matching geometry. As a result, Plane 1 changes both its position and orientation and becomes aligned with a planar surface of the reference mesh.
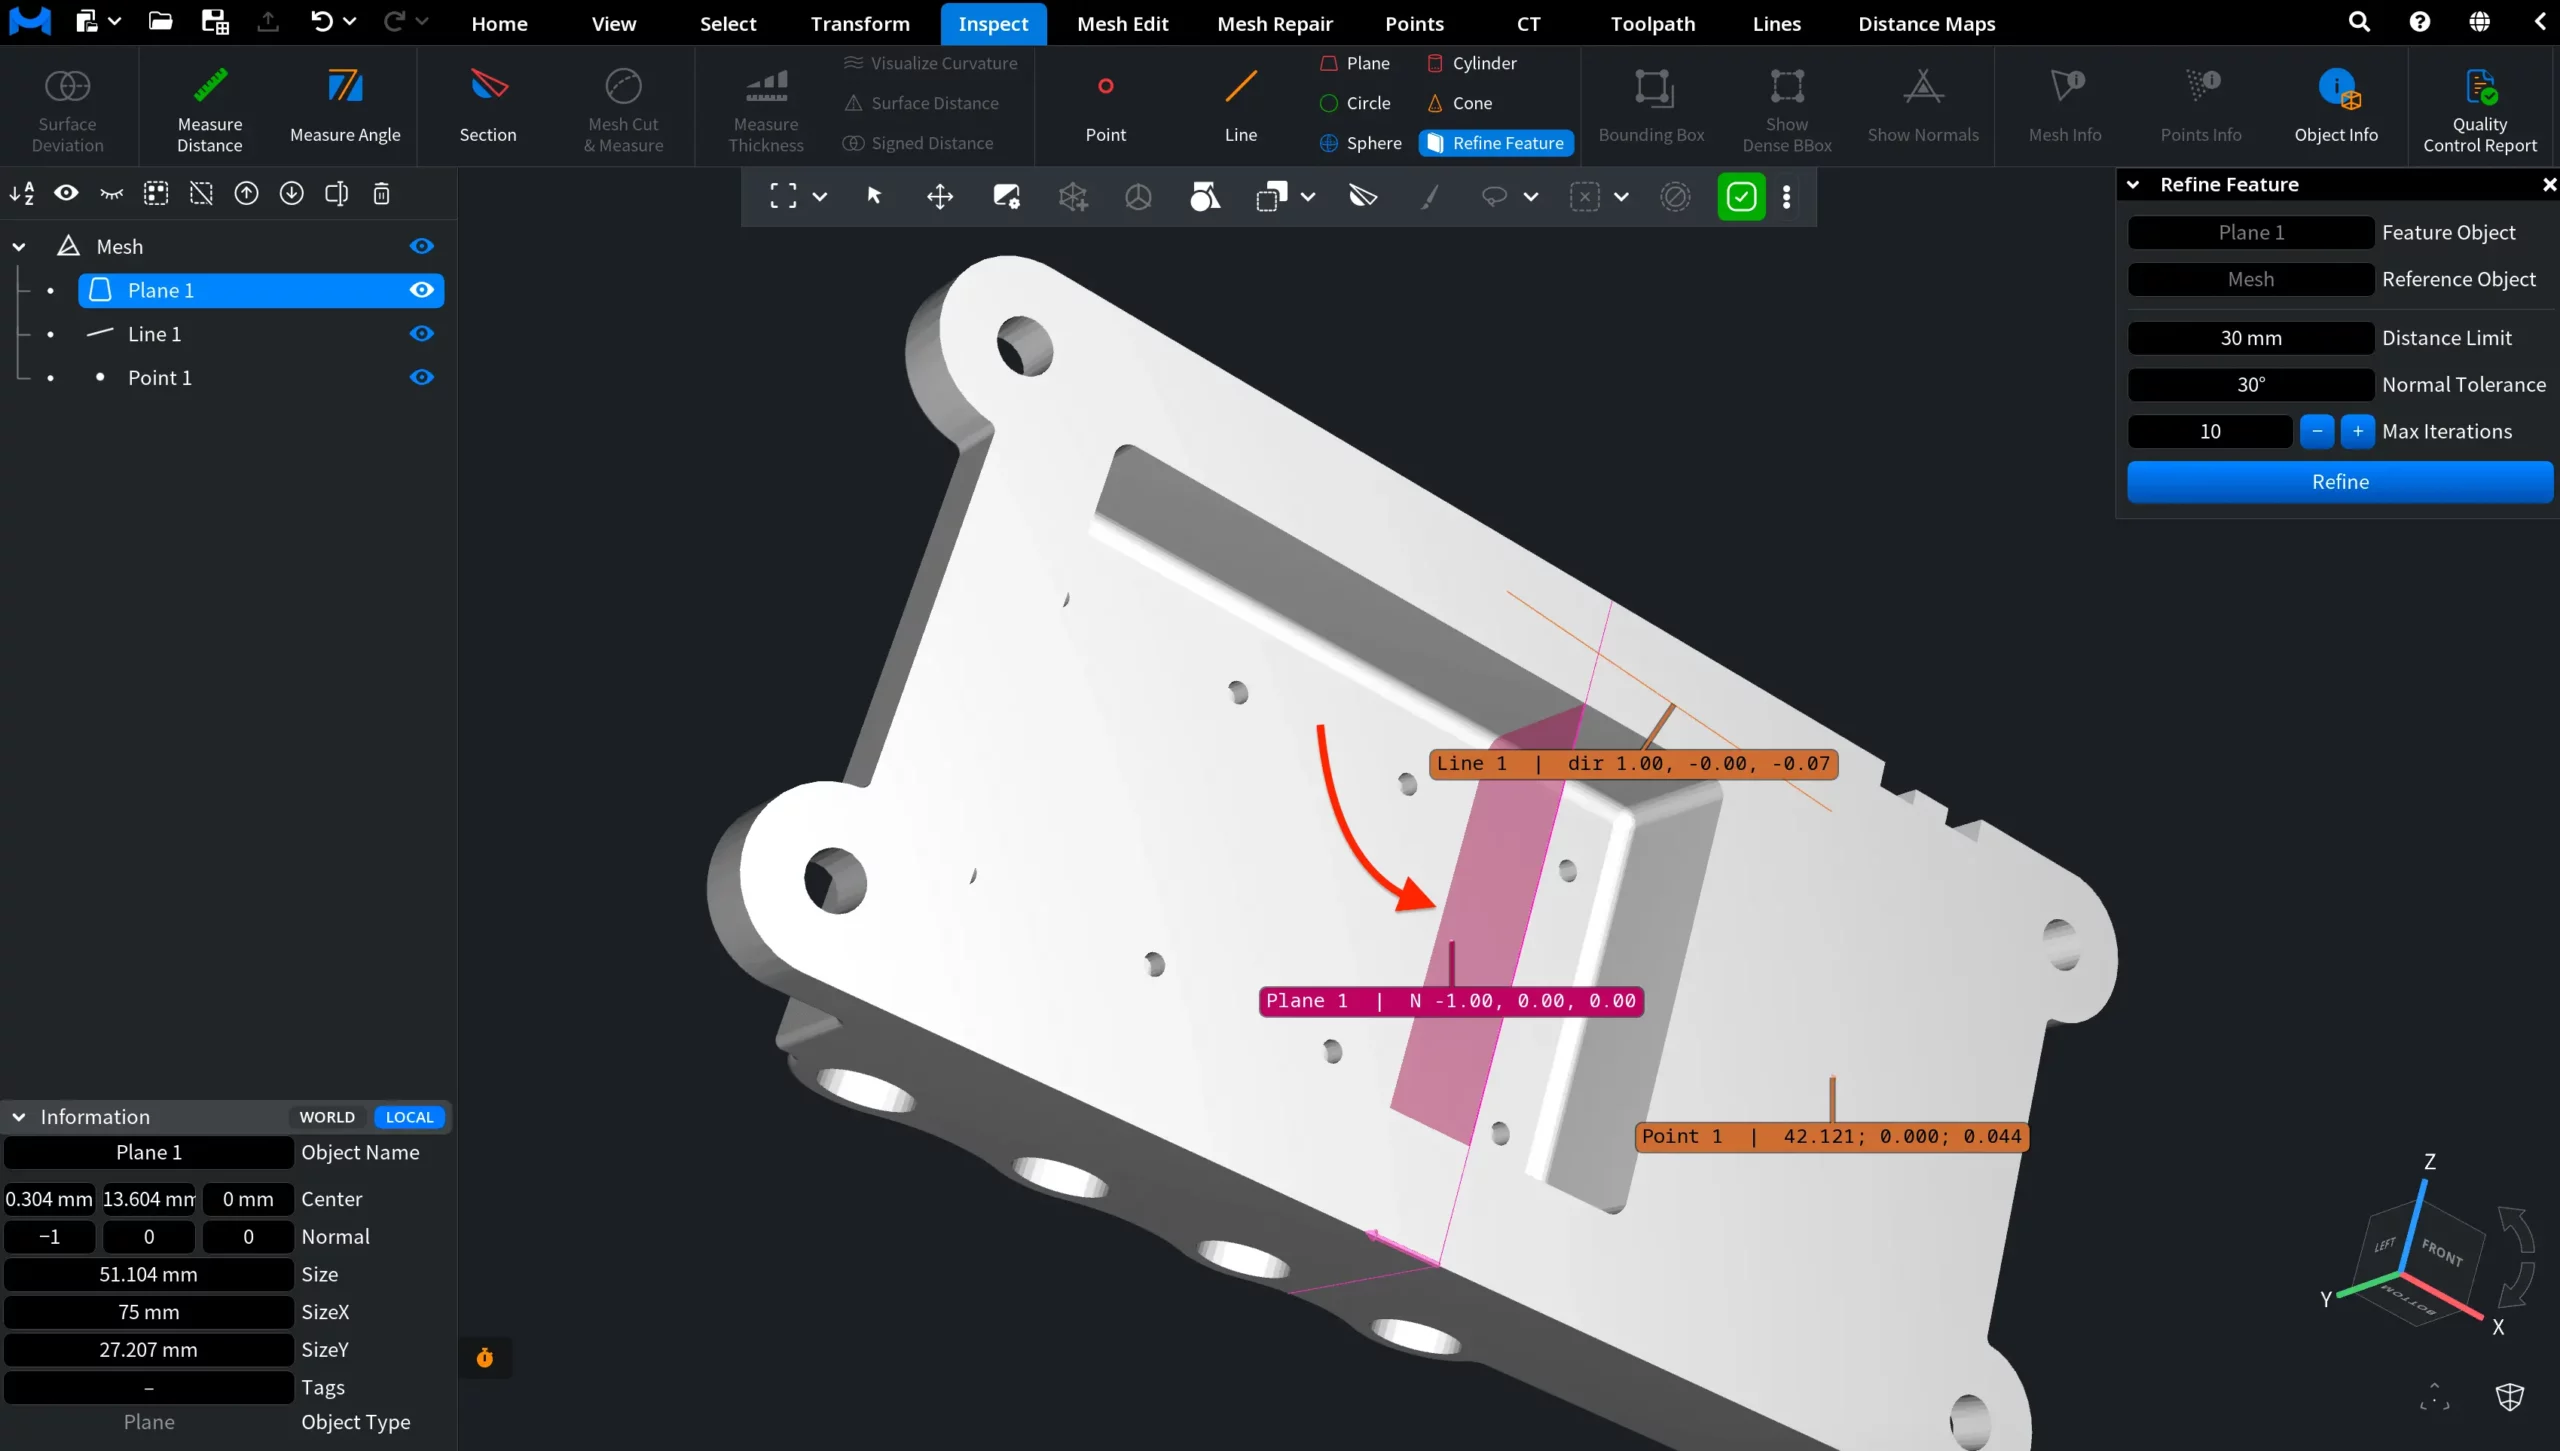
The change can also be seen in the Information panel. After refinement, the plane has a normal of approximately (-1, 0, 0), showing that its orientation has been updated to match the detected surface.
If further adjustment is needed, you can continue refining the same feature. Modify the Distance Limit, Normal Tolerance, or Max Iterations settings and click Refine again. MeshInspector will perform another refinement operation using the updated parameters.