
Lines to Distance Map builds a distance map around a polyline: a rectangular grid of pixels in which every pixel stores the distance to the nearest point of the line. With With Sign on, the distances on one side of the contour are positive and on the other side negative, so the map also tells inside from outside. Use it to measure how far an area is from a contour, or as the first step to offset contours with Distance Map to IsoLines.
The tool is on the Lines tab, in the group with the other conversion tools.

The map is flat: MeshInspector uses the X and Y coordinates of the line and ignores Z. Use contours that are parallel to the XY plane of the object, for example a section contour of a part.
Build a distance map
- Select exactly one polyline object in the Scene tree.
- Click Lines › Lines to Distance Map. A red frame in the viewport shows the area of the future map. It is only a preview, not an object.
- Set Origin Point and Size so that the frame covers your contours. The default area is only 5 × 5 units from the origin, so for a real part you almost always need to change it.
- Set the resolution with Pixel Size or DMap Size, choose the sign options and click Convert (or press Enter).
MeshInspector adds a new Distance Map object named after the line with _DistanceMap at the end. The polyline stays in the scene, and the panel stays open, so you can build several maps with different settings.
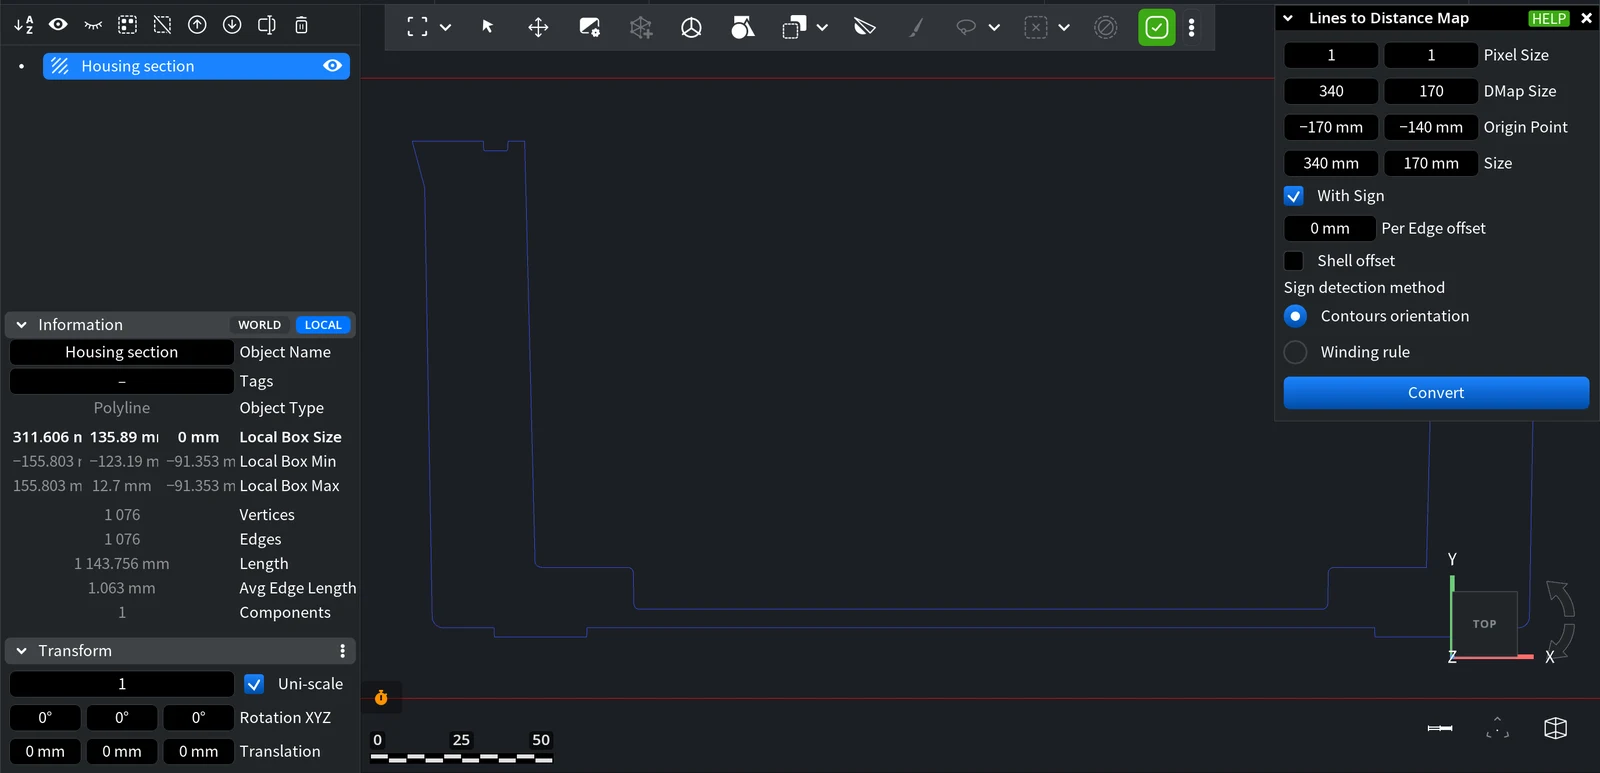
Settings
| Setting | What it does | Default |
|---|---|---|
| Pixel Size | The size of one pixel along X and Y. A smaller pixel gives a more detailed map. Changing it changes Size: the number of pixels stays the same. | 0.05 × 0.05 |
| DMap Size | The number of pixels along X and Y. Changing it changes Size: the pixel size stays the same. | 100 × 100 |
| Origin Point | The X and Y coordinates of the corner of the map. Moves the red frame. | 0, 0 |
| Size | The size of the map area along X and Y. Changing it changes Pixel Size: the number of pixels stays the same. | 5 × 5 |
| With Sign | Off: every pixel stores the distance to the line, always 0 or more. On: pixels on one side of the contour get positive values and on the other side negative values. | Off |
| Per Edge offset | Measures the distances not from the line itself but from a contour shifted by this value from every segment of the line. Range from −5 to 5. | 0 |
| Shell offset | On: the Per Edge offset is applied to both sides of the line, like a shell around it, and cannot be negative. Off: the offset goes to one side. | Off |
| Sign detection method | How MeshInspector decides which side of the contour is which: Contours orientation (recommended for oriented contours without self-intersections) or Winding rule (recommended for non-oriented contours or contours with self-intersections). | Contours orientation |
With Contours orientation, the sign depends on the direction of the contour. If the sign is the opposite of what you need, reverse the line with Flip Orientation and build the map again.
The result
In the viewport, a distance map is shown as a relief: the height of the surface at each pixel is its distance value. Hide the map or the line in the Scene tree to compare them.
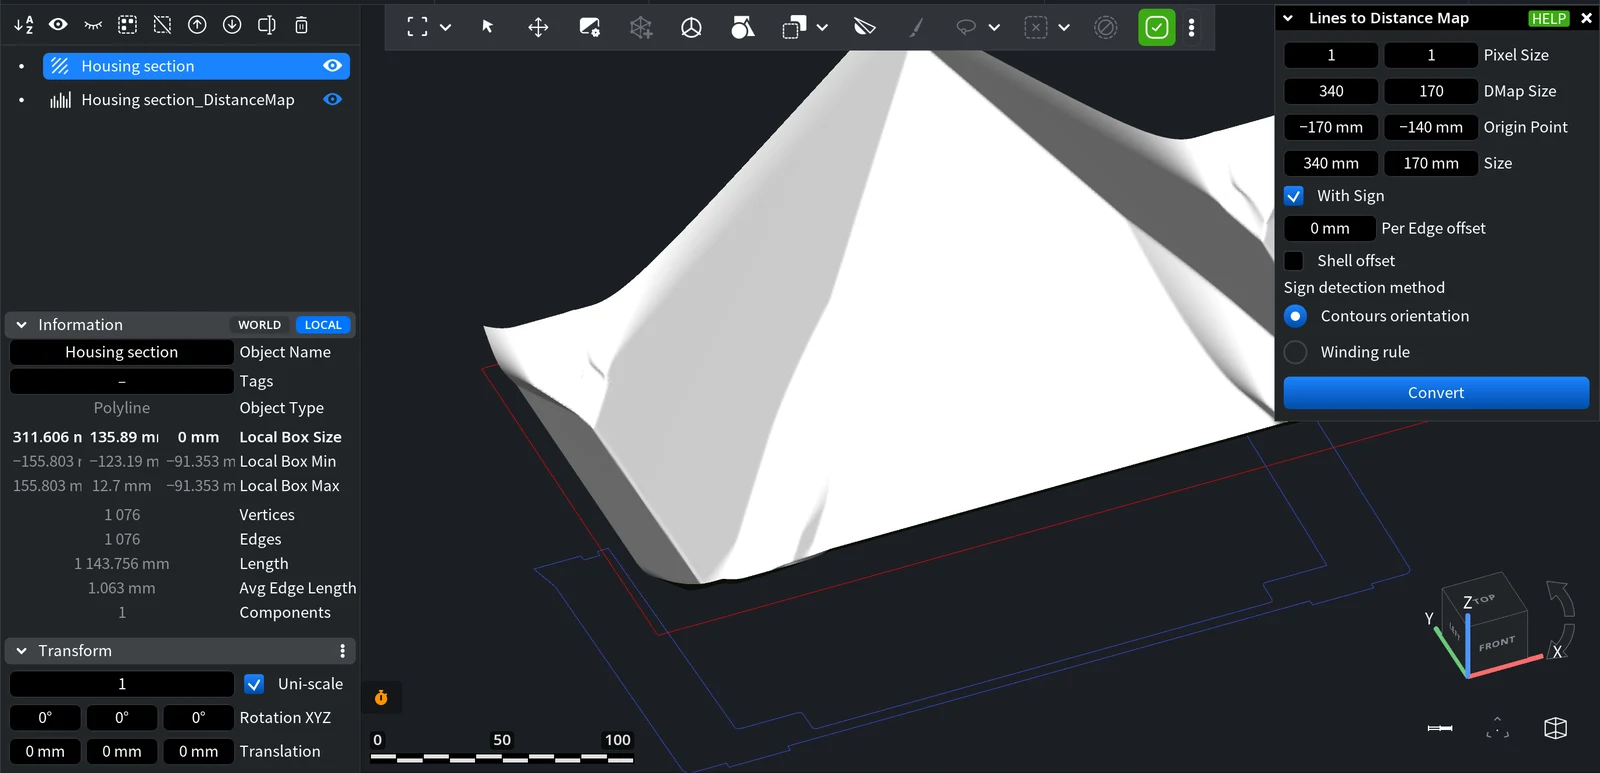
What you can do next:
- Draw contours at a set distance from the original one with Distance Map to IsoLines.
- Turn the map into a relief mesh with Distance Map to Mesh or into a picture with Distance Map to Image.
More about this object type: Distance maps.


