
Shrink Wrap moves every vertex of one mesh to the closest point on another mesh and can keep a set distance from it. Use it to fit a mesh onto a surface, for example to snap an edited or simplified copy of a part back onto the original scan, or to make a shell follow a model at a given gap.
You find the tool in Mesh Edit › Shrink Wrap.
Before You Start
- Two meshes. Select exactly two meshes; with any other selection the tool stays disabled.
- Roles. The Reference object stays as it is; the Modified object is the one that moves onto it. The panel shows the reference name in red and the modified name in blue. The mesh that is higher in the Scene tree becomes the reference; click Swap to exchange the roles.
- Shape and position. The modified mesh should already be close to the reference and have a similar shape. Each vertex moves to its own closest point, and no vertices are added, so far-away or very different areas do not wrap well (see Limits).
Fit a Mesh Step by Step
-
In the Scene tree, select the two meshes: click the first one, then Ctrl+click (Cmd+click on macOS) the second.
-
Go to Mesh Edit › Shrink Wrap. The panel shows the Reference object and the Modified object.
-
If the roles are the wrong way round, click Swap.
-
Set the Offset: the distance to keep from the reference. A positive value keeps the modified mesh outside the reference, a negative value inside it, 0 puts it right on the surface. The default is 0.
-
Click Apply. A progress bar shows the computation; then the panel closes and the modified mesh takes its new shape.
-
If the result is not what you need, press Ctrl+Z (Cmd+Z on macOS) to get the old shape back, then open the tool again with another Offset.
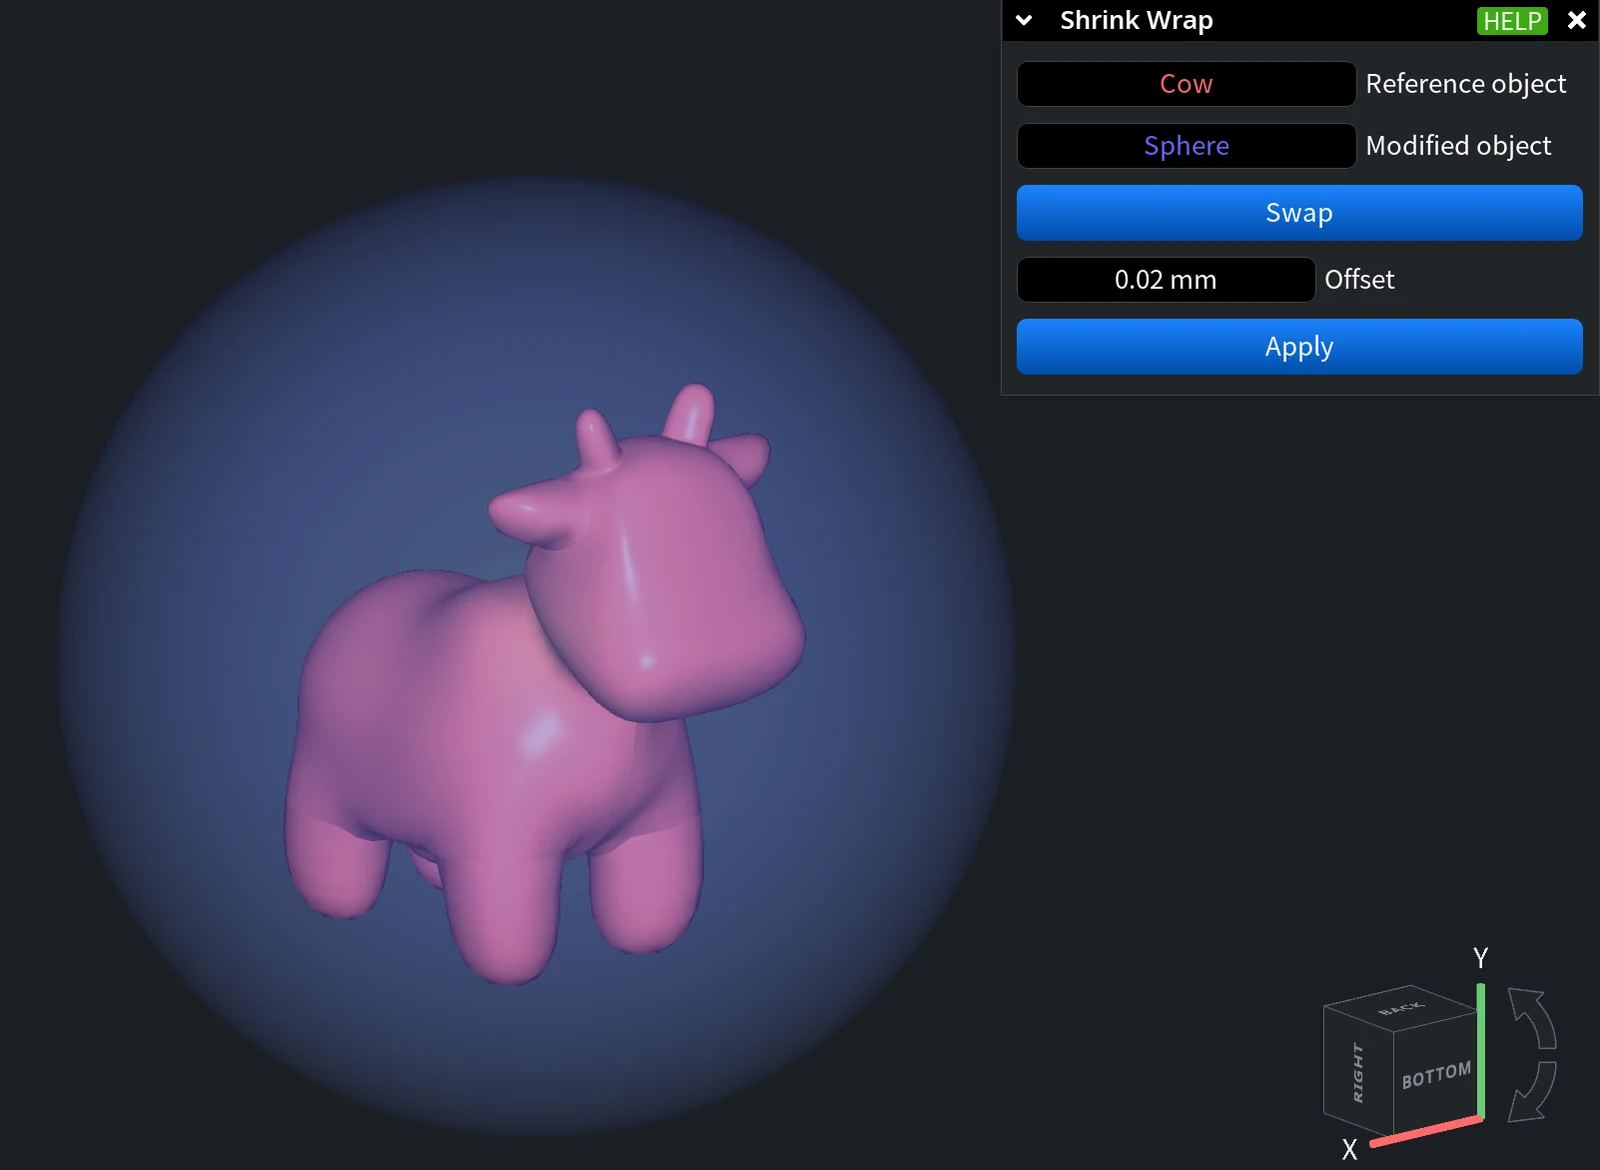
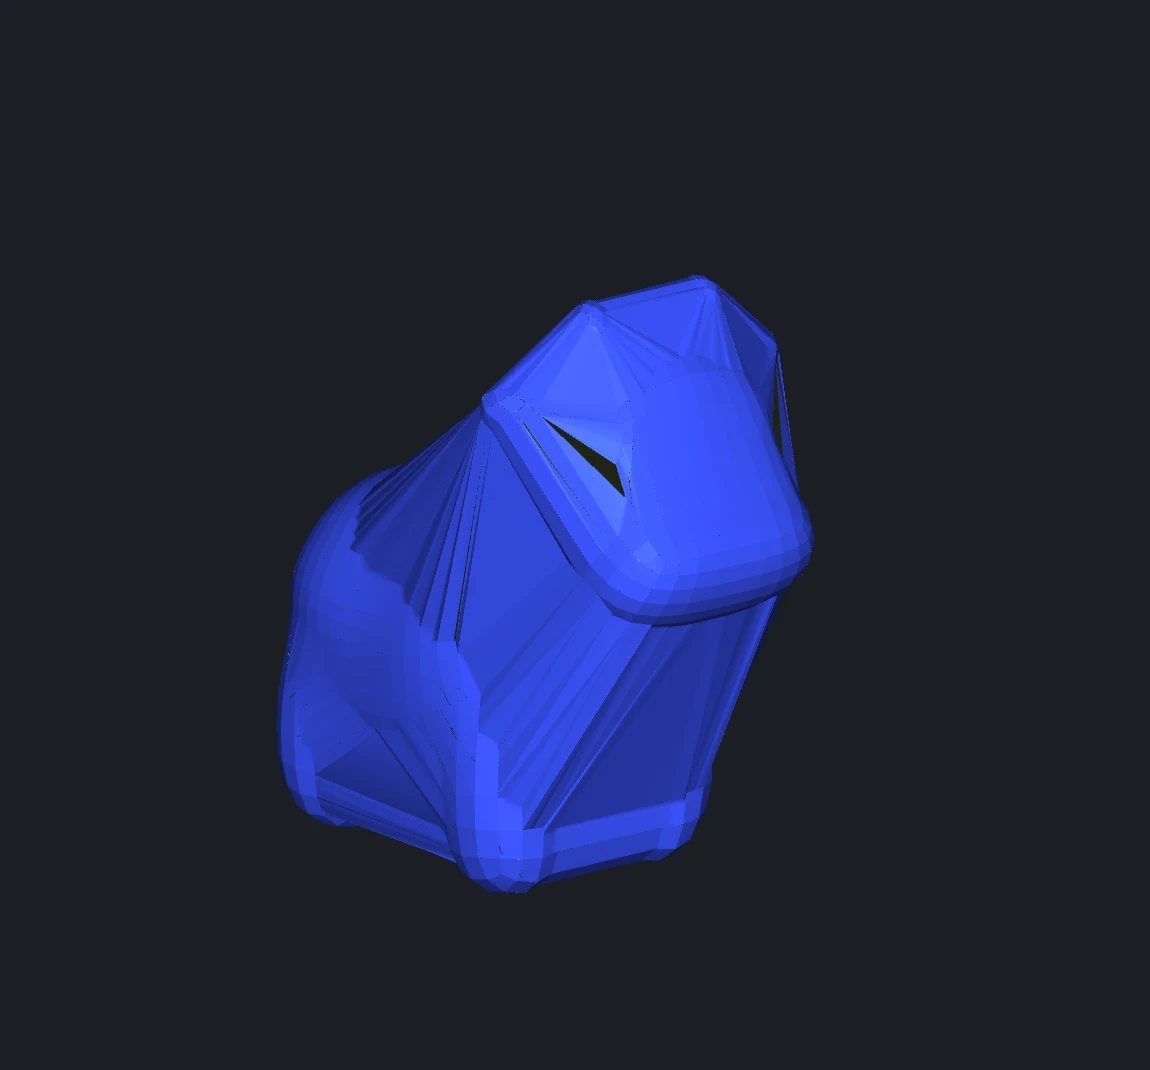
In the example above, a sphere was wrapped onto a cow model with an Offset of 0.02 mm. The sphere took the rough shape of the cow, but the legs and the horns are lost: each vertex of the sphere moved to the part of the cow closest to it, and long triangles span the gaps. This is why the modified mesh should start close to the shape you want:
Move Only Part of a Mesh
If triangles are selected on the modified mesh, only the vertices of the selected triangles move; the rest of the mesh stays in place. The panel then shows the note Only the selected triangles of the modified object are moved.
- Select the modified mesh and select the triangles to fit, for example with Select Primitives.
- Select the reference mesh too, open Shrink Wrap and check the note in the panel.
- Set the Offset and click Apply.
To move the whole mesh again, clear the selection of triangles first.
Limits
- Only vertex positions change. The modified mesh keeps all its vertices and triangles and how they are connected. Small details of the reference that fall between the vertices of the modified mesh are lost, so the modified mesh needs enough triangles for the detail you want.
- Concave areas. Where the reference is concave, the result can intersect itself, and a non-zero Offset makes this more likely. If you need a closed shell at a distance from a model without self-intersections, use Offset instead.
- Positions in the scene count, but the Offset is measured on the reference. Both meshes are taken where you see them in the scene, with their current transforms. The Offset, however, is applied in the reference mesh's own coordinates: if the reference object is scaled (for example with Transform Object), the gap in the scene is scaled too, and an uneven scale also changes which point counts as closest. If the reference is scaled, run Transform › Apply Transform on it first.


